Autumn Theme Week: Day 3
**All items in the Fall section are 15% off during theme week**
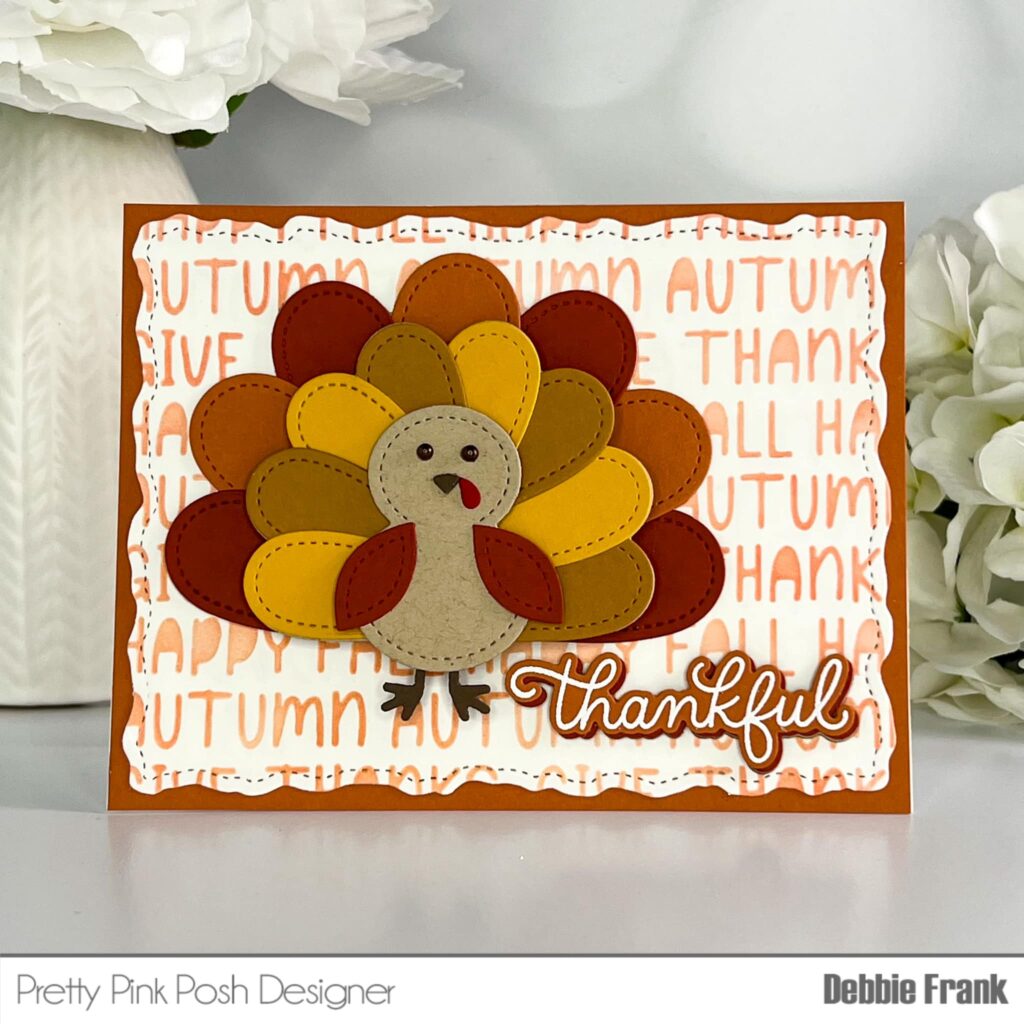
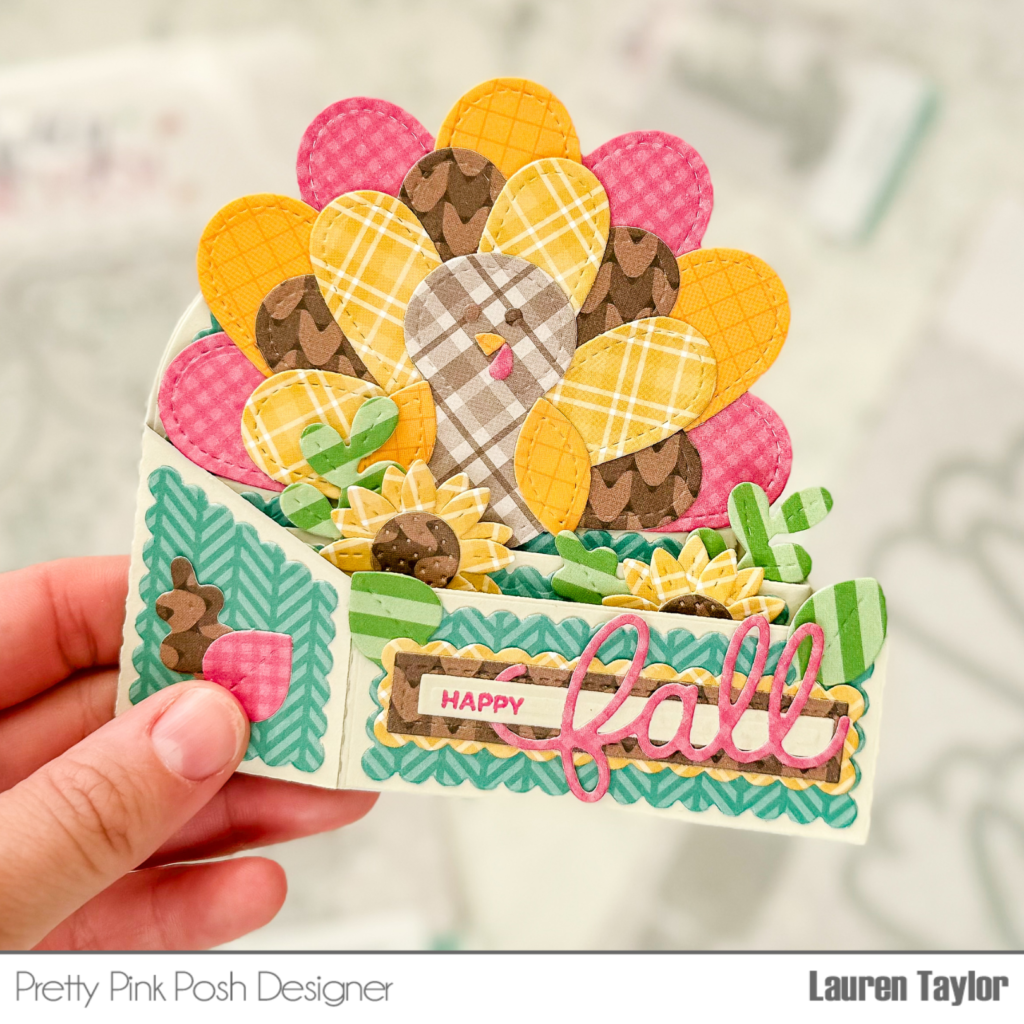
Hi, friends! It’s Lauren and I am back with a new video today. I’m sharing my next box card – this time for Fall and Thanksgiving!
Watch the video above I Watch the video in HD on YouTube
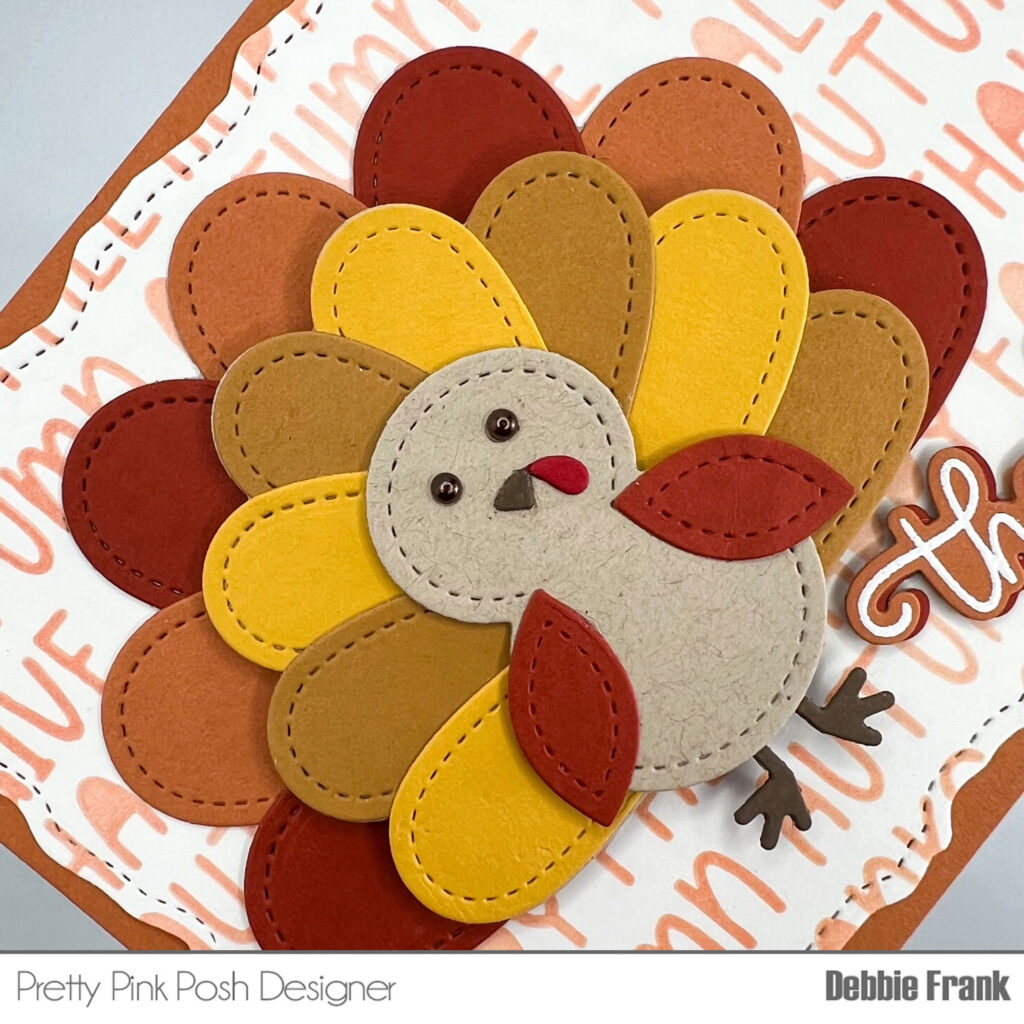
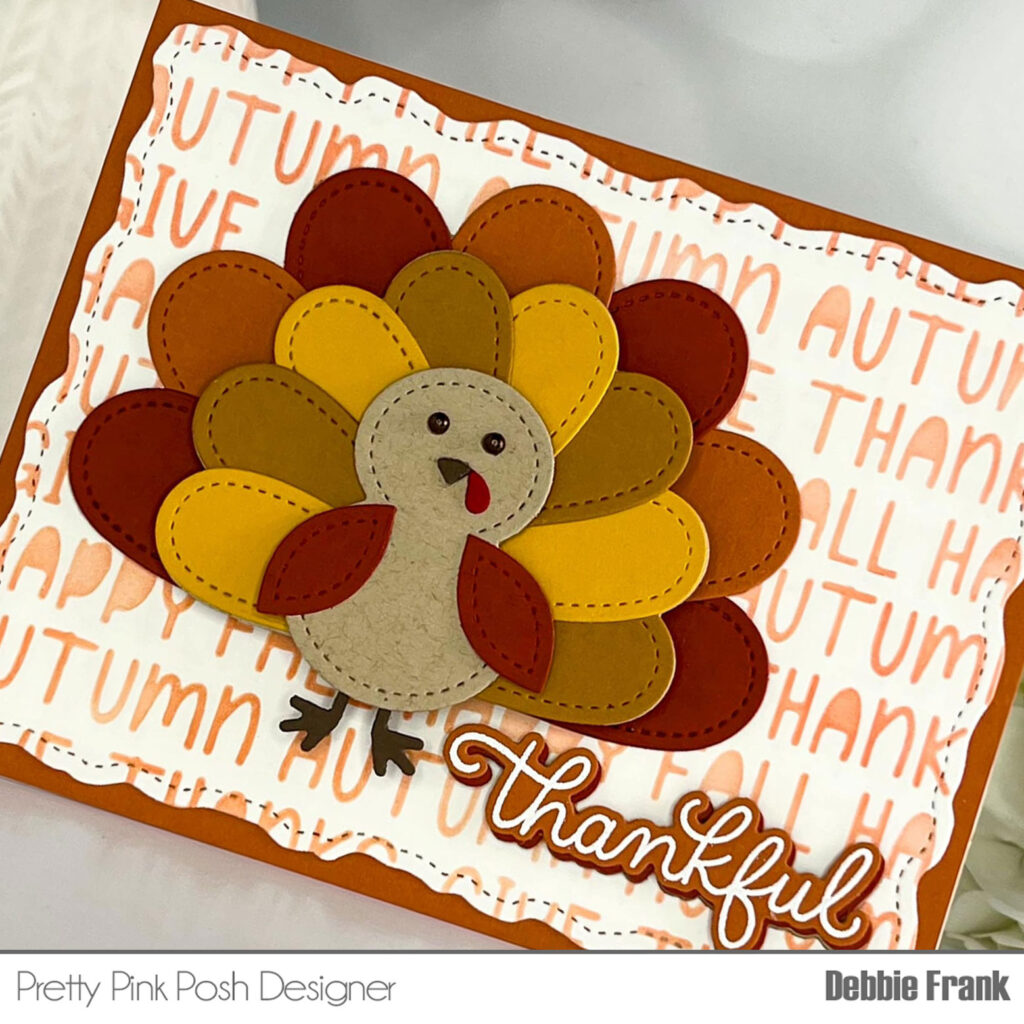
I started with die cutting all of the pieces I needed with patterned paper in Fall themed colors. I cut the Stitched Turkey Dies, leaves and flowers from the Big Fall Cupcake Dies, layered strips from the Sentiment Strips Dies, and my base from the Scallop Box Card Dies. My thinnest sentiment strip and base of the box card were die cut from a beige cardstock.
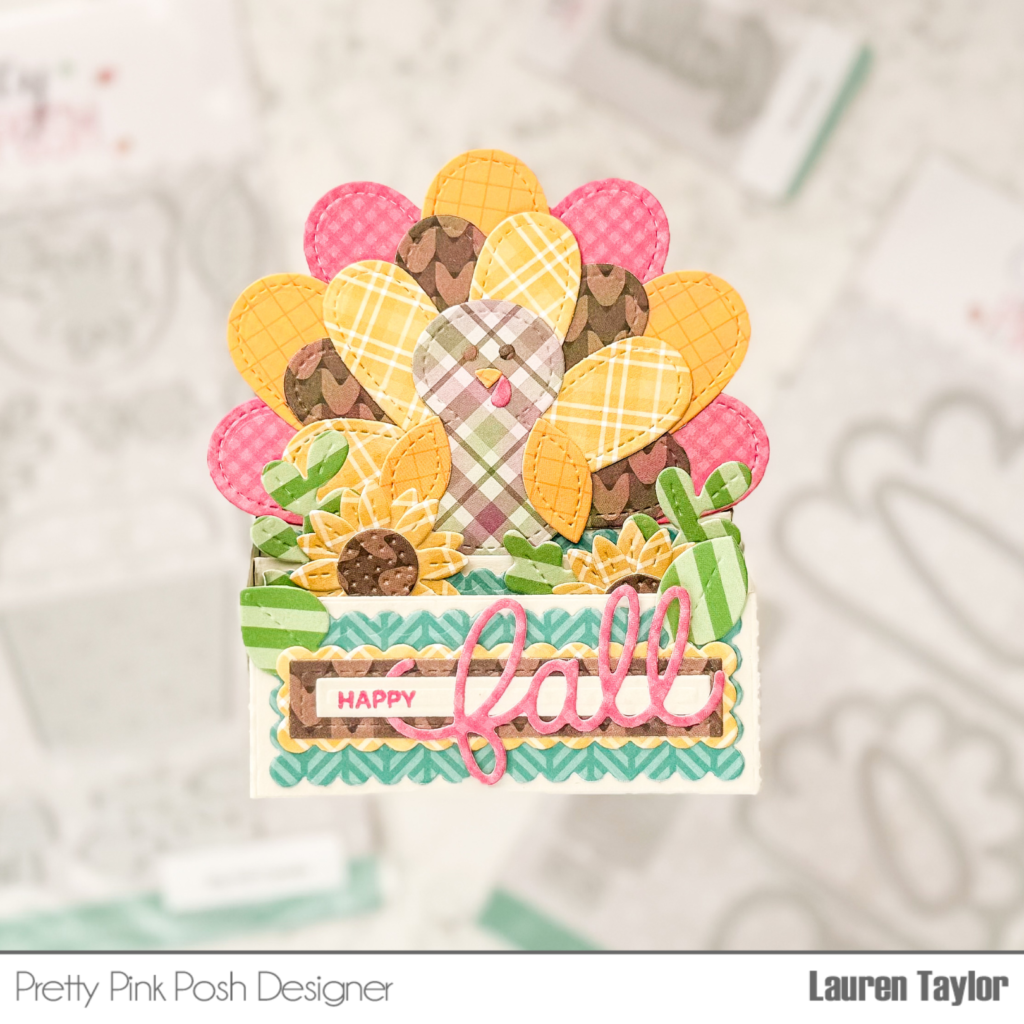
For the sentiment, I cut the Fall Script Die out of a dark pink cardstock and stamped “happy” in a matching ink from the Holiday Sentiments stamp set to create the “Happy Fall” sentiment for the box card.
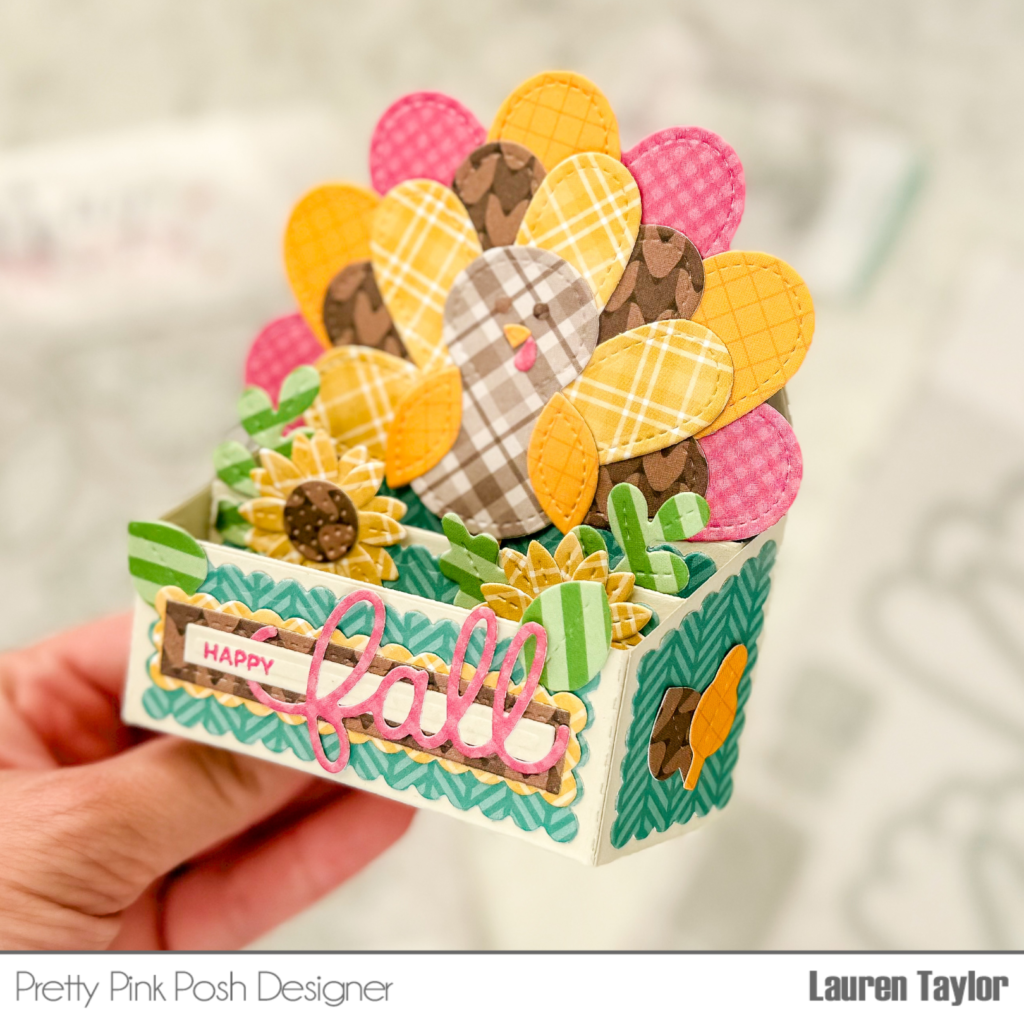
I assembled the turkey together and adhered it to the back of the two middle shelves in the middle of the box card. On the front of the two middle shelves, I adhered the sunflowers and green leaves. The sides of the box card, I added different colored leaves and a couple more on the front of the box card with the sentiment strips.
I hope this gives you some inspiration to use your patterned paper to create a fun turkey for the upcoming season.