Hi friends! Sophie here today happy to share a card celebrating Summer Theme week here on the Pretty Pink Posh Blog. I hope you’ve been having a wonderful summer so far! It always goes by so fast…
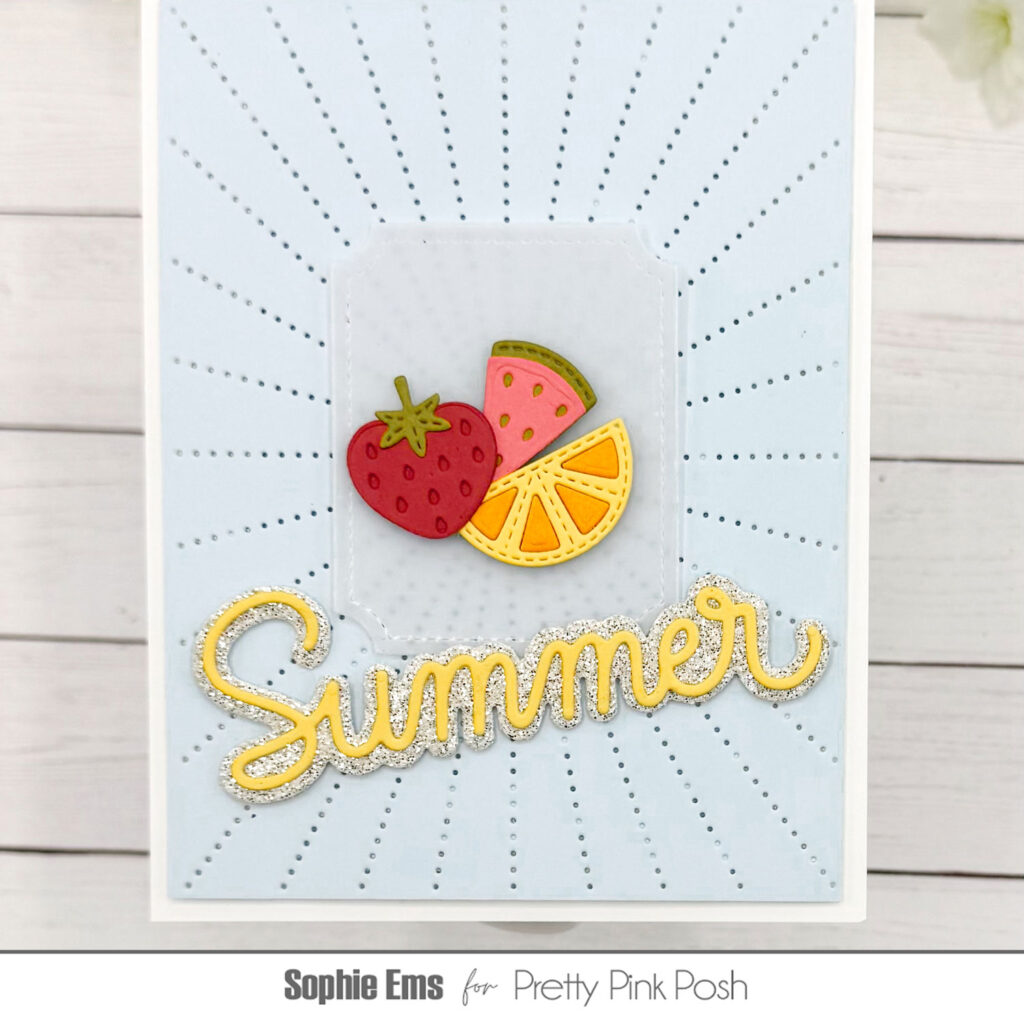
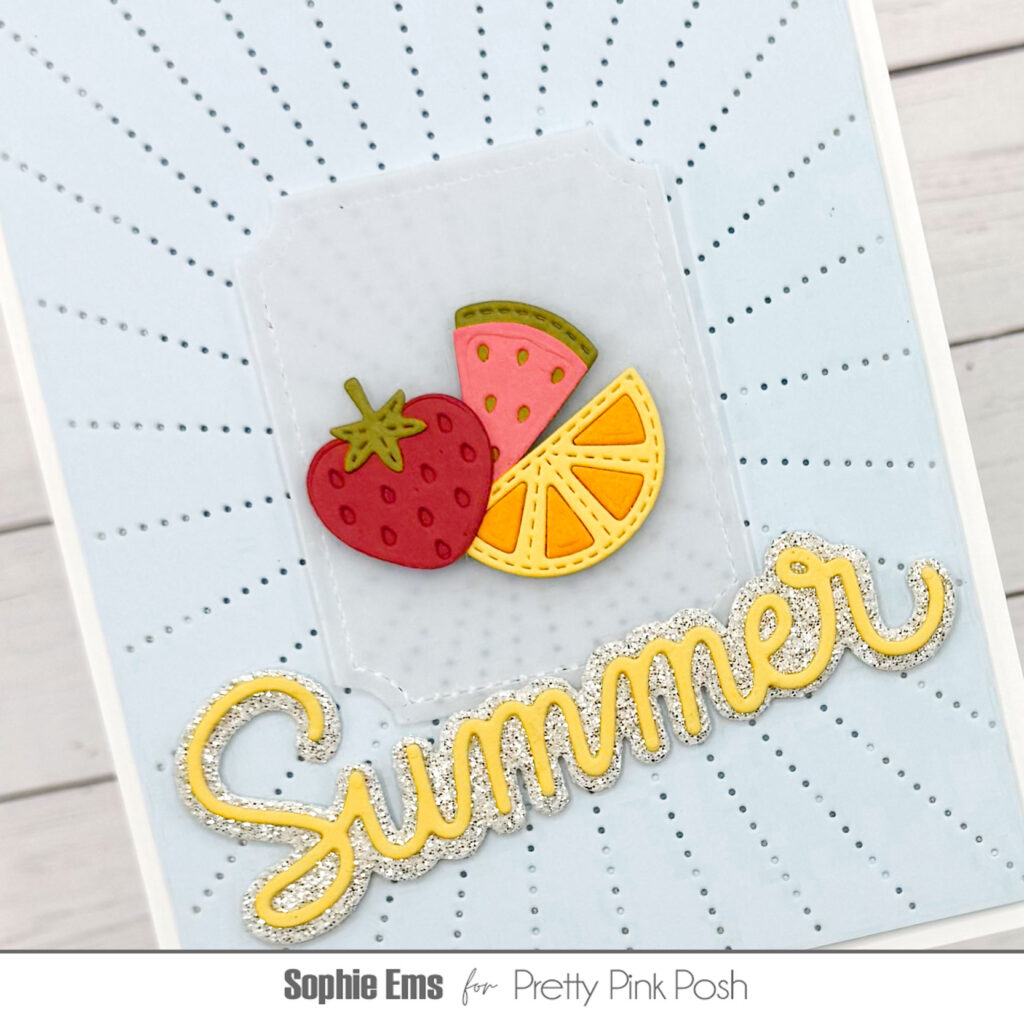
For my project I am featuring the Fruit Mug Additions dies paired with some of the newest summer realese products. I wanted to encourage you to hopefully look at older die sets that you have and give them new live by integrating with some newer products. I also wanted to show that there is so much life to even the small dies in a larger set! I only used a few of the little fruit dies here, and they are the star of the show; you don’t always have to use the whole die set or use it as it is originally intended!
The new Summer Shadow die set is quickly becoming a favorite of mine along with the new Sunburst Pierced Plate – such a staple die to have in your stash! To help draw the eye in to the little fruit die cuts I layered them on a vellum Notched Rectangle die.
I hope this inspires you to look at the small dies in your stash and your older sets! Can’t wait to be back soon to share more!
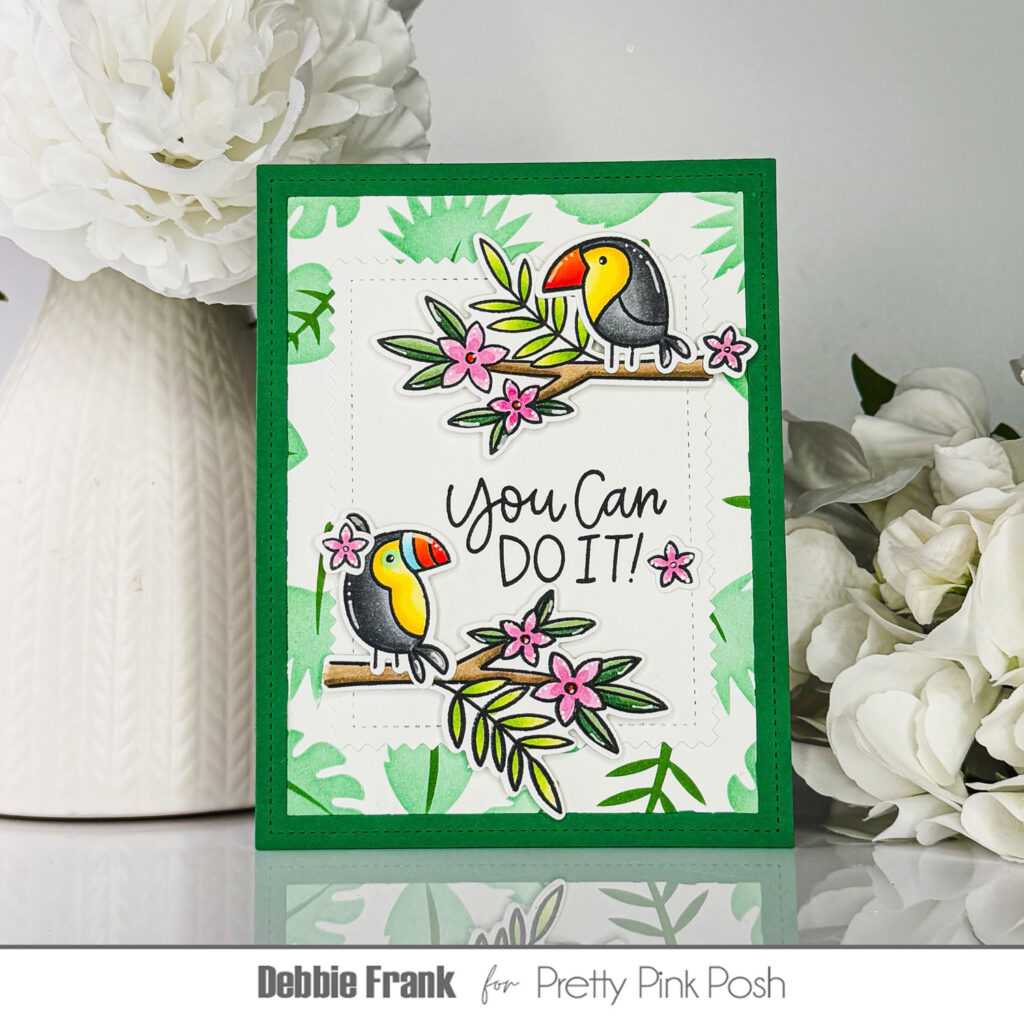
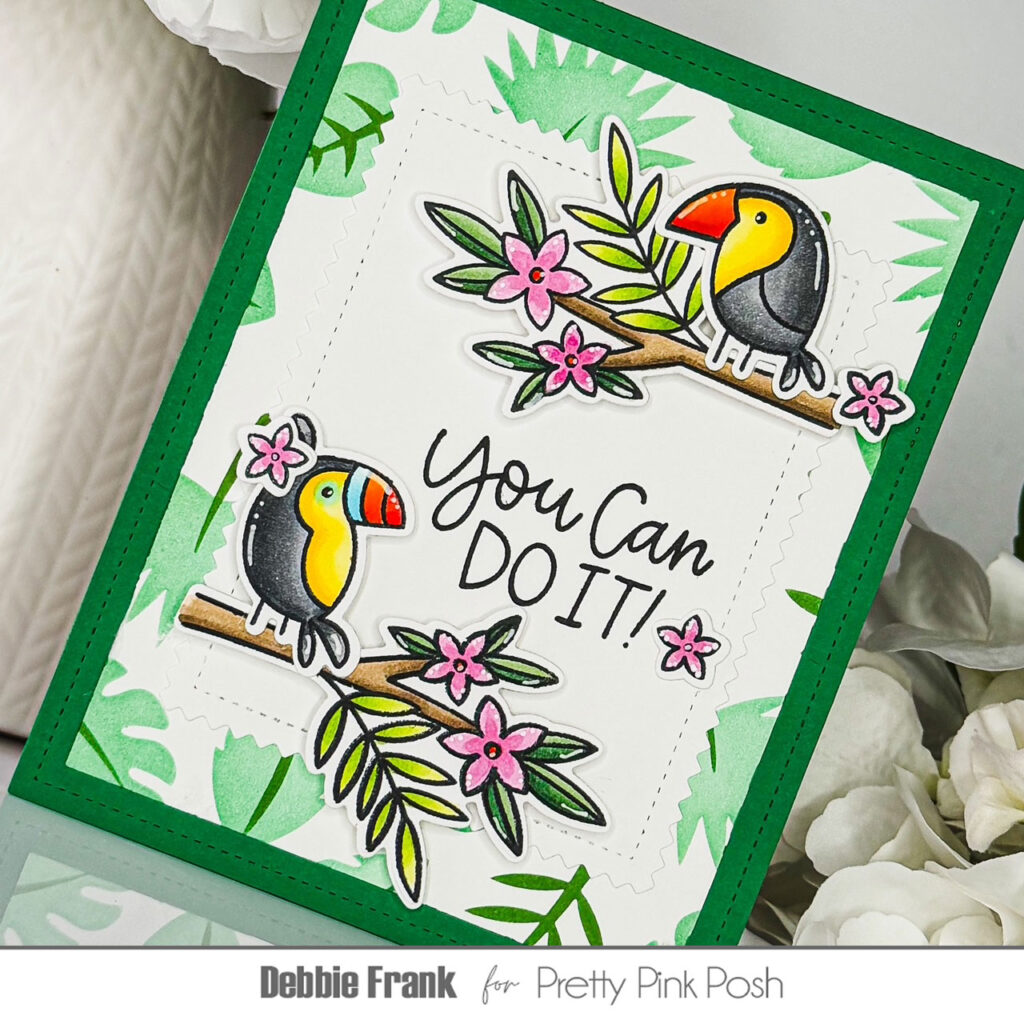
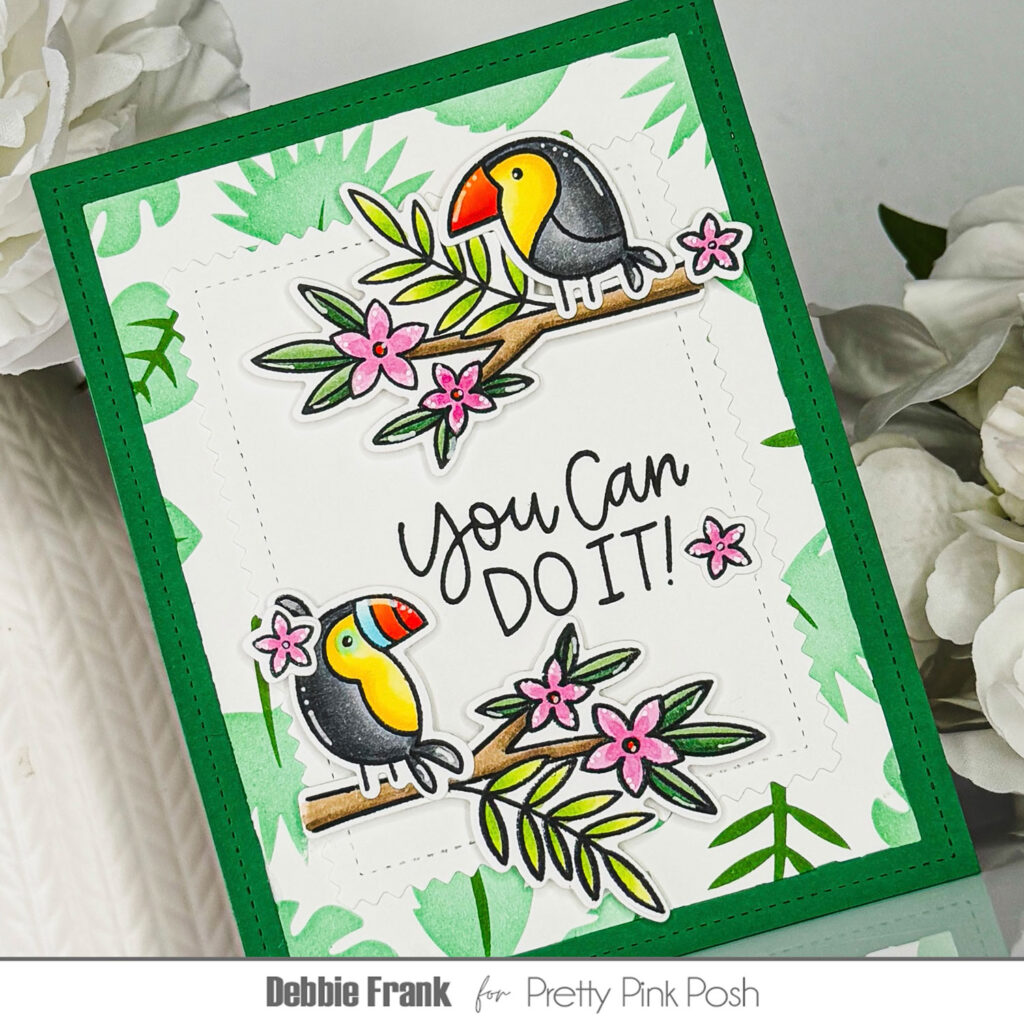
I started off by stamping out all the images plus an extra branch and flowers from the set onto Copic friendly premium card stock using Memento Tuxedo Black ink in my Misti. Once I finished coloring up the images with my Copics, I die-cut them out with their Coordinating Dies.
For my background panel I used the new Layered Tropical Leaves Stencil, applying two shades of green dye inks with the layers on a standard A2 panel of Neenah Classic Solar.
To make the toucans show up on the stencil panel, I die-cut out another white panel using the second to largestPinking Rectangle Dies. I laid out my design on the pinking rectangle panel but before I attached the toucans and greenery, I stamped on the sentiment “You Can Do It!” from the stamp set.
Using the Spider Web Cover Plate, I die-cut it out with matching card stock snipping off the web to use the frame for the Toucans!
I then assembled my card by gluing on the white panel onto the stenciled. With foam squares on the back of the images I popped them on the Pinking Rectangle panel. Finishing off my card by adding white highlights using a Decogel Milkyway pen and adding a Portrait top fold card base
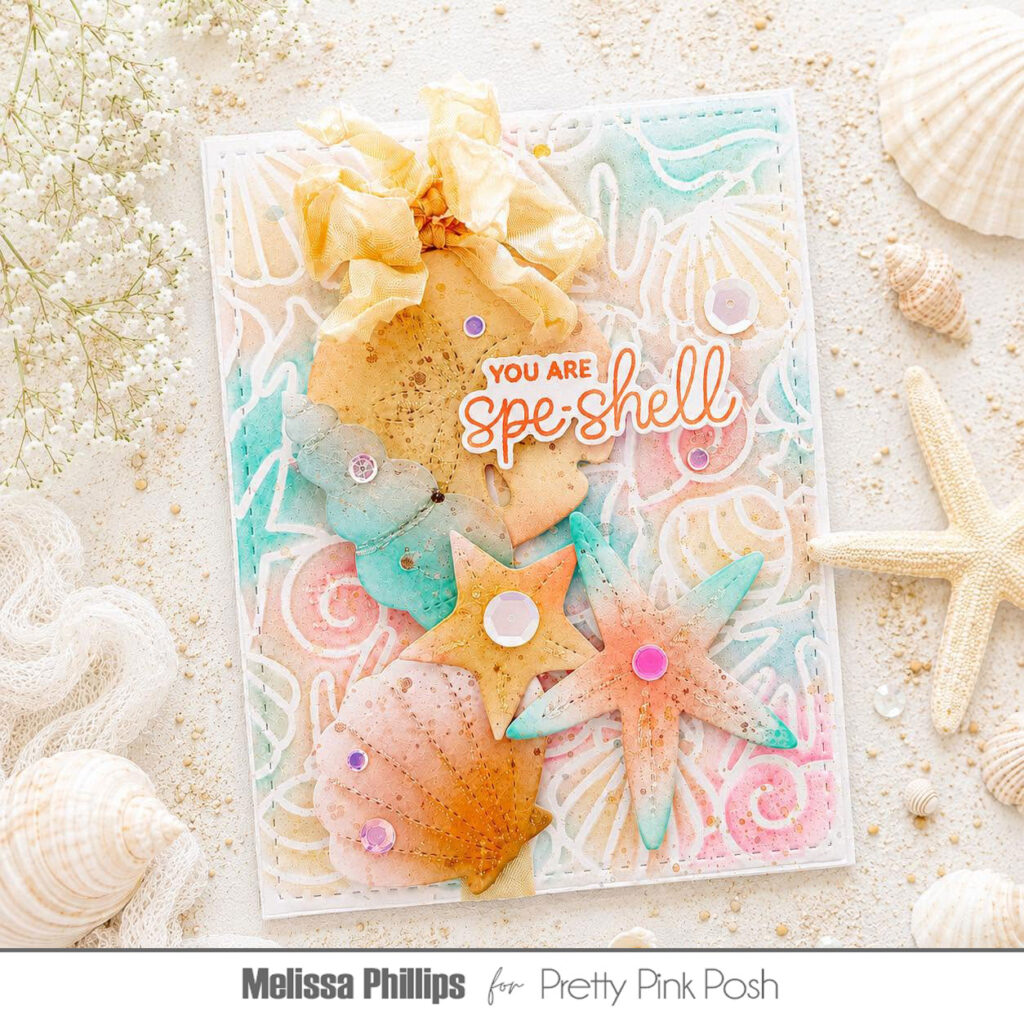
Hi Everyone! It’s Melissa here with you today, and I have the most endearing card and sentiment to share with you, using some sweet, Summertime products from Pretty Pink Posh.
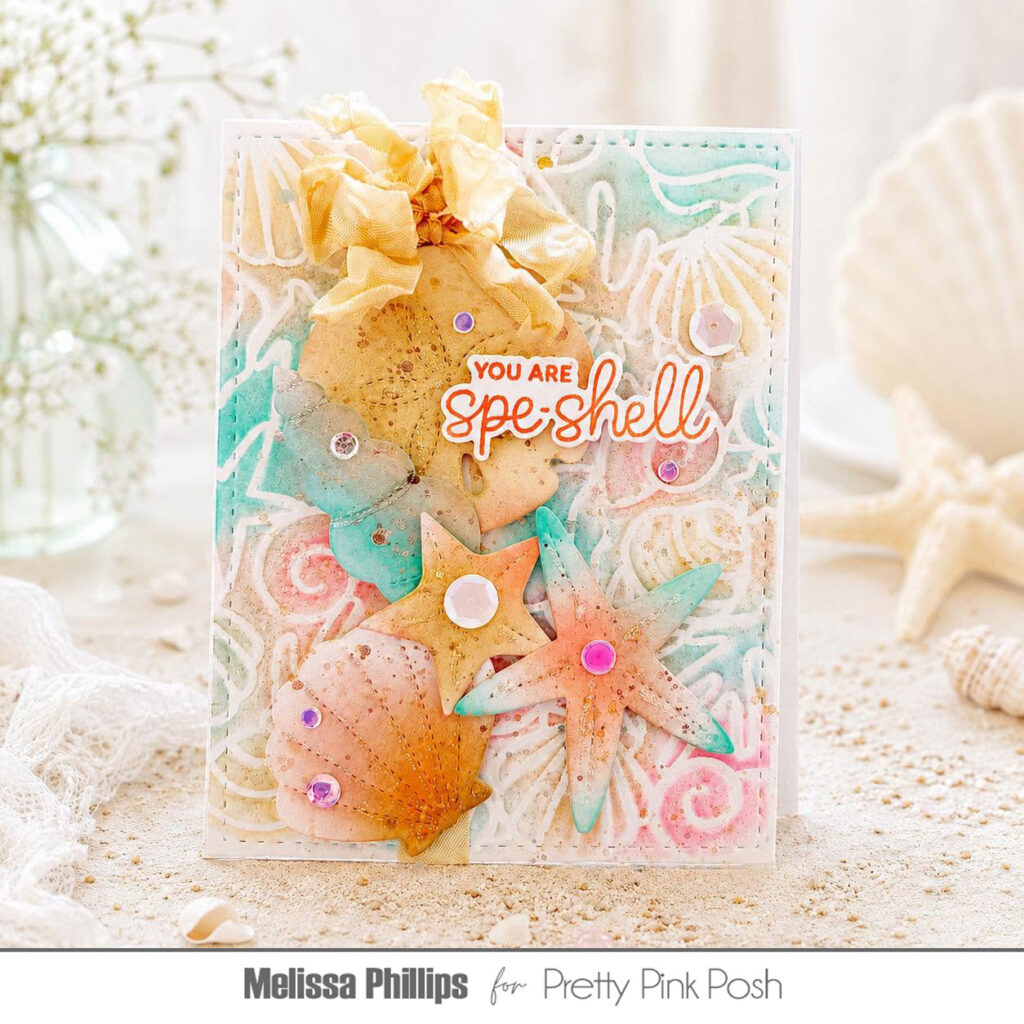
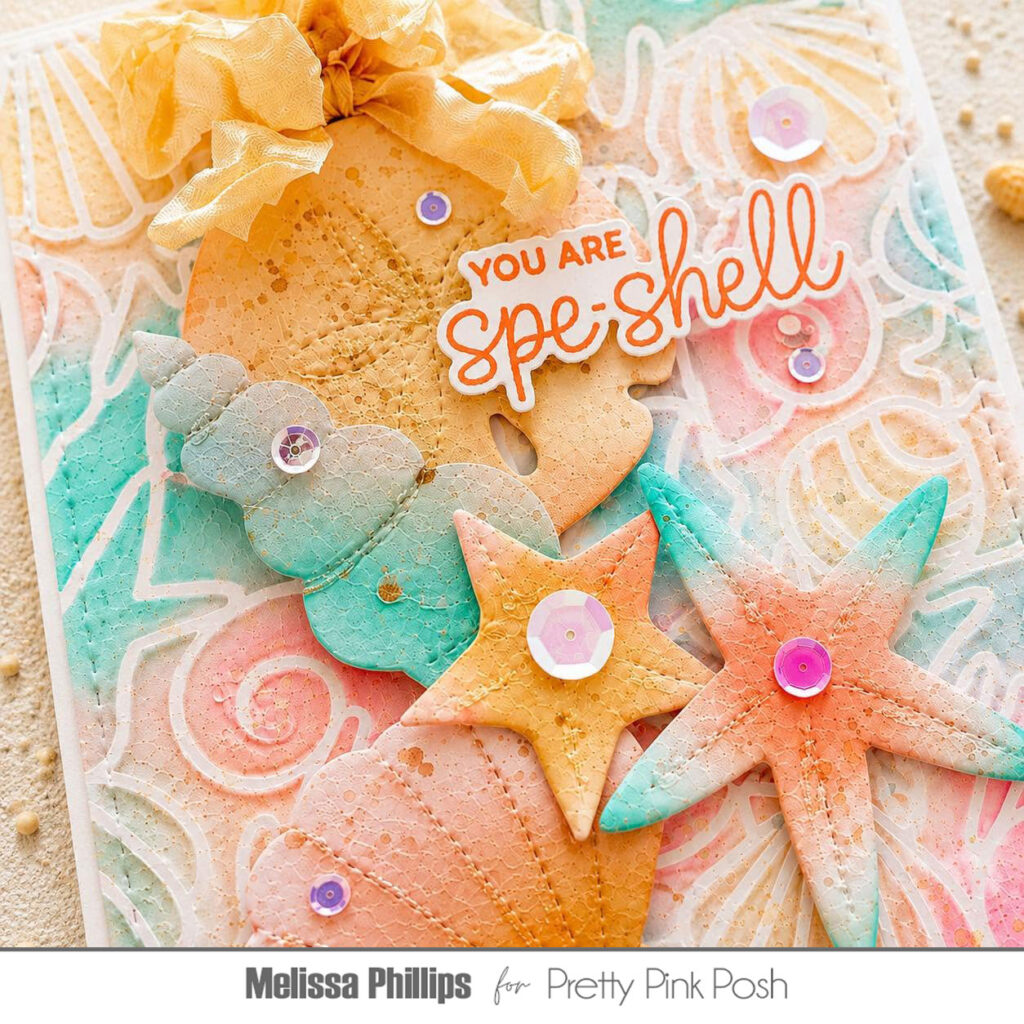
It all began with the most adorable sentiment from theSeashells stamp set and coordinating dies. I couldn’t resist using You Are SpeSHELL on my card and then wrapping it up with other shell-themed products.
I began with the beautiful Seashell Background Stencil. After adhering my stencil to my block of white cardstock, I used pale aqua, coral, and tan to create my watercolor background. I added a few splatters of Peacock Feathers and Fossilized Amber Distress Spritz to create a soft, speckled look.
Next, I added a scrunched seam binding bow in cream and nestled in my seashells cut from the Stitched Seashells dies. I added color to them in the same shades as my background using blending brushes as my tool. I used Distress Spritz once again to each seashell to mimic how they’d be found in nature.
Lastly came the sentiment I love so much. I wanted it to stand out, so I used the coordinating dies and foam adhesive to pop it up and off my card to shine for the recipient!
I love seashell season and weather, don’t you? Thanks for visiting. Happy Summer crafting!
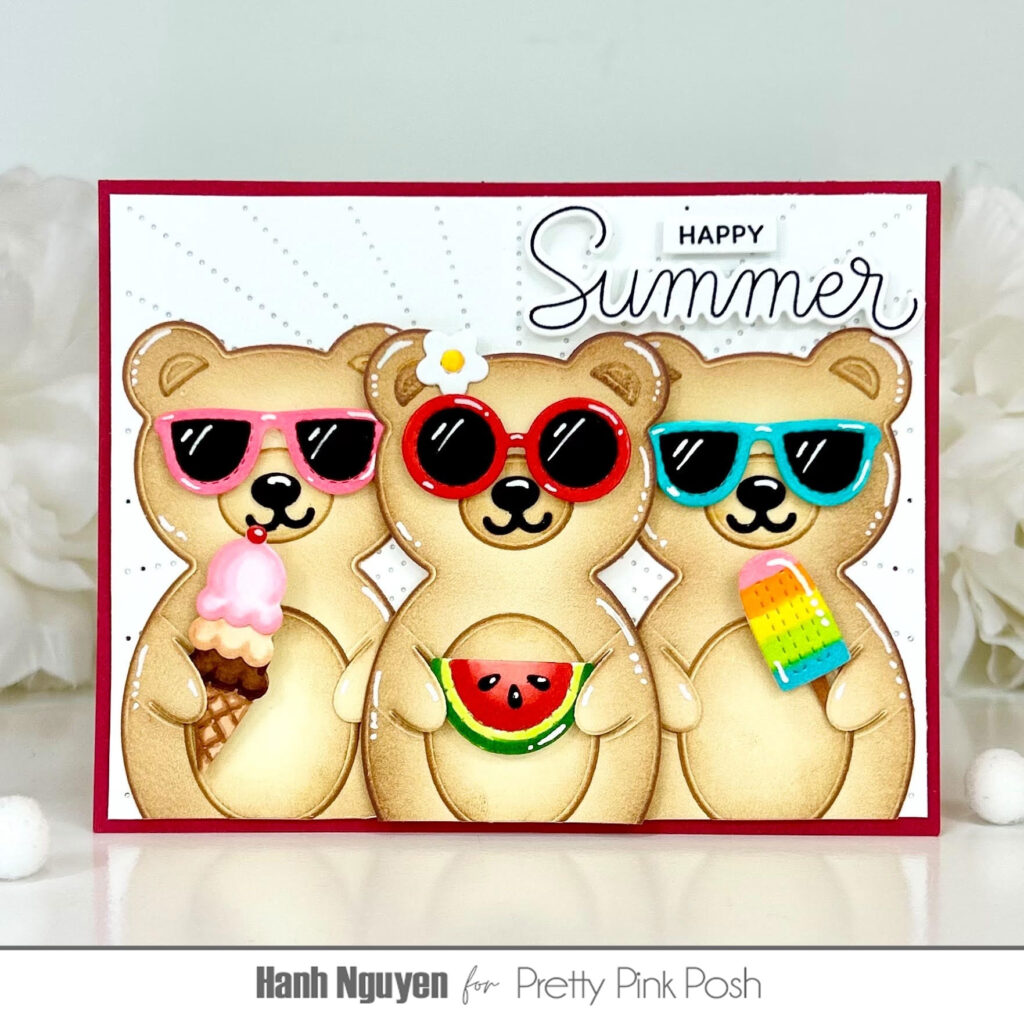
Hello Crafty Friends! It is Hanh here with you today. Happy Summer Theme Week! There are so many fun summer products to choose from over at the Pretty Pink Posh Shop.
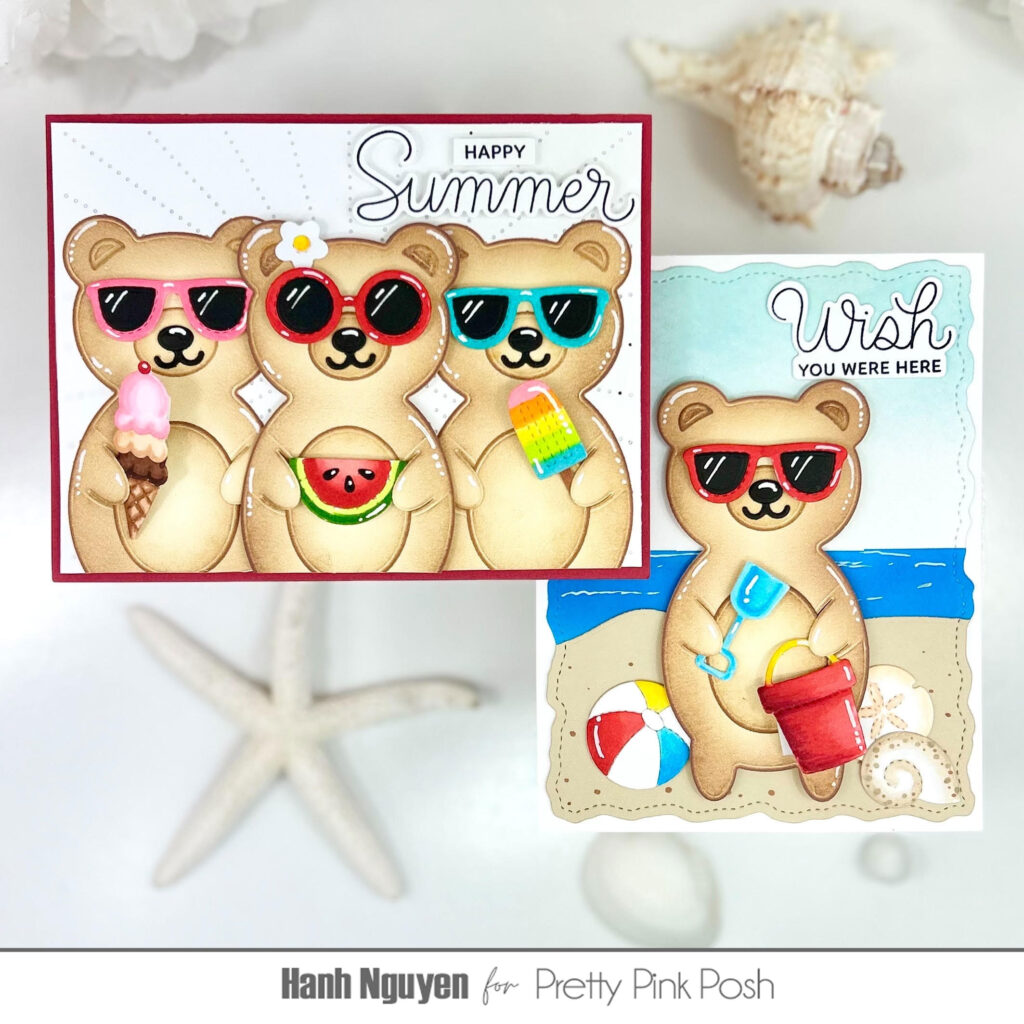
Today I am excited to showcase the Summer Holder Additions Dies. This has got to be one of my favorite products from the latest Pretty Pink Posh release. It is so versatile when it comes to making summer themed cards. I had so much fun playing with it that I created two cards to share with you today. So let’s get started.
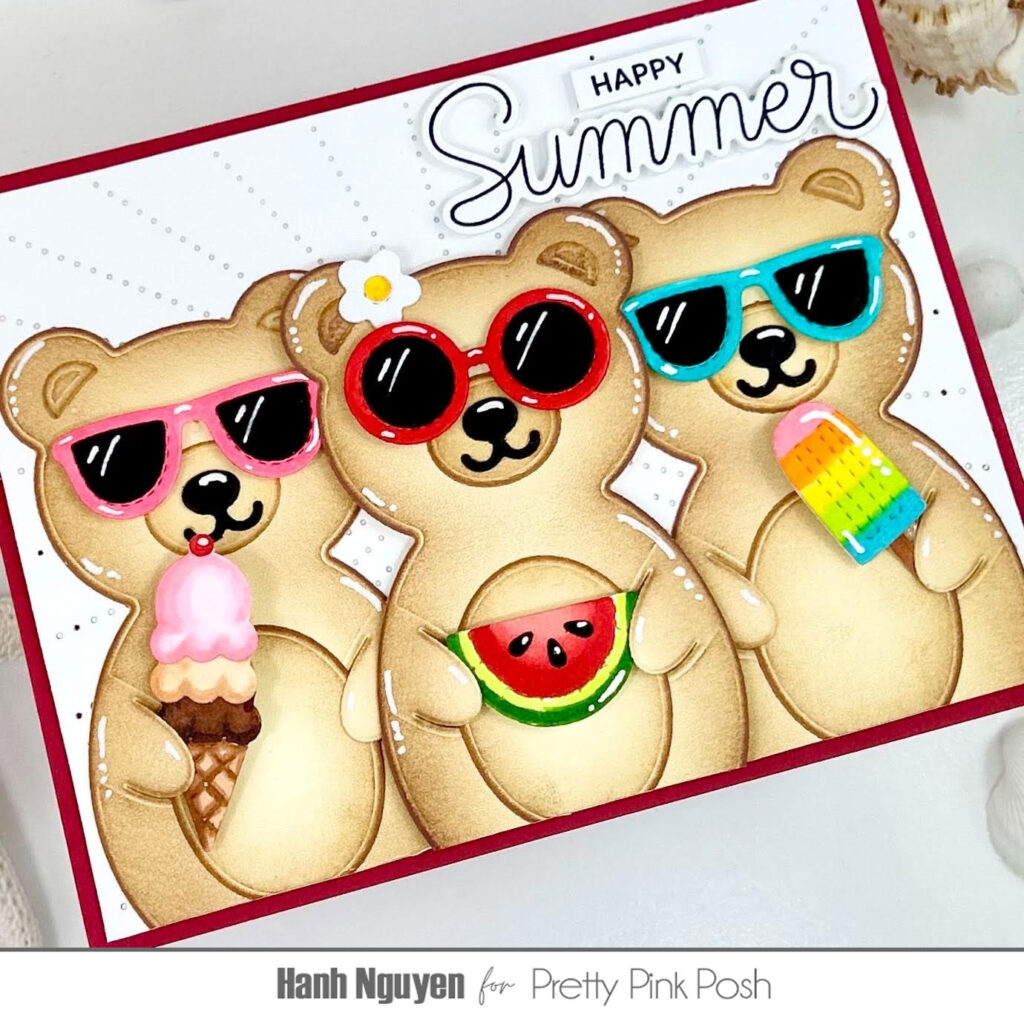
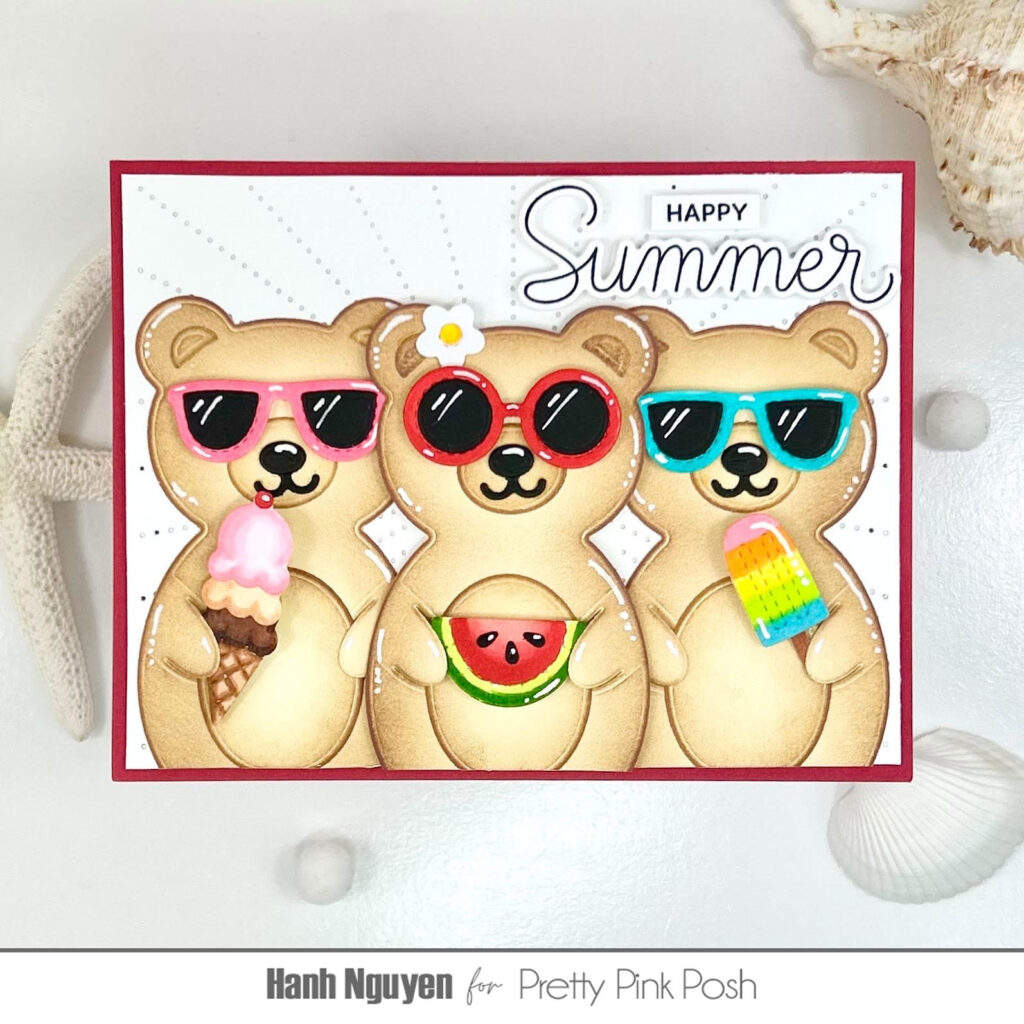
For my first card, I focused on the first thing that comes to mind when I think about summers … all of the yummy food that’s associated with it! For both cards, I used the adorable Bear Holder Dies to diecut the bear out of cream and black cardstock. I lightly ink blended the edges of all of the cream colored pieces and assembled the bears with liquid glue.
Next, I used the Summer Holder Additions Dies to diecut the sunglasses, ice cream, watermelon, popsicle and flower out of Neenah Solar White 110 lb and black cardstock. I colored with Copic markers, assembled with liquid glue and highlighted with a white gel pen.
For the background, the Sunburst Pierced Plate Die was used to diecut a white panel. A thin edge was trimmed off of the panel before it was matted with a piece of red cardstock.
The bears, accessories and sentiment strips were adhered to the panel with a combination of liquid glue and foam tape for a bit of dimension and interest. Finally, the panel was adhered to a white A2 cardbase (5.5” x 4.25”).
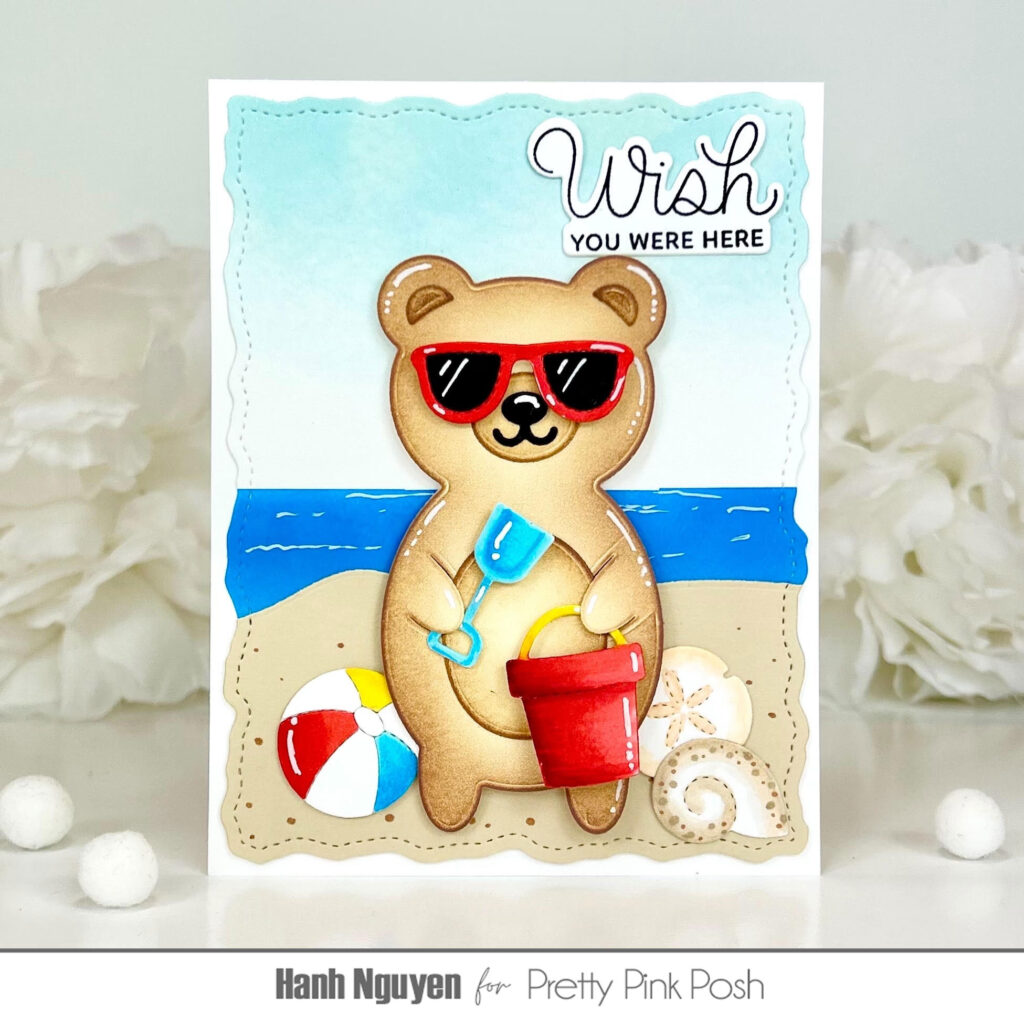
For my second card, I created a simple beach scene to pair up with all of the fun beach accessories and seashells from the Summer Holder Additions Dies. Once again, I diecut all of the elements out of white and black cardstock. I olored with Copic markers, assembled with liquid glue and highlighted with a white gel pen.
For the background, I lightly ink blended with Tumbled Glass and Salty Ocean Distress Oxide to create the sky and ocean. The Snowy Hills Border Dies was used to trim a piece of tan cardstock for the sand. The Stitched Torn Rectangles Dies was used to trim out the panel.
For the sentiment, I stamped the “Wish You Were Here” sentiment from theBeach Fun stamp setwith Memento Tuxedo Black ink onto a piece of white cardstock and diecut it out with the Beach Fun coordinating dies.The bear, accessories and sentiment were adhered to the panel with a combination of liquid glue and foam tape for a bit of dimension and interest. Finally, the panel was adhered to a white A2 cardbase (4.25” x 5.5”).
I appreciate you taking the time to stop by and visit today. I hope you liked my cards and are inspired to try out this fun Summer Holder Additions Dies set. Be sure to head on over to the Pretty Pink Posh Shop check out all of the different products available and take advantage of the 15% discount on all items in theSummer Section during this theme week!
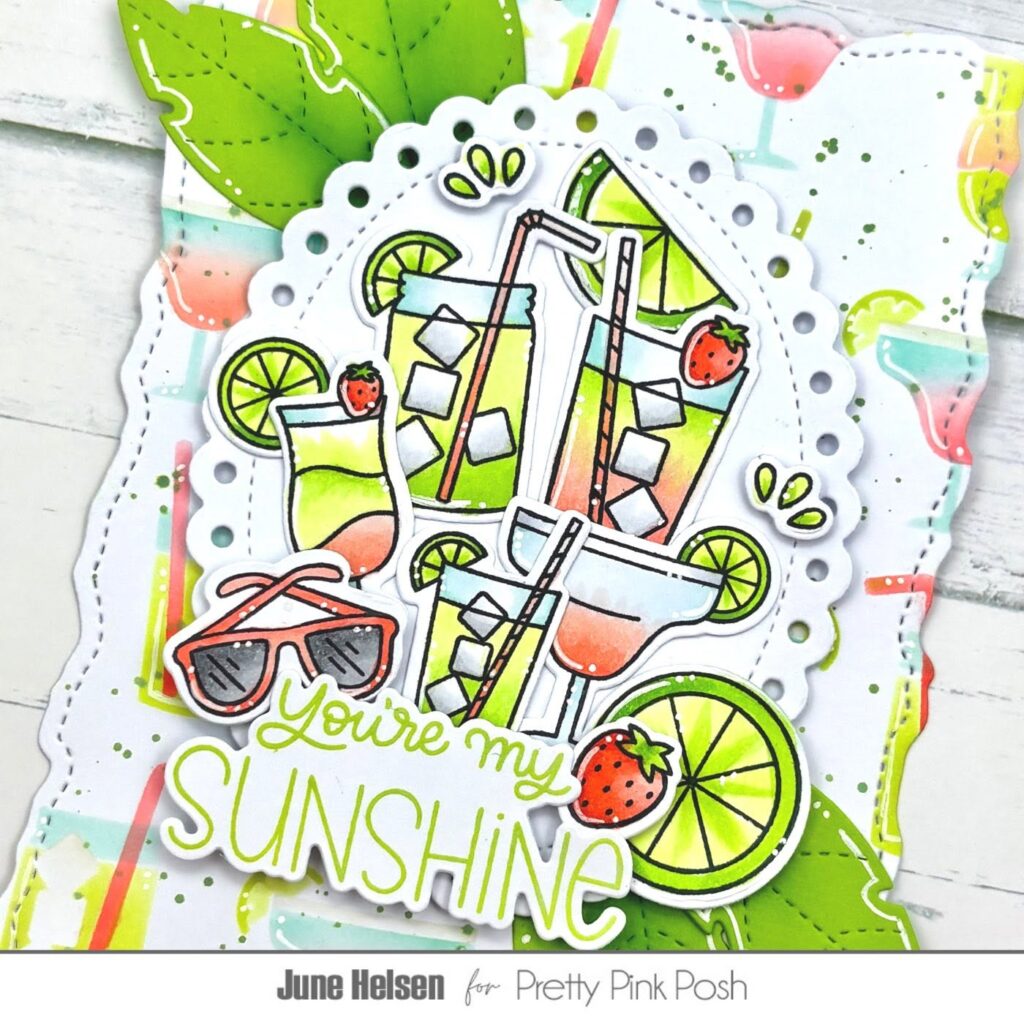
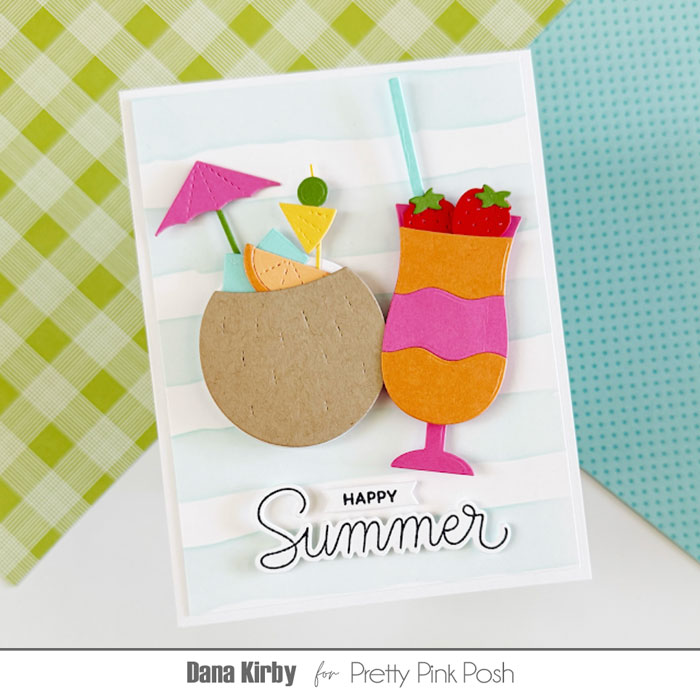
Hello everyone, it’s June here and I’m kicking off Summer Theme Week on the blog! Today I’m sharing this card combining some new products with older ones, all in a fun mojito theme!
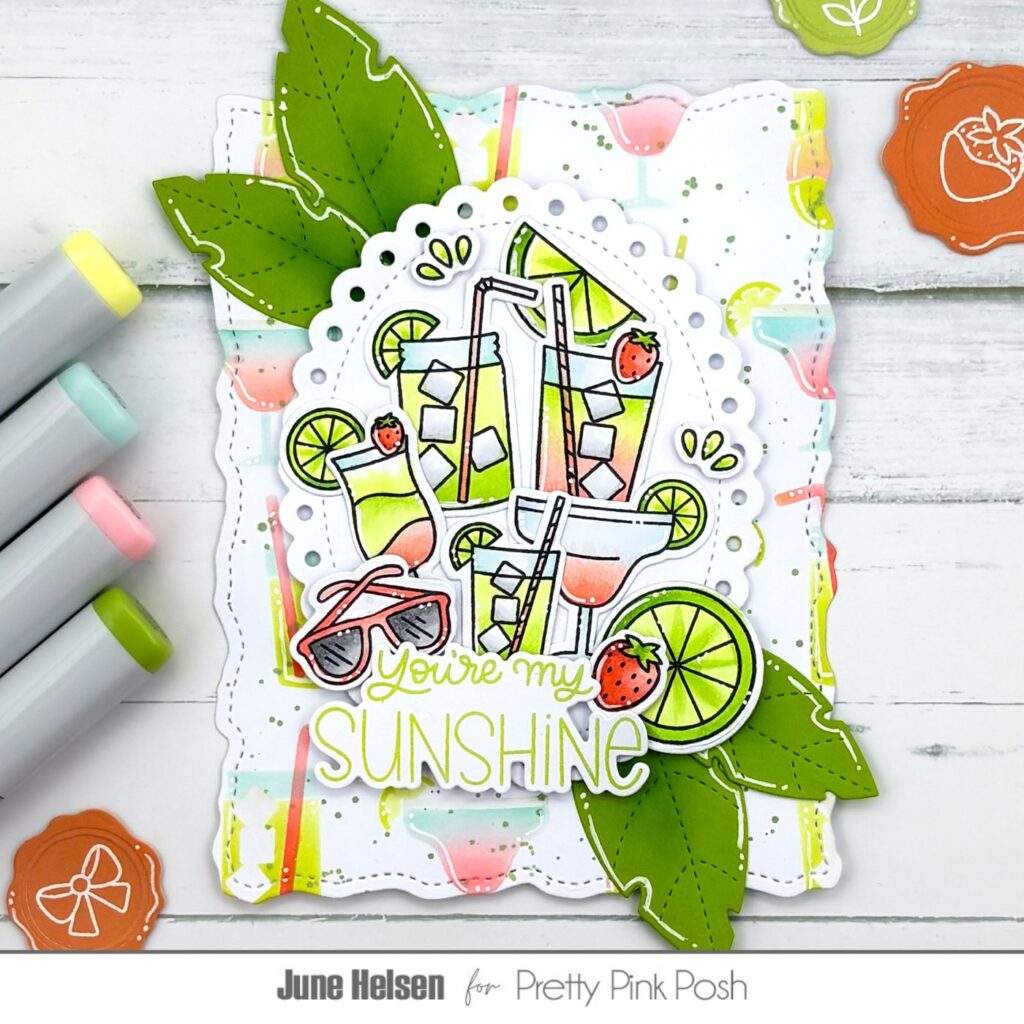
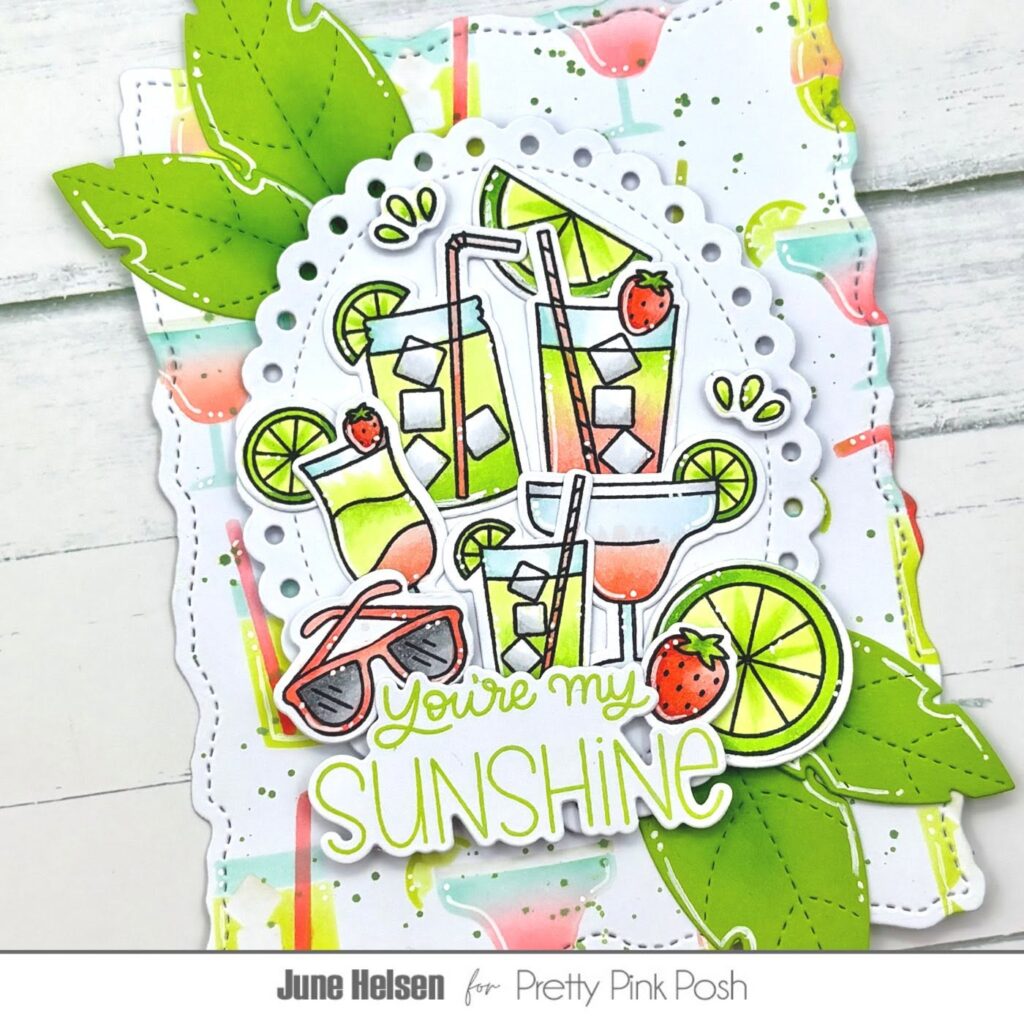
My card features both normal mojitos and even better, strawberry mojitos! I LOVE how well the new Summer Sips stamp set combines with the older Summer Drinks set. The 2 smaller drinks on my card are from the latter, they look like smaller versions of the new set, but they’re not exactly the same (except for one) so using them together creates a full lineup of different drinks. I loved coloring them in the green-pink color palette, one even getting a gradient, looking like strawberry syrup inside a lime colored mojito.
I decorated around my drinks using the sunglasses from the newer set, along with the lime slice and the strawberry from the older one. I really couldn’t think of a better combination of stamp sets! And even better, the Citrusstamp set, which you might know is one of my favorite Pretty Pink Posh products ever, also works as a good companion set! I used both slices as well as some splashes. I adhered all of these images to an Eyelet Oval and added a sentiment from the new Happy Summer set in the bottom left.
Now let’s get started on the background! I cut a Stitched Torn Rectangle from white cardstock and used small brushes to make a nice colorful drink themed background using the Layered Summer Drinks. Blending the small gradients in the drinks was so satisfying! After stencilling everything, I splattered some Rustic Wilderness Distress Oxide all over to fill the blank space.
All that’s left to do now is cut some ‘mint’ leaves from the new Tropical Leavesdie set, add some ink blending and gel pen detailing and glue them behind the oval. And that wraps it up!
I hope you were inspired by my card today, be sure to stop by each day this week for more summer inspiration! See you again soon, bye!
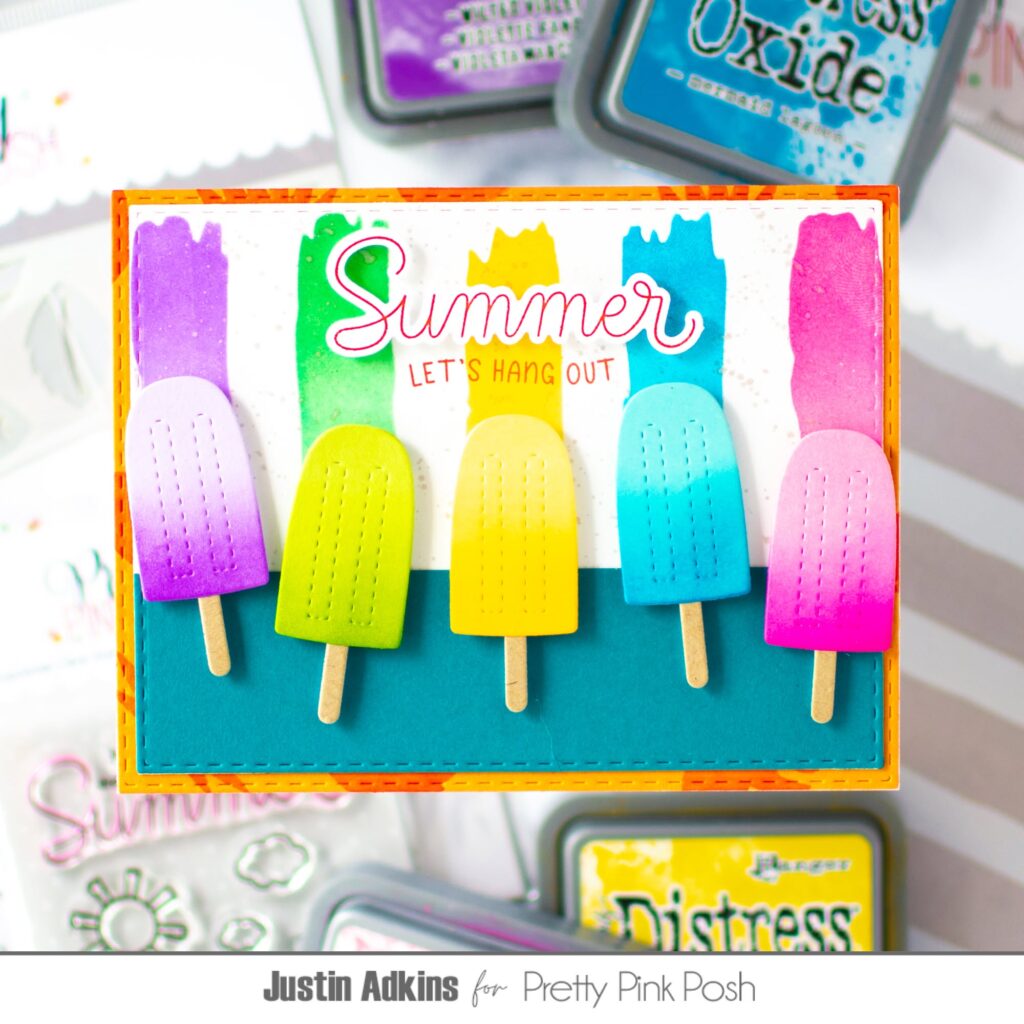
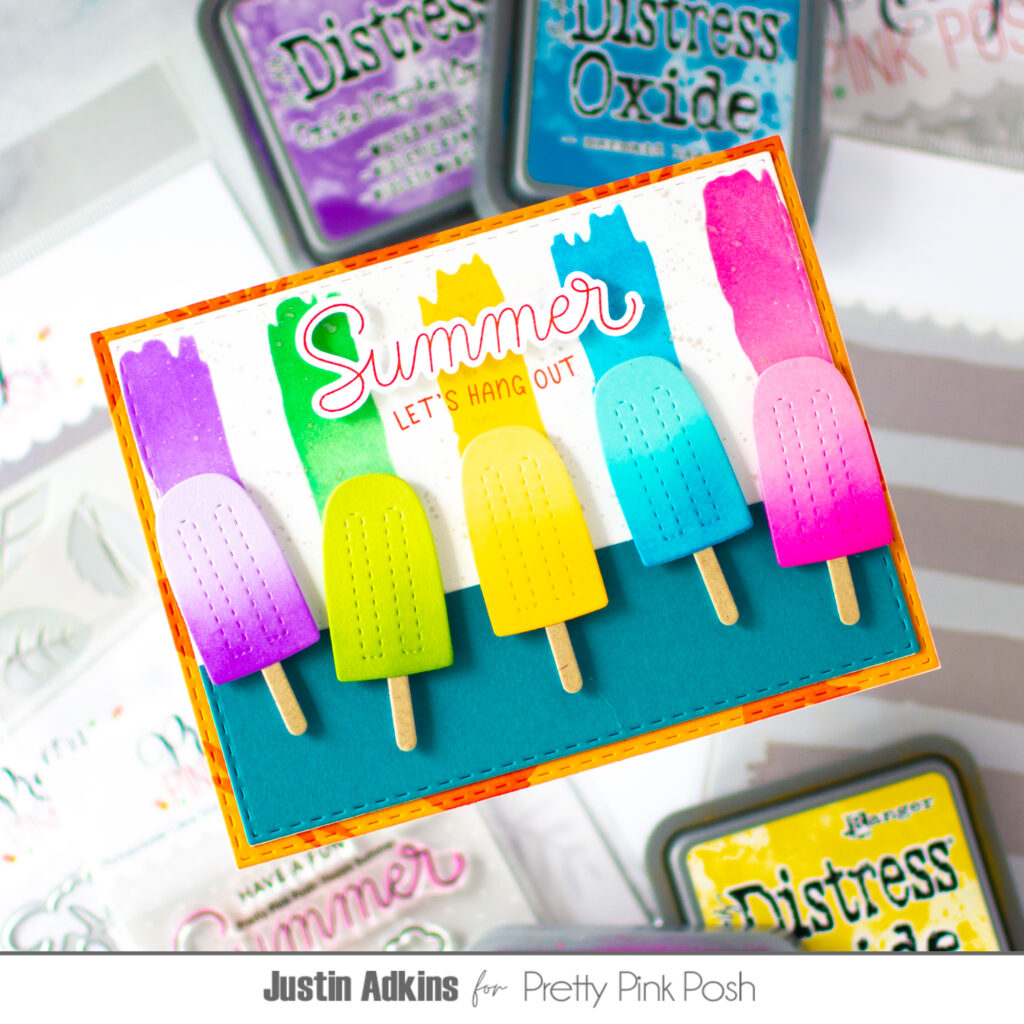
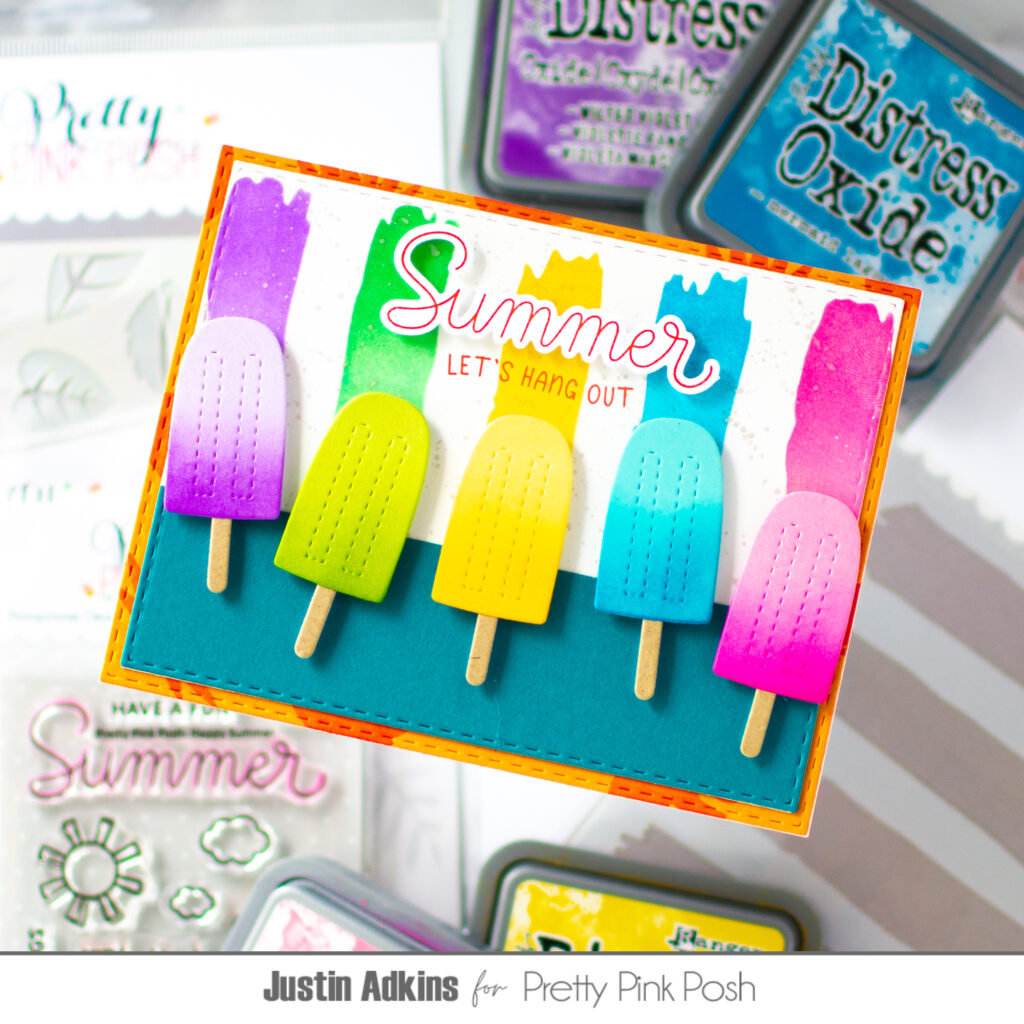
Hello, friends! Justin, and I’m excited to be back on the Pretty Pink Posh blog sharing another bright and cheerful project featuring products from the latest Pretty Pink Posh June Release.
Today’s card is full of summertime fun with a rainbow row of popsicles, vibrant ink blending, and layered details that celebrate all things sunny and sweet. I love how these new products work together to create playful scenes perfect for summer cards.
For this card, I started by creating the colorful striped background using the Watercolor Strips Stencil and Distress Oxide Inks. Blending the colors into soft ombrés gave the card a bright and summery feel while adding plenty of visual interest.
The popsicles were created with the Summer Bucket Additions Dies. Instead of starting with white cardstock, I die cut the pieces from colored cardstock and then added extra depth by blending coordinating Distress Inks around the edges. This simple technique adds dimension and helps the die cuts really stand out.
To add a subtle finishing touch, I used the Layered Tropical Leaves Stencil around the outer border of the card. The soft tone-on-tone pattern adds texture without overwhelming the focal design.
I also mixed sentiments from two different sets by pairing the large script “Summer” from the Happy Summer Stamp Set with the smaller “Let’s Hang Out” sentiment from the Summer Banner Greetings Stamp Set. Combining sentiments is a fun way to create custom greetings that perfectly fit your project.
I hope this colorful popsicle card inspires you to create something fun with the new summer release. These products are perfect for summer cards, vacation memories, and sending a little sunshine through the mail.
Don’t forget to follow me on Instagram and YouTube at @justanotebyjustin for even more crafting inspiration!
Hello crafty friends! It’s Dana here today and I am back with a card that uses the adorable Summer Cocktail dies. These dies can be used to make fun festive drinks that will leave you dreaming of a tropical vacation! I love all the cocktail garnishes and summer accents that can be mixed and matched to give you lots of fun options.
I started my card by making my card panel with the Watercolor Strips stencil. I ink blended the strips with a light aqua ink and then trimmed the panel down and attached it to an A2 card base. Next, I used the Summer Cocktails diesto make my two cocktails. I die cut all the pieces from colored cardstock and then assembled my cocktails with a strong liquid glue.
For my sentiment, I used the Happy Summer stamp set and die set. Once my sentiment was stamped, I attached it to my card panel with foam adhesive, along with my cocktails, to finish my card.
Thanks for joining me today and I can’t wait to see what you create with these fun new products!
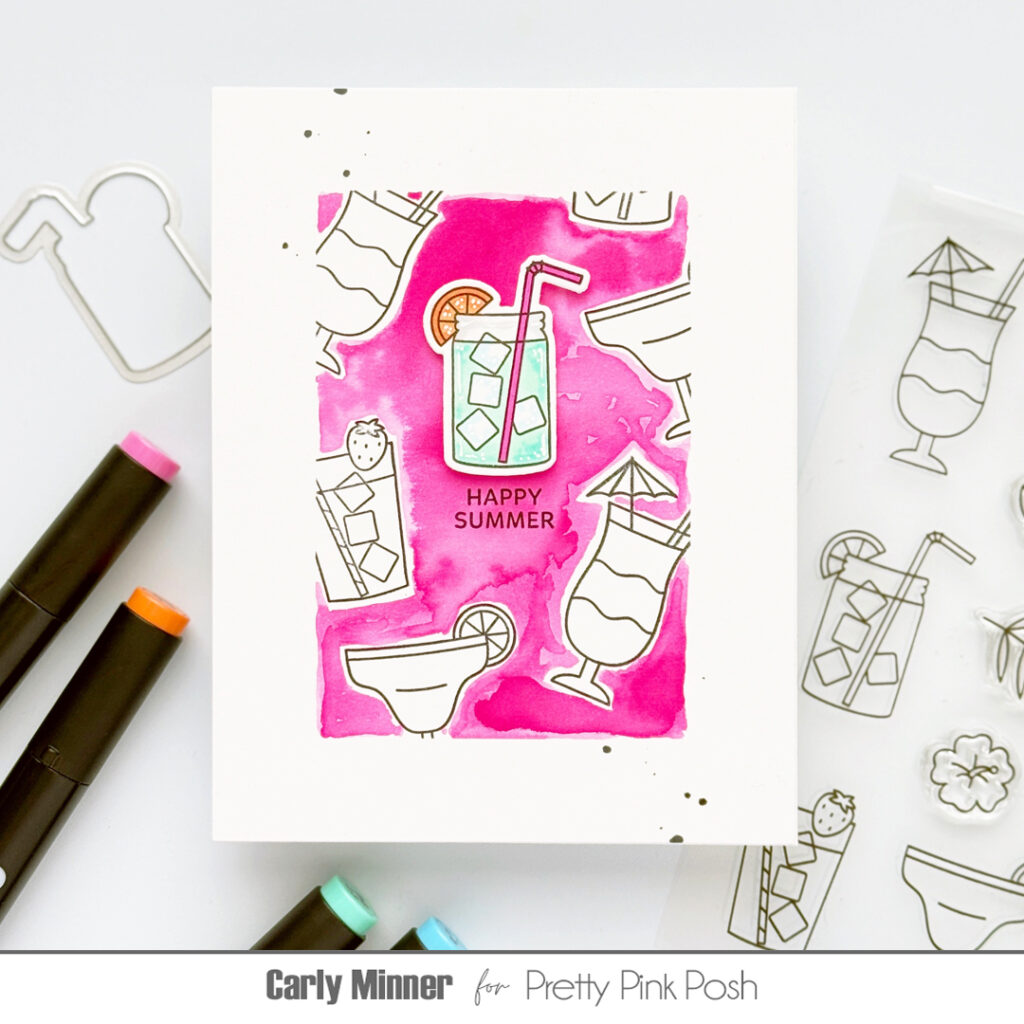
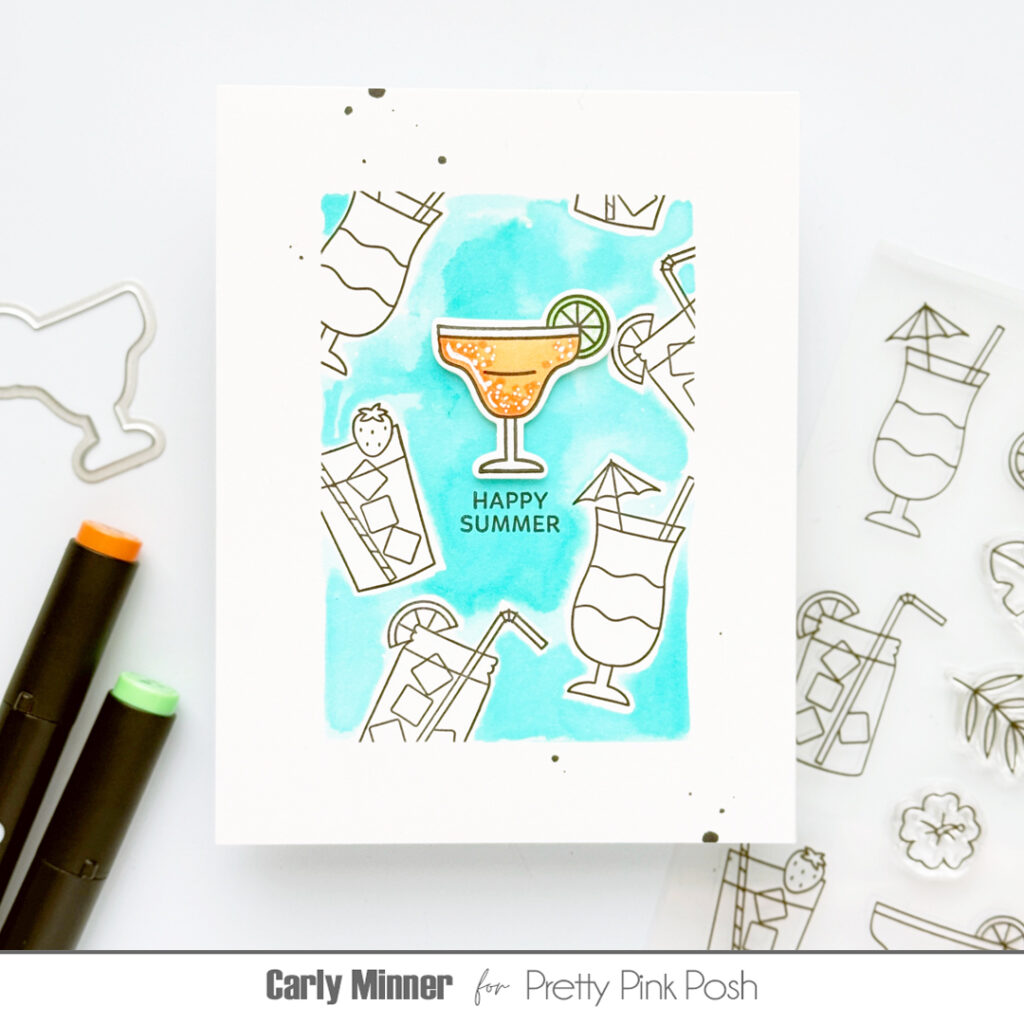
Hi friends, it’s Carly here. Are you looking for an easy, no-fail card design? Let me show you this easy one I love that includes SUPER easy watercoloring!
something to watercolor with…could be watercolor paint or water reactive ink pad/reinker
The process is so quick & fun! Mask a rectangle on cardstock. Stamp images as desired in waterproof ink. And then with tape still in place, watercolor around the stamped images to create a really fun background!
When the paint is dry you can add any focal element & sentiment!
OLO Marker Colors
RV1.3 Pink Lotus
OR1.3 Papaya
O2.2 Cantaloupe
G1.2 Mint
G0.0 Small Emerald
BG2.3 Aqua Green
BG2.1 Sea Glass
B1.3 Blue Hydrangea
B1.1 Light Blue
Thanks for stopping by! I hope you enjoyed today’s tutorial.
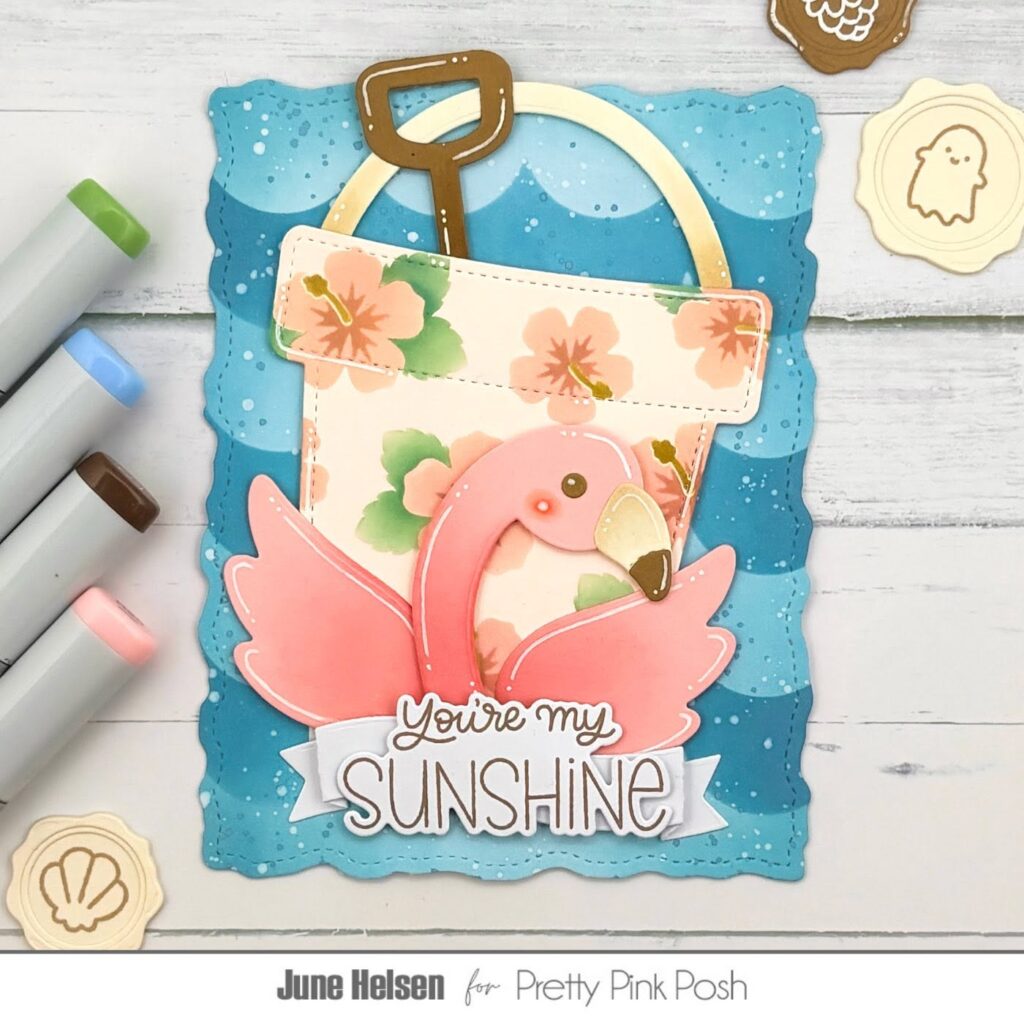
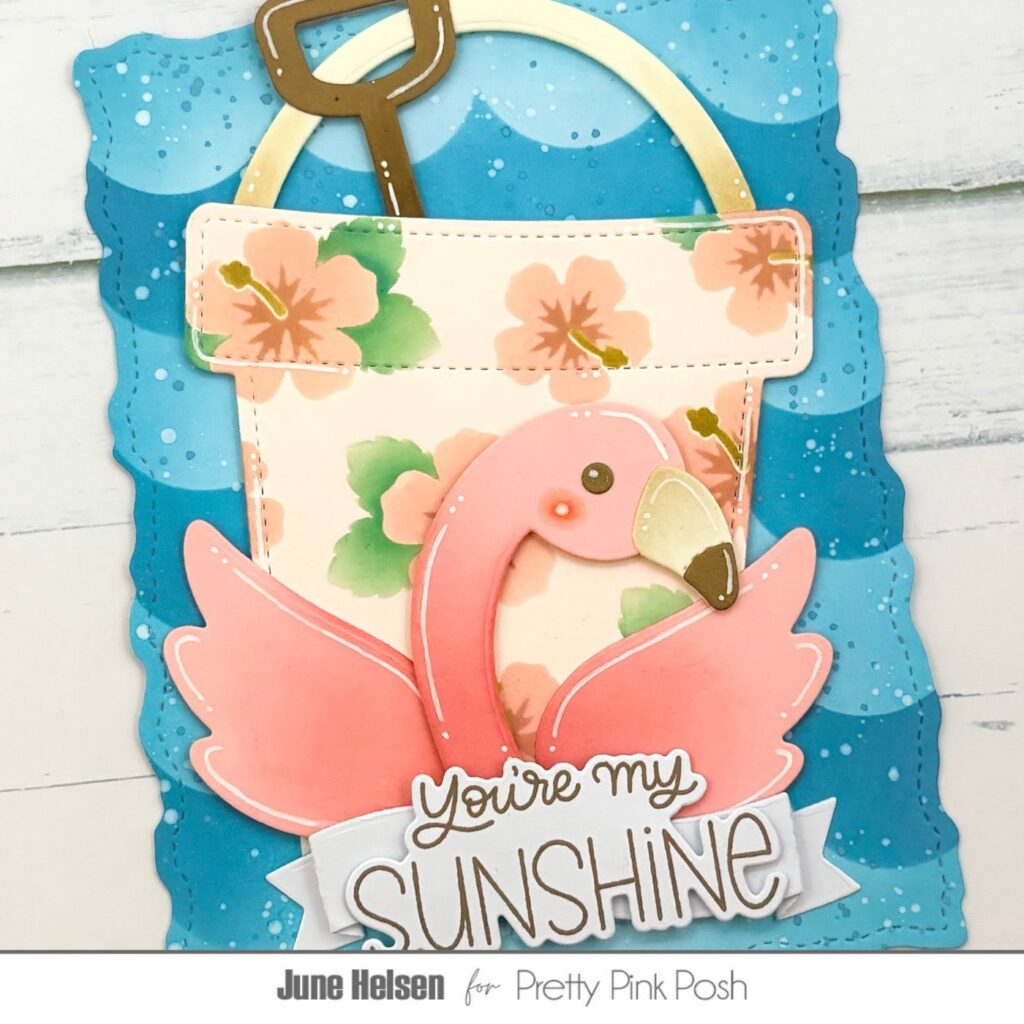
Hello crafty friends, it’s June here! I’m back on the blog with a card that showcases one of the newly released products and how it combines with some older products. Let’s get started!
My favorite dies in the new Summer Bucket Additions have to be the flamingo ones! But what if I don’t want to use them with the Candy Bucketit was intended for, and instead combined it with an older summer product: the Sand Bucket Shaker? Well, no problem because they work great together! And using this slightly taller bucket gives me so much extra space to decorate the bucket itself with a stencilled pattern. I used the Layered Hibiscus stencil on the bucket that I cut from pastel pink cardstock, which creates a vintage, yet summery floral pattern. I used Distress Oxides in the colors Victorian Velvet, Aged Mahogany, Evergreen Bough and Gathered Twigs. I cut the handle from cream colored cardstock and the shovel from brown, adding a bit of ink blending to both.
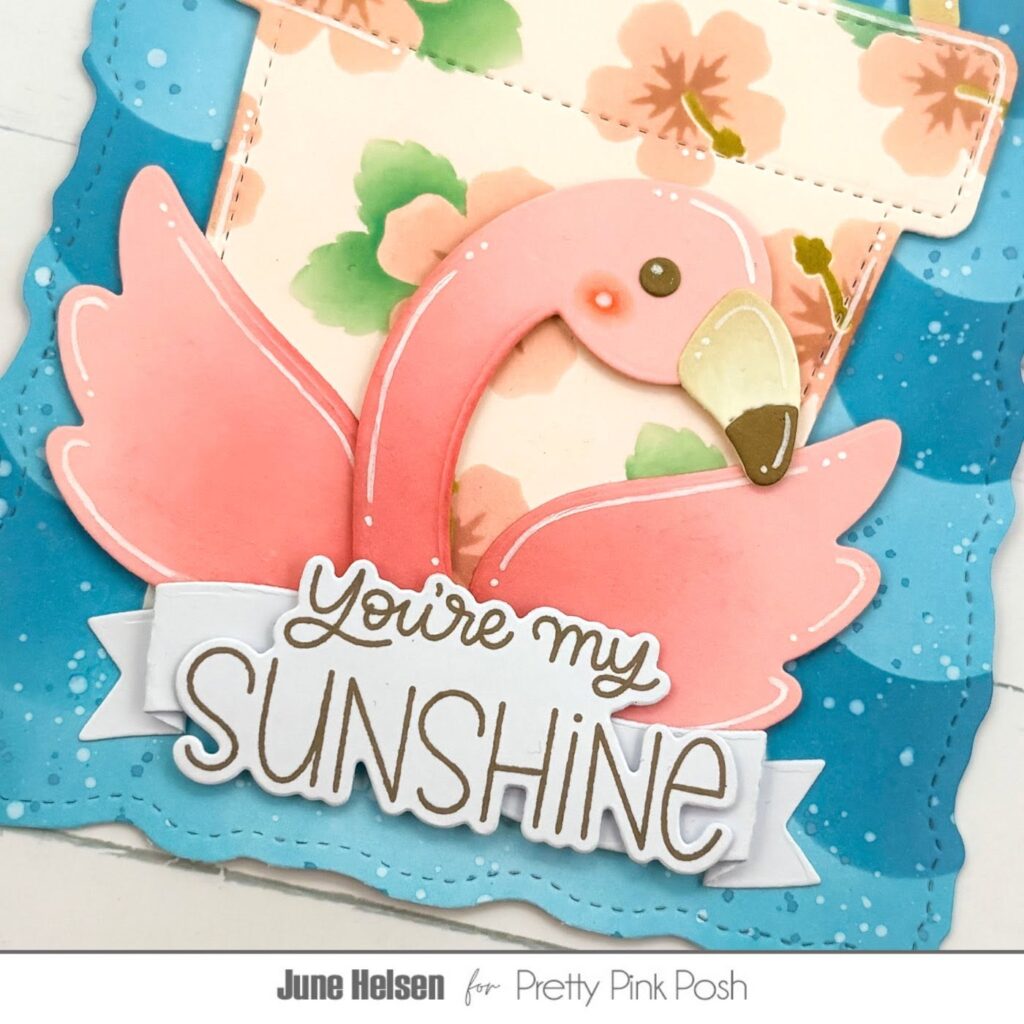
I cut the flamingo from slightly darker pink cardstock and used a very light hand to apply a bit of that Aged Mahogany so it looks more dimensional. I cut the eyes and beak from the same cream and brown cardstock I used before, giving it a very soft look. I gave my flamingo a bit of blush and added white gel pen lines to bring it to life even more.
I cut a background panel using the largest of the Stitched Torn Rectangles and blended it completely in blue, going lighter towards the middle. I then used one of the Stacked Scallops stencils to create darker waves on top. I didn’t use both stencils as I was going with a darker shade instead of 2 different colors. I splattered the darker shade of blue on top aswel as white paint.
I chose to go with a stacked sentiment, layering a Happy Summer sentiment on top of one of the 3D wavy banners from Banner Greetings 2. I love the way the flamingo pops out from behind the sentiment!
And that’s it for today! I hope you’re enjoying your summer so far and have been feeling inspired to create some fun sunny projects. I hope to see you again soon, bye!
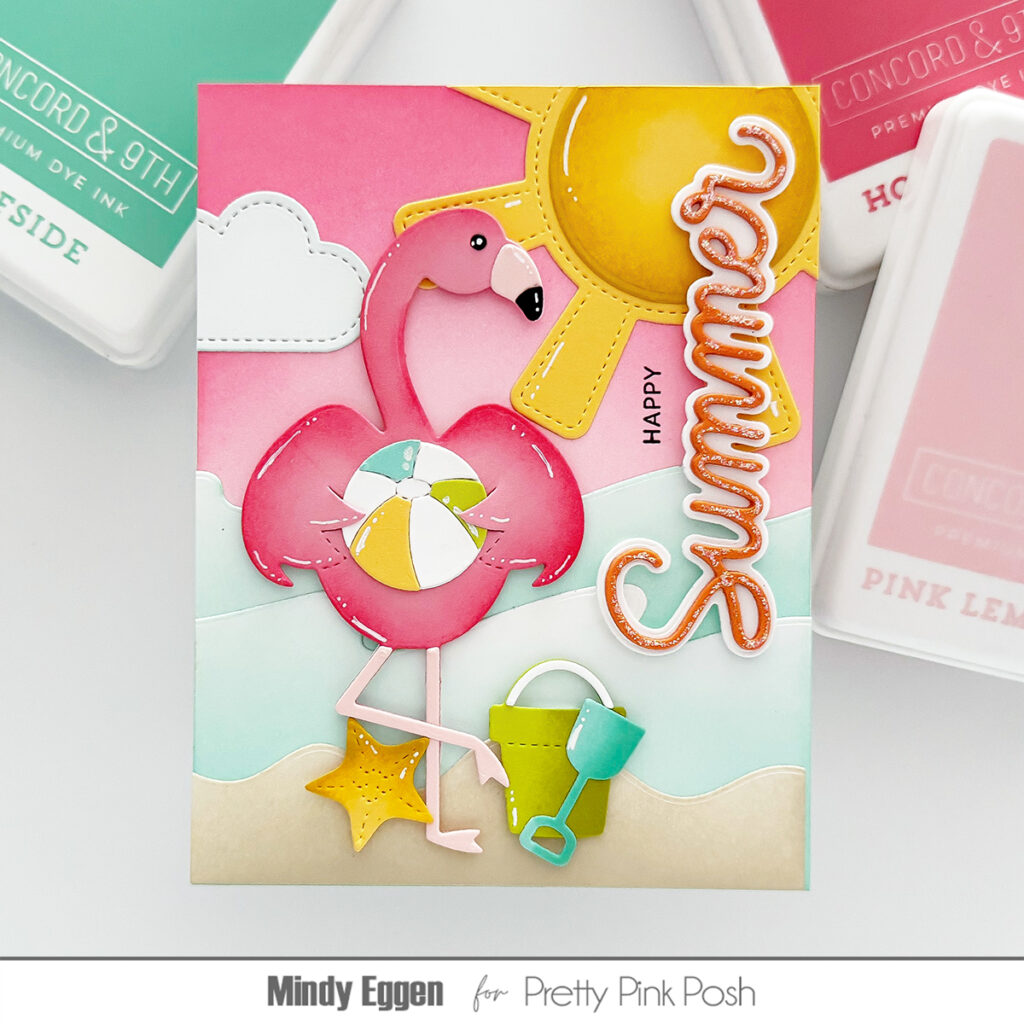
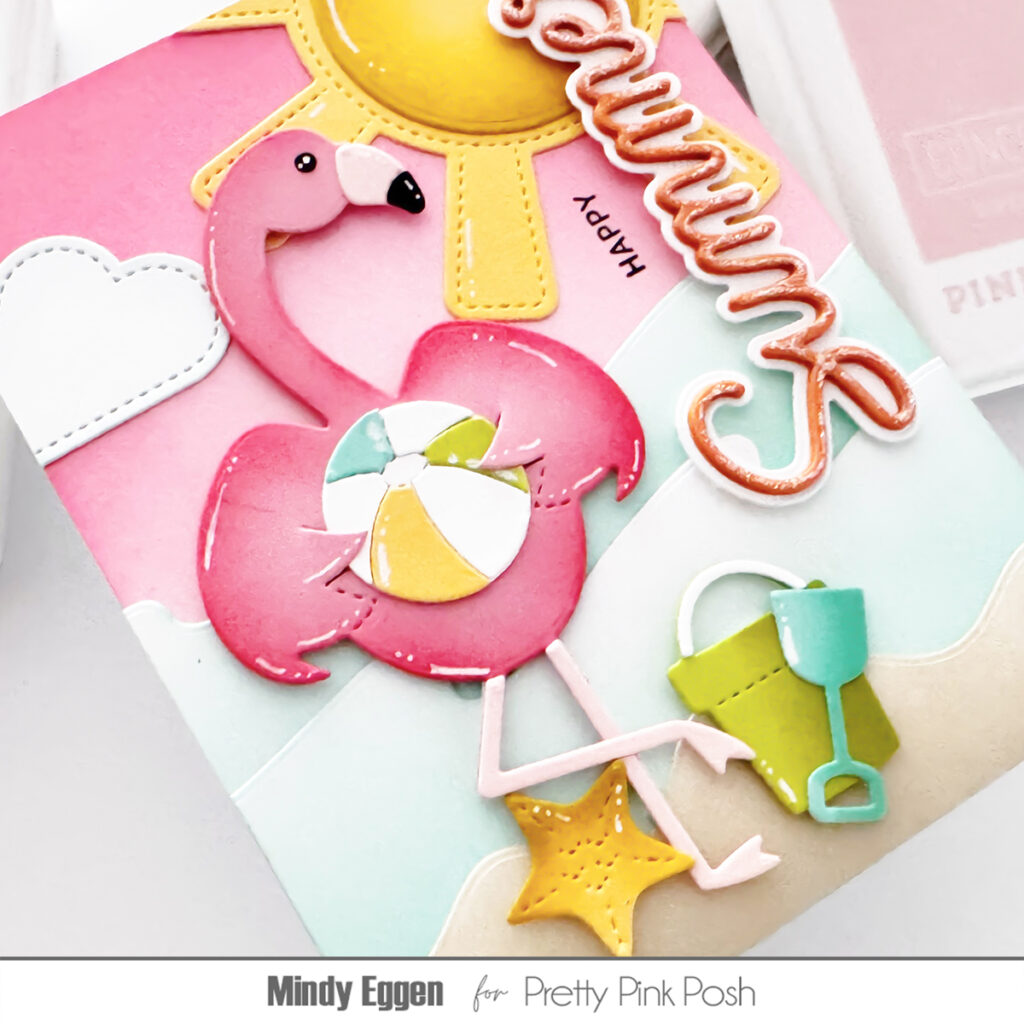
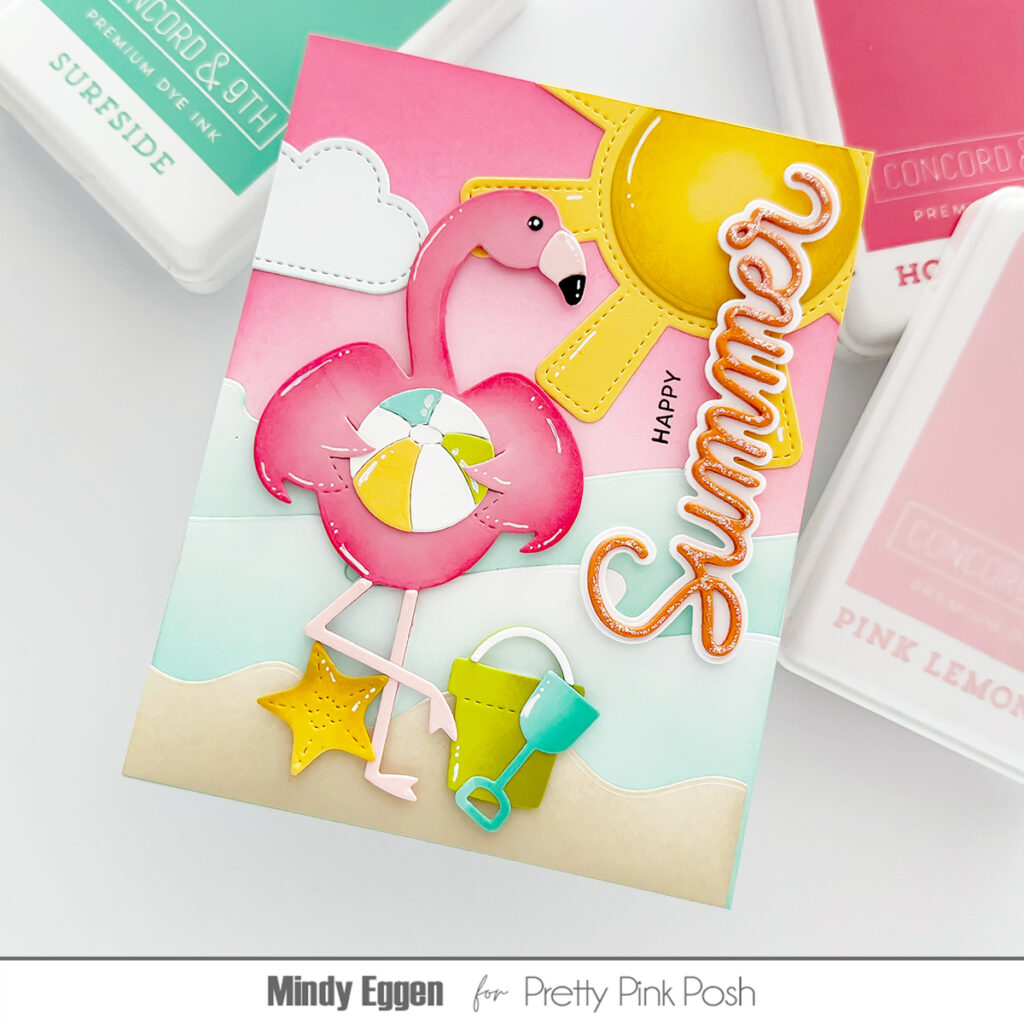
Hi everyone! It’s Mindy with Pretty Pink Posh, and today I’m creating a bright, cheerful summer card featuring the adorable Flamingo Holder die set!
This is such a fun interactive die because your flamingo can hold all kinds of summer accessories. For today’s card, I gave mine a colorful beach ball, but there are so many possibilities with the Summer Holder Additions set.
Before assembling everything, I added a little ink blending to each piece. This simple step makes such a big difference! Adding darker ink around the edges gives the die cuts extra dimension and helps all of those cute details stand out once they’re assembled.
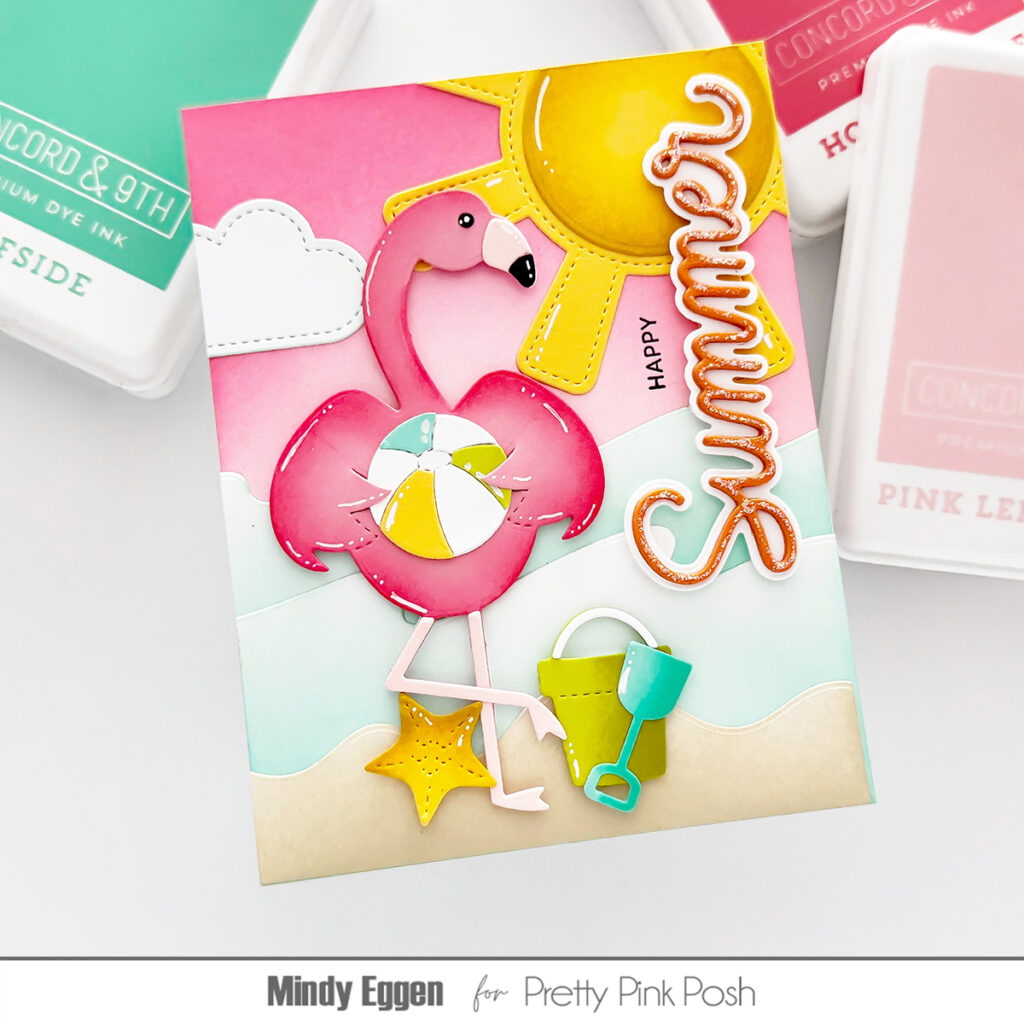
For the greeting, I die cut the large Summer three times from orange cardstock and stacked the layers together to create a nice chunky die-cut. This adds plenty of dimension while making the sentiment really stand out against the finished scene.
Once the layers were adhered together, I attached the sentiment to the white shadow layer so it would pop even more from the colorful background.Now for my favorite part—the background!
I started with an A2 card front and ink blended a soft pink sky. The bright pink gives the card a fun, tropical feel without taking away from the focal images.
Next, I die cut two Shoreline Border pieces to create rolling ocean waves and lightly ink blended them with teal ink. For the sandy beach, I die cut another border and blended brown ink along the edges for a little extra depth.
Layering the beach and waves across the bottom of the card instantly creates a simple seaside scene that’s perfect for our flamingo. Before gluing anything down, I like to arrange all of my die-cut pieces on the card front first. This helps me find the best layout and also lets me stamp my sentiment exactly where I want it.
I used a sentiment from the Happy Summerstamp set, making sure everything was positioned before committing with adhesive.
For the sunshine, I used the main pieces from the Sun Shaker die set—but instead of turning it into a shaker, I simply assembled the pieces to create a bright sun for the corner of the scene.
Once everything was in place, I popped up the flamingo and the layered summer sentiment with foam tape for extra dimension.
To finish the card, I added white gel pen highlights to the die-cut images to help bring out all of the details. Then I added a little Glitter Stickles over the Summer sentiment for just the right amount of sparkle. It’s a simple finishing touch that catches the light beautifully and adds even more summer fun.
I hope today’s card inspires you to create your own sunny beach scenes with the Flamingo Holder collection. There are so many fun combinations you can make by changing what the flamingo is holding, making this a die set you’ll reach for all summer long.
Thanks so much for joining me today, and happy crafting!