
Day 1: Lucky Theme Week
**All items in the Lucky section are 15% off during theme week**
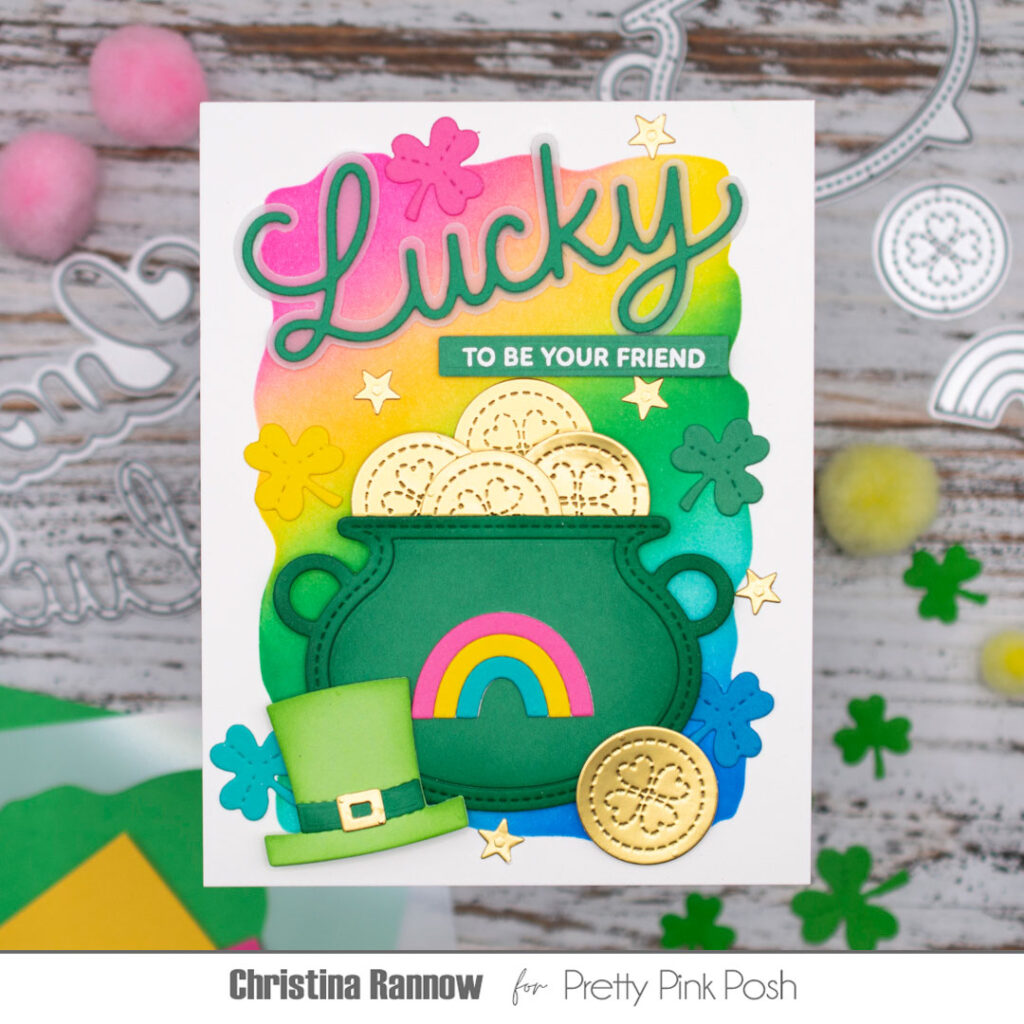
Hi crafty friends! It’s Christina, and I’m excited to welcome you to Lucky Theme Week! We’ll have magical inspiration all week, while anything in the “Lucky” category will be discounted 15% in the shop. Today I’m sharing a lucky rainbow-colored card design featuring something that might be a little unexpected, the Cauldron Shaker. It easily does double duty as a pot of gold using the Lucky Holder Additions to fill it with gold coins. So fun! Take a peek at the supplies I used, and then we’ll get started!
Cauldron Shaker Dies
Lucky Holder Additions Dies – coins, hat, and rainbow
Lucky to Know You Stamp Set – sentiment on sentiment strip
Lucky Shadow Dies
Watercolor Rectangle Stencil
Horseshoe Shaker Dies – stars and shamrocks
Sentiment Strips Dies
My first step was to create the rainbow background panel. On a white cardstock panel, I blended a rainbow of inks inside the Watercolor Rectangle stencil. To create the rainbow, I used some of my favorite pink, yellow, green, teal, and blue ink colors and blended them at an angle across the panel.
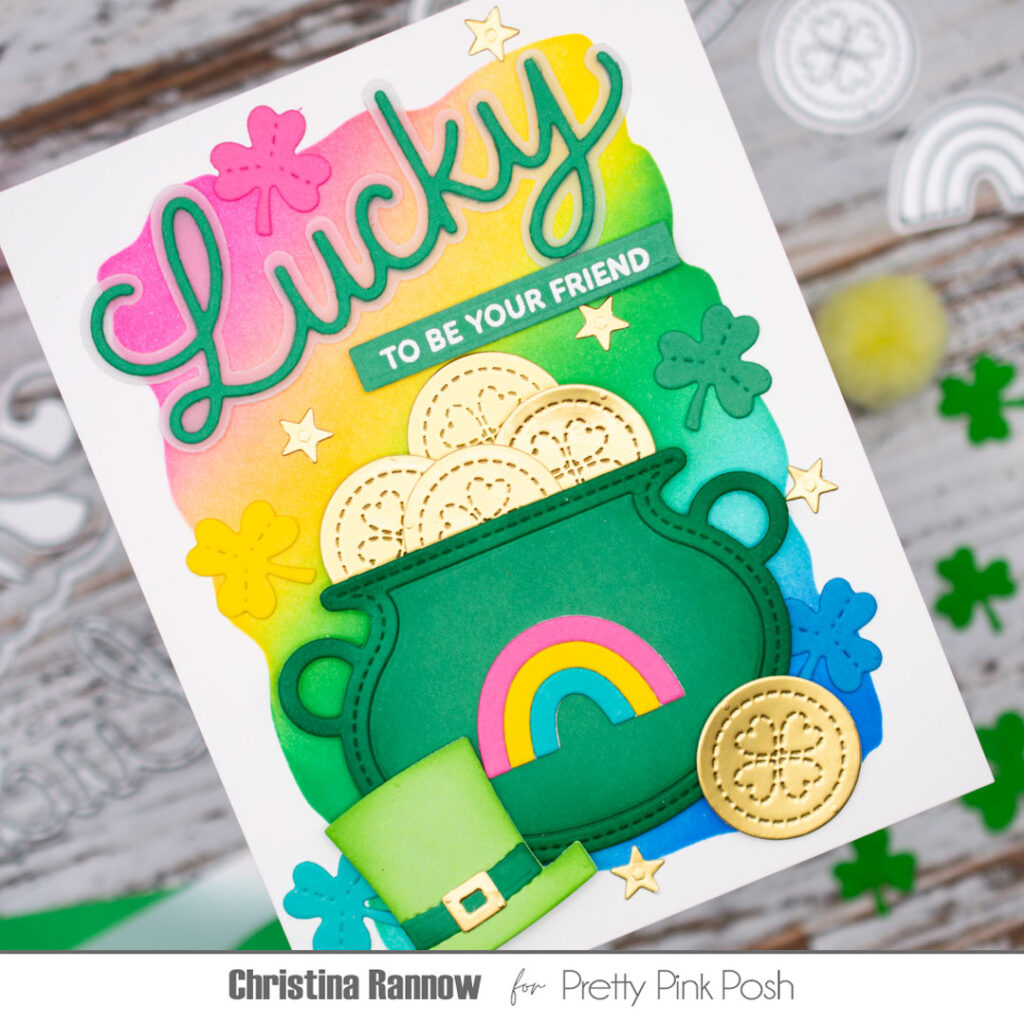
Next, I got to work die-cutting some of the elements for my card design. For the “pot of gold” and the hat, I die-cut them from colored cardstock and inked the edges with coordinating inks to add some dimension and shading. Then I die-cut the coins and the stars from matte gold cardstock. And finally, I die-cut a rainbow of shamrocks from colored cardstock to coordinate with the rainbow background panel.

My next step was to create the sentiment. First I die-cut the Lucky Shadow using green cardstock for the text and vellum for the shadow piece. Then I heat embossed the rest of the sentiment with white embossing powder on a green sentiment strip.
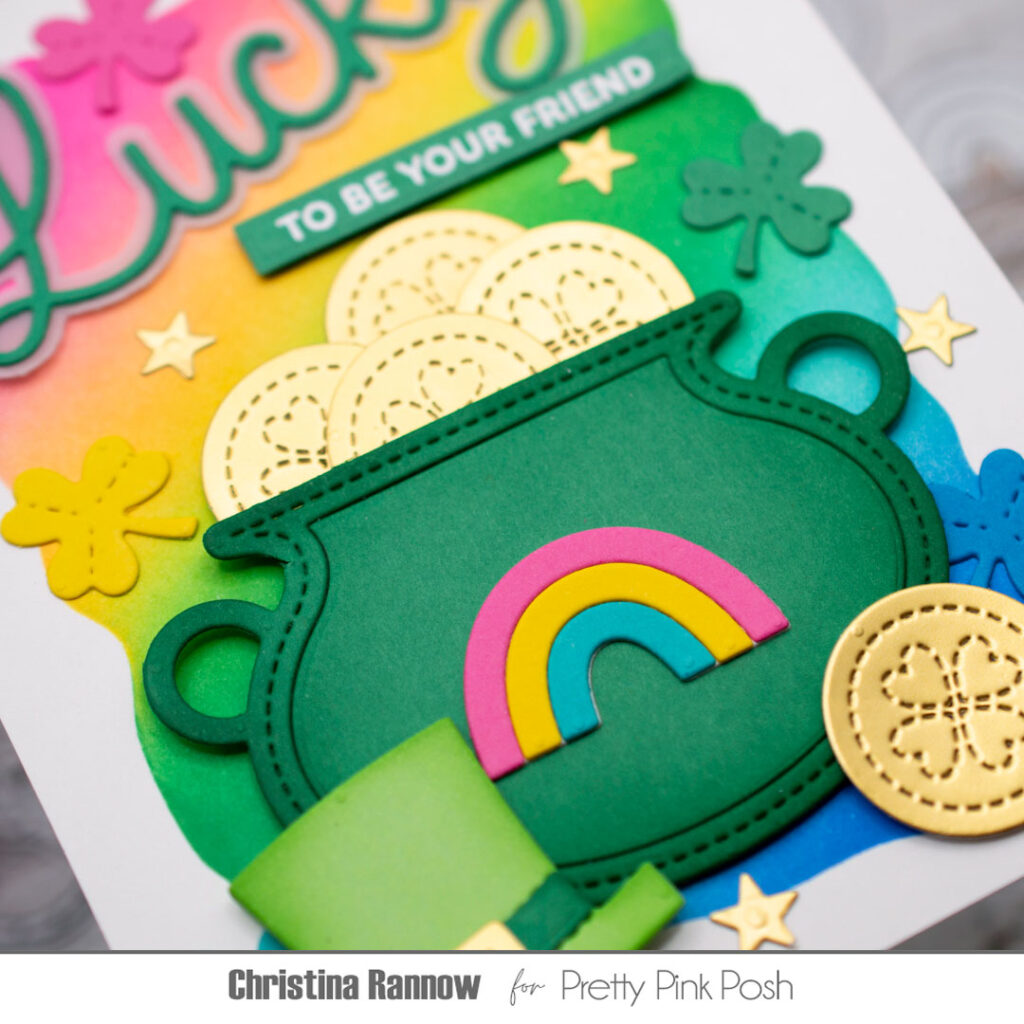
Time to wrap things up! I used foam squares to attach the “pot of gold” to the rainbow background panel and tucked some gold coins inside. I embellished the pot with a rainbow diecut and added the hat and a coin near the bottom with more foam squares. Then I added the rainbow of shamrocks and gold stars to the background for a little lucky flair. Finally, I added the Lucky Shadow and the sentiment strip.

Thanks so much for checking out Day 1 of Lucky Theme Week here on the PPP blog! Be sure to check back all week for more St. Patrick’s Day inspiration!
What a fun St. Patrick’s Day card!
Excited for the inspiration week!