Hi everyone, Rina here. I am a BIG fan of shaker cards, so today I thought I would make a mini shaker birthday card. I love this smaller size; you do not have to use too many sequins to make a huge impact.
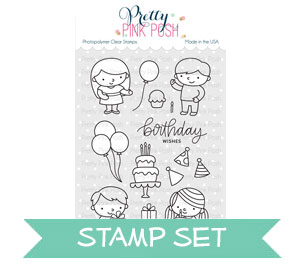
I am using the Bunny Friends, Birthday Friends and Fly Away Friends stamp sets for today’s card. I am also using the larger Scallop Square die to create the shaker frame. I am coloring the bunny and balloon images with 4 copic markers: RV0000, RV21, RV25, RV29.
To create the sentiment I cut out a thin piece of black paper and white heat embossed the Happy Birthday sentiment from Fly Away Friends. I wrapped the piece around the shaker frame. Once the sentiment is in place, adhere the bunny and balloon images to the middle of the card. To finish off the card, I accented the stamped images with Spectrum Noir Sparkle pen in Clear and adhered the new Watermelon Jewels to the outside of the shaker.
Once the card front is all complete, adhere the shaker to a 4 ¼ x 4 ¼ inch card base!
I hope you try this mini shaker out! Thanks for stopping by!
Hello Pretty Pink Posh fans! This is Yana and today I am sharing video tutorial showing how to create a colorful birthday card for a girl using the Birthday Friend stamps.
Pretty Pink Posh has many other stamp sets from the Friends series and many of them can be used to create a card like this. The characters within these sets maintain their size so you can easily combine friends from different sets to tell a story on your cards.
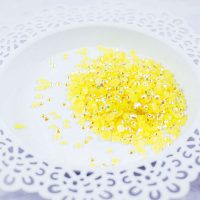
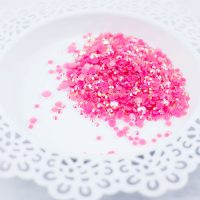
I picked pinks and yellows for this project as primary colors and made it into a birthday card for a girl, by using greens and blues you can easily change it up and make into a birthday card for a boy.
The colors I picked were somewhat influenced by the set of sequins I was planning to use to embellish my card – the Party Time sequin mix. There are yellow, pink and blue sequins in this set; I wanted to color the elements on this card in colors that would match these sequins. It might seem a bit odd – trying to match the coloring to the color of sequins, but I often use this trick when I want to make sure everything will match. Its very easy to pick the right colors that would coordinate or resemble the colors of my sequins and not vice versa. Plus the sequin mixes already have the colors that work quite well together, so why not use that to our advantage?
I started working on my card by stamping nearly all of the images from this stamp set in Copic Marker friendly ink onto white cardstock panel. The only image I didn’t stamp was the little candle. I colored my images using Copic markers. I used:
RV14, RV13, RV11 to color pink
Y19, Y15, Y11 to color yellow
B02, B00, B000 to color blue
E00, E000, E11, E13, E33 to color skin and hair
I cut my images out using the coordinating dies and also die-cut identical shapes out of sticky fun foam – I often prefer to use a solid fun foam shape to foam adhesive squares. This adds a lot of stability to my foam mounted elements and prevents sagging.
Next, I white heat embossed the birthday sentiment onto a gray cardstock panel, foam mounted it in the center of a 4 ¼ x 5 ½” white panel and added my colored elements around it. In a way it looks like there’s a Birthday party going on on this card and the friends are dancing and having lots of fun!
Finally, I embellished my card using the sequins I used for my color combo inspiration – I added a lot of sequins in various sizes filling in the gaps in between the images. I also coated some elements using a shimmer pen.
I hope you enjoyed today’s post and video. Happy cardmaking!
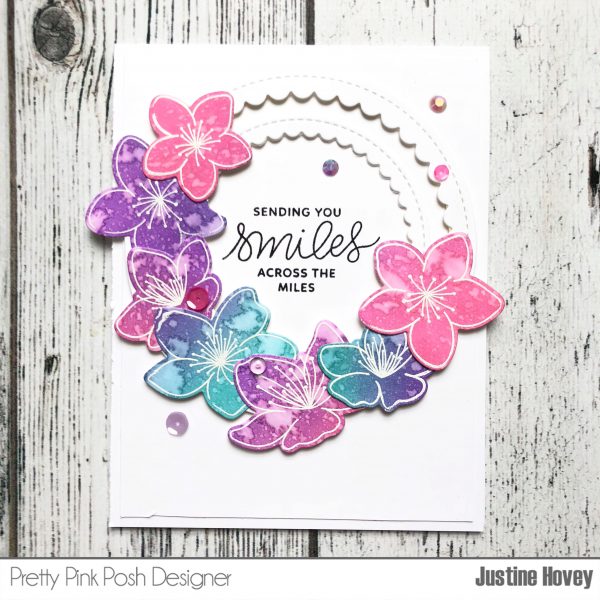
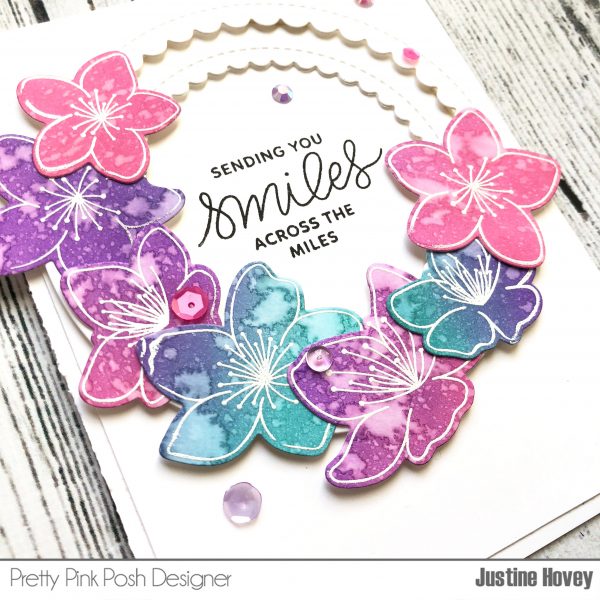
Today’s card video tutorial shows off how to colour your stamps without fancy crayons or markers! It’s Justine again, taking over the Pretty Pink Posh blog! I’m excited to be here with you again bringing you another video tutorial! Today I am using some of the fun new release stamps Cherry Blossoms and Encouraging Greetings! I am generally quite intimidated by colouring, so I always love to figure out ways to colour without needing a lot of colouring skills!
I hope you enjoyed the video tutorial and it helped explain how to make this fun card. If you enjoyed today’s video, feel free to check out my YouTube Channel. See you in April!
Good morning! Heather here this morning to share another Something Old, Something New card with you – the idea is to mix together both older and newer Pretty Pink Posh products – and to show you how AMAZINGLY well all of Pretty Pink Posh’s products work together! Today’s card is definitely not one to tackle unless you have a bit of spare time – but the results are SOOO worth the effort! Check out that SPARKLE!
So I started off by stamping the bottom border from Sparkle Dot Patterns 2 Stamp set on a panel of white cardstock repeatedly with soft gray ink. I did this so that once I finished the card, if I used a jewel too small to cover the dot, or misplaced it slightly, you wouldn’t see a black circle peeking out. It was also helpful for the Clear Droplets I added, since you can’t see it under there either.
Then was the slowest part! I add alternating rows of Aquamarine, Lemon Drop, and Watermelon Jewels. I filled in the centers of the pattern with 4mm Clear Droplets. I used alternating sizes of the jewels – mostly so I didn’t have to sort through for one size, or run out! My jewel picker was very helpful with placement. There are lots of options for adhesive – for this I used tiny dots of Glossy Accents. It was nice and sturdy to hold everything in place, and I like that since it dries glossy, it just adds to the look of the Clear Droplets.
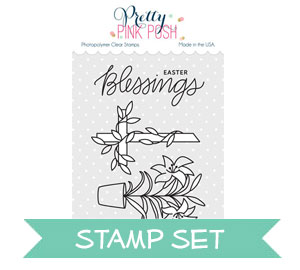
Next up, I die cut a large Scallop Frame from aqua cardstock, then stamped and heat embossed my image fromEaster Blessings in the negative die cit so as not to waste anything!
I colored the image with Chameleon Colored Pencils, then die cut with the coordinating Easter Blessings Dies. I also die cut the Easter from Happy Easter Script Die twice – once from pale yellow, and once from white to adhere together with a glue pen for a bit of a more sturdy and dimensional sentiment.
These jewels are SOOO beautiful! They are super sparkly and fun in real life – kind of hard to fully capture in a photo.
I definitely think this is the longest I’ve spent on one single card in a while! I almost feel like I should frame it and use it as a decoration – haha!
Thanks so much for stopping by today! Have a wonderful day!
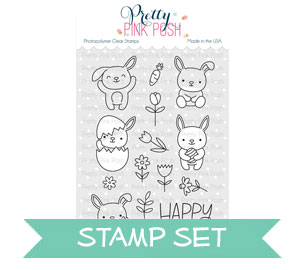
Hi friends, Eloise here today to share a Easter themed card to share with you all. I’ll be using the brand new Bunny Friends set and Happy Easter Shaker Die to help create my window card today.
To begin my card today I first stamped my images out from the Bunny Friends stamp set onto some Neenah Solar White cardstock using black ink. I then used my Copic Markers to colour in my images using a spring colour palette. Once I finished colouring in my images, I used the coordinating dies to cut them out. I then set them off to side and worked on my main focal point. I first used the Stitched Notes Dies and cut out the large stitched rectangle from some Watercolour Cardstock and then used the Happy Easter Shaker die and cut the die out of the center of the cardstock. Once I had it cut out of my front panel, I laid the rectangle with the die cut egg over the top of a folded card base, adhered it down into the centre where I eventually want to adhere it and then laid over the egg die cut again, fit it into place where it fits perfectly, opened the card base up and ran it through my big shot machine again. Now I have all my layers to create my window card.
Next up, I cut a piece of acetate and adhered it down on top of my card base. Once I adhered this down, I realised I needed to ink blend on my card base, so I left the acetate on and also adhered my shaker die on top with some washi tape, then just ink blended some Twisted Citron Distress Ink over the top fading up to white like normal. Once that was ink blended on, I worked on my positive Happy Easter Shaker piece. I used an exacto knife and cut out the ‘Happy Easter’ wording and also the flowers and leaves at the bottom. This then leaves me the perfect frame. I then added adhesive onto the back and adhered it into place directly on my card base. I added foam tape onto the back of my rectangle piece, lined it up with the egg shape on the card base and adhered it down.
Now that my card base was ready on the outside, it was time to do the inside. I took some post it tape, cut it down to a hill shape and adhered the negative piece onto the inside of my card base. I then ink blended some Twisted Citron and Mowed Lawn Distress ink blending down into white, reversed the masks and did the same thing with the sky, only using Tumbled Glass and Salty Ocean and blending, fading up to white. Now my background for my scene was ready, I could begin adhering. I added pop dots onto the back of my bunnies and adhered them down into place, making sure you could see all three from the front of the card. One they were adhered down I also adhered my flowers next to them using flat adhesive.
To finish up my card, I added some extra flowers from Bunny Friends onto the flowers on the die cut shaker piece and I coloured those in with coordinating colours I used earlier, then adhered them on with foam squares. Then, I also used the same greens as I did for all the leaves before and coloured in the remaining leaves. This would definitely be easier to do before I adhered it to the acetate, but for me it was an afterthought. Lastly, I replaced my front rectangle panel with another piece that I used some Tumbled Glass Distress Ink on, to replicate the card base I coloured as well. I decided this card didn’t need a sentiment also, so I left it sentiment-less and I feel like it worked perfectly with the design of card. But again, you could add one if you feel like you wanted too.
Thank you so much for stopping by today. I hope you enjoyed and got inspired to create a window card. I love these designs so much especially for a card like this where you wouldn’t always need to write a long message. It works so nicely! Anyway, thank you again and I’ll catch you all next time!
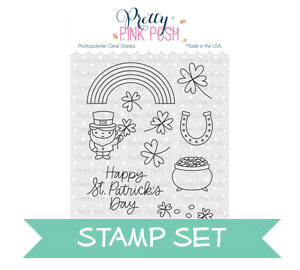
Hi friends, Eloise here and today I have some St Patrick’s Day little gift boxes to share with you all. These would be perfect for little gifts for co-workers or even children, just a little gift to give someone to give them a little luck and a sweet treat, or whatever you decide to put in them. I’ll be using the Best of Luck stamp set to help theme these DIY gift boxes.
To begin my boxes today, I first cut down two pieces of green cardstock to 5 ½” wide by 8 ½” tall. This means you can get two boxes from one sheet of 8 ½” x 11 cardstock, which is great. Once they were cut down in half, it’s time to score. I pulled my large scoring board out, you can use a small one but you’ll need to turn the cardstock around every time to get the full length. My first score line is going to be on the short side at ¼”, then at 1 ¼”, then at 4 ¼” and lastly at 5 ¼”, then turn your cardstock 90 degrees and then on the long side, you’re going to score at 3”, then at 4”, again at 7” and again at 8”. This will be the base for your box.
Next take your box base over to your trimmer and you’re going to cut out a few rectangles. On the short side, you’re going to cut down vertically the 1 ¼” score line, all the way down to the 3” horizontal score line. Then, do the same for the 4 ¼” score line. At the bottom of your box, still on the short side. Cut up from the 1 ¼” score line again, to the 8” score line and repeat for the 4 ¼” score line. Then rotate your box 90 degrees, making sure you have the longer cut lines to the left of your trimmer and at the 3” score line, cut down to the cut you made earlier. Then, move your cardstock down, and do the same at the 8” score line. Then, flip your cardstock 180 degrees, and repeat. For the last cut, move your cardstock long ways and cut at the 4” score line, to the score line of the long cut you made earlier, flip the cardstock around 180 degrees again and repeat. This will be the base for your box all ready to go. If it’s easier for you, you can use scissors – but I personally liked using the trimmer, especially with a wire guide. Also – this will be explained and shown in the video so if you’re a visual learner, check that out above!
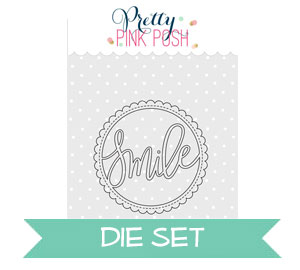
Now that my boxes were all ready before I moved onto anything else, I flipped it over to the front of the box, and ink blended some Lucky Clover Distress Ink at the bottom of which will be the top of the box, just to give my box a little gradient of colour. I repeated this for all four boxes, then turned over my box so it’s the inside and then stamped ‘Happy St. Patricks Day’ on the inside at the top with black ink on all four boxes as well. Then, I used my bone folder and scored along all the edges. I then set my boxes off to the side and worked on the decorations. I stamped out all my images from Best of Luck onto some white cardstock and used my Copic Markers to colour them all in. I then used the coordinating dies and cut them all out. While I was die cutting, I used the Smile Shaker Die and cut that out four times of white cardstock also. Since I just wanted the frames I used an exacto knife and cut away the ‘Smile’ word. Now I have all my frames, I can decorate my boxes.
To finish up my boxes, I first punched a hole at the top flap, and punched two smaller holes on the ½” flap. This will be for the string. Then, I used foam squares around the circle frames and adhered them to the front flaps of my boxes. I also added foam tape to my images and adhered them in place also. I then opened the box and adhered the four leaf lover images around the sentiment. For the little gift inside the boxes, I adhered four green foiled heart chocolates on the inside to create a four leaf clover, it’s super cute! To finish up the boxes, I folded in all the sides, added green twine into the punched holes and tied a bow to hold the top and bottom of the box together. Then for the sides, I added small strips of adhesive on each of the ¼” flaps and adhered them to the top of the box.
So that finished up my DIY gift boxes project today. I hope you enjoyed! These little boxes are super cute and easy to make with a half sheet of cardstock and can be decorated with any occasioned stamps. These would be perfect for small gifts as well.
Thank you so much for stopping by today and I’ll catch you all next time.
It’s Justine Hovey visiting the Pretty Pink Posh blog for my monthly video. Today, I created a shaker card with some heat embossed acetate. If you know my style, you know that I love colour, but I’m not a massive fan of colouring. I wanted to find a way to incorporate gorgeous colours with stamped images from a variety of Pretty Pink Posh Stamp Sets: Hummingbird Thanks, Pretty Petunias, Butterfly Friends (releasing in May) and Love Sentiments. I stamped them in Versafine onto heat-resistant acetate and embossed the images in white.
Hello friends, Eloise here and today I have a 3 Cards 1 stamp set video for you all using the Birthday Friends stamp set. Everyone always needs birthday cards and what’s better than being able to make three cards super quick and easily with the same stamp set? I’ll also be using the Love Shaker die and the Sparkling Clear Sequin Mix to finish off my cards.
To start off all my cards today I stamped, coloured all my images with Copic Markers and die cut them out using all the coordinating dies. I used a colour scheme from Pinterest as colour inspiration to colour in all my images. Then coloured my balloons rainbow for a separate card. Now that all my images are ready, I can move on to creating my cards.
To begin my first card, I pulled a piece of watercolour cardstock out and ink blended some Spun Sugar and Picked Raspberry onto the bottom of the panel. Then I flicked some water over top to create the splatter look. I then dried it off with my heat tool and set it off to the side. Next, I took the Love Shaker dies and cut three out of some white cardstock. Then, I used an exacto knife and cut away the ‘Love’ word from the centre, so I’m left with three heart frames.
Next, I added a thin strip of foam adhesive around each of the frames and then adhered them around my card. I cut off the excess around the outside with scissors. Then, I added foam tape onto the backs of all my images and adhered them down inside of the heart frames. Lastly, I white heat embossed the ‘Birthday Wishes’ sentiment on a strip of black cardstock, cut the end at a diagonal and tied a small bow on the other side of the sentiment. I then added foam tape on the back and adhered it on the top right-hand side of my card. That finished the first card, now let’s move onto the second.
For my next card, I pulled all my rainbow balloons out and set them off to the side. I then made a make shift cloud mask/stencil that I just created with scissors out of some post it tape. I just drew a cloud border on the tape and cut around it with scissors. I then cut down a top folding card base, adhered it down onto my work surface and ink blended over the stencil with Tumbled Glass Distress Ink, then I moved up the mask, ink blended over it again and continued up until I ink blended over the entire panel.
Once I ink blended over my card base, I went ahead and added foam squares all along the back of my images and adhered them down into place onto my card base. Lastly, I stamped down the ‘Birthday Wishes’ sentiment in the bottom left hand corner with black ink and that finished up my second card.
For my final card, I started off with another top folding card base, and masked off the edges with some ¾” painters tape to create a rectangle in the middle. I then went ahead, and ink blended some Picked Raspberry and Spiced Marmalade Distress Ink over my entire panel. Once I ink blended over the entire panel, I removed the painters tape and used a white gel pen to do some dots on the background, just to give it a little extra.
I then added foam tape onto the back of my images and adhered them down at the bottom of the ink blended area. Then, I stamped the ‘Birthday Wishes’ stamp set in black ink at the top of my panel and that finished up my third card.
To completely finish all my cards off, I scattered some Sparkling Clear Sequins around my cards and adhered them down.
Thanks so much for stopping by today, I hope you enjoyed and were inspired!
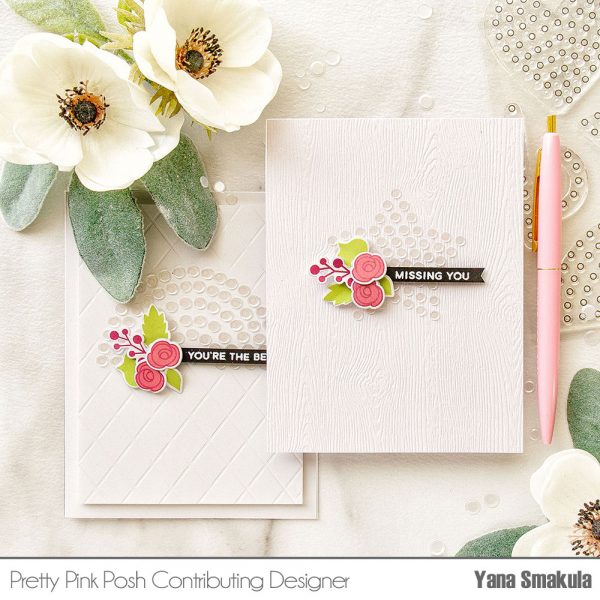
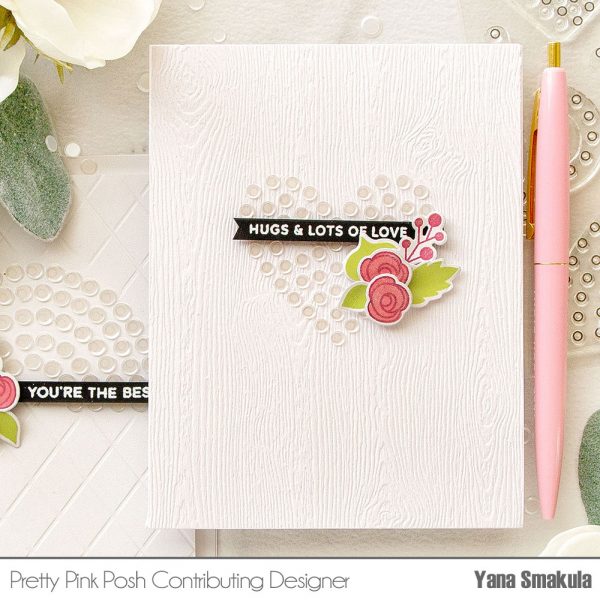
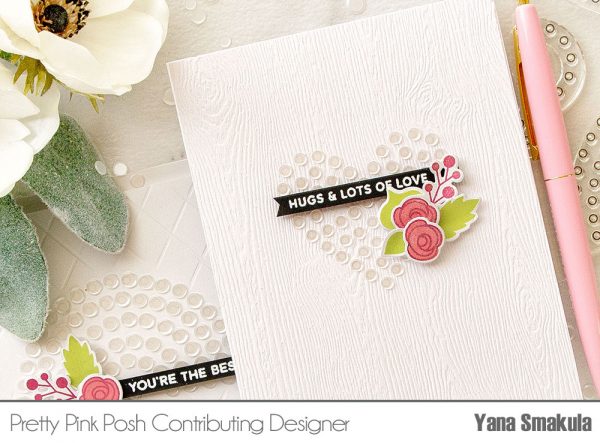
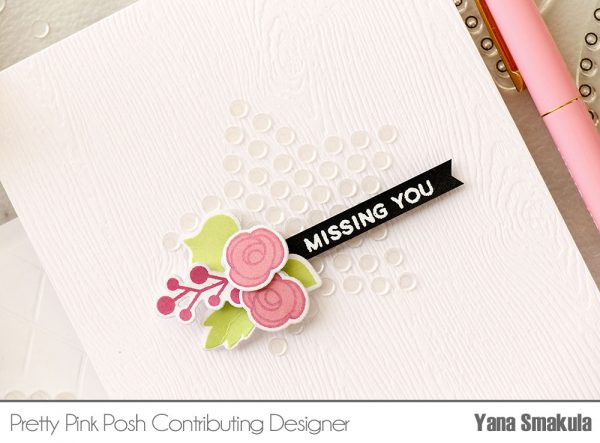
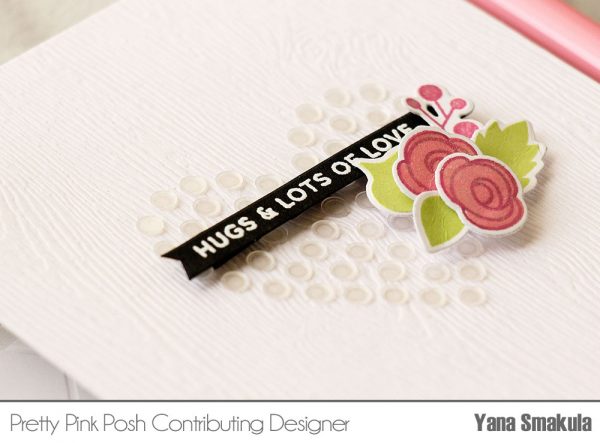
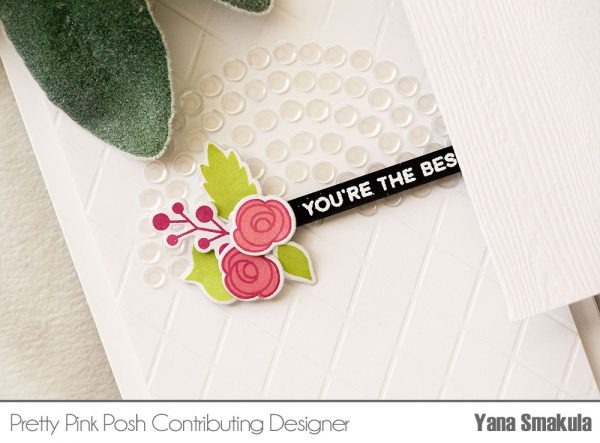
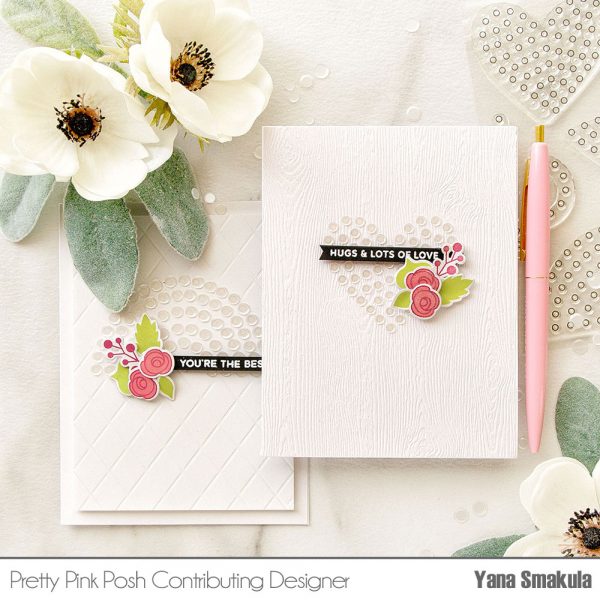
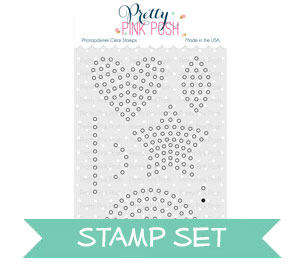
Hello Pretty Pink Posh fans! This is Yana and today I am sharing a video tutorial showing how to use the Sparkle Dot Patterns 1 stamp set(the 2nd set is releasing in March!).
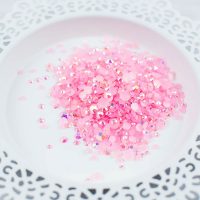
This is a very clever stamp set that has been designed to help you align and evenly space any tiny embellishments on your cards. Each little circle dot represents a space for a sequin, or confetti piece, or little enamel dot, or jewel (we have these coming in our next release!). If you’ve ever tried to arrange tiny embellishment to form some sort of a pattern you know that it never works and the object, or shape, or pattern ends up looking wonky.
So you are probably wondering how does this stamp set work? Let me show you. I used a panel of white woodgrain cardstock for my cards today (and also a plain white panel), I love to use this paper for clean and simple projects that feature a lot of white space. Normally, I never stamp on this paper, because of it’s texture, as you’ll never be able to get a good enough impression, but since I didn’t really need a good impression, these stamps need to be used as a guide only I was safe using this paper and stamping on it.
Watch my video tutorial below to learn how I made this card.
It’s best to use a light color of ink for your stamping so that the stamping will remain invisible under your embellishments. I used a very light gray ink. If you stamp onto colored cardstock you can use a watermark ink for a barely visible impression. It’s best not to use black as it might be visible even under the darkest color sequins and it will surely show through white.
Another must have tool for this technique is a pick up tool. I used a Crystal Katana tool– I always use it when I work with tiny embellishments, it really is a must have as it’s not that easy to pick up little piece with your fingers and position them properly on the project. There are other tools similar to this one, so you don’t have to use this exact tool, but just any tool that will help you pick up the pieces and place them exactly where you need them.
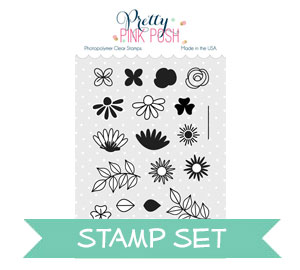
After adhering my confetti in place I set my panel aside to dry for a few minutes and worked on a sentiment as well as a floral cluster. I stamped flowers and leaves using images from the Autumn Blooms and Bold Blooms stamp sets and grouped them together into a tiny floral arrangement.
I also white heat embossed sentiments onto black cardstock using messages from the Birdie Friends and Winter Woodland stamp set and foam mounted onto the card.
I had tons of fun making these Clean & Simple projects and I love how easy it was to create fun shapes using my sequins with the help of this stamp set. I definitely see myself using it over and over again for all sorts of cards!


 Next take your box base over to your trimmer and you’re going to cut out a few rectangles. On the short side, you’re going to cut down vertically the 1 ¼” score line, all the way down to the 3” horizontal score line. Then, do the same for the 4 ¼” score line. At the bottom of your box, still on the short side. Cut up from the 1 ¼” score line again, to the 8” score line and repeat for the 4 ¼” score line. Then rotate your box 90 degrees, making sure you have the longer cut lines to the left of your trimmer and at the 3” score line, cut down to the cut you made earlier. Then, move your cardstock down, and do the same at the 8” score line. Then, flip your cardstock 180 degrees, and repeat. For the last cut, move your cardstock long ways and cut at the 4” score line, to the score line of the long cut you made earlier, flip the cardstock around 180 degrees again and repeat. This will be the base for your box all ready to go. If it’s easier for you, you can use scissors – but I personally liked using the trimmer, especially with a wire guide. Also – this will be explained and shown in the