Hi Crafters, Justine here and I’m back with you for another video tutorial this month! I hope you are loving the new release as much as I am! Today I wanted to create an elegant, yet easy card tutorial. You can use stamps and dies from this release or any of the fabulous Pretty Pink Posh stamps in your stash to try this out.
I started off by die cutting the Hello Shaker Die out in white cardstock. I grabbed some Himalayan Musk Embossing Powder by Wow and embossed the die cut three times. This creates a very thick, almost chipboard like embellishment. It’s a favourite technique of mine because you get a really smooth impression on the embossing powder.
I then stamped out a background using the Geraniums stamp set in black on a white card panel. To fill in the gaps, I used a little image from the School Friends set– it was the perfect filler stamp!
I glued the die cut to another die cut (off-center) in black cardstock to make it pop off the card. You could also challenge yourself to a more complex card by turning this die into a shaker card! If you enjoyed my video, be sure to check out my personal channel for weekly videos.
Next, I die-cut the new Hugs Shaker Die, but left off the scalloped circle. I also did cut 3 times then stacked the pieces and Copic color the “hugs”. I also sandwich the hugs in between to give that interest on the die-cut.
I also distressed the panel with Distress Ink Oxide.
Here’s the final piece, I literally adhered everything with foam tape for dimensions. I also incorporated the new Metallic Gold Jewels to give it bling.
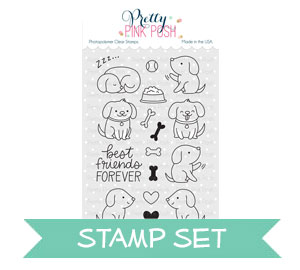
For this next card, I completely used Playful Puppies stamp set and its coordinating Playful Puppies Die set.
Next, I distressed the white panel with different colors of blues and greens using Distress Oxide. Then die-cut with Stitched Borders 3 Dies.
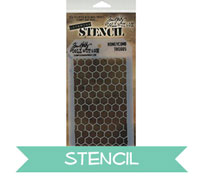
To begin, I first started off with a piece of watercolour paper, taped it down onto a craft sheet and laid over my Tim Holtz stencil at an angle. I then ink blended some Squeezed
Lemonade and Fossilized Amber Distress Oxide Inks over the top. While blending, I was careful to not go over the harsh edges, because this stencil is so skinny, I really wanted there to be full hexagons rather than half hexagons from the edges, so I was just super careful. Then once I was finished blending on that area, I carefully moved the stencil over a little and ink blended a little more so it was wider. Now that I ink blended over the stencil, I wiped it clean and used some Transparent Texture Paste and added it over top using some palette knives. Once it was over the stencil, I removed the stencil and set the panel off to the side to dry.
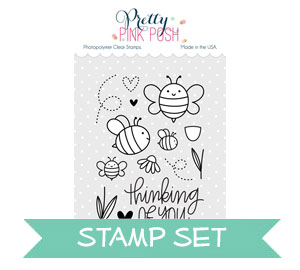
Next, it was time to colour my images. I used some Copic Markers and the images from Bee Friends. I stamped them down, then coloured them in and cut them out using the coordinating dies. I set them off to side once they were cut, and dried off the rest of my panel with a heat tool just to make sure it’s super dry. Now, I used the hexagon border from Stacked Edges 2 Dies and cut that three times from some white cardstock, I popped them up on foam tape and adhered them to the edge of my coloured panel. Making sure they were staggered so they looked a little more random. Next, I added more foam tape to my bee images and adhered them down around also. Making sure to adhere their trails behind them flat onto the background.
Now that my card was almost complete. I used the Encouraging Greetings stamp set and white heat embossed the sentiment ‘You Got This’ onto strip of black cardstock. I also popped that up on foam tape and adhered it to the right hand side of my card hanging off the edge a little. Lastly, I added some Lemon Drop Jewels onto my card, scattered around my images. I then popped up the entire panel onto a white card base that had a little strip of blue cardstock on the left.
So that finishes up my card today, I hope you enjoyed the project and feel inspired. Thanks so much for stopping by today and I’ll catch you all next time.
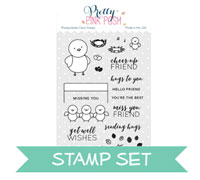
Good morning Pretty Pink Posh friends! Heather here this morning with a fun tutorial showing you how to I made this bright and colorful sea creature card! Plus, this stamp and die set is 25% off for the next 3 days!
The Sea Friends stamp set is so fun for all sorts of projects and works well with a LOT of Pretty Pink Posh products! Be sure to follow us on social media to see a great assortment of cards from the team using this set the next few days!
I love how well older Pretty Pink Posh products – like the older Mini Tags die set – work so well with newer products. And I always love using some of the smaller images from a stamp set that are often overlooked – and making them the star of the show instead – like these adorable creatures from the Sea Friends stamp set! And of course, I LOVE a good sentiment – and Thoughtful Greetings is one of my all time favorites.
First off, I chose several smaller images from Sea Friends and die cut them with the coordinating Sea Friends Dies.
I then colored them up with Copics – here are the colors I used:
Then I die cut several tags using Mini Tags die set, layed out my sea creatures how I wanted them to be, and then chose some distress ink colors to make each image pop and balance out the card. You may notice that I tried to place some of the colors opposite each other – such as the yellow of the starfish and the yellow tag in the opposite corner, or the purple octopus and the purple tag in the opposite corner. This helps provide balance to the colors on the card.
Finally, I stamped my sentiment on my cardbase, adhered the tags around it, then added lots of 4mm Clear Droplets and 6mm Clear Droplets for bubbles! Also added a few white dots with a white gel pen on the critters cheeks – I love doing this for a tiny finishing touch that adds SOOO much!
Thanks so much for stopping by today! Hope you are having a wonderful day!
Rina here and for today’s cards I wanted to use the Sparkle Dot Patterns 2 stamp set to create giant balloons with Nuvo Crystal Drops Gloss in Simply White. This was my first time trying this technique and the verdict is in – THIS WAS SO FUN! The stamp creates dots where a variety of materials can be adhered to create an image. I used Nuvo drops, but anything can be used such as sequins, confetti, stickles, etc. I cannot wait to figure out what to do next with these fun stamps!
In addition to using the Sparkle Dot Patterns 2 stamp set, I am also using “Birthday Friends” for the girl and boy image. I created a hill using the Scallop Borders 2 Dies.
I colored the images using copic markers and here are the colors I used:
Skin: E21, E50, R20
Hair: E34, E35, E37, E29
Pink: RV13, RV25
Blue: BG10, BG53
Grey: C1, C3, C5
I used Versamark ink to stamp the balloon 3 times into colored cardstock. I placed the Nuvo Drops on each circle of the stamped image. This was really fun and satisfying. Once you get the hang of it, you will want to do this all day! I used twine to create a string from the balloon to the stamped image. If you do not have twine, you can simply draw the balloon strings in. I stamped the sentiment Birthday Wishes from the Birthday Friends stamp set. I added the stamped image so the image looks like it is holding the balloon strings. To finish off the card I added Sparkling Clear Confetti near the sentiment and then adhered my card front to a 4 ¼ x 5 ½ inch card base.
I hope you enjoyed these cards, the Sparkle Dot Patterns stamps sets are super fun and a great new technique to try out. Thanks for stopping by!
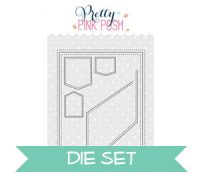
Rina here for a tutorial on a get well easel card. I wanted to create a fun card for someone who is not feeling so well in fun spring colors, with fun, playful images. Easel cards are great because they are great to display and they can stand up by themselves, so the recipient can see and enjoy them! A message can be written on the inside or in back of the easel card. What is also great is these cards can also lay flat and be put inside an envelope.
For inspiration I imagined that all my Pretty Pink Posh stamp sets were just one giant stamp set. I picked and chose the images that I wanted to achieve the look I was going for. Here is what I decided to use:
The images were colored in Copic Markers, here is what I used:
Blue Green – BG10, BG11, BG32
Yellow – Y00, Y13
Pinks – R11, R21, R22, R24, R32, R14
Blacks – C1, C3, C5, C7
The background was created using Distress Oxide Inks in Fossilized Amber, Broken China, Cracked Pistachio and Worn Lipstick. A distress sprayer can be used for a soft distressed look. I used the Picket Fence die to ground the bears. For small images, I used the Zots Bling Glue Dots to adhere them to the background.
Here is how I constructed the Easel Card:
Start with an A2 card base, fold the front in, mountain fold style
On the bottom of the mountain fold adhere a 4 ¼ x 5 ½ inch decorated card front (only the bottom of the fold)
On the inside of the card base, figure out where you want the card front to rest
Apply an embellishment or a sentiment on a piece of paper and double foam tape it on the inside card base to allow the card front to rest on
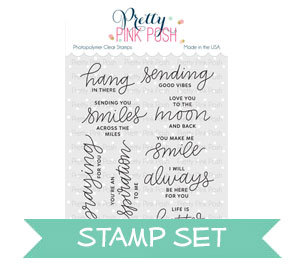
Hi everyone, Eloise here on the blog and YouTube channel today with an encouragement card using the Cherry Blossoms and Encouraging Greetings stamp sets. I’ll be doing a sort of colour blocking technique I guess, basically I’m blending on stripes of colours, and white heat embossing my images over top of the coordinating colours needed. I don’t have a good technique name, but that’s the gist what I did.
To begin my card today, I started off with a piece of watercolour cardstock, added some tape to the back of it to hold it down onto a craft sheet and then used post it tape to mask off diagonal lines. First tip is to use post it tape, or another low tack tape. I literally went through 8 pieces of cardstock from using the wrong tape and in the end decided to just use post it tape, because that’s what worked the best. So I masked off stripes all over my background and ink blended different colour Distress Oxide inks inside each strip. Since I was using Cherry Blossoms, I basically wanted them to be pink. Generally, I would want them to be lighter, because Cherry Blossoms are a lighter pink, but I didn’t have any lighter Oxide Inks, so this is fine. I used Worn Lipstick, Picked Raspberry and Abandoned Coral for the pinks and then Twisted Citron and Lucky Clover for the green areas. Once all my stripes were ink blended, I flicked on some water to create a water splotch effect, dried it off with my heat tool and then I could stamp my images.
Once my background was dried, I used my powder tool to coat my background, so that any powder didn’t stick to places I didn’t want it too. Then, I strategically stamped out my images over the coordinating colour stripes. I made sure to stamp out my flowers on the edge of the pink sections so that there was room for the leaves to be right next to each flower. Once they were all stamped, I used white heat embossing powder, poured it over top and then heat set all my images.
For my sentiment, I decided to use the Encouraging Greetings stamp set and so I stamped the ‘You Got This’ sentiment on a strip of black cardstock and white heat embossed the sentiment. I then added foam tape to the back and adhered it on the right hand side of my card. I then added fun foam onto my panel, set it off to the side and worked on my card base.
I cut down a piece of teal cardstock at a diagonal to match my background and adhered it onto a white card base. I wanted there to be an additional colour as well as white on the card base to match my white embossing, so that’s my little way of incorporating two colours into my card base. It’s a fun design element as well. I then adhered my panel on top and used some new jewels in Watermelon, Pink Blush, Spring Green and Shamrock onto my card base as well.
So that finished up my card for today, I hope you enjoyed and got inspired and I hope you enjoyed my video as well. Thanks so much for stopping by and I’ll catch you all next time!
We are excited to be part of this super fun blog hop event. We have partnered with 17 other stamp and papercraft companies to do a special blog hop and will be giving away 18 prizes to 18 lucky winners!
WHEN: Starts TODAY, April 23 and ends Friday, May 4th at midnight EST
HOW: Follow this blog and each participating sponsor in the hop. Comment at each blog stop
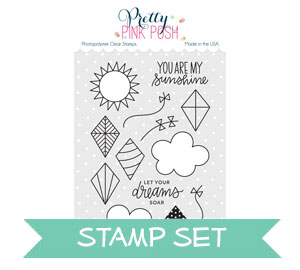
Hi everyone, Eloise here and today I have a card to share with you all using theFly A Kite Stamp Set along with showing you how to create your own pop-up box card.
To begin my card I first started off with my images. I coloured these a while ago and just used them now for a card. I used Copic Markers to colour them in and then used the coordinating dies to cut them out. Once my images are ready I can begin to work on my box card.
Making these box cards are actually surprisingly easy. I first pulled a piece of blue cardstock and cut down two pieces to 5 ¼” wide and 4 ¼” tall. Out of the same blue cardstock I also cut three pieces down to 3 ½” wide and 1” tall. Once they were all cut down I could score them. For each 5 ¼” x 4 ¼” pieces I scored them at 2” and 5” on the long side, then I turned my piece 90 degrees in my scoring tool, to the short side and then scored at 2 ¼”. I repeated this step for both pieces. Then for each of the three pieces I cut, I scored each end at ¼”. So, score at ¼”, rotate 180 degrees, score at ¼” again. Once all my pieces were cut, I took them to my paper trimmer and cut down the 2” score line to the horizontal score line, and the same at the 5” score line. Then I rotated my piece 90 degrees again and cut up from the bottom to the 5” score line, cutting on the horizontal score line, just to remove the over hang. I did this to both pieces.
Now it was time to assemble the box card. I folded along all the score lines and then added a strip of adhesive on one of the flaps and adhered it to the other side of the box card. I then added strips of adhesive on each of the three long pieces and adhered one side into my card. I them removed the backers from the other side and closed the box card on top of them, this adhered both sides of the middle pieces to the inside of my box card. Then on the last flap, I added more tape and adhered that inside too. Now my box card was all ready to go.
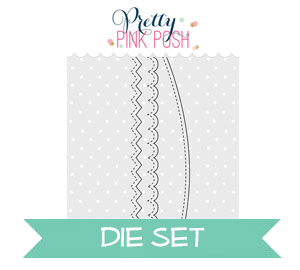
First up I die cut down a white cardstock piece using the Stitched Borders 1 Dies and I used the little scalloped edge as a border and adhered that to the background of my box card, to make it look like white clouds. I then added strips of acetate onto the back of three of my previously stamped, coloured and die cut kites and then adhered the strings on the bottom of each too and adhered them into the middle of my card. I also adhered some clouds and a sun to the background of my card flat.
Now my images were adhered, I laid my card down flat and adhered another cloud and also stamped the sentiment ‘Let Your Dreams Soar’ in black ink onto the front of my card. At this stage my card was missing a little something so I used the same Stitched Borders 1 Dies and cut down two more small strips of white cardstock with the scalloped border and adhered those onto both side flaps of my card to finish it up completely.
I loved making this card today and I hope you enjoyed the DIY tutorial on how to make a box card without a die. Thanks so much for stopping by and I’ll catch you next time!
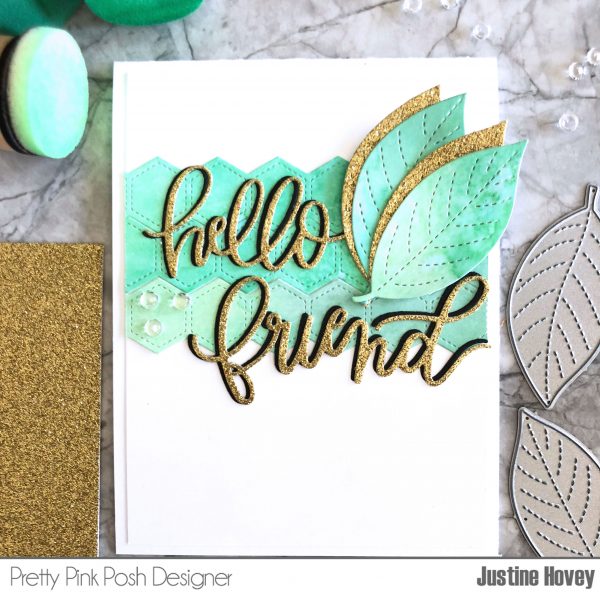
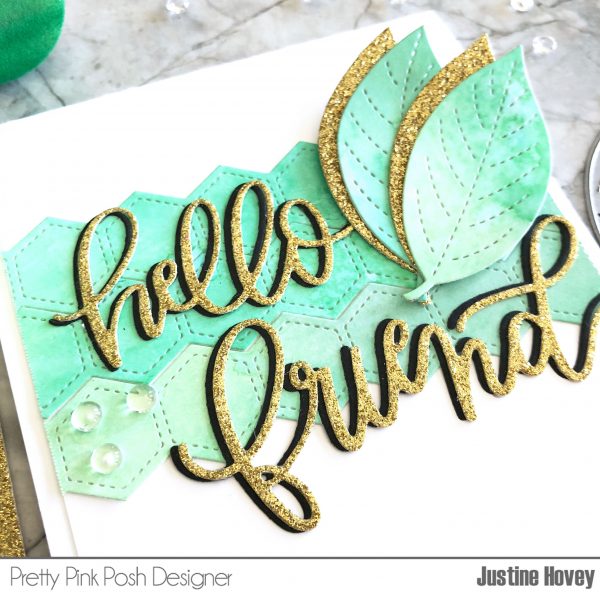
I always look forward to adding colour to my projects and I challenged myself to use a colour I rarely use. It was so worth it! It’s Justine here again for an April video tutorial. I’m looking at using dies on your cards and I have a challenge for everyone – try to step out of your comfort zone! I did it twice – using green and no stamping!
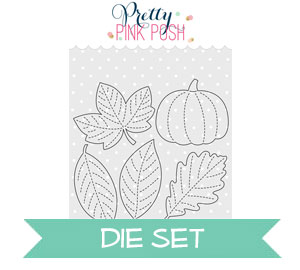
I used the Stacked Edges 2 die to create an interesting green background. I additionally added the Stitched Foliage leaves cut twice in both gold glitter paper and the green background I created with Distress Oxide inks. The sentiment, Hello Friend Script, has been cut with the same glitter gold paper and black cardstock. I topped off the card with a few clear droplets.
Thanks for having me again here on the blog. I look forward to bringing you more inspiration next month! If you enjoyed my video, be sure to check out my personal channel for weekly videos.
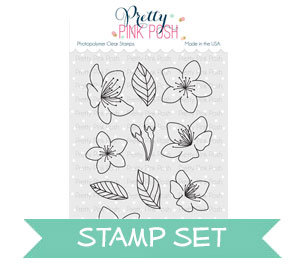
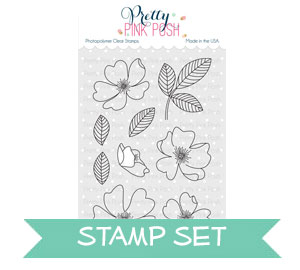
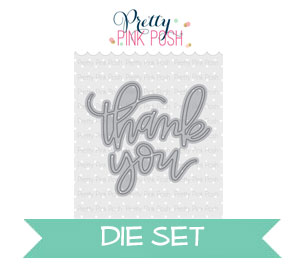
Hello friends, Eloise here and today I have two cards to share with you using the Wild Rose stamp set. I LOVE florals. They make for super classy cards for almost any occasion and I think everyone needs a good floral stamp set. This one is great as it contains so many images and you can create full clusters and bouquets. I’ll also be pairing in the Thank You Script word dies since I couldn’t help but use it also! These new products are amazing!
To begin my card today I wanted to try something new. I decided to pull out some Toned Tan and Toned Gray cardstock that I had in my stash from Strathmore and since it’s a mixed media paper, it can be used with watercolours. So I really wanted to try it out with my Zig Clean Color Real Brush Markers with it. I originally had purchased it to use with coloured pencils, but I didn’t have any yet so I thought watercolours would give an interesting look too. I first stamped three flowers and six leaves onto each colour of cardstock. Then I told heat embossed the images on tan paper with gold embossing powder and silver on the grey paper. I always prefer to have heat embossed images when I’m water colouring, it’s easier to contain it.
I coloured up my images the same way I colour on normal watercolour cardstock. I scribble some of my colour down where I want the darkest area to be and then with a water brush, I pull out the colour in stages into the rest of the area. This ensures a nice gradient between the colour so it looks perfectly blended. I repeated this process on all the petals and then on the leaves also and these markers blended so nicely on this paper, so super smooth and the colours blended out so well. I loved colouring with these markers on this paper I got great results and colouring on a different colour of cardstock gives it a really interesting look to it all. The colouring on the tan paper makes the colours appear more warm, and the colouring on the grey cardstock makes the colours appear more cool. Which is so interesting and gives a completely different look to these markers.
Once my colouring was completed I die cut the images out using coordinating dies. Next up, I used the Stitched Notes die set and cut into two pieces of white cardstock that measure 4″ wide by 5 1/2″ tall. This is because I want to use frame not the actual rectangle piece that it cuts. So when I lined up the die, I want it to be perfectly centered. So once I die cut those, I added foam tape onto the back and adhered them onto two card bases. For the inside of my cards, I die cut some green polka dot cardstock with the same rectangle die from Stitched Notes and adhered them flat into the card base. For my flowers and leaves, I arranged them onto the center of my card, picked them up with a little press n seal and adhered them down in stages. I used liquid adhesive for the leaves, then more foam tape for the flowers. I did this since I wanted these flowers to be placed perfectly, and once I got them places I didn’t want to loose where I had placed them.
For my sentiment, I used the ‘Hello’ from Birdie Friends and white heat embossed it twice onto a strip of black cardstock. Then I used the Thank You die set and just cut the ‘you’ word six times out of white cardstock and adhered three each together. I then adhered both sentiments onto my cards. To finish up I used the Berry Bright Sequin Mix and scattered them around the flowers.
That finishes up my cards for today, I hope you enjoyed and are inspired to try different papers to see how different mediums look on them. Thanks so much for stopping by and I’ll catch you next time.


 For my sentiment, I decided to use the