Bug Treat Boxes
Hi crafty people! It’s Rachel here today with two bug-tastic treat boxes. I always love having treat boxes ready to go, so I always have some cute packaging for a birthday, a thank you, etc. For that reason, the Birthday Treat Box Die is a must-have for me.

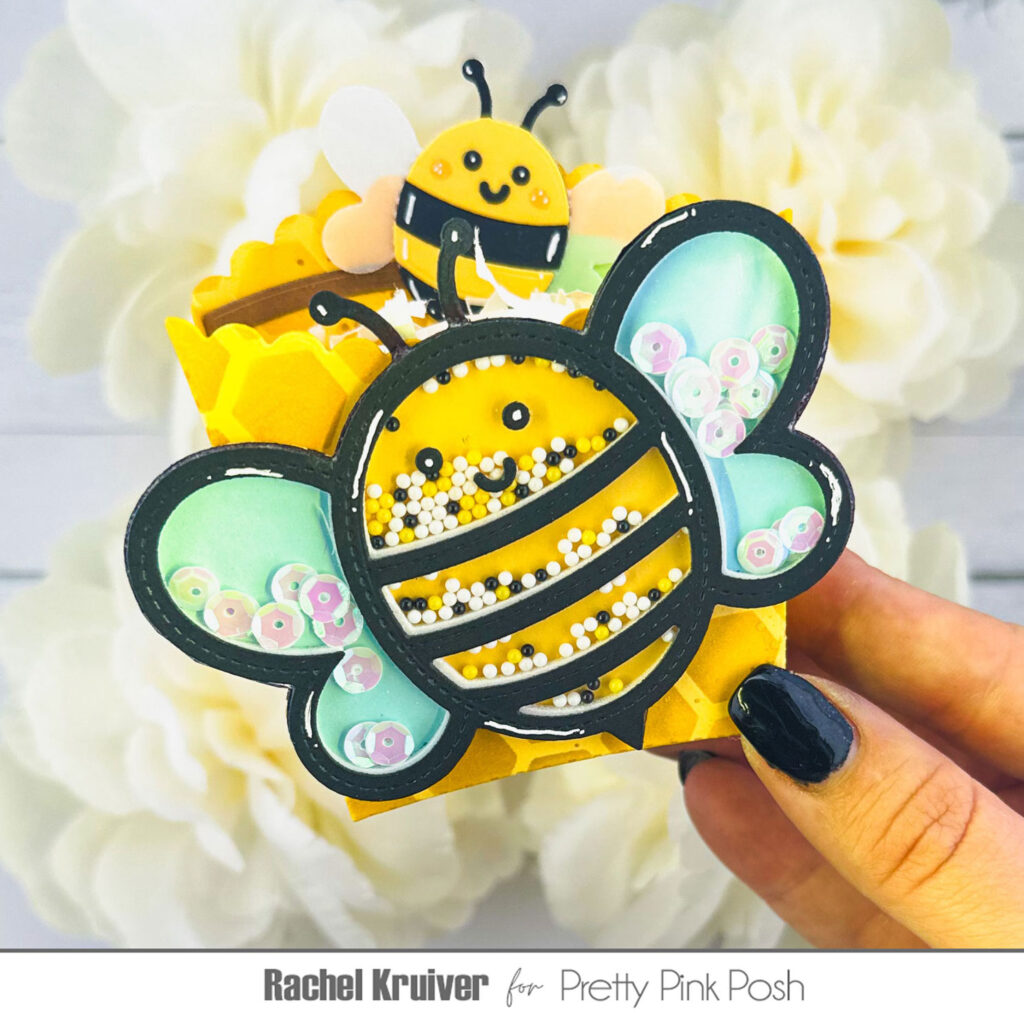
For these two treat boxes, I decided to use products from the May 2026 release to decorate them. Let’s start with the base of the treat boxes. I die-cut the Birthday Treat Box one time out of yellow and one time out of red cardstock. On the yellow one, I used the Honeycomb Stencil. For the red one, I used the Layered Baby Wreath Stencil, only the dots, so I could create a ladybug pattern paper. I added some splatters to add some shine to them. For my red treat box, I used the frame that comes with the treat box die set to make a window. I put some vellum behind it.
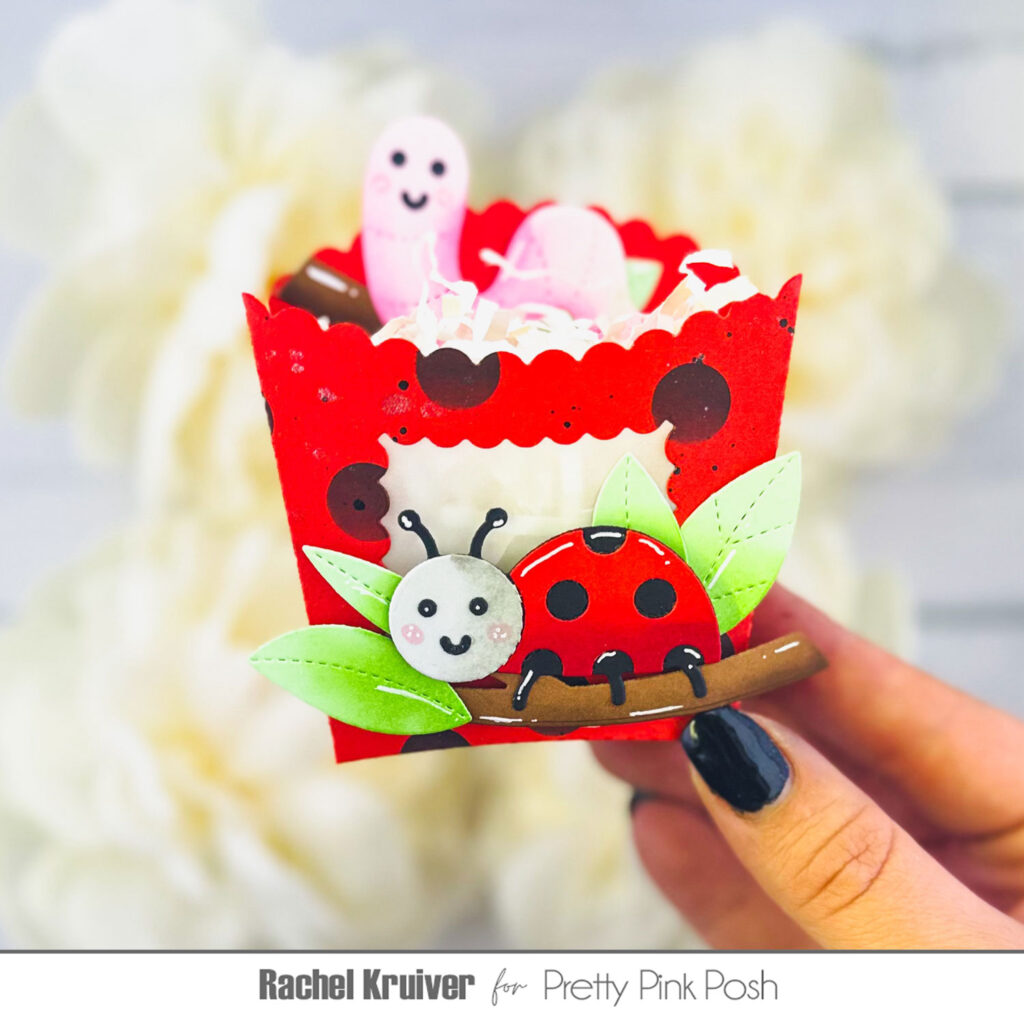
From the Stitched Bugs die set, I die-cut the bee and two times the ladybug. I also die-cut the Bee Shaker die and used the Bee Happy Shaker Beads for my shaker element. Thinking about what else to add, I decided on the Everyday Branches die for some extra interest.
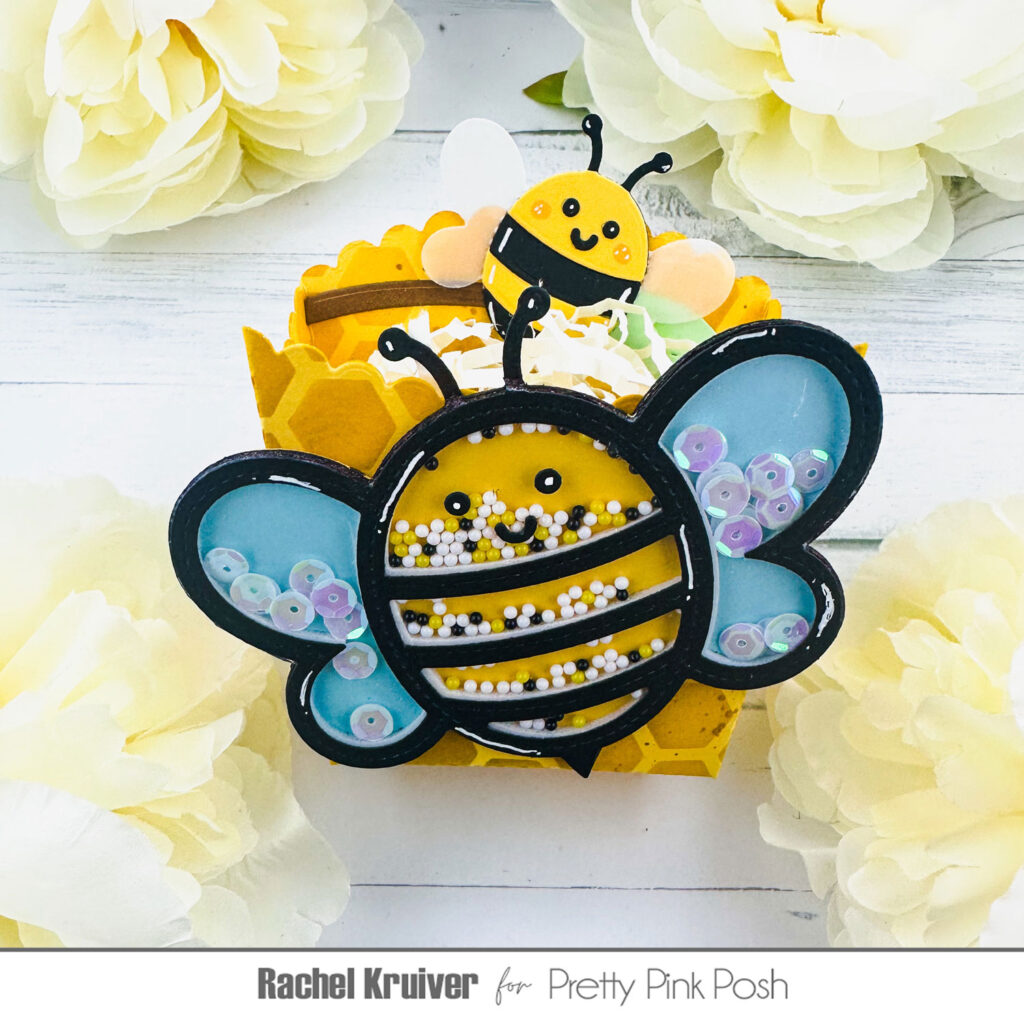
Then it was time to assemble all these adorable bugs. For my placement of the dies, I always like to put the treat boxes together first. I used liquid glue for this. After that, play around with your assembled die cuts to see where you like them. Once I decided on my placements, I attached everything using liquid glue and foam tape to add some dimension.
On my bee treat box, I used the smallest of the Rounded Stitched Rectangles dies on the back. This way I can easily write a longer message on there for the recipient.
Thank you for taking the time to read my blog post. I hope you like these treat boxes and got inspired to make your own. Mix and match your products to decorate them.
Don’t forget to follow me on Instagram @cards.byrachel for more crafting inspiration.
Happy crafting,
Rachel