
Creating 3D Pine Trees
Hello crafty friends! It’s Leica here. I have made the cutest 3D paper Christmas trees using the Pine Tree dies and I’m very excited to share some tips and tricks for making these trees.
CLICK HERE to see a short video on how to make these trees
The Pine Trees include 3 different sizes and I was able to cut 4 of each from an 8.5″ x 11″ cardstock. The work is tedious, but the end result makes it all worthwhile. Just enjoy the process ;)
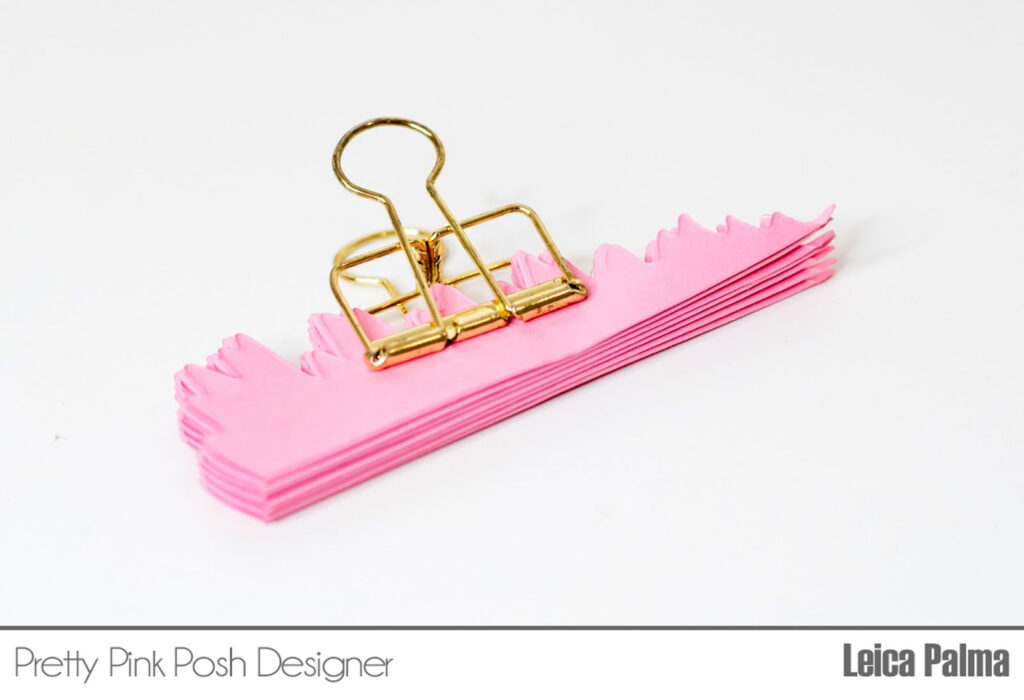
Once all the pieces are cut, simply score in half and glue one side to the other. The more trees you add, the fluffier it gets. Here is my first tip: use a binder clip to keep the trees in place while the glue dries.
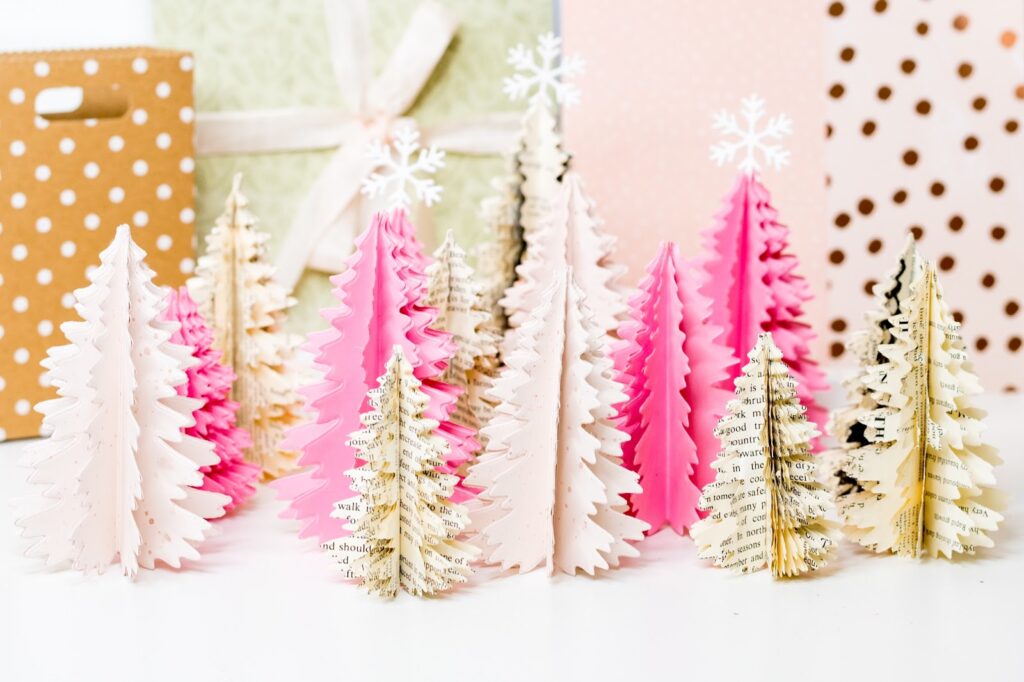
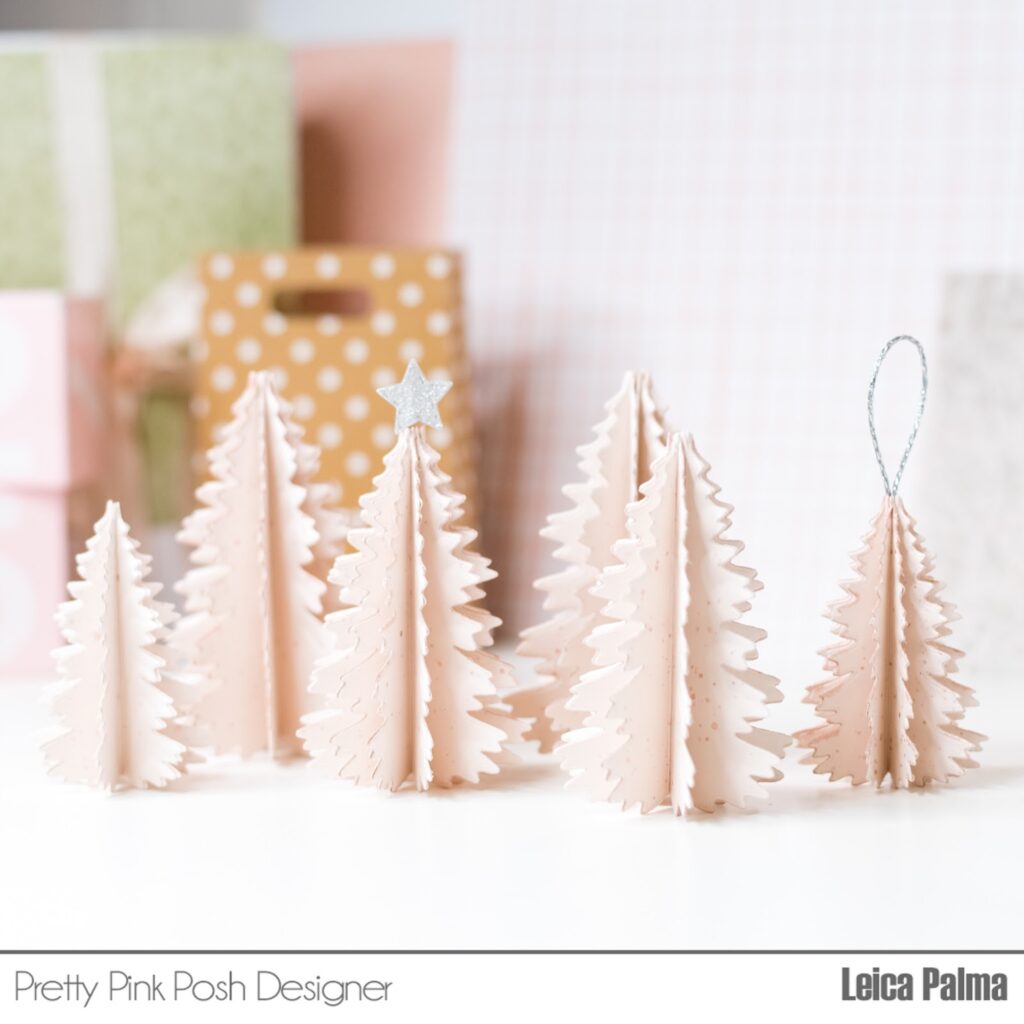
I used 10 trees each for these pink ones:
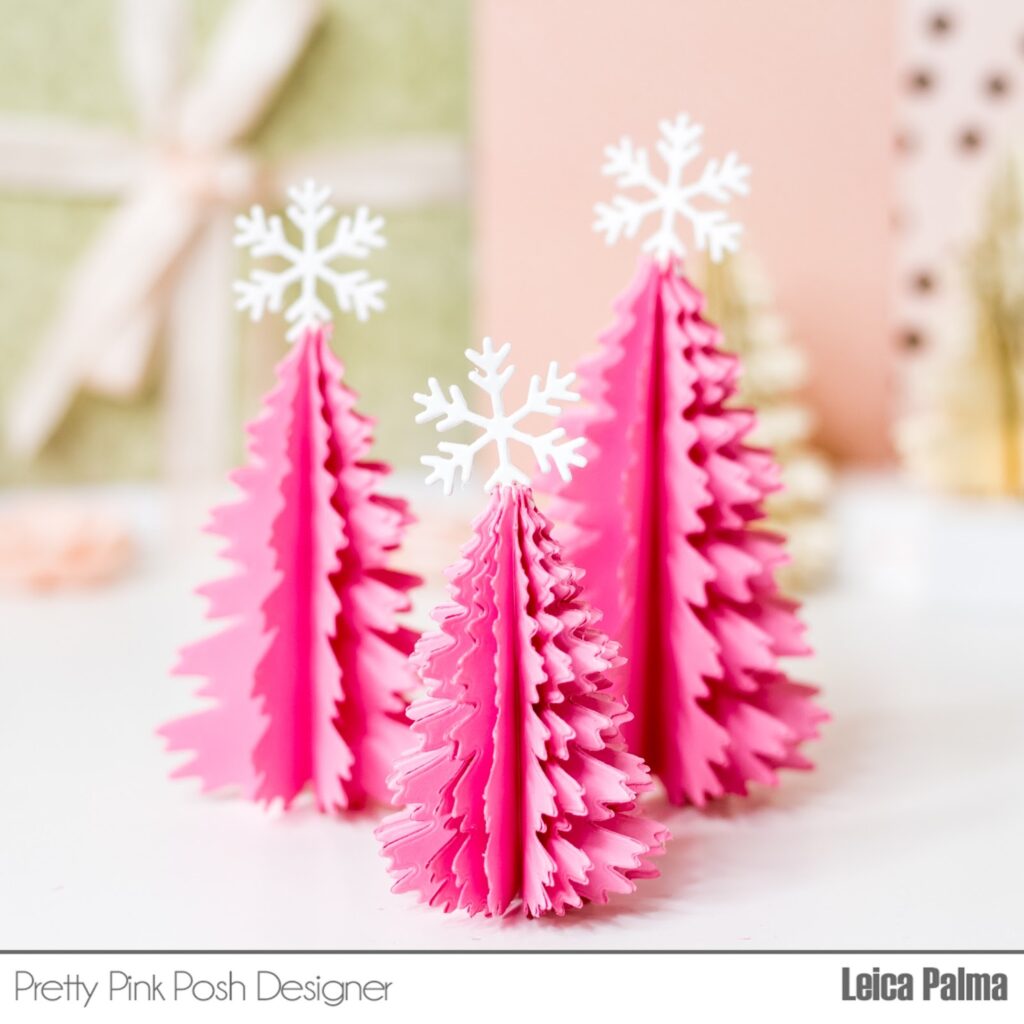
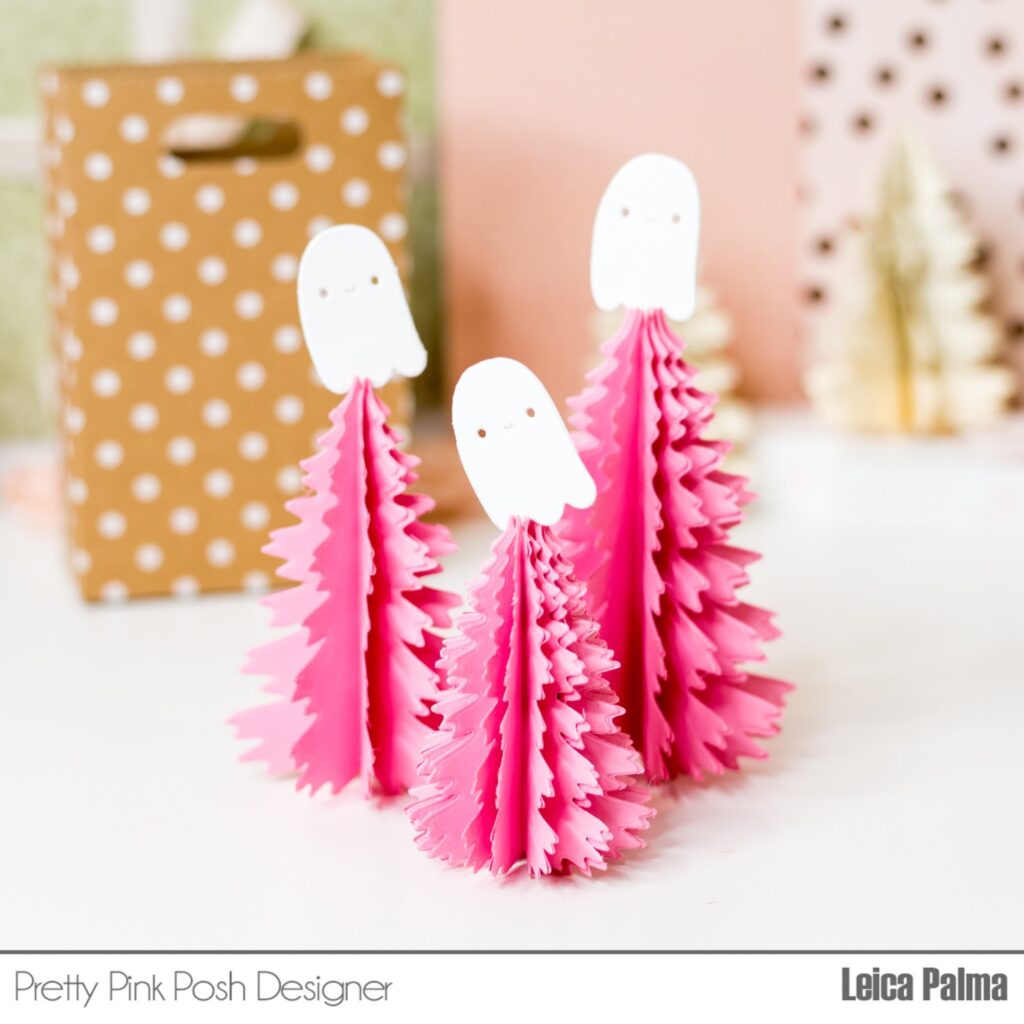
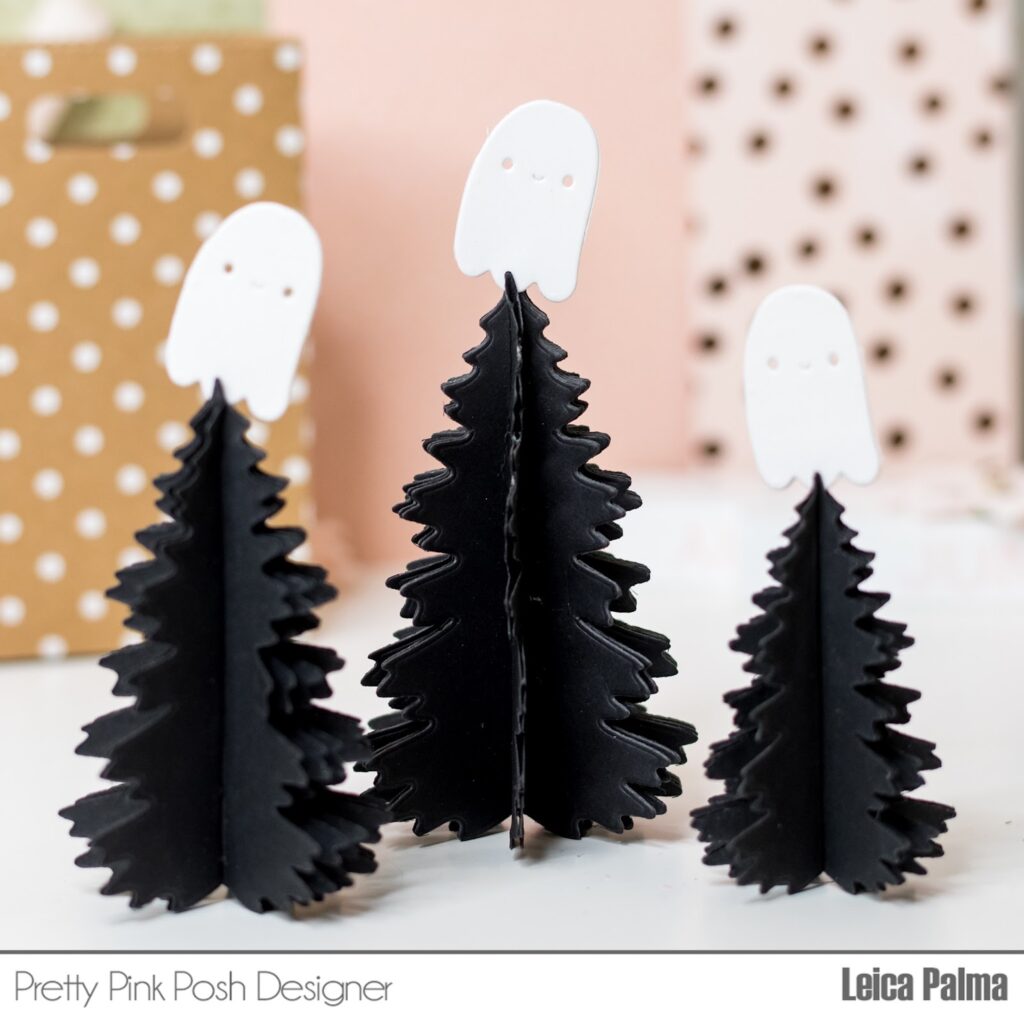
I cut some snowflakes from the Winter Mug dies and used them as tree toppers. How about some pretty, pink, posh ghosts? (You like what I did there? Hehe) The ghost die cut is also included in the Winter Mug dies. You can add a little bit of glue or just tuck it in-between the pages of the tree so that you can easily swap the topper when the season changes. I’m thinking red hearts for Valentine’s would be cute, too!
I obviously got hooked on making these trees. I’ve decided to make black ones for Halloween.
And some blush-colored ones. I splattered some rose gold paint on the cardstock before cutting them. Of course, you can cut stars and use them as toppers or add twine and use them as ornaments. Or how about tags for gifts?! The possibilities are endless!
After making a few of these trees, I realized that it’s easier to staple the trees together instead of gluing one side to the other. Not only does it save a lot of time, but you also save glue. For the black trees, I was able to staple 8 of them together (65 lb cardstock). If you are using cardstock, just make sure to score the trees in the middle first.

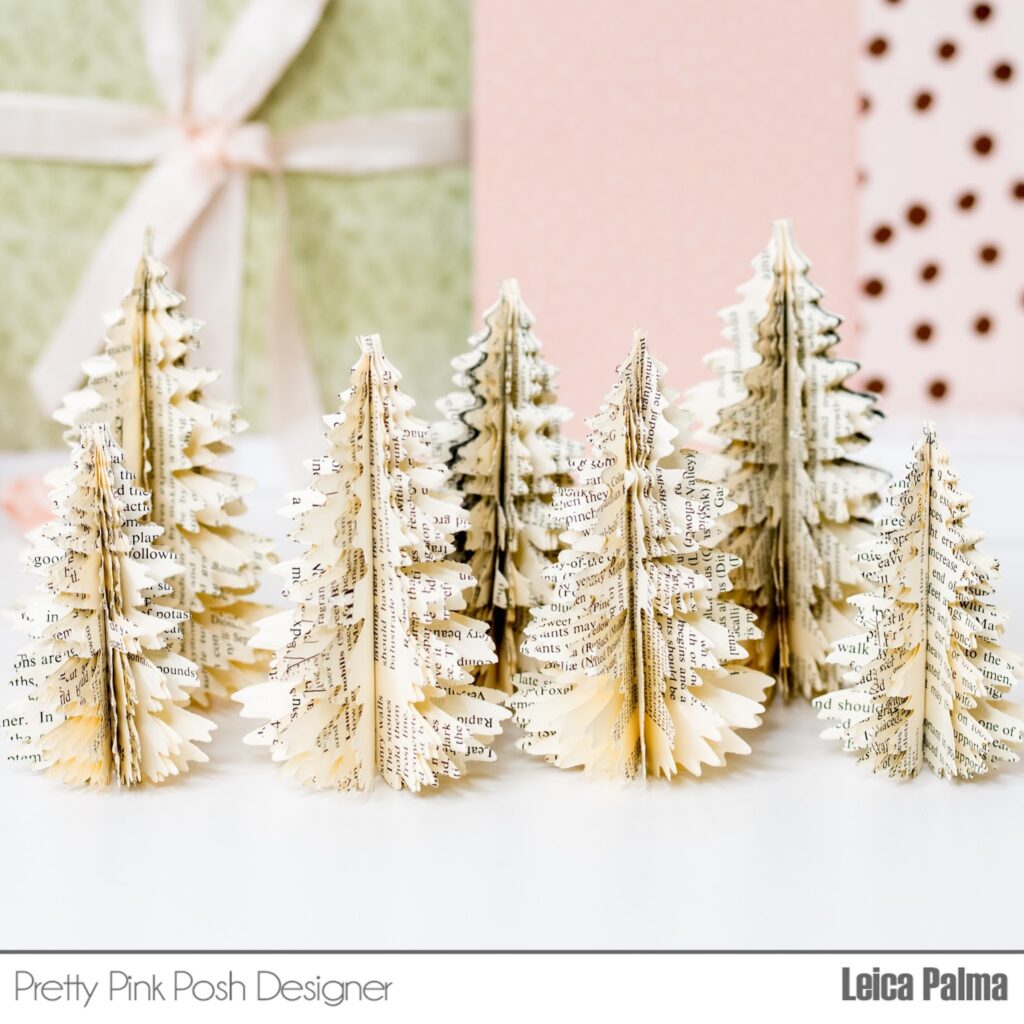
I have an old book that I got for free from the local library and I made some trees using book pages. These are way easier to make. Because the pages are thinner than cardstock, I was able to run 5 pages at a time through my die cut machine. I also did not have to score them down the middle as it is easy to fold them in half once stapled together.
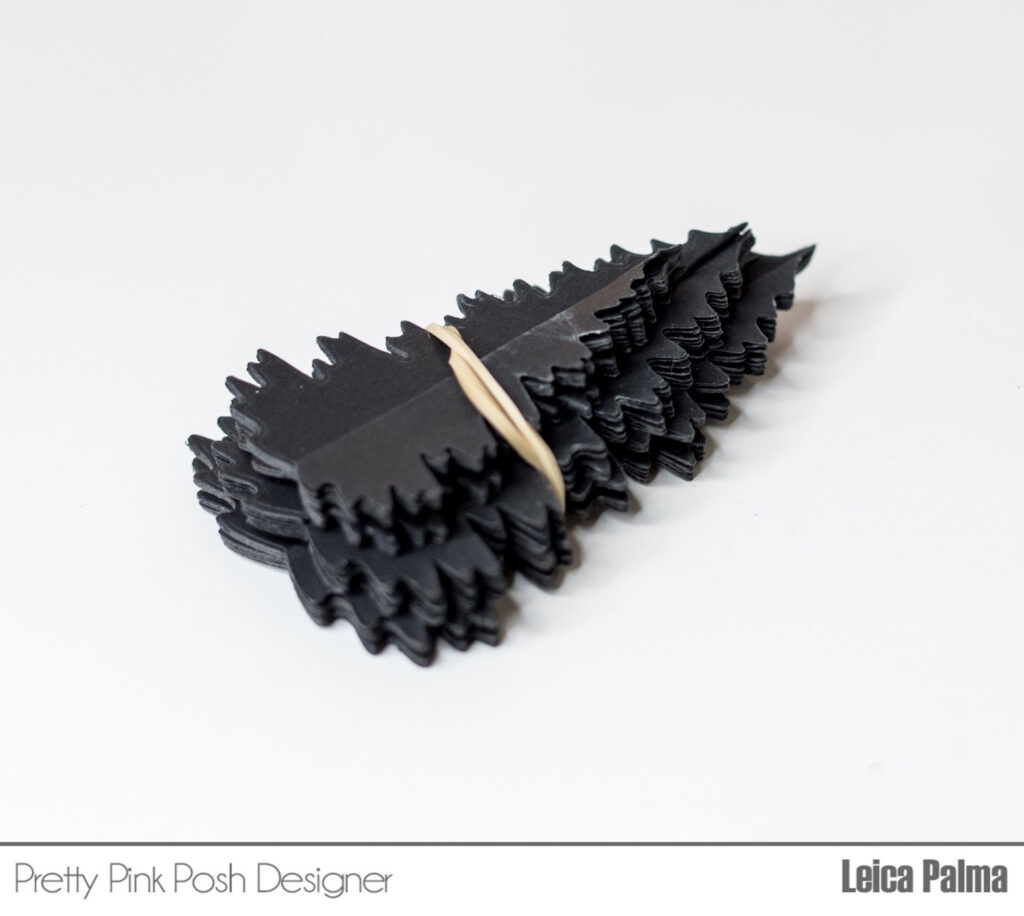
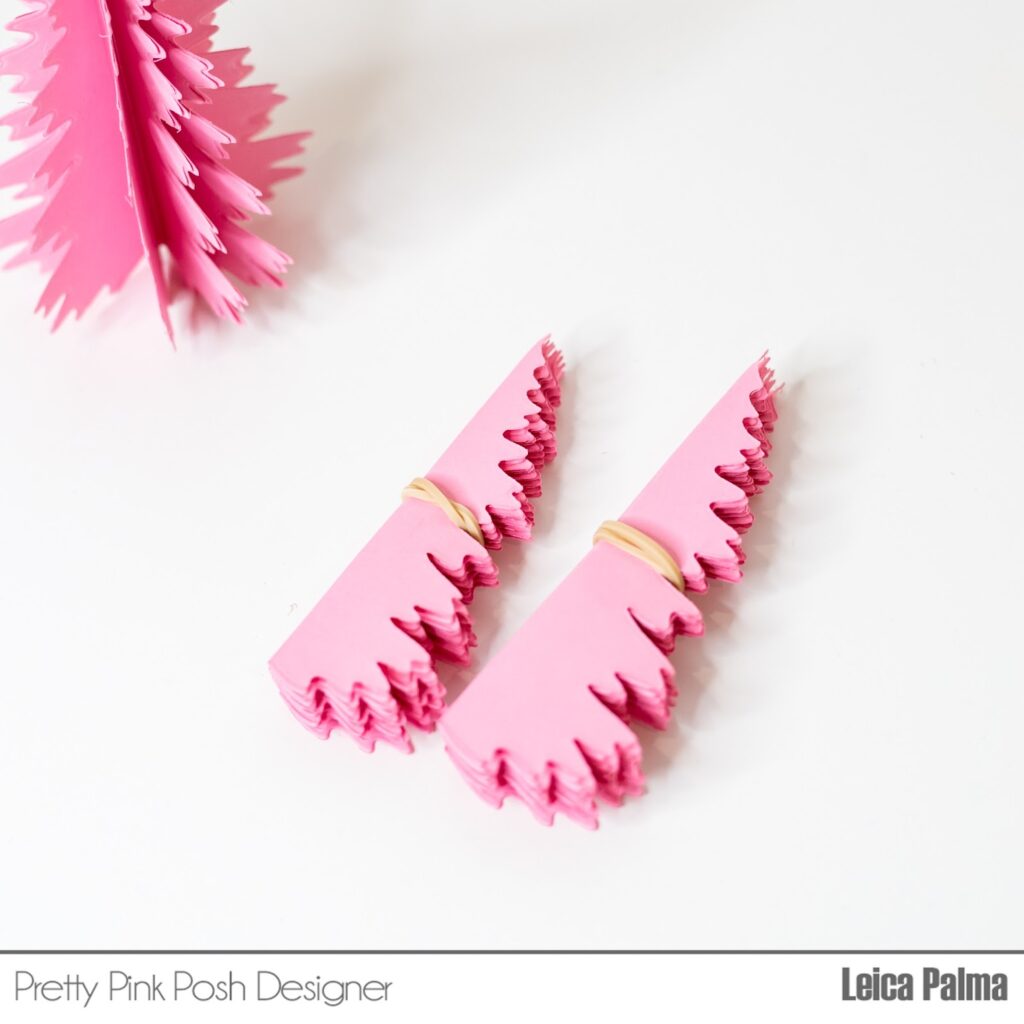
Lastly, I wanted to share that if you are using the glue method, you don’t have to glue the last ones together. The trees open up nicely and stay open even without gluing the last pieces together. I also realized that these trees can be stored flat by tying a rubber band around it. Here are a couple ways to do so:
I hope that I’ve inspired you to make 3D paper Christmas trees! Happy Crafting!
All I can say is WOW!
This is so clever and great for all of our holiday festivities!! Loved the pink and book pages especially!! Great idea!!
Love this idea, they look terrific!
What is that piece in the middle of the trees used for?
The middle part is the tree stump, which you can use behind or in front of the pine trees. :)
If you make the 3D tree, you won’t add the stump. Hope this helps!
Very cute and a great way to use the dies.