
Tutorial: Creating A Cute Birthday Card
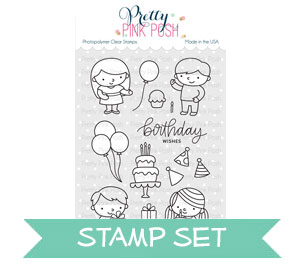
Hello Pretty Pink Posh fans! This is Yana and today I am sharing video tutorial showing how to create a colorful birthday card for a girl using the Birthday Friend stamps.

Pretty Pink Posh has many other stamp sets from the Friends series and many of them can be used to create a card like this. The characters within these sets maintain their size so you can easily combine friends from different sets to tell a story on your cards.
I picked pinks and yellows for this project as primary colors and made it into a birthday card for a girl, by using greens and blues you can easily change it up and make into a birthday card for a boy.
The colors I picked were somewhat influenced by the set of sequins I was planning to use to embellish my card – the Party Time sequin mix. There are yellow, pink and blue sequins in this set; I wanted to color the elements on this card in colors that would match these sequins. It might seem a bit odd – trying to match the coloring to the color of sequins, but I often use this trick when I want to make sure everything will match. Its very easy to pick the right colors that would coordinate or resemble the colors of my sequins and not vice versa. Plus the sequin mixes already have the colors that work quite well together, so why not use that to our advantage?

I started working on my card by stamping nearly all of the images from this stamp set in Copic Marker friendly ink onto white cardstock panel. The only image I didn’t stamp was the little candle. I colored my images using Copic markers. I used:
- RV14, RV13, RV11 to color pink
- Y19, Y15, Y11 to color yellow
- B02, B00, B000 to color blue
- E00, E000, E11, E13, E33 to color skin and hair
I cut my images out using the coordinating dies and also die-cut identical shapes out of sticky fun foam – I often prefer to use a solid fun foam shape to foam adhesive squares. This adds a lot of stability to my foam mounted elements and prevents sagging.

Next, I white heat embossed the birthday sentiment onto a gray cardstock panel, foam mounted it in the center of a 4 ¼ x 5 ½” white panel and added my colored elements around it. In a way it looks like there’s a Birthday party going on on this card and the friends are dancing and having lots of fun!

Finally, I embellished my card using the sequins I used for my color combo inspiration – I added a lot of sequins in various sizes filling in the gaps in between the images. I also coated some elements using a shimmer pen.


So cute indeed!! :)
oh I like the characters around the sentiment! Very cute design. Thanks for sharing. I have my brand new birthday friends cut out and colored, but they are waiting to go on a card. I may do something like this on the weekend. Thanks for the inspiration!
I love your cards and the way you list everything .
Thank you for that
Hi Yana, ADORABLE card, such pretty colors and I love that stamp, so cute. Thanks for a great post.
So cute. I love PPP images.
Fantastic car!!!! I soooo want this stamp set!!!!