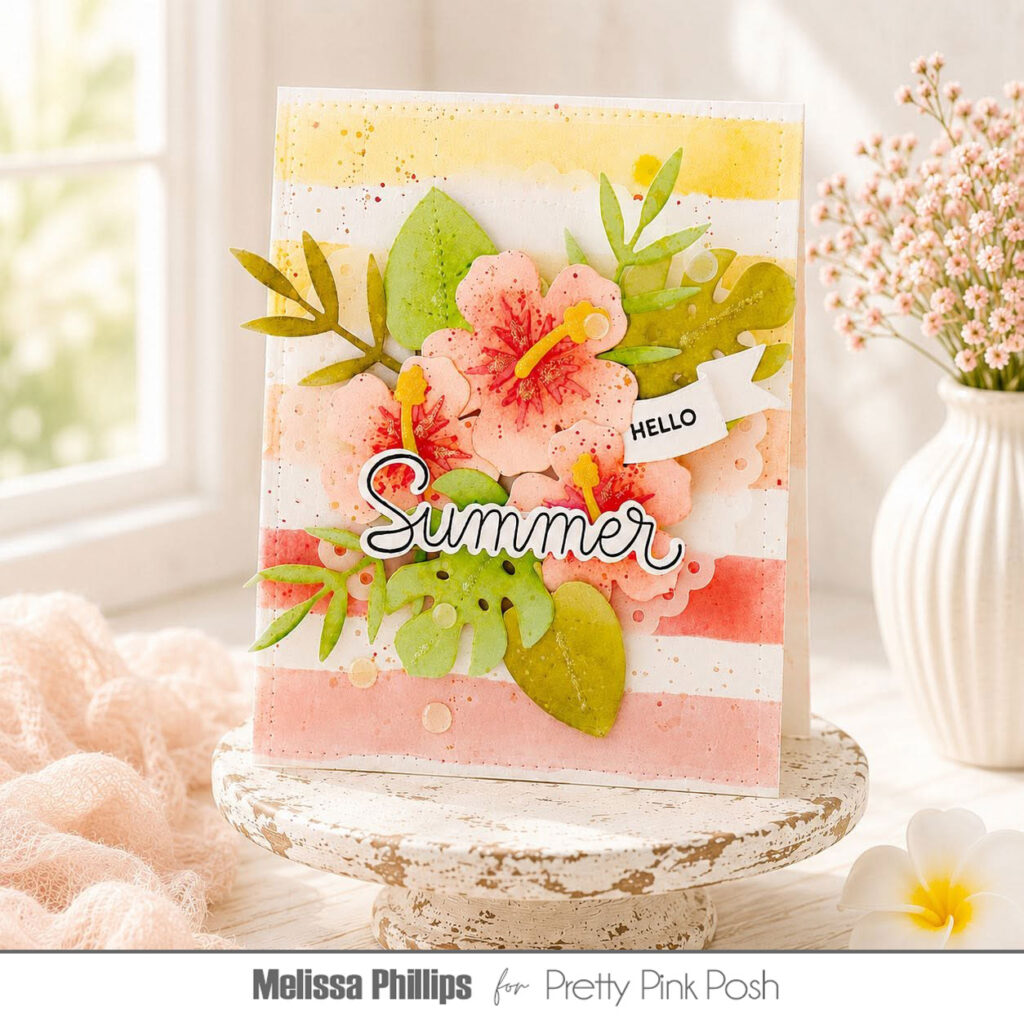
Hi Everyone! It’s Melissa here with you today, bringing you some summer sunshine! I absolutely adore the June Pretty Pink Posh Release and have been creating some fresh, fruity, summertime goodness to share with you. Let’s get started!
I began by using the new Watercolor Strips Masks Stencils. I used a variety of colors to mimic a sunset or sunrise on a warm summer day. I think these stencils would be so much fun to create a plaid background with…I’ll try that with my next card :).
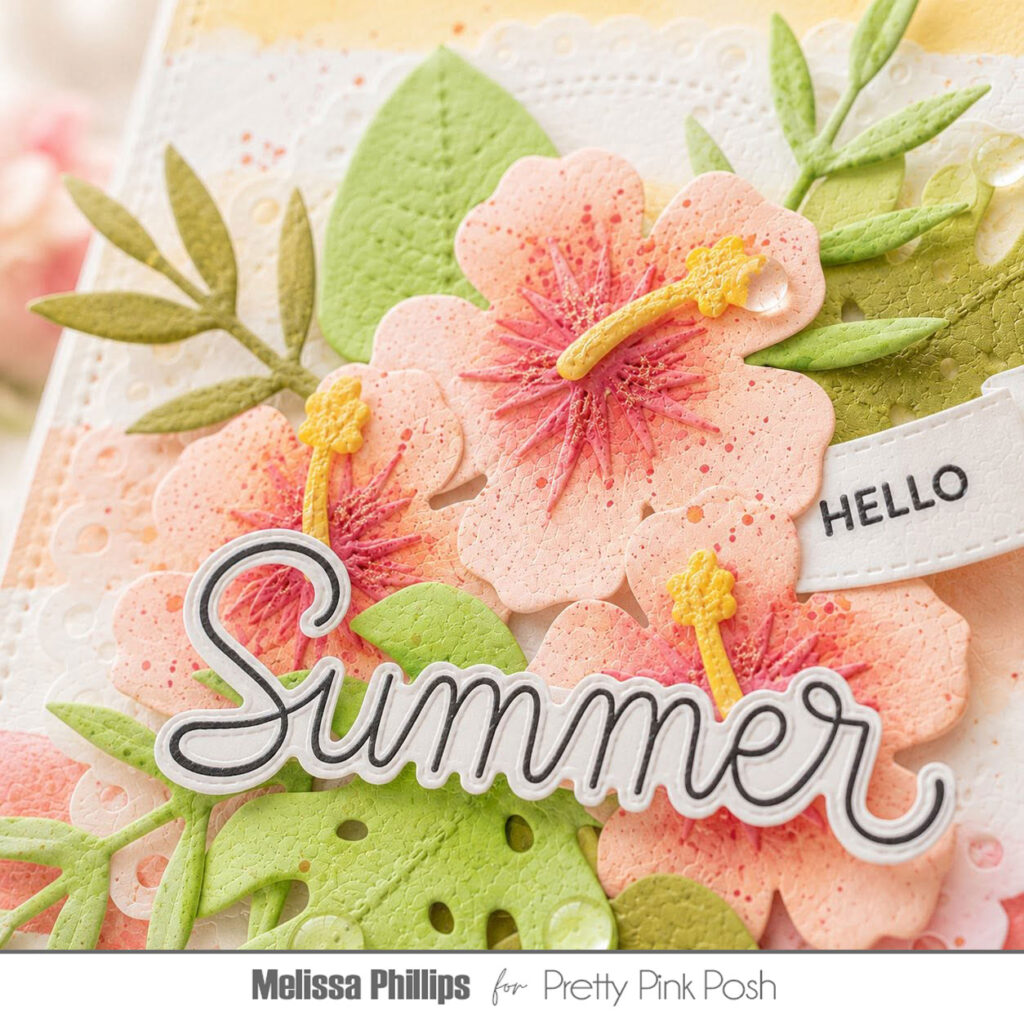
Next, I die cut flowers and leaves using the Tropical Leaves Diesand Hibiscus Flowers Dies. I cut them from shades of green and pink and then added a bit of ink blending to deepen and brighten the colors a bit. I arranged them in the center of my card in a fun tropical cluster.
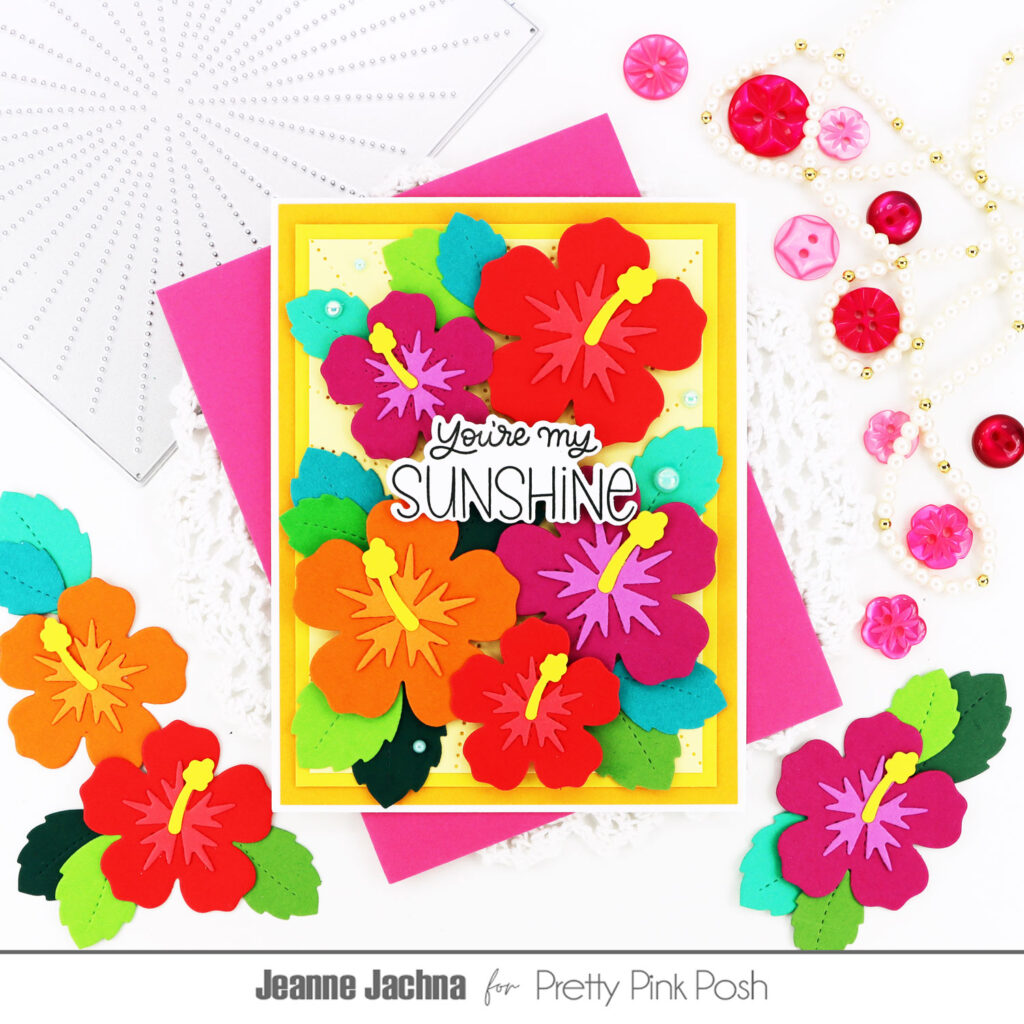
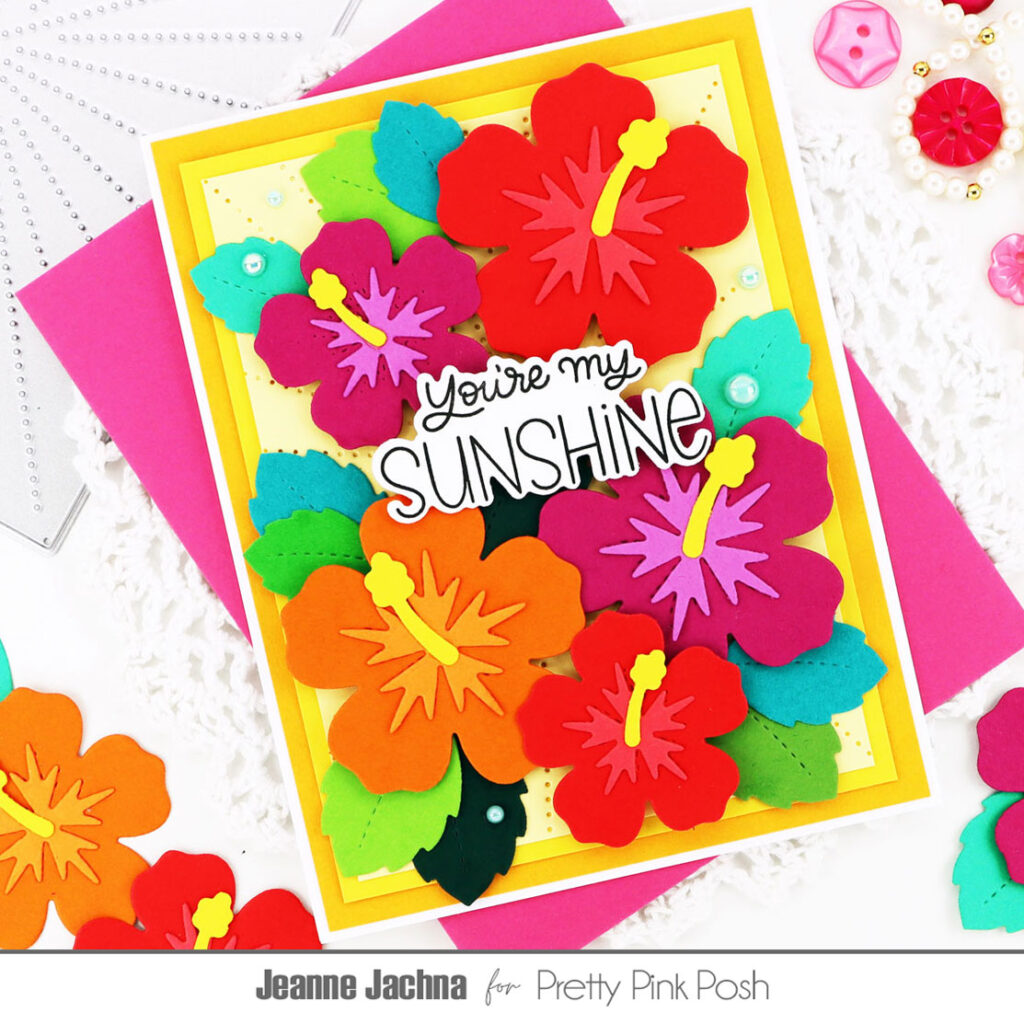
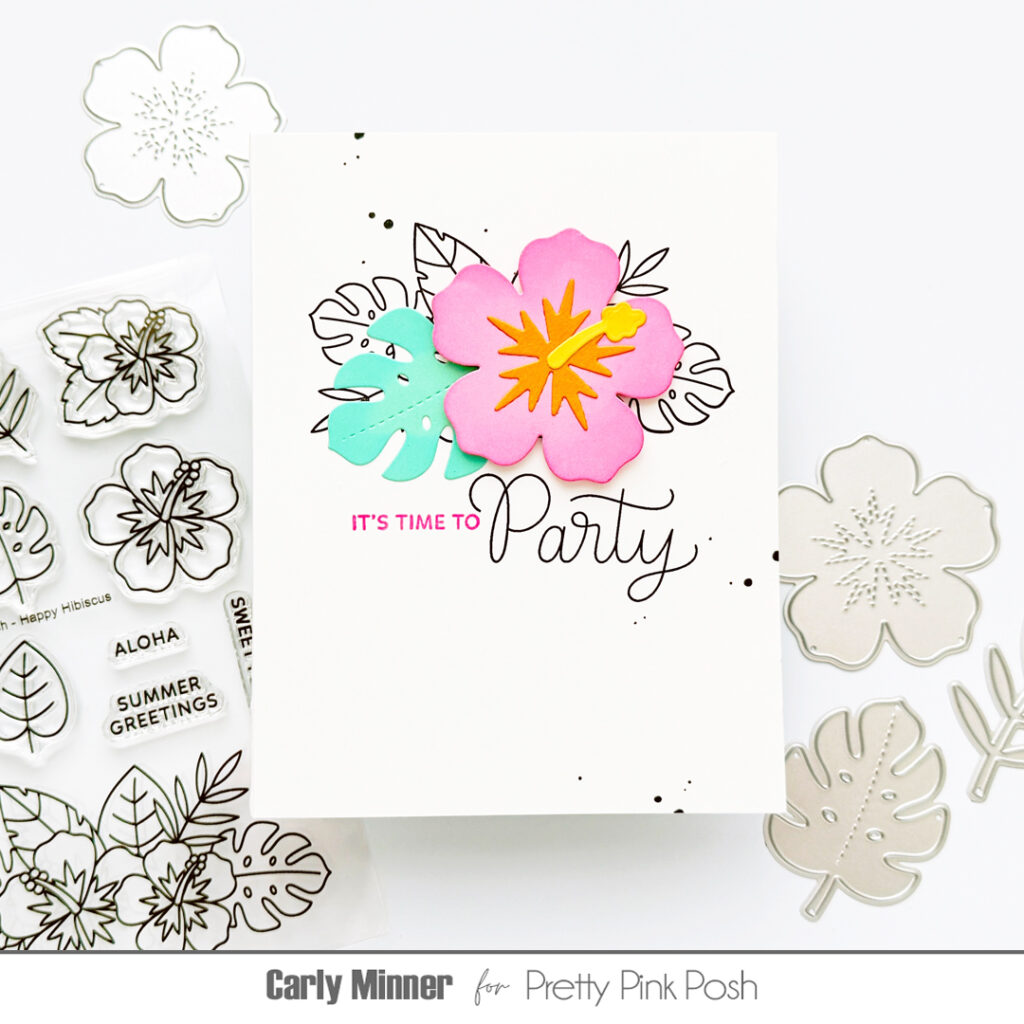
Hi friends, it’s Jeanne here today. I hope you’re loving the new release from Pretty Pink Posh! It’s absolute sunshine on paper! I’m excited to share my card today featuring the new Hibiscus Flowers die set!
I love bold graphic style and always try to incorporate as much color as I can to my designs. If you look close, you’ll see that my background has three layers of yellow cardstock. The lightest shade is closest to the top, and has been cut with the new Sunburst Pierced Plate.
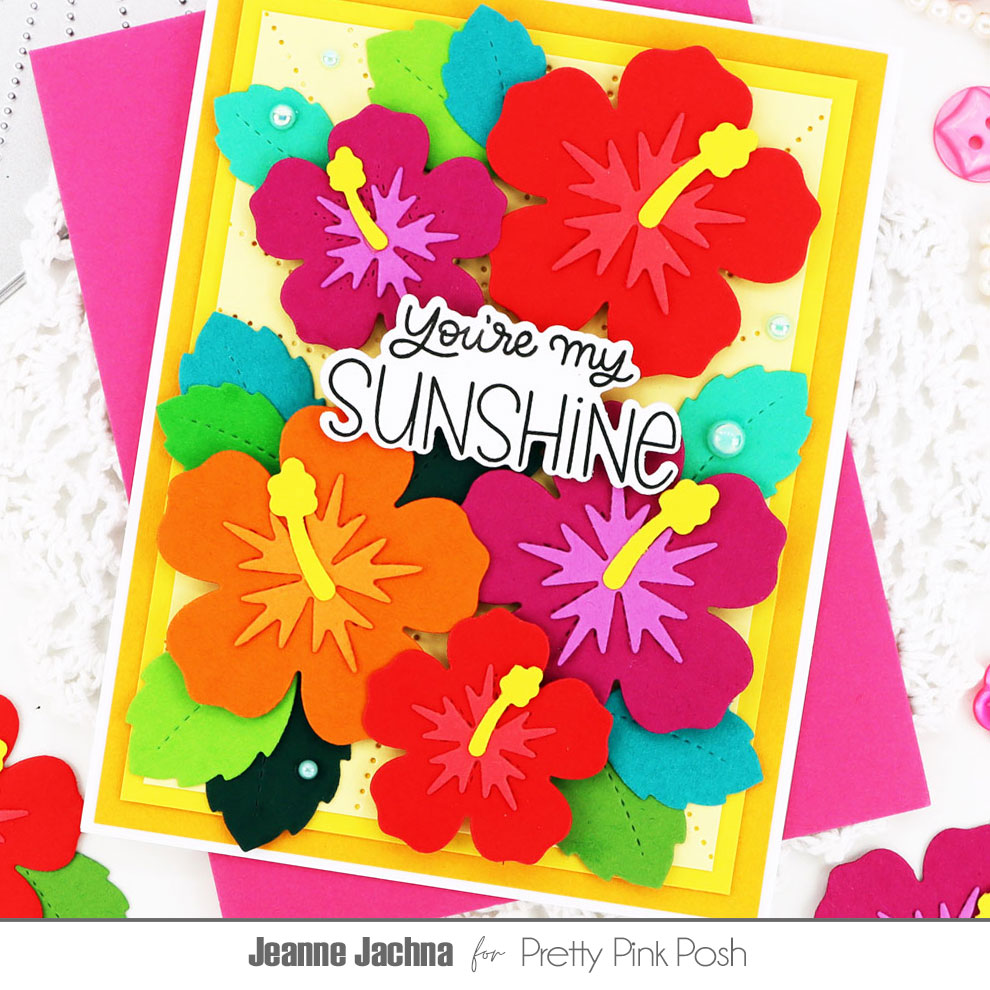
I topped the panel with colorful Hibiscus Flowers. The die set includes a large, medium and small flower and leaf. The flowers are easy to assemble. I cut the largest die from dark cardstock and then layered a lighter shade for the flower centers.
I adhered the flowers with adhesive foam tape so they’re raised. This makes it easy to tuck the leaves under the flowers wherever you like. My sentiment is from the Happy Summer stamp set. I love how the coordinating die set fussy cuts the mixed font sentiment!
I hope you’ll stop by for more designs made with the new release!
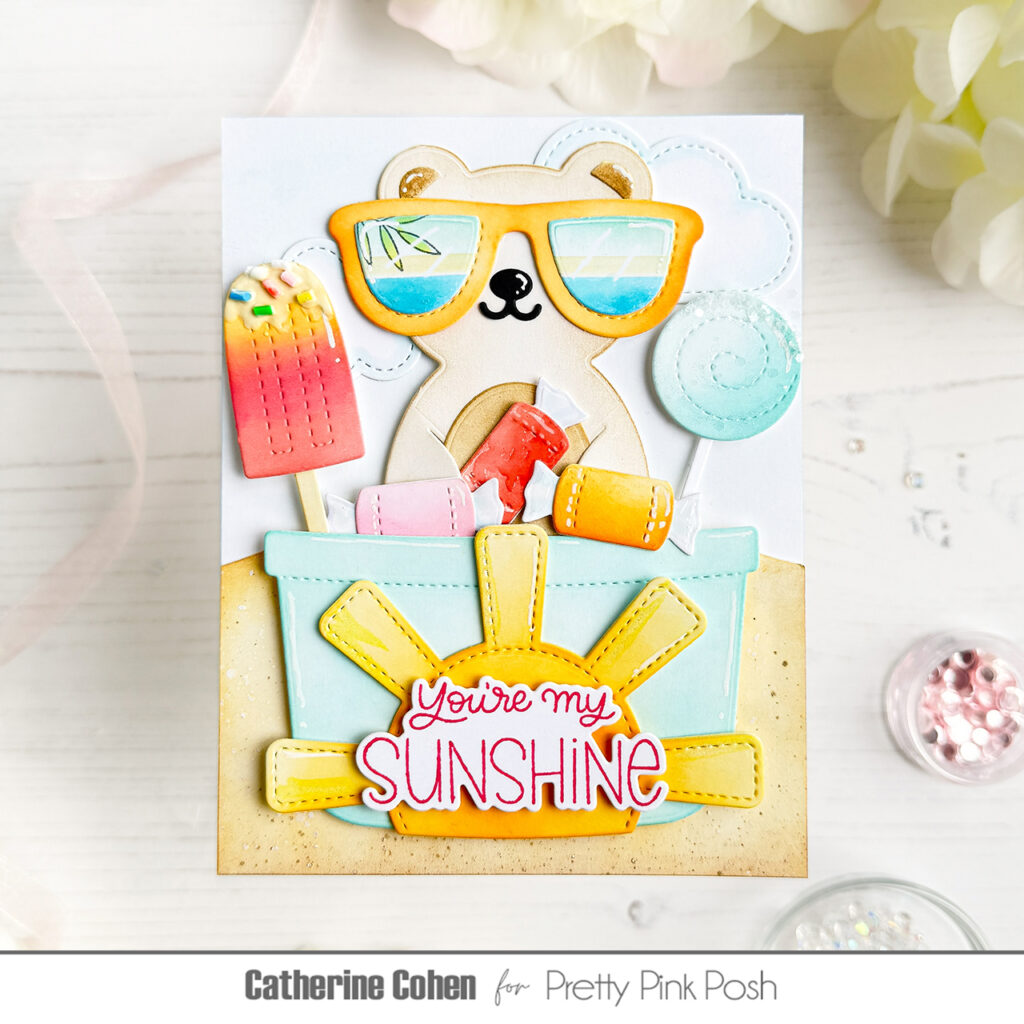
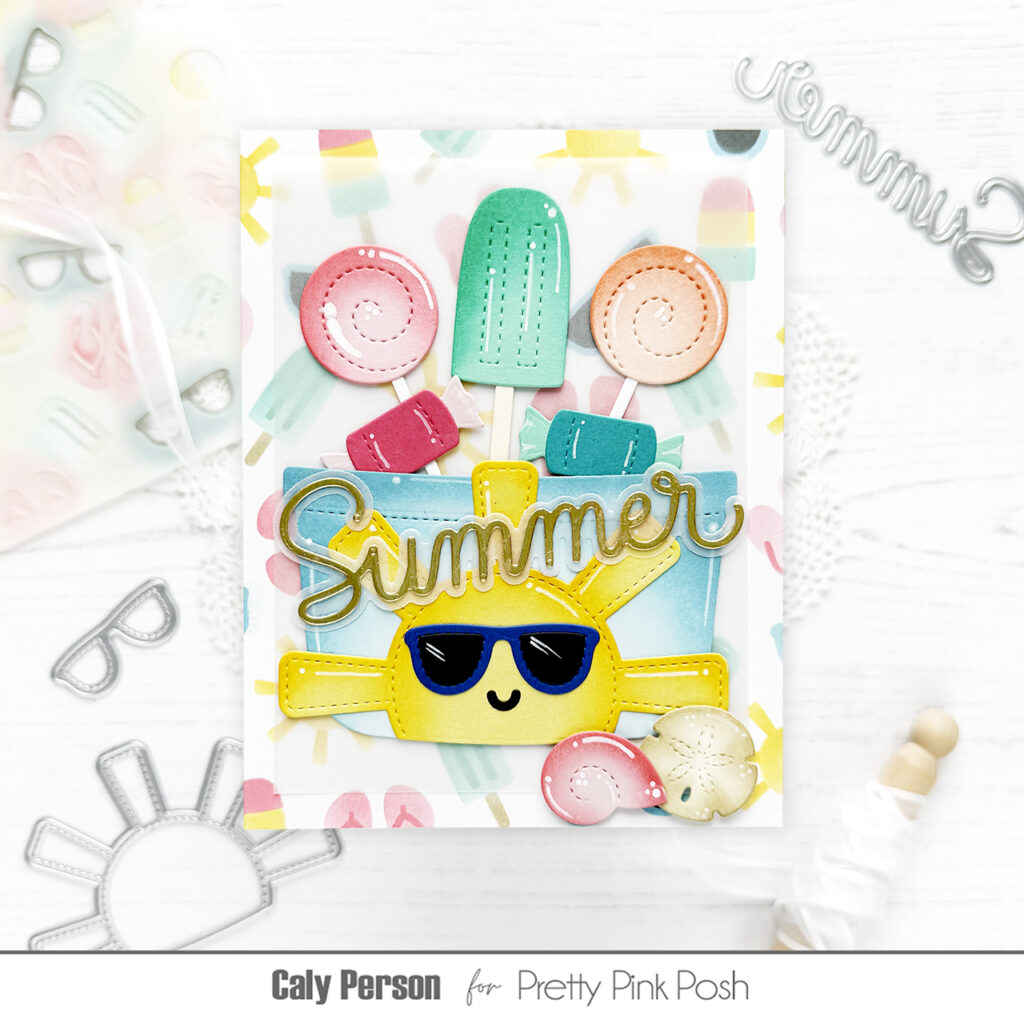
I began by softly ink blending a sky background onto an A2 white cardstock panel using Tumbled Glass Distress Oxide Ink. Next, I created a sandy hill border with theSnowy Hillside Border dieand ink blended with Gathered Twigs and Antique Linen. To give the sand extra texture, I splattered diluted Gathered Twigs along with white watercolor across the panel.
I die cut the candy bucket and accessories from white cardstock, and the adorable bear from linen cardstock. I ink blended using the following Distress Oxides (the nose and mouth were die cut separately from black cardstock):
For some added sweetness and shine, I decorated popsicle with sprinkles, added glossy accents to the center candy and sprinkled sugar glitter onto the lollipop.
To create the reflection effect on the sunglasses, I ink blended a strip of white cardstock slightly larger than the lenses using MermaidLagoon, Dried, Marigold, and Tumbled Glass. I lightly dabbed the Mermaid Lagoon ink with a wet wipe to create a watery texture. I stamped the leaf image from the Summer Sipssetonto scrap paper first before stamping it again onto the background using the second impression for a softer look. I placed the lens die onto the strip and ran it through my die cut machine and adhered the lens onto the frame.
To finish the card, I added die cut clouds softly inked blended with Tumbled Glass and completed the design with a coral colored stamped “You’re My Sunshine” sentiment.
I hope you were inspired by this card. Thanks for stopping by!
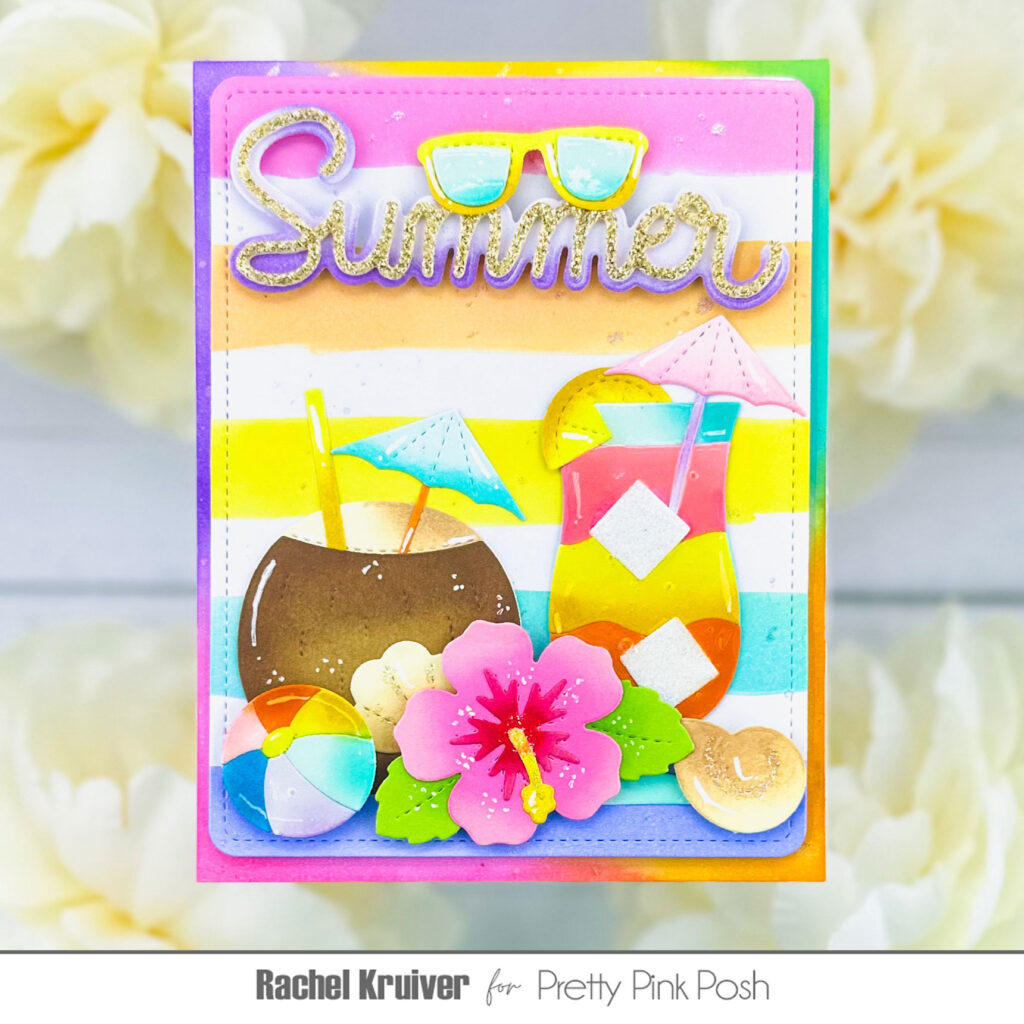
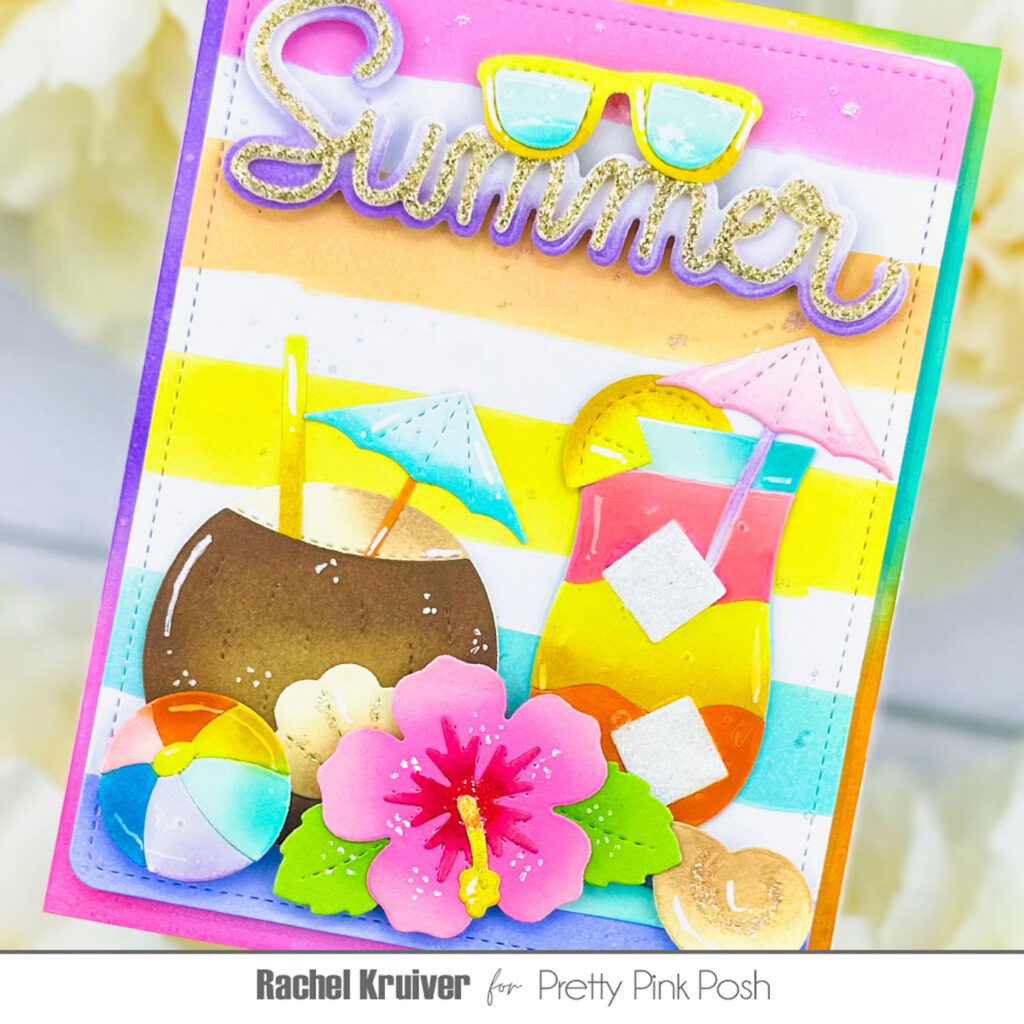
Hi, crafty people! It’s Rachel here today with a colorful summer cocktail card. I made this during a heatwave in the hope it would help to quench my thirst. I love mixing and matching products. So let me show you how I made this card with some products from the new June 2026 Pretty Pink Posh release.
I started by cutting a white piece of cardstock to 4 ¼ x 5 ½ inches and cutting a card base for it. Then I used the largest die from the Rounded Stitched Rectangles Dies on a white piece of paper. I put the new Watercolor Strips Stencil on top of it and started ink blending it, every opening a different pastel color. You can use the masks that come with the stencil to make sure you don’t get a color where you don’t want it to go. I used the same colors around the edges of my 4 ¼ x 5 ½ white panel. Added some sparkle splatters, and there we go. We have our base pieces for the card.
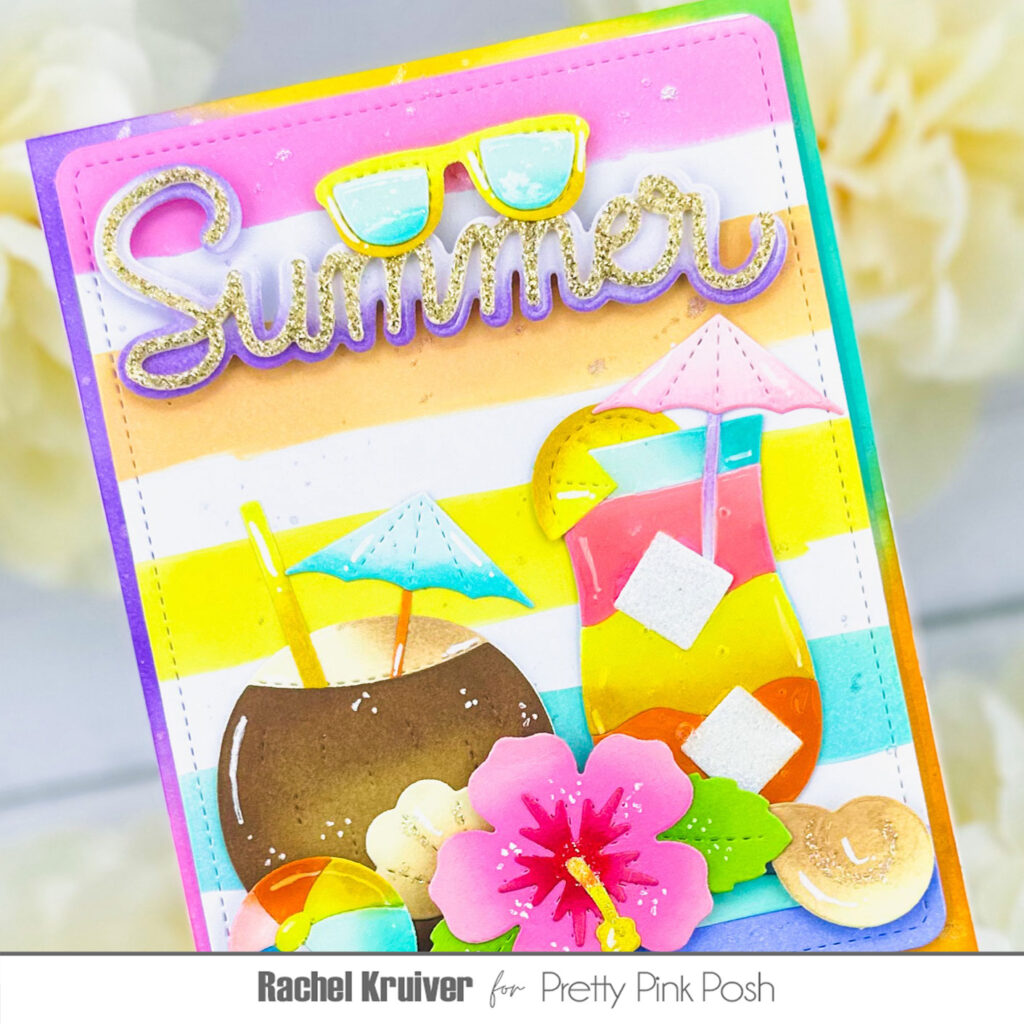
I die-cut pieces from the Summer Cocktails Die, Summer Holder Additions Dieand the Hibiscus Flowers Die in different colors. And added shading to it by using a darker ink color on them. I put all the elements together with a liquid glue. After that I wanted a sentiment; I used the Large Summer Shadow Die for it. I cut the shadow layer I cut in white and the lettering from some gold glitter foam paper. Then added some purple to the shadow layer and glued them together.
For the assembly of my card, I attached all the elements with liquid glue and foam to give some dimension to my card. As a finishing touch, I used some glossy accents on the beach ball and the glass cocktail.
Don’t forget to follow me on Instagram @cards.byrachel for more crafting inspiration.
Thank you for taking the time to read my blogpost. Happy crafting everyone!
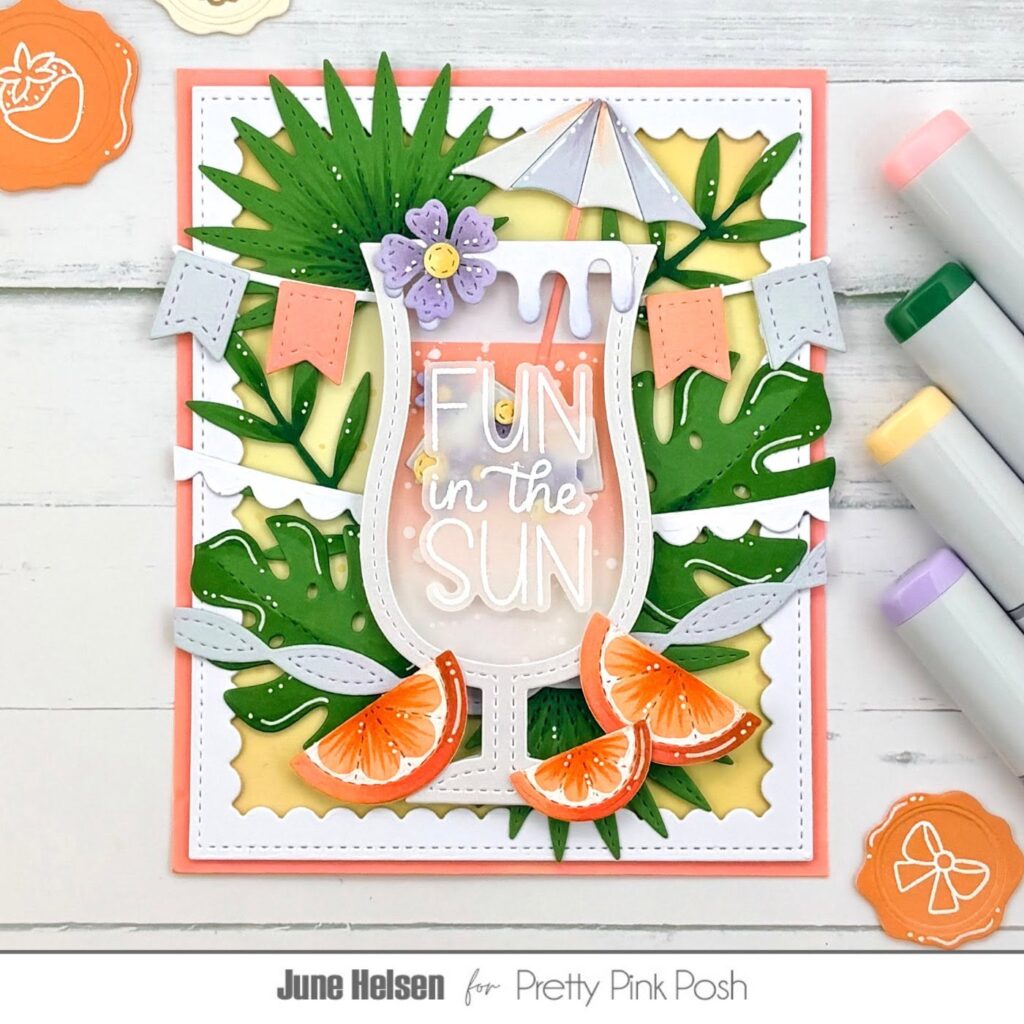
Hi crafty friends, June here! Today I’m sharing a very detailed card I created using the new June release. Let’s get started!
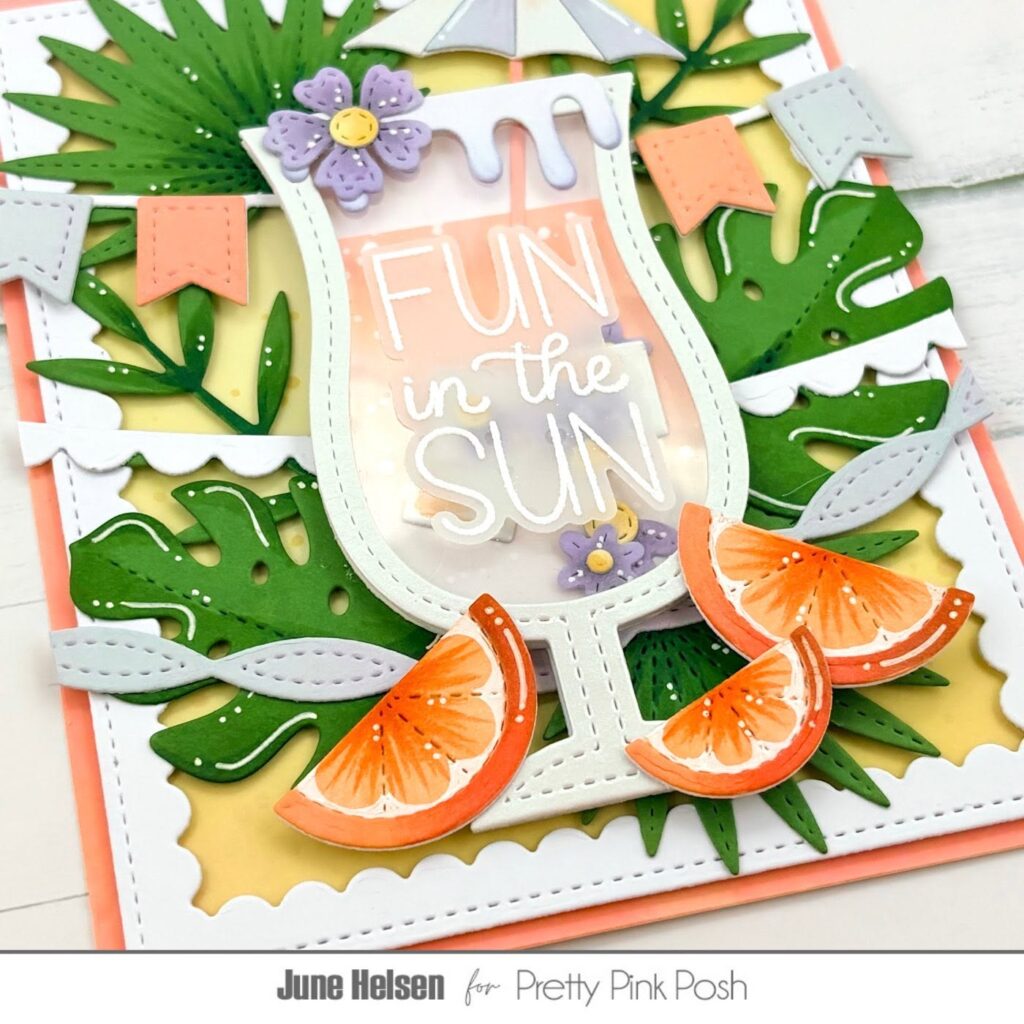
I started off by making a Summer Drink Shaker. As a cocktail lover, I couldn’t be any more excited about all the cocktail themed products that are in the release! I love very fruity cocktails with a floral hint, so that’s exactly what I chose to make for this card. I masked the top part of the shaker back panel and blended a peachy gradient. I also did some white ink splattering on top to make the drink appear fizzy. I filled the inside with my own die cuts instead of using shaker beads. I cut some ice cubes from the Summer Cocktails die set from iridescent cardstock and tiny flowers from Spring Foliage. I also cut out one of the larger flowers to put on the rim of the glass.
To add even more decorations to my drink, I cut out the icing from the Big Halloween Cupcake and trimmed it so I could put it on the rim of the glass aswel. I did some slight purple blending on it to bring in more of the color of the flowers. I also cut the included parasol from theshaker set and did a bit of Copic coloring on it to match the color scheme. The ‘fun in the sun’ sentiment from Happy Summer fits perfectly inside the glass, so I embossed it on a piece of vellum to put it ‘inside’.
I made a very busy background using leaves and banners. I cut a variety of leaves from the new Tropical Leavesdiesand did a bit of Copic coloring on them for some added dimension. My banners are from the older Streamer die set. I thought it would add to the summery cocktail bar vibes, so I cut a few of them from various cardstock colors that matched the color palette.
I thought the cocktail looked like it might have grapefruit in it (even though I really dislike grapefruit), so I used the citrus dies from both the Summer Drink Shaker and Summer Cocktails to make slices of grapefruit. They are colored completely using Copics and white gel pen so I could add as much detailing as possible.
The background is just a soft ink blended butter yellow panel with a Scallop Frame on top, and matted onto a piece of peach colored cardstock. I like the way the yellow background brings back the yellow from the flower centers!
And that’s it for today! Something tells me I’d really enjoy this cocktail even though it has grapefruit in it. Maybe next time I can try making one of my favorites, like a Lazy Red Cheeks or a Shirley Temple! Do you have a favorite cocktail you want to try making using the new release? Be sure to tell us!
Anyway, I hope to see you again soon on the blog, bye for now!
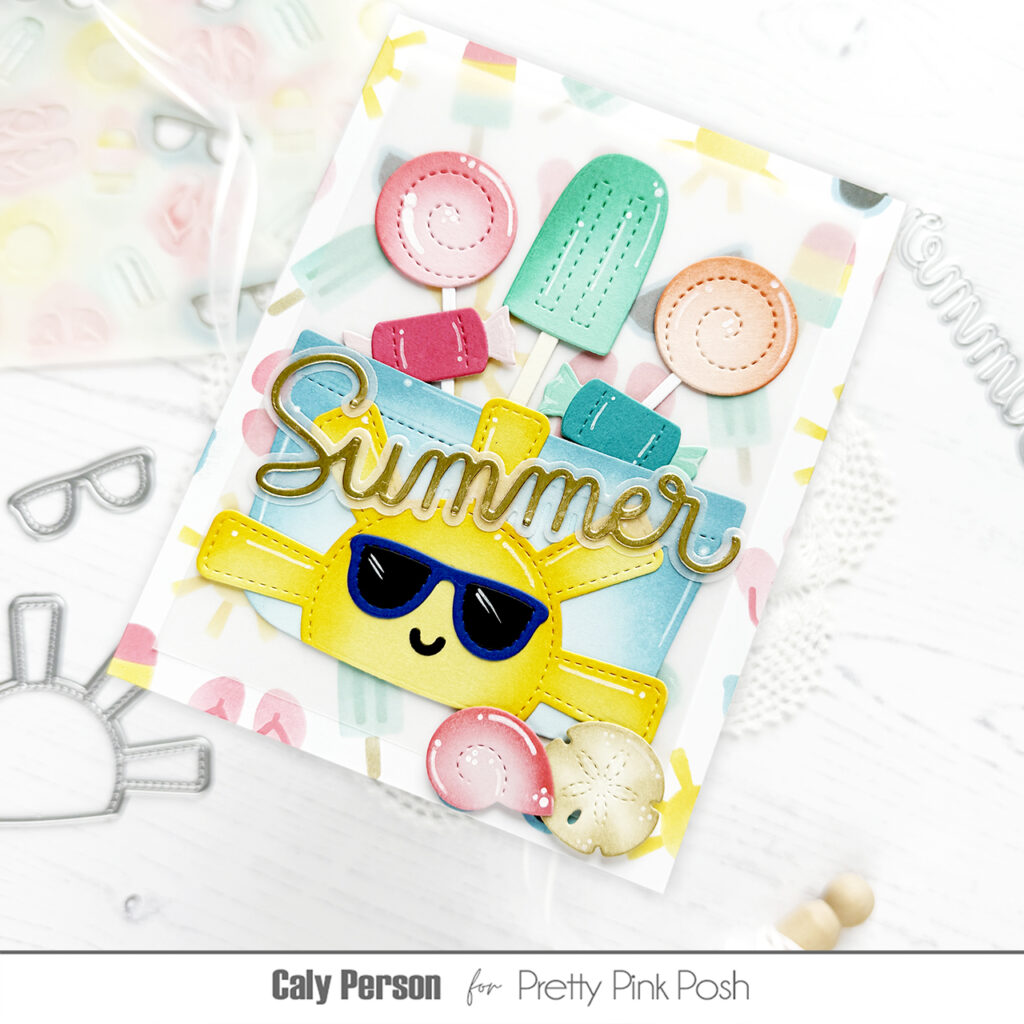
I made a fun background using the Layered Summer Fun Stencils, isolating all the icons so I could use several different colors. To soften it, I added a vellum layer on top before building my summer bucket.
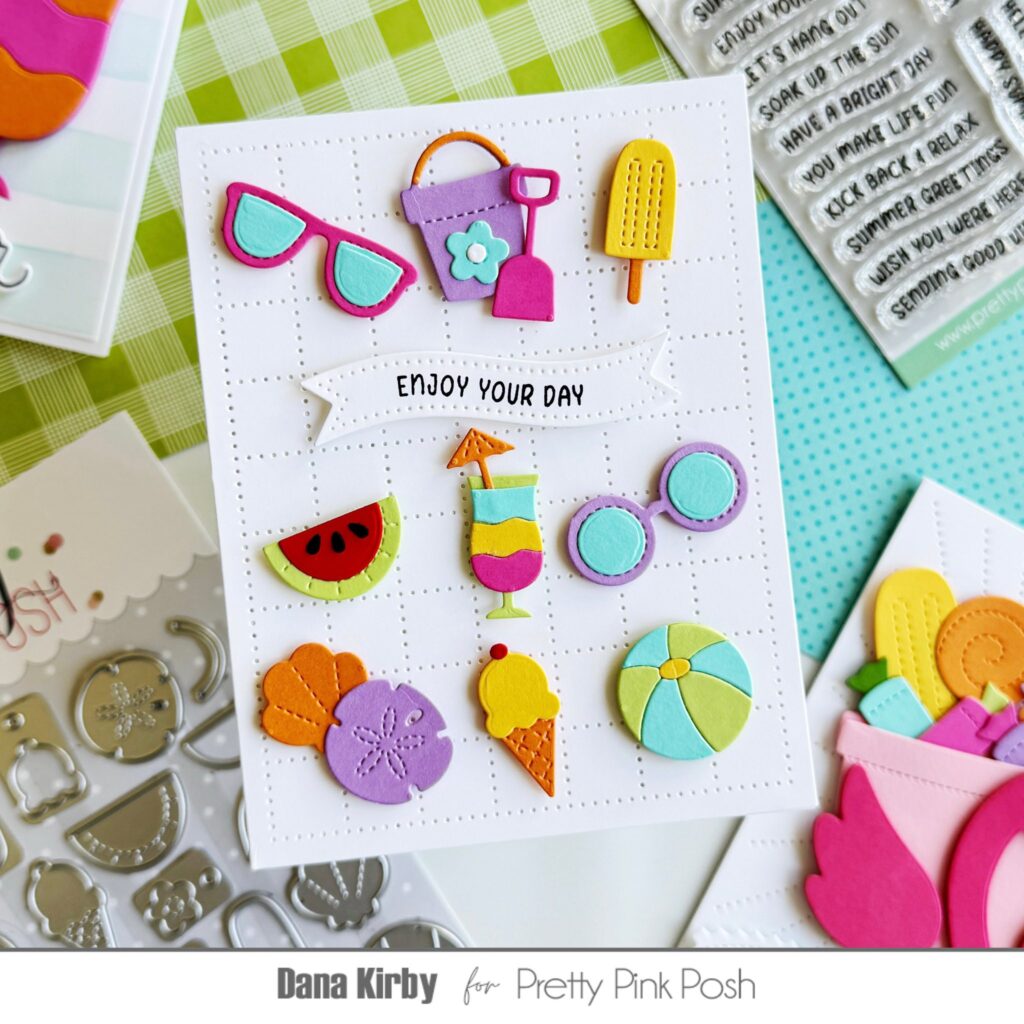
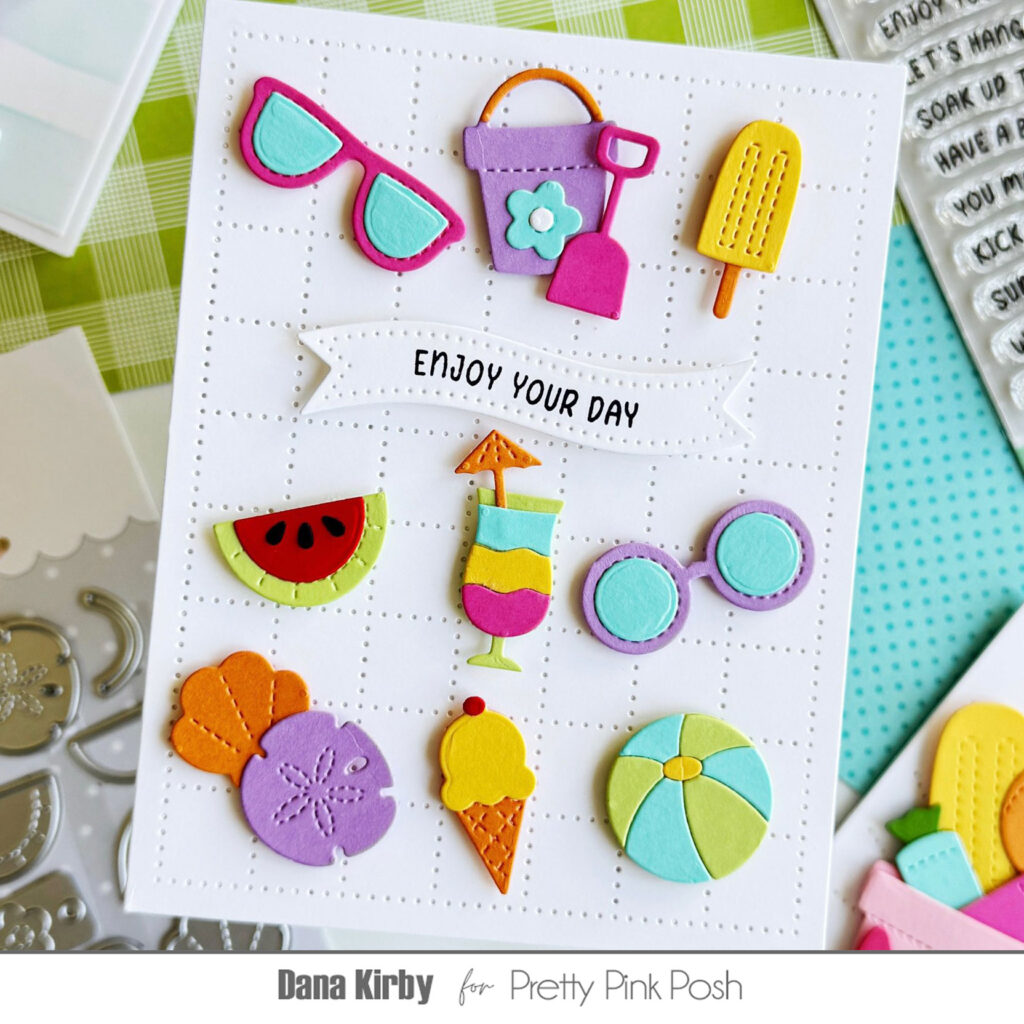
Hello Friends! It’s Dana here today and I am sharing a card that uses the adorable Summer Holder Additions die set. This set includes lots of dies that can be used with the new Flamingo Holder die or any of the other Animal Holder dies that are available. I decided to use the dies to create a grid layout, but will definitely be using these dies again with the fun flamingo.
I started my card by die cutting all of my images with the Summer Holder Addition dies. I die cut the pieces from fun bright summer colors and then used a strong liquid glue to assemble the individual images. Next, I used the Checkered Pierced Plate to create my card panel. I attached my images with foam adhesive, in a grid design to the panel, leaving a spot open for my sentiment.
Lastly, I used the Summer Banner Greetings stamp set and Banner Greetings 3 dies for my sentiment. I attached my sentiment banner with foam adhesive to finish my card. Such a fun card to create and I love that it can be used for lots of different occasions by just changing the sentiment.
Thanks for joining me today and I hope I inspired you to use the Summer Holder Additions dies to create a card of your own.
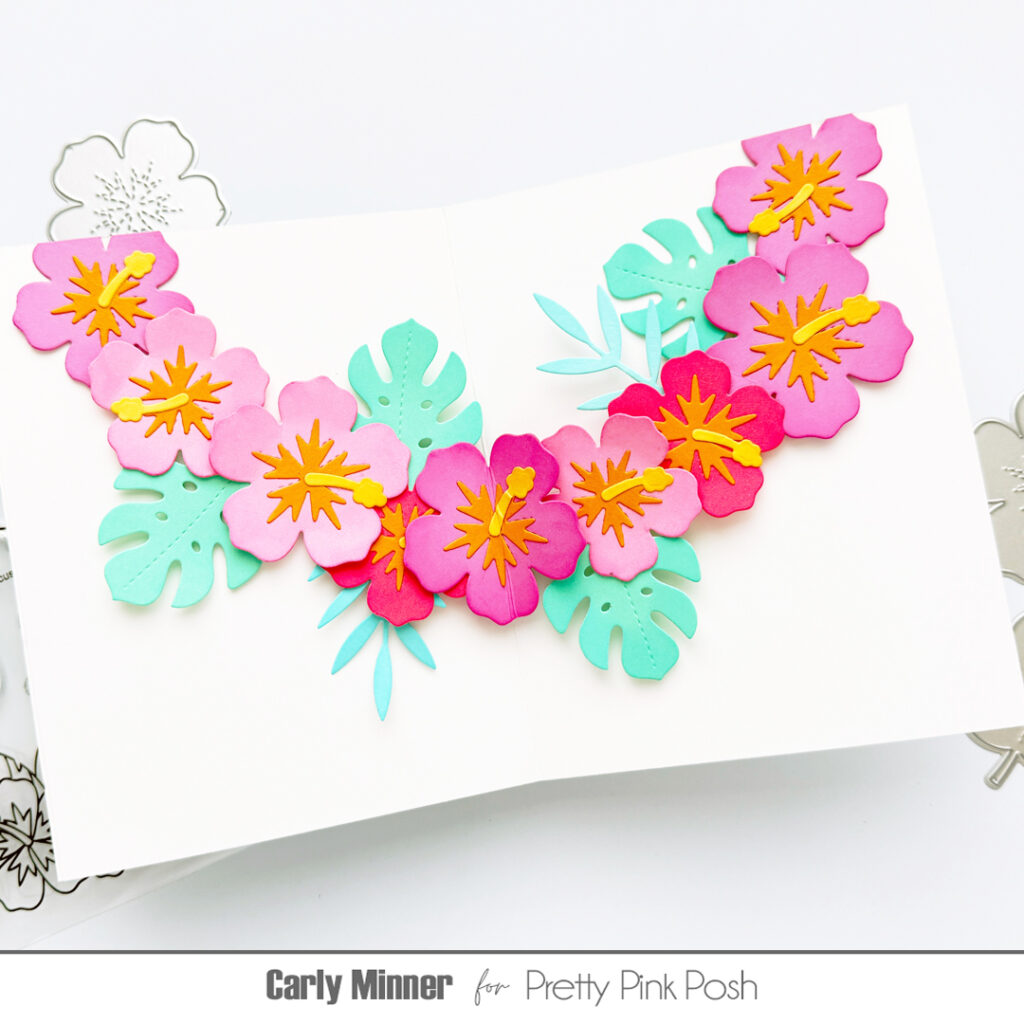
Hi friends, it’s Carly here. Are you looking for an extra special card to make for a birthday, graduation or another celebration? How about a tropical lei card? It opens to reveal a beautiful flower lei inside!
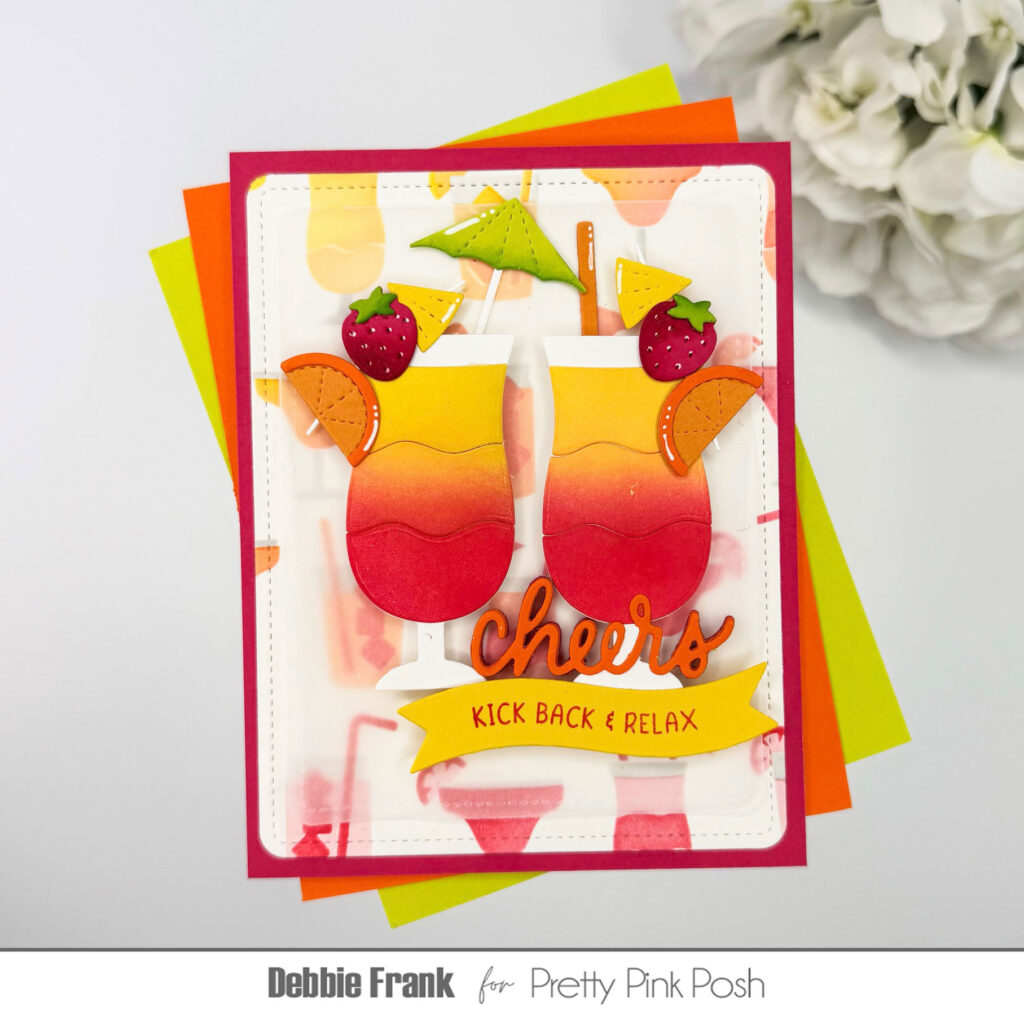
Hi friends, Debbie here with you today! Things are getting hot over here at Pretty Pink Posh with the new Summer Release! Who’s ready for summer or a Tropical Vacation!? I am sharing the new refresh Summer Cocktail Diesthat’s sure to quench your thirst!
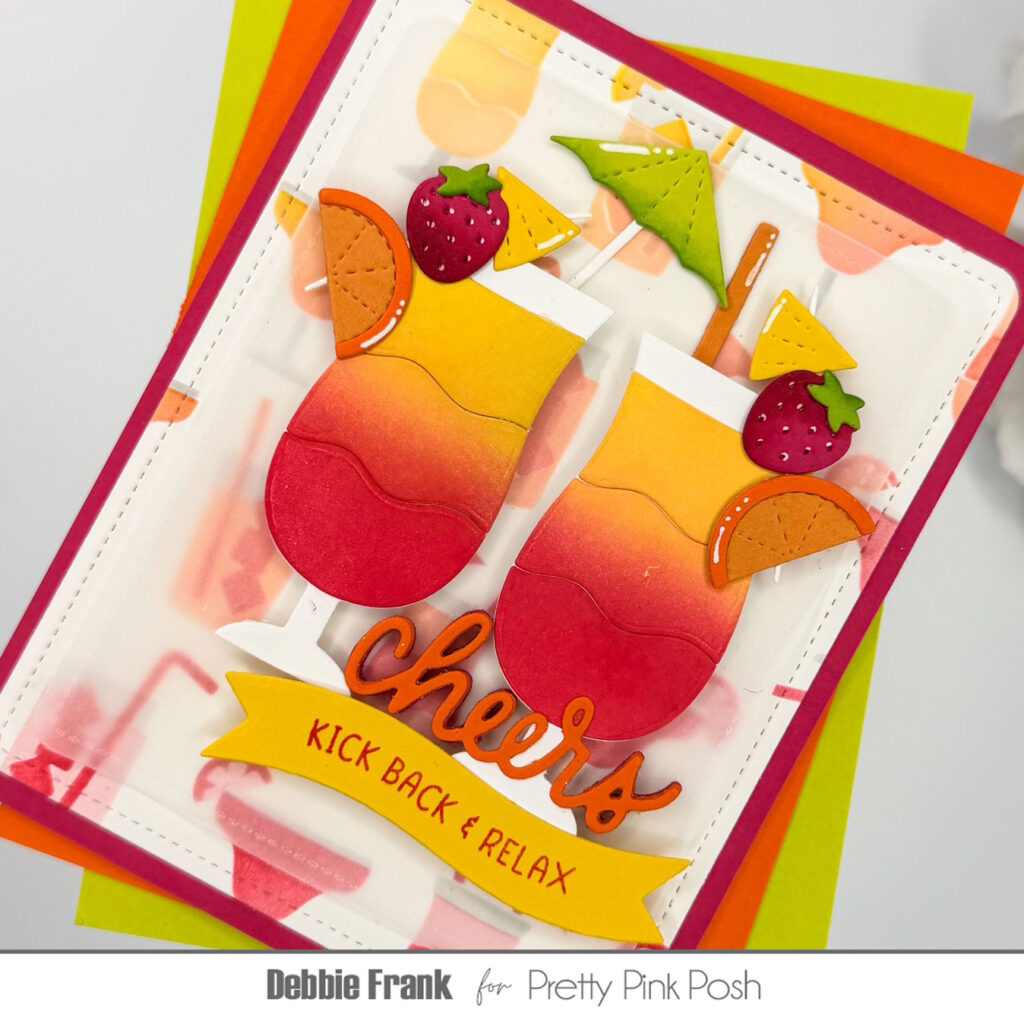
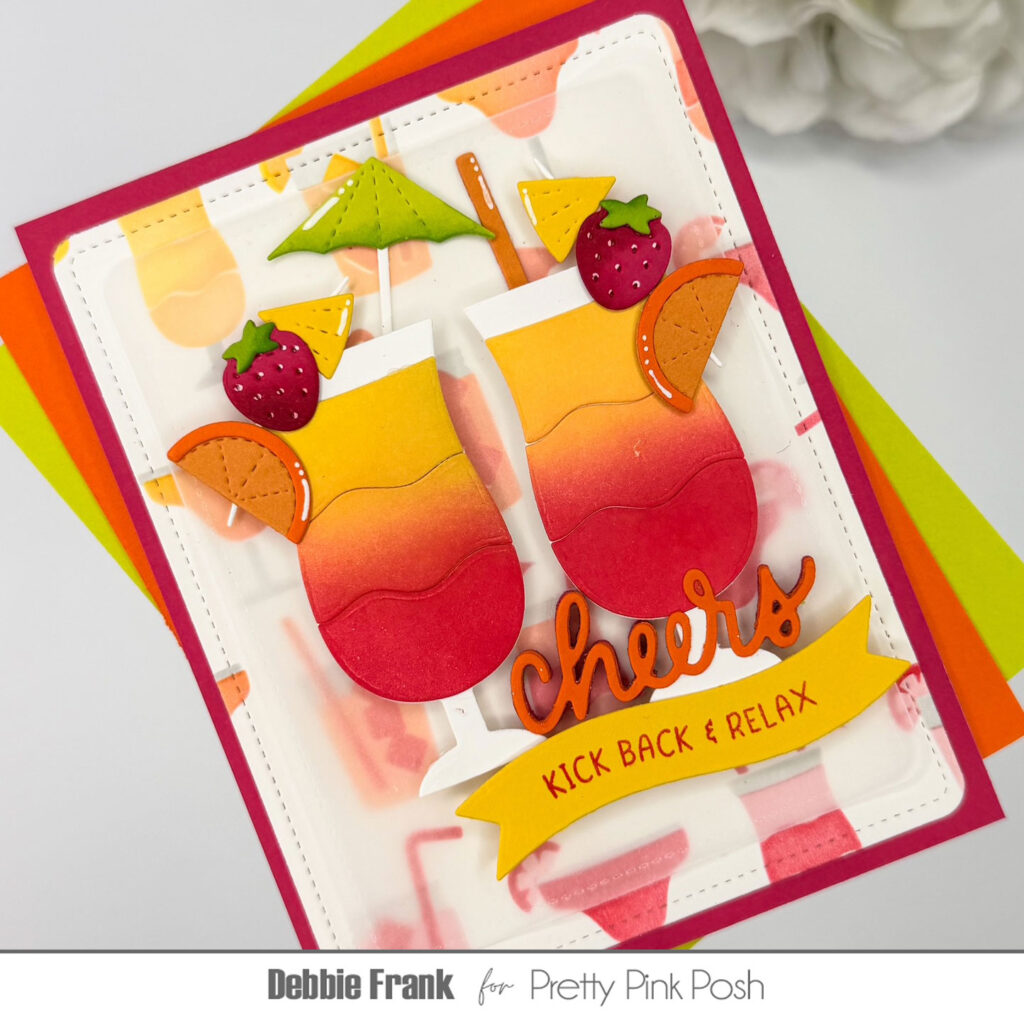
I started off with the new Layered Summer Drinks Stencil and a standard A2 panel of Neenah card stock #80. With the first layer (A)and the panel on a grip mat I ink blended on a gray dye ink. Then with the next layer (B) I used a yellow and reddish pink dye inks to make orange in the middle with a soft blend at an angle. For layer (C) I went with the same colors but one shade darker. If you don’t have a shade darker you can just go in with a heavier hand.
Next, with the largestRounded Stitched Rectangle DiesI die-cut out the stenciled panel and matted it with a matching card stock. I also die-cut out a piece of vellum with the second largest Rounded Stitched Rectangles die.
With the Summer Cocktail Dies, I die-cut out the drinks from white card stock and blended on with same dye inks that I used for the stencil panel. It definitely looks delicious or a beautiful sunrise! For the rest of the elements I used colored card stock adding on some dimension and white highlights. Adhering the elements together with liquid glue and adding foam squares to the back of the overlapping fruits.
For the sentiment I used the new Summer Banner Greetings stamp set, stamping out the “Kick Back & Relax” with one of the previously dye inks used. Die-cutting the sentiment out using the previously released Banner Greetings 1 Die Set. To finish off my sentiment I went through my stash and found the “Cheers” die from an older set called Fruit Mug Additionsdie-cutting it out several times to add dimension.
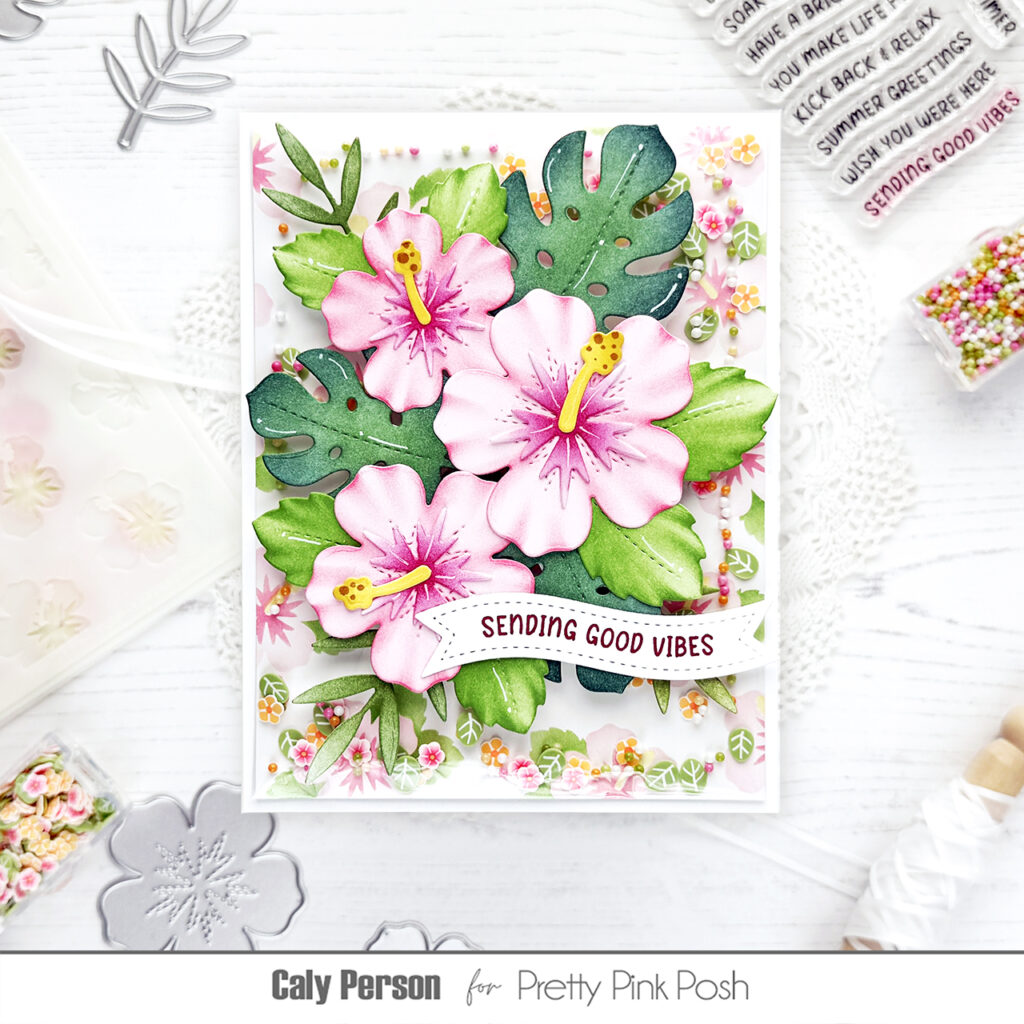
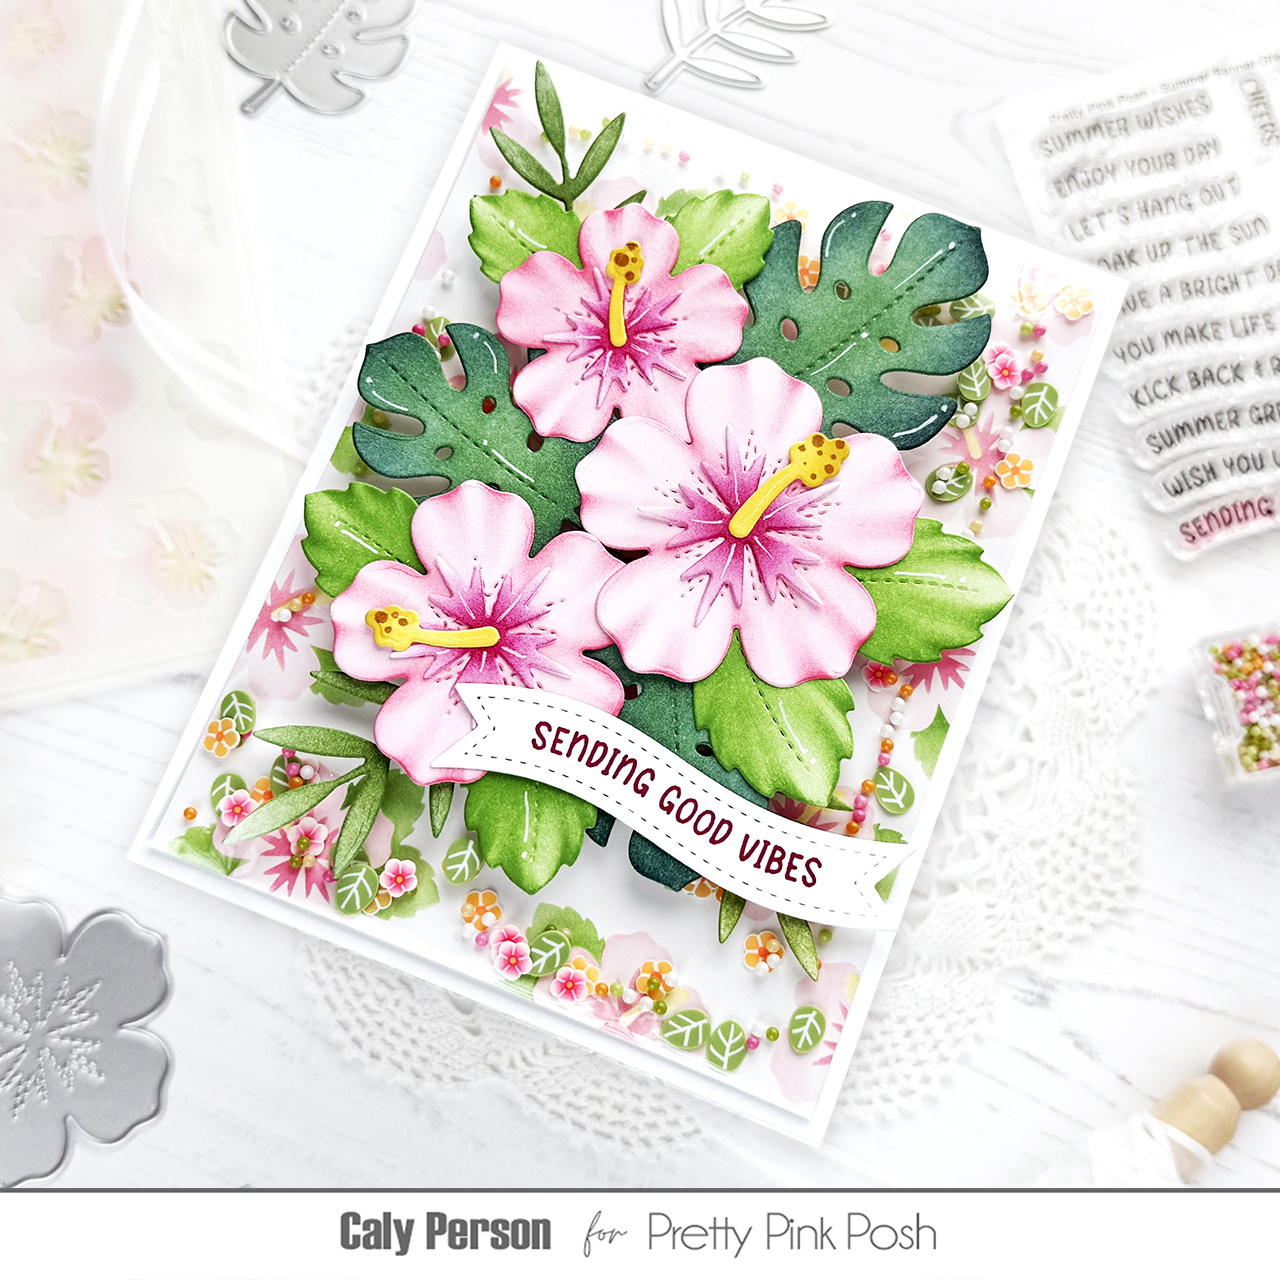
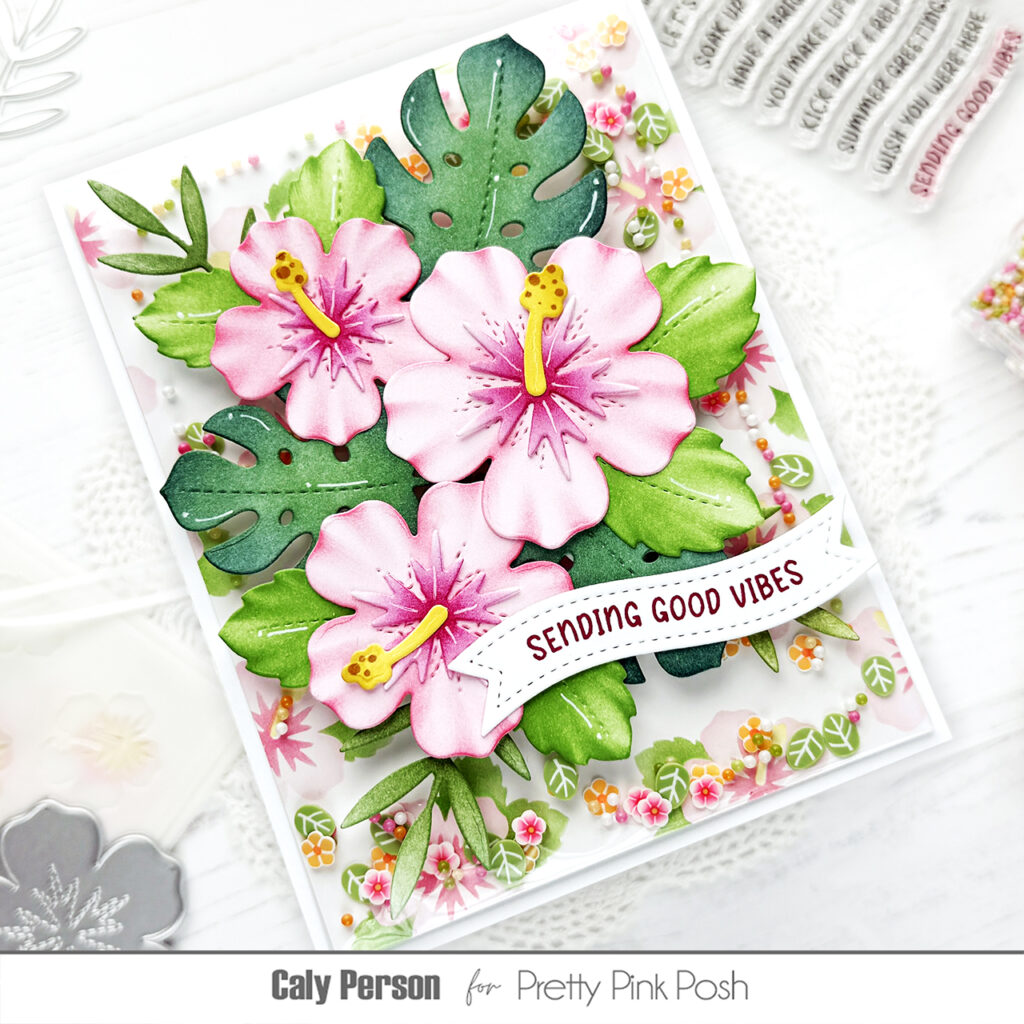
Hello, friends! It’s Caly with you and today’s card celebrates the June 2026 release with Hibiscus! Join us for the video hop, sharing lots of inspiration from this fun release and leave a comment along the way for your chance to win a gift card to shop this release!
To make my infinity shaker, I started with the background. I ink-blended a soft hibiscus background using the Layered Hibiscus Stencils. I knew this layer would be good for the background and chose soft colors intentionally.
When done, I turned this into an infinity shaker using some cellophane from stamp/die packaging. It’s an easy, lightweight option! Be sure to watch my video to see how it’s done if you are interested! I filled the shaker with a mixture of the Summer Blooms Clay Mix and Rainbow Sherbet Glass Shaker Beads.
I die-cut flowers and leaves using the Hibiscus Flowers Dies and the Tropical Leaves Dies and ink-blended them to add color. Using a detailed brush, I added texture to the hibiscus flowers and leaves.