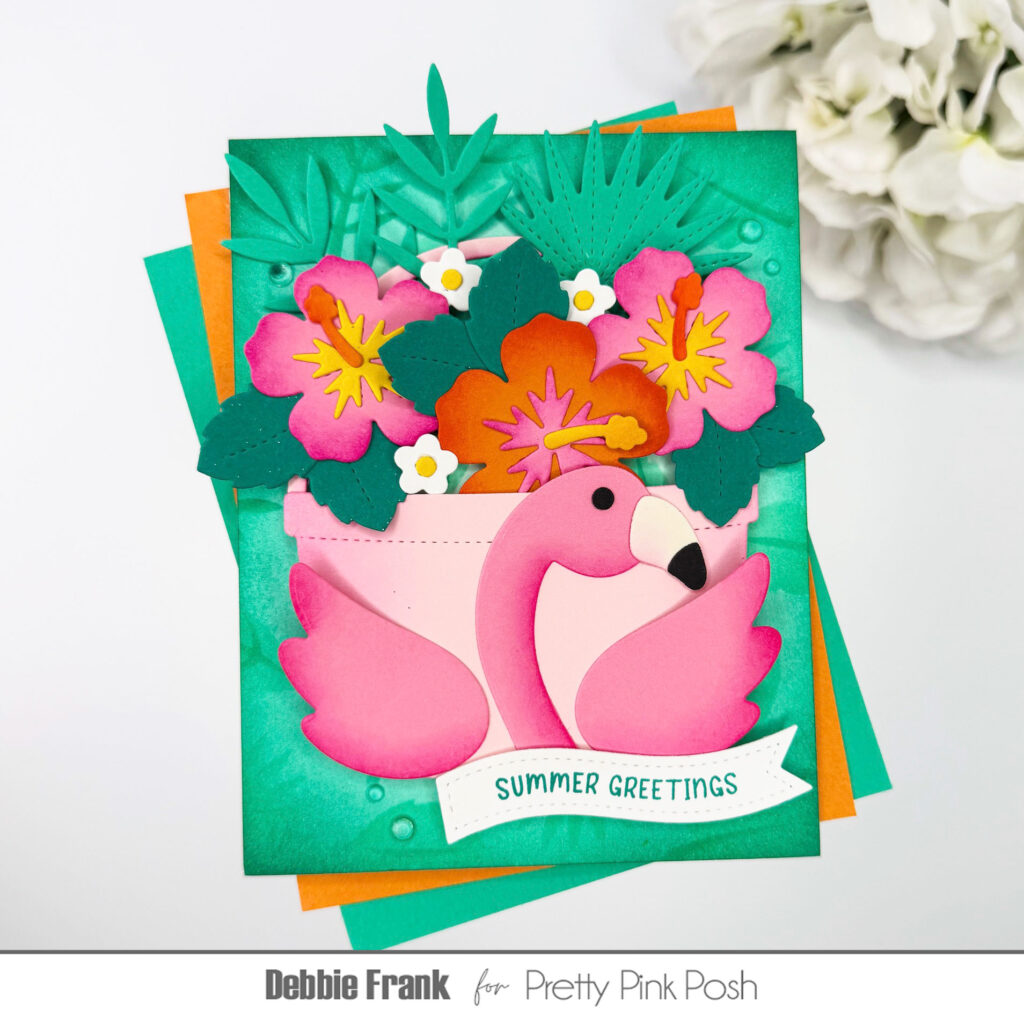
Flamingo Hibiscus Bucket
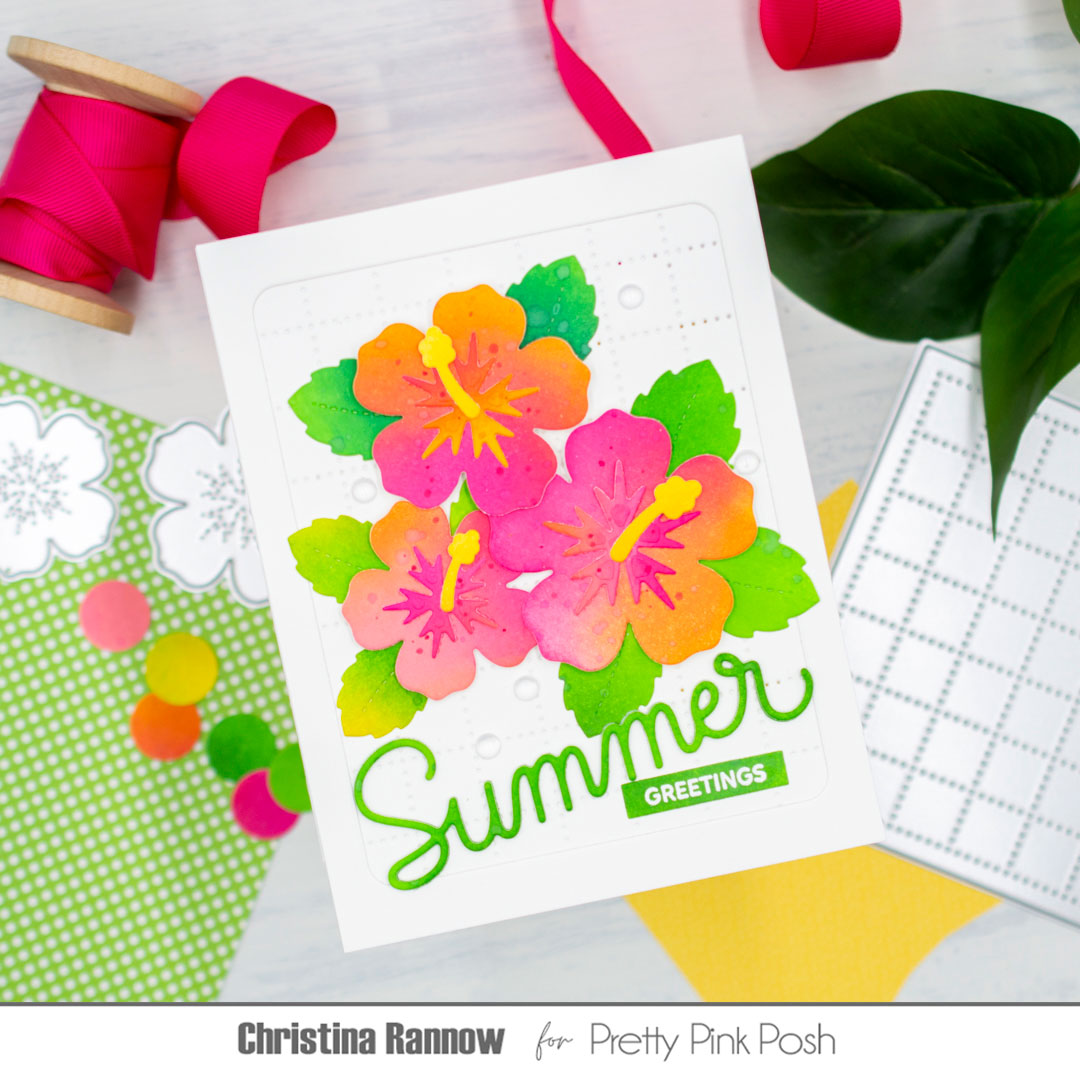
Hi crafty friends, it is Debbie here! I’m super excited to share the new Summer Bucket Additions Dies from the June release here at Pretty Pink Posh. I adore this Flamingo Add-on with the previously released Candy Bucket Dies. I went with florals in my bucket filling it up using the Hibiscus Flower Dies.
Summer Bucket Additions Dies
Hibiscus Flowers Dies
Layered Tropical Leaves Stencil
Summer Holder Additions Dies
Tropical Leaves Dies
Summer Banner Greetings Stamp
Candy Bucket Die
Banner Greetings 3 Dies
I started off with the Layered Tropical Leaves Stencil and a standard A2 panel of Neenah card stock on a grip mat. With both layers I inked them with teal dye inks in two shades. After I was done with the two stencils I went back over the panel with residual ink on my brush. Then with the darkest teal ink I went over the edges of the panel.
Next, I die-cut out the Candy Bucket and the Summer Bucket Addition Flamingo. Adding dimension on the edges with a dye ink. Then I die-cut out two of the small Hibiscus Flowers from pink card stock. And went back and die-cut out the medium size from the orange card stock.
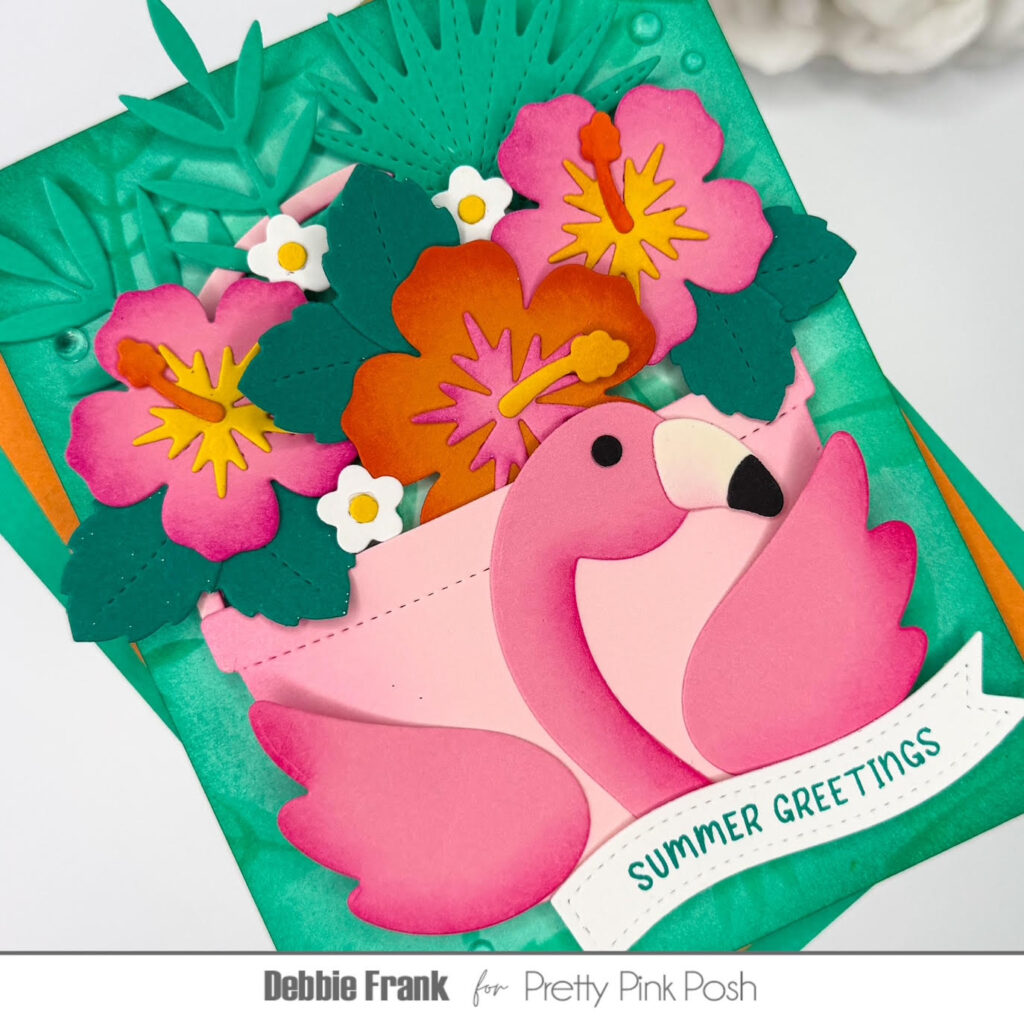
Once I started to lay out my design I needed some smaller flowers to fill in between the Hibiscus Flowers, with the Summer Holder Additions Dies there is a small flower die that I die-cut out from white card stock.
I love floral baskets with spike plants making it more funky! So with the Tropical Leaves Dies, I die-cut out some of the leaves from a green teal card stock and tucked them in behind the flowers.
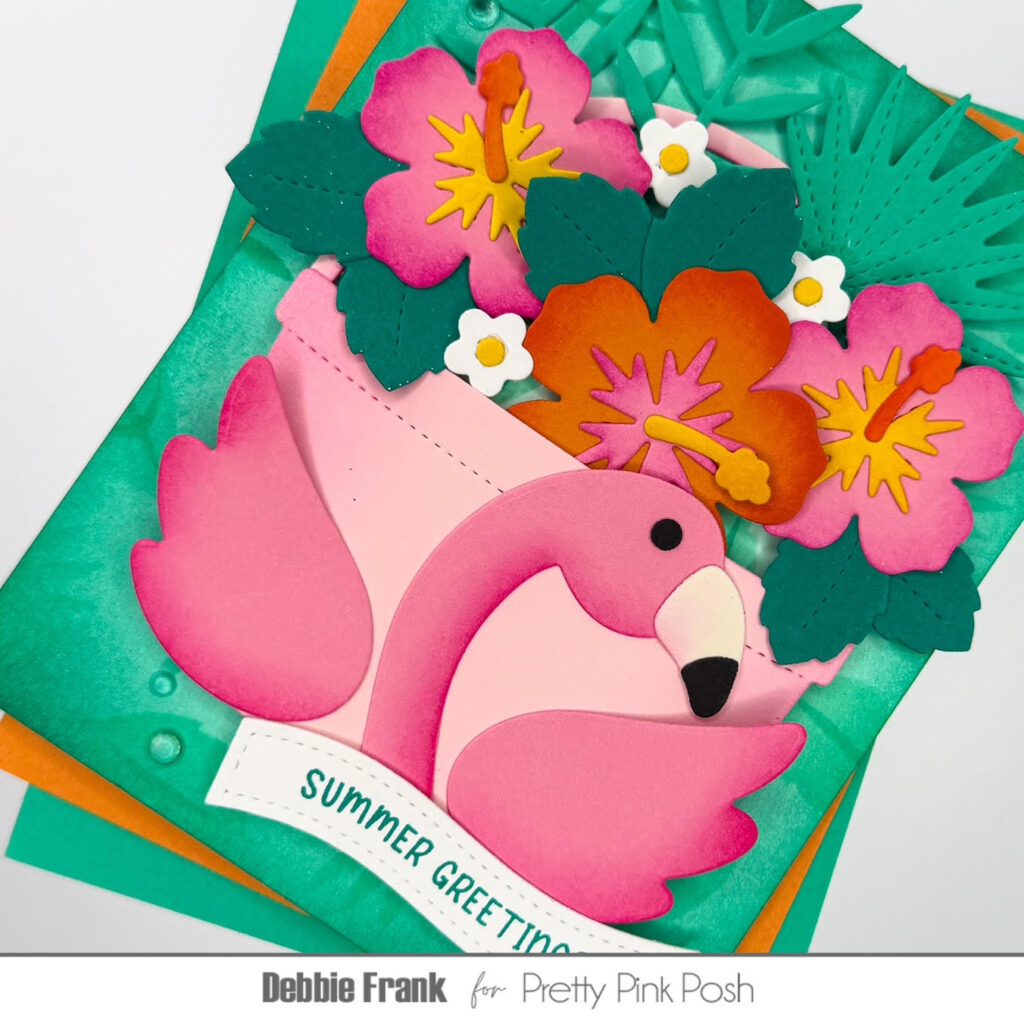
Then I stamped out the “Summer Greetings” from the Summer Banner Greetings stamp set with the teal dye ink. Then, I die-cut it out with the Banner Greetings 3 Dies.
I hope you like my floral bucket using the Flamingo from the Summer Bucket Additions!
Thanks for stopping by!