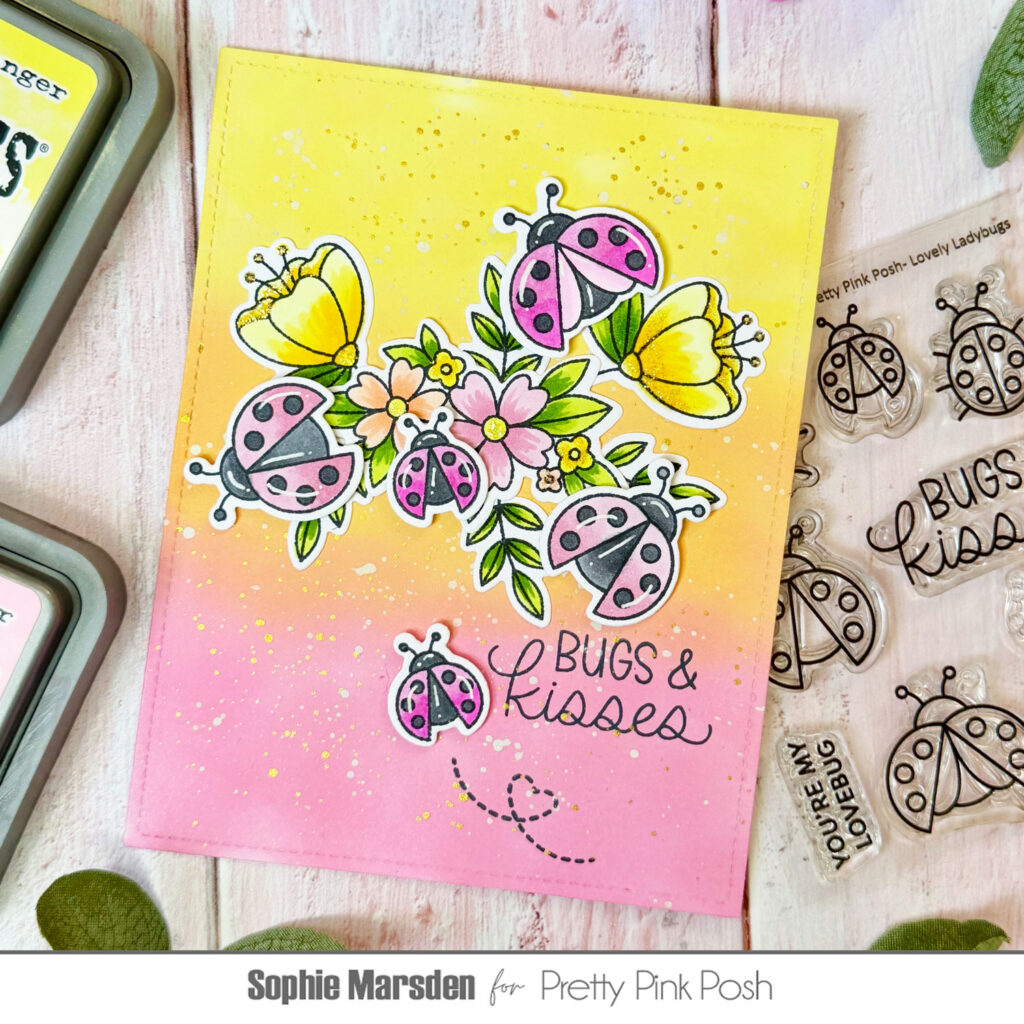
Hey everyone, it’s Sophie. I’m so happy to be here on the Pretty Pink Posh blog sharing a card I made for the new release featuring the Lovely Ladybugs Stamp Set.
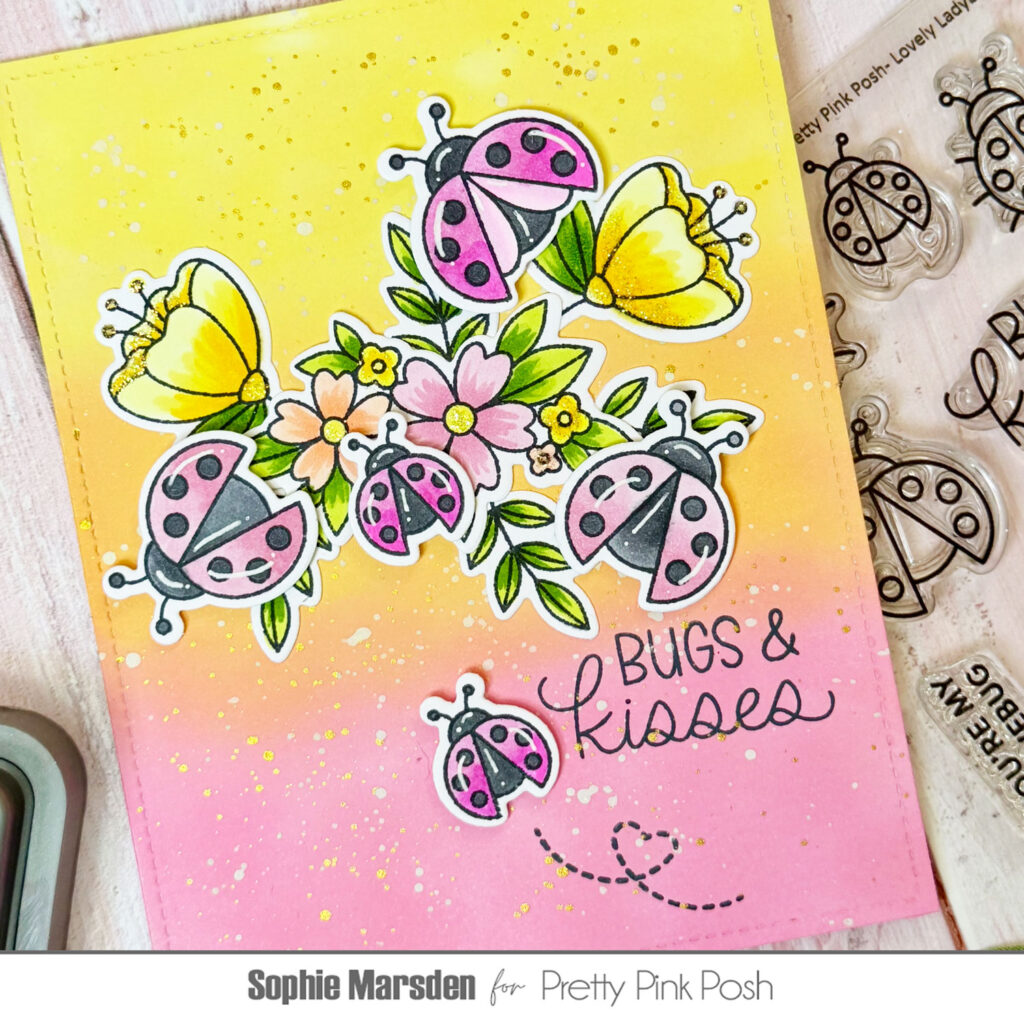
I started by die cutting a rectangular panel of white card and ink blending the background. I used Distress Oxide inks in shades ‘Squeezed Lemonade’, ‘Dried Marigold’ and ‘Kitsch Flamingo’. To add texture, dimension and a touch of subtle sparkle I added splatters of gold and white paint. While the background was drying I started on the main decoration pieces.
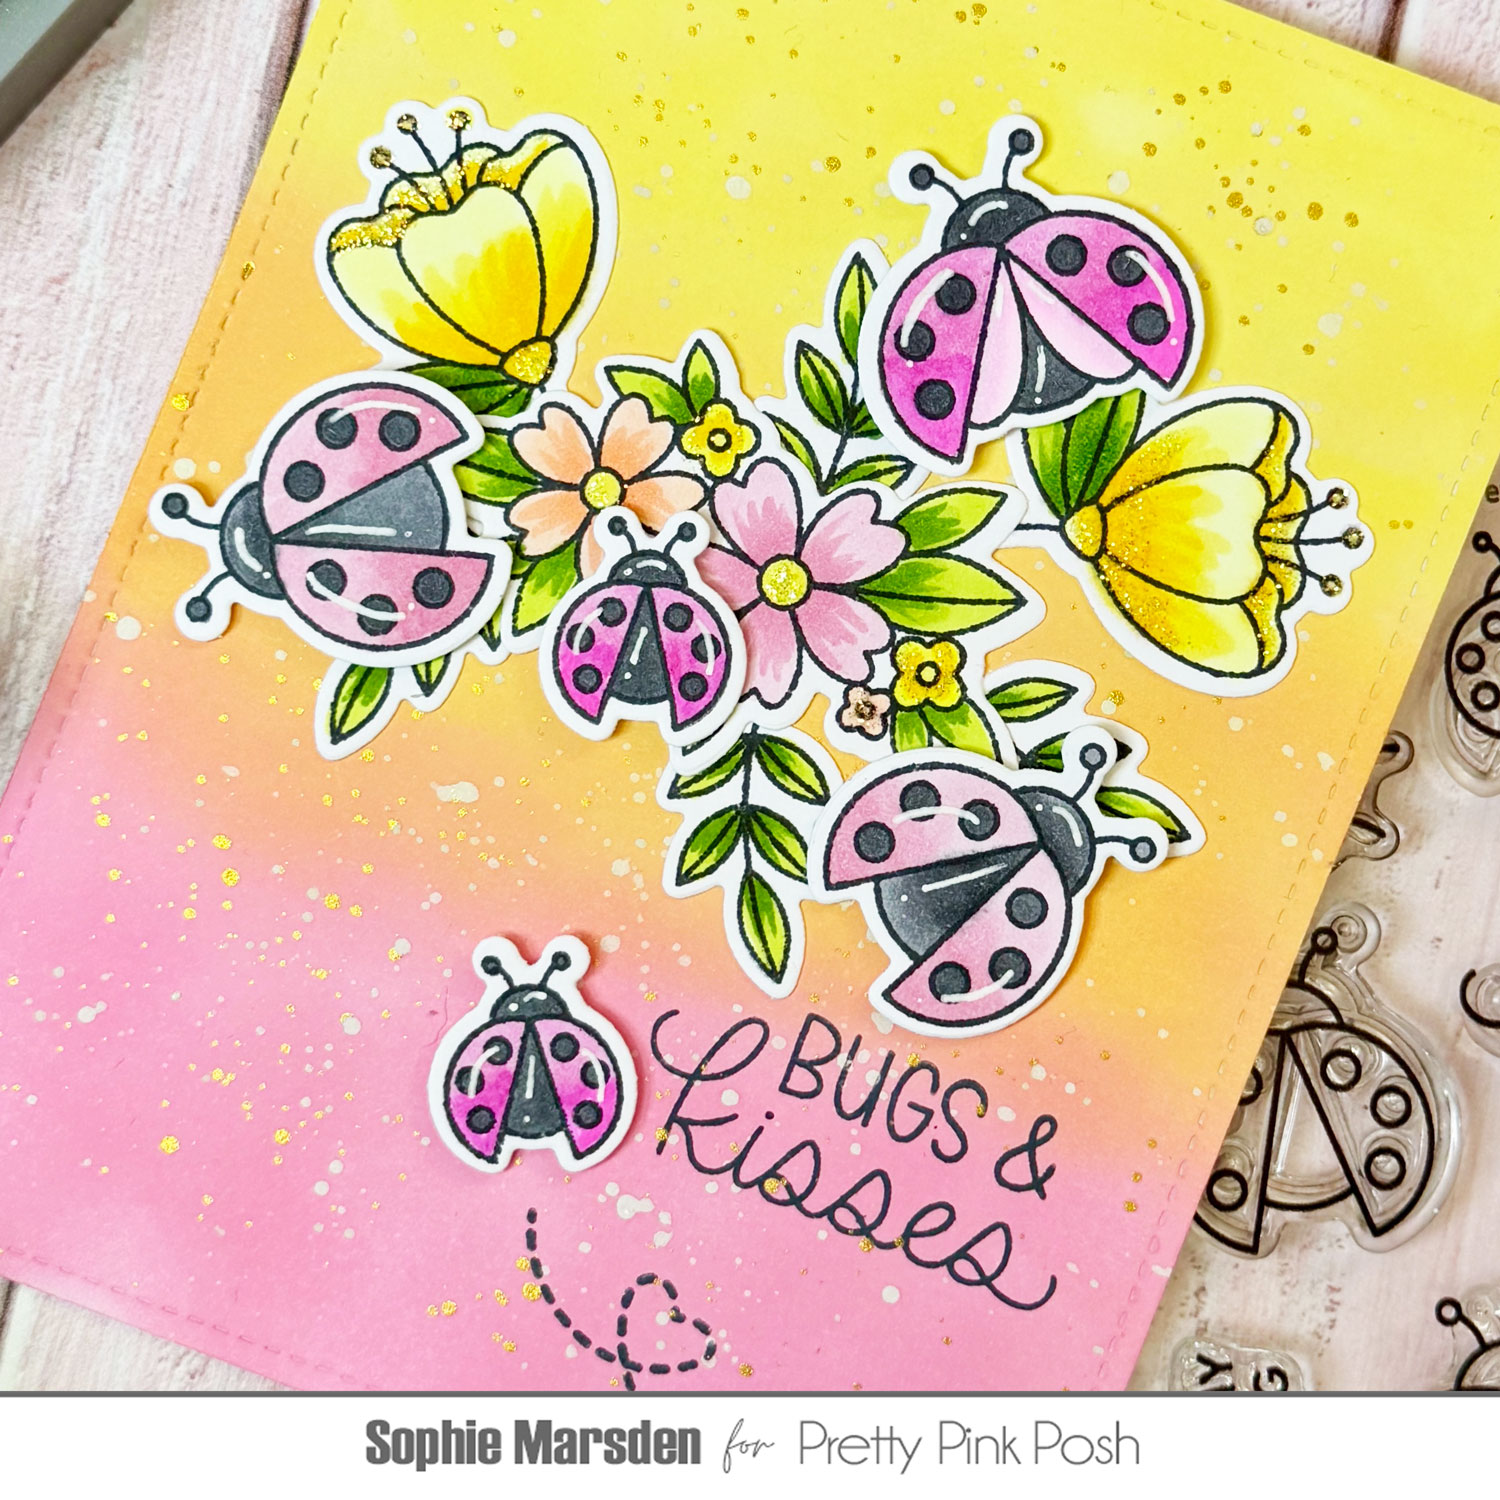
The ladybugs pair perfectly with the florals from the Hummingbird Floral Stamp Set so I stamped and die cut a number of flowers and ladybugs. I wanted to tie in the colours I used in my stamped images with the colours in the background so I chose a variety of Copic markers in shades of pink, orange and yellow. I really love colouring the ladybugs in pink instead of the traditional red and I think they look so pretty!
I added the main floral piece to the centre of my card and then adhered the ladybugs using foam squares for depth. Once everything was adhered in place I then stamped my sentiment (always scary stamping your sentiment last!) and added an extra ladybug zooming around – the heart shaped trail is so cute!
I’m all about the sparkle so I just had to finish the card by adding some glitter glue to the flowers along with a few highlights in white pen.
I hope everyone is loving this release because I know I am and I had so much fun creating this card!
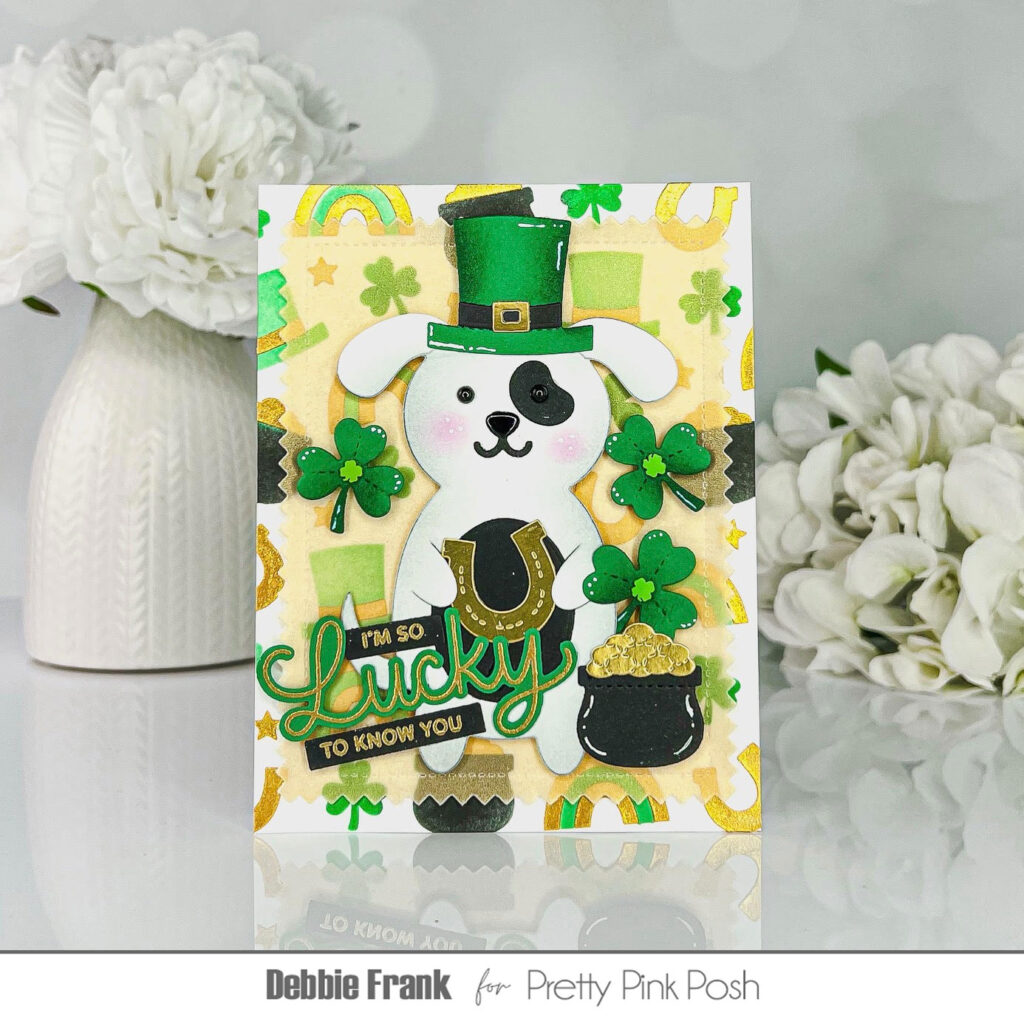
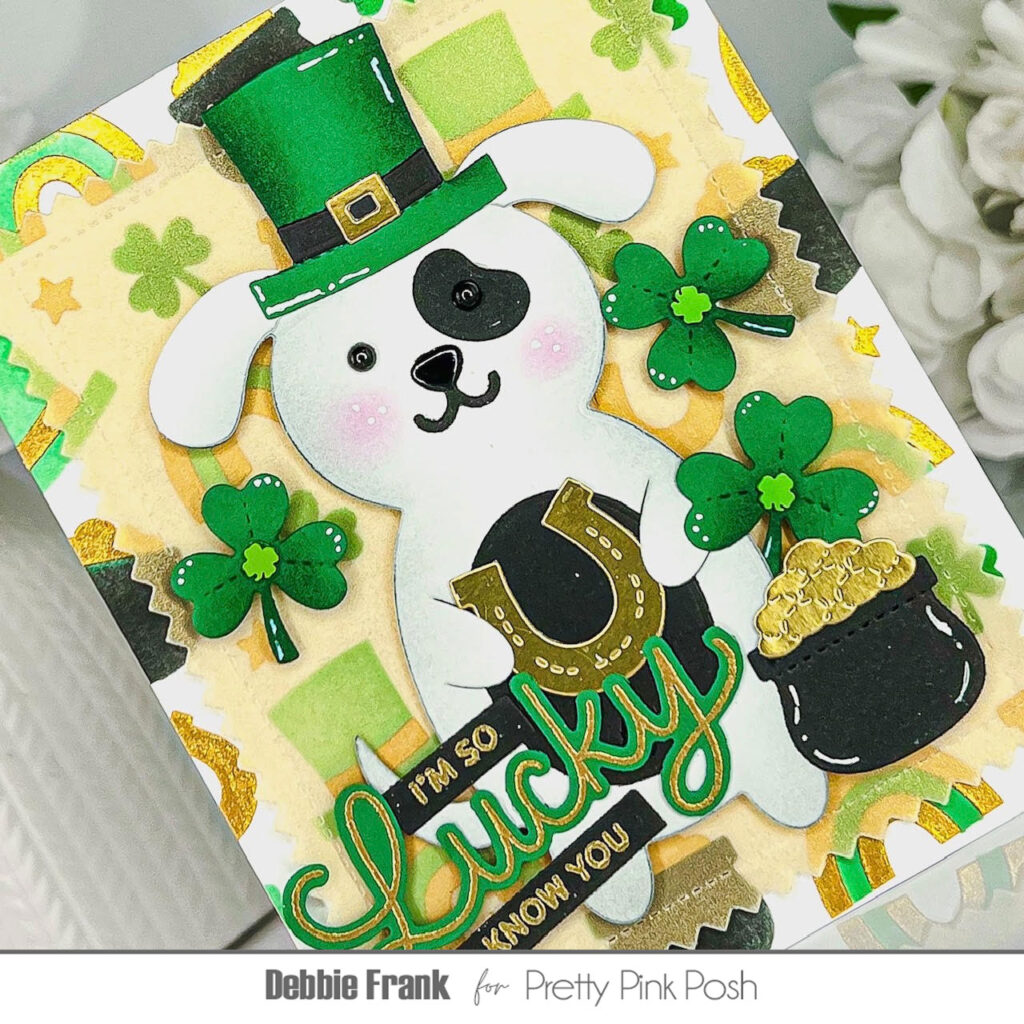
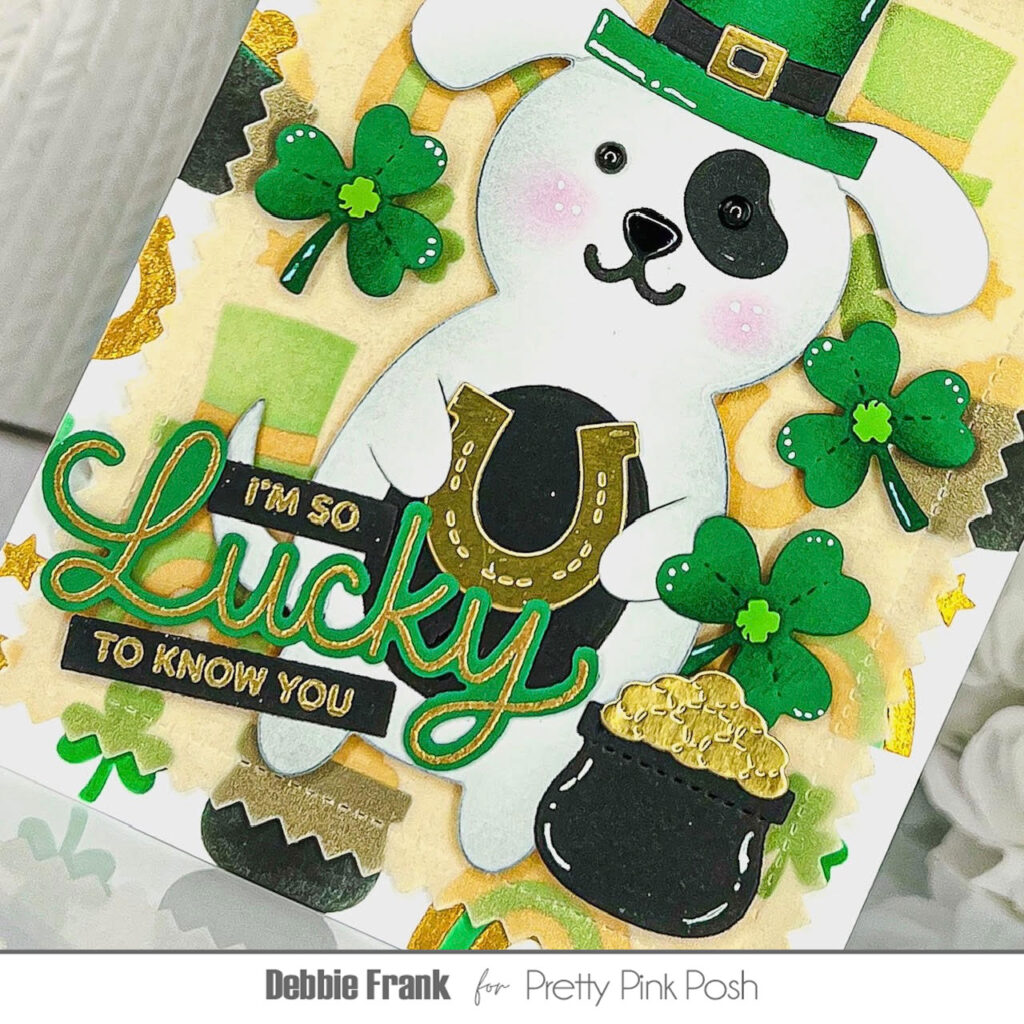
Hi friends, Debbie here with the new Valentine’s Day/St. Patrick’s Day Release! When I saw the new Lucky Holder Addition Dies I knew I had to bring out one Lucky Dog with the Dog Holder Dies!
I started off by die-cutting out a few of the items from the Lucky Holder Additions, because he is so lucky he needs more then one horseshoe in his paws!
As I wasn’t completely sure on what color I wanted the dog to be. So I started off by ink blending the Layered Lucky Items Stencil onto a standard A2 panel. With the stencil layer A over the panel on a grip mat, I ink blended on green for the shamrocks and in the one stripe of the rainbows, black ink for the pot of gold! Then with the Layer B I applied a thin layer Gold Glitter Paste, set it to the side to dry.
I knew now that I wanted the Dog Holder Diesto be a white dog with a black spot over the one eye. Giving him a little shading with gray ink blending on the outer edges for some dimension. Add a little rosy cheeks and Onyx Pearlsfor the eyes.
Next, with the largest Pinking Rectangle Dies I die-cut it out some gold vellum in my stash. This will make the Dog Holder stand out but you can still see the Lucky Items on the panel.
I adhered it all together and attached to the vellum Pinking Rectangle. Then one the back side I had places to hide the liquid glue when attaching the vellum to the panel.
Then final touch I added the clay shamrocks from the Lucky Mixto the center of the die-cut shamrocks. And then add white highlights and Glossy Accents to the nose.
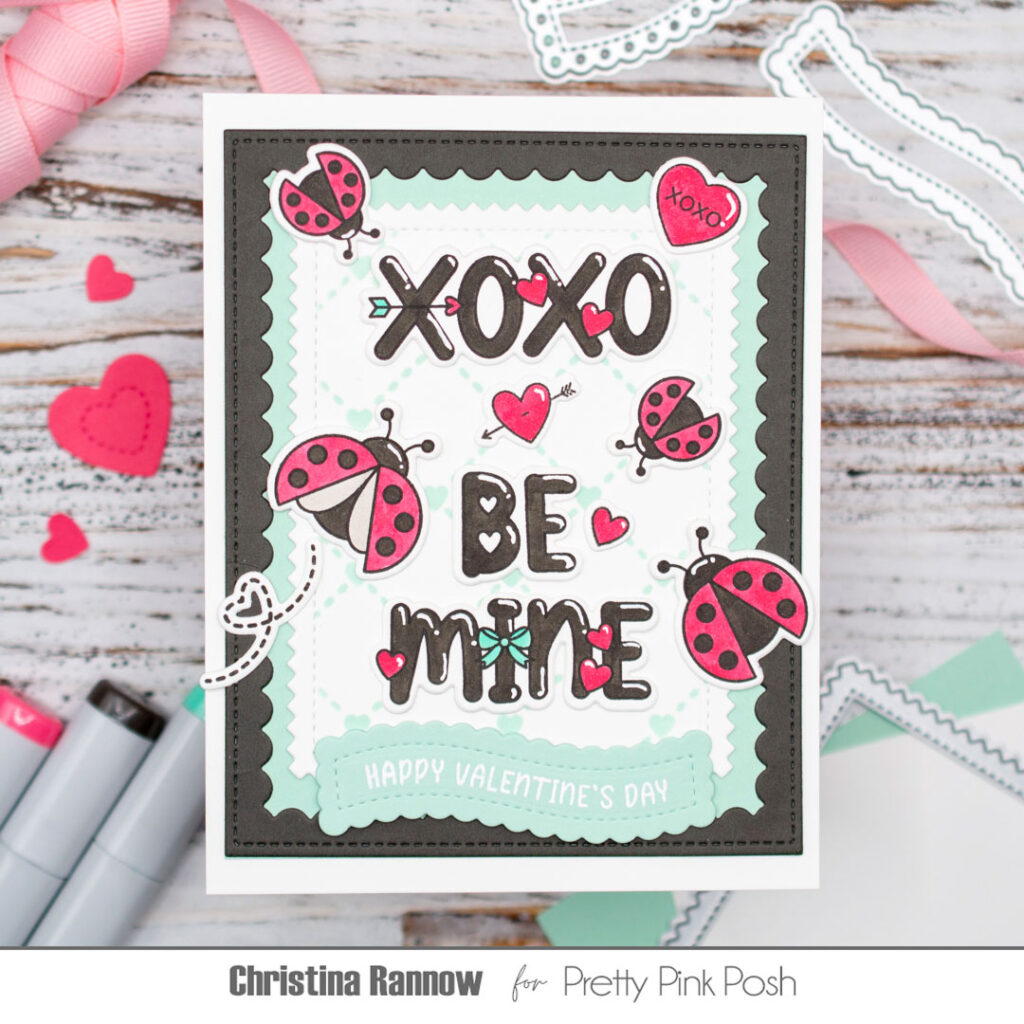
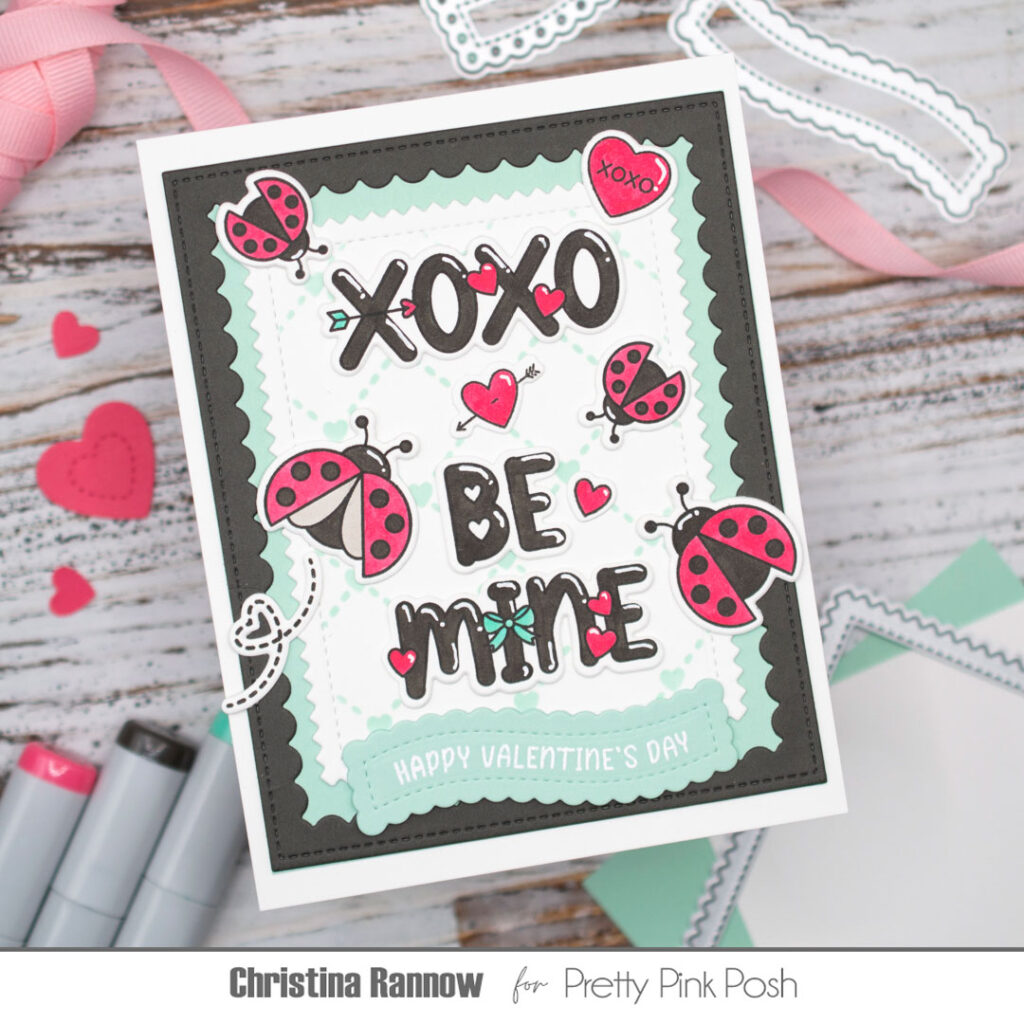
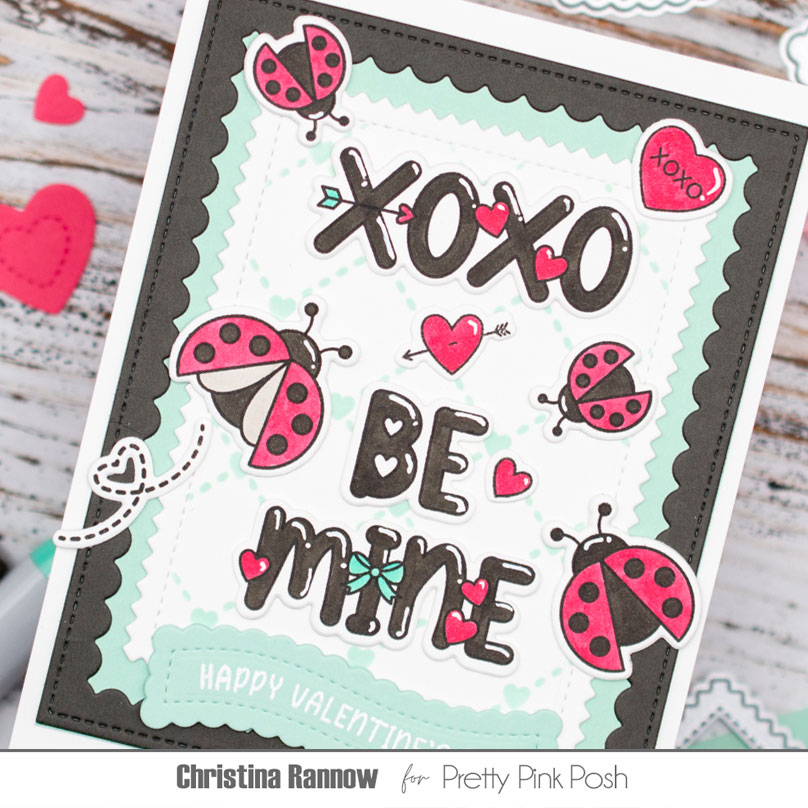
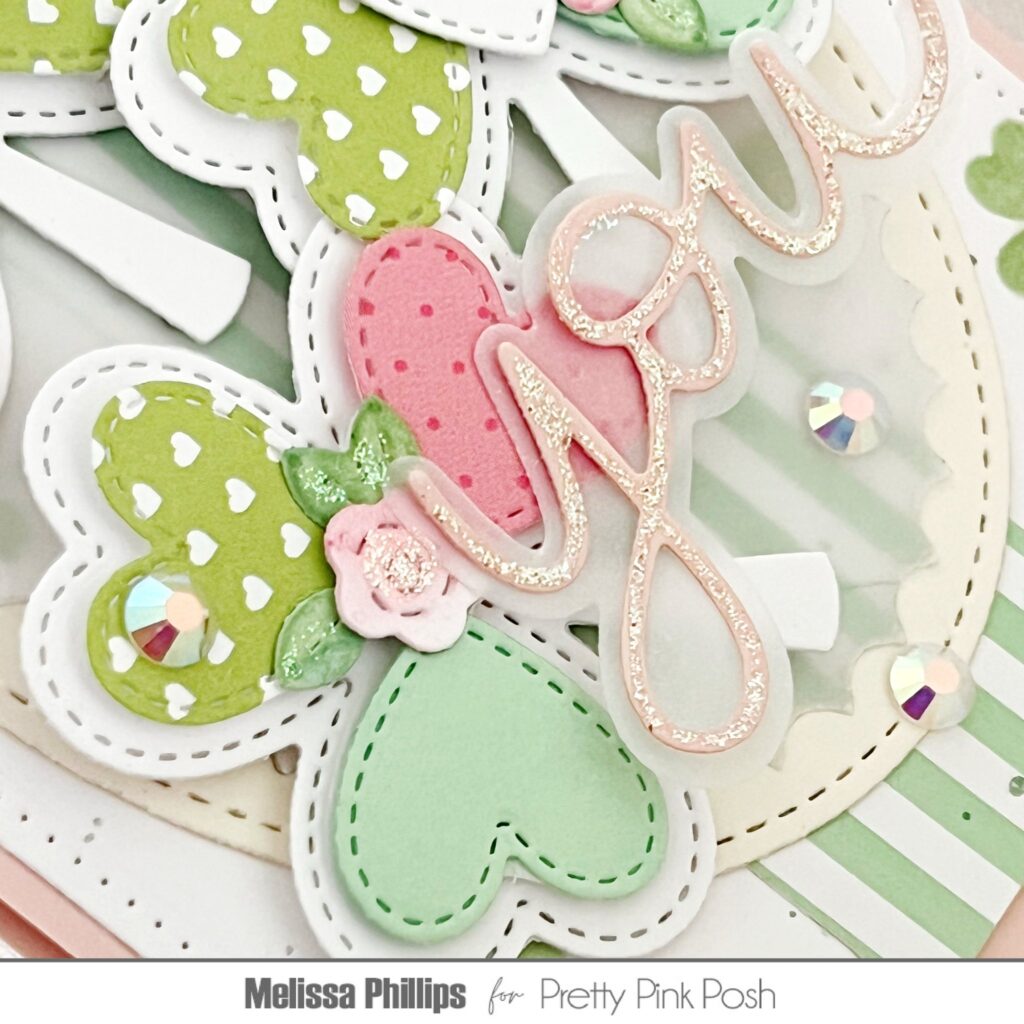
Hi friends! Christina here to share a darling Valentine’s Day card with you featuring two new stamp sets from the latest release. I used the Lovely Ladybugs and Valentine Word Scenesstamp sets to create this super cute design. I colored the images in a simple color palette of watermelon, minty green, and charcoal gray and placed them on a dainty Layered Heart Latticebackground. Take a peek at my supply list, and then we’ll get started!
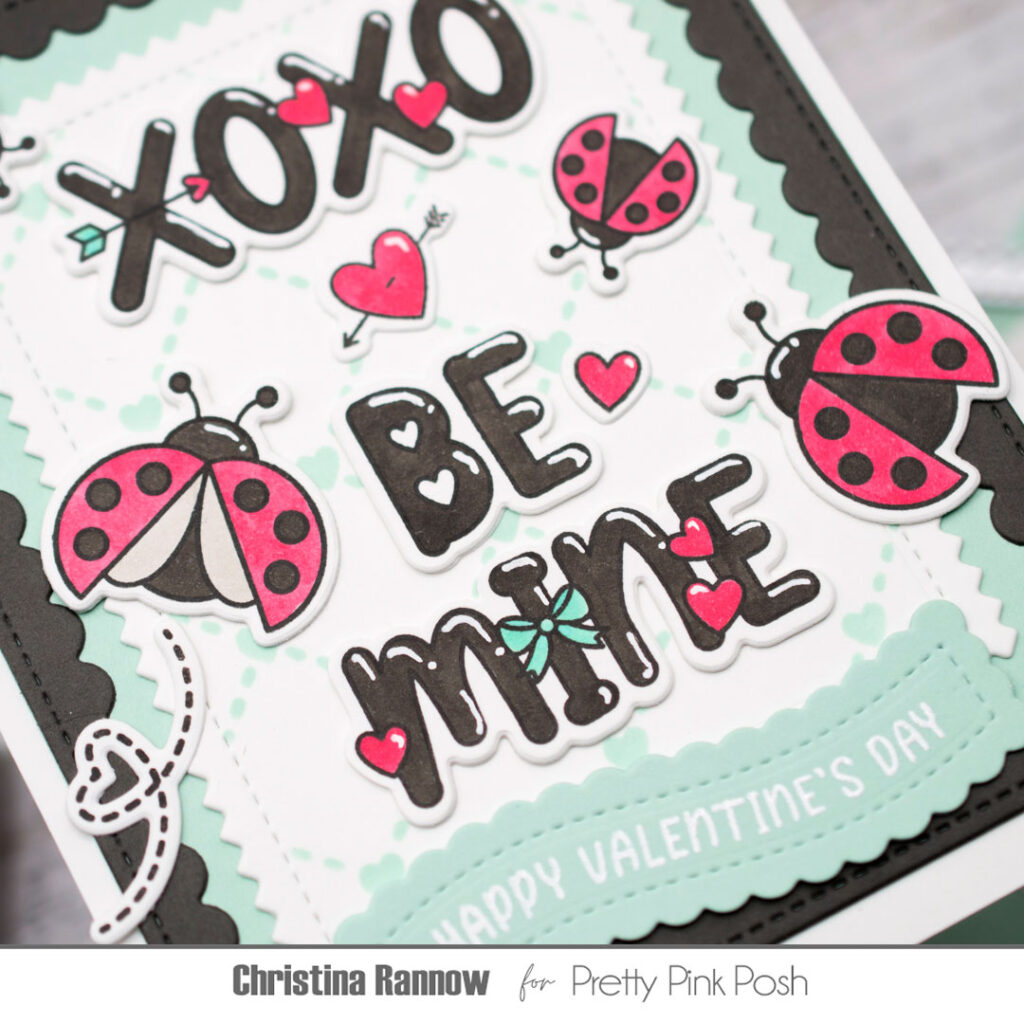
I started my card design by stamping the Lovely Ladybugimages and the Valentine Word Scenes with black ink on white cardstock. Then I colored all the images with Copic markers W3, W7, RV14, and BG34. I used the coordinating dies to die-cut the images and did a little fussy cutting on the “Be Mine” word scene to separate them so I could stack them on my card front to better fit my design layout.
My next step was to stencil the Heart Lattice pattern on a Pinking Rectangle panel with minty green ink. Then I layered this panel onto a coordinating minty green cardstock and finished with a charcoal gray Scallop Frame. I centered everything on a side-fold card base, giving the design a thin white border.
To bring the design together, I attached all the colored and die-cut images onto the lattice panel. I placed the word scenes first and then added the ladybugs flitting around the words and popped in a few heart icons. My last step was to add a Valentine Banner Greeting heat-embossed on minty green cardstock.
Thank you for checking out my Valentine’s Day card featuring some of the darling new products from the latest release. Have a lovely day!
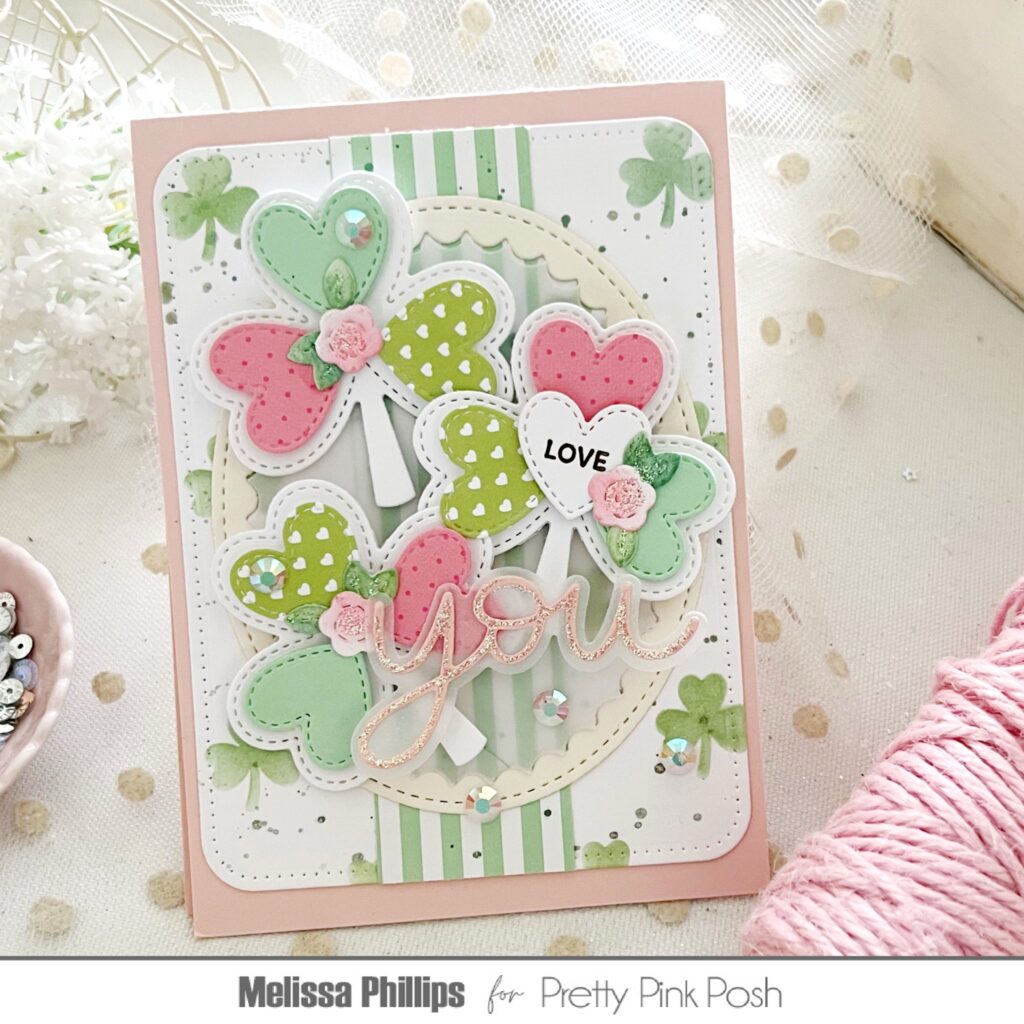
Hi, friends! It’s Melissa and I’m here with you today sharing a “Lucky in Love” card that combines hearts and lucky shamrocks in a fun and unique way. Let’s get started!
I pulled out the sweet Layered Shamrocks Stencils, which are a 2-step stencil, but I only used one of the stencils to create my background. I wanted a subtle look and wanted to be sure my heart clovers took center stage.
To help center my clovers and give them a bit of a landing space, I used theScallop Ovals dies, cutting the outer edges from a soft cream and the center from vellum. I attached them to the center of my card.
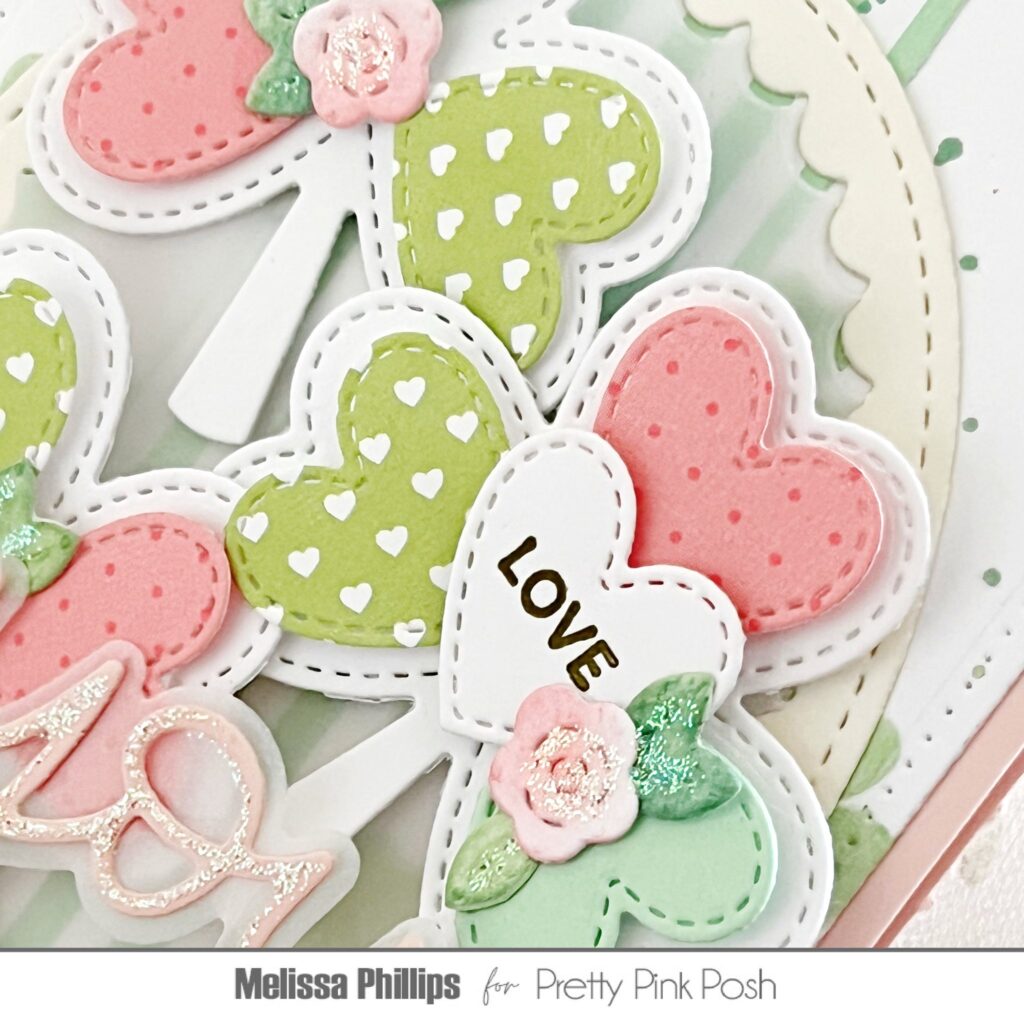
Next I cut three clovers using the Stitched Shamrocks diesand selected the solid image. Hearts cut from the Big Valentine Cupcake dies were just the right size to add to each of the leaves on the clover. I used three different colors and even added in some fun patterned paper to bring in extra character and personality.
For my sentiment, I used the Sentiment Strips: Valentine stamp set, stamping it on a white heart and then adding it to the center of one of my shamrocks. I then used the Love You Shadow dies for the second portion of my sentiment. I added some tiny flowers and leaves cut using the Big Valentine Cupcake dies, sequins, and Crystal Stickles glitter to finish. I can’t wait to give this to a dear friend!
It’s been such a treat to create for you today. Happy Valentine crafting! Thanks for visiting!
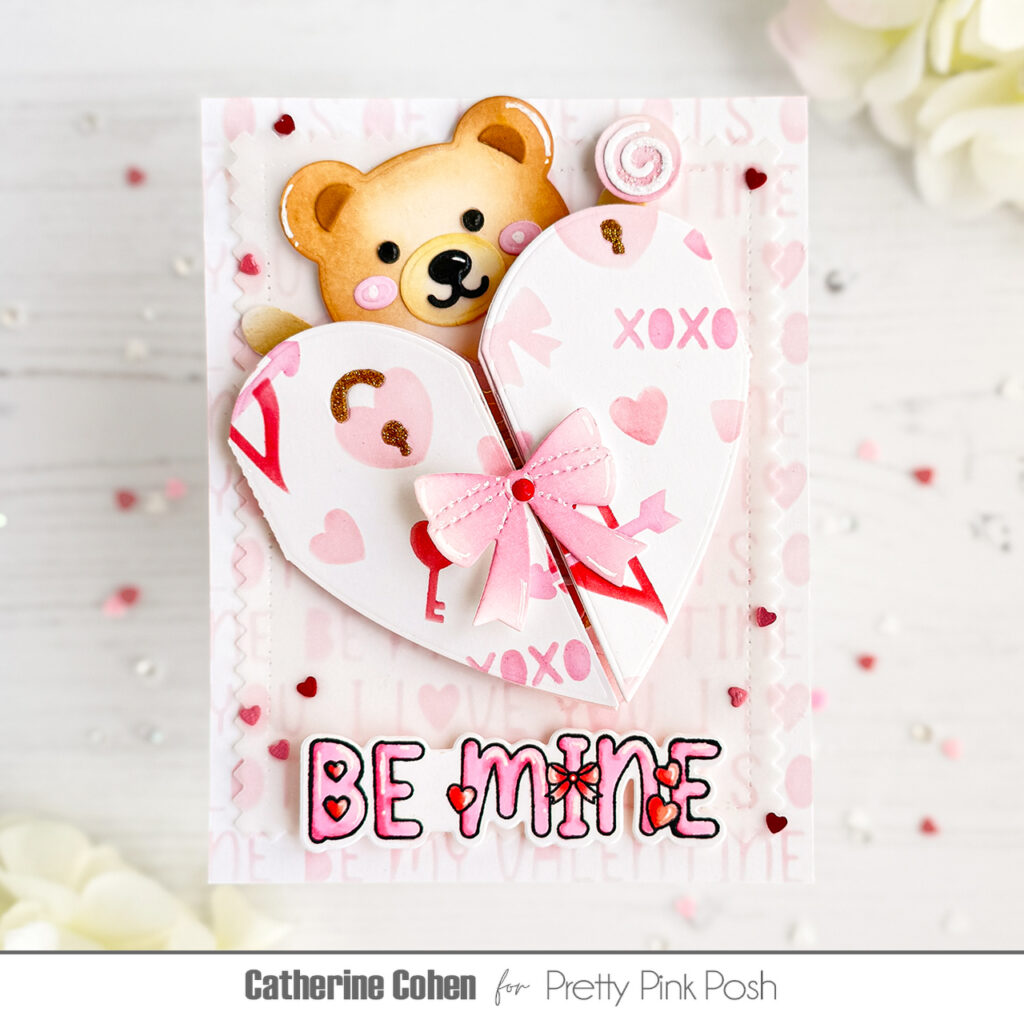
Hello Crafty Friends! Catherine here, I’m so excited to be sharing a sweet chocolate-themed Valentine created with the new BearHolder, Box of Chocolates, and Heart Card Base from Pretty Pink Posh’s latest release!This collection is full of adorable stamps and dies that are perfect for mixing and matching for endless creative possibilities!
I began by stencilling the background using the Love Words Stencil with Kitsch Flamingo Distress Oxide, then layered a soft vellum Pinking Rectangle over the top.
To create the chocolate box, I die cut theHeart Card Base from pink cardstock. I die cut the inner heart with white cardstock and softly ink blended the edges with Spun Sugar Distress Oxide.
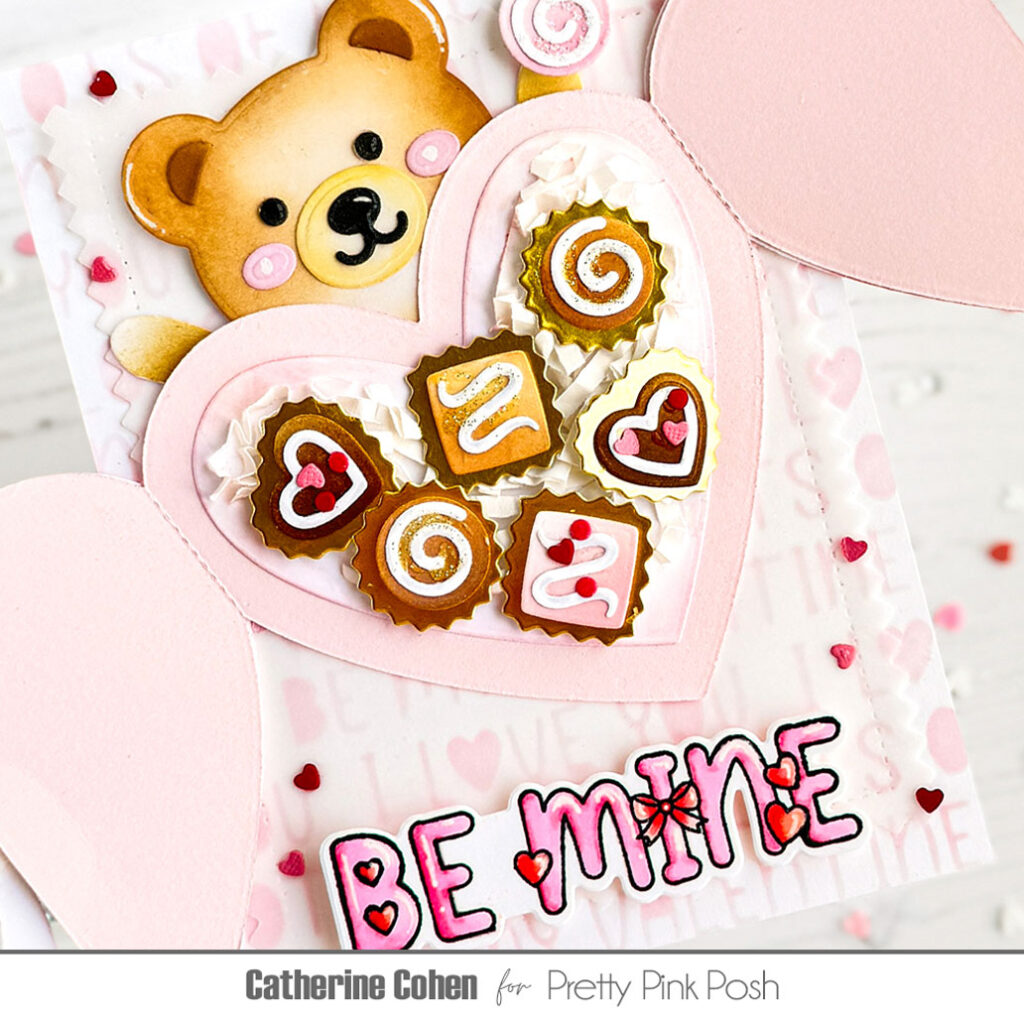
Next, I die cut the chocolate pieces and ink blended with the following Distress Oxides:
Pink: Kitsch Flamingo Light Brown: Tea Dye Medium Brown: Gathered Twigs Dark Brown: Ground Espresso
I added a touch of glitter and heart sprinkles to the chocolates then adhered them onto metallic gold wrappers.
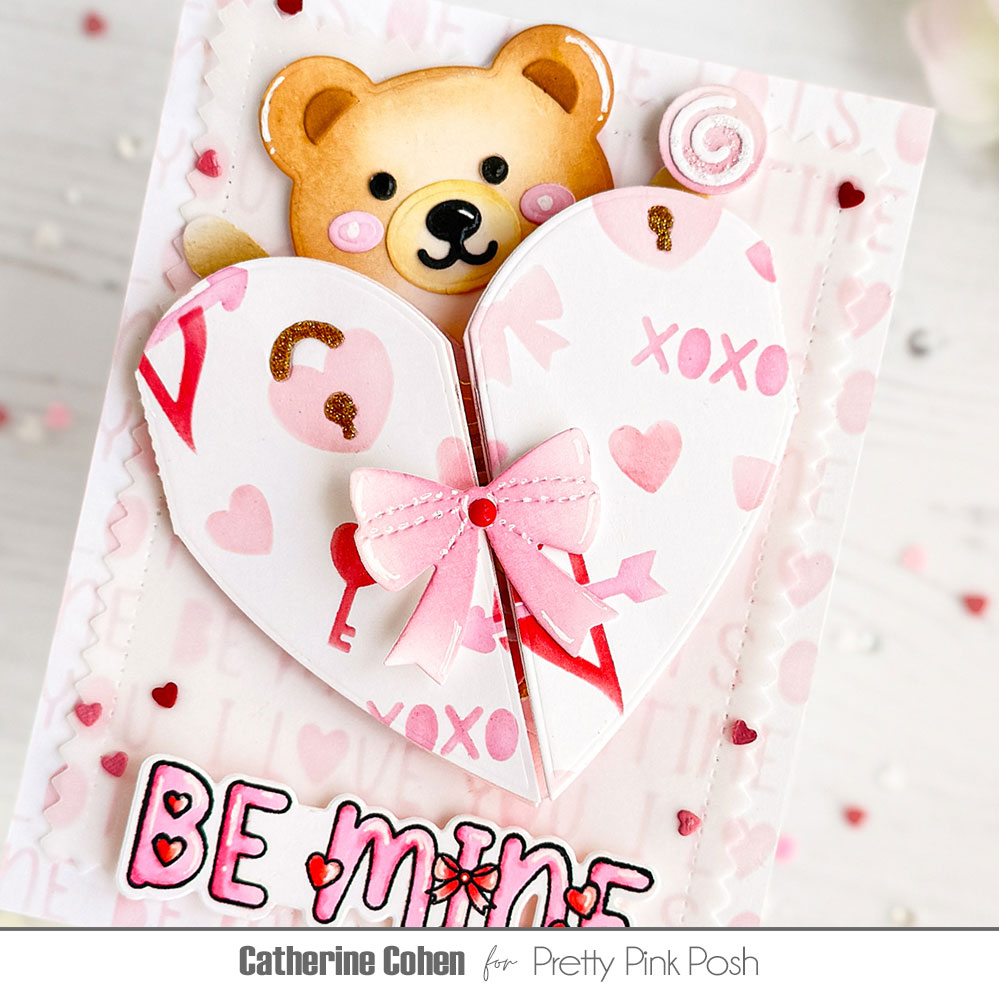
I glued a small amount of shredded white paper into the heart base, followed by the chocolate pieces. I added a bow across the center of the heart and secured it with a removable glue dot so the box can open and close.
For the bear, I die cut the Bear Holder and ink blended the bear with Gathered Twigs, Tea Dye, and Antique Linen. I added details with Black Sootfor the eyes and nose and Spun Sugarfor the cheeks.
I adhered the chocolate box onto the card front and tucked the bear behind it. To finish, I added a “BE MINE” sentiment from the Valentine Word Scenes set, colored with Copic markers; R32, R30, RV13, RV11, RV10.
Thanks so much for joining me today! I hope you enjoyed this sweet Valentine! 💕
Hello crafty friends, June here! I hope everyone’s as excited about the new Valentine’s & Saint Patrick’s Day release as I am. I always love bug-themed things, so when I laid my eyes on the Ladybug Shaker, I know that this release was gonna be a good one!
I think this die would look amazing in traditional ladybug colors, but I decided on a brown-pink-yellow combo instead. Even though it was very cold when I made this card, I must’ve been in a spring-y mood judging by that color choice. I cut everything out of white cardstock and did some ink blending on those pieces so I could easily get the multi-colored look. I love how there’s the option of either dots or hearts to go on its wings, and since I wasn’t going for the look of a real ladybug anyway, I used the hearts. The shaker bits I added inside were older ones, the Chocolate Shaker Beads and the Paradise Shaker Beads.
I had loads of fun creating this background. I knew I had to include the Layered Ladybugs Stencil that perfectly matches the shaker, but I wanted it to be quite subtle. What I ended up doing is creating a tone-on-tone look using pink inks inside of the Watercolor Oval Mask. I added a bright mustard shade to the outside to bring back the color of the hearts. I also splattered darker yellow ink on the outside for some extra texture. I’m still so in love with both of the Watercolor Mask stencils, they’re a great way to bring a pattern into your card design without having to go for a full patterned background each time. They’re so insanely fun to play around with!
I cut my ink blended panel with the largest of the Pinking Rectangles. I’ve been loving matting my card panels lately, so I trimmed a piece of beige paper to be a bit larger than the rectangle and backed both of those onto my slightly larger cardbase. Lots of little details!
I couldn’t decide on just one sentiment, so I added two! Of course, the ‘Bugs & Kisses’ from Lovely Ladybugs was a must, but I also wanted to use one of the new banner shapes from Banner Greetings 2, so I also picked a fitting sentiment fromValentine Banner Greetings to fit inside. I stamped both of them in brown to bring back the color of the bug’s body.
I feel like I got to use all my favorites from this release on one card! All of the bug-themed products, the new stackable rectangles and the new banner shapes. Valentine’s cards are always so much fun to make, but I feel like these items are gonna be staples for me all year round, even the lovebugs.
I hope you enjoyed reading about my card as much as I enjoyed making it. I hope to see you again soon, bye!
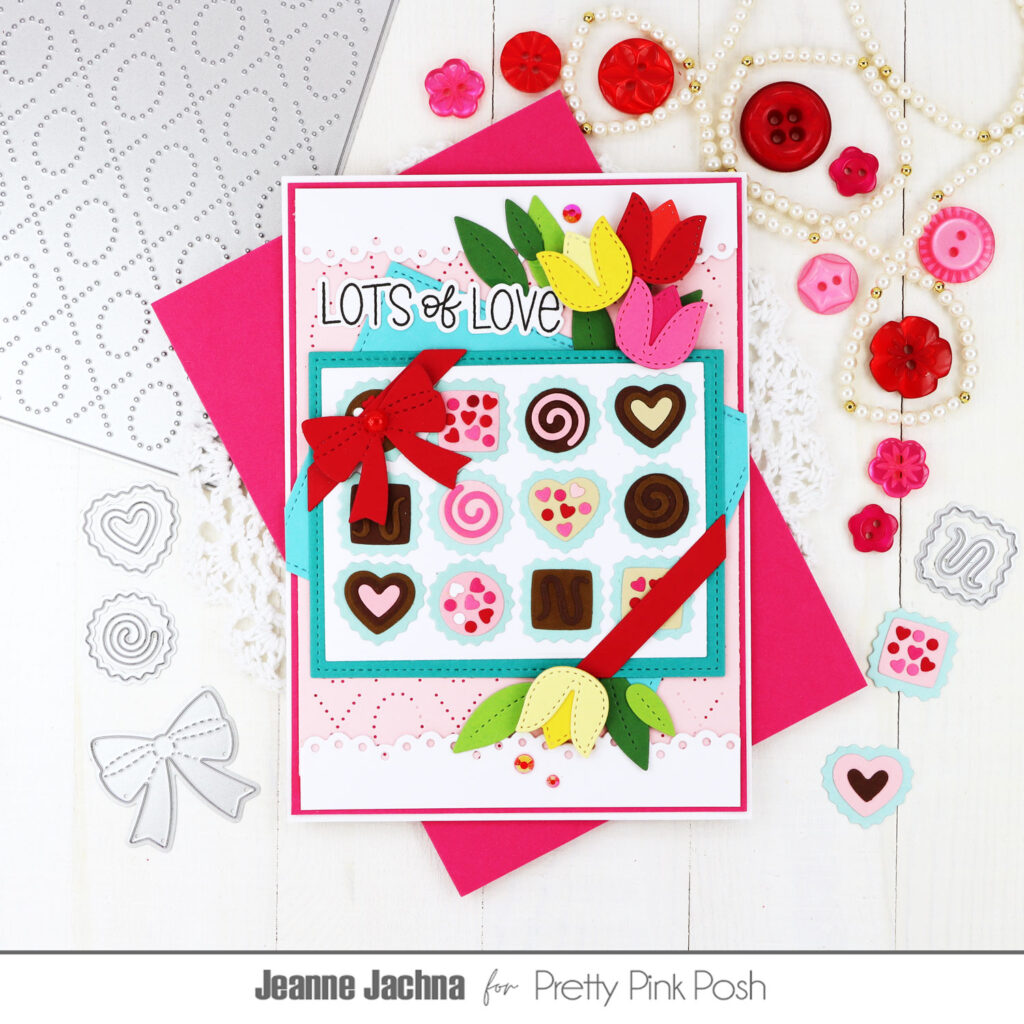
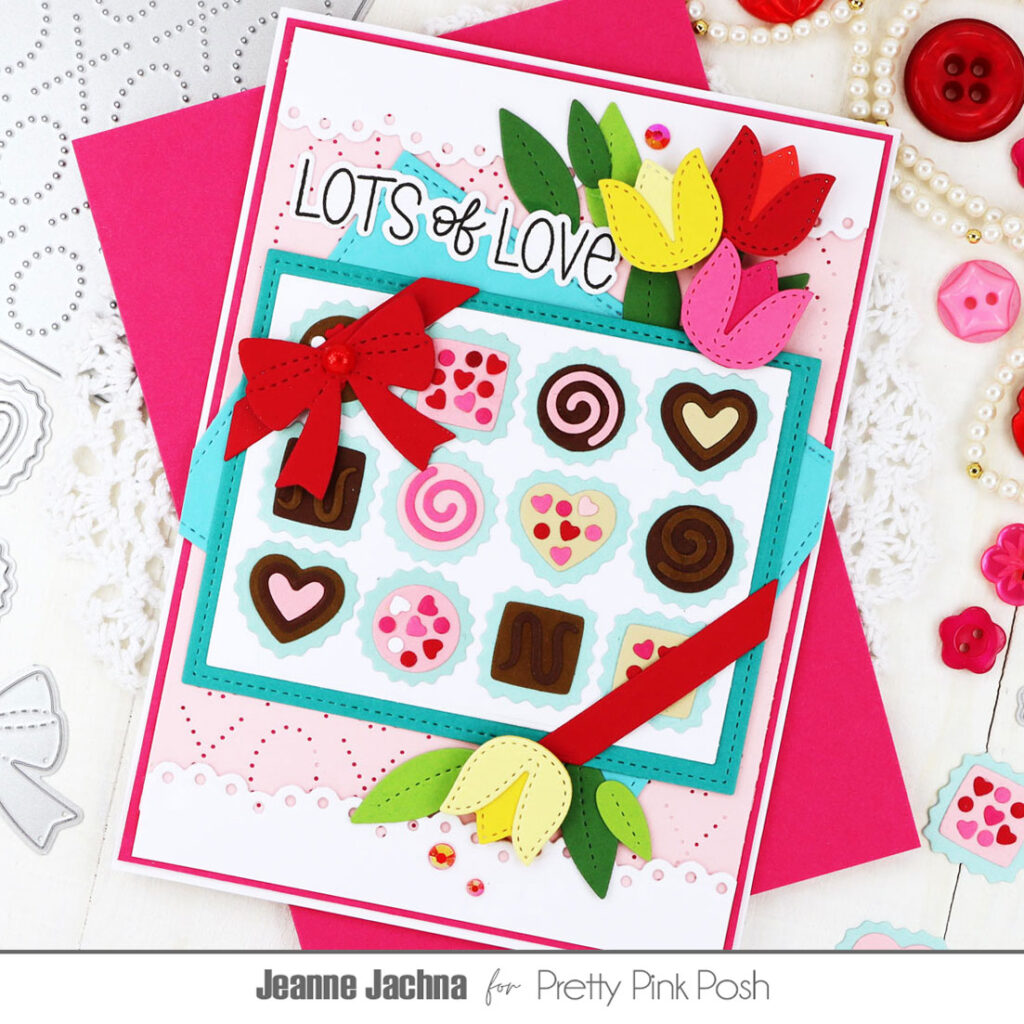
Hi friends, Jeanne here with you. Today we’re sending lots of love with some sweets made from the Box of Chocolate die setfrom Pretty Pink Posh!
The card starts with an XOXO Pierced Plate A2 cut from light pink cardstock. Because I placed the panel on a larger card base there were gaps along the top and bottom edge of the card. No problem because I added some lacy border die cuts so you don’t even know they were there!
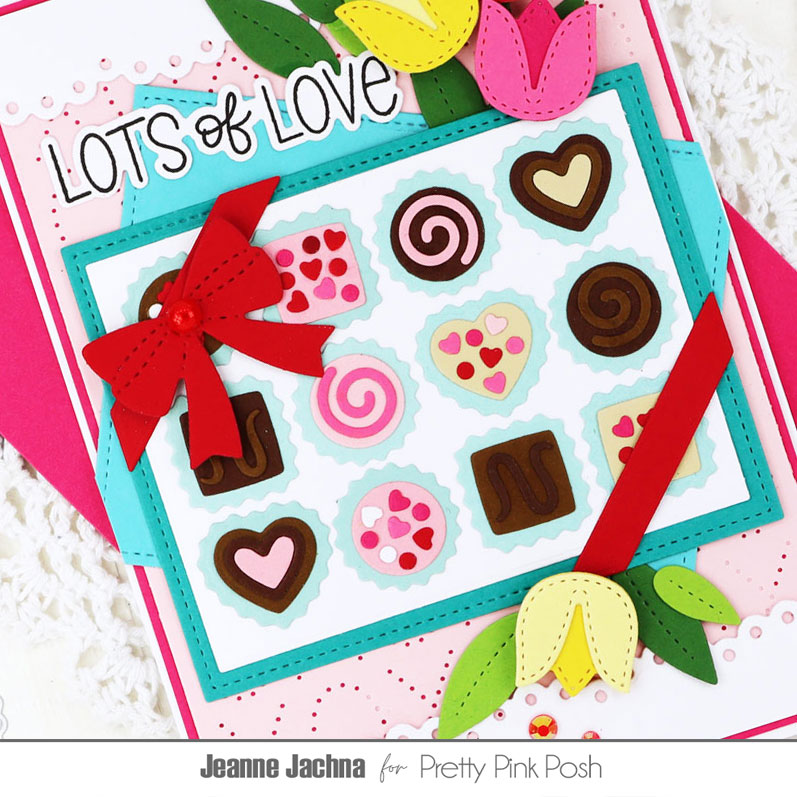
The box of chocolates was fun and easy to assemble. I cut chocolates from dark, milk, pink and white chocolate so there is a little something for everyone. Toppings of swirls, hearts and sprinkles makes them extra tempting!
Because the box is open, I added the lid underneath and put the bow wrapping along the corners. The only thing that could make them sweeter was a few florals – the hard part is choosing which ones to use. These are from the Spring Mug Additions. The sentiment is from the Valentine Greetings – I love how the dies fussy cut the letters!
Sweets for your sweets wrapped and ready to deliver! Thanks for stopping by!
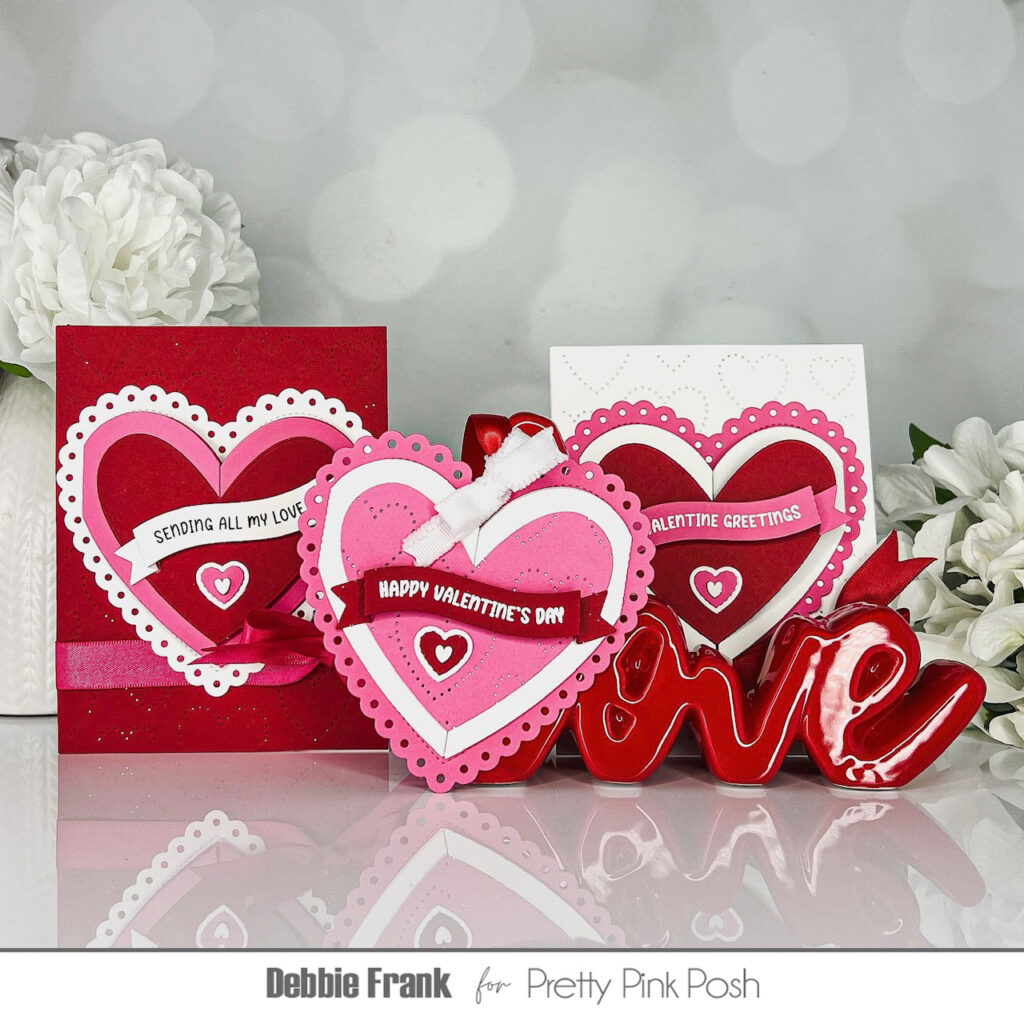
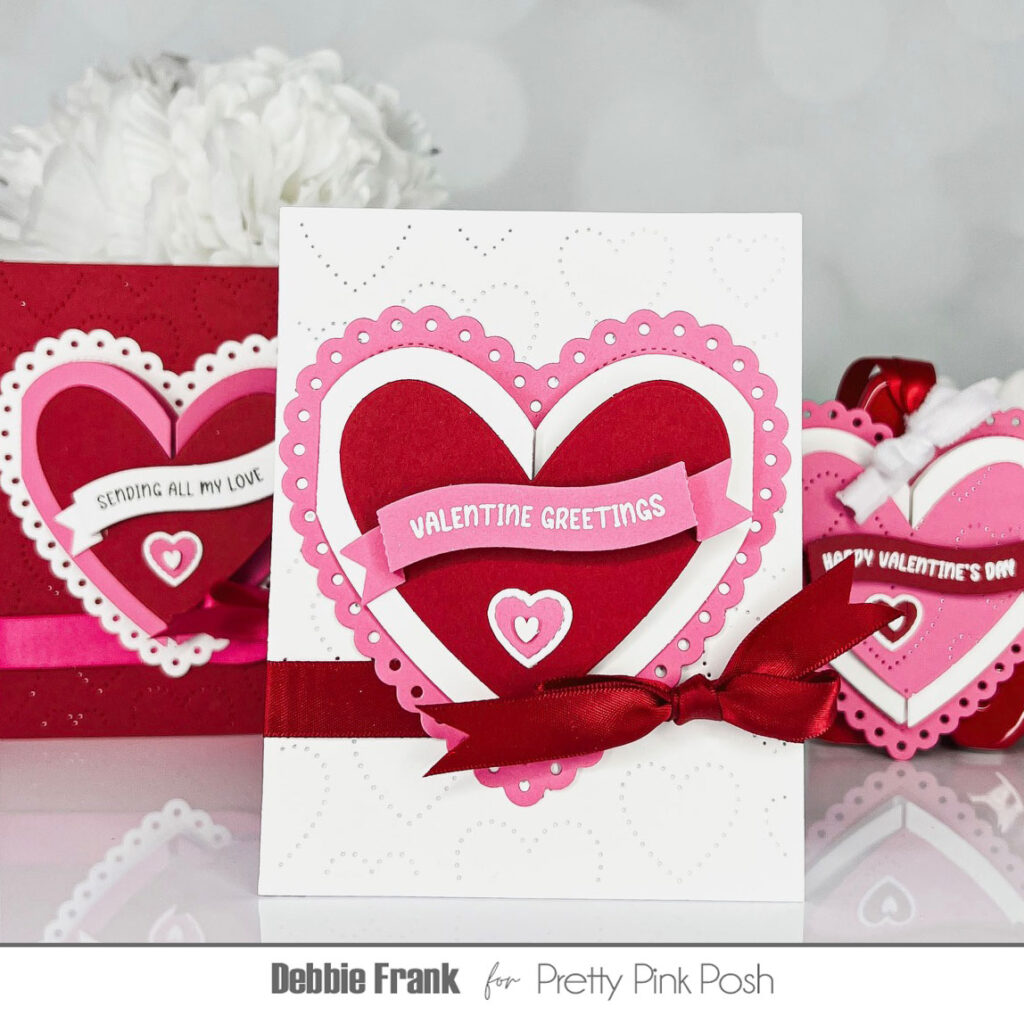
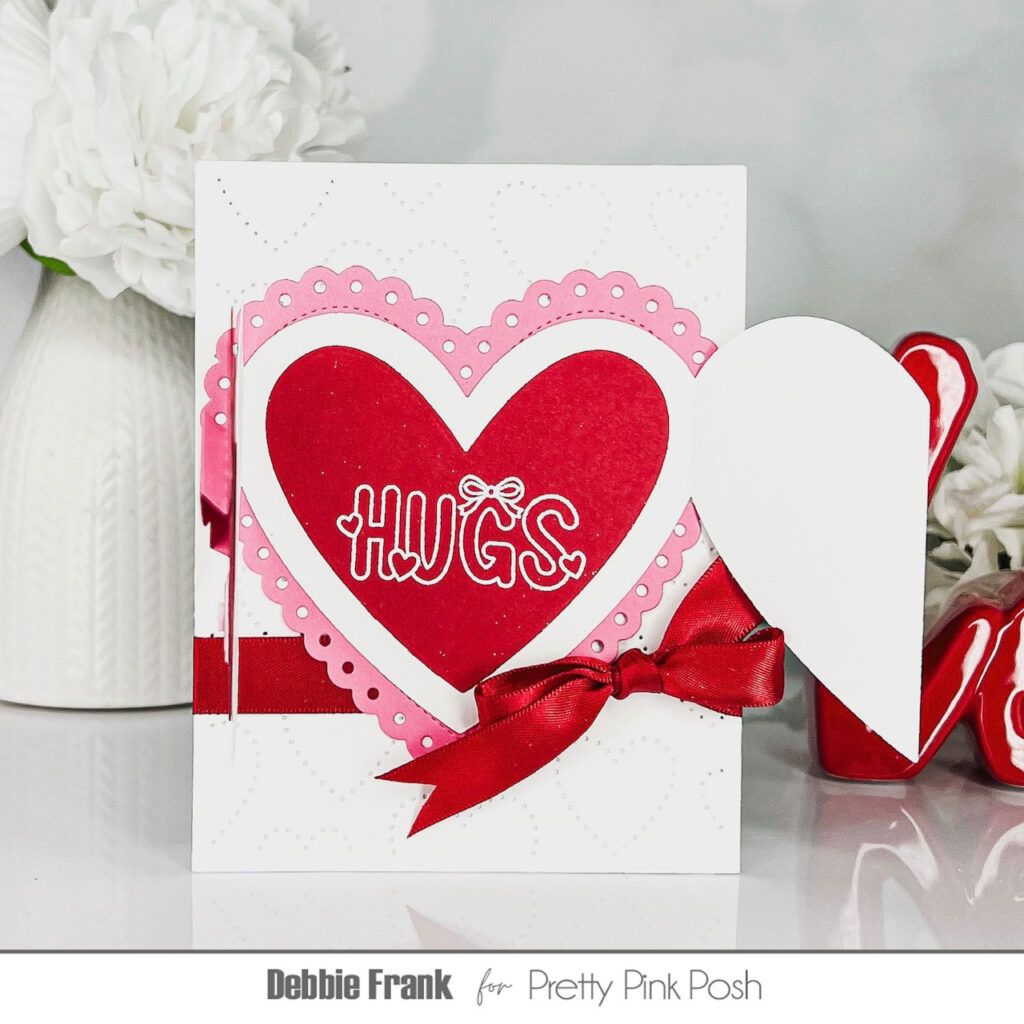
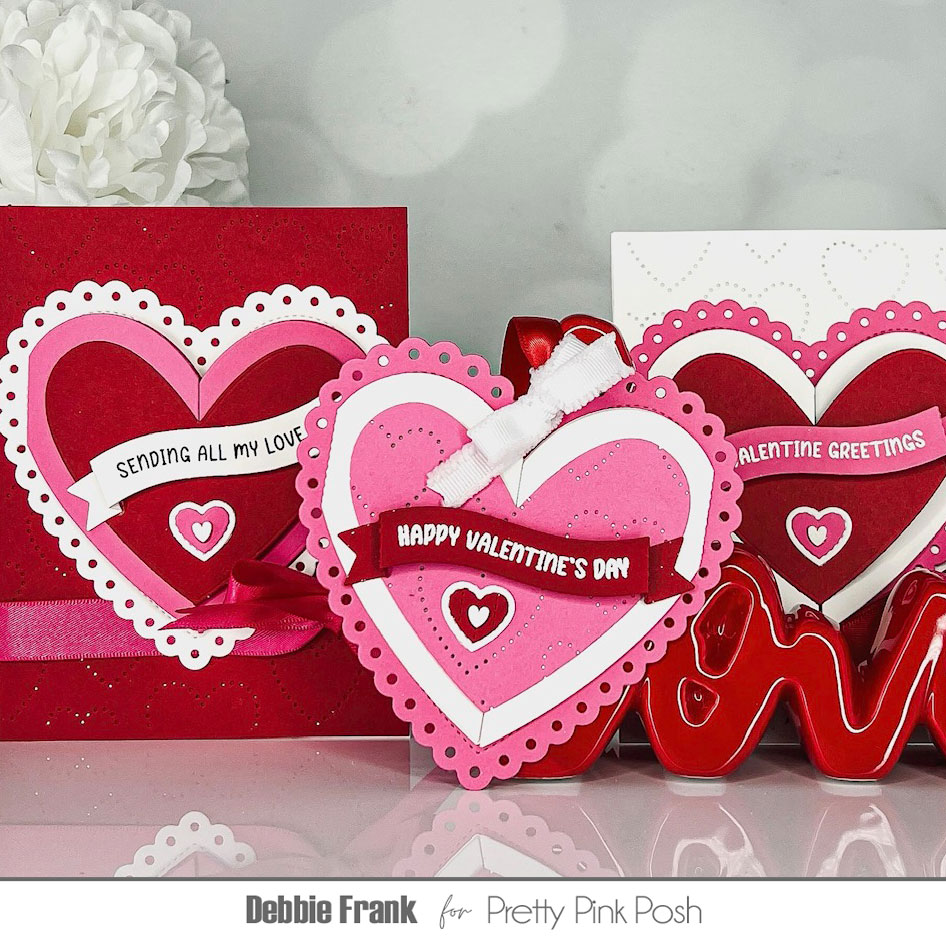
Hi Crafty Friends, Debbie here with the new beautiful Heart Card Base from the Valentine’s Day/ St. Patrick’s Day release. I love that the Heart Card Base Diecan be used as a card or tag for any loved one with a special message or a sweet little colored up image inside.
To start off I die-cut out the Heart Card Base Die from a solid white card stock. Then with the inner heart die I die-cut it out of red stock and adhered to only one side of the Heart Card Base. Next, with the largest Eyelet Hearts DieI die-cut it out of light pink card stock and attached the Heart Card base to it.
With a standard white A2 card panel I ran it through with the Pierced Heart Plate Die for my background.
I then die-cut another inner heart die piece to attach on the inside of the card base for my sentiment. But first with the Valentine Word Scene stamp set I stamped and white heat embossed the “HUGS” and attached to the inside of the Heart Card Base.
With the Valentine Banner Greeting stamp set I stamped and white heat embossed “Valentine Greetings” and with the Banner Greeting 2die-cut it out for my sentiment for the front of the heart. Adhering it to the red heart on the front of the Heart Card Base, adding some of the smaller heart dies from the set and in the centers I used the small clay hearts from the Sweet XOXO Mix.
With red ribbon from my stash I wrapped around the Pierced Heart panel and tied a bow and then attached my Heart Card Base with liquid glue.
With my tag I did the same process but with the inner pink heart I ran it through with the Pierced Heart Plate Die to give it some texture before I attached to the Heart Card Base. I ran my ribbon through one of the Eyelet Heart Die holes.
I hope you like my cards and tag! I do feel like this could be a mass produced card for Valentine’s Day.
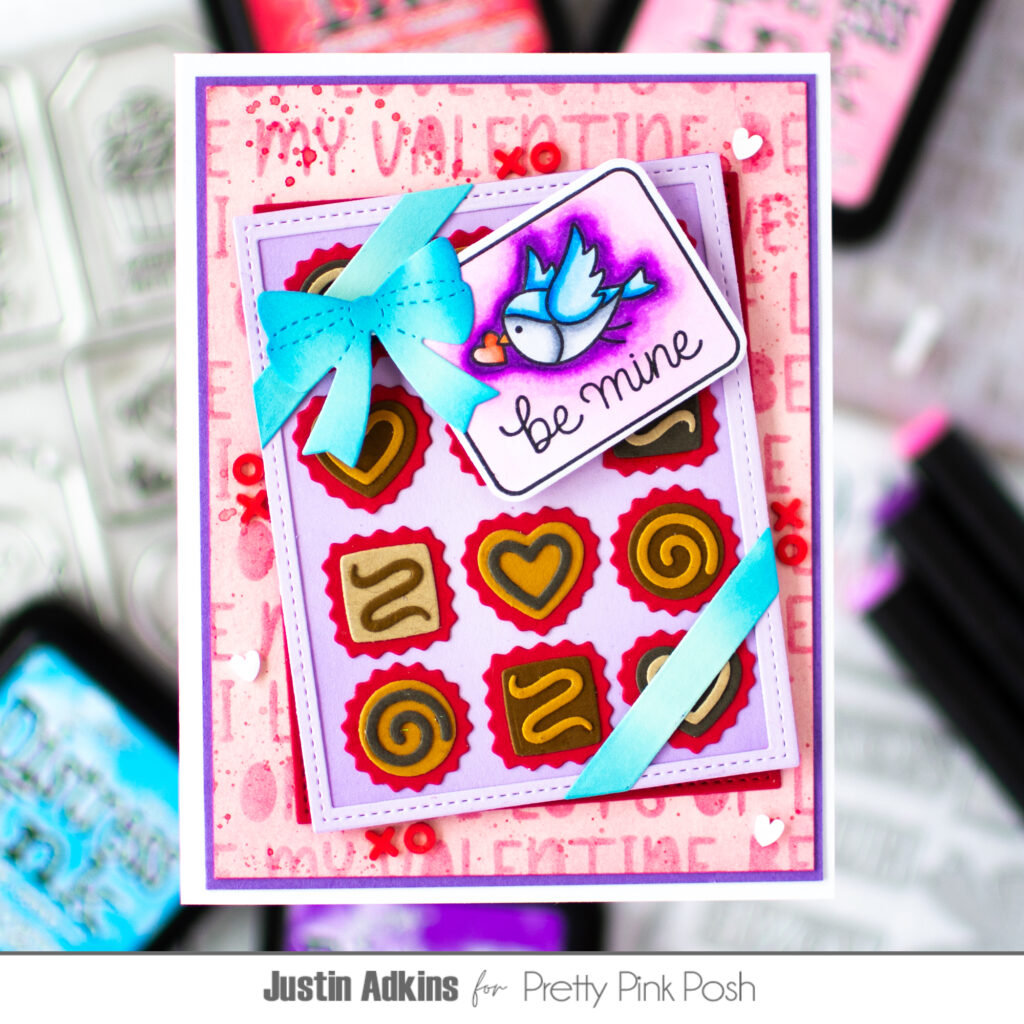
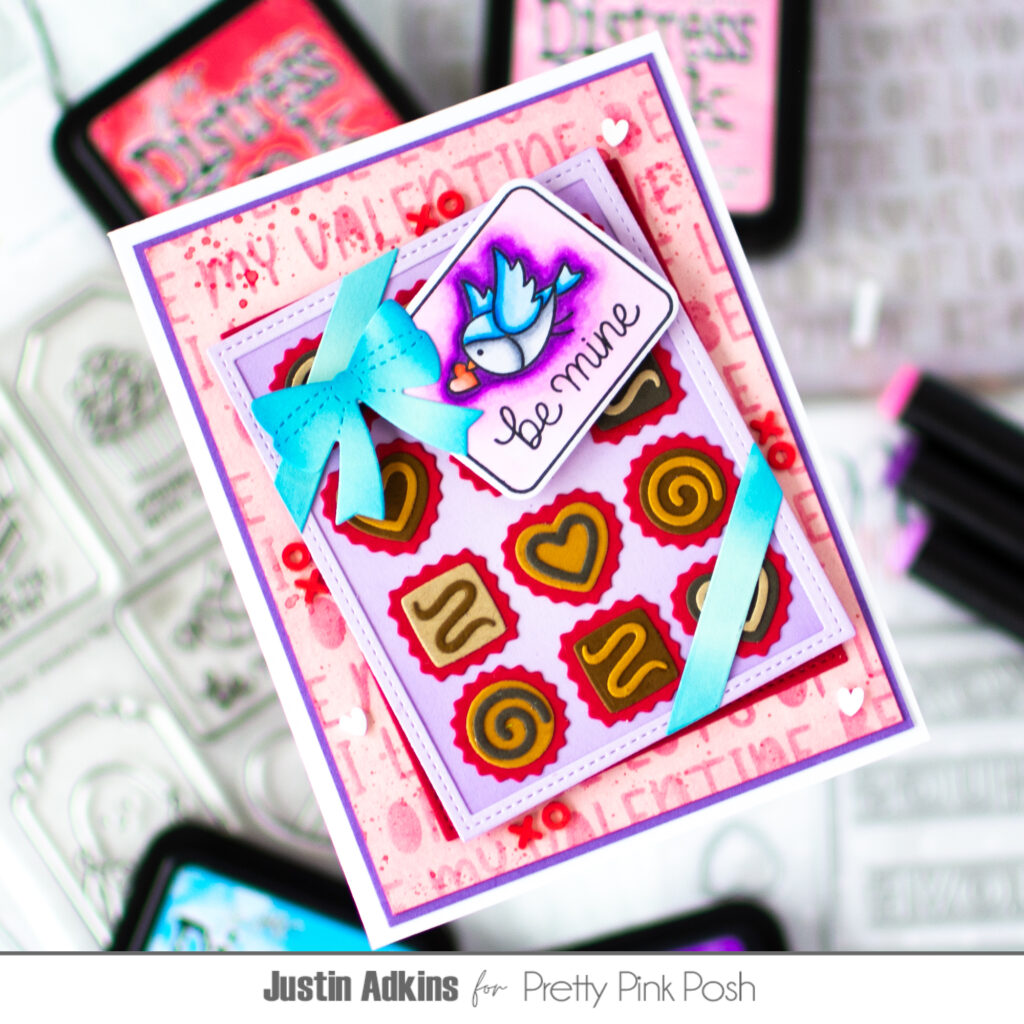
Hello, friends! Justin Adkins here, and today I have some sweet and chocolatey inspiration to share with you using some brand new products from the Pretty Pink Posh January Release! I adore the new Box of Chocolates Die Set, and I love how it takes up such a large portion of a standard card front! I thought of a fun way to combine this set with the Valentine Tags set that I think will truly put the bow on top of your Valentine’s Day Card Collection this year!
To begin your Box of Chocolate assembly, I recommend planning all your colors of paper in advance. I chose my card to have a Light Blue, Purple, Pink and Red color palette, but to also allow the earthy brown tones of the chocolate to take place as well. I grabbed a handful of pieces of cardstock, including a bunch of scrap pieces. Because this die set has a handful of smaller shapes to cut, this is a fantastic set to put some of those paper scraps to good use!
I assembled my chocolate pieces as I was die cutting them, which allowed me to keep better track of all of my pieces. Once I had all the chocolate pieces ready, I ink blended the base of the chocolate box with a little bit of Wilted Violet Ink to create some shadows, adhered the frame/box top shape to the top of it, and arranged my 12 chocolate pieces as precisely as I could in a 3×4 pattern.
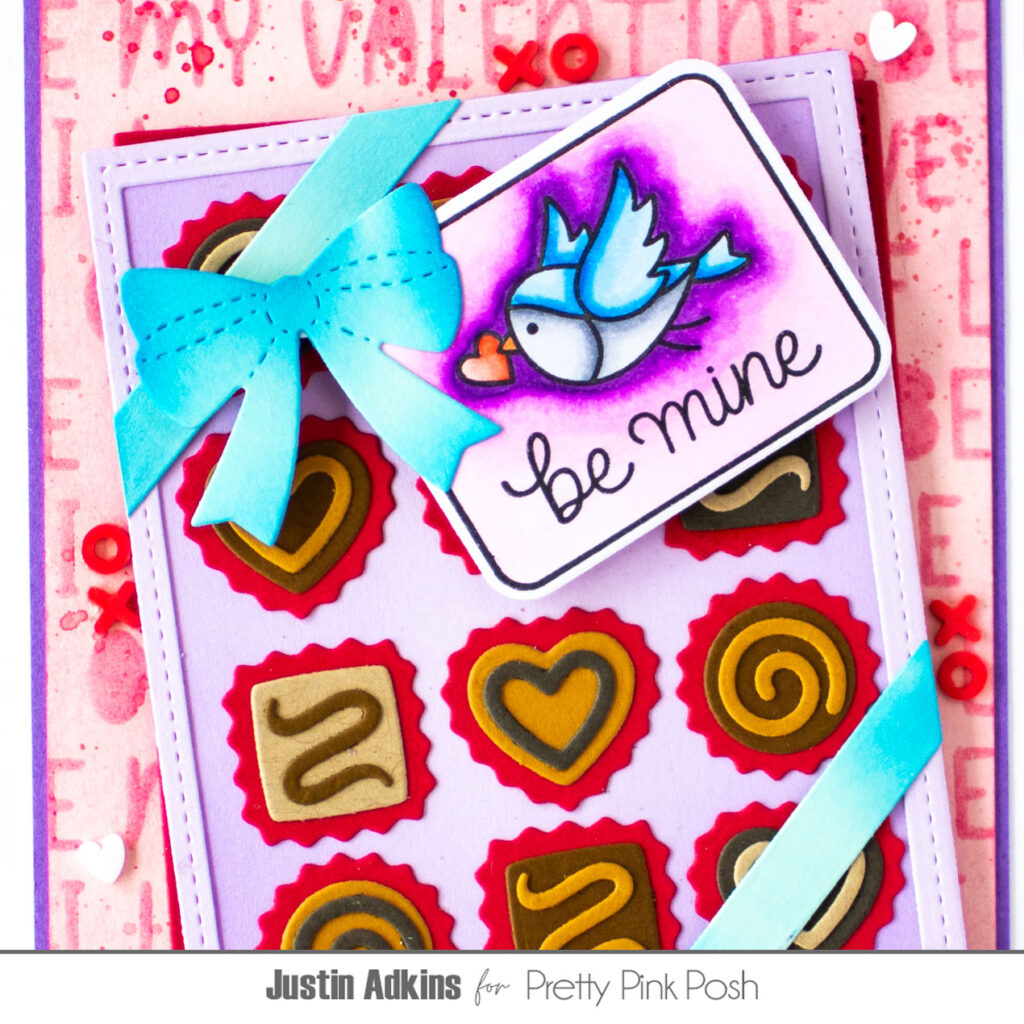
The little bird “Be Mine” image from the Valentine Tags stamp set spoke to me for this card, as I wanted to use a tag for my chocolate box that wasn’t so large that it covered an excessive amount of chocolate pieces. I colored this tag up with my Olo Markers, and then cut it out with the coordinating die cuts. After ink blending the ribbon and bow die cuts included in the Box of Chocolates Die Set, I adhered the ribbons first in opposite corners with liquid adhesive, adhered the tag under the bow, and then adhered the tag and bow unit with foam tape for a little bit of dimension.
I also die cut an extra chocolate box base from red paper, which I adhered with liquid adhesive to the back of my chocolate box unit slightly offset to provide a little extra detail.
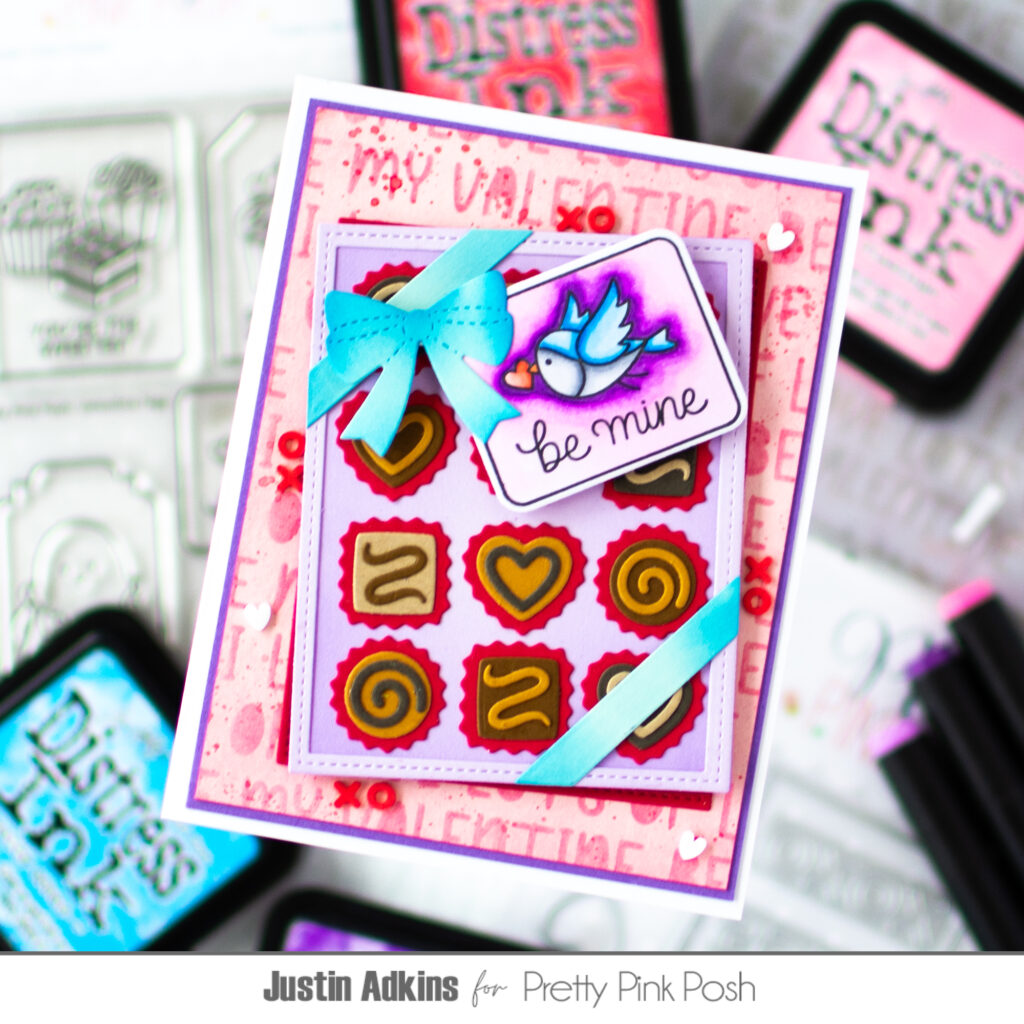
Using a panel of 3.75” x 5” light pink cardstock, I blended the Love Word Stencil over top with Kitsch Flamingo ink, splattered it with some Festive Berries Ink. I adhered this on top of a piece of 3.875” x 5.125” purple cardstock, and adhered it to my card base.
Using some more liquid adhesive, I placed my chocolate box in the center of my card on a slight tilt. To finalize my project, I used the Sweet XOXO Mixto adhere some embellishments. I love that this mix includes “X” and “O” shapes, which I used to adhere in certain areas around the box for an extra fun effect!
Thank you so much for stopping by the Pretty Pink Posh Blog! I hope this card gave you some fun ideas to creating your very own Box of Chocolate themed Valentine projects!
Don’t forget to follow me on Instagram and YouTube at @justanotebyjustin for even more crafting inspiration!
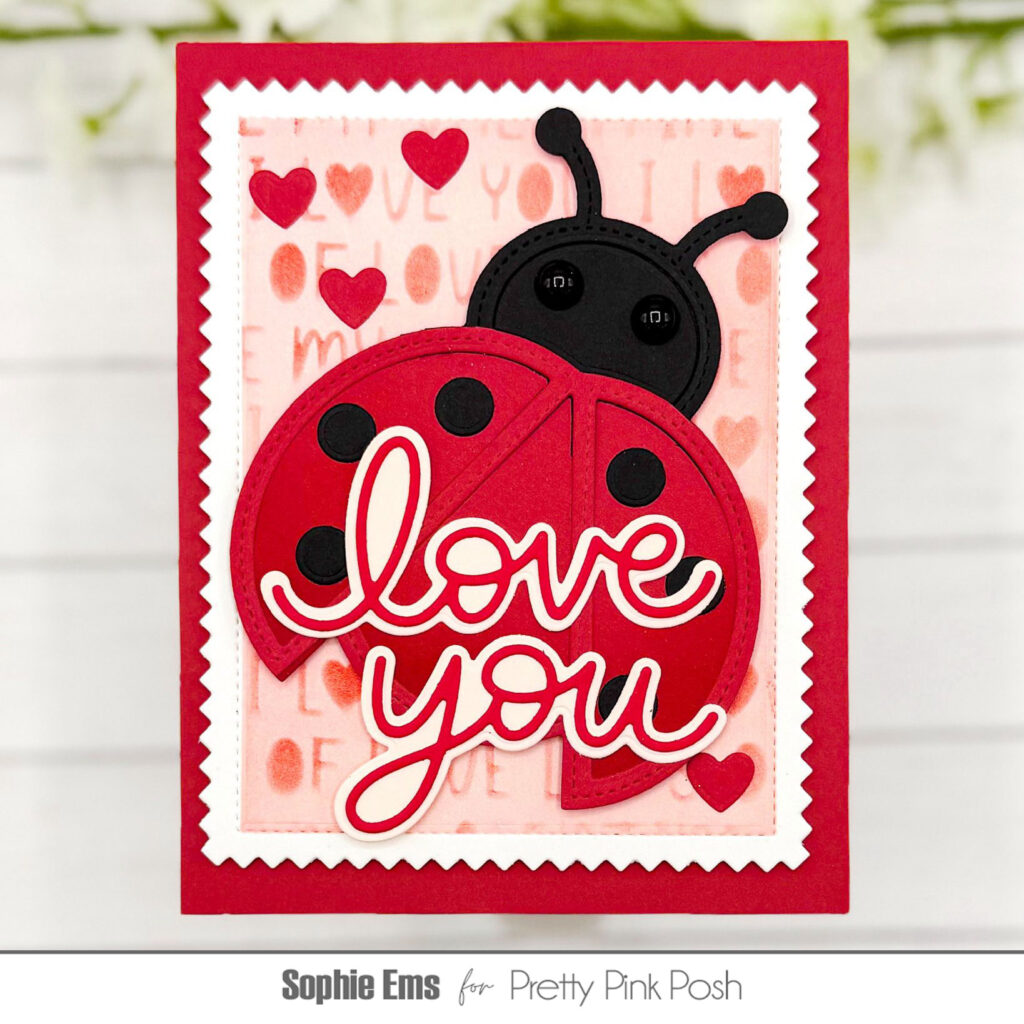
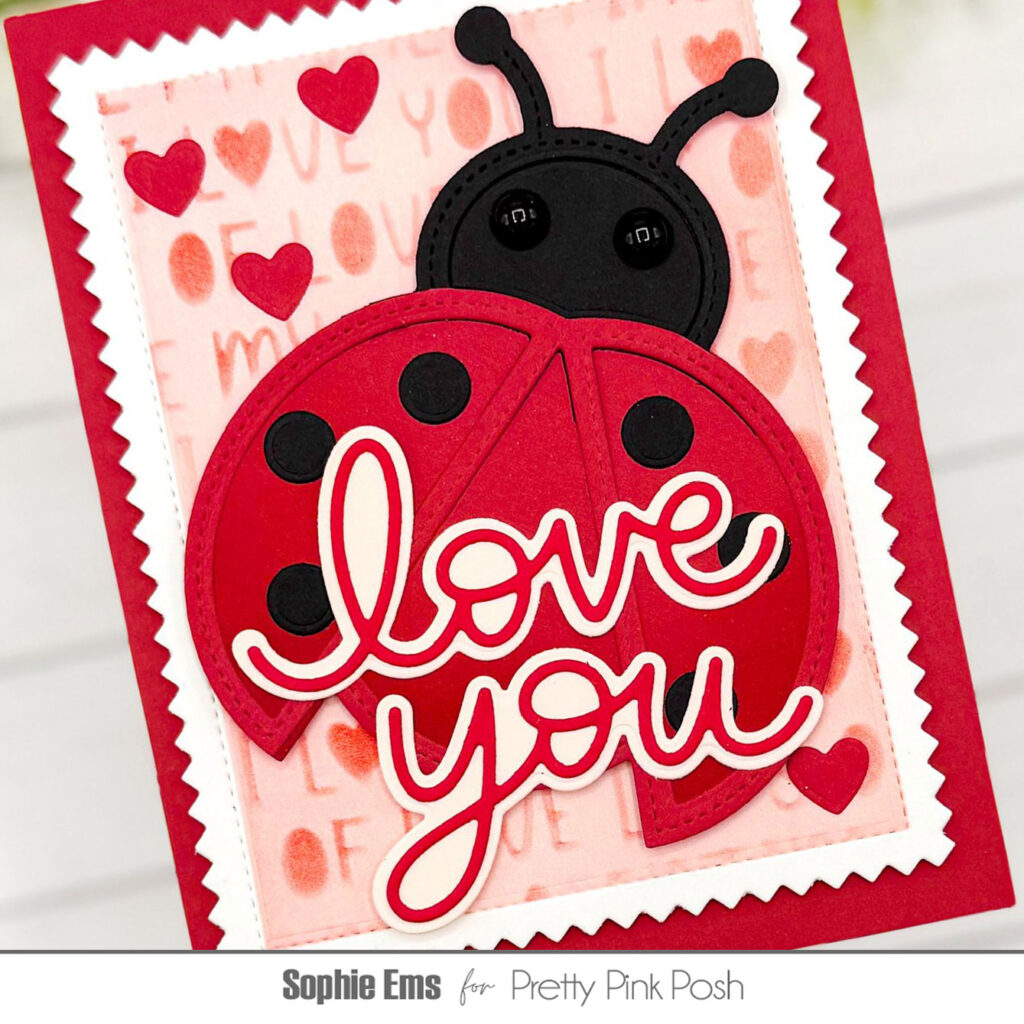
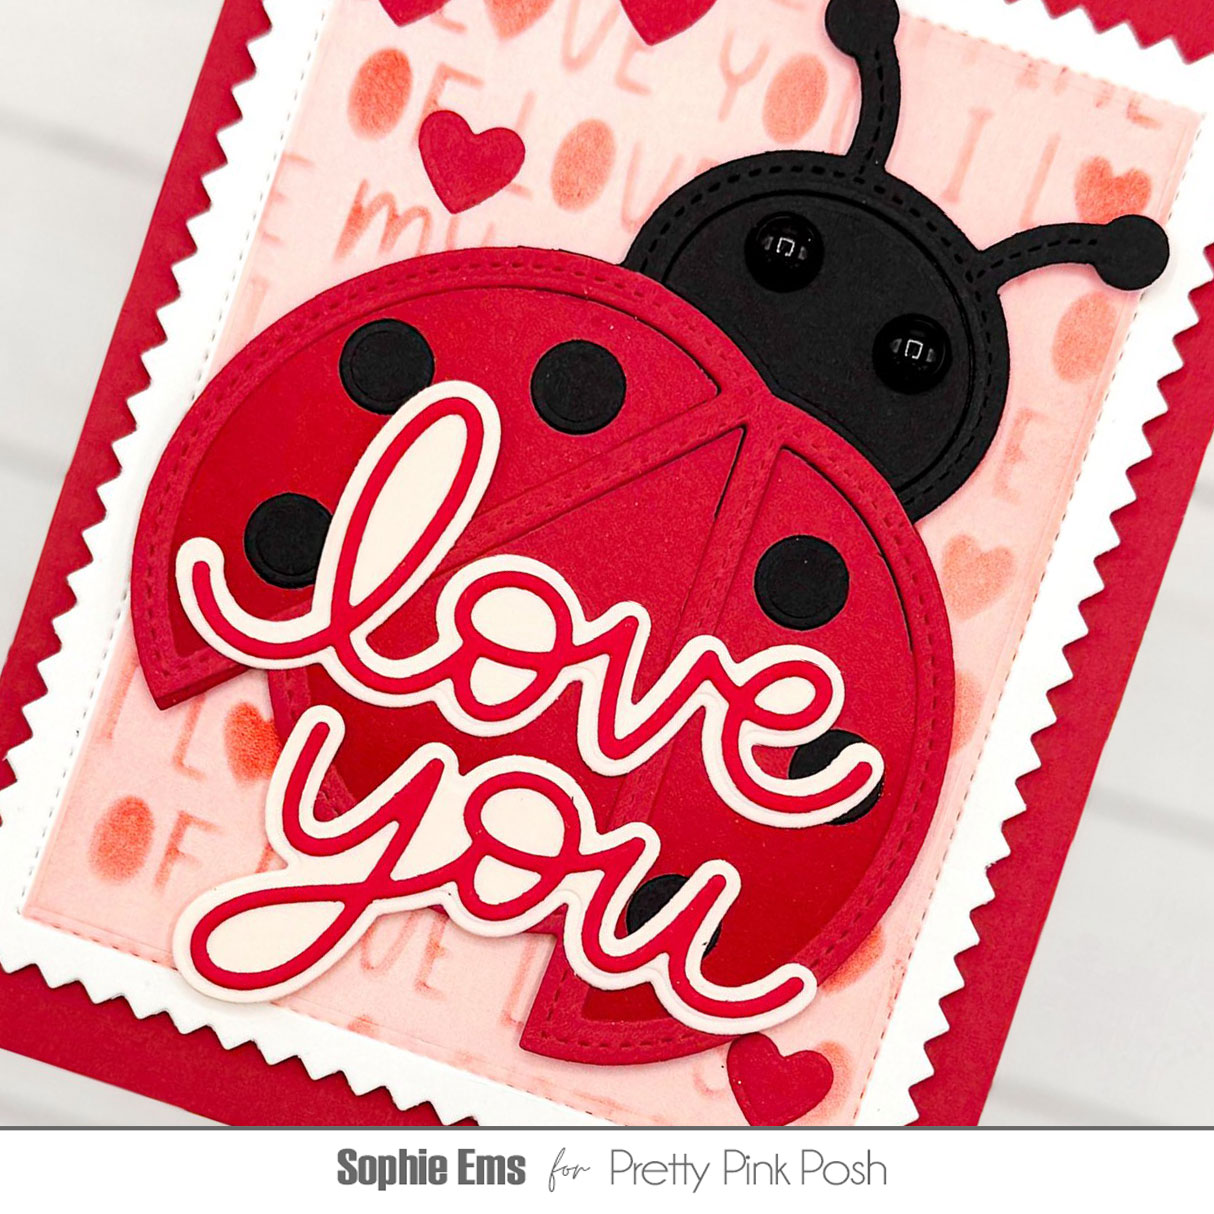
I am *thrilled* about the new bug-themed products. I think they are so versatile and cute! This ladybug shaker is such a wonderful addition to the shaker die line up that Pretty Pink Posh is known for. I love that these dies can be used as shakers or as non-shakers, too!
For my card I started with a panel of white card stock that I cut using the newPinking Rectangles diesin the largest size. I then masked off the edges using some post-it tape and stenciled a light wash of pink over the background. Then, with the masks over the edges still in place I layered on the Love Words stencil and did a darker wash of pink Ink to add some subtle interest.
I built my Ladybug shaker just using colors card stock in black and red. I used glossy accents for the eyes to make them pop!
The sentiment was made featuring the new Love You Shadow dies. I love how substantial this greeting is so it stands on it’s own even with the large Ladybug!
I hope you are inspired. I’d love to know, do you make Valentine’s day cards? Comment below! :) Be back with more inspiration soon!