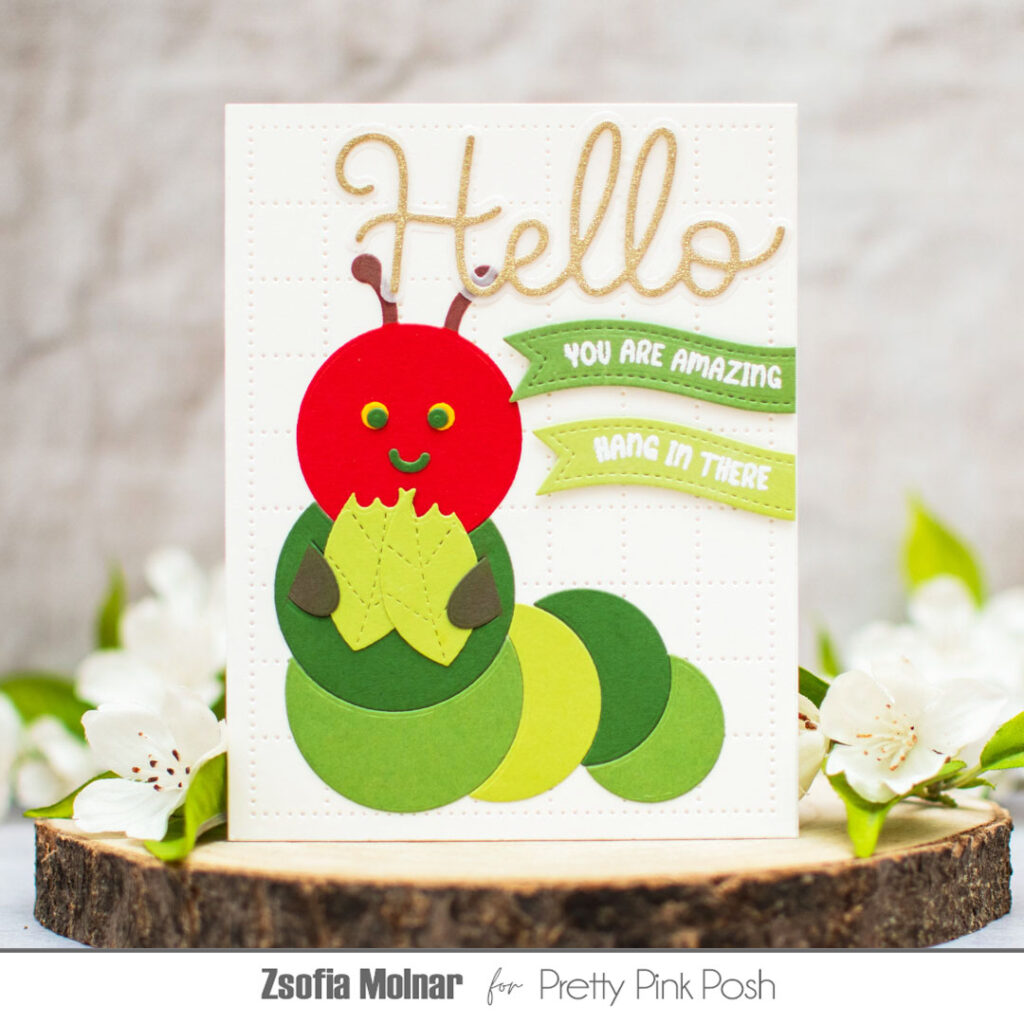
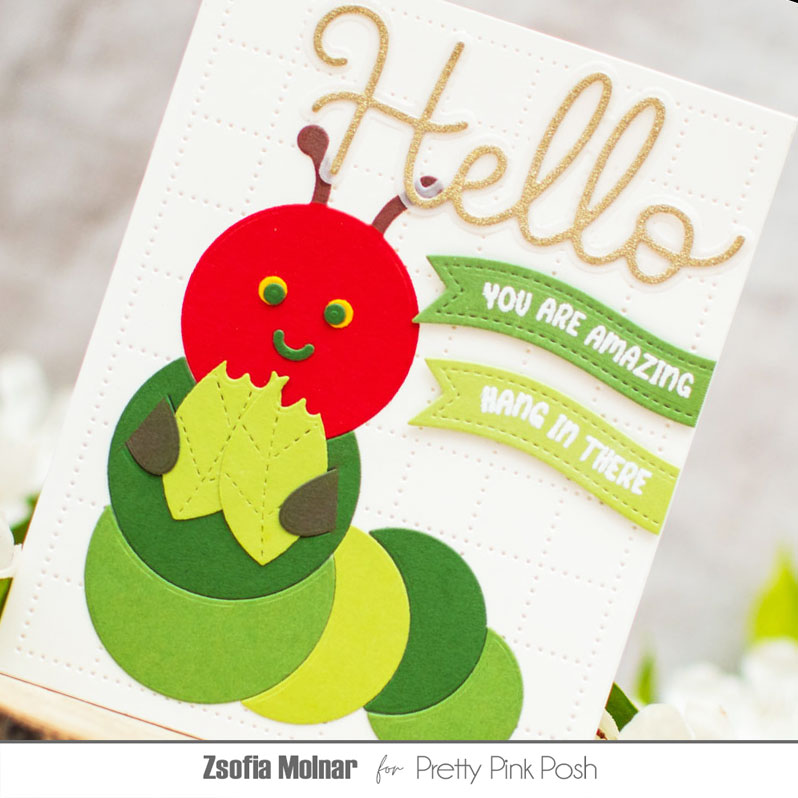
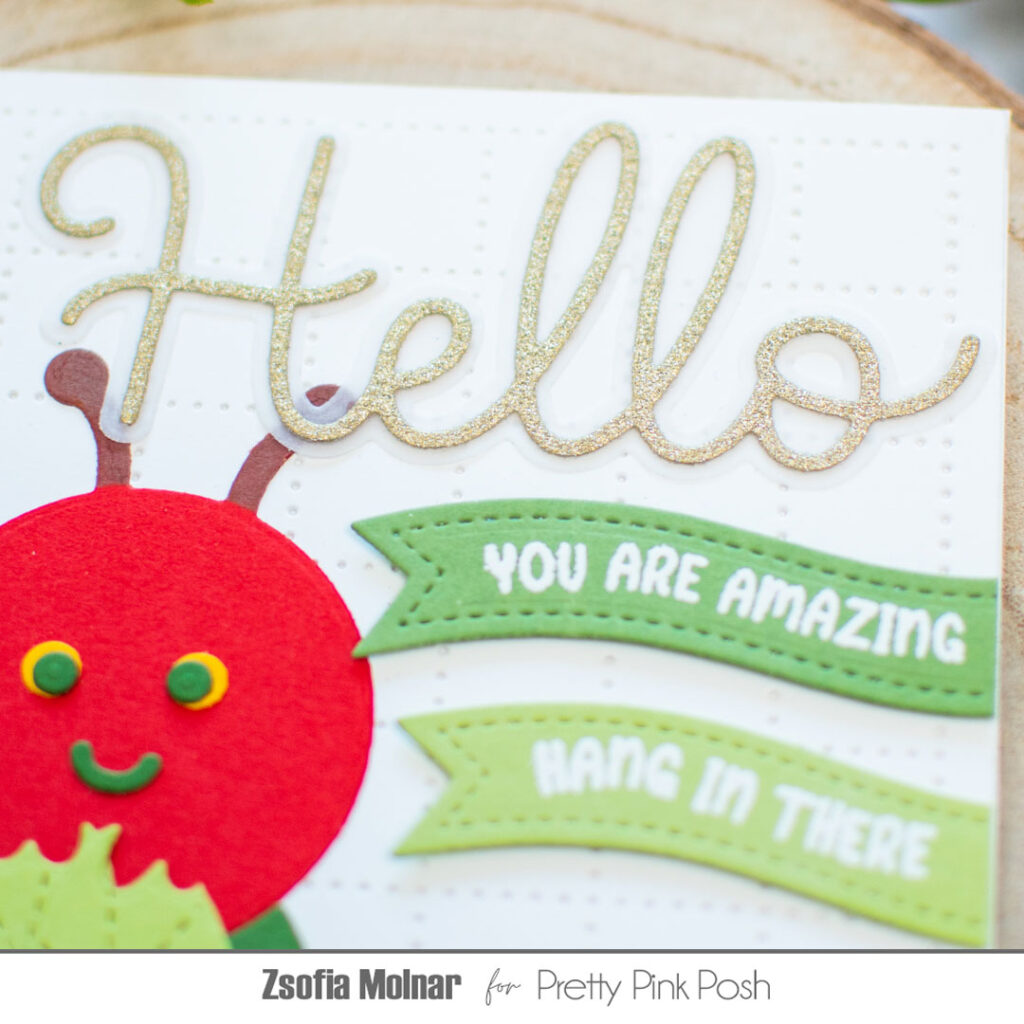
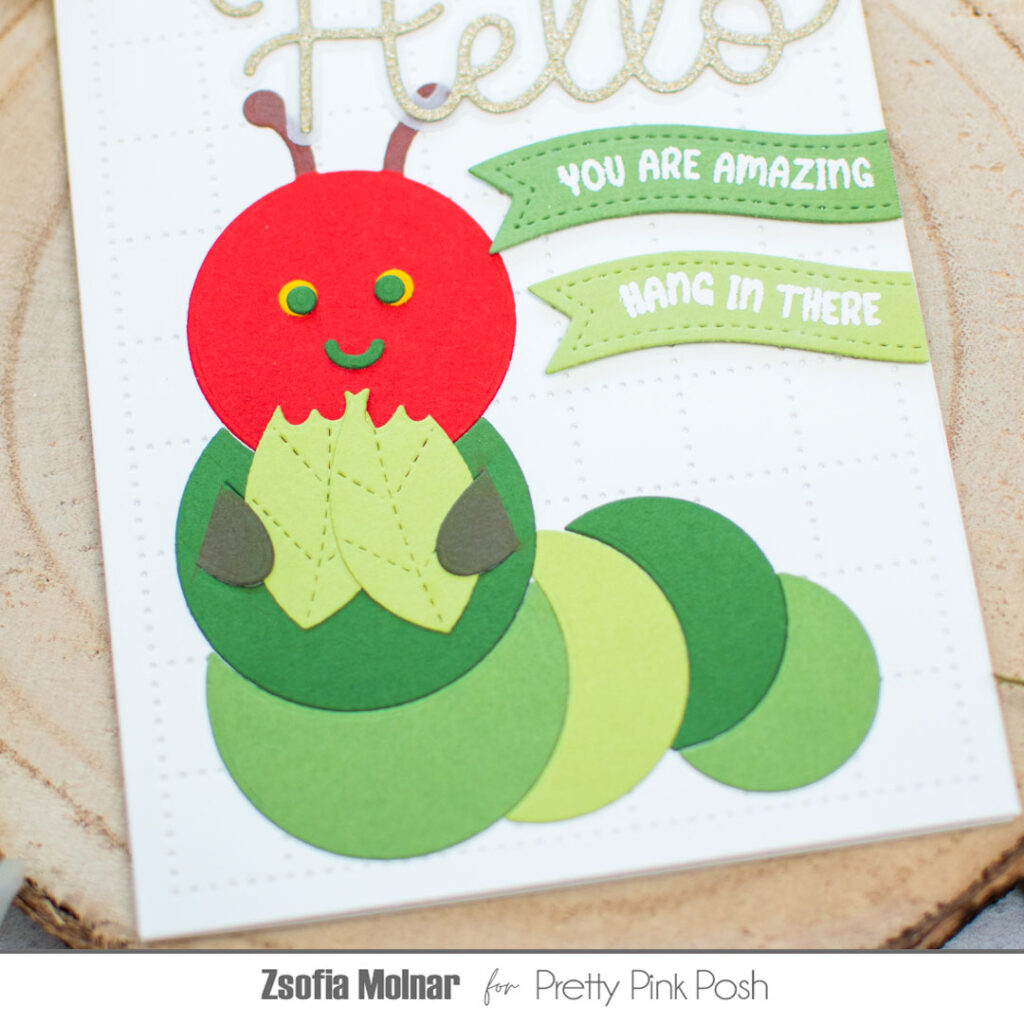
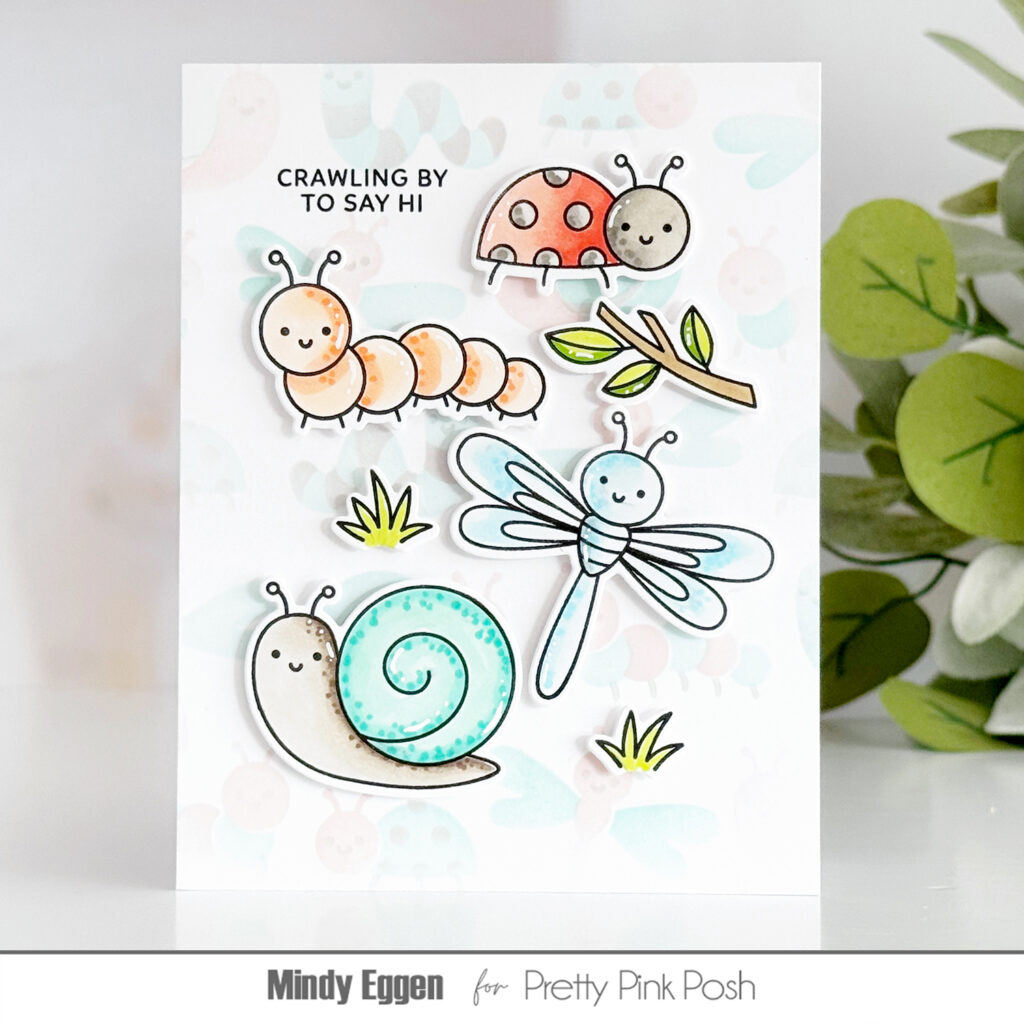
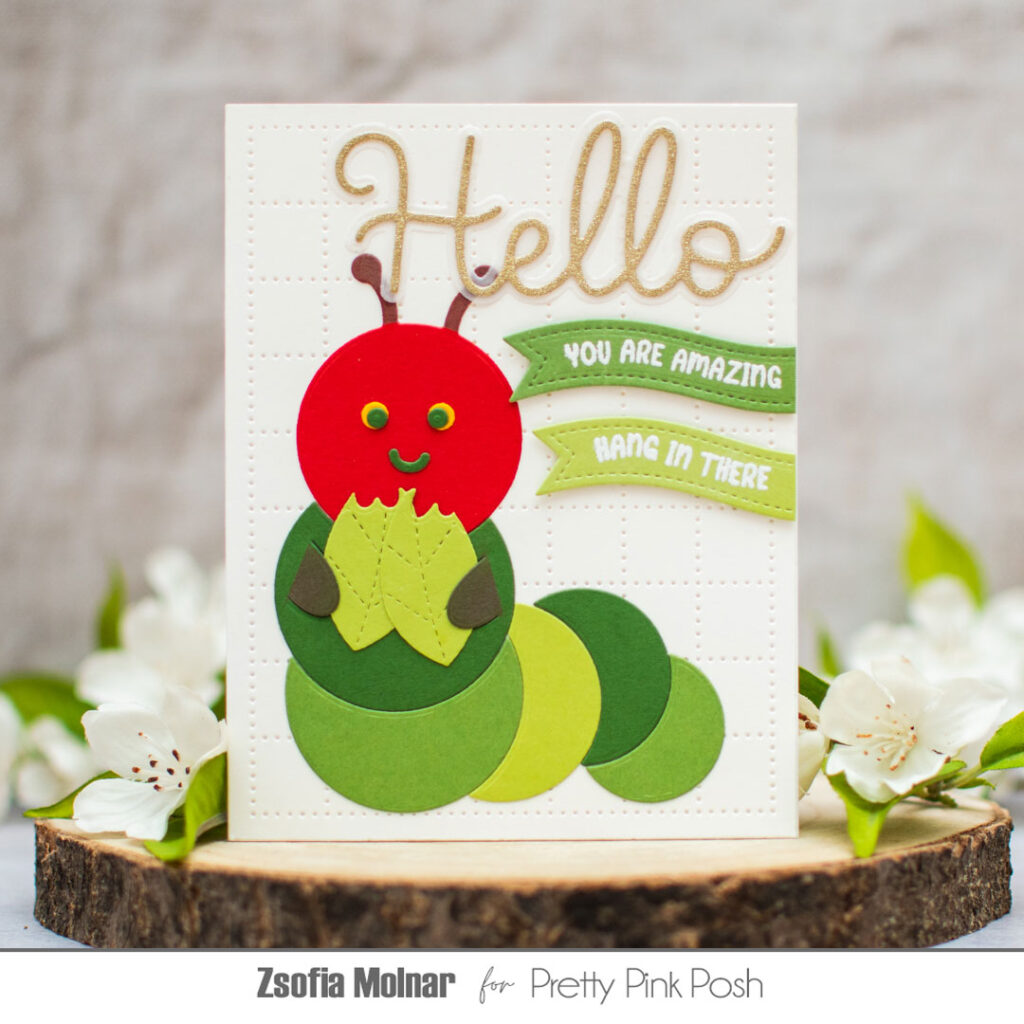
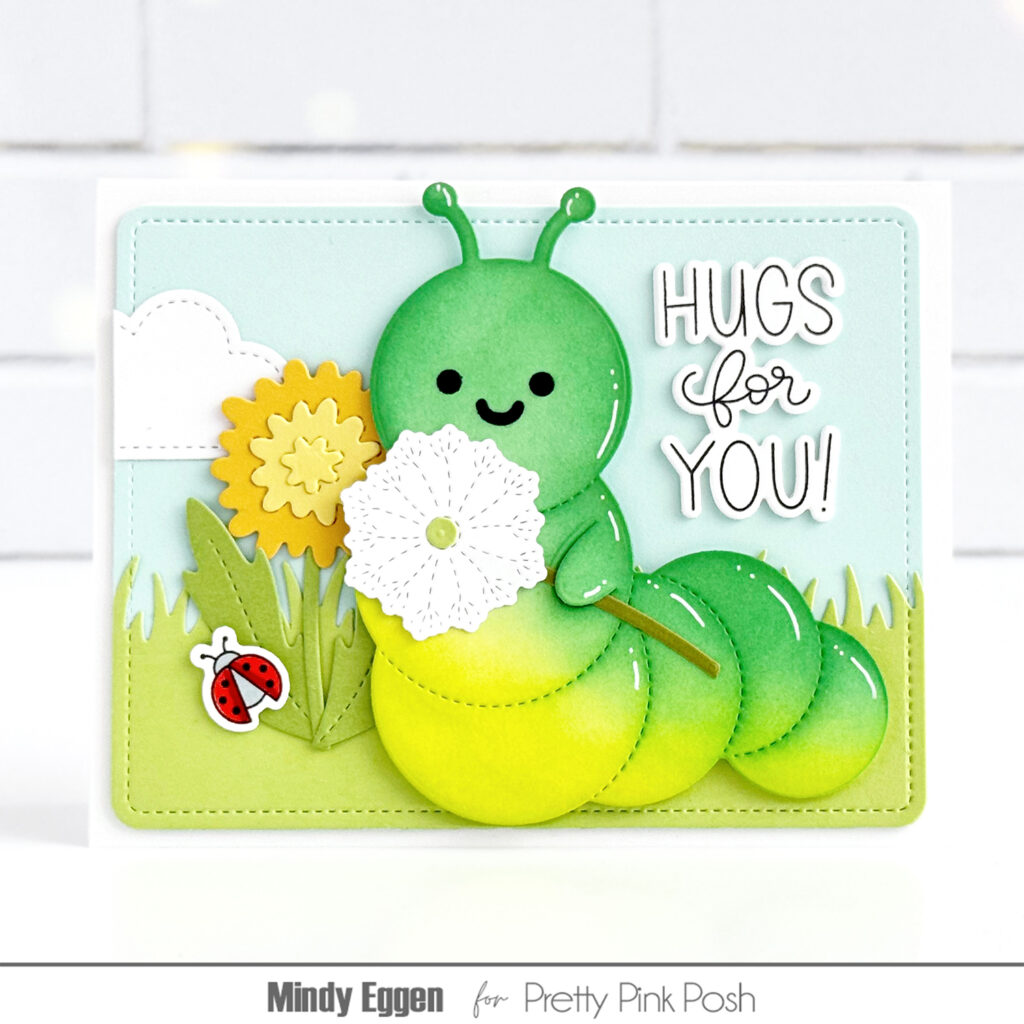
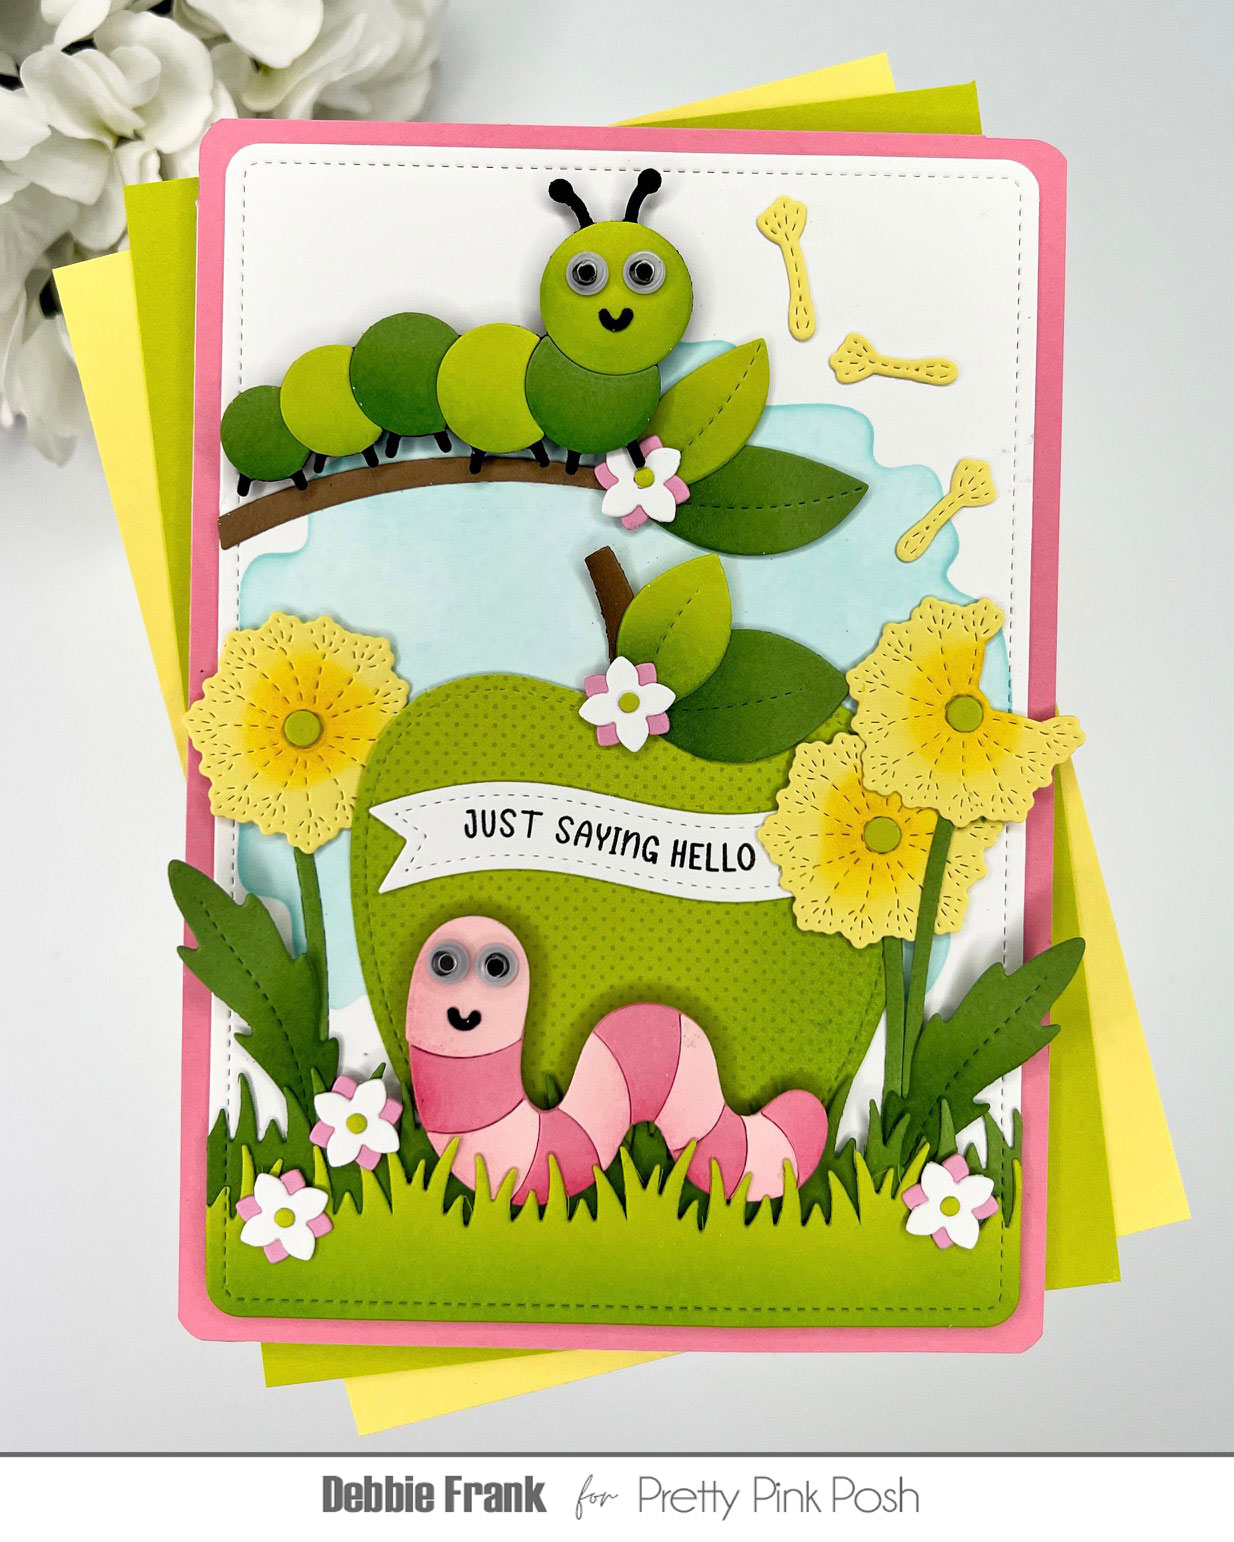
Spring Caterpillar
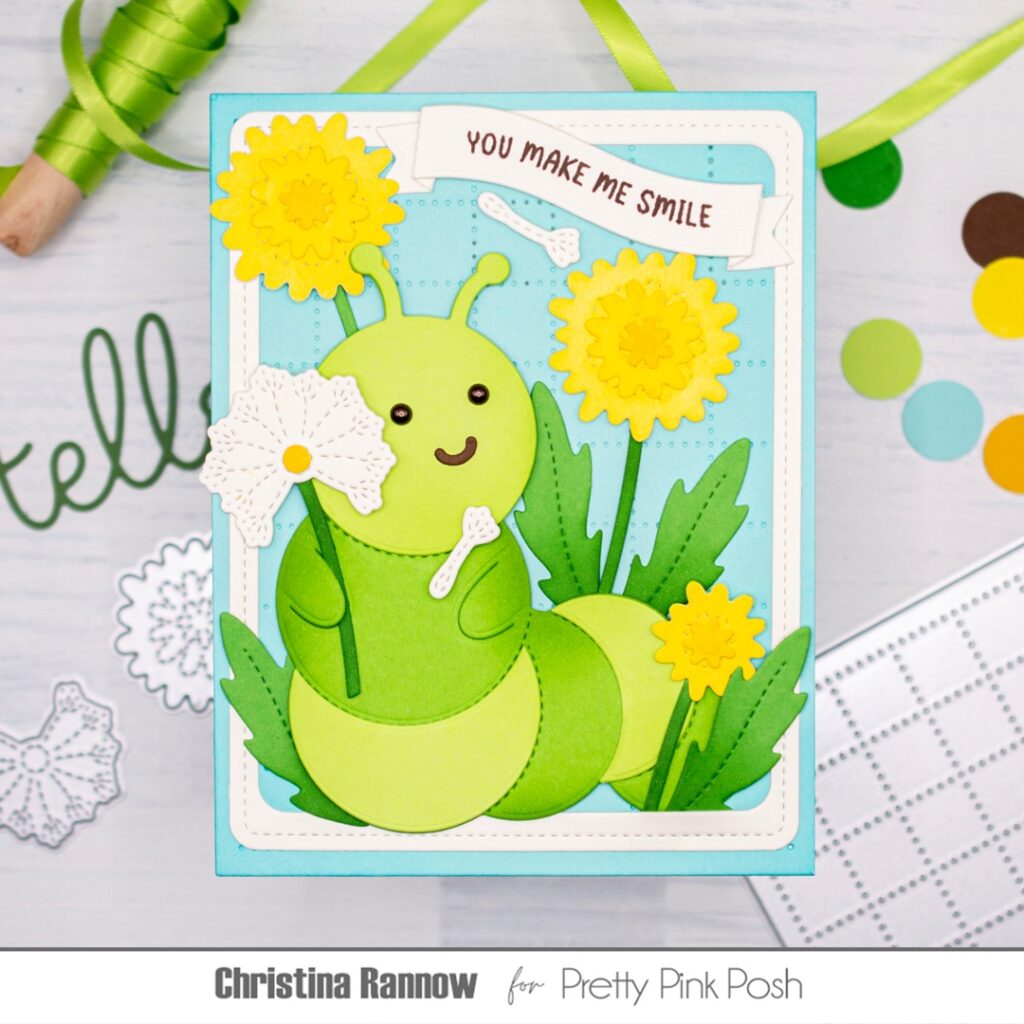
Hello crafty friends! It’s June here and today I’m sharing my process of this card featuring a cute caterpillar tending to its flower garden. Let’s get started!
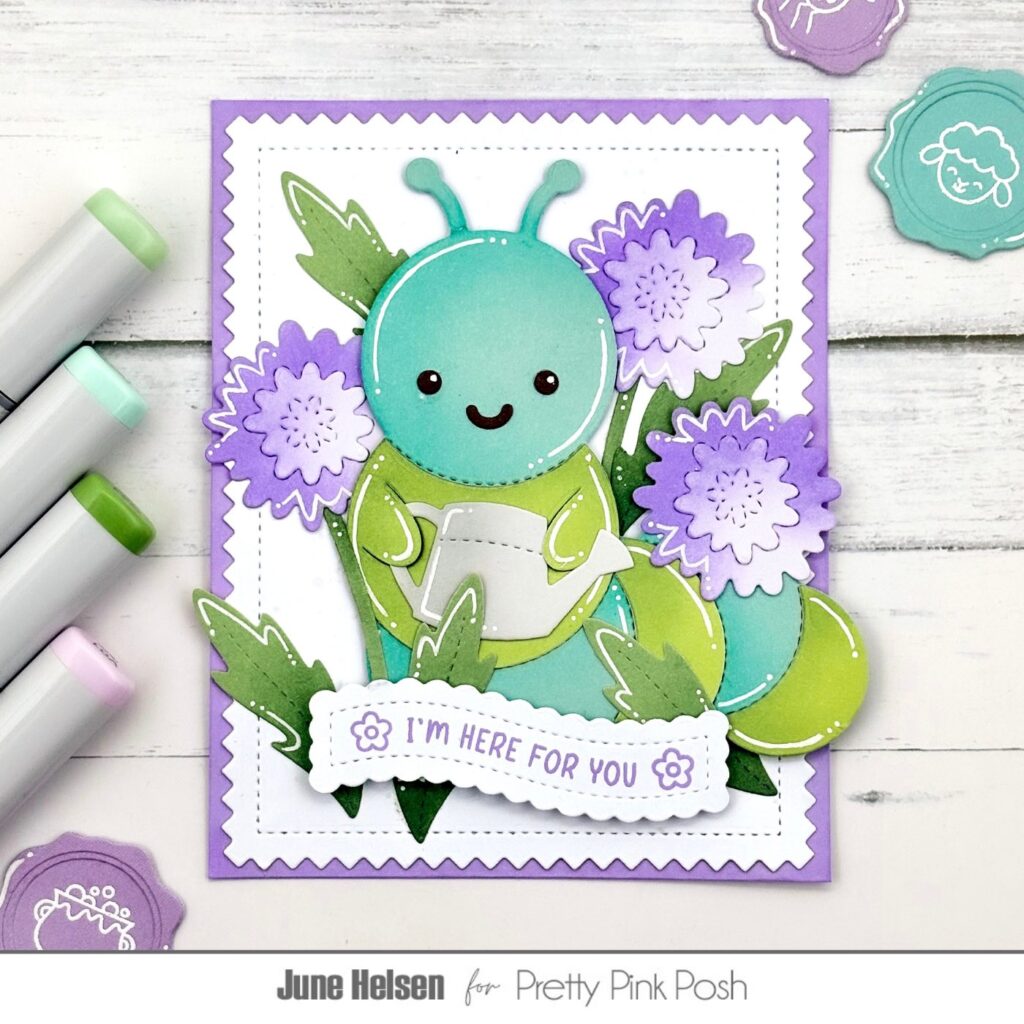
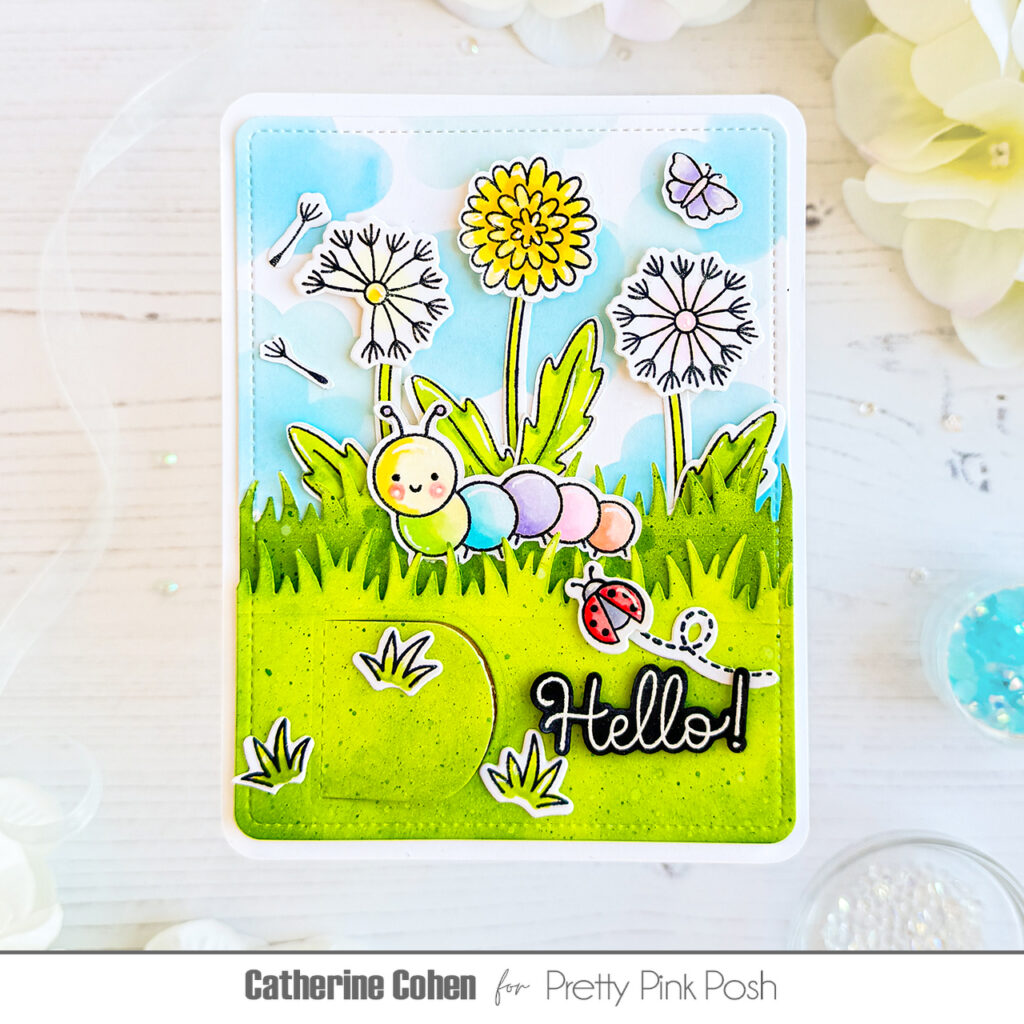
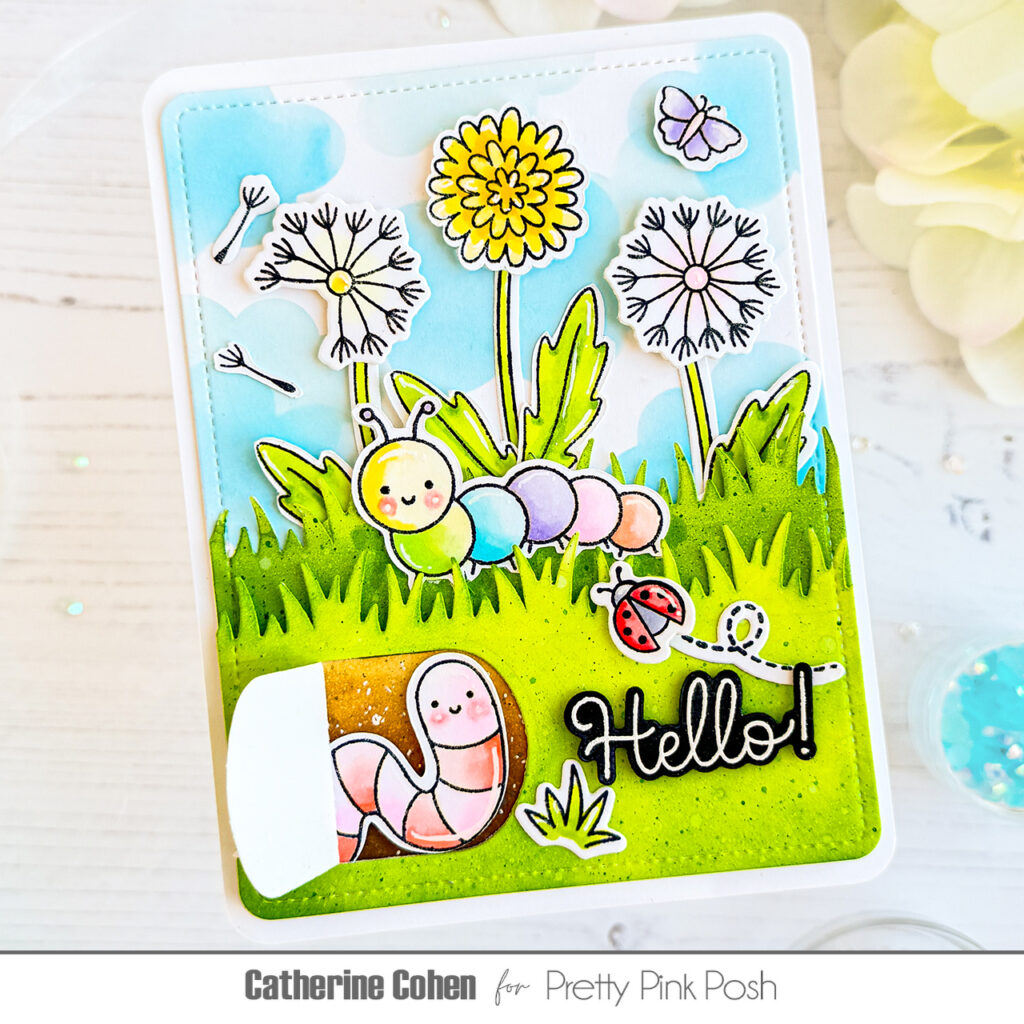
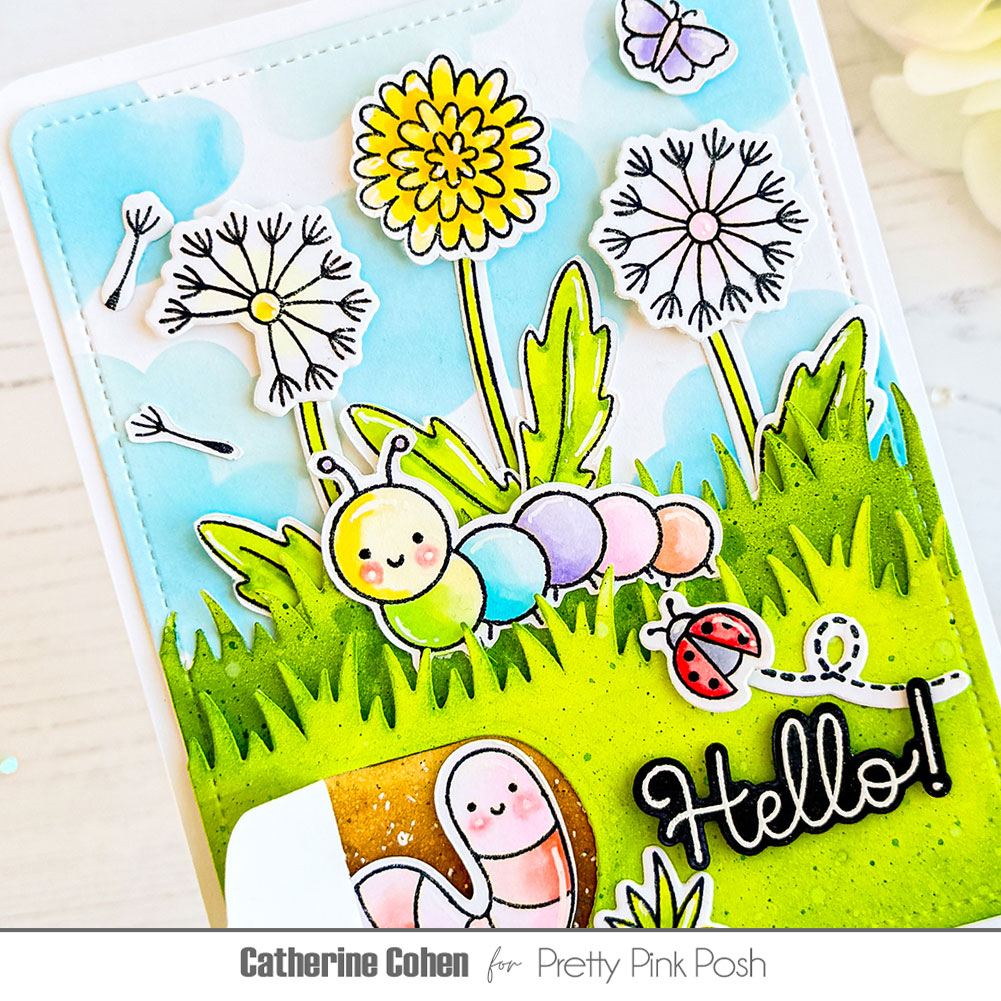
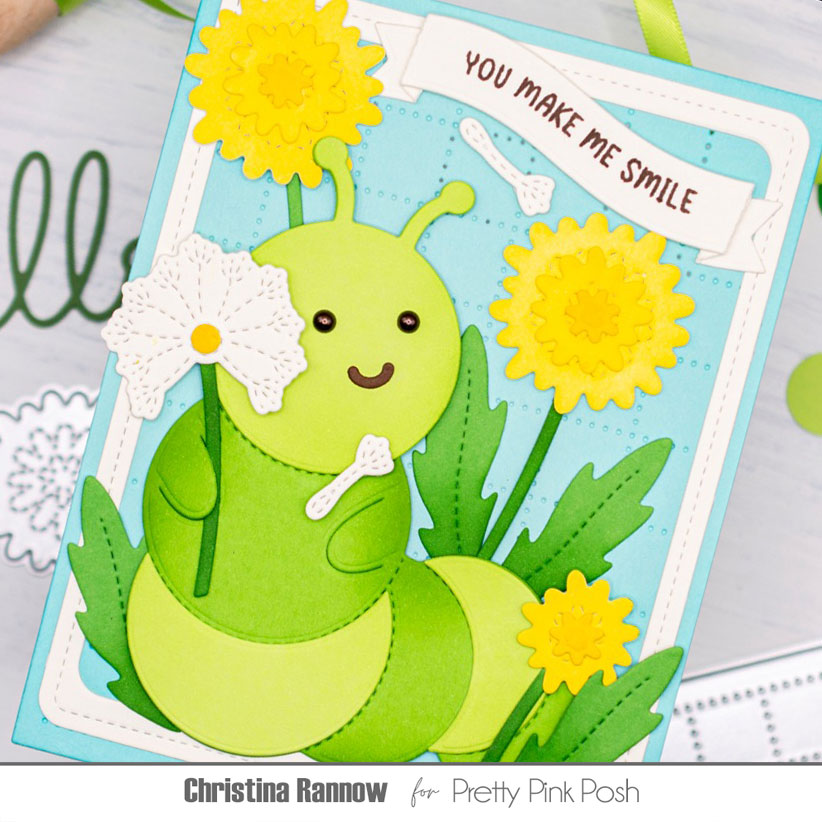
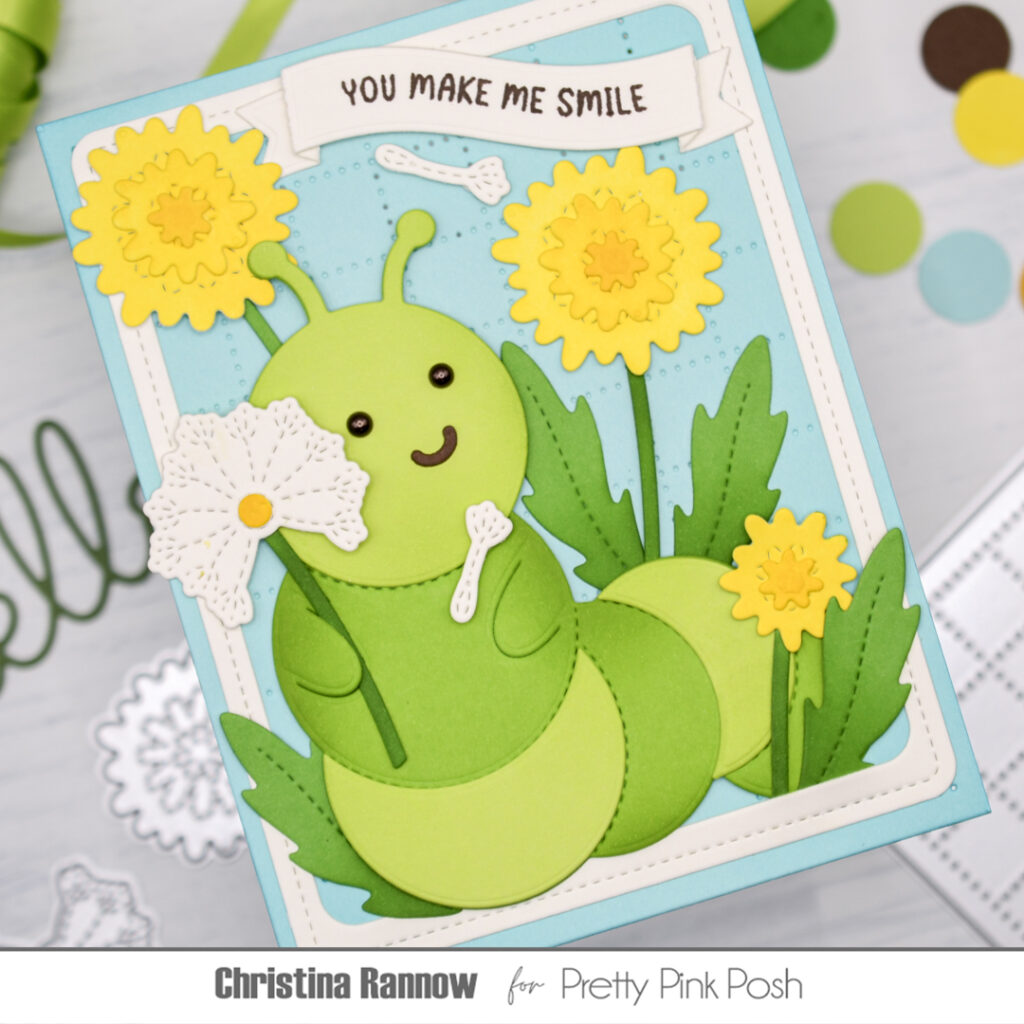
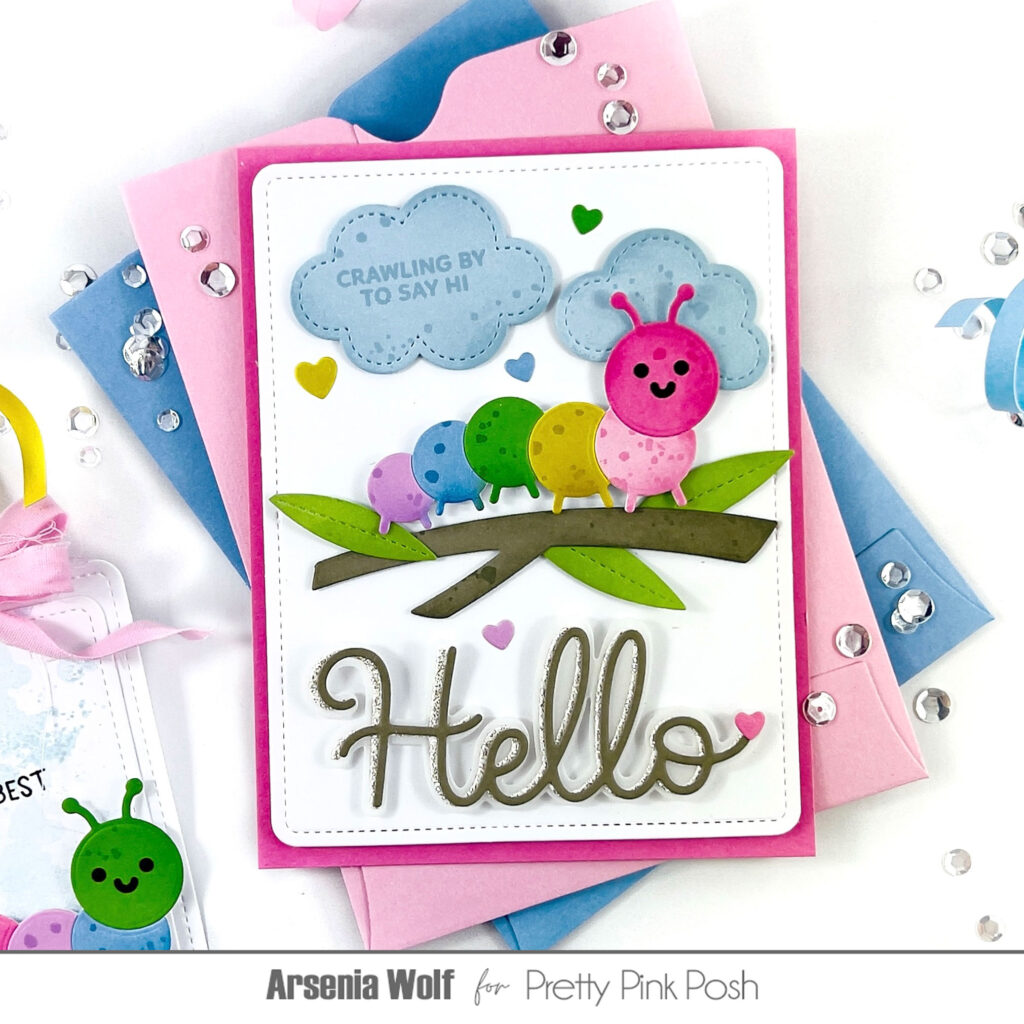
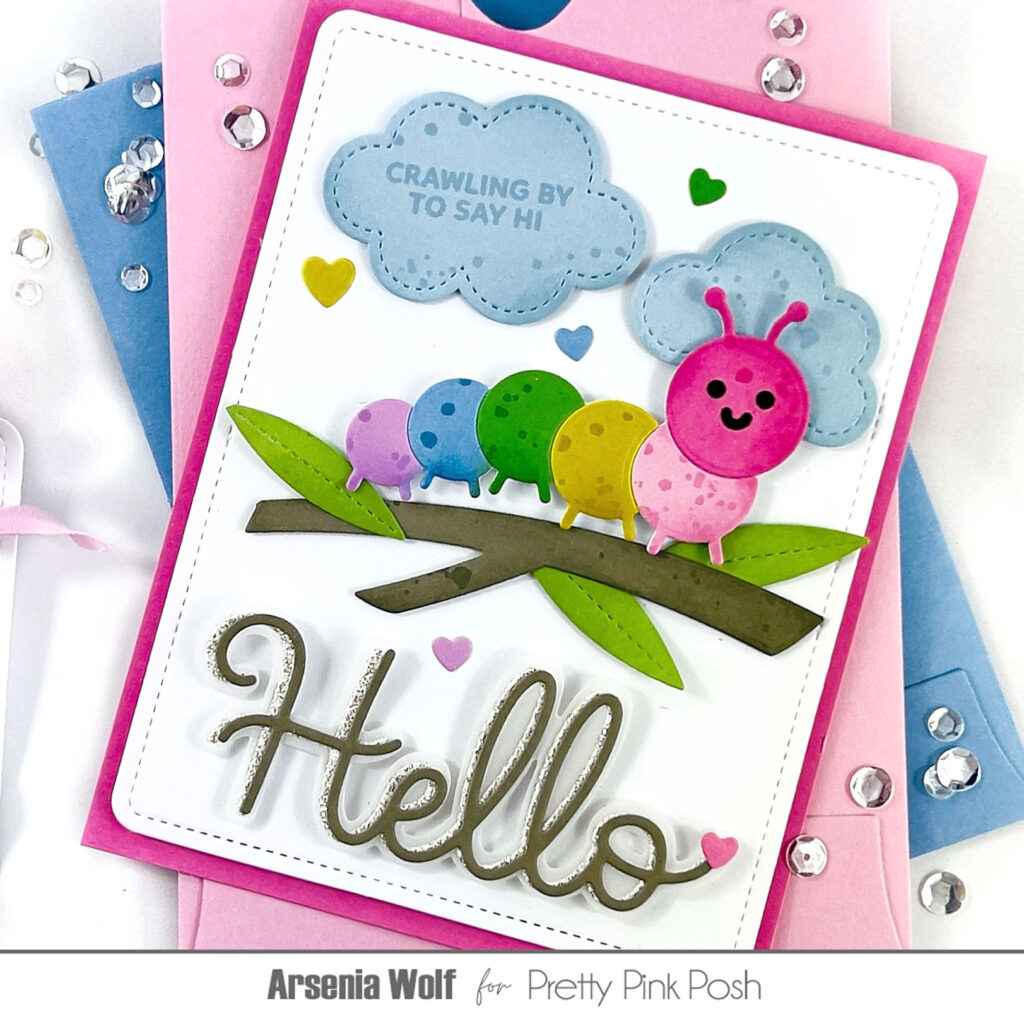
Okay so first off, the Caterpillar Holder is definitely my favorite holder die that Pretty Pink Posh has released so far! I love how you can cut the body sections from different colors to make him fit any color palette you want. Personally, I wanted to alternate between only 2 colors, so I did that with blue and green. I also added some light ink blending and gel pen details to make him pop. The spring release had a watering can die in the Springtime Holder Additions and I thought that would look really cute with this little guy!
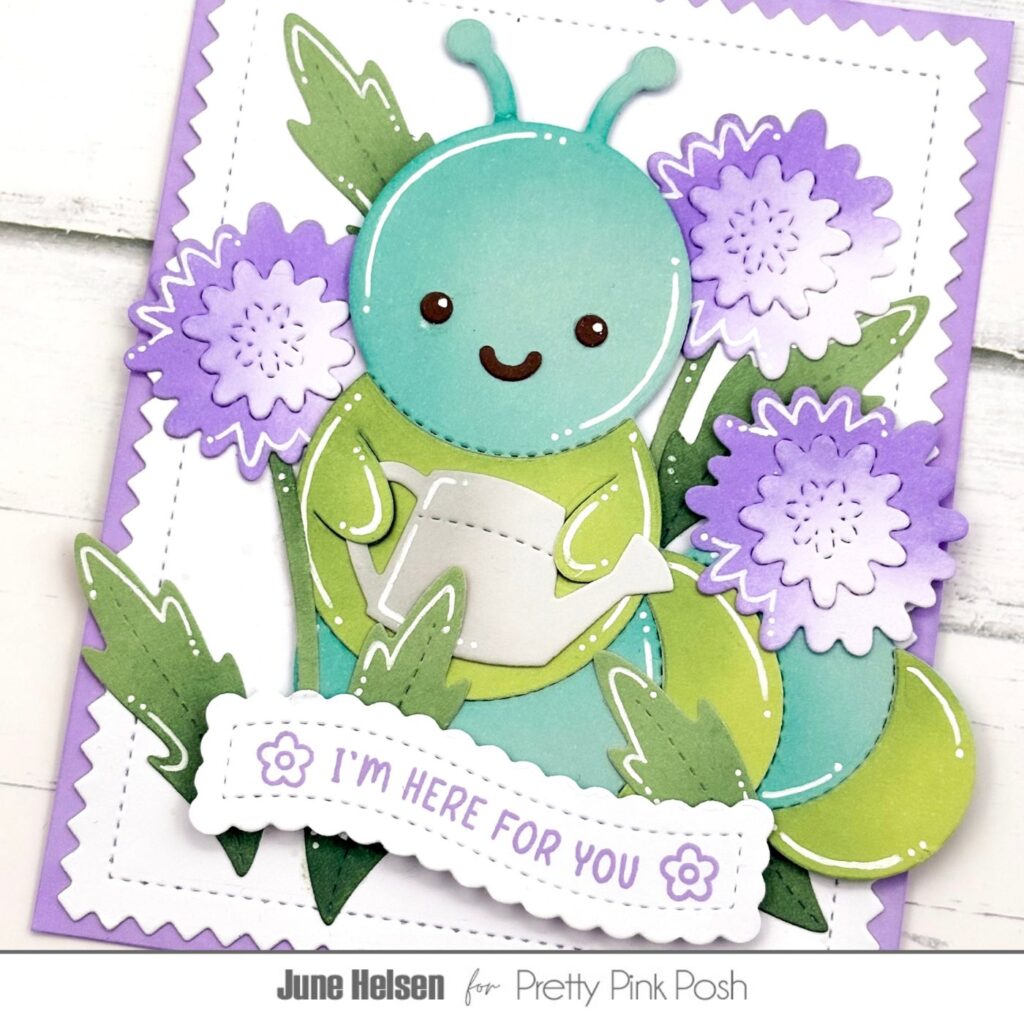
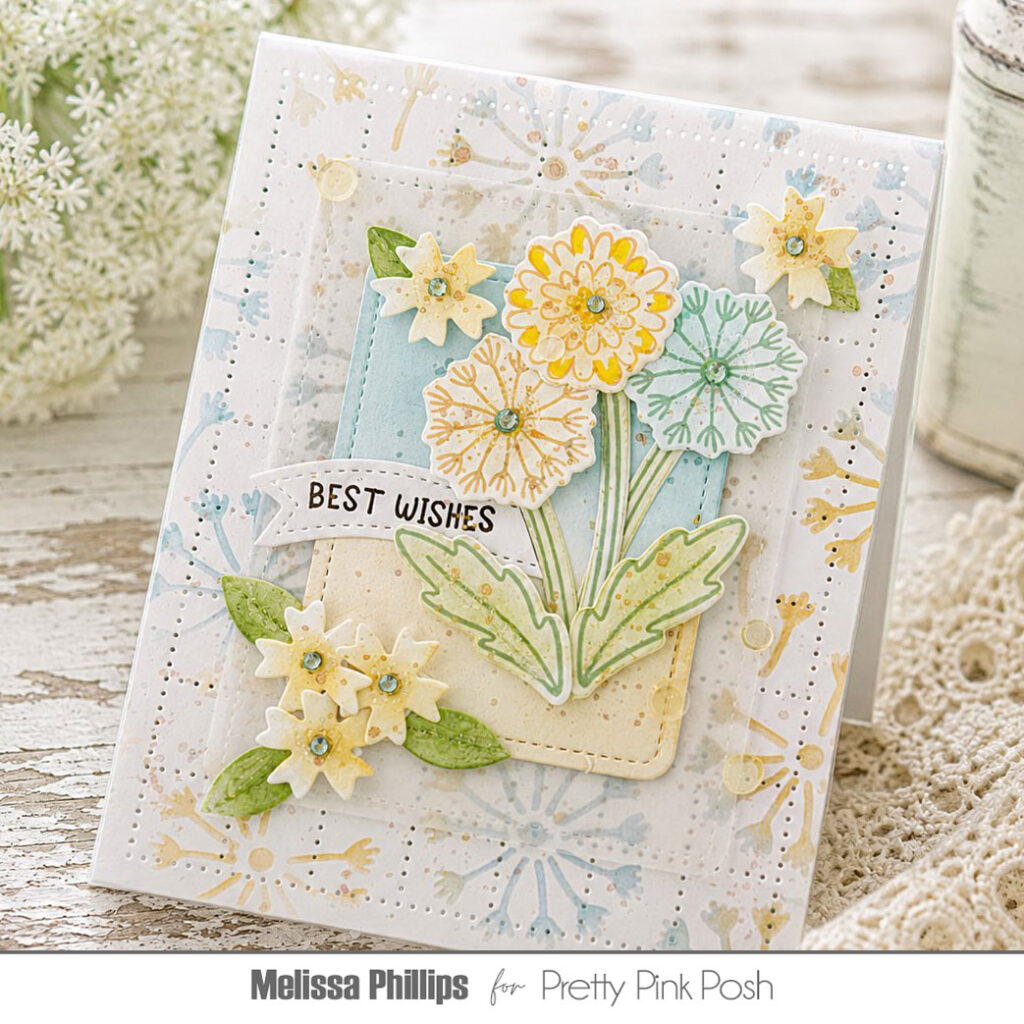
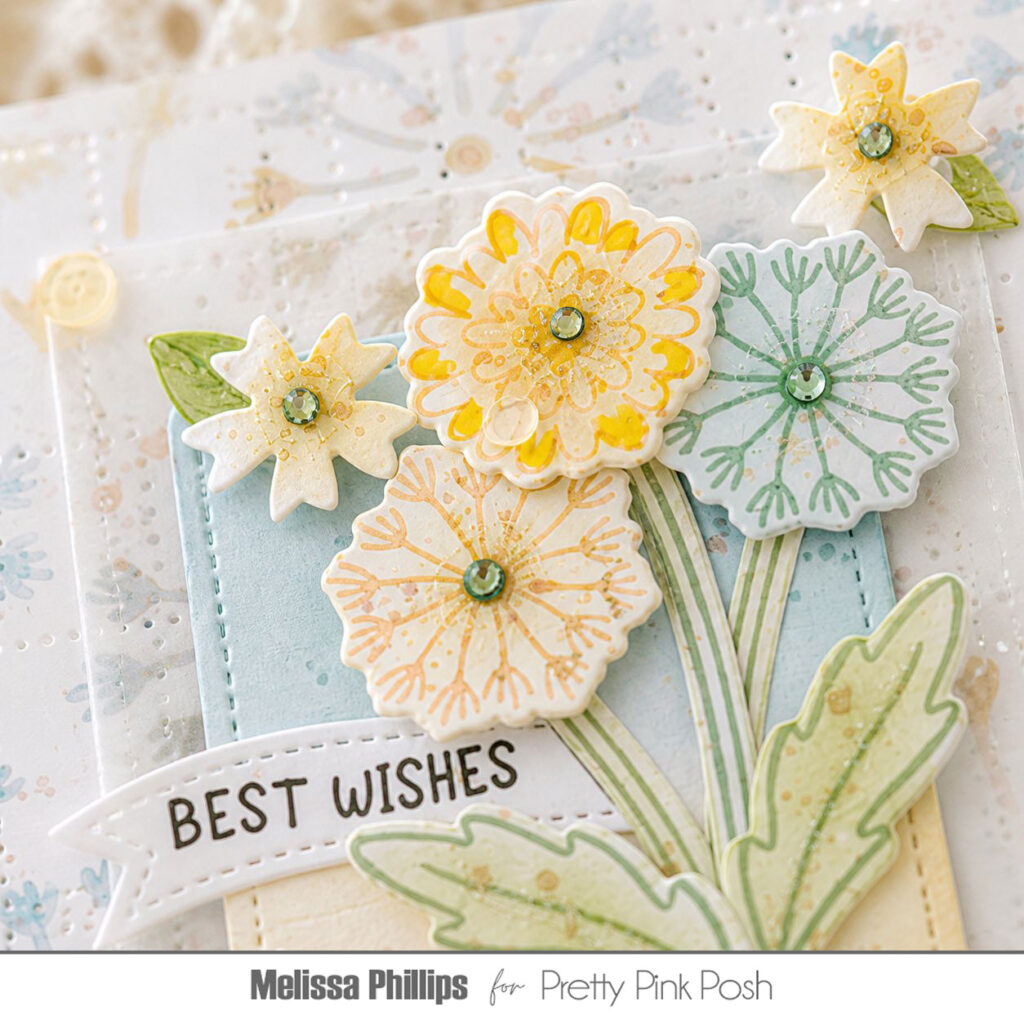
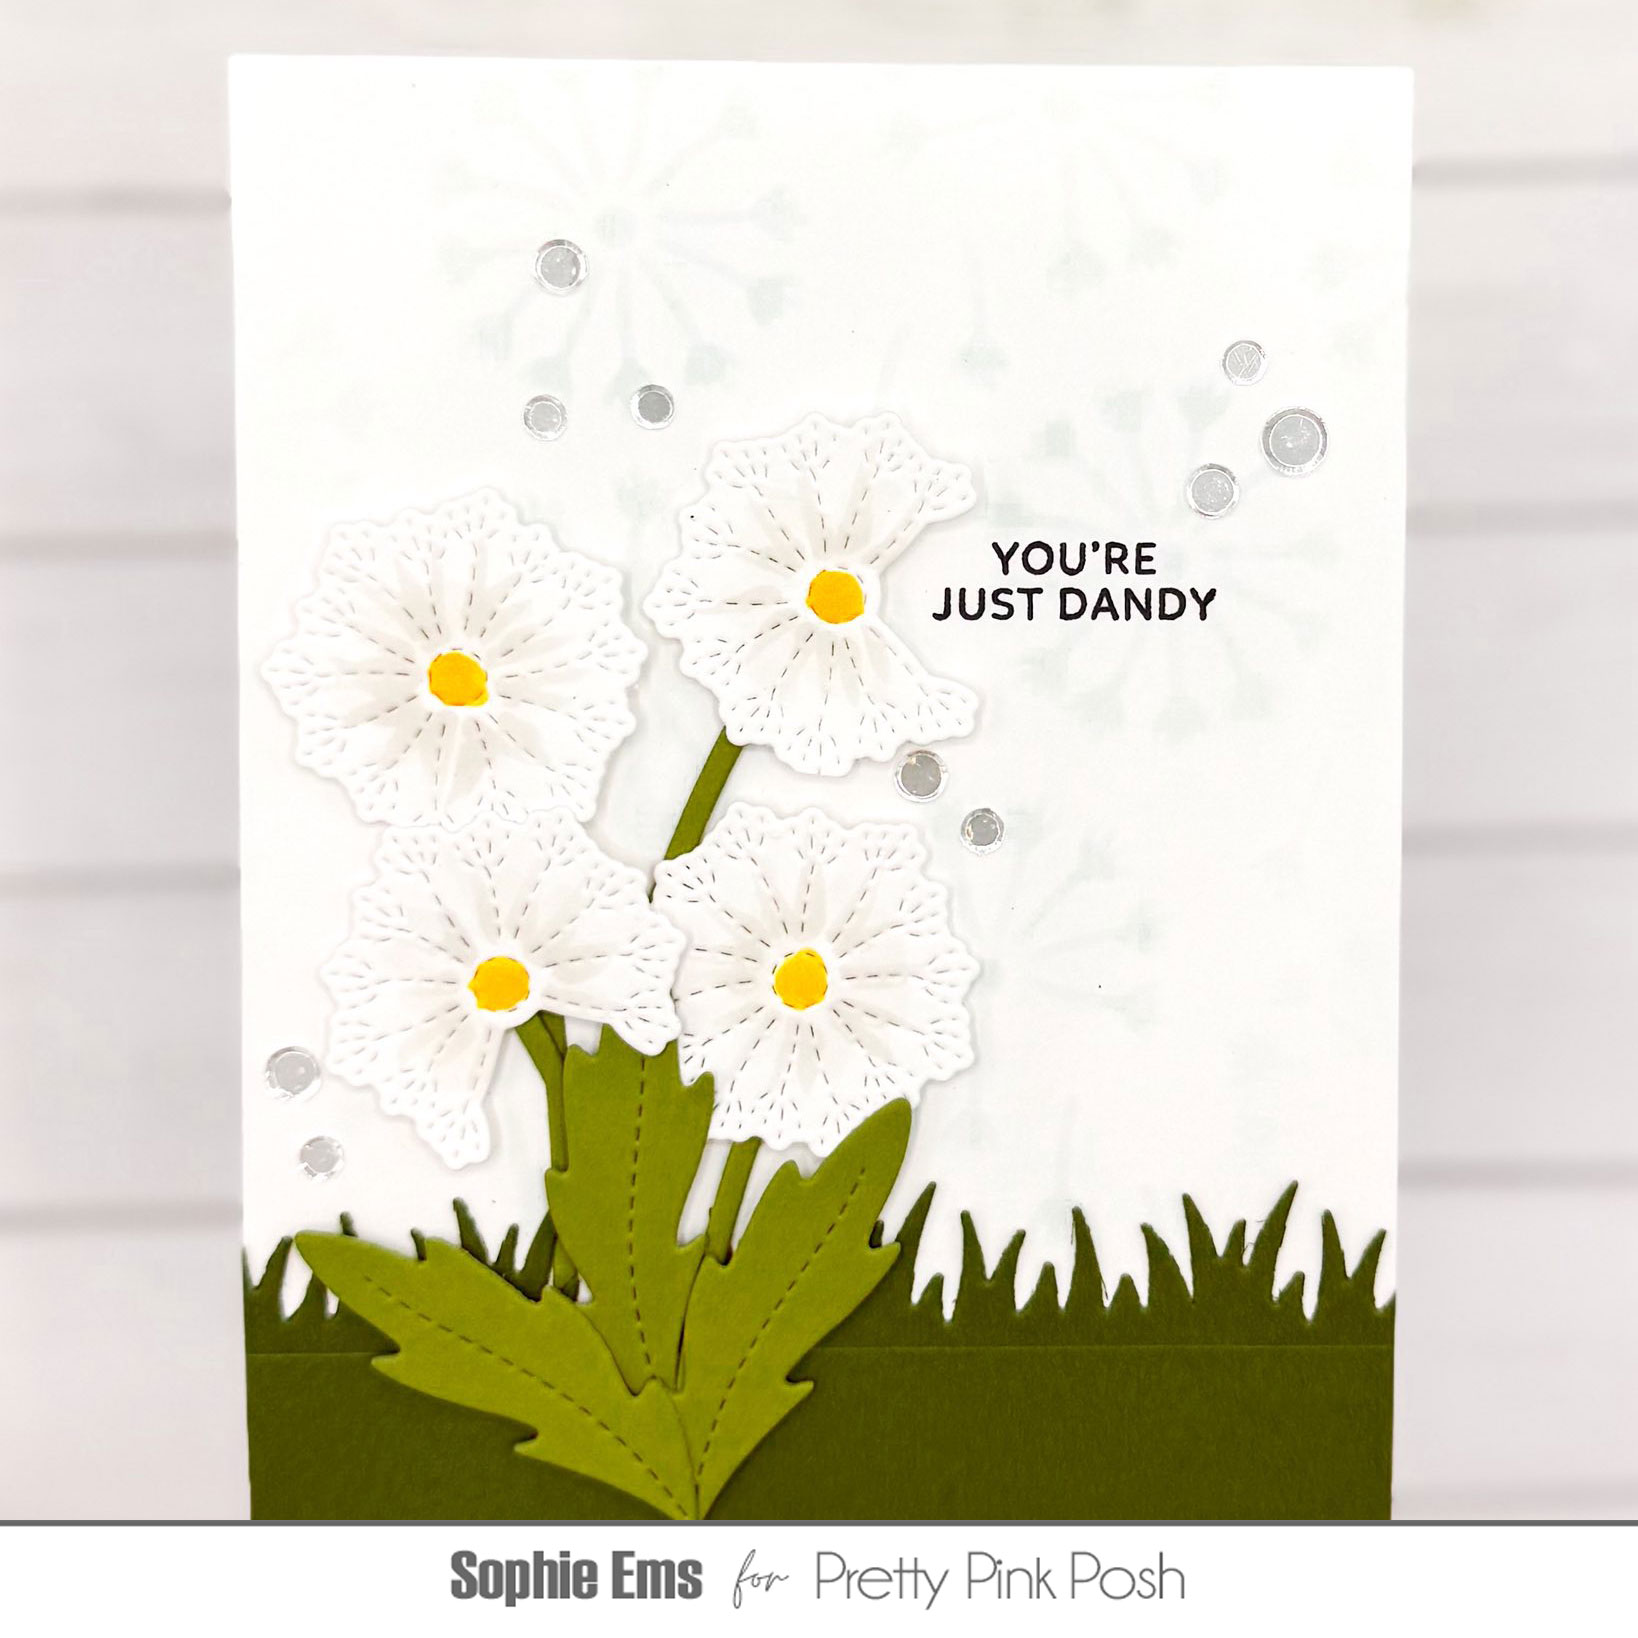
To give him some flowers to tend to, I used the new Stitched Dandelions, but instead of going for a traditional yellow, I cut them from light purple cardstock and did some more ink blending on them to give them more contrast. I am so in love with the look of these flowers, they almost look like chrysanthemums in this colorway! I also cut the stems and leaves from the same die set so I could arrange the flowers as a flower patch around the caterpillar.
I cut the largest Pinking Rectangle from white cardstock and did some very light grey ink splattering on it. It’s barely visible in my photos, but it is there and in real life I feel like it adds a nice touch of texture. I backed the panel with purple cardstock to match the flowers.
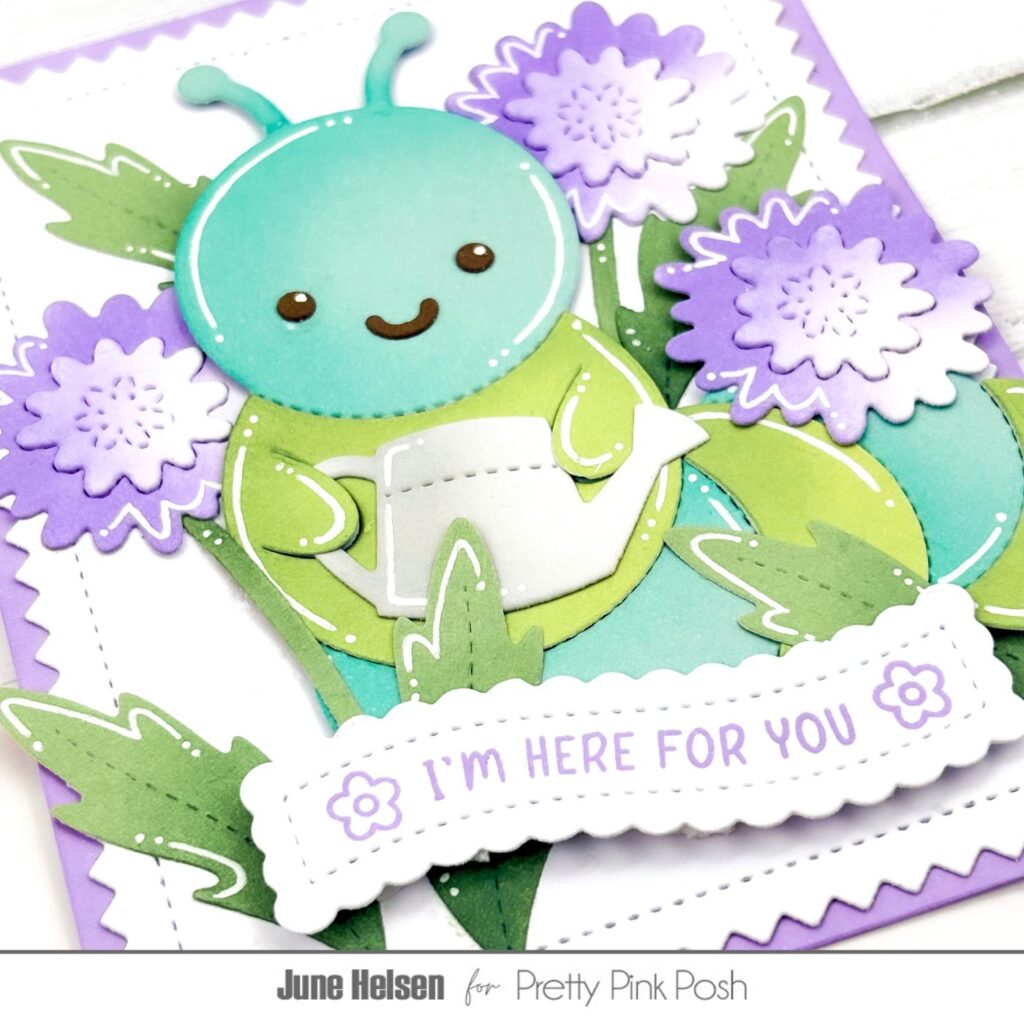
For the sentiment, I used my favorite scalloped banner from Banner Greetings 2 and stamped one of the sentiments from the Everyday Banner Greetings onto it using purple ink, as well as 2 tiny flowers from Hello Friend to fill the empty space.
I had so much fun creating this card and I hope you enjoyed reading about it! I hope to see you again soon on the blog, bye!