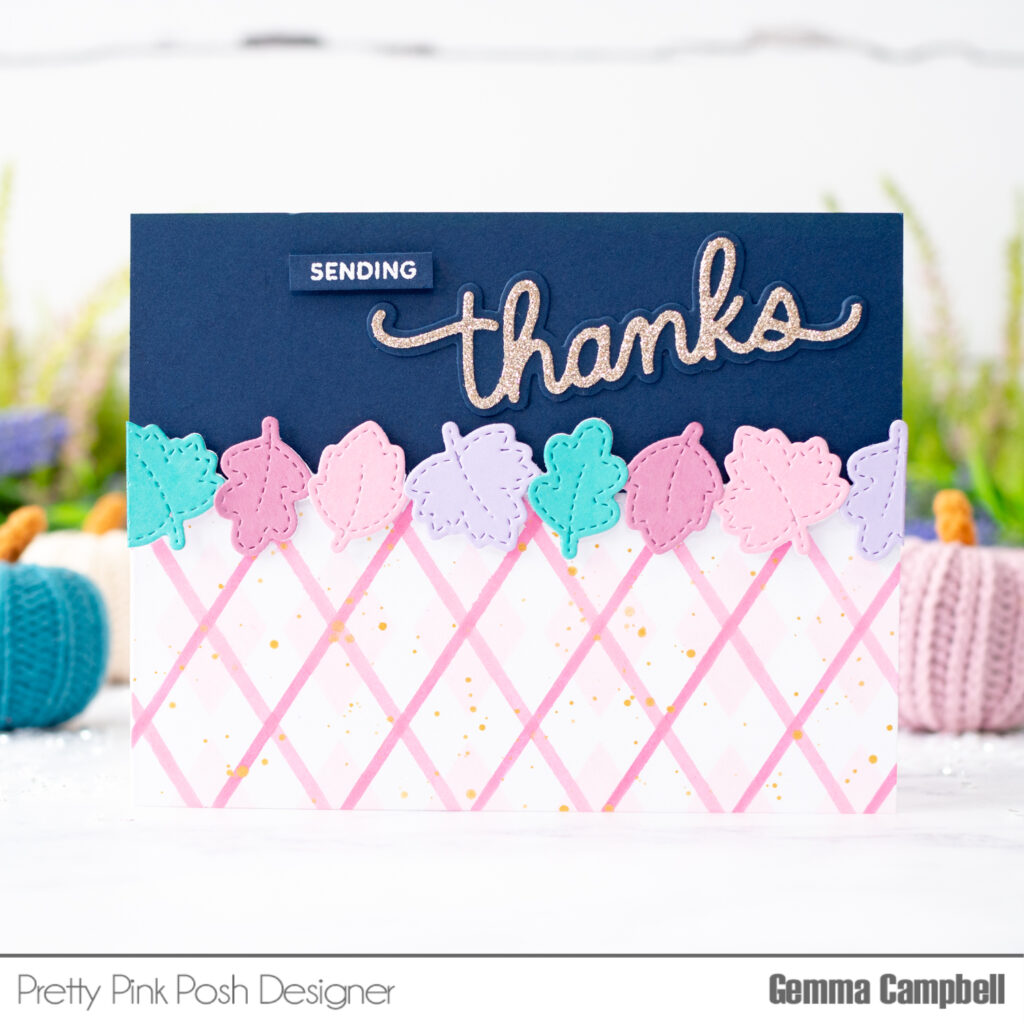
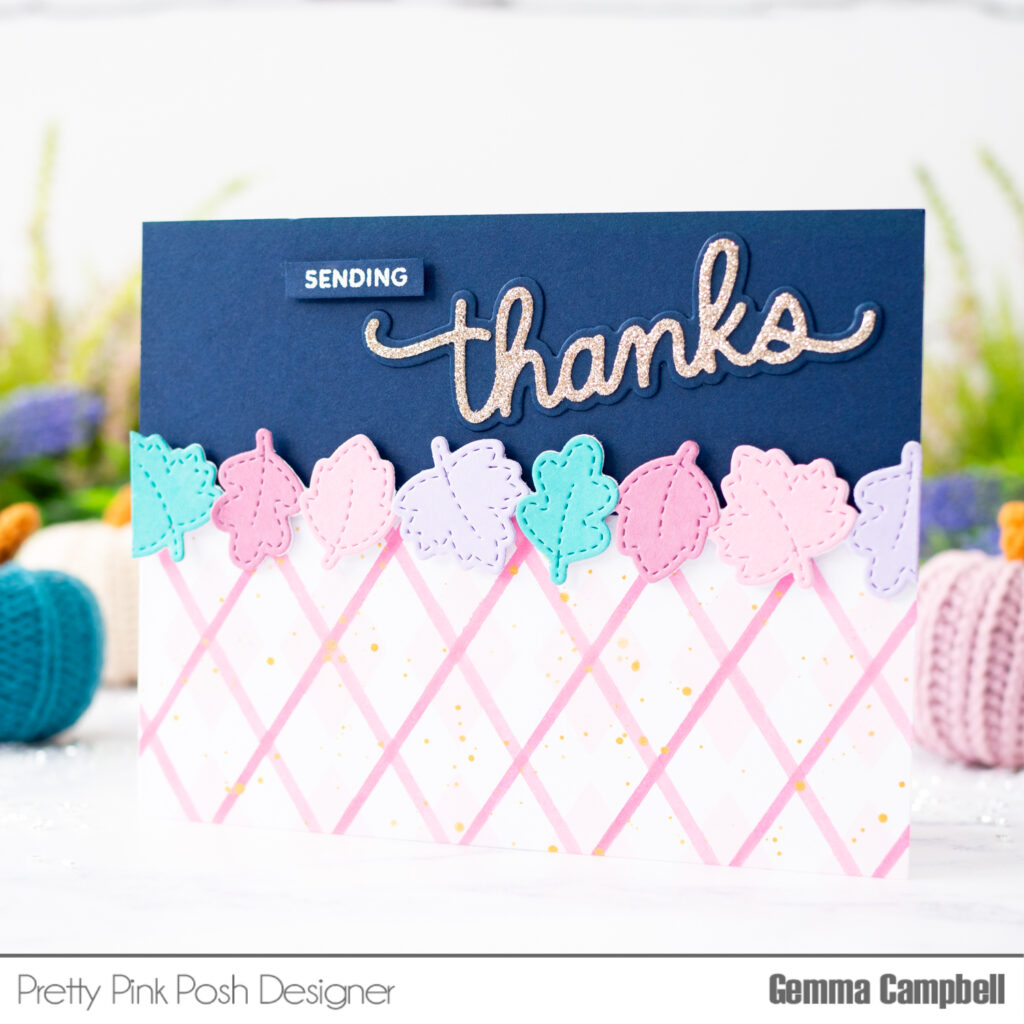
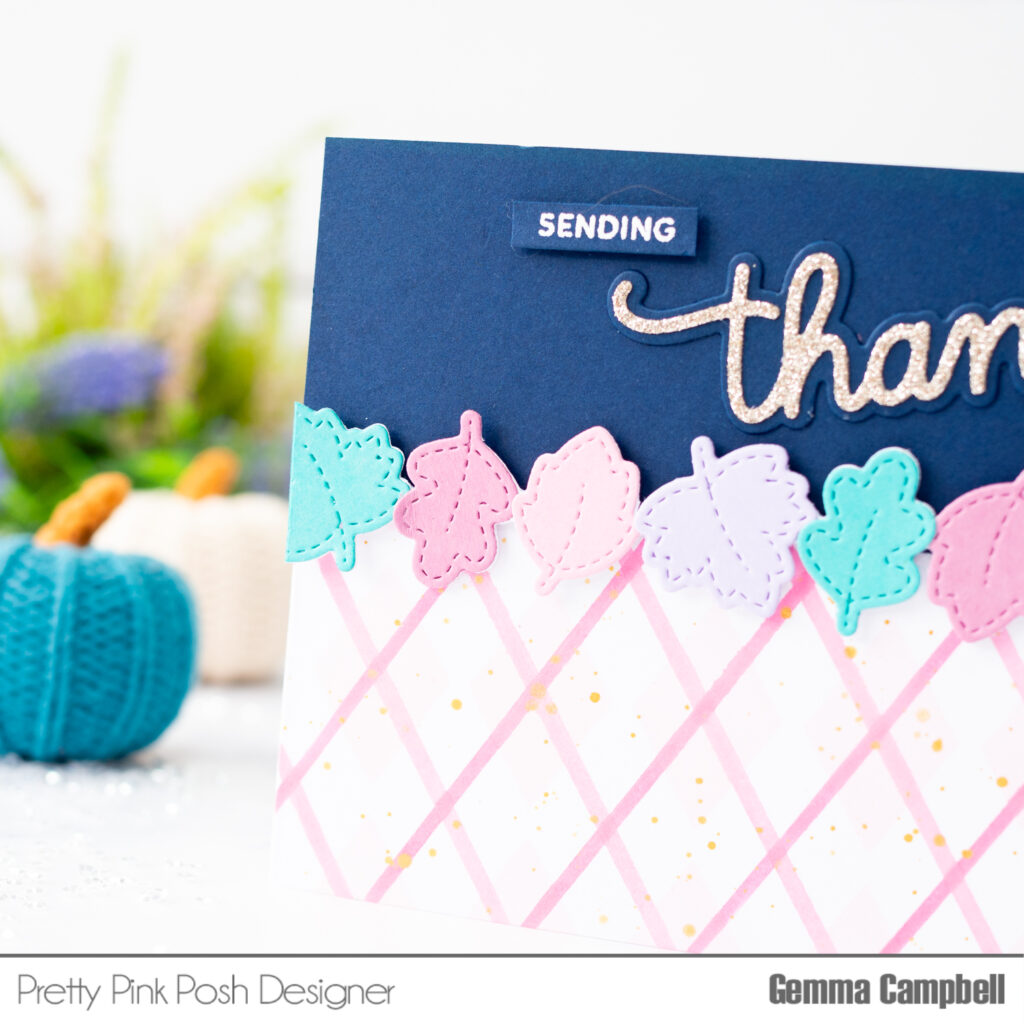
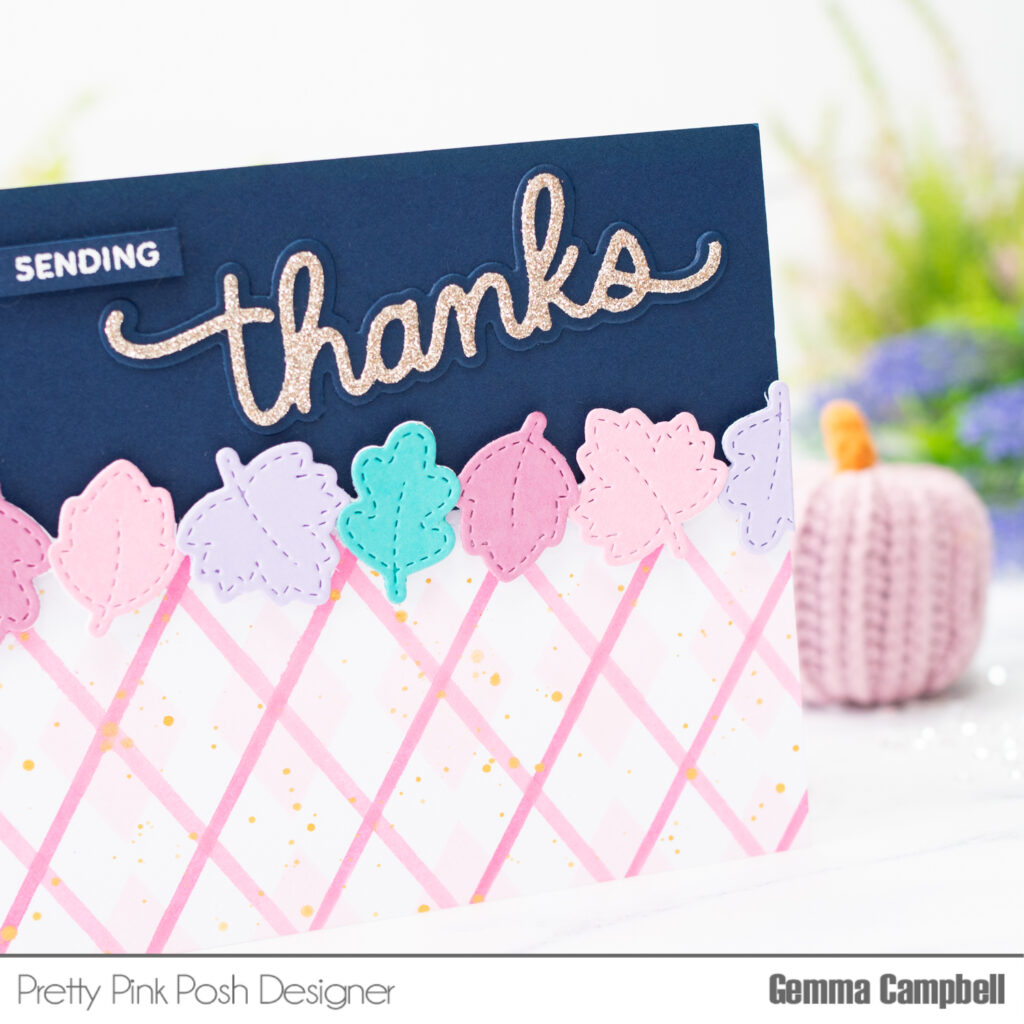
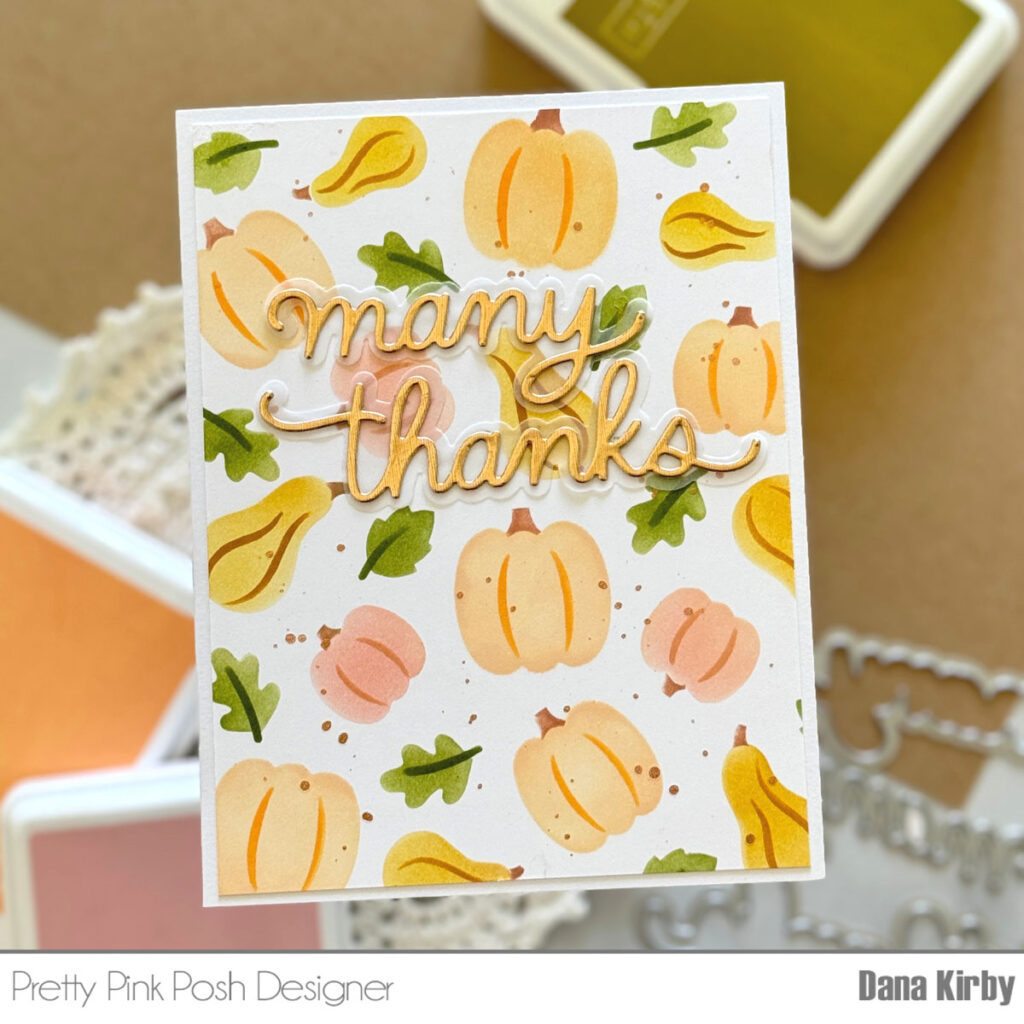
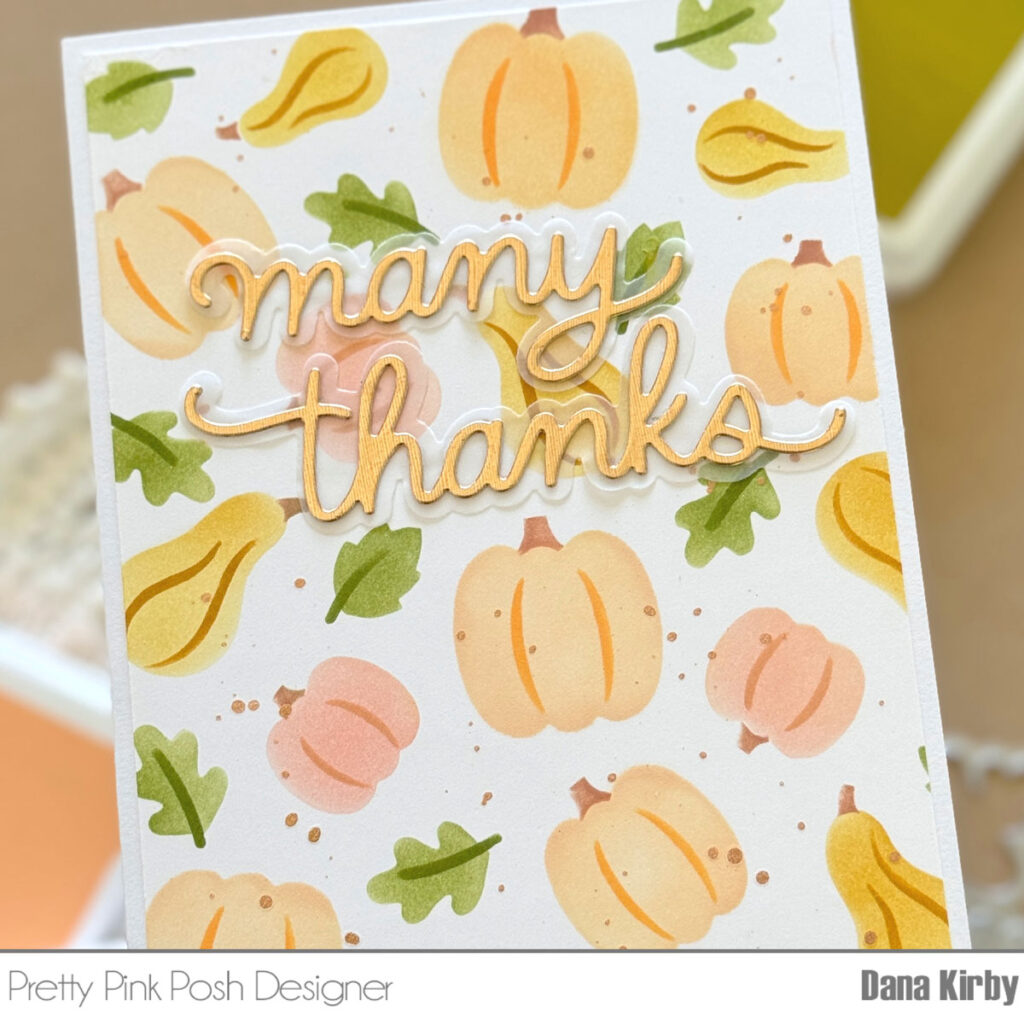
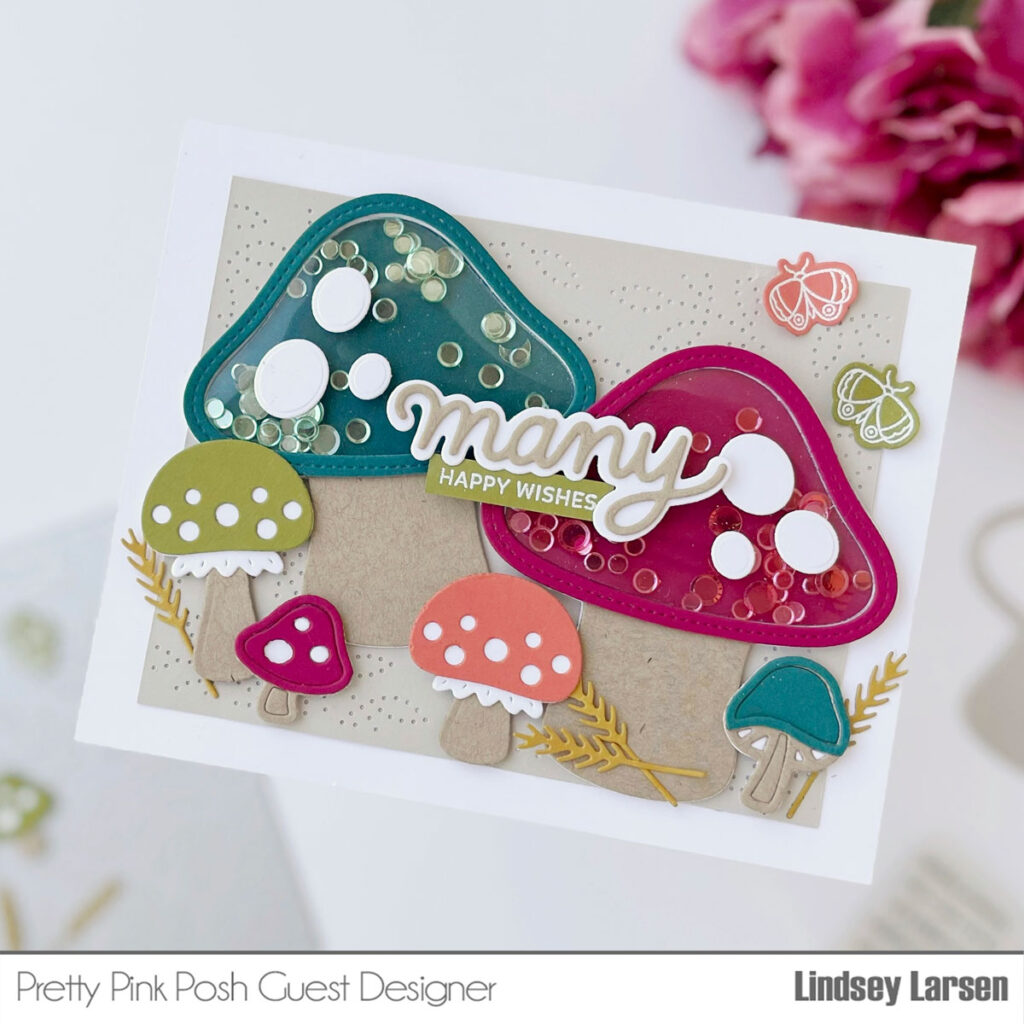
Many Thanks Leaves
Hi friends! It’s Sophie Ems here on the blog today sharing a fun idea using the new Fall Leaves Border die from the fabulous new September release. Let’s dive in!
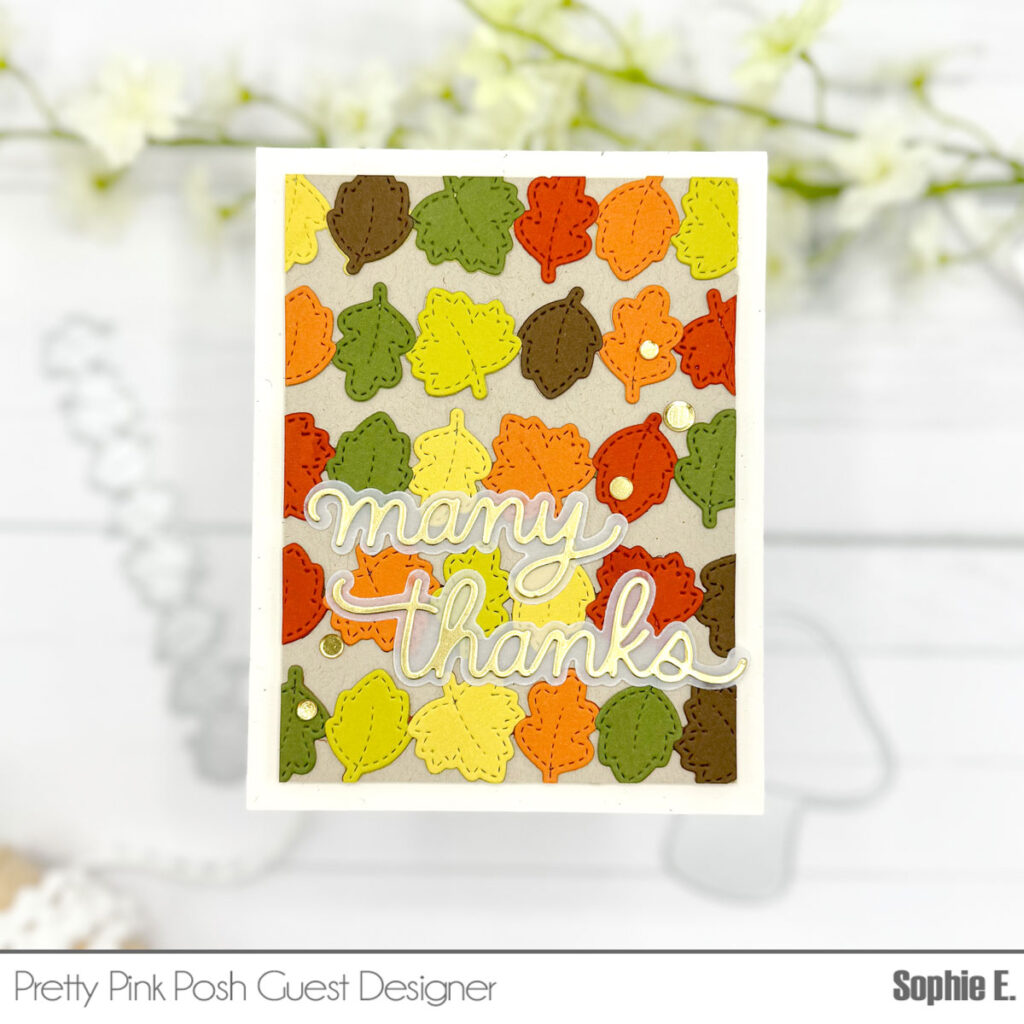
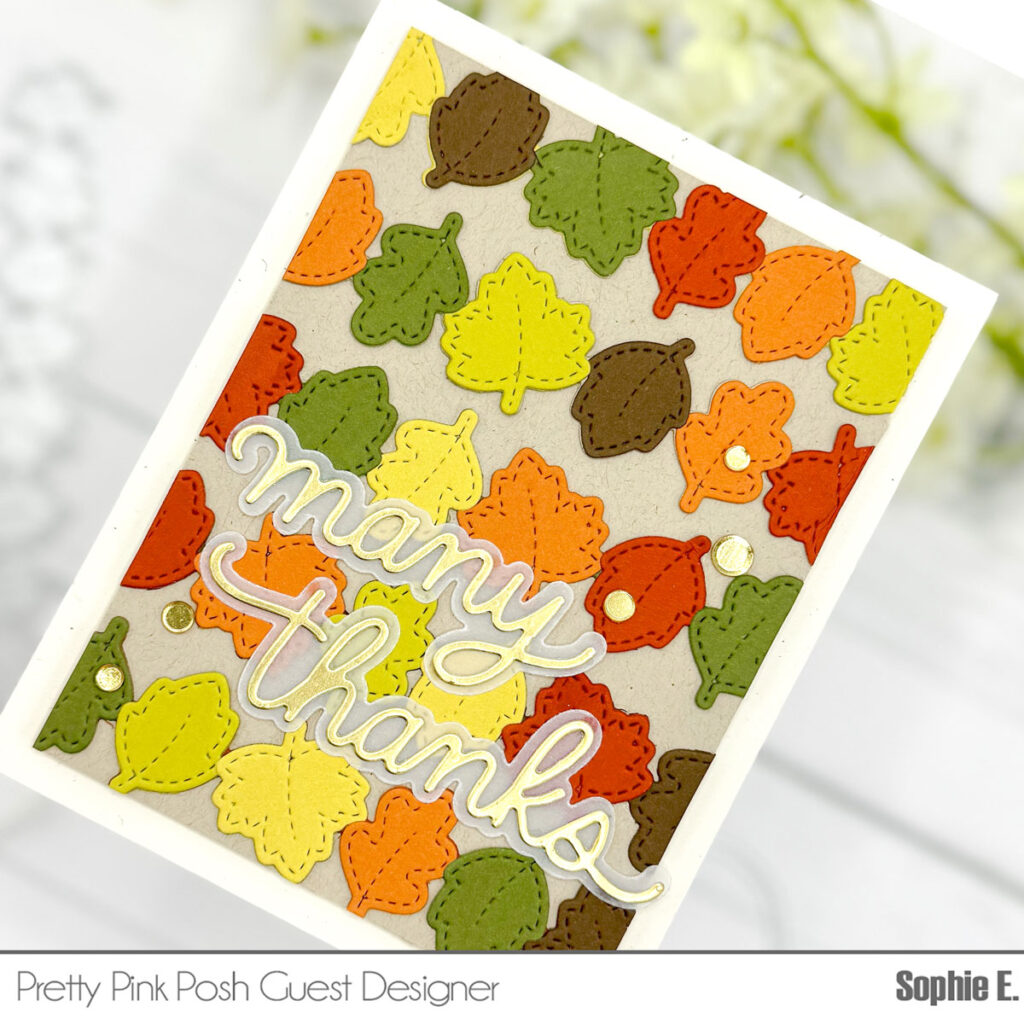
I love the various border dies that Pretty Pink Posh has. They have border dies for most seasons/holidays including Halloween, Easter, etc. Border dies can be used as accents on cards or even as the main focal point as I did here.
For my card I chose a few colored cardstocks from my stash in a variety of autumnal colors and turned on my favorite TV show while I did some repetitive die cutting. This came together pretty fast and it was relaxing to make!
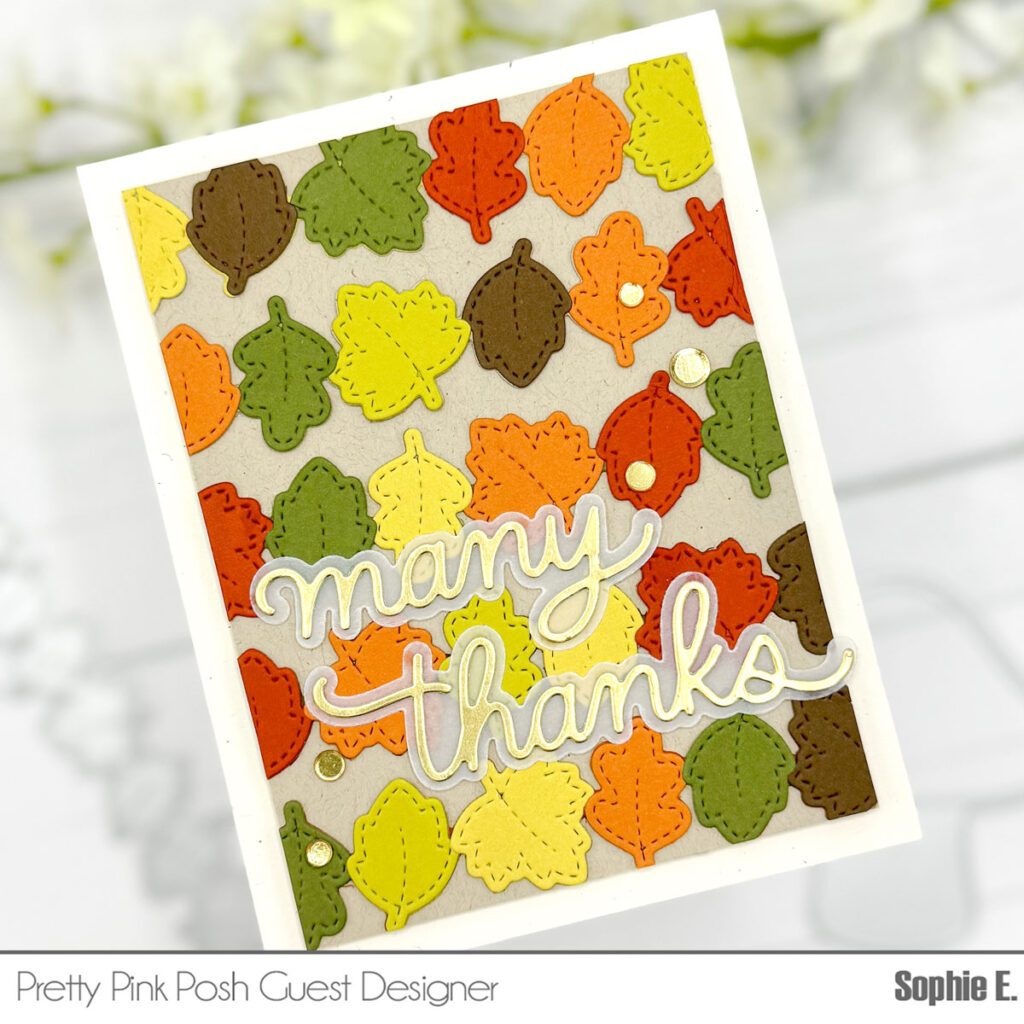
To create these colorful leaves I die cut the connected strip of leaves from kraft colored cardstock and then used the individual leaf dies from the set to cut from the various colors. I glued each colored leaf in a random order on top of the kraft strip of leaves so I could easily align everything up on my card.
For my sentiment I used my favorite die set from this release – the Many Thanks Shadow dies. I love this set! I am always making thank you cards and this elegant script thanks is just perfect. I love that it has a shadow layer that you can choose to use or not. For this card I cut the shadow from vellum and the words from gold metallic cardstock.
For my cardbase I used a piece of light cream cardstock. I cut down my kraft panel so there was a little border framing the main focal point and I like how it turned out!
I hope you enjoyed this card project! I love that this card featured die cutting only without stamping. It was super easy and relaxing to create and I hope this encourages you to look at your border dies differently!
I cannot thank Pretty Pink Posh enough for inviting me to guest design again this month. A total dream come true! I have had the best time creating a ton of projects using this September release that I’ll feature over on my Instagram throughout this month – I hope you’ll check them out!