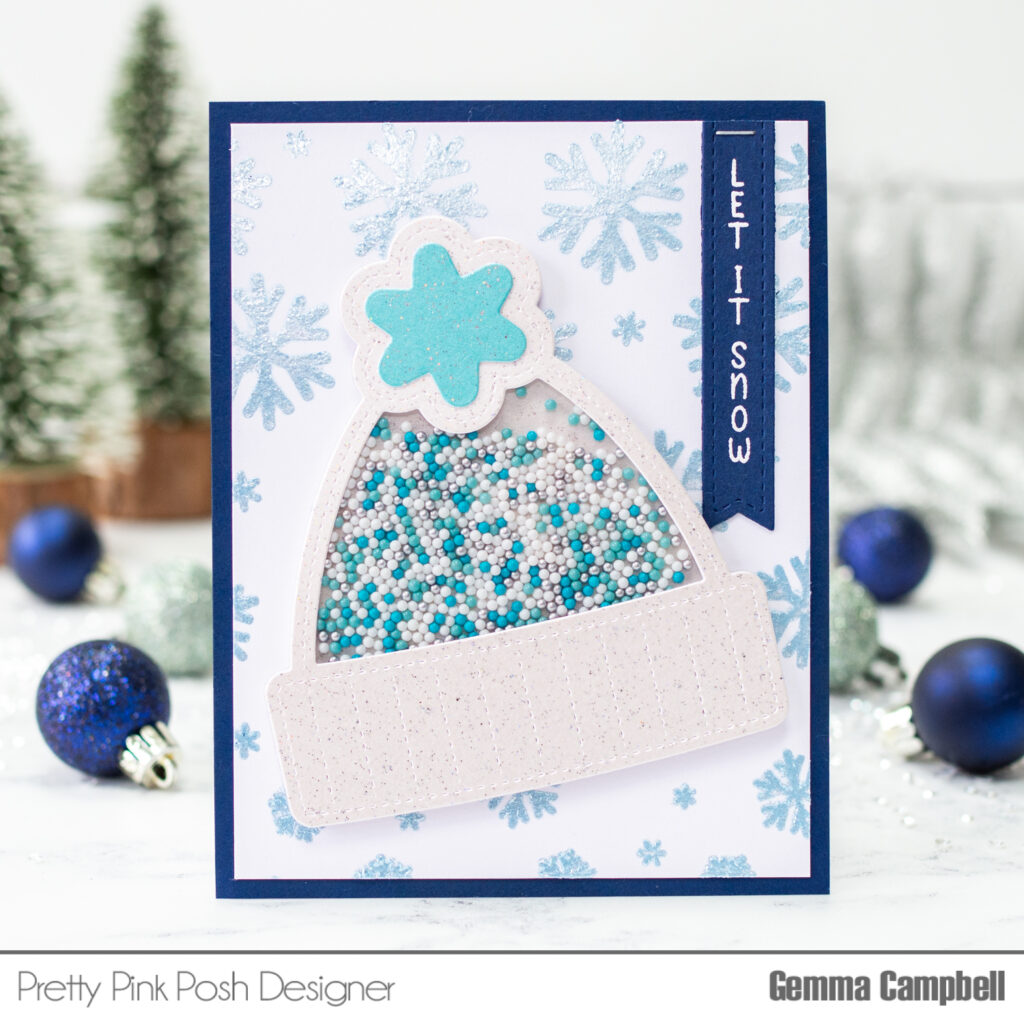
I began with the background. I placed the Cascading Snowflakes Stencil over a white card panel, then spread some Nuvo Frostbite Glacier paste over the top. I put my stenciled panel aside as it takes around an hour for the paste to dry.
*Remember to clean your stencils right away after using any kind of paste.
Next, I die cut the Winter Hat Shaker. I cut it twice from pearl white sparkle card, and die cut the centre out of one of them.
I also cut an acetate panel, along with a pearl blue sparkle bobble for the top of the hat. I adhered both these pieces to the hat with the centre cut out.
On the reverse of this die cut, I added some foam strips – just one layer all over. I added some of the beautiful Snow Days Shaker Beadsto the centre, then adhered the back panel to seal my shaker.
For my sentiment, I white heat embossed a greeting from the Upright Greetings: Christmas stamp set. I cut this out with a Sentiment Strip die, then attached it to my stenciled panel.
On an A2 card base, I adhered a navy blue panel, then the stenciled panel layered on top. Finally, I adhered the Winter Hat Shaker to the card to finish.
I hope you enjoyed this winter card idea. Thank you for stopping by!
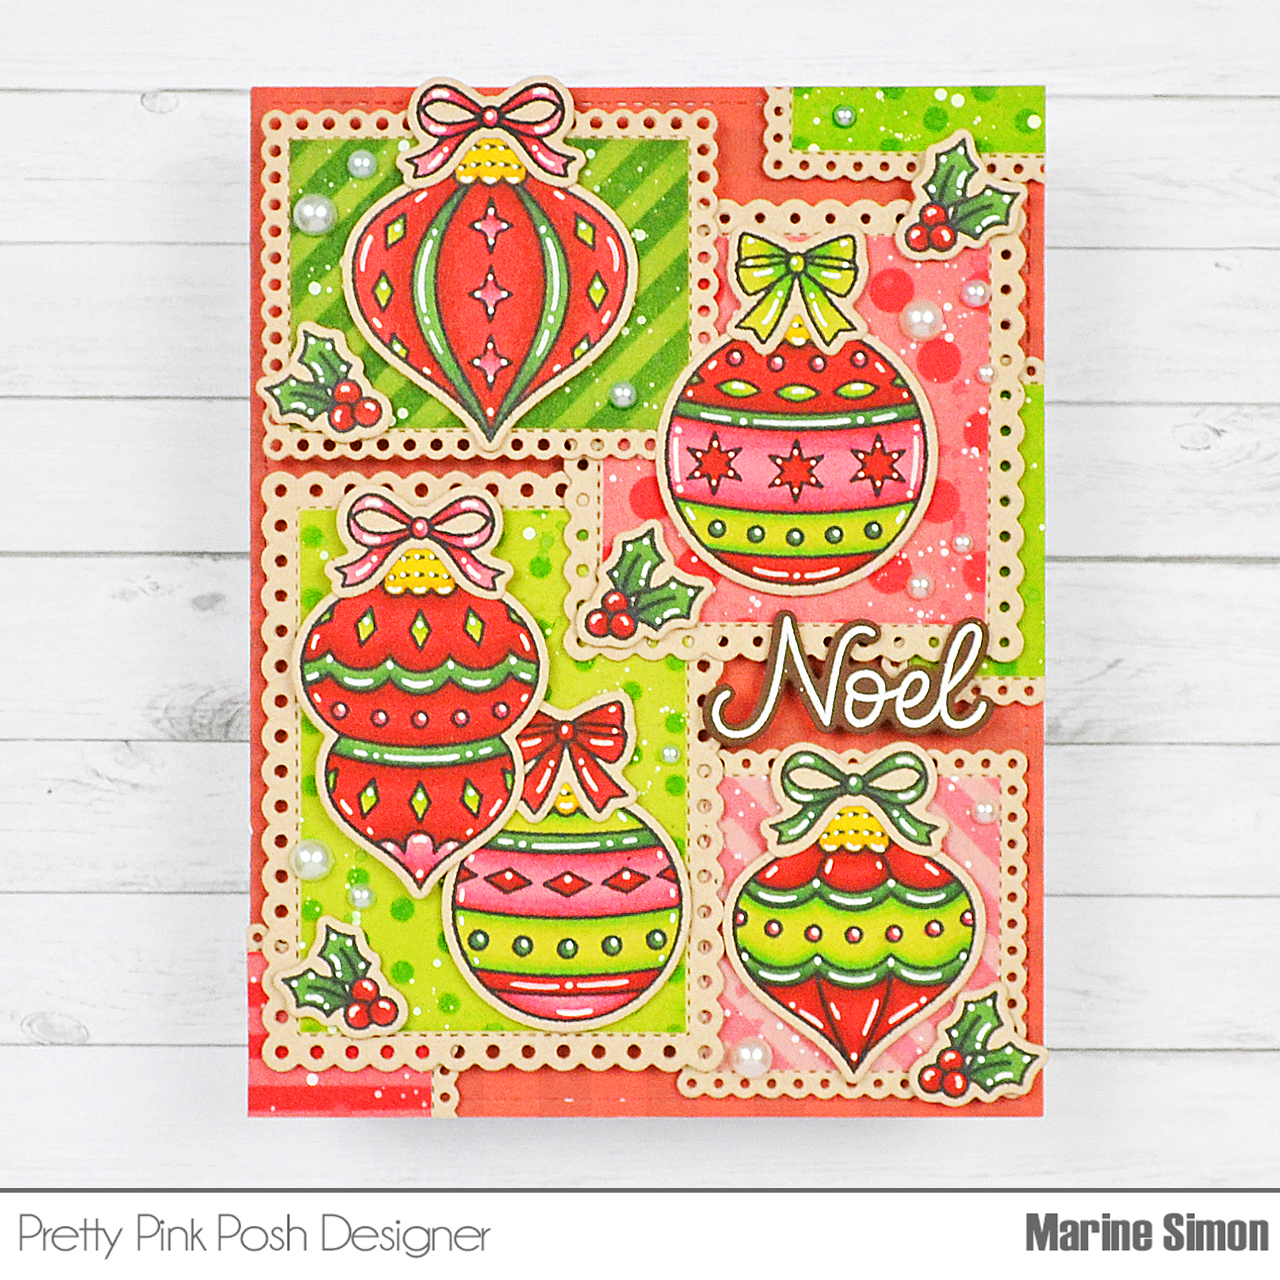
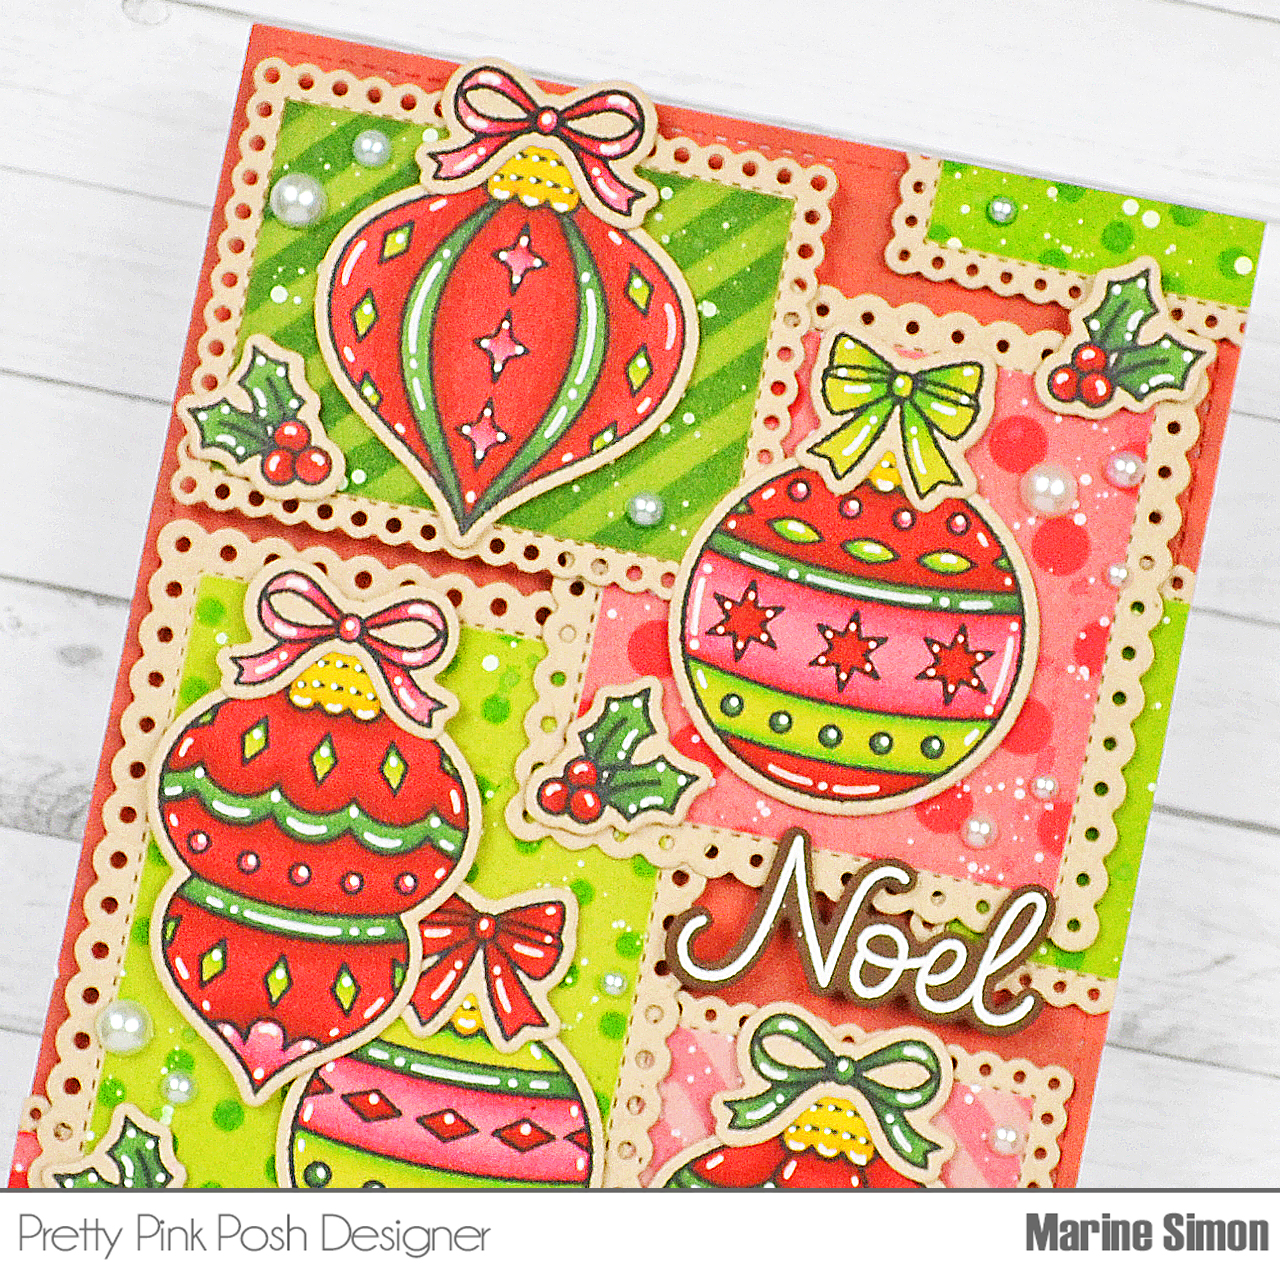
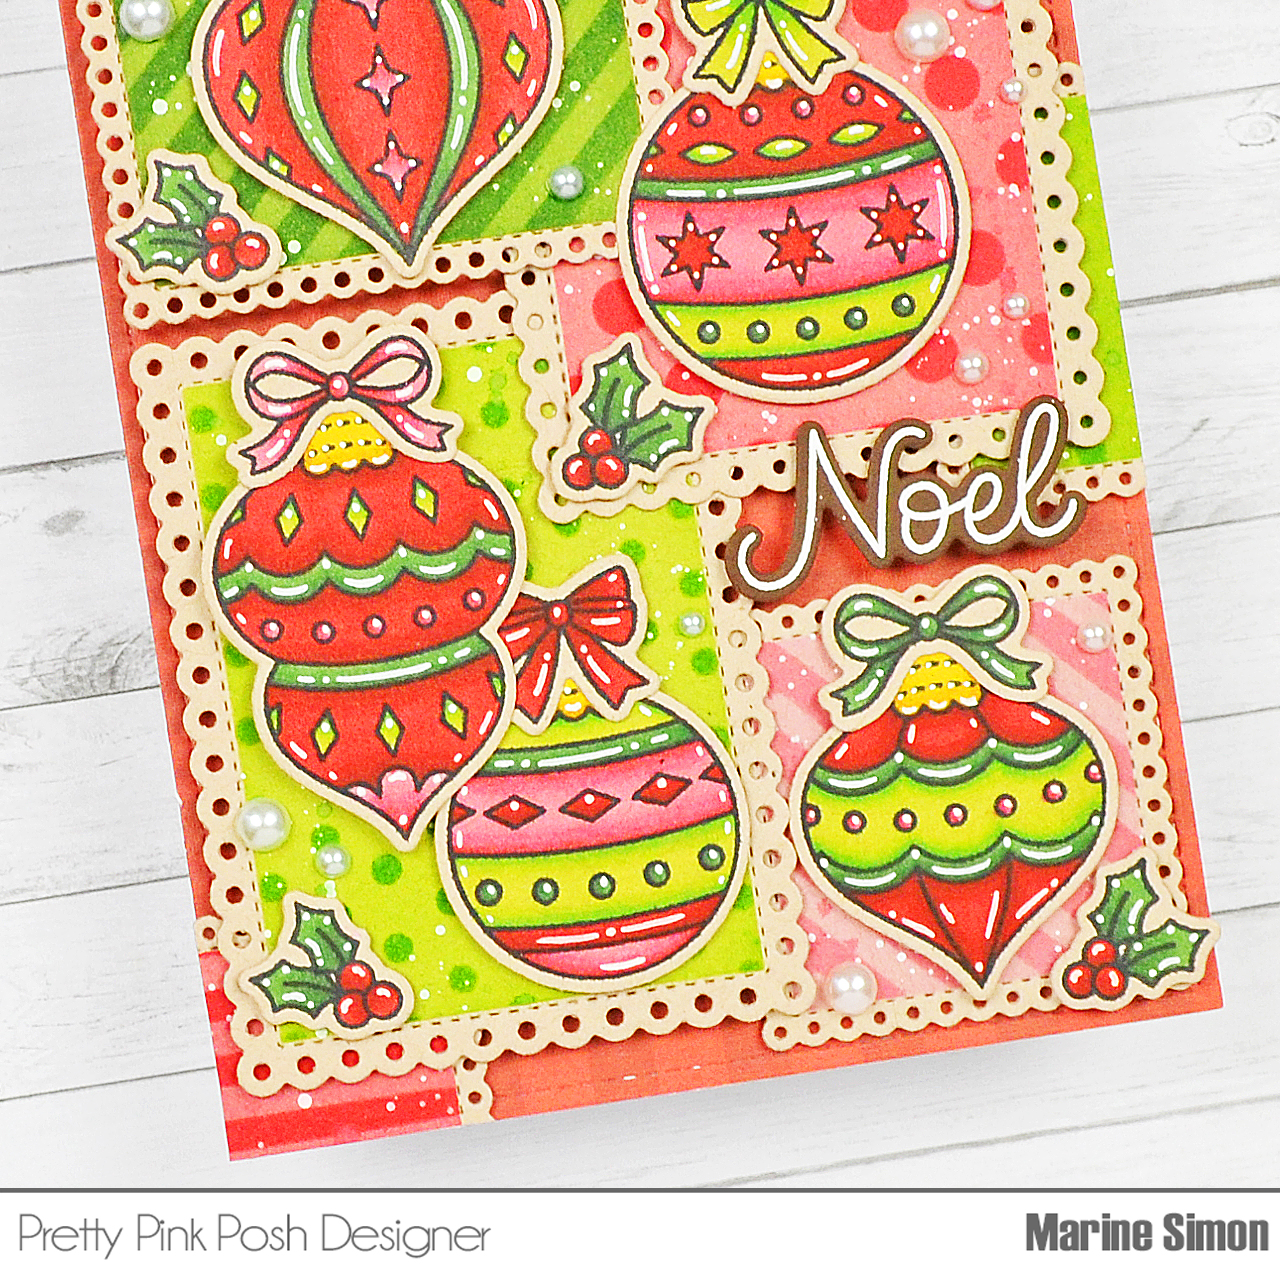
Hello crafty friends, Marine here, I’m thrilled to be back on the blog with this bright and cheerful holiday card showcasing the Holiday Ornaments from the holiday release. I went for a traditional look, with reds, greens and pinks, and colored everything on kraft cardstock to emphasize the vintage look I wanted to give to my card.
And speaking of which, I started off by stamping all the images on kraft cardstock using an alcohol marker friendly black ink. I cut them all using the coordinating dies, and colored everything using my Ohuhu markers. Most of the images (baubles, bows, holly berries) are from Holiday Ornaments, and I used the holly berries from Holiday Icons as well.
I cut a 5,5 x 4,25 inches gingham red panel, and started off by attaching my eyelet panels using 1mm and 2mm foam squares. Next I stuck the baubles and holly berries using foam squares again, I white heat embossed “Noel” from Winter Greetings on dark brown cardstock, cut it using the matching die, and attached it on the panel using foam squares. As always I added highlights and details to the images using a white gel pen, and finally, I added a few Ivory pearls here and there.
And that’s it! I hope you like this lovely Christmas card with traditional colors. Thanks so much for stopping by, and see you next time.
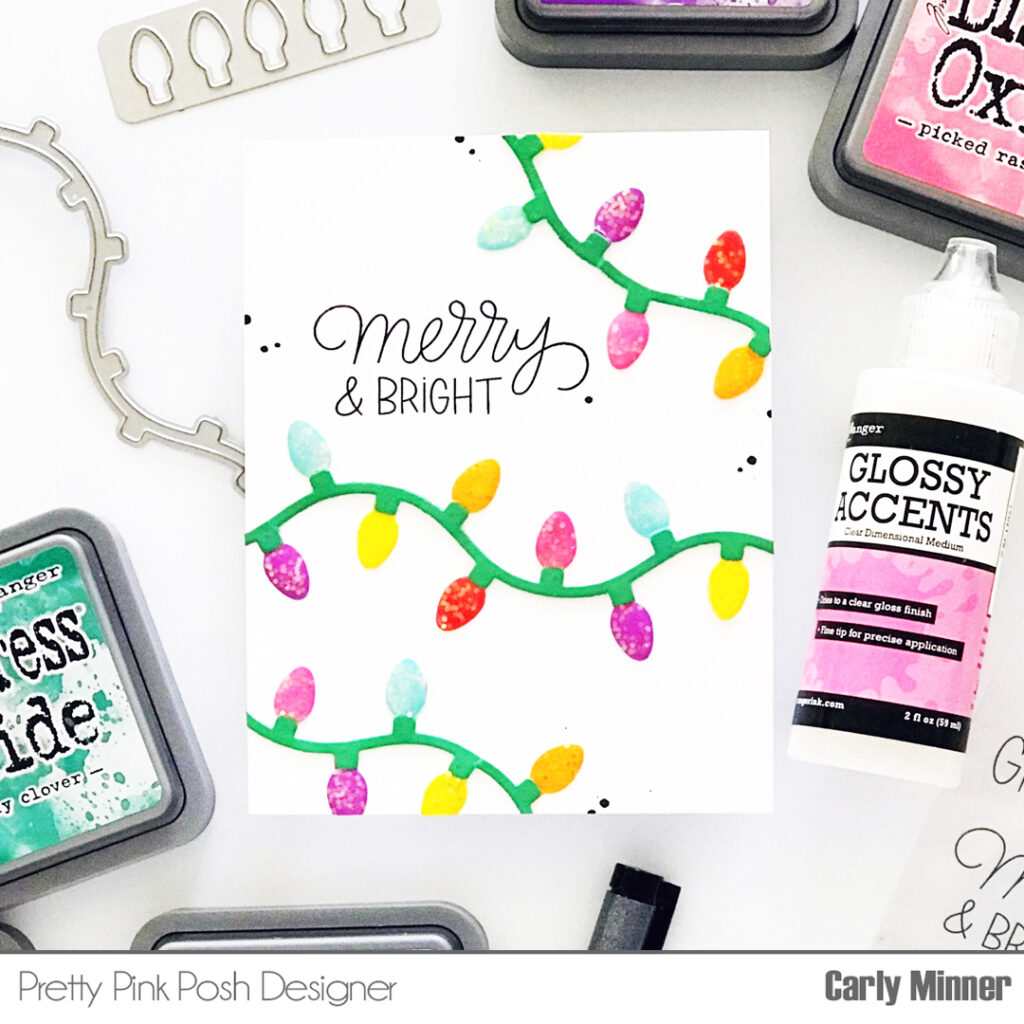
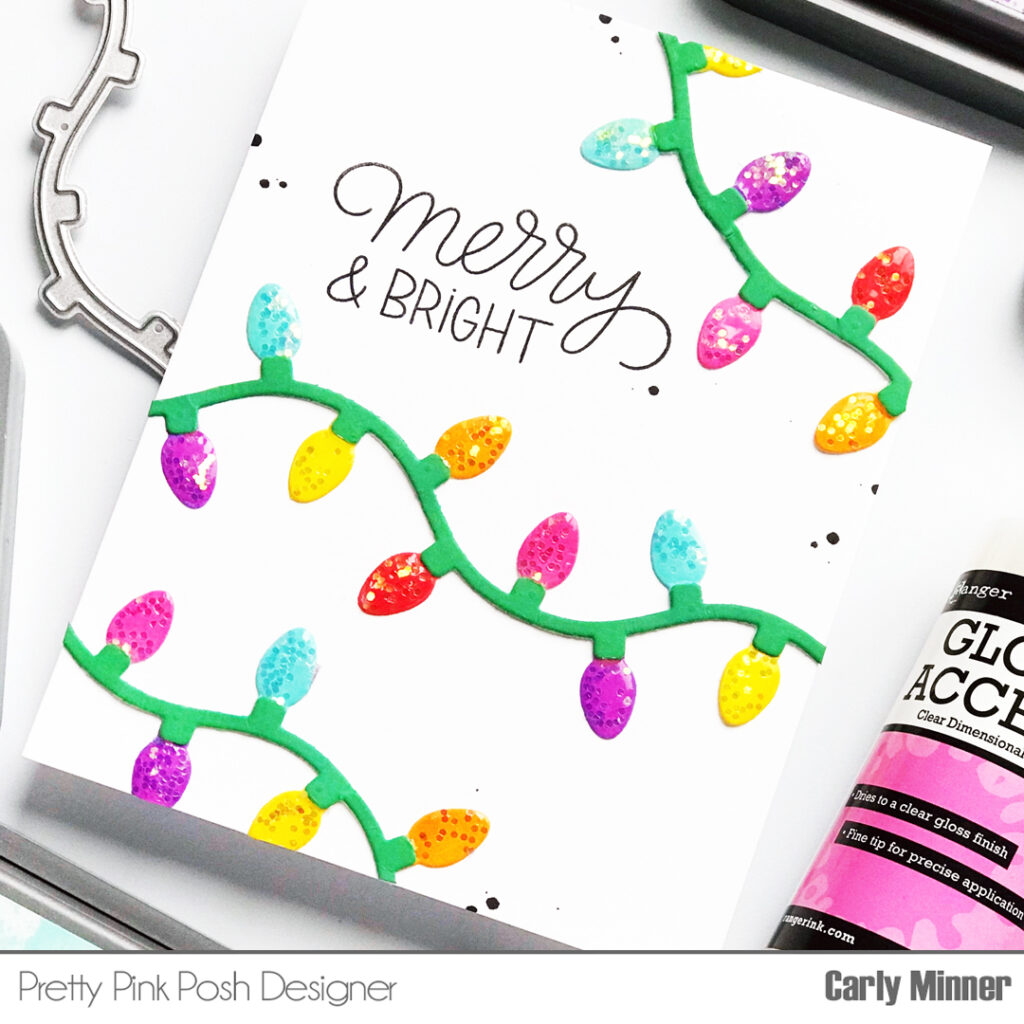
Hi Crafty Friends! Carly here and if you are reading this, you might already love die cuts like I do but have you tried dressing them up with a little gloss and glitter?
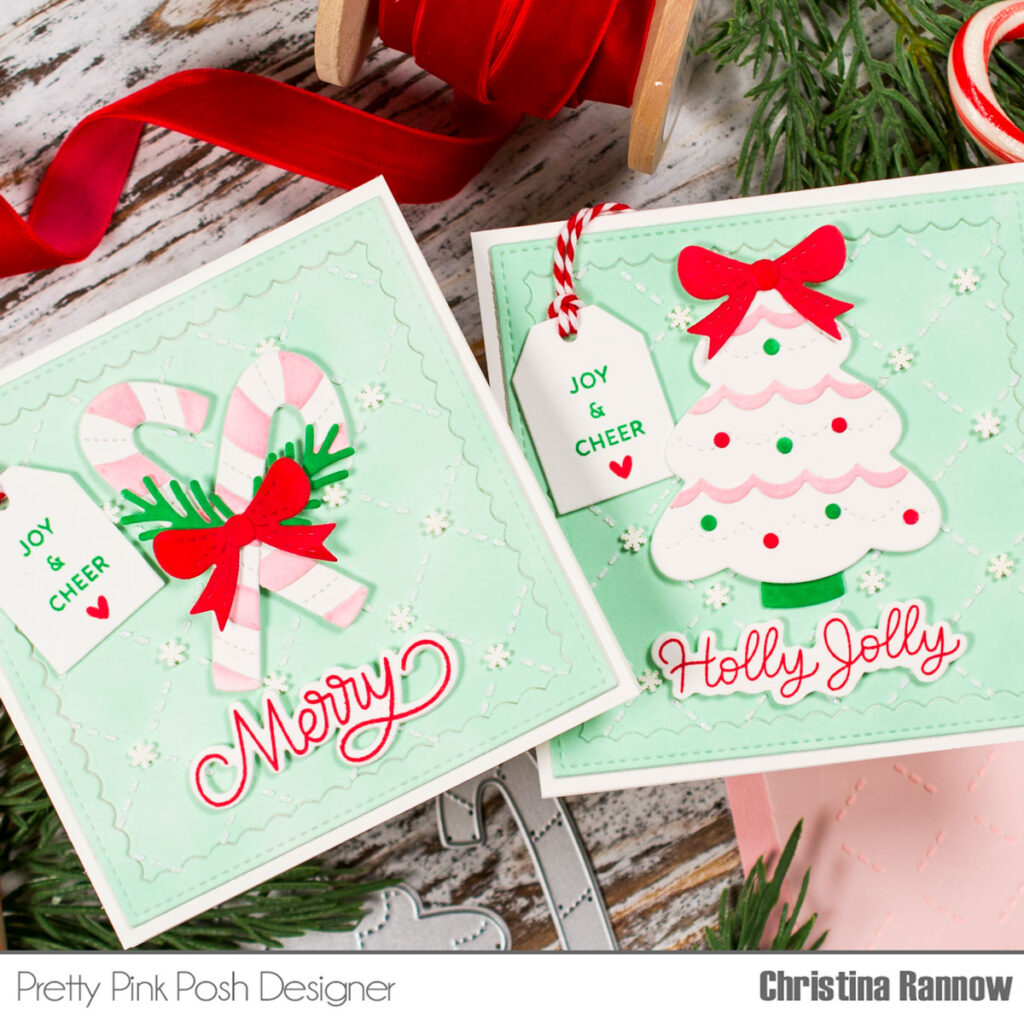
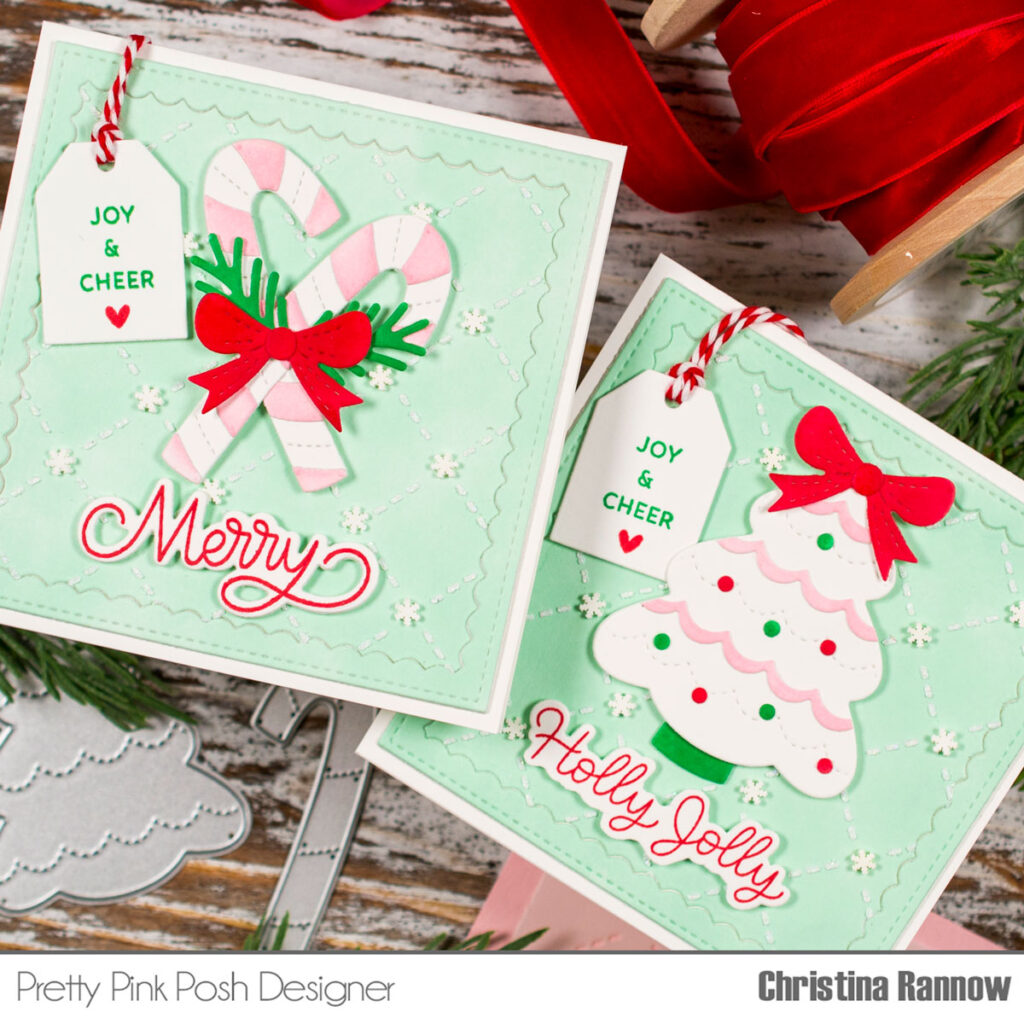
Hi friends! Christina here to share with you the cutest little holiday cards. Pairing minty green and pink with the traditional red and green gives these 4 x 4 square cards a festive vintage vibe, and they are a breeze to put together. Let’s get started!
I started by die cutting the larger Scallop Squares from white cardstock that I had inked with a mint green color. You could also die cut them from colored cardstock. Then I stenciled the inside square pieces with just the lattice layer in the Layered Leaf Lattice Stencils with white glitter stencil paste. Once these were set, I attached them and the scallop frame pieces to card bases measuring 4 ¼ x 4 ½ .
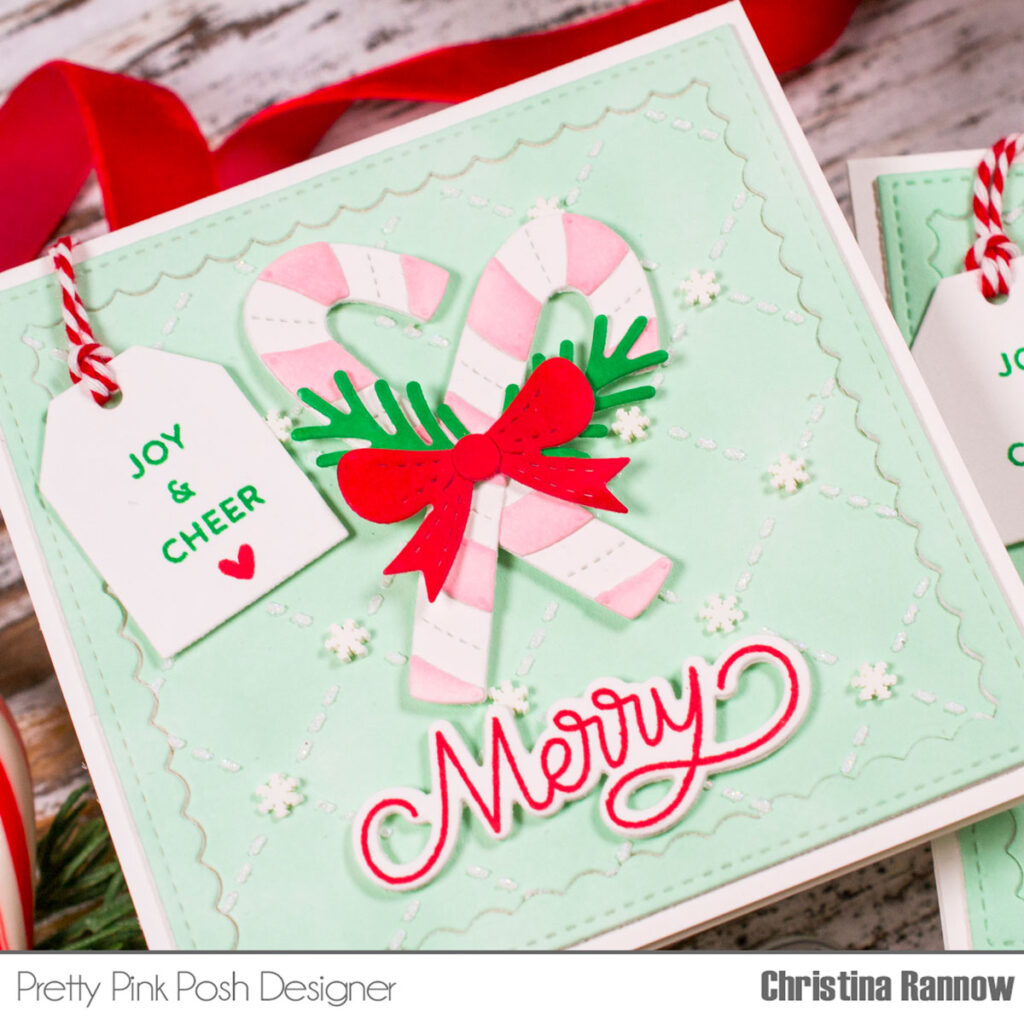
After inking the die cuts, I assembled them and attached them to my card fronts with foam squares. I stamped a small sentiment from the Sentiment Strips: Christmas Stamp Set on the tags and added some red and white twine before attaching them with foam squares too. The twine is just wrapped around to the back and secured with a little Christmas washi tape. Nothing fancy.
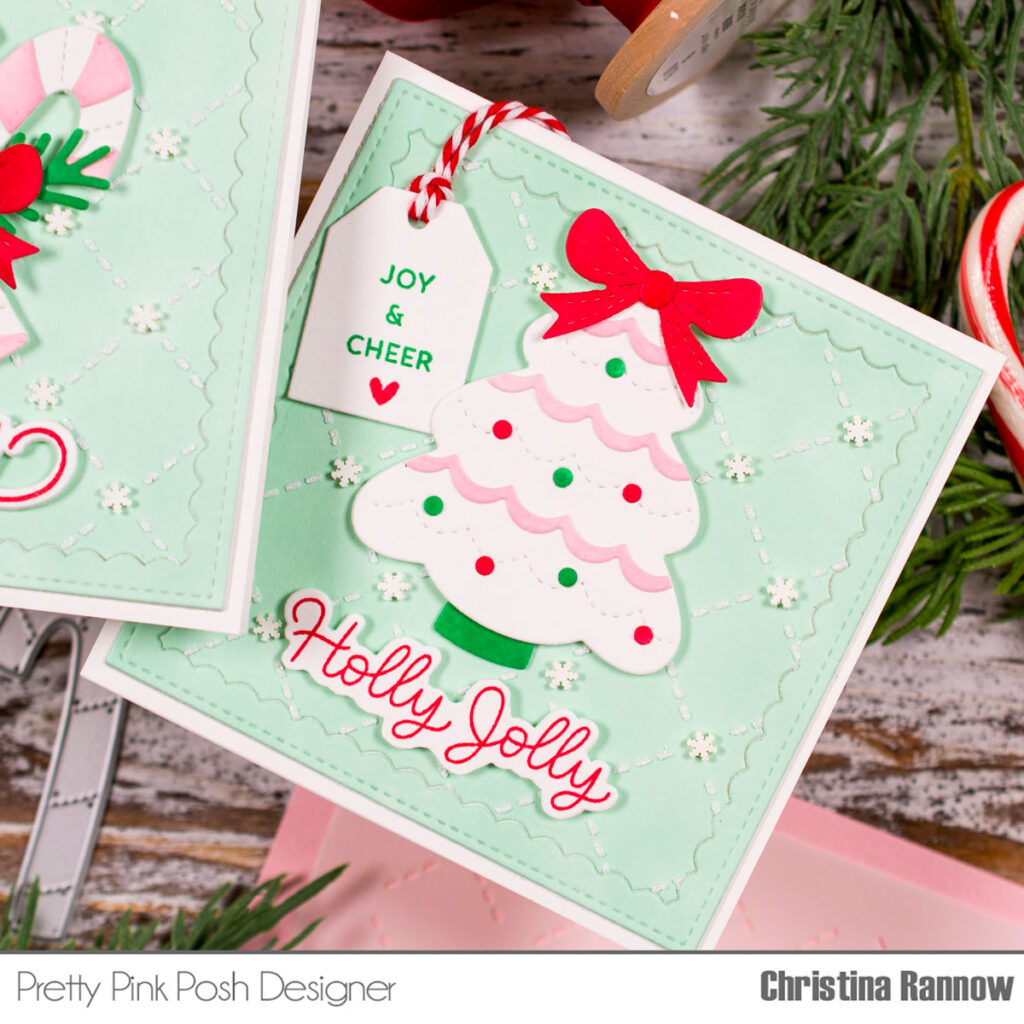
To finish up my cards, I stamped sentiments from the Winter Greetings and Holiday Scripts sets with red ink before die cutting and fussy cutting them and then attached them with foam squares. For the final detail, I added white clay snowflakes from the Winter Snowflakes Clay Confetti to the stenciled backgrounds.
Thanks for following along with the steps to creating this festive pair of 4 x 4 holiday cards with a fun vintage vibe. See you again soon!
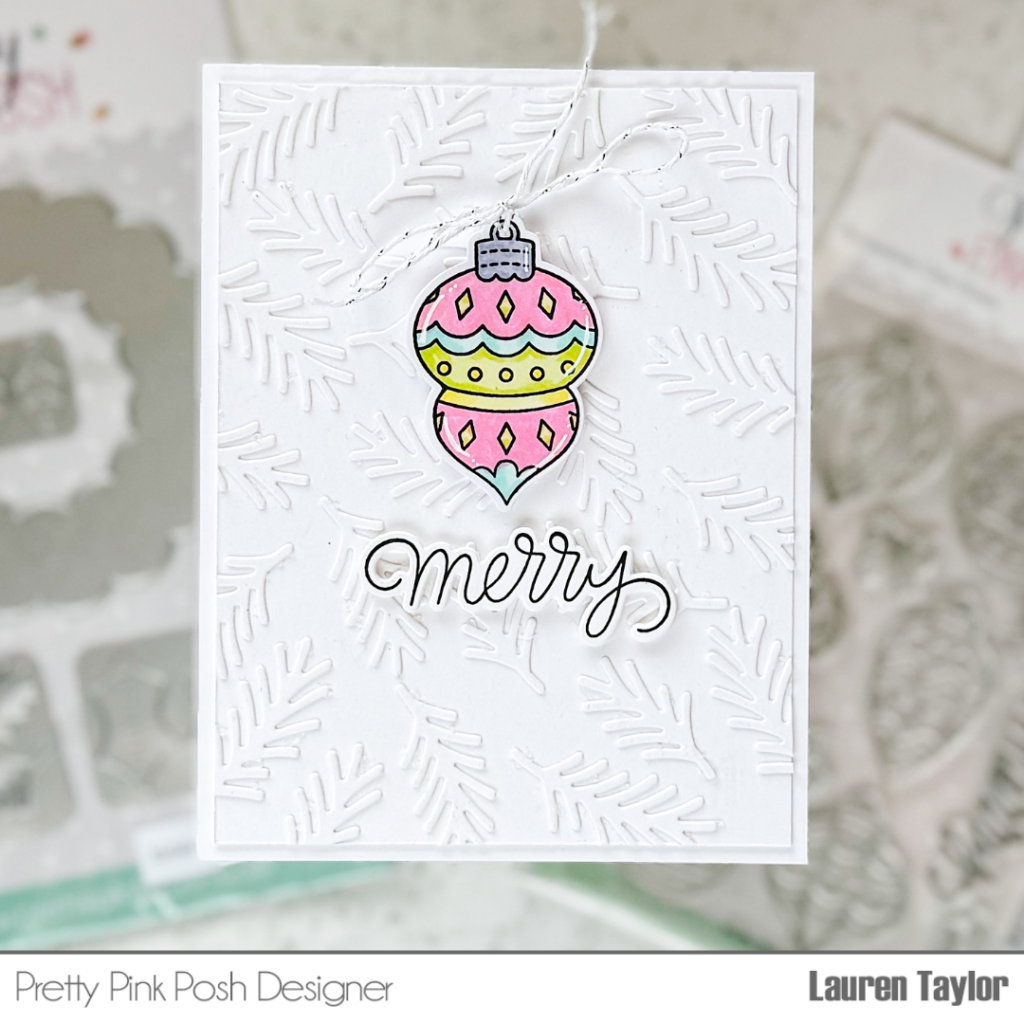
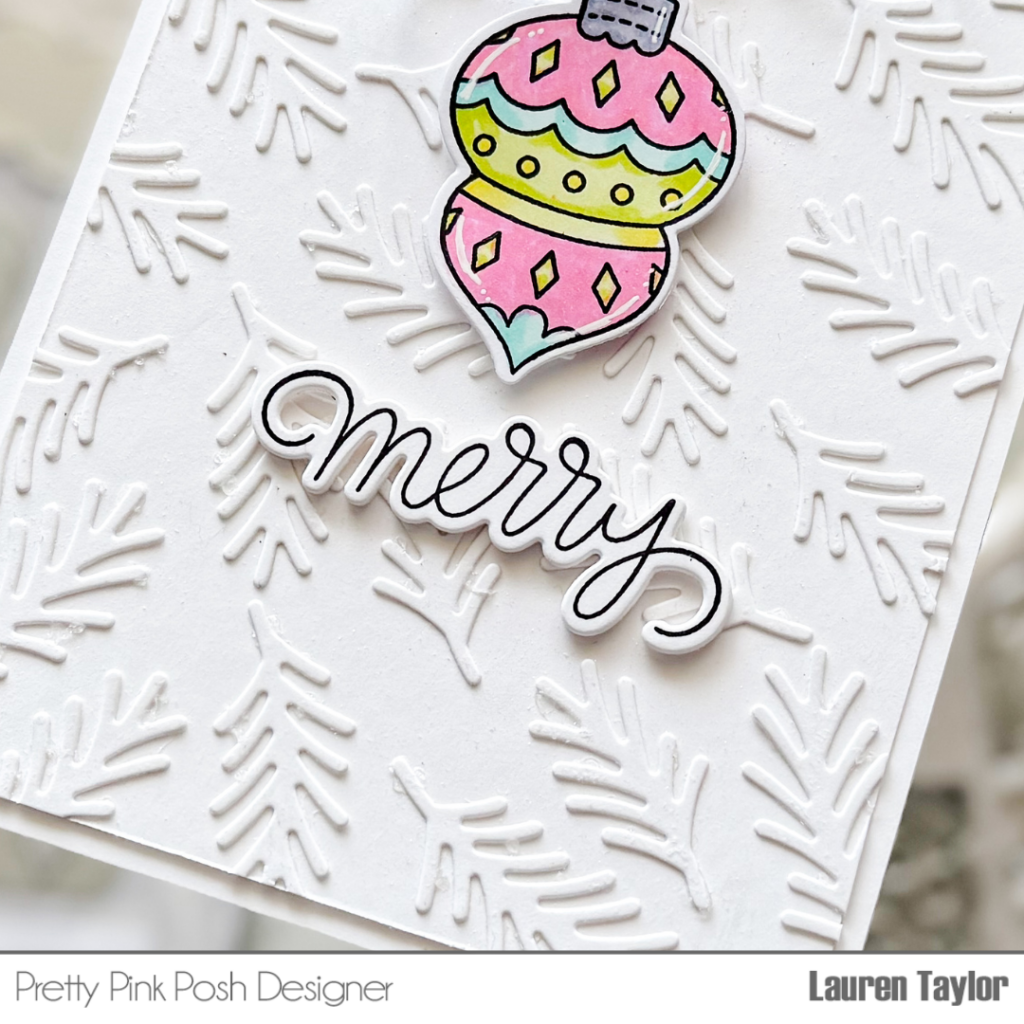
Hi, friends! It’s Lauren and I am back with a new video today. I have a simple, faux embossed Christmas card to share with you! My card has a tone on tone look using die cuts which gives the card a look and feel like an embossing folder was used.
I started with die cutting the pine needles (all three sizes) from the Holiday Wreath Builder Dies – each die four times from white cardstock. I cut a panel of white cardstock to 4×5-¼” and glued the pine needle die cuts around the panel. When the glue was dry, I trimmed off any of the small die cuts that extended past the panel. I used an iridescent glitter spray on top of the panel to give it some shine and make sure all of those pieces were glued down.
Next I stamped my favorite of the vintage ornaments from Holiday Ornaments Stamp Set and colored it in with alcohol makers. I also stamped the “merry” sentiment and used the Coordinating Dies to cut them both out. I used a small hole punch to add a hole to the top of the ornament and tied a bow with baker’s twine.
I adhered the ornament to the center of the card and the sentiment just below it. To give the sentiment dimension without foam, I cut the “merry” three more times out of scrap white cardstock and layered them all together before attaching to the card.
I hope this simple card brings a smile to your face today!
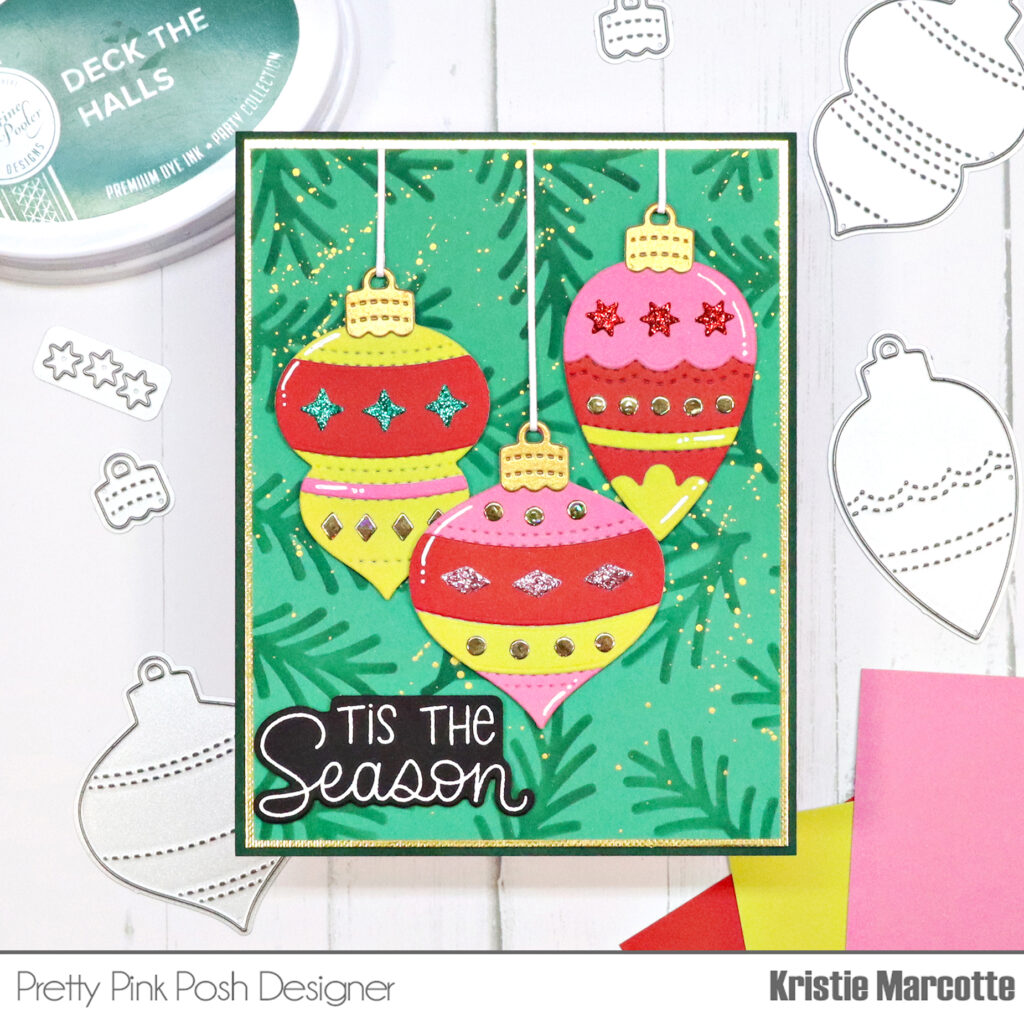
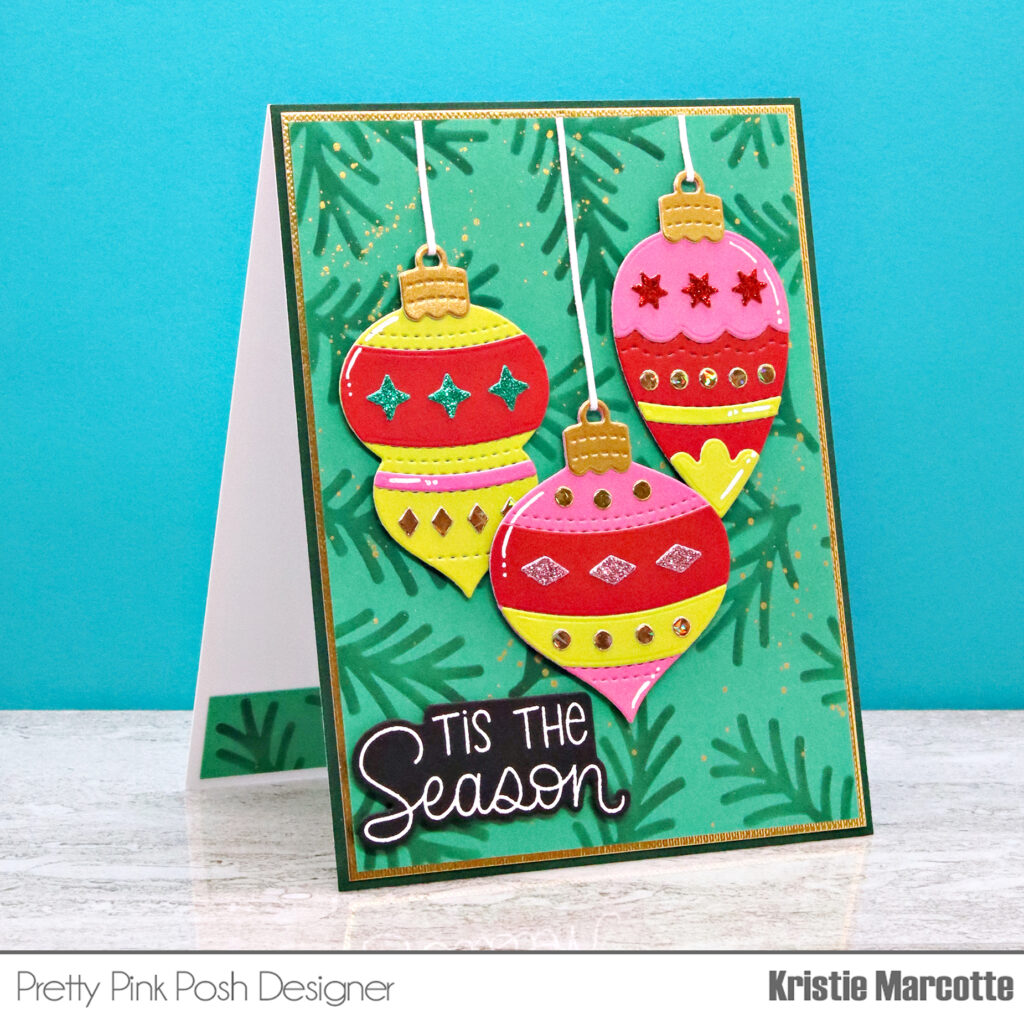
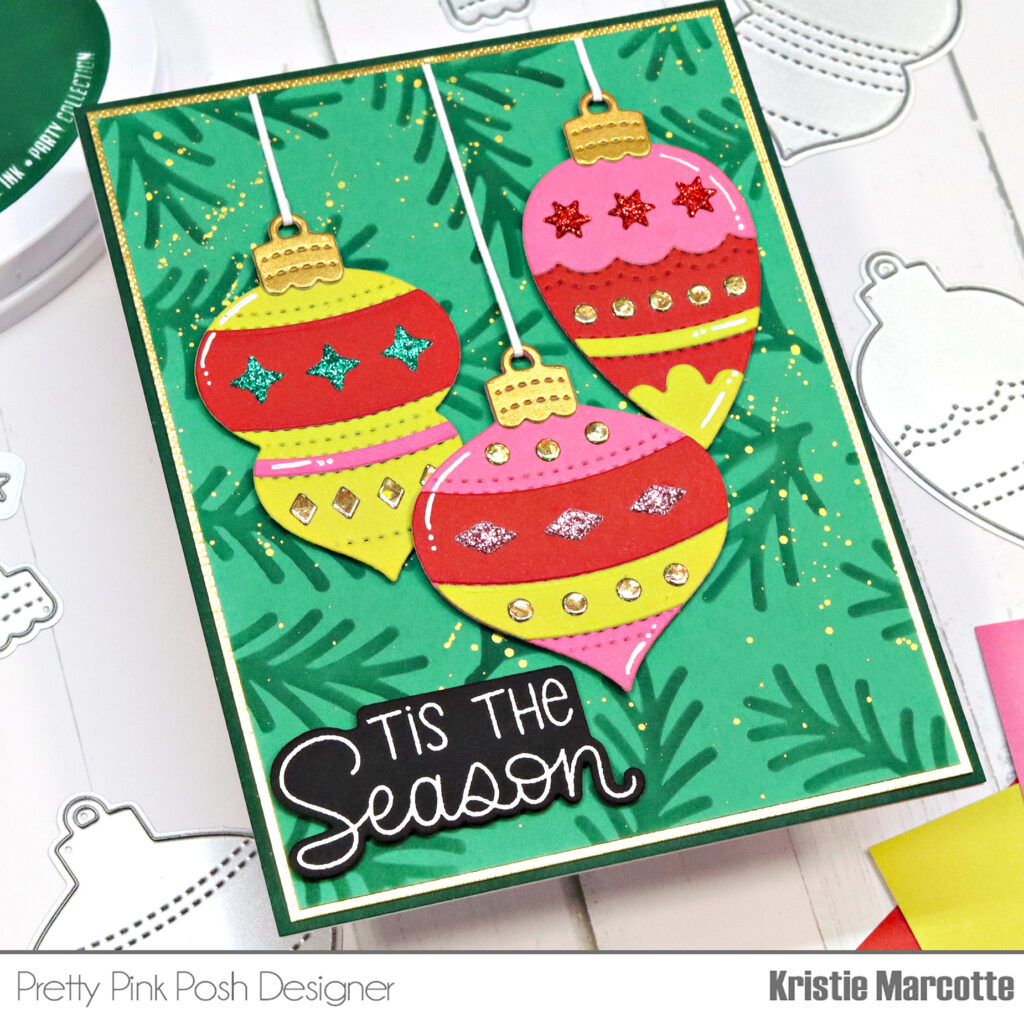
Hello friends! It’s Kristie and I have a fun Christmas card to share today. I used Pretty Pink Posh’s new Build an Ornament die set with some vibrant colored cardstock.
The Build an Ornament die set is super cute and so fun to customize. There are 4 different sizes and ornament styles, plus lots of cute pieces to decorate the ornaments.
For the background of my card, I used just one of the stencil layers from the Layered Christmas Lights set. I love the look of the pine branches behind the ornaments. For a bit of sparkle, I splattered the background with gold watercolor. I layered the background first on gold mirror cardstock, then again on dark green cardstock.
I selected 3 vibrant cardstock colors for the ornaments and used specialty cardstock for the little décor pieces. There’s lots of sparkle and shine on this card!
The sentiment is from the Winter Greetings stamp set and I cut it out with the coordinating die. I heat embossed the sentiment with white embossing powder, so it pops against the black cardstock.
Hi friends Debbie here! The colors of my Stocking card was influenced by The Color Cube #206 in the Winter category. I love these colors together and I was told these are the Christmas colors for 2024!
Starting off with a 5 X 7 panel and ran it partially through the P6 with the Pierced Snowflake Panel. Then I moved it over to do the other side and ran this side partially through. You can also have the cutting plate not covering it all where you don’t want any piercing or a cut. I figure the center will be covered with the center stocking. Trim the panel down to 4.75 X 6.75 inches.
Next I blended Simon Says Pawsitively Ink- Heather and Twilight, then splattered on Dr. PH Martin white diluted down a little.
Die cut out the Build a Stocking Diesfrom Cornflower, Light Pink, Lilac, Orchid, and Royal Blue cardstock. I die cut out all the dies with all the colors to mix and match! Plenty of left overs to mass produce!
Then with the smallest bow die from Beautiful Bows Die, die cut out with the papers used from above.
Next was the Large Joy Shadow Die, cut out from White Glossy and Metallic Silver Cardstock. I did cut the shadow die an additional three times more for dimension.
The top of the middle stocking I stamped and white heat embossed the sentiment from Sentiment Strips: Christmasby masking off the “Sending You” Die cut it out with the top of the stocking from Build a Stocking Die set.
I added 3D foam behind all the stockings and also silver thread to make them look as though they are hanging. Just tape the thread onto the back of the panel.
Adhere to the panel a 5 X 7 cards base with liquid glue. Then attach the bows, on the bows I added matching Pearls. Lastly was to add white highlight to the images.
Thanks for stopping by and stay crafty my friends!
Hello crafty friends, Marine here, I’m so happy to be back on the blog with this super fun and very colorful slimline card featuring the cutest Christmas trees celebrating the holiday season. When it comes to making holiday cards, I don’t particularly have a favorite color palette, I like the traditional red and green, pastels, and even rainbow, like today’s card, for some extra fun.
I started off by cutting a Strathmore bristol smooth panel using the largest Slimline Peekaboo Windows die, and I colored that panel with oxide inks. When I make rainbow cards, I like to create tone on tone looks using my favorite oxide inks, so I first blended a base using, from left to right, kitsch flamingo, dried marigold, squeezed lemonade, twisted citron and salvaged patina oxide inks. And I added a fun tone on tone tree pattern to my panel using the Layered Christmas Trees stencil #1 along with, from left to right, picked raspberry, spiced marmalade, fossilized amber, mowed lawn and peacock feathers oxide inks.
I added lots of textures to my background, starting with water droplets that I dried with a paper towel. I mixed some copic opaque white ink with water and added splatters all over the panel using a slim brush. And then I did the same with liquid stardust for sparkling details, and with fossilized amber distress spritz for gold details.
Next I cut all the bits and pieces to create my five little trees, and here is a detailed list of the dies I used: • Big Christmas Cupcake: trees, large and small stars, scalloped decorations, baubles (cheeks) • Build A Monster – arms & legs, mouths.
I added white splatters to my trees, and then assembled everything: I glued the cheeks, mouths, stars and cheeks on each tree, and to make my card extra fun, I added wiggly eyes to each one of them to give them more personality. I attached the orange and green trees on my panel first using 1mm foam squares, next the pink, yellow and aqua trees using 2mm foam squares, and then the arms and legs using foam squares as well.
I gold heat embossed “Noel” from Winter Greetings on white cardstock, cut it using the matching die, and tucked it between the yellow tree’s arms. And since there was a little bit of space above the trees, I decided to add some coordinating sentiments: “Merry & bright”, “Oh what fun!”, “Ho ho ho” and “Peace & love” are from Sentiment Strips: Christmas, and “Fa la la la” is from Winter Birds. I cut each sentiment using a Sentiment Strips die, attached each strip above its matching Christmas tree, and finally stuck my panel to an 8,5 x 3,5 inches card base.
And that’s it! Thank you so much for stopping by, and Happy Holidays!
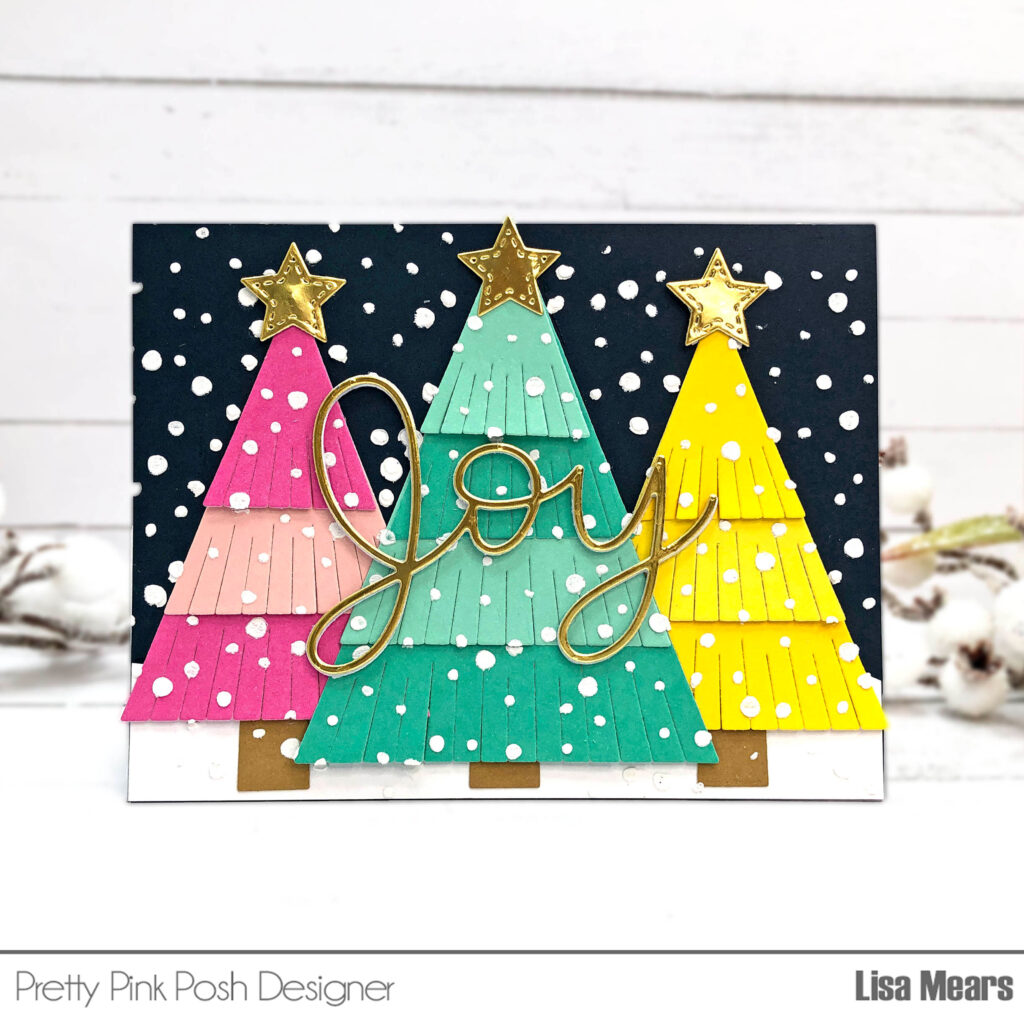
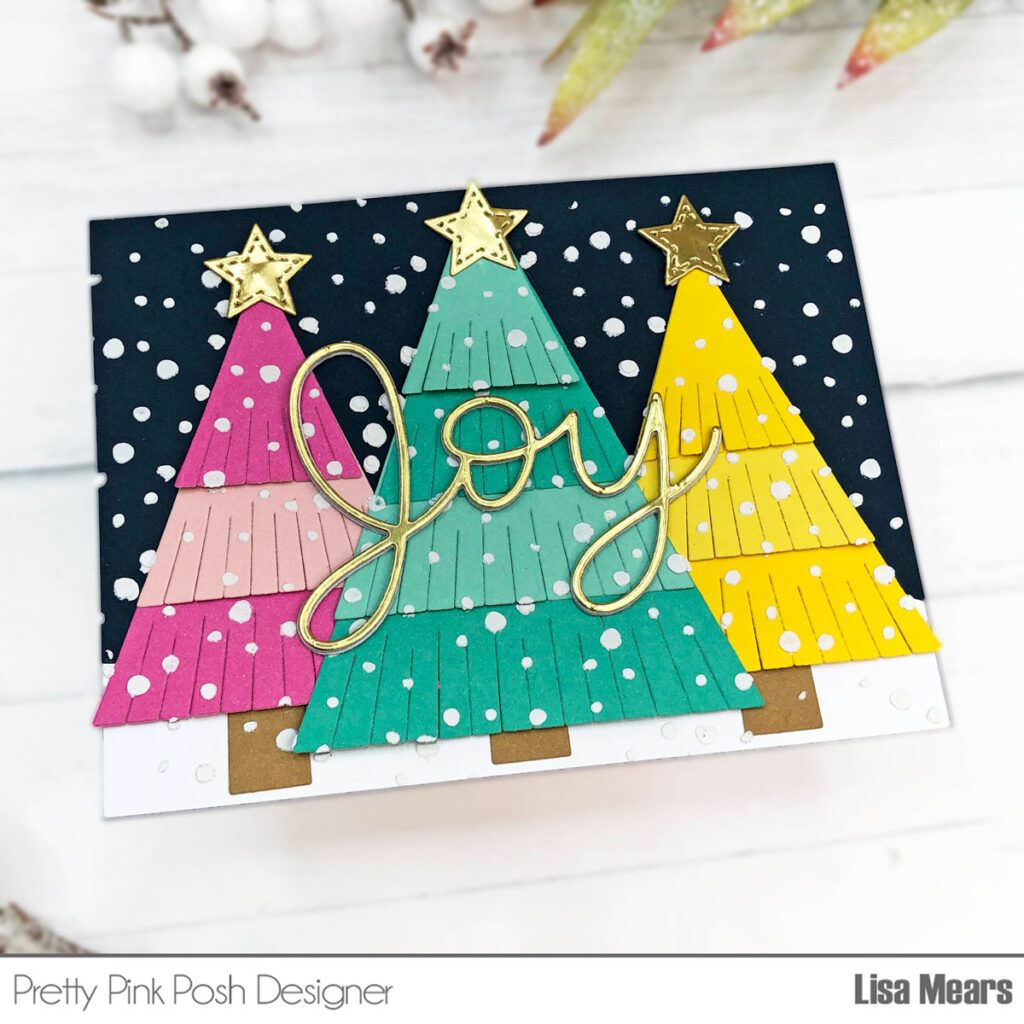
Using the Fringe Tree dies, I created three vibrant fringe trees in pink, teal green, and yellow. The layered fringe on the bottom of each tree adds a playful, textured feel that really makes the design come to life. To enhance the depth of the trees, I paired dark and light shades of cardstock from the same color family, giving the trees a more dimensional and realistic look.
To add a soft, wintery touch, I stenciled a snow background using the Snowfall Stencil along with Scrapbook.com Cloud Whip to create a beautiful, dimensional snow effect that spans across the entire card. The Cloud Whip is slightly raised, adding a nice texture that complements the rest of the design.
For the finishing touch, I used the Large Joy Shadow die in gold cardstock to make the sentiment truly stand out. I stacked the sentiment with three layers of white cardstock and topped it with the gold, giving it a raised, eye-catching effect that really makes the card pop!
Thank you so much for stopping by today. Have a wonderful day! Lisa Mears
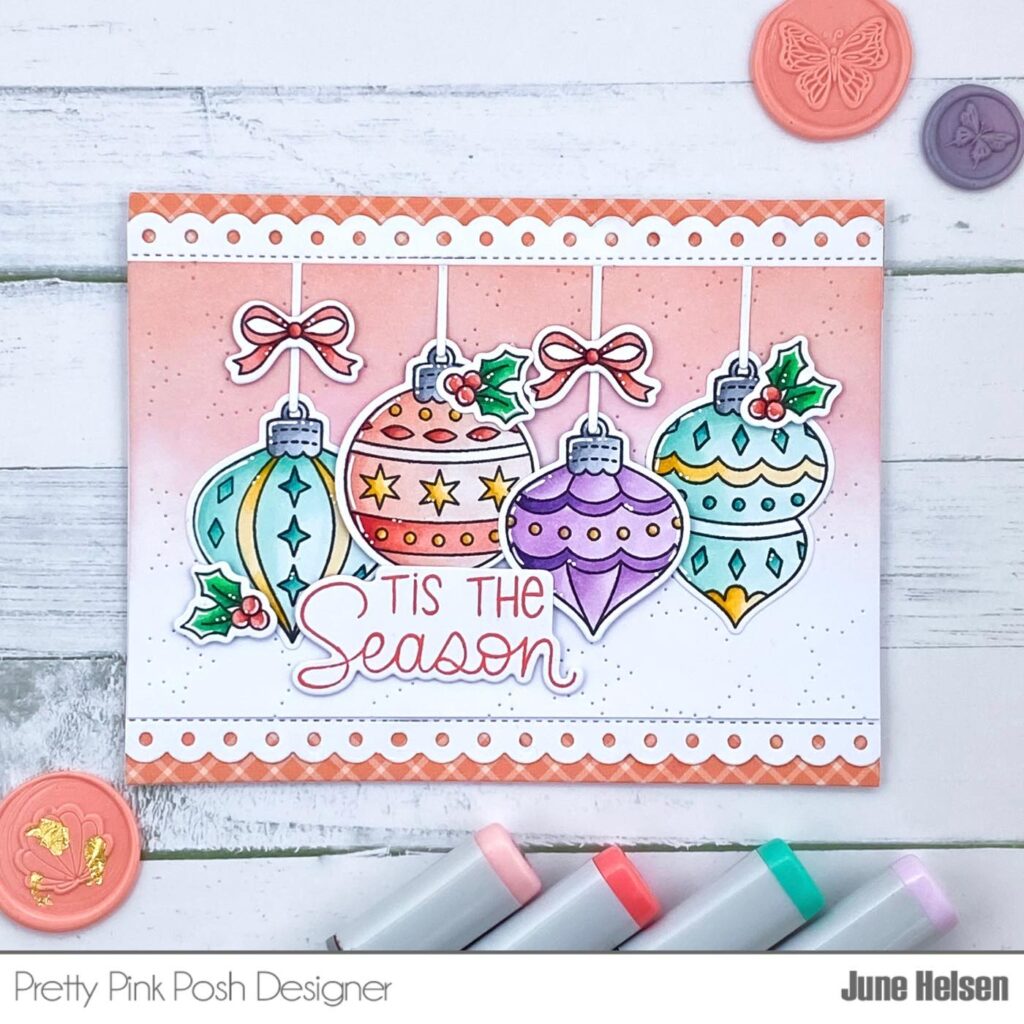
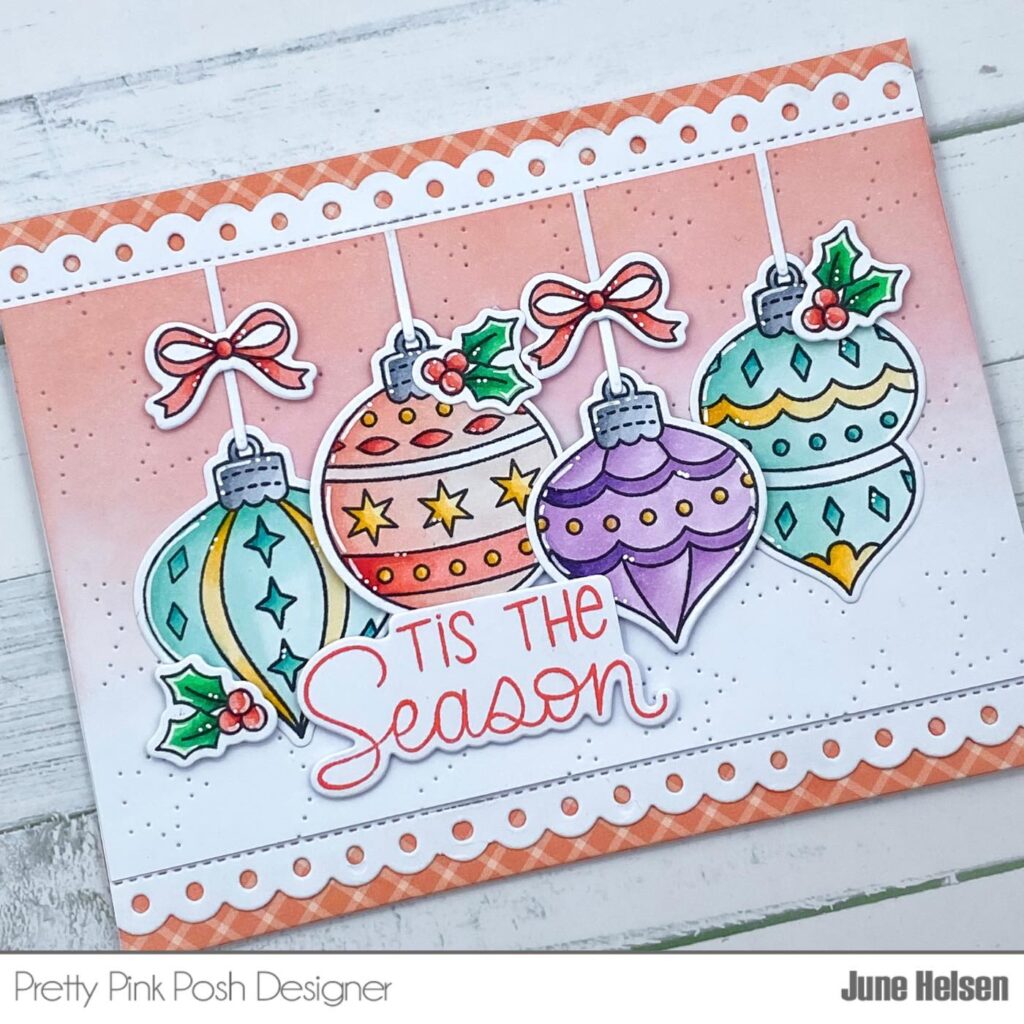
Hi crafty friends! It’s June and I’m sharing some details about a Christmas card I made using a combination of new and older products. I didn’t feel very inspired today, so let me walk you through the process I go through whenever that happens.
Whenever I don’t feel inspired, I like to go for simple color combinations and layouts I’m familiar with, so I don’t have to overthink when I’m creating. I started by coloring in my Holiday Ornaments using 3 colors I love to use together: pink, blue and purple. I started by coloring in the base in very pale shades. For the decorations on each of the ornaments, I went with a combination of gold and a darker shade of the base color. I really didn’t feel like playing around with color combinations within each ornament, so this did the trick! Easy peasy!
I used some of the small decoration pieces from the same set, like the bows and holly, to create some interesting details. I really like how I was able to bring back the red from the pink ornament this way. There wasn’t a string I could stamp, so I cut out the string from the Party Balloons to hang my ornaments.
For my background, I did my extending method using the largestEyelet Rectangle die. I have talked about this technique many times, because it’s one of my favorite ways to stretch my die collection, pun intended. I love the way this layout can frame any scene, so it was a great idea to use it so I didn’t have to think about my layout too much.
I cut out a smaller panel to fit inside the stitch lines of my die cut and added a soft ink gradient using Tattered Rose Distress Oxide. I ran that panel through my die cutting machine using the Pierced Stars Plate Die. I think it really gives it that little bit of detail my background needed. I backed my scalloped panel using a scrap piece of pattern paper that compliments the colors I chose.
To finish off my card, I stamped the ‘Tis the Season’ sentiment from the Winter Greetings stamp set in a coral red shade of ink. I glued everything onto my card base and popped up some of the pieces using foam tape.
And that’s it! I actually think this card turned out really cute even though I didn’t expect much today. Sometimes, staying in your comfort zone on these type of days can be the best option it seems!