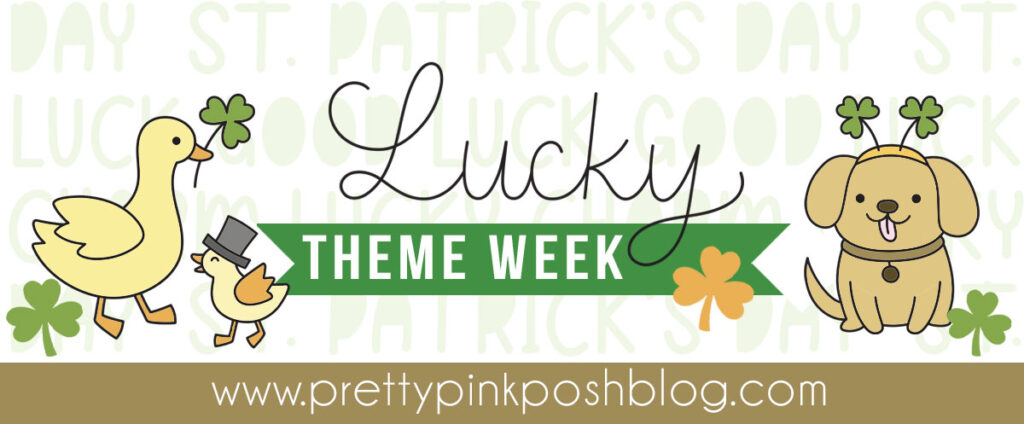
Day 7: Lucky Theme Week
**All items in the Lucky section are 15% off during theme week**
Hello Crafty Friends! It is Hanh here with you today. Happy Lucky Theme Week! There are so many fun Lucky themed products available in the Pretty Pink Posh shop.
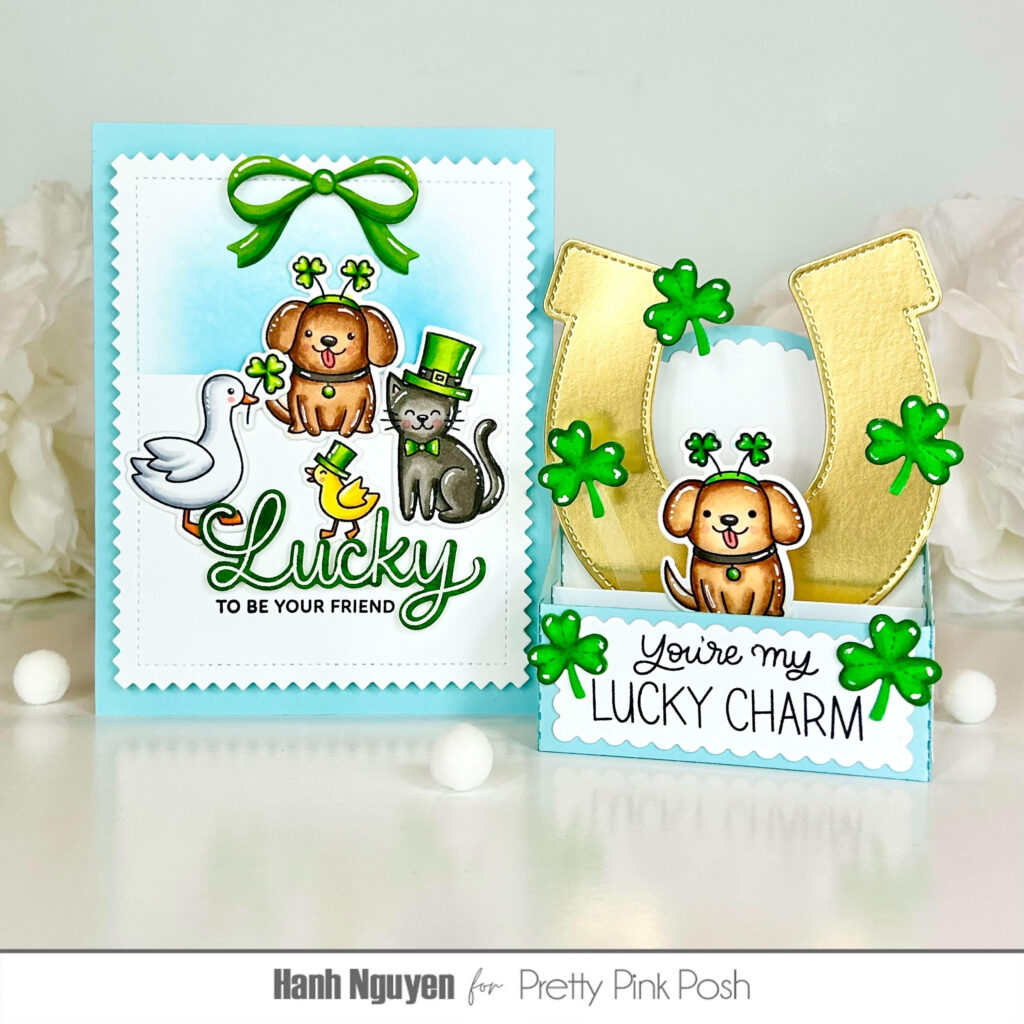
Today I have two cards to share with you featuring the super cute Lucky Animals set. Let’s get started!
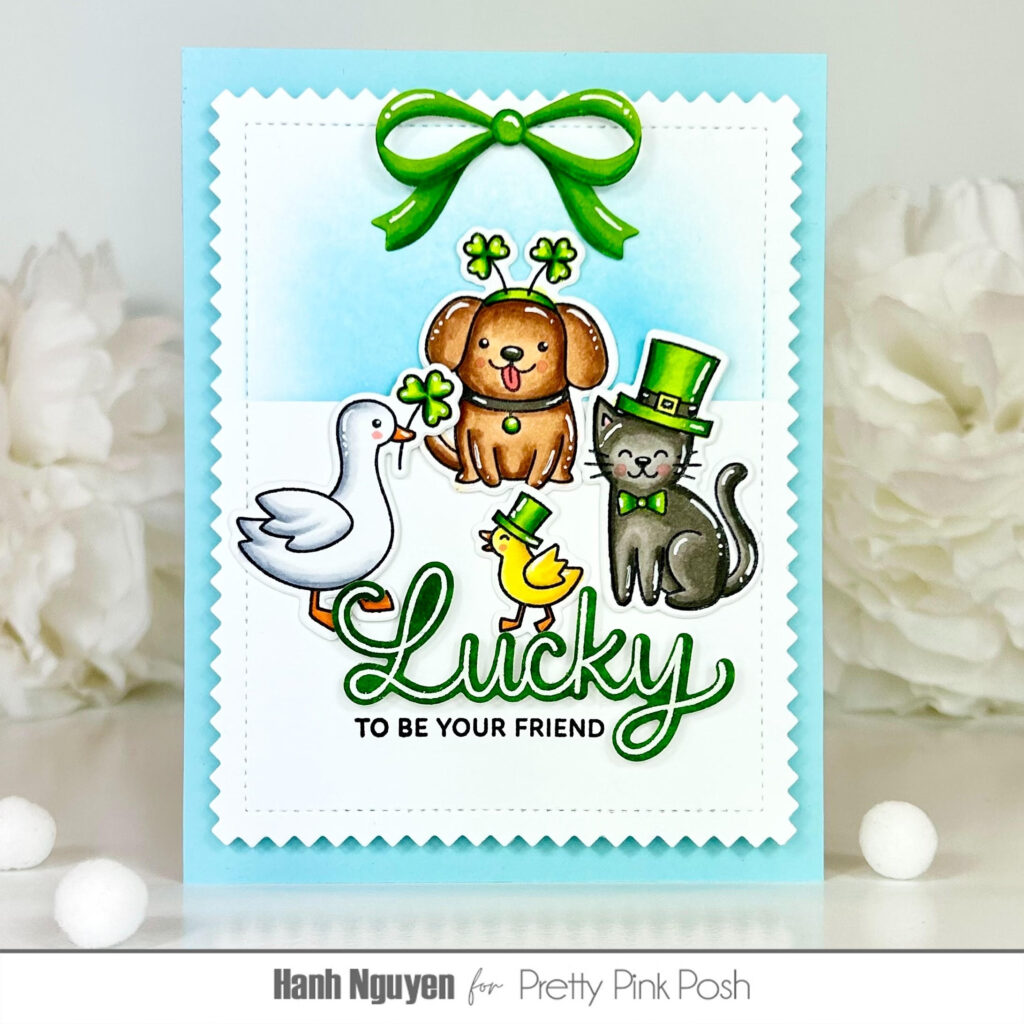
For both cards, I stamped the images from the Lucky Animals Stamp set onto a piece of Neenah Solar White 110 lb cardstock with Memento Tuxedo Black ink and used the coordinating Lucky Animals Dies to diecut them out. For this first card, I also diecut a bow using the Beautiful Bows Dies. I colored them with Copic markers and highlighted with a white gel pen.
COPIC COLORS:
Dog: E51/53/33/99/35, R20, R22, W5/7
White Duck: C00/0/1/3, Y38 YR04, R000/20
Duckling: Y11/13/15, Y38 YR04, R20
Cat: W1/3/5/7, R000/20
Hats: YG01/03/25/17, Y06, W5/7 Green: YG01/03/25/17
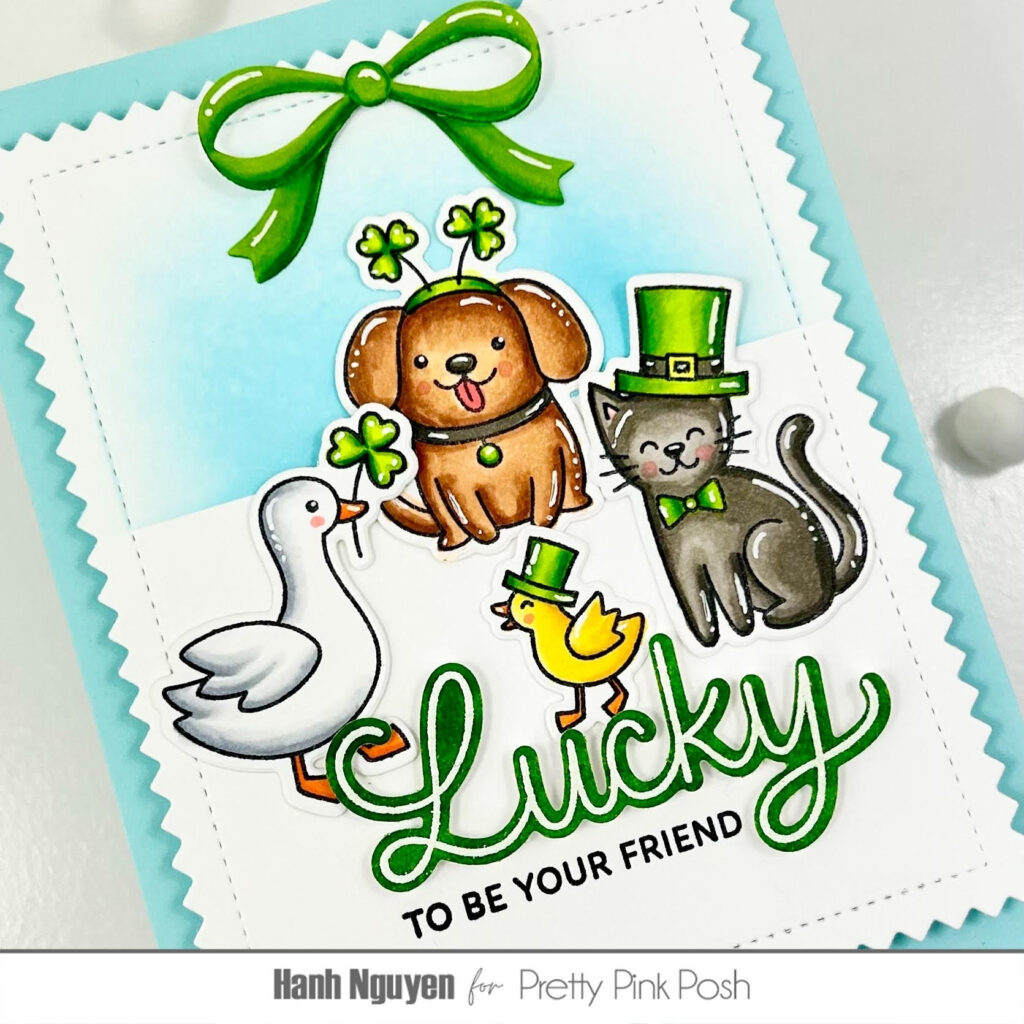
For the background, I used the largest die from the Pinking Rectangles Dies to diecut a piece of white cardsctock. I masked off the bottom and edges of the panel and lightly ink blended a subtle background with Tumbled Glass Distress Oxide ink. A piece of craft foam was adhered to the backside of this panel before it was adhered to a piece of light blue cardstock and then a white A2 card base (4.25” x 5.5”).
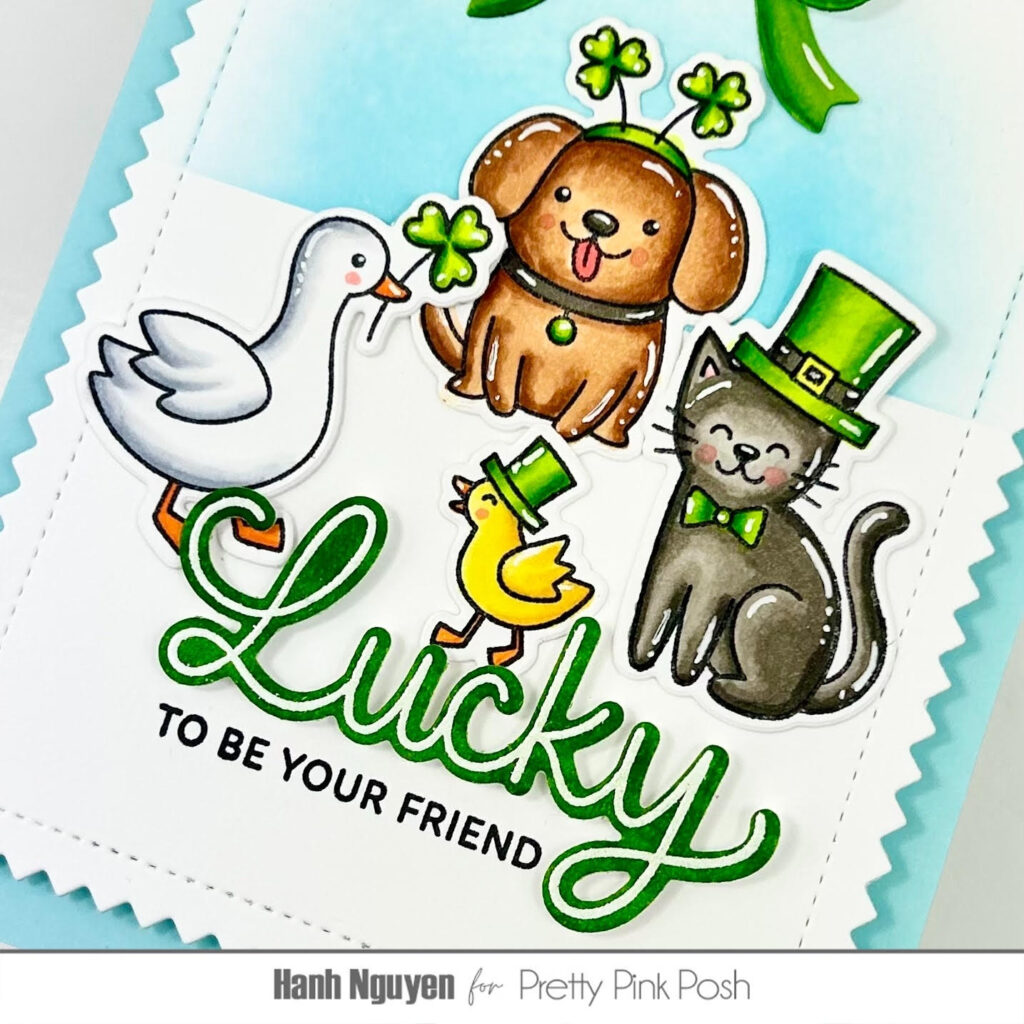
For the sentiment, I stamped the “Lucky” sentiment from the Lucky to Know You stamp set with Versamark Watermark ink onto a piece of green cardstock and heat embossed with Detail White Embossing Powder. I used the Lucky to Know You Dies to diecut it out. I also stamped the “to be your friend” sentiment from the same set directly onto the panel with Memento Tuxedo Black ink.
I adhered the colored images, bow and Lucky sentiment onto the panel with a combination of liquid glue and foam tape for a bit of dimension and interest.
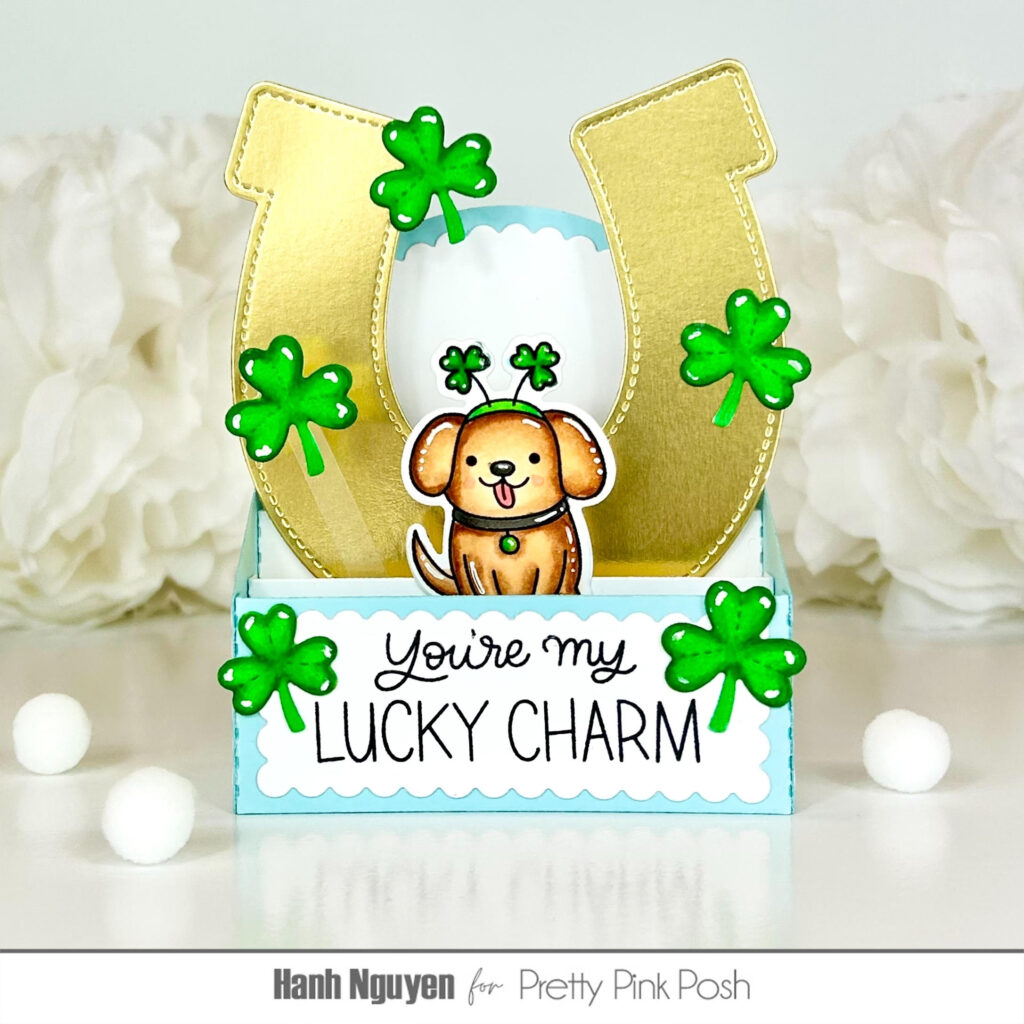
For my second card, I decided to make a fun boxcard using the Scallop Box Card Dies and featuring the adorable little pup from the Lucky Animals set with some lucky elements from the Horseshoe Shaker Die set. I used the Scallop Box Card Dies to diecut the base, two shelves and the back panel out white and blue cardstock. I assembled the box, back and side scalloped panel with liquid glue.
For the sentiment, I stamped the “You’re My Lucky Charm” sentiment from the Lucky to Know You set directly onto the scallop front panel with Memento Tuxedo Black ink. I adhered the panel onto the front of the boxcard.
I used the Horseshoe Shaker Dies set to diecut the horseshoe and some clovers out of matte gold and Neenah Solar White cardstock. I colored the dog from the Luck Animals set and the clovers with Copic markers and highlighted with a white gel pen.
COPIC COLORS: Dog: E51/53/33/99, R20, R22, W5/7 Green: YG07 G05/19/28

I decorated the box card with the lucky dog, horseshoe and clovers as seen in the picture. I used a clear acetate strip to adhere the floating clover. I love that this fun little 3D box card can flatten to fit into an envelope for easy mailing.
I appreciate you taking the time to stop by and visit today. I hope you liked my cards and are inspired to create and send out some Lucky themed cards of your own. Be sure to head on over to the Pretty Pink Posh Shop to check out all of the fun Lucky themed products.
Have a wonderful and crafty day!