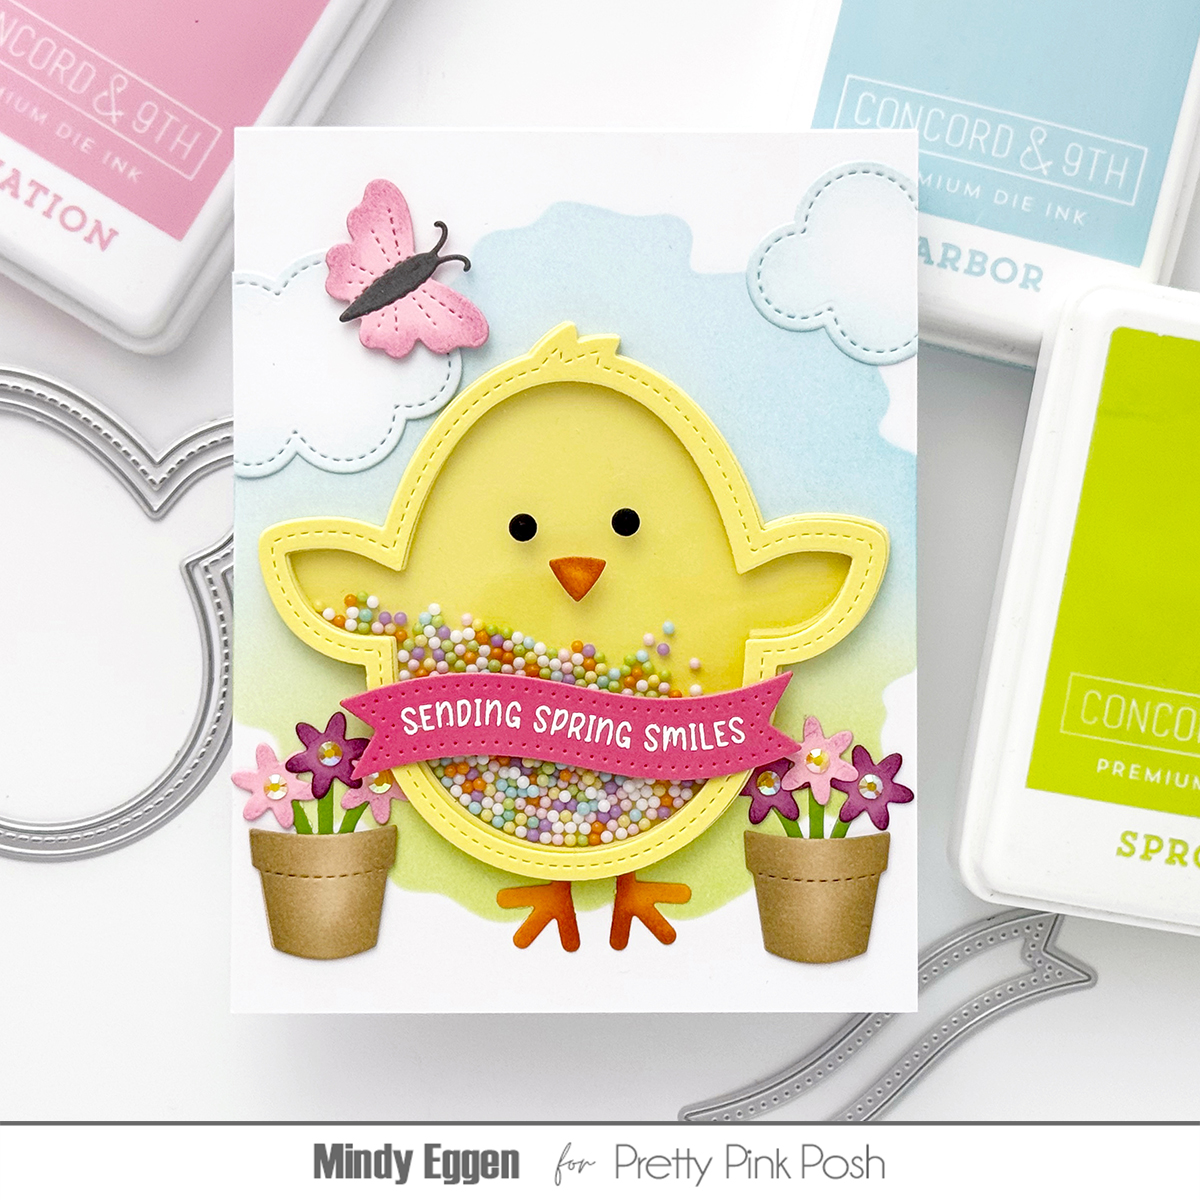
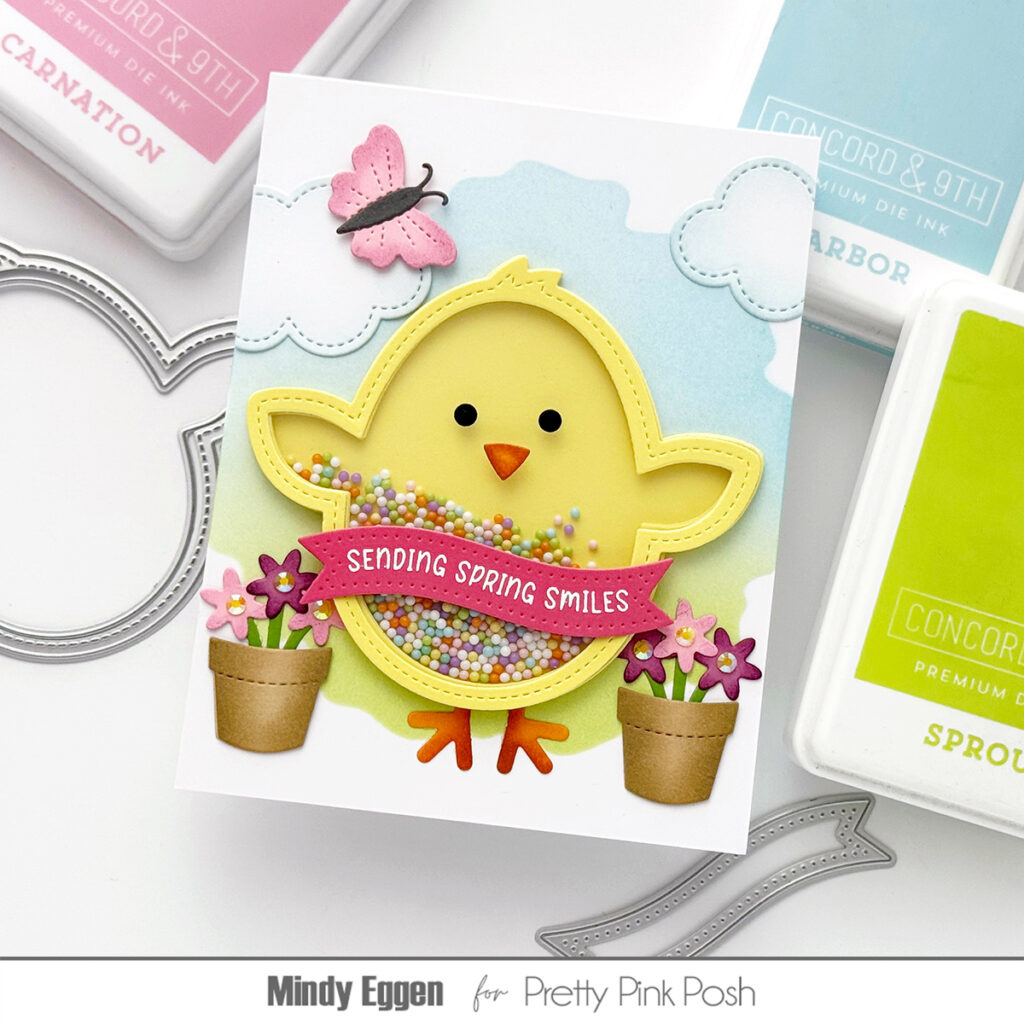
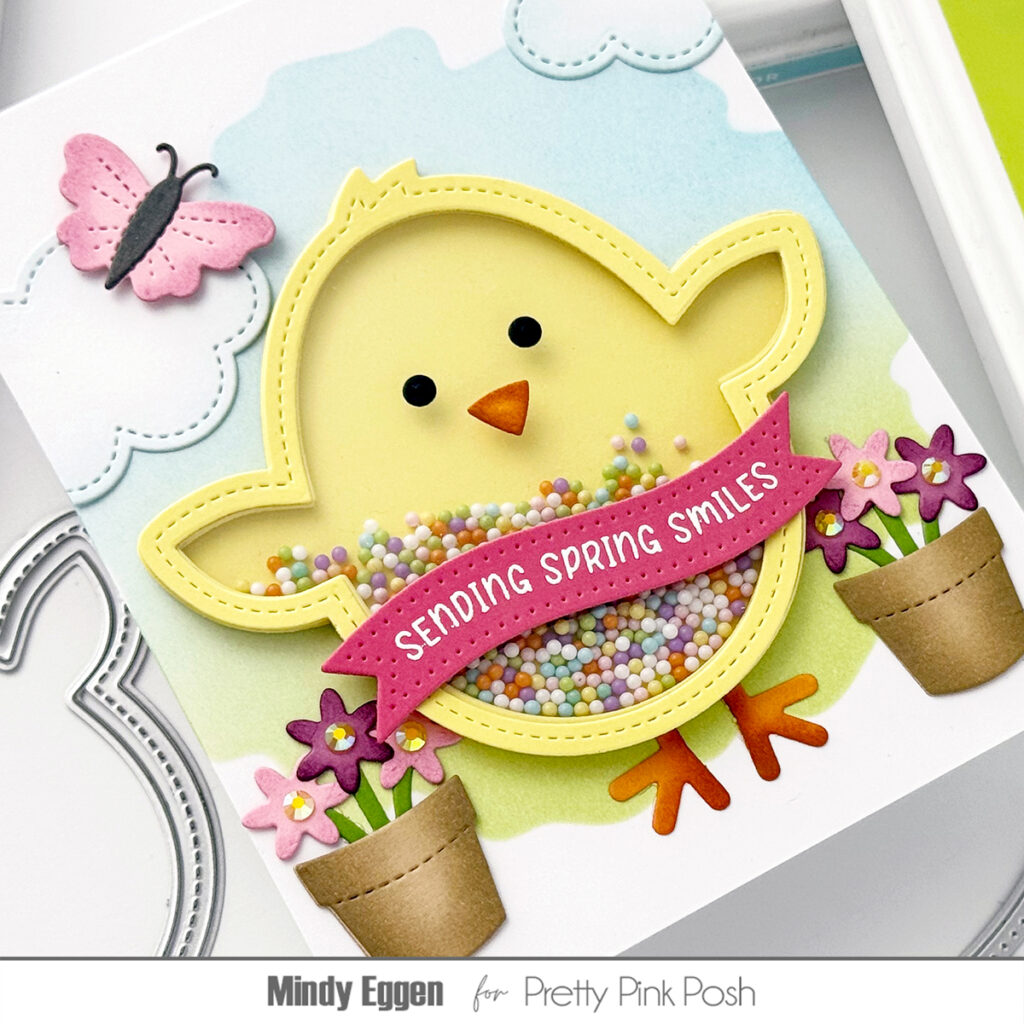
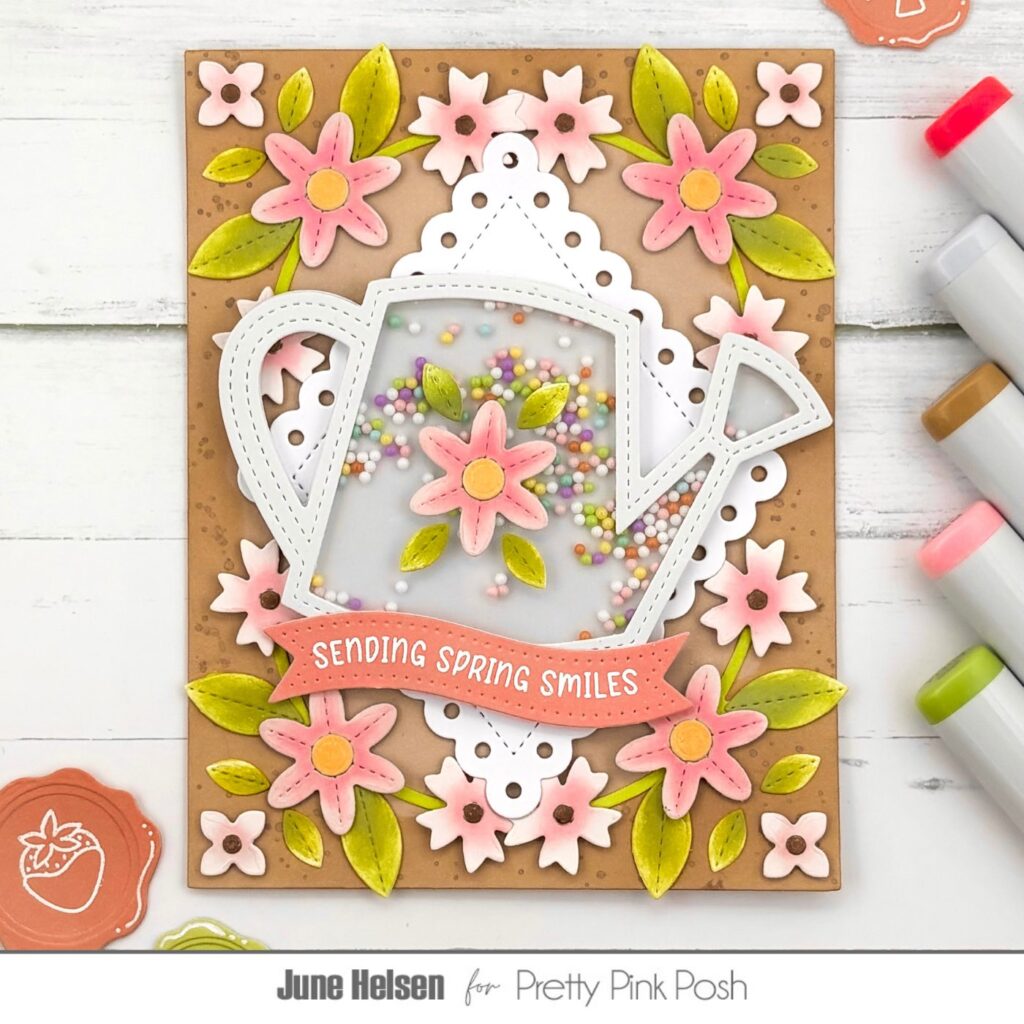
Spring Bloom Tags
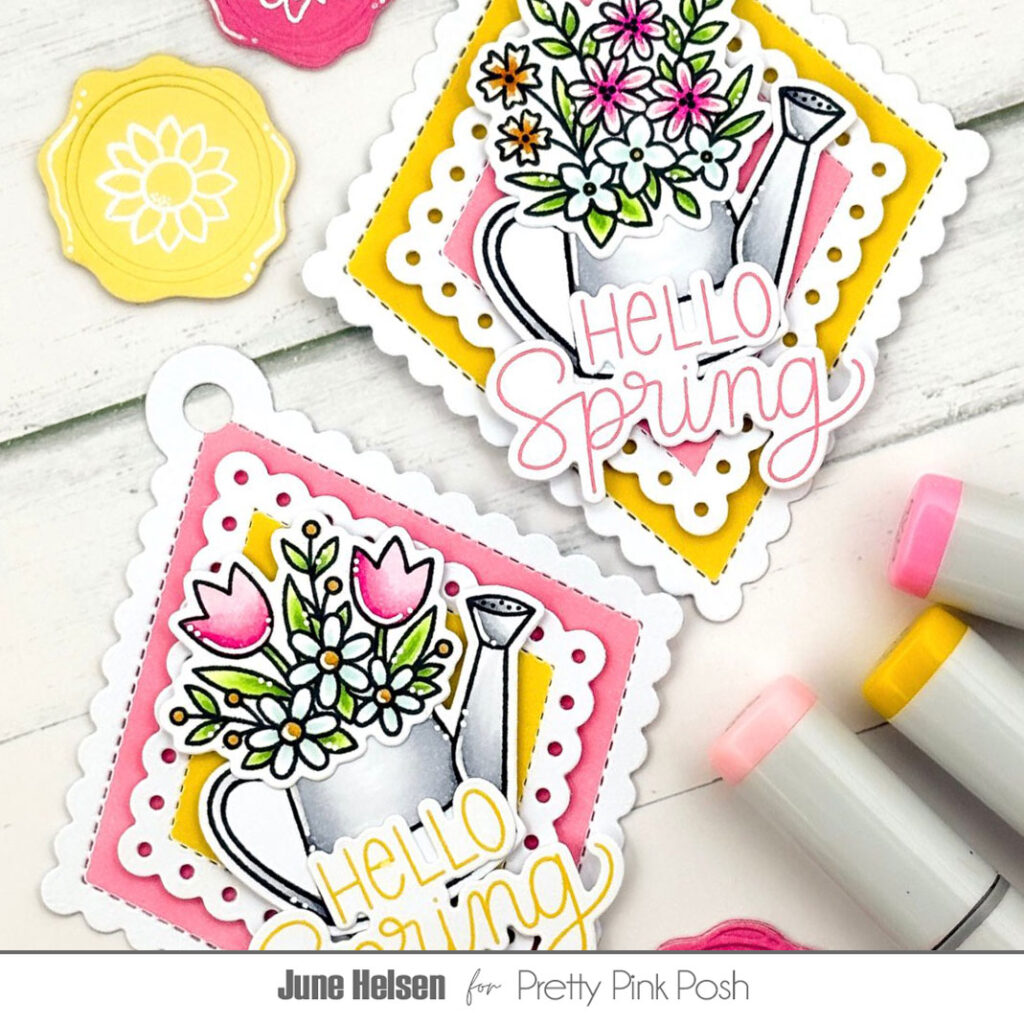
Hi crafty friends, it’s June here! How has everyone been enjoying the release so far? I’ve been loving creating projects with the new products, but one I was especially excited about is the Eyelet Diamonds die set. It’s always a lot of fun when a new shape gets added to the collection! However, it’s not actually the first diamond shaped scallop stackable that was introduced. The Scallop Diamond Tags actually have the same proportions, so they’re a perfect match!
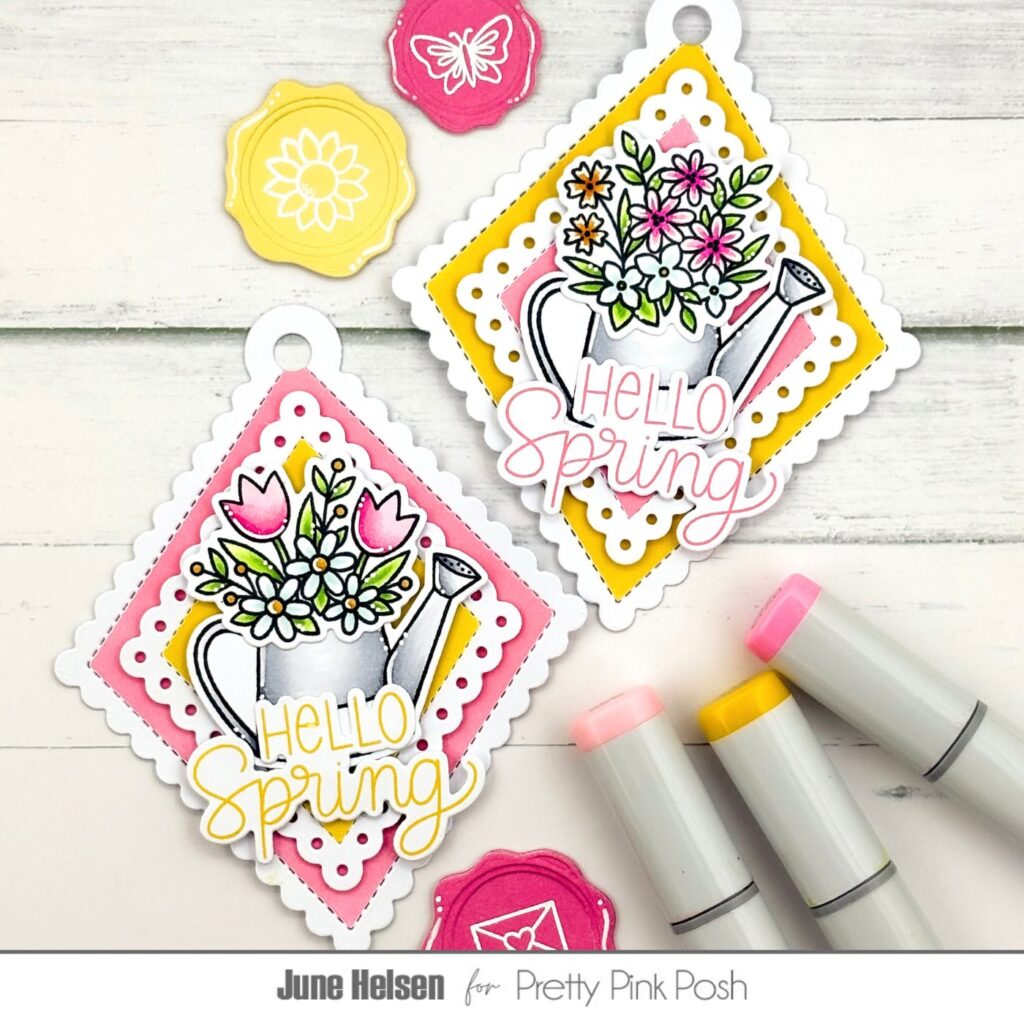
The tags I created with these 2 products are quite simple, but a lot of fun because of the way the stackables work together. I cut both shapes from white cardstock and used masking tape to mask the scalloped borders. I blended one of each in pink and yellow and adhered them on the opposite color using foam tape. No special blending techniques here, just solid colors to get that nice two-toned look on my die cuts.
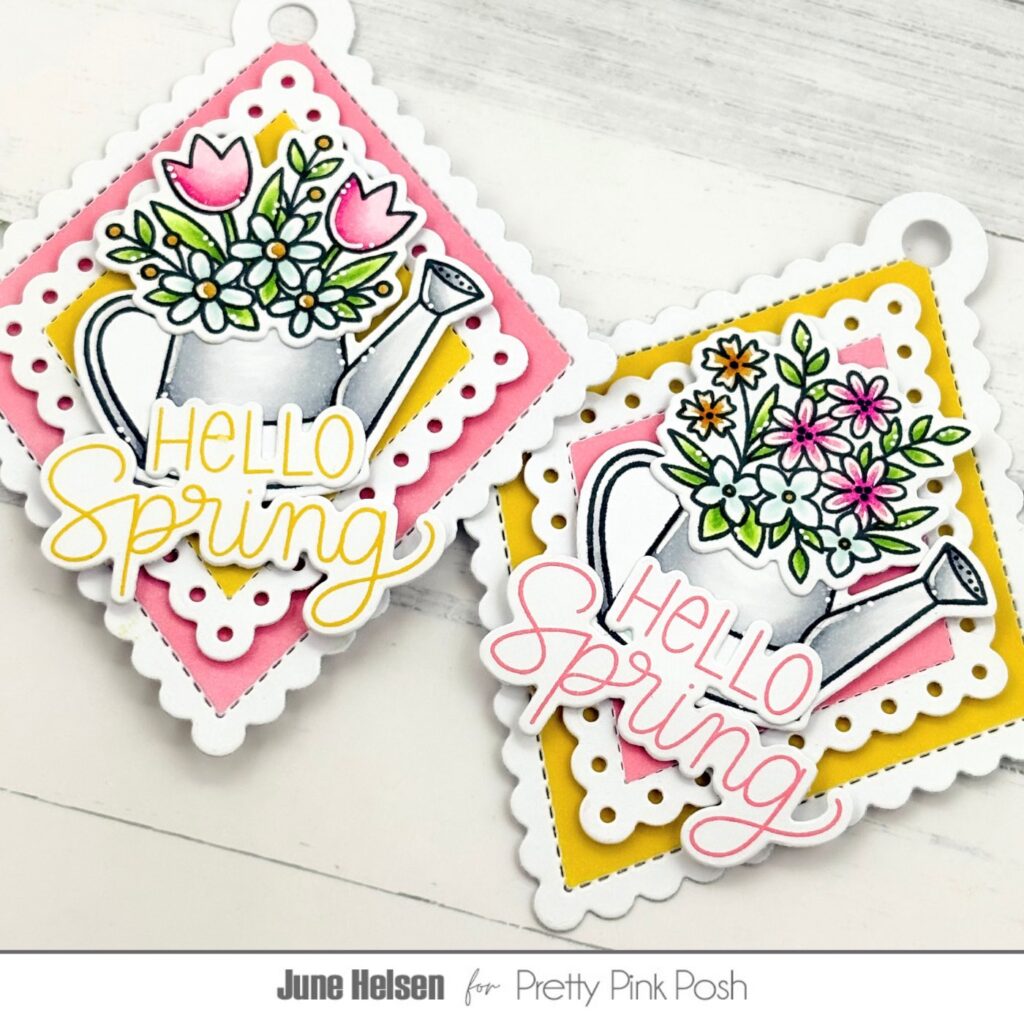
I stamped some watering cans and 2 different bouquets from the new Spring Blooms stamp set to put on my tags. I brought back the yellow and pink I used for the tags in the flowers, aswel as adding a pop of green for the leaves. The stamp set also includes a sentiment that worked really well on a small tag like these, so I stamped it in both yellow and pink. I also used foam tape on my images and sentiments for some extra dimension.
Like I said, a very simple project, but those are also fun every once in a while right? I only used 3 products here and everything came together very quickly. I’m definitely gonna be using the diamond stackables again in this way whenever I’m in need of some quick tags for last minute gifts!
I hope to see you again soon when I’m back with another post, bye!