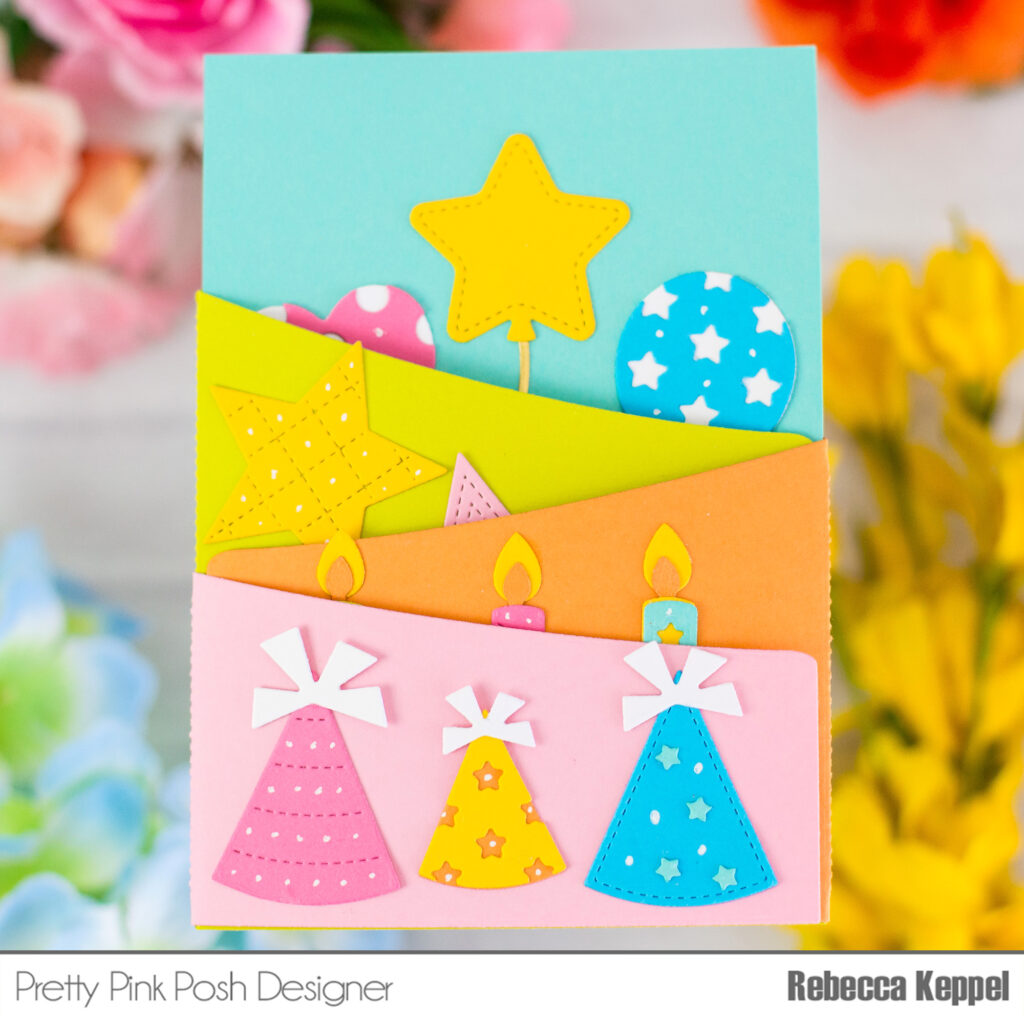
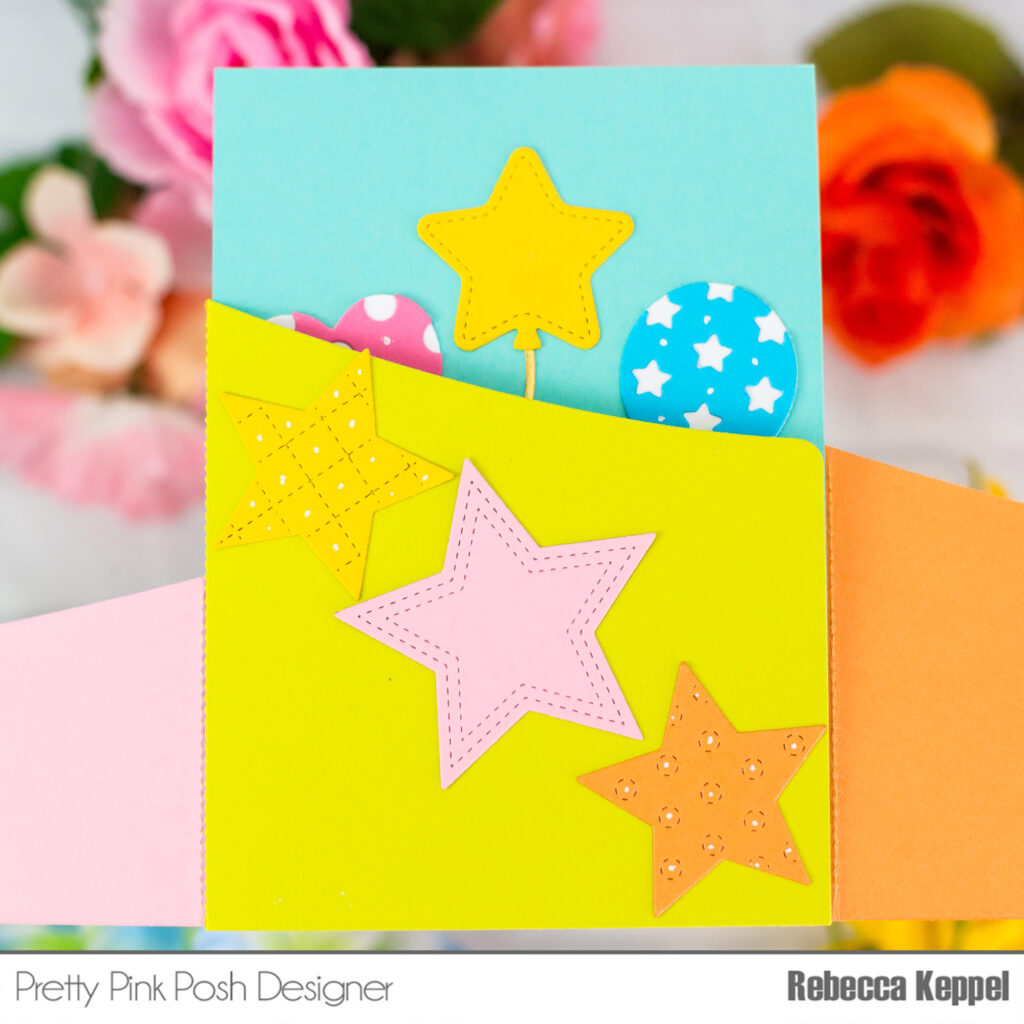
Hi there, it’s Gemma here and today I have a card to share featuring the Birthday Mug Additions die set. I love that the elements in these addition sets can be used with or without the mug.
I began by die cutting the cake, candle, hat and balloon from different card stock colours. I then assembled all the pieces, adhering them with liquid glue.
Next, I arranged the die cuts across an A2 card base. Once I was happy with the positions, I used some Press n Seal to keep them in place.
A few at a time, I lifted up the press n seal and added liquid glue behind the die cuts, before laying them back down and adhering to the card base.
As this is a busy background, I went for a Simple Sentiments stamp set greeting, stamped on white card and trimmed to a thin strip. I adhered it to the card with foam tape to finish.
Thanks for joining me today! I hope you were inspired by this card idea!
I’ll start by stamping the wreath from the Leafy Spring Wreath stamp set and images from the Mom stamp set two times in an alcohol friendly ink. One of the wreaths I’m going to color with shades of green from the Triblend Markers and the other wreath I’m only going to add a light gray to one edge of each leaf.
I’m also going to color in all the flowers I stamped out using some light pinks from my Triblend Markers. I’ll use the coordinating dies from both the Leafy Spring Wreath & Mom Stamp Set to cut out all the images so I can pop them up with foam squares later on.
For the first card, I created a striped background using various colors of cardstock from my scraps. I’ll trim this panel down to add to an A2 size card front and I’m going to use the wreath that has the light gray coloring on it. I like keeping the color soft and light on this one when adding to a colorful background. This way I don’t feel like the card is too busy.
For the second card, I’m lightly ink blending on Lost Shadow Distress Ink using the Pretty Petals Stencil. I start in the center of the card and have the stencil fade out as it gets towards the edges.
I will add my green wreath over the top with foam squares and decorate with the flowers.
Both cards are using the Mom Word & Shadow die. One is cut from white glitter cardstock and the other from Matte Gold cardstock and placed over the center of the wreaths.
The smaller sentiment also comes from the Mom Stamp set in which one is stamped in Black ink onto White cardstock and the other heat embossed in Gold to match the Matte Gold cardstock.
Such a fun look for both of these cards! Hope you enjoyed today’s inspiration! Thanks for stopping by!
Hello hello! It’s Leica here today on the PPP blog. I’ve got a fun birthday card to share with you and the color palette of my card is inspired by the Party Swirls Clay Confetti. Blue, pink, and purple – I love these colors together!
I first started by ink blending through the Streamers Stencils with Milled Lavender, Spun Sugar, and Tumbled Glass Distress Oxide Inks. I then cut the frame from the Fancy Cake Dies in purple cardstock and made a shaker card by adding acetate and foam tape onto the frame. I filled the shaker with half a teaspoon of Party Swirls Clay Confetti.
Next, I cut the cake twice in white cardstock. I ink blended the cake stand with Picked Raspberry Distress Oxide Ink. For the cake, I used Antique Linen and Wilted Violet for the icing. The candles are ink blended with Broken China and Tumbled Glass Distress Oxide inks. I sprayed the die cut pieces with water for an oxidized effect and I also splattered some white ink. Next, I colored the flames with Copic markers. Then I cut the “hip hop hooray” in gold cardstock and glued it on the cake. I glued the cake in the middle of the card as the focal point. Lastly, I adhered the cad panel onto an A2 size card base.
That’s all for this shaker card. The frame from the Fancy Cake Dies makes it super easy to create a shaker card – just add acetate and .25” foam tape around the frame. I hope you’ll try this method to make a shaker card.
Hi, friends! It’s Lauren and I am so excited to be back on the Pretty Pink Posh YouTube channel! My daughter has been getting invited to lots of birthday parties recently and I realized that I needed to build up my stash of birthday cards that are more interesting to kids. The Scallop Box Card Dies are perfect as you can create fun pop up scenes!
I started with stamping images from the Dinosaur Friends Stamp Set and Dinosaur Additions Stamp Set. I used their coordinating dies (Dinosaur Friends and Dinosaur Additions) to cut out the images and used a light tack mat to hold them in place when coloring them in with Ohuhu Art Markers. I am coloring the dinosaurs in all different colors so i can create two different themed cards.
Next I added Distress Oxide Inks to white cardstock die cuts from the Scallop Box Card Dies and Stitched Leafy Borders Dies. On the scalloped arch, I used Tea Dye, Broken China and Prize Ribbon to create the ground and night sky. Using the Dino Dig Stencil, I added Vintage Photo to create rocks and Slippery When Wet Lunar Paste for gold stars. Using Tea Dye and Vintage Photo again, I added ink to the “shelf” pieces that will be used in the box card as ground for the dinosaurs. Finally, I added Twisted Citron and Mowed Lawn on the Stitched Leafy Borders. The rest of the die cuts were cut out of colored cardstock.
You can follow along in the video as I show how to assemble the Scallop Box Card Dies and any tips I have to help add in the “shelf” pieces. I added the Stitched Leafy Borderaround the front of the box card and added the scalloped side pieces of glitter cardstock. Once the box was assembled, I added in my volcano, trees, dinosaurs and leaves. The pterodactyl is adhered to the back side of the second “shelf” with acetate so it looks like it’s flying above! I stamped the sentiment with dinosaur tracks on the scalloped rectangle from the Scallop Box Card Dies and glued it to the front of the box card. With my extra dinosaurs and leaves, I glued them to the back of the box cards with another scalloped arch so we have some room to write a note. I love how these two cards turned out and how they are similar but so different because of the color schemes!
Let me know what kind of scenes you would like to see on future box cards – I want to make so many more so I could use some ideas!
The wreath is so versatile and fun to decorate! I started by stamping it out and coloring it using Ohuhu markers, then cut it out using the coordinating dies.
To decorate it, I used one flower (the teal one) from the same set and the rest of the flowers and bugs were from the Spring Jarstamp set. Spring Jar also has coordinating dies which I used to cut out the images.
All images were colored using a mix of Copics and Ohuhus (O):
Leaves: GY1(O), GY4(O), GY7(O)
Butterfly: BV04, BV02, B60, E43, E41
Ladybugs: R5(O), R1(O), R19(O)
Bee: W5, W1, Y6(O), GY6(O), BG10
Teal flowers: BG13, BG10
Pink flowers: R11, R000
To create the background I used a light coat of Distress Oxide in Salvaged Patina fading to white and darkened with Oceanside from Concord & 9th near the upper edge. Next I splattered some water onto the background and lifted it off with a paper towel for some extra texture. I also used a white gel pen to add a bit of a splatter effect as well.
The sentiment is from the Spring Jar stamp set. I stamped it directly onto the background using black ink once I determined the position of the wreath.
Then I adhered the wreath to the background using some foam tape for dimension and glued flowers directly onto the wreath. Finally, I added some foam tape to the little bugs and propped those up around the card. For final touches, I also added a little bit of highlight using the white gel pen.
Thanks so much for stopping by and I hope you like my card! Happy Spring!
Hello crafty friends! It’s Leica here today with a Spring-themed box card. The Scallop Box Card Die is finally available and I’m so excited about this die. I have made box cards with different box card dies in the past, but this is my absolute new favorite. It comes with perforated lines, which makes it easy to fold without scoring the line. It is also smaller in size, which is easy to fill and perfect for a quick card to make for your recipient.
For my card, I cut the Scallop Box Card Die pieces in white cardstock. I assembled it by folding the perforated tabs and gluing them onto the main piece. For the scallop panels, I ink blended the back one with Squeezed Lemonade and the inserts were inked with Twisted Citron Distress Oxide Ink. I then sprayed some water for an oxidized effect. Once dry, I stamped the “Spring Greetings” sentiment on the front scallop panel of the card. This is from the Flower Garden Stamp Set.
I then stamped, colored and cut the images from the Flower Garden Stamp Setand the cute little chick from the Spring Chicks Stamp Set. Here are the colors that I used: BG02/000, BV01/000, N7/5/3, R24/22/20/00, W3/1/0, Y18/15/13, YG23/21. I added some white gel pen highlights on the images and glued them onto the inserts of the box card.
And that completes my card. It really is very simple to assemble this Scallop Box Card Die and fill with the cutest images from PPP. I hope that you’ll give this interactive card a go!
Hi crafty friends! Rebecca here with two quick and easy colorful cards! Have you tried the Pretty Pink Posh Layering Stencils? Using them is truly the easiest way to achieve the cutest multicolor image backgrounds!
With just some ink pads and mini blending brushes you can ink blend over the Layered Easter Floral Stencils and Layered Umbrella Stencils with a variety of colors and create adorable Easter and Spring themed, colorful backgrounds for cards.
Once you have all your stenciling done, you don’t need to add much to your card so you can let those backgrounds shine. Choose a pretty sentiment from the Easter Sentiments Stamp Set and cut it out with the Easter Sentiments Dies.
You can trim the stenciled panel down to 4 x 5.25” to matte it on some colorful cardstock, or cut the stenciled panel out using the Wonky Stitched Rectangle dies.
Add a bit of trim under the Easter Sentiments label or cut out a few of the Stitched Strips Dies to place under the label. The multicolor panels are so fun, you don’t need much more than that, but if you do want to include some embellishments, you can die cut some images like Easter eggs from the Easter Mug Additions Dies!
The Pretty Pink Posh layering stencils come in a big variety of themes and images, so next time you need a colorful and adorable background try them for an easy way to add multicolor images to your cards!
I grabbed a lot of Distress Inks for my stenciled background today, but I really wanted a rainbow of colors! I stenciled the bunnies with Lost Shadow; the eggs and flowers with Kitsch Flamingo, Dried Marigold, Squeezed Lemonade, Twisted Citron, Salvaged Patina and Shaded Lilac; and the bunnies’ eyes with Walnut Stain. I masked off parts of the stencils to do my best at keeping the colors separated.
The final layer of the stencil, I added in Champagne Gold Stencil Butter for flower details, Fuschia Stencil Butter for the bunnies’ noses, and Pearl White Stencil butter for their little tails! The background took a little time, but I think it was well worth it as I just love how colorful it turned out.
Using my plastic packaging, I created an infinity shaker around my background once it dried and filled it with the Easter Garden Mix! I trimmed down the stenciled background to 4×5-¼” and I just love those chubby carrots in the mix. It’s so fun and matches so well with the Easter Sentiments Stamp Set.
I stamped out the images from the Easter Sentiments Stamp Set with an alcohol marker friendly black ink and colored them in with my Ohuhu Art Markers. I added in some highlight details with a white gel pen and die cut them out using the Easter Sentiments Coordinating Dies. I also cut out the label die in both white and a glitter purple cardstock.
Using black ink, I stamped the “Easter Wishes” sentiment to the center of the white label die cut. I cut the glitter purple label in half and glued the pieces behind the white label so you can see the glitter popping out on the left and right side of the white label. I layered the sentiment label and all of my images onto the front of the shaker panel and adhered with adhesive tape.
With more strong adhesive tape, I adhered my shaker to an A2 panel of the same glitter purple cardstock that is attached to an A2 card base. I’d love to know what you think of infinity shakers! Do you find them fun to make or would you like to see an in-depth tutorial in the future on them?
I hope you like this card and it inspires you for your Spring and Easter projects!
I first cut a 5 inch square panel and worked on the background using the Layered Roads Stencil. I inked through the stencil using Distress Oxide Inks in Mowed Lawn, Twisted Citron, and Weathered Wood.
Next, I stamped and colored the images from the Across the Miles Stamp Set. I then cut the images with their coordinating dies. I stamped the sentiments onto the card panel using Memento Tuxedo black ink. The images are then foam mounted onto the card panel. I then cut a 5.5 inch square panel using patterned paper and layered the panels before adhering onto a 5.5 inch card base.
That’s all for this card. I hope that you enjoyed today’s card share and that you enjoy crafting with these products! Have a great day!
Hello hello! It’s Leica here today sharing an any-occasion card that is sure to make someone smile. For my card, I’m using the new Umbrella Shaker Die and the previously-released Spring Foliage Dies. What I love about this card is that there’s no Copic coloring involved. Yay!
To begin, I inked through the Grid Stencil with Salvaged Patina on a 4.5” square white cardstock. With the remaining ink on my brush, I ink blended through the white areas very lightly. I then took scraps of white cardstock and ink blended them with various Distress Oxide Inks, sprayed them with water that has a bit of white ink, and used these papers to cut out the flowers and the cute little sign. For the umbrella, I gave it a pattern by inking through the Medium Polka Dots Stencil.
I arranged the flowers on the umbrella and foam mounted them onto the card. The “for you” sentiment is from the Spring Jar Stamp Set. I simply inked the “for you” line only so that it would fit in the label. You can also use the Simple Sentiments Stamp Set as a substitute. To embellish the card, I glued some Pansy Purple Pearls here and there. Lastly, I glued the card panel onto a 4.5” square white card base.
I hope that you’ve enjoyed my card using the Umbrella Shaker Die. As the name suggests, you can make a shaker card with this die. I’m sure I’ll be playing with this again. Have a great day!