Sneak Peek: January 2025 Stencils
Hi friends! It’s Dana here today and I am excited to be sharing a sneak peek of two of the new stencils that are part of the new Valentine’s Day release. The new release will be available on January 6th and it’s packed full of amazing new products for Valentine’s Day and more!
New release will be available January 6th

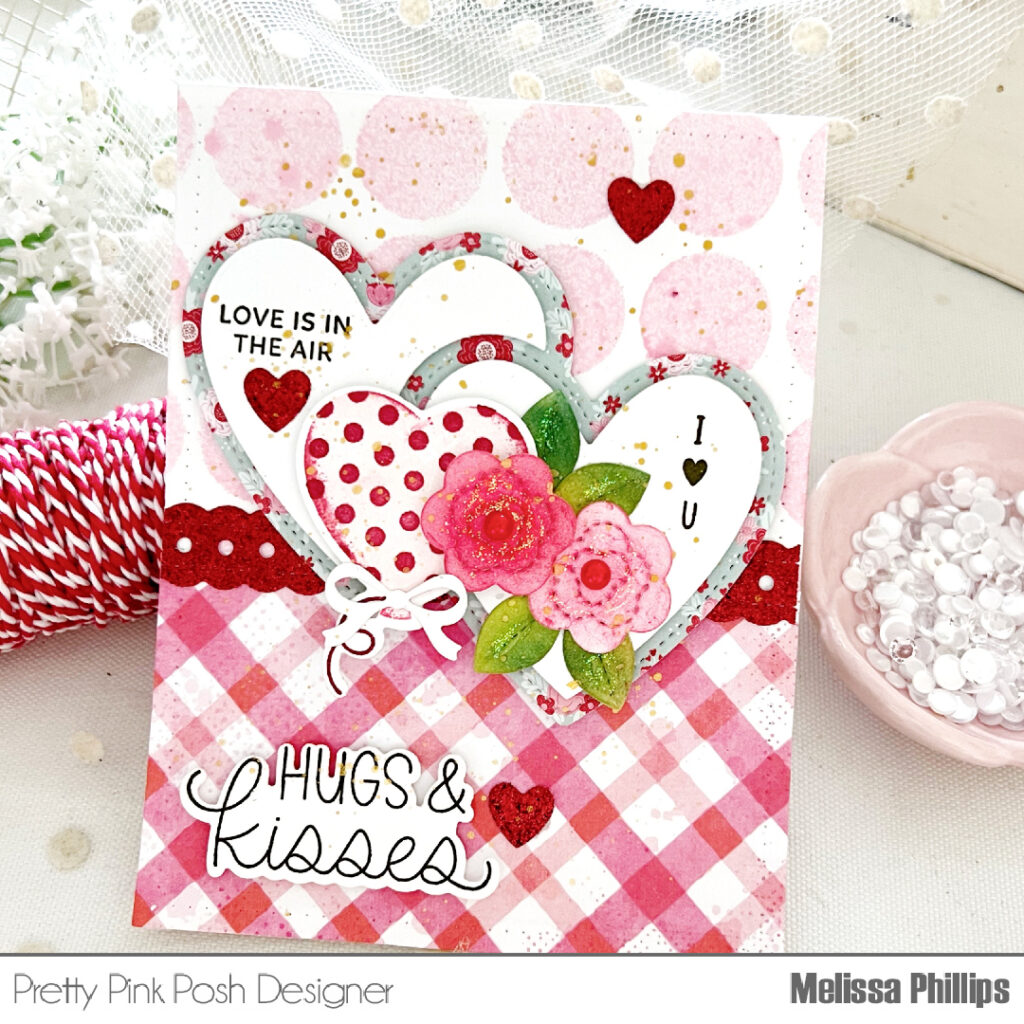
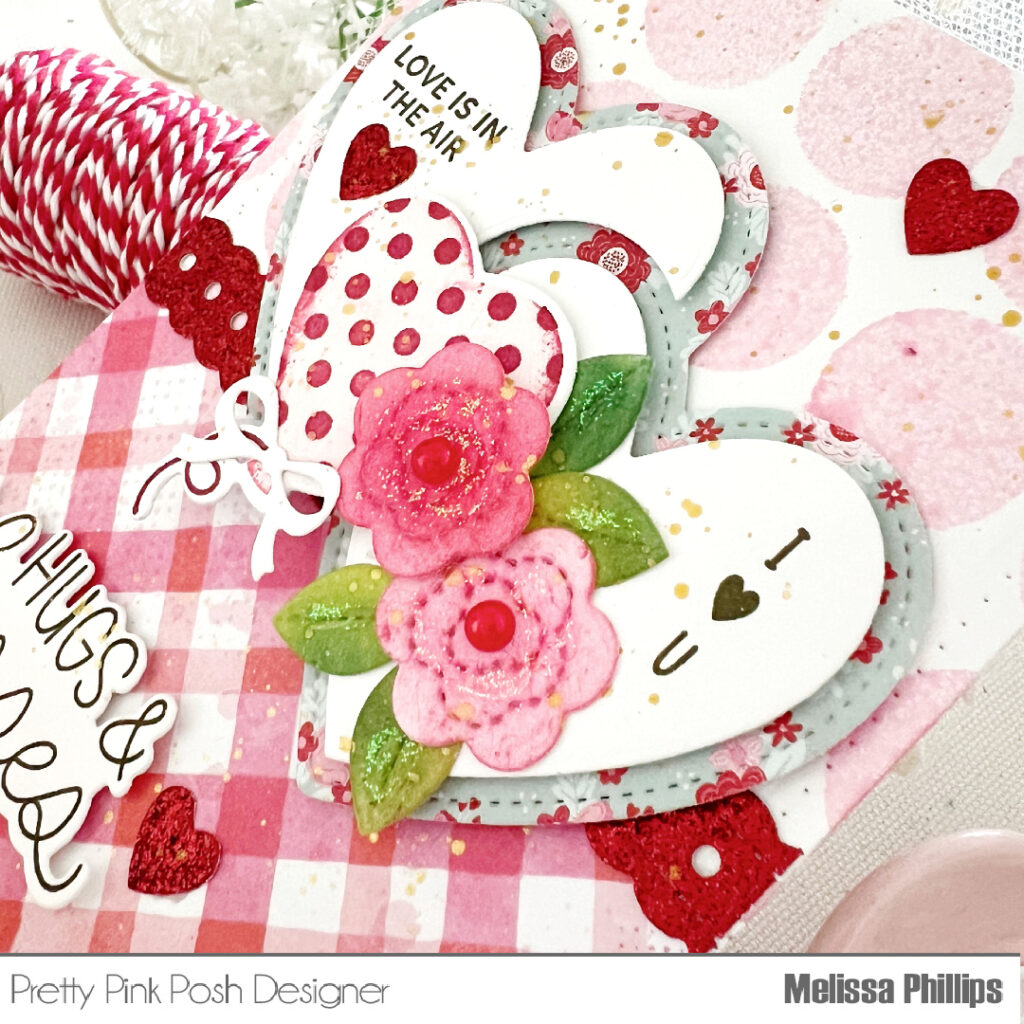
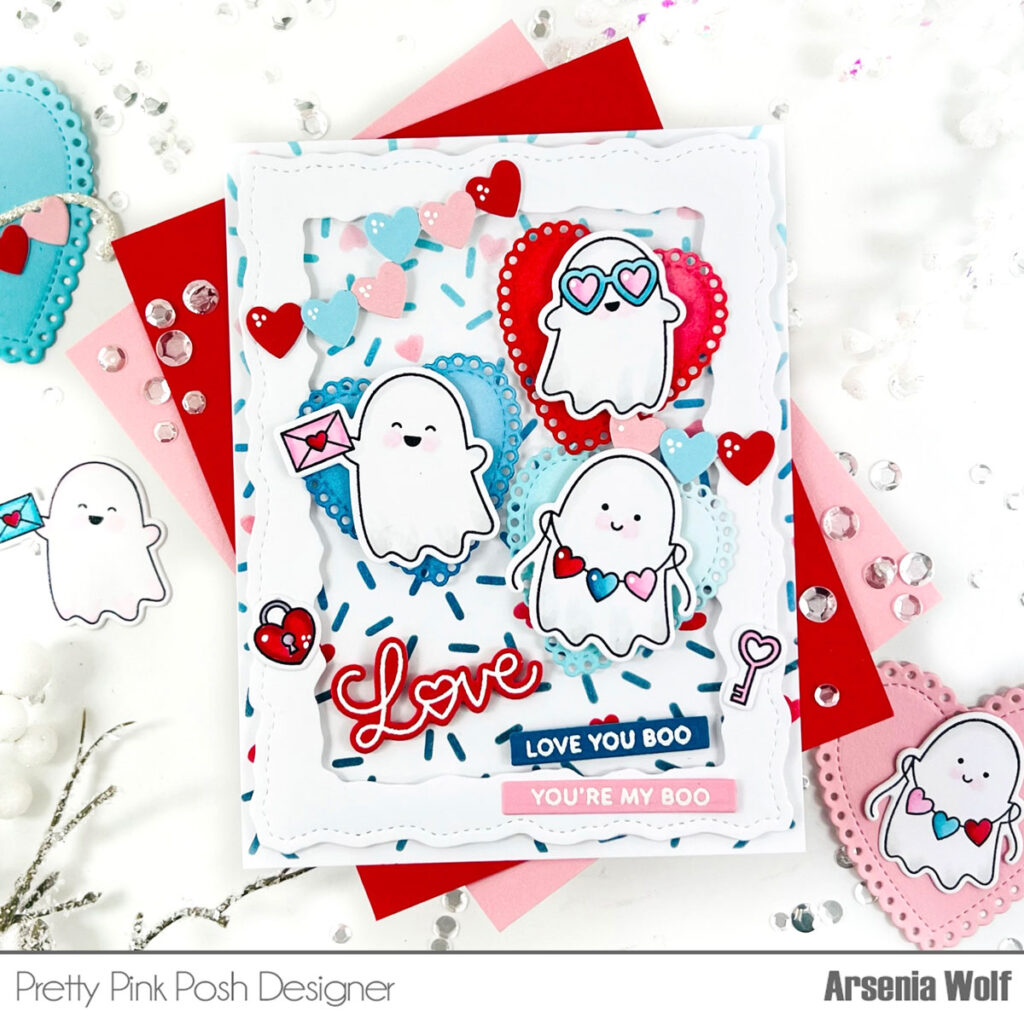
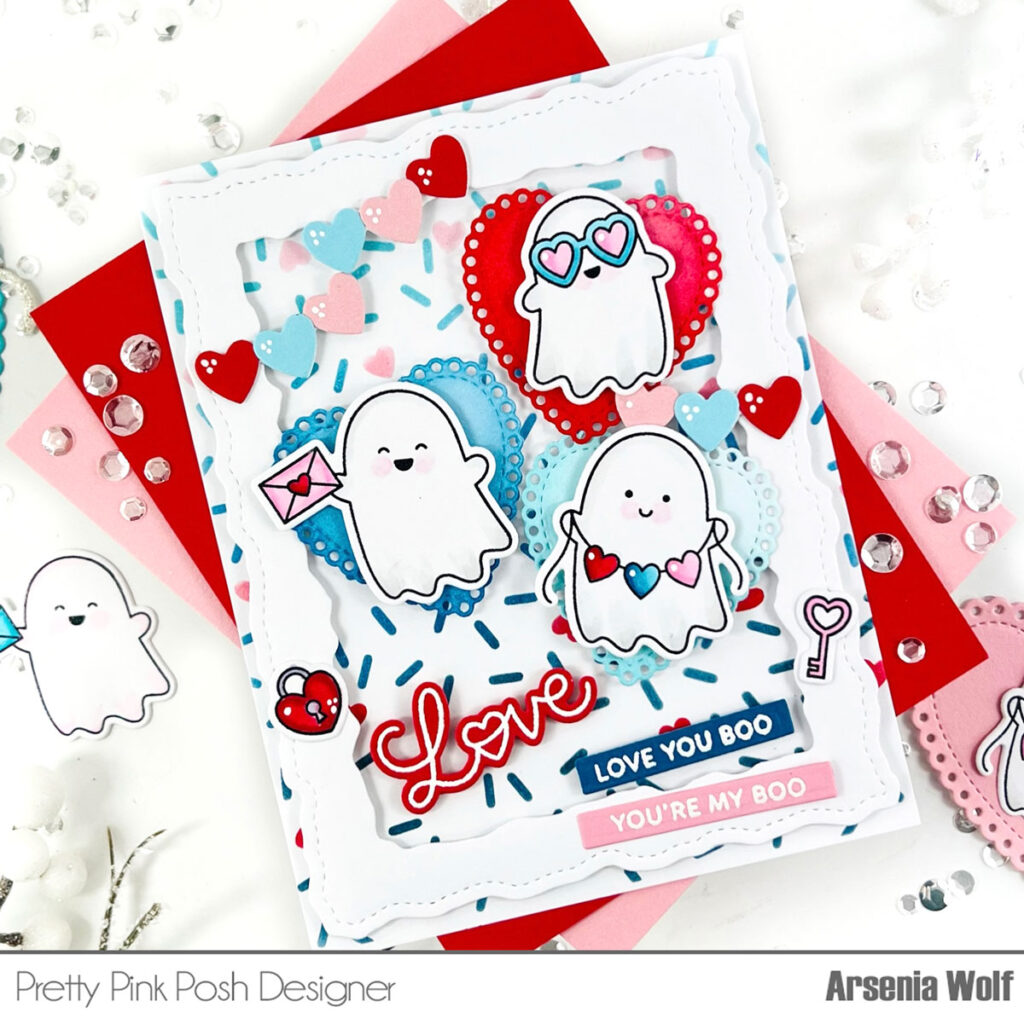
For my first card I used the Scattered Hearts Frame stencil to create my card panel. I used dye ink and finger daubers for my blending. This stencil has scattered hearts around a large heart in the center. The large heart is the perfect place for a sentiment or an image.

For my card, I decided to cover up the large heart with a heart I created with the Fringe Heart dies. I ink blended the layers in coordinating colors and then attached the heart to the center of my panel. Lastly, I used the Love Script die for my sentiment.

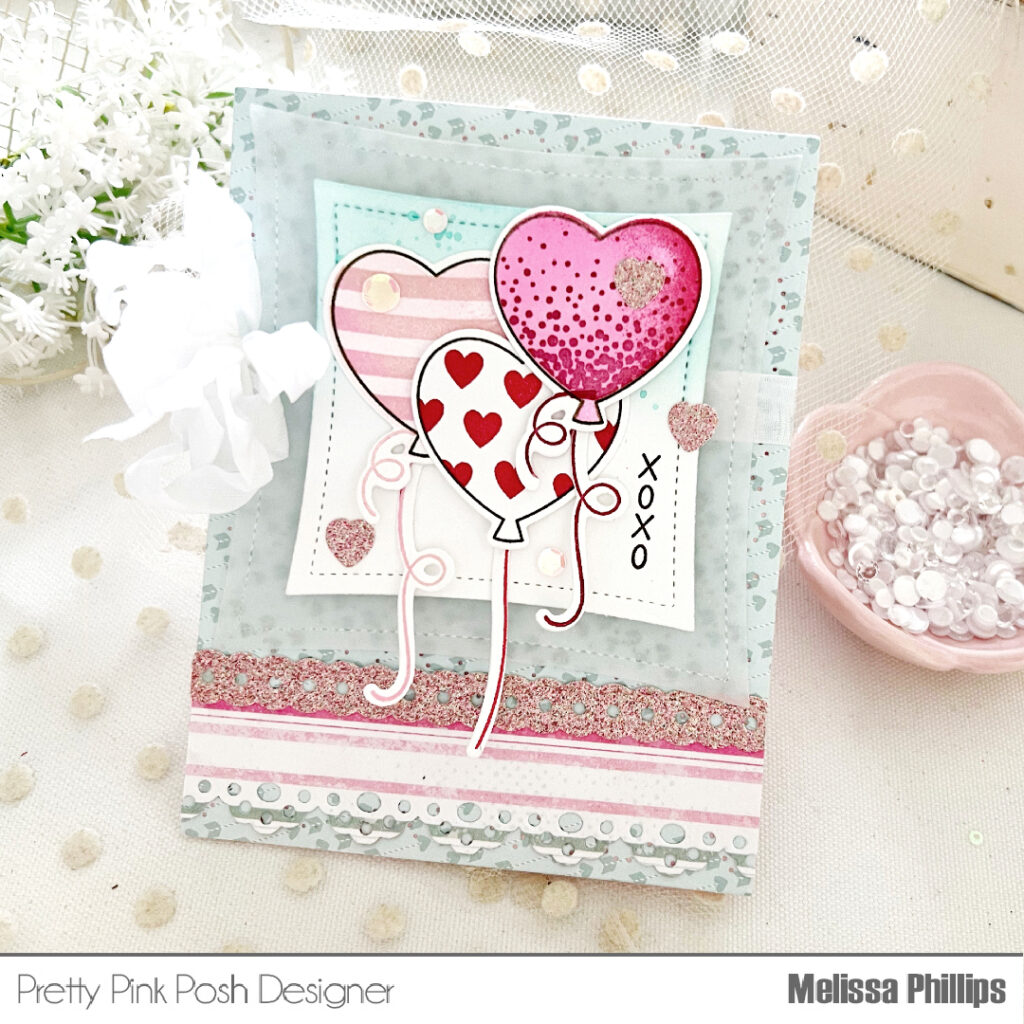
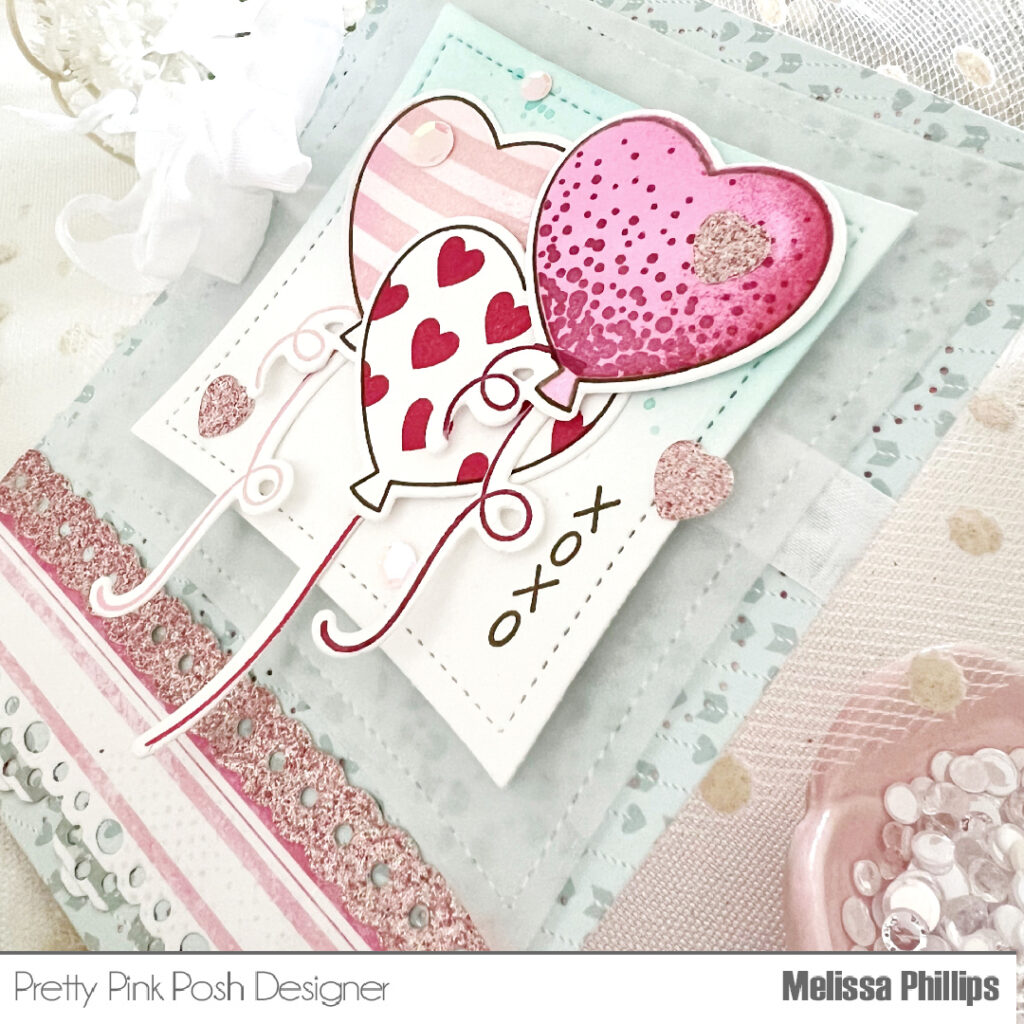
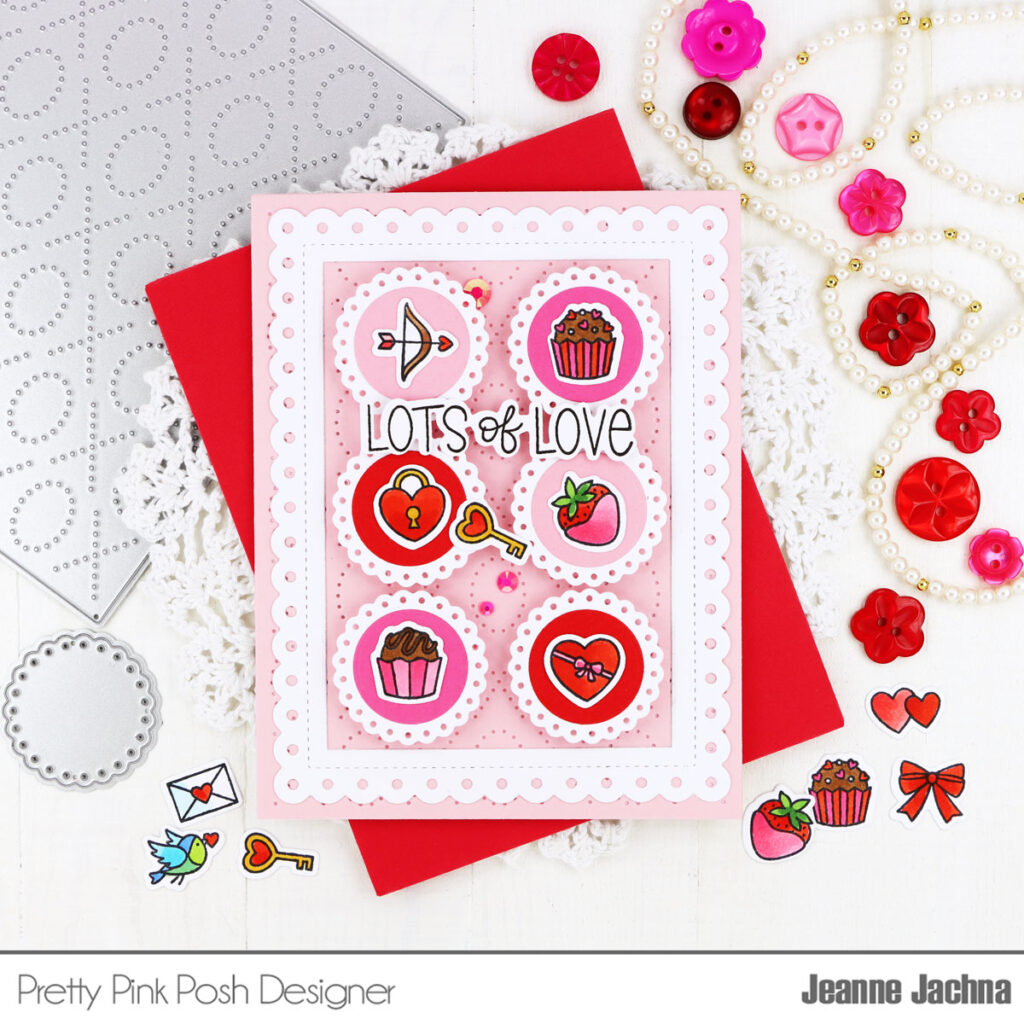
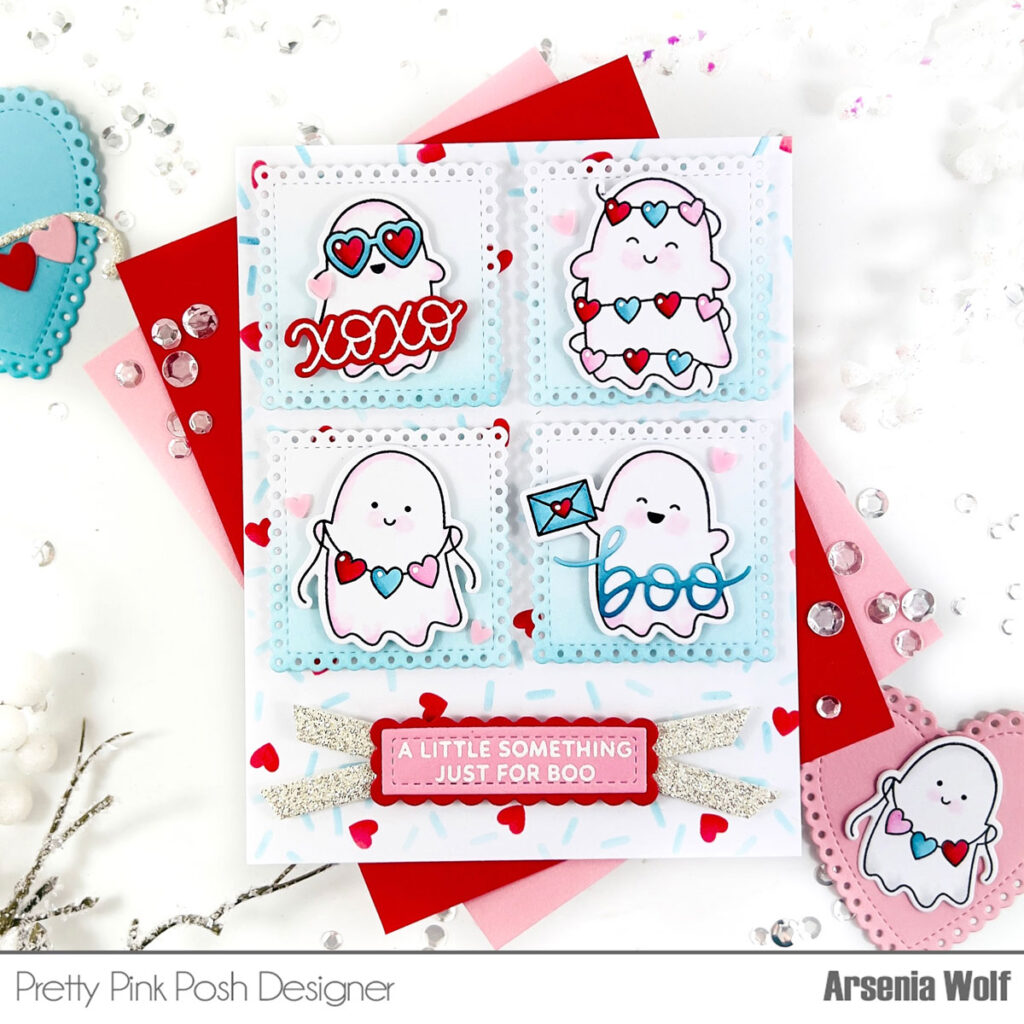
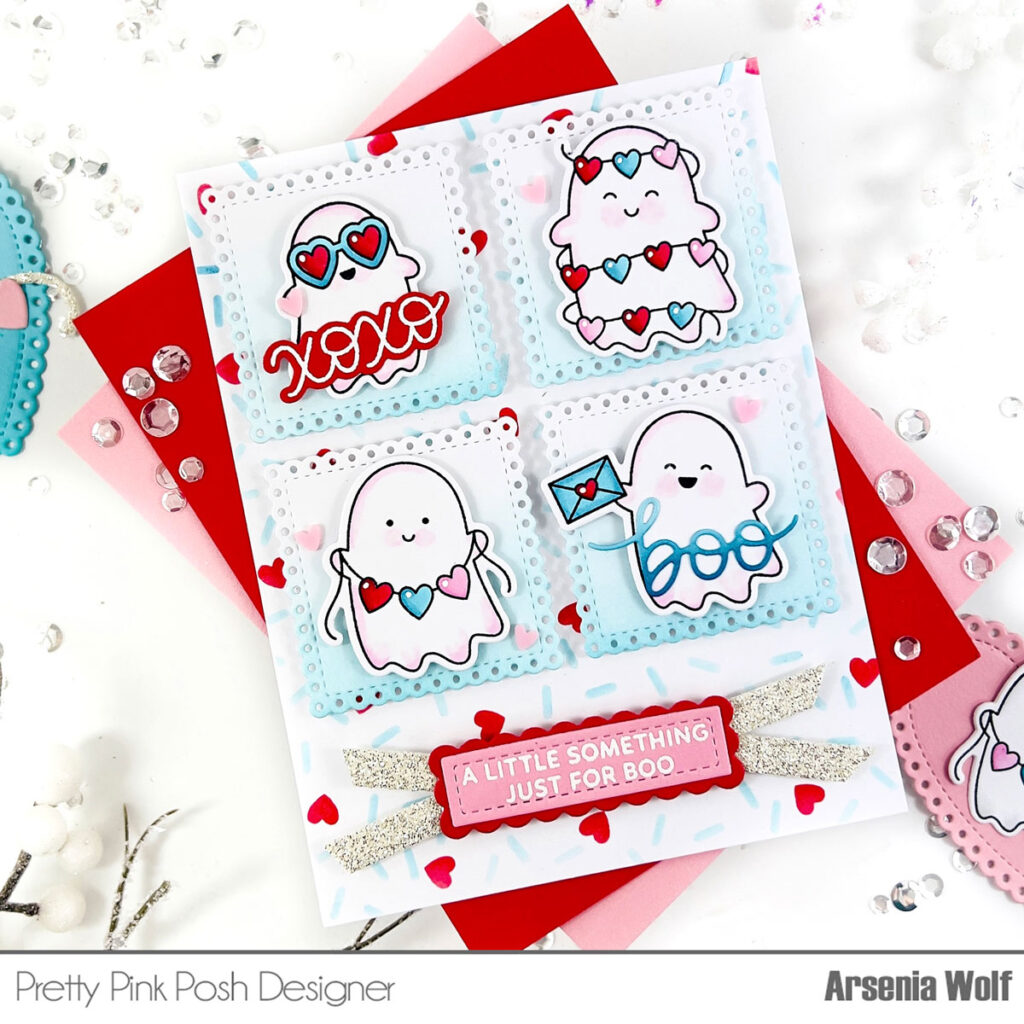
My next card uses the Circle Grid stencil. This stencil coordinates with the Icon stamp and die sets. The little images in the Icon sets fit perfectly into the ink blended openings. There is also a Square Grid stencil and a Diamond Grid stencil being released. I love how these stencils will coordinate with the icon sets.

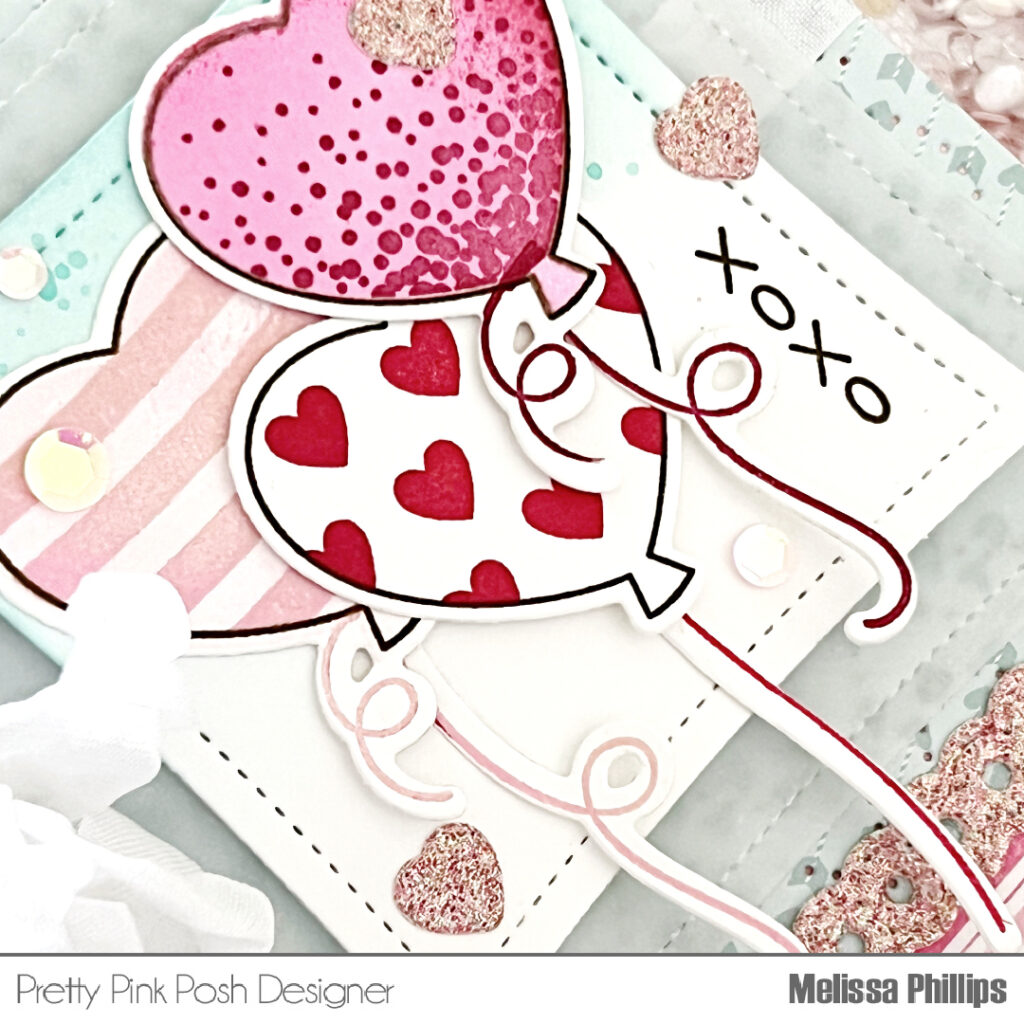
I started my card by using the Circle Grid stencil to create my card panel. I again used dye ink and finger daubers for my blending. I stamped my images with the Valentine Icon set with VersaMark ink. I then heat set the images with gold embossing powder. I colored the images with Copic markers and used the Valentine Icon die set to cut them out.

Next, I used the Valentine Greetings set for my sentiment. Lastly, I attached the images and sentiment onto my panel with foam adhesive to finish my card.

Thanks for joining me today and I hope you enjoyed my card. I know you will love these new products and I can’t wait to see what you create with them!!
Enjoy your day, Dana