Pretty Pink Posh Shop

|

Easter Theme Week- Day 4

easterweek

Hello and Welcome Spring!  I just love this time of year…….the colors, the sounds, the weather!  We continue to share the Spring and Easter theme week today.

Pretty Pink Posh

I love the birdie in the Birdie Friends stamp set.  I’ve colored the main bird, tiny eggs, and branch with Copics and die cut with the coordinating dies.  The tiny nest was stamped in brown dye ink and eggs were adhered with foam adhesive.

Pretty Pink Posh

To give this a springy look, I layered a piece of plaid pattern paper to a top folding notecard.  I layered all my images onto some of the Mini Tags Dies from Pretty Pink Posh.  These were adhered to the plaid notecard as flat embellishments.  I adorned the branch and the birdie with some pink flowers from the Spring Flowers Mix.

Pretty Pink Poshborder

If you have missed any of the previous posts, click on the photos below to see the post from that day.

easter1 easter2 easter3
Thanks so much for joining us today and hope you are enjoying a bit of Spring where you are! We’ll see you tomorrow for day 5 of Easter week!
|

Easter Theme Week- Day 3

Pretty Pink Posh

Hi everyone!  It’s Carissa here.  Thanks for stopping by today and for joining in all of the fun of the Pretty Pink Posh Easter Week.  I have a fun little shaker card for you today, featuring that adorable little birdie from the Birdie Notes stamp set along with the Stitched Photo Frames Dies and Stitched Borders 4 Dies.  Lots of Pretty Pink Posh goodness on this card.

Pretty Pink Posh

I started out by stamping my little chick-a-dee in some black ink.  I used  permanent ink, as I knew I was going to watercolor this little guy with my Zig Clean Color Real Brush Markers.  I used Lemon Yellow, Yellow and Bright Yellow to watercolor this little guy.  Rather than take the markers directly to the cardstock, I decided to pick up the ink from an acrylic block using a watercolor brush.  This gave me a little more control over the intensity of the color from the get go.  I knew I was going for a more watercolor look, and I didn’t want to overdo it on the first stroke. :)

Pretty Pink Posh

I also used an egg stamp from the Simon Says Stamp Melody’s Easter stamp set.  I stamped the egg in several soft spring colors.  I used the Simon Says Stamp hybrid ink cubes in Lake Shores, Twirling Tutu and Willow for my eggs.

Once all my stamping and coloring was done, I used the coordinating dies to cut out my images.  I usually hold my dies in place with a little micropore tape as I run them through my Big Shot.  This prevents them from shifting around and eliminates the oopsies that can sometimes come with die cutting colored images.

Pretty Pink Posh

I also cut the Stitched Photo Frames die.  I used a little bit of textured cardstock for my frame.  I love the…well for lack of a better word…texture that this card stock adds.  A simple little touch like this can make all the difference in the world.  I used the same die to cut some fun foam as well.  This will allow me to create the shaker window on the front of the card and eliminates the frustration of cutting down tiny pieces of foam tape to add to the back of the die cut piece.

Building the shaker window up off of the card front is one of my favorite ways to create shakers.

Pretty Pink Posh

I filled my shaker window with some Pretty Pink Posh goodness and some of the die cut eggs as well.  I used the 4mm Sparkling Clear Sequins and the Silver Shimmer Seed Beads to create subtle shimmer inside the shaker window.  I love the movement that the seed beads add inside shakers.  It adds a fun noise element too that you don’t get with just sequins.  I also sprinkled a few of the sequins outside of the shaker window as well.

Pretty Pink Posh

I used the scallop edge border from the new Stitched Borders 4 die to add a fun shaped element to my card front.  I also used the same border die to cut some metallic gold cardstock.  I just mounted the card front slightly offset from the gold to create a beautiful double scallop edge.  I embossed my greeting on the bottom of my card front using some gold embossing powder from Ranger.   This ties in the gold that I used to mat my card front.

Pretty Pink Posh

For my card base, I used the Bazzill Pale Rose card stock.  This is one of my favorite pinks.  It’s just so soft and subtle and very springy!

I added my shaker window to my card front and added my adorable little chick as well.  I added him with foam adhesive to make him pop off of the photo frame.  I also added a few of the Easter eggs on the outside of the photo frame as well.  I adhered them using a mix of foam adhesive and tape runner adhesive to create depth.

Pretty Pink Posh

So there you have it, a fun idea for an Easter card featuring a whole bunch of Pretty Pink Posh goodness, new and old.  I hope you’ve enjoyed this project.
border

If you have missed any of the previous posts, click on the photos below to see the post from that day.

easter1 easter2easter4
I don’t know about you, but now I’m inspired to create all sorts of cute Easter projects. I hope you’ve been inspired with our theme week so far. We still have two more days of inspiration to share!

See you tomorrow…

| |

National Craft Month Blog Hop

national-craft-month-banner

I am so excited to be blogging today and on top of that, I get to share a card I made recently!

Today’s card uses some of the brand new products in the Pretty Pink Posh Shop. I was able to sneak in some crafty time recently and boy, did I have fun! With the busyness of running the day-to-day things in the shop, I don’t often get to craft, but when I do, I remember why I started doing what I do. Give me a few days, Netflix, coffee and stamp supplies and I’m one happy girl!

When I haven’t crafted in a while (ahem, months), it usually takes a few hours to get the creativity going, but the first card I make usually is my favorite from the bunch. This card was the first card I made in the most recent craft session and I just love how it turned out.

Pretty Pink Posh

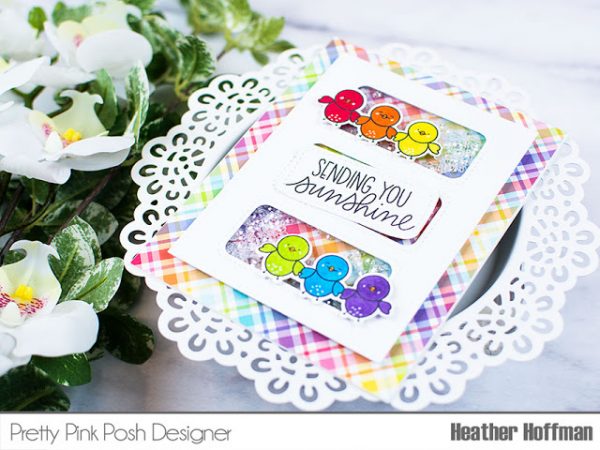
I started off by using the Scallop Circles as my focal point and paired it with the birdie trio from the Birdie Friends set. This set is my current go-to because you can use it for so many occasions and I really put a lot of thought into the elements and sentiments. I went the route of creating a mini scene and added the mini pink flowers from the Spring Flowers Mix.

To “frame” the mini scene, I paired the larger Scallop Square and made a shaker using my favorite Sparkling Clear Mix and added some of the Sparkling Clear Seed Beads. That little addition really adds to the shaker element, since those beads are really small and delicate.

Pretty Pink Posh

For the last finishing touch, I added two bows from the Twine and Bows die set using some silver glitter cardstock. It’s amazing how just this little addition really made the card feel and look complete. Plus, die cutting it from the glitter cardstock made the card even more special.

Pretty Pink Poshborder

Did you know that it’s National Craft Month? My friends at Right At Home are having a week long link-up so YOU can share what you have made recently and possibly win a prize! I’ve donated a $25 PPP gift certificate and I know there’s lots of other fun prizes, too. If you’re hopping along in their blog hop, your next stop is Catherine Pooler!

I hope you all enjoyed my card and the blog hop. Thanks for stopping by!

|

Easter Theme Week- Day 2

easterweek

Gayatri here sharing a card using the newly released Birdie Friends stamp set, Birdie Notes and Scallop Circles die set.

On this card, I have a shaker element sitting on a beautiful pastel background created using a masking technique.

Hugs to you hello friend card vertical

For the background, I die cut many pieces of birdies from both the Birdie Notes and Birdie Friends coordinating dies using masking paper. I randomly adhered the mask on a white card panel. I used the smaller birdie to fill in the gaps. I burnished the edges of the mask using a Teflon folder so they don’t pop out when I am sponging inks. I picked pastel distress inks for sponging the background. They are Squeezed Lemonade, Tumbled Glass, Shabby Shutters and Spun Sugar. Once I sponged them on the panel, I spattered some clean water to get some texture. Afterwards, I removed all the masks. Once I patted down the water dry, I stamped the masked area with the respective birdies using Gray Flannel Memento Luxe Pigment ink. I wanted the image to be subtle, so I chose the grey colour instead of black. Once finished with the colouring, I adhered the panel on a white card base.

For the shaker element, I die cut the large Scallop Circle using white glitter paper. I also die cut a circle using vellum and adhered the vellum circle behind the scallop circle. Then I stamped the two birdies and the chick, copic coloured them. Die cut them out using the coordinating die. Then I stamped the sentiment from Birdie Friends stamp set on a strip of white cardstock. Finally die cut a big bow using blue cardstock using the Twine and Bows die set.

Hugs to you hello friend card closeup

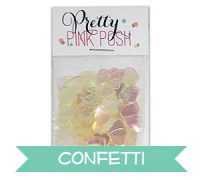
To assemble the shaker element on the card front, I added Iridescent Mini Heart Confetti to the centre of the card front. Then adhered the scalloped circle die cut with vellum backing on top of the confetti using foam adhesives making it the shaker box on the card front. On top of the shaker circle, I adhered the coloured birdies and chick die cuts using foam adhesives with the chick double foamed and the sentiment strip below the birdies. The bow die cut is adhered on top of the scalloped circle. Finally, I added the Sparkling Clear Mix to bring the whole card together.

Hugs-to-you-hello-friendsborder

easter1 easter3easter4

I hope that you’ve been enjoying our Easter theme week so far. We still have three more days of great posts- we’ll see you tomorrow!

|

Easter Theme Week- Day 1

Pretty Pink Posh

Hello everyone, Joni here sharing inspiration for the upcoming Easter holiday.

You can easily create this project  using the following Pretty Pink Posh products: Birdie Friends stamp set, Birdie Friends coordinating die set, Stitched Borders 4 dies, Scallop Circles dies set, and my all time favorite the Twine & Bows dies set.

Pretty Pink Posh

To begin, I first stamped my clear cellophane bags with white StazOn ink using the cute images from Birdie Friends stamp set. Just make sure to clean your stamps with Hero Arts Ultra Clean as this will be sure to remove the white ink on your stamps.

Pretty Pink Posh

Next, I die-cut white cardstock using the Scallop Circles dies set then distress the sides with Tumbled Glass distress ink, but instead of using the scallop portion, I used the negatives. I also used the negative of the large scallop and use the small circle scallop to create a cream border for my card tag (see the picture below).

To create a card tag I simply die-cut another negative circle and scored the top portion of the circle and adhered with glue. The distress on top and the scored portion on the bottom.

Pretty Pink Posh

To create my grass for the tag I distressed the white cardstock and used the large scallop die to die-cut and get the negative. Then die-cut negative on the green portion using the tiny scallop border from Stitched Borders 4 dies.

Pretty Pink Posh

The look of the tag card.

Pretty Pink Posh

For the goodie bag, I die-cut an antique gold cardstock using the tiny scallop border from the Stitched Borders 4 dies and adhered at the bottom of the cellophane for added touch on the bags.

Pretty Pink Posh

On the tag card, I stamped the sentiment “Sending Hugs” from the Birdie Friends stamp set using gold embossing powder. The cute birdie images are from the same stamp set they were watercolored using ZiG Clean Color Real Brush 60 and die-cut with their coordinating dies.

I also added my favorite bow from the Twine & Bows die set to finish it off.

Pretty Pink Posh

Pretty Pink Posh

I hope you guys enjoyed! Stay tuned- all week we will have Easter inspiration using Pretty Pink Posh products!

easter1 easter3 easter4
sig name

| |

March Product Release Blog Hop

March2016bloghop

Hello, sweet friends!

It’s time for the Product Release Blog Hop for the March 2016 release. Many of you have already placed orders, but for those who were wanting for more inspiration, today the design team and special guests have all sorts of inspiration to share!

Before we get to their awesome creations, I wanted to share a card that I made using several of the new products. If you have followed me for a little while, you know that I’ve been obsessed with glitter cardstock (especially with the scalloped dies) and the new Scallop Circles are no exception. They make the perfect frame for images.

march1a

I always enjoy creating scene-like cards and with the new birdie sets, they’re easy to make! I paired the Birdie Friends stamp set with the Picket Fence dieStitched Speech Bubbles, Twine and Bows, and added a sprinkling of the Spring Flower sequins.

Just think of all the fun color combinations you could create using this card layout. Also, if you had little egg stamps, you could replace the flowers for eggs to create an Easter card!

march1b

Ready to hop along and see LOTS more fabulous inspiration with this release?

PRIZES: be sure to leave comments on each stop. I’m giving away 2 $25 gift certificates to two random comments left before March 14, 2016 at 11:59 PM PST. I’ll be announcing the winners next week, so be sure to return and see if you are one of the winners!

march2016a

I truly hope you enjoyed the blog hop. Be sure to leave lots of love for the design team and guest designers!

Thank you all for your enthusiasm about the new stamp sets, dies and sequins. I can’t wait to start seeing your creations with the new products in blog and social media land!

|

Birdie Hello

Hello everyone!

It’s Joni here sharing a project using the new Scallop Circles die setBirdie Friends stamp set and the coordinating Birdie Friends die set. I really love these dies and I know you will too.

Pretty Pink Posh

I want to show you below all the elements of this card.

Pretty Pink Posh

The larger scallop I turned into a shaker using an all-time favorite Sparkling Clear sequins in 10mm, I also used Iridescent Mini Star Confetti and Silver Shimmer Seed Beads. I also cut the small circle scallop to put on top of the larger circle scallop. The small stitched circle you see below if from the Stitched Banner Duo 2 dies. The cute birdie is from the new Birdie Friends stamp set.

For the card panel, I cut an A2 white cardstock distressed it using Papertrey Ink dye inks in Harvest Gold and Melon Berry and cut the bottom using the new Stitched Border 4 die set. The hello die is from Essentials by Ellen called Brushstroke Hello.

Pretty Pink Posh

Here’s a look at the card all finished. Look at all the pretty elements in the shaker circles!

Pretty Pink Posh

Be sure to mark your calendars for Thursday, March 10th. We have a super fun blog hop that will showcase the new stamp sets, dies, and sequins and there are some amazing special guests joining along in addition to prizes! If you’re on Facebook, be sure to visit the blog hop event page HERE– there will be a special giveaway there soon!

Pretty Pink Posh

I hope you guys enjoyed! Thank you so much for stopping by.

sig name

|

Birdie Friends Circle Card

Today I’m so thrilled to share this adorable card that Liz created using several of the new products from the March release. Let’s take a closer look at this card and the card details she shared…

Pretty Pink Posh

I’m absolutely in love with these new Scallop Circle Dies as it has the most amazing details with the stitching and inverted scallops, not to mention how nicely they cut through cardstock and fun foam to create this upright circle shaker card so that it can sit up wherever you want.  Here I’m using the largest size, which is so amazing in person.

Pretty Pink Posh

For this card I’m using the adorable brand new stamp set called Birdie Friends which I’m also thrilled about as it has several sentiments and different font combinations. Plus, I love all the extra images including this cute banner which fits perfectly above the three little birds and used the matching coordinating dies to cut all the images out and pop them up for dimension.

Pretty Pink Posh

I decorated the inside of the card using the Birdie Friends set along with adding adorable little cloud from the Rainy Days set as it has this cute smiley face that can be stamped inside the clouds and thought it was perfect to add in. For the sentiment, I took the banner sign and cut off the legs and added foam mount to pop it up. This is what helps to hold the card upright so one can place anywhere.

Pretty Pink Poshborder

I hope that you enjoyed this card as much as I did- I literally squealed when Liz shared it with me! Join us tomorrow for another post using the new products.

Thanks for stopping by!

| | |

Mixing It Up With Ellen Hutson!

Pretty Pink Posh

Hi everyone, it’s Nina-Marie here today to share a fun way to combine your distress inks with traditional watercolors and achieve beautiful results!

I created this for Ellen Hutson’s Mix It Up challenge and I hope you’ll stop by their blog too so that you can link up your cards featuring Pretty Pink Posh and Ellen Hutson! This card is full of you products from both Ellen Hutson’s Essentials by Ellen line, and Pretty Pink Posh!

Pretty Pink Posh

I used the Bohemian Garden stamps and Zipper Panel die sets (by Ellen Hutson), along with Pretty Pink Posh’s Rainy Days stamp set and Sparkling Clear mix sequins… I’m telling you, I love the Sparkling Clear sequins; they work for EVERYTHING!

Pretty Pink Posh

Pretty Pink Posh

I used my distress inks for the background and Prima’s Tropical Watercolor Confections palette to add color to my flowers.

I have put together a video showing how I created the card from start to finish, so be sure to check that out below, or over on the Pretty Pink Posh YouTube channel… don’t forget to subscribe too so that you don’t miss any of our future videos!

Watch the video above   I Watch the video in HD on YouTubeborder
Pretty Pink Posh

I hope this card has inspired you to do some watercoloring using any watercolor mediums you have on hand…. remember that watercoloring looks good whether it is “controlled” or “freestyle”. Use the method you like best and give it a try. Then, link up your projects over at the Ellen Hutson blog for a chance to win a $50 gift certificate!

50 Store Credit

Happy crafting and thanks for stopping by today!

xoxo, Nina-Marie

|

New Release Available!

Hi everyone, Joni here sharing some of the new products that was just released in Pretty Pink Posh Shop!

For this project I used the new Birdie Friends stamp set. This set have 17 images and 8 sentiments. I also used the new sweet Scallop Oval die set, which is quickly becoming a favorite of mine. I really love that the scallops of this oval are larger to give that impact showcasing the cute birds.

Pretty Pink Posh

This oval has one large scallops design (large scallops’ teeth) and one small scallops design with (smaller scallops’ teeth) to coordinate with your projects. Below you can see the difference.

Pretty Pink Posh

I created a shaker using this set. First, I die cut the large Scallop Oval in white cardstock 4 times and distress one center of the oval with Papertrey Ink dye inks in Harvest Gold, Limeade Ice, and Ripe Avocado, then added some spritz of water once done. I die-cut another large Scallop Oval die using a light- pink cardstock to put on top of the stack white scallops after putting all the sequins inside. Next, I glued the acrylic cardstock on top of the white stack ovals and then glued the pink di-cut oval on top of the acrylic.

Tip: Make sure the glue is dry before cutting the excess acrylic on the ovals.

For this shaker I used the new upcoming Easter Sequin Mix and added some Sparkling Clear sequins as well in the mix. The birds and the branch images were watercolored and die cuts using the new Birdie Friends coordinating dies. The leaves for the branches were also die-cuts using some green scrap papers.

Pretty Pink Posh

For the background panel, it was also distressed using some dye ink and splattered with water as well.

Pretty Pink Posh

I hope you guys enjoyed the closer look of some of the new products. Paulina will be sharing more inspiration and details about this release soon.

sig name