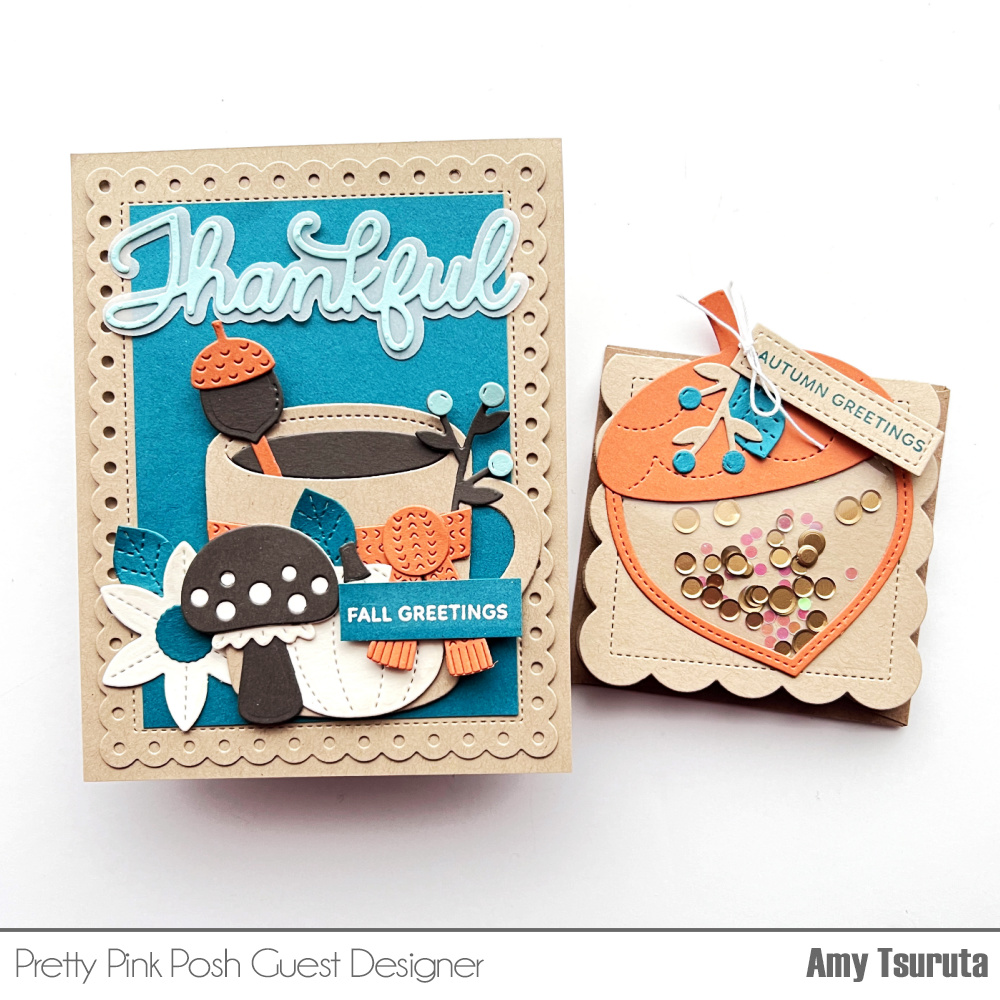
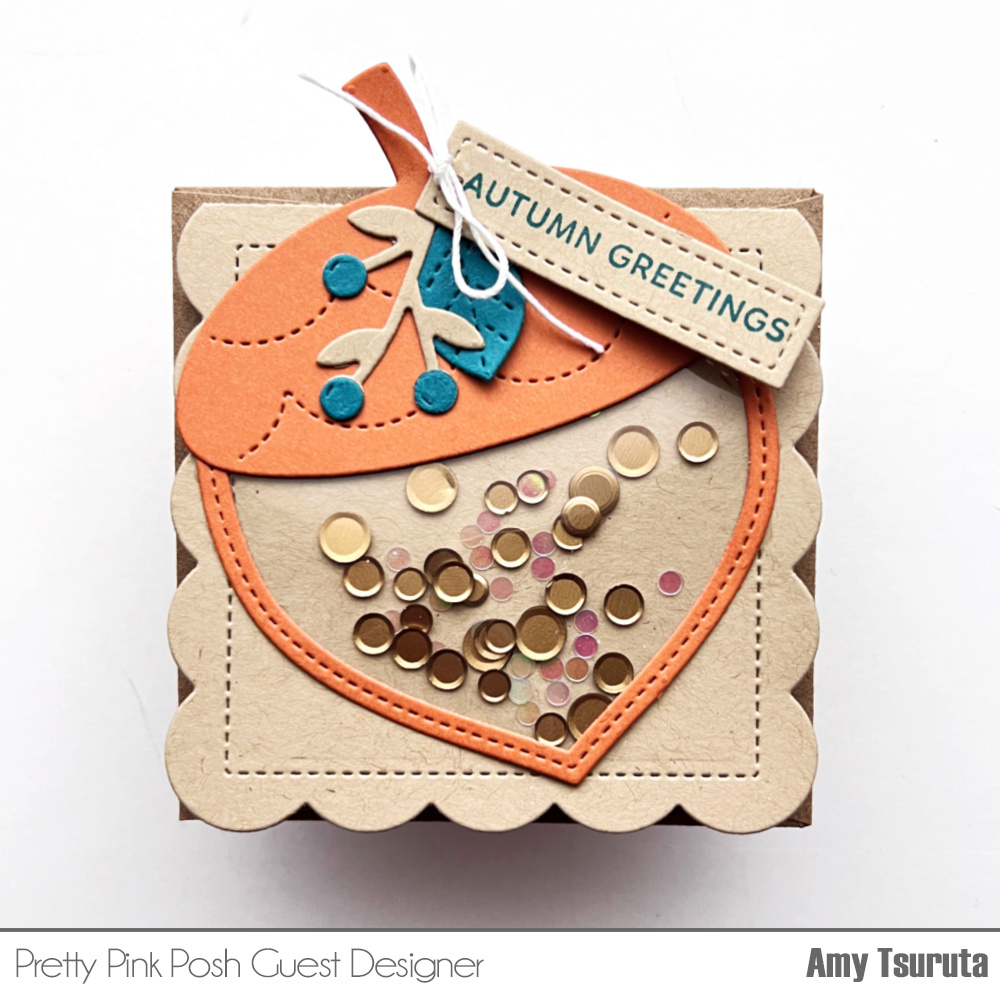
The Mini Scallop card really packs a punch. Love the scallops and the stitching. There are coordinating envelopes for the Mini Scallop Card, I used one in the photo. I’ll tuck the card in it and pop it into an A2 card for mailing.
Make sure you check out the Thanksgiving section in the shop. Everything is on SALE through the week!
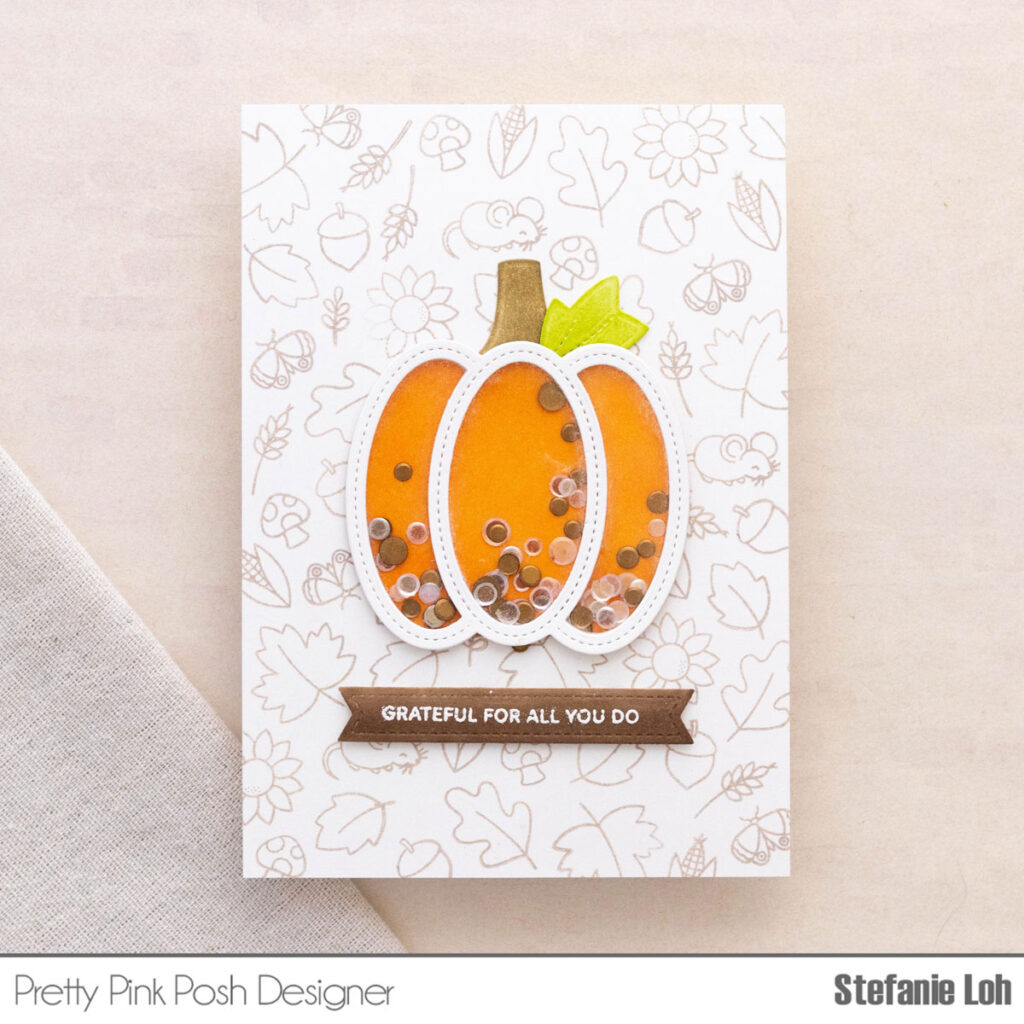
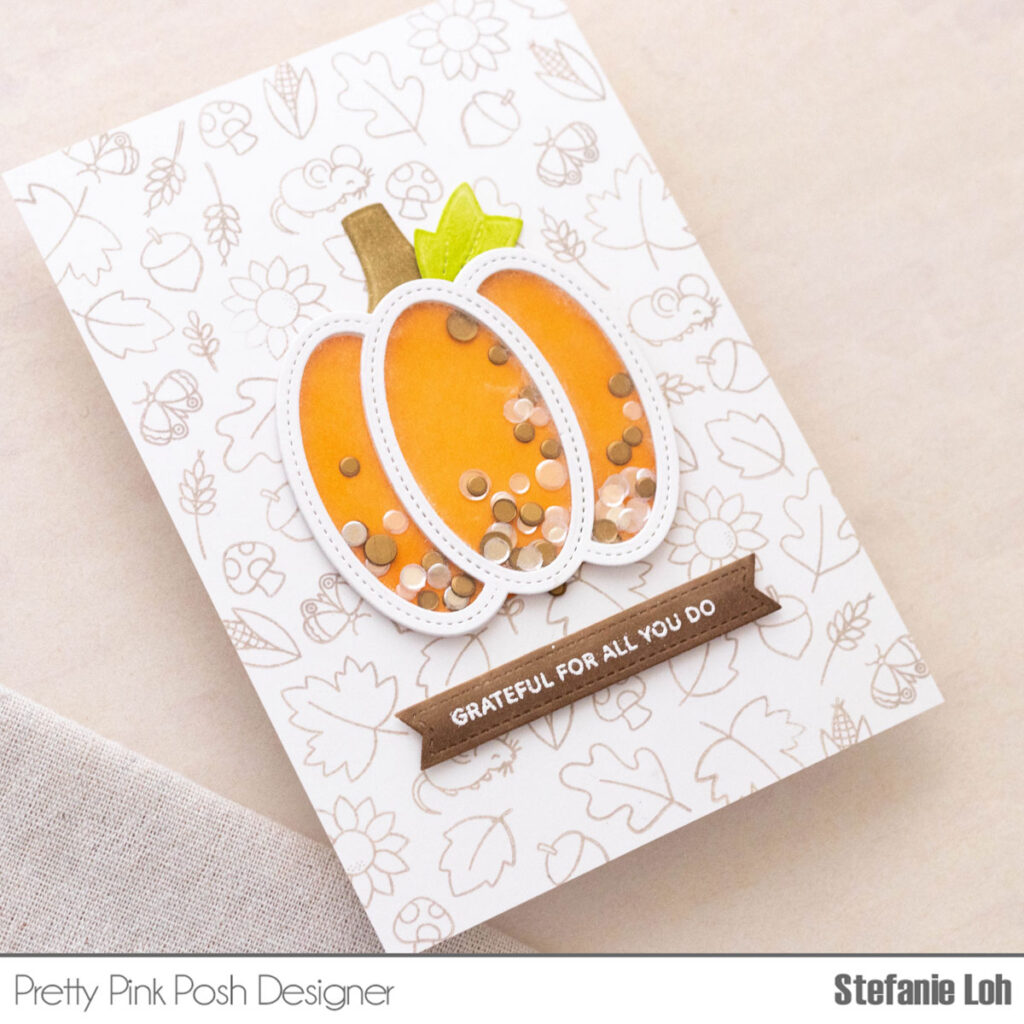
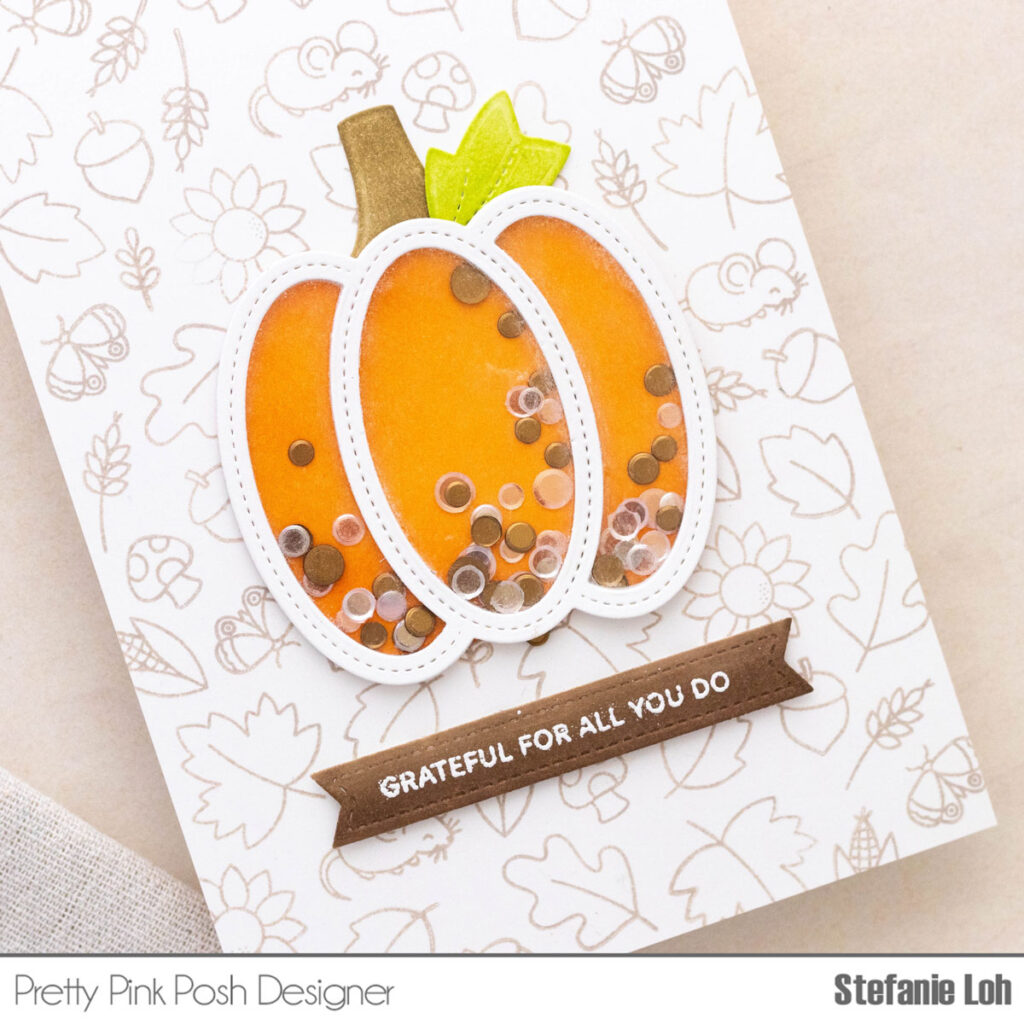
Hi friends! It’s Stefanie here today kicking off Autumn Theme Week and I’ve created a cute pumpkin shaker on a simple stamped background to share with you!
To create the card, I started by using the Pumpkin Shaker Dies and die cut the outline of the pumpkin 6 times on white cardstock. I stacked them together using liquid adhesive and sandwiched some acetate between the top 2 layers to create a shaker window.
I filled the shaker with a combination of the gorgeous Matte Gold Confetti Mix and Sparkling Clear Confetti Mix. Then I sealed off the back of the pumpkin shaker with cardstock that I ink blended evenly with Concord and 9th’s Marmalade orange.
The stem and leaf at the top of the shaker are also from the Pumpkin Shaker Dies, but this time I only used single layer die cuts. I ink blended the stem and leaf using Concord and 9th’s Wheat and Sprout colored inks, respectively and adhered them behind the pumpkin shaker.
Now that the shaker was complete, I moved on to create the background. I wanted the pumpkin shaker to be a bright focal point and opted for a simple stamped background using the cutest mini stamps from the Fall Jar stamp set. I stamped them all out using Pumice Stone distress oxide for a soft and subtle look.
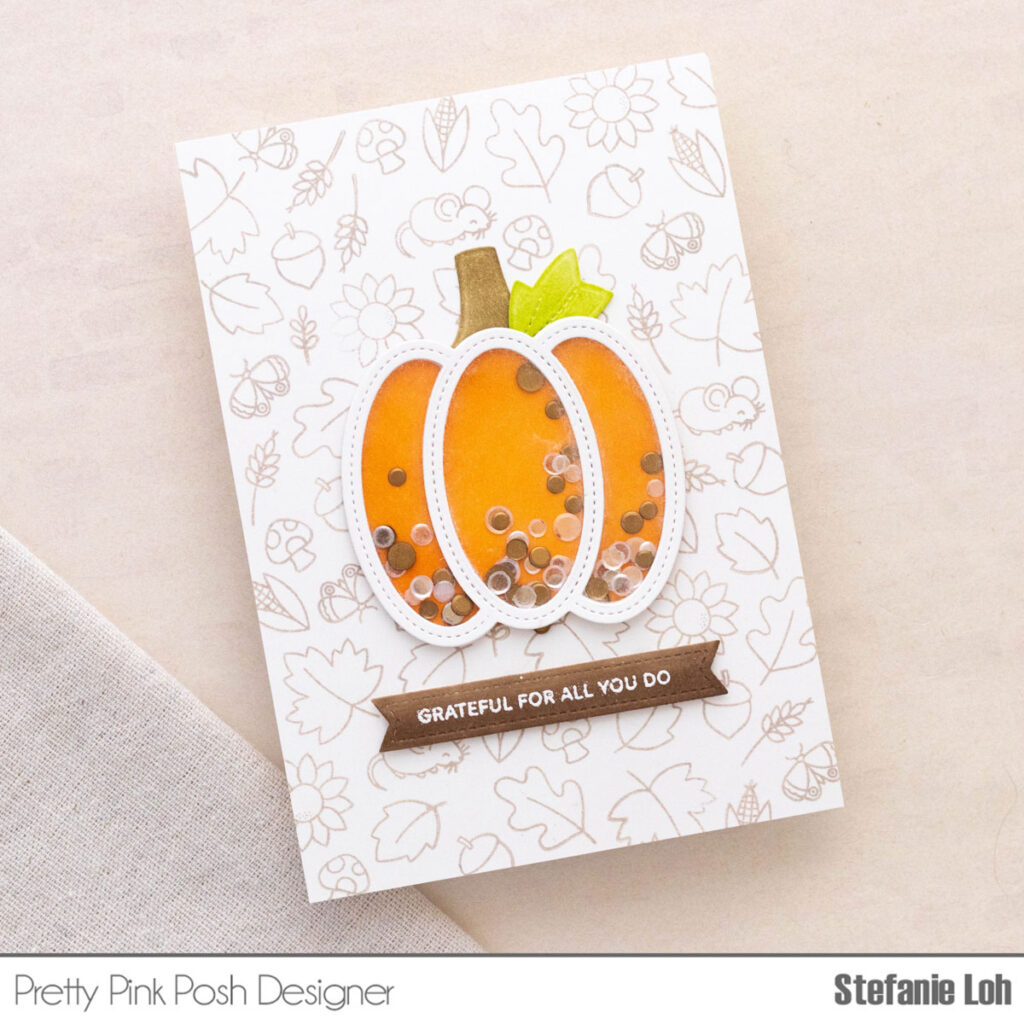
The pumpkin shaker was then adhered directly onto the background and I propped up a sentiment underneath. The sentiment is from Sentiment Strips: Fall stamp set, embossed in white on a banner from the Sentiment Strip Dies which I colored brown using Copic marker E44.
And finally the card is finished! Thanks so much for stopping by and I hope you like how my card turned out!
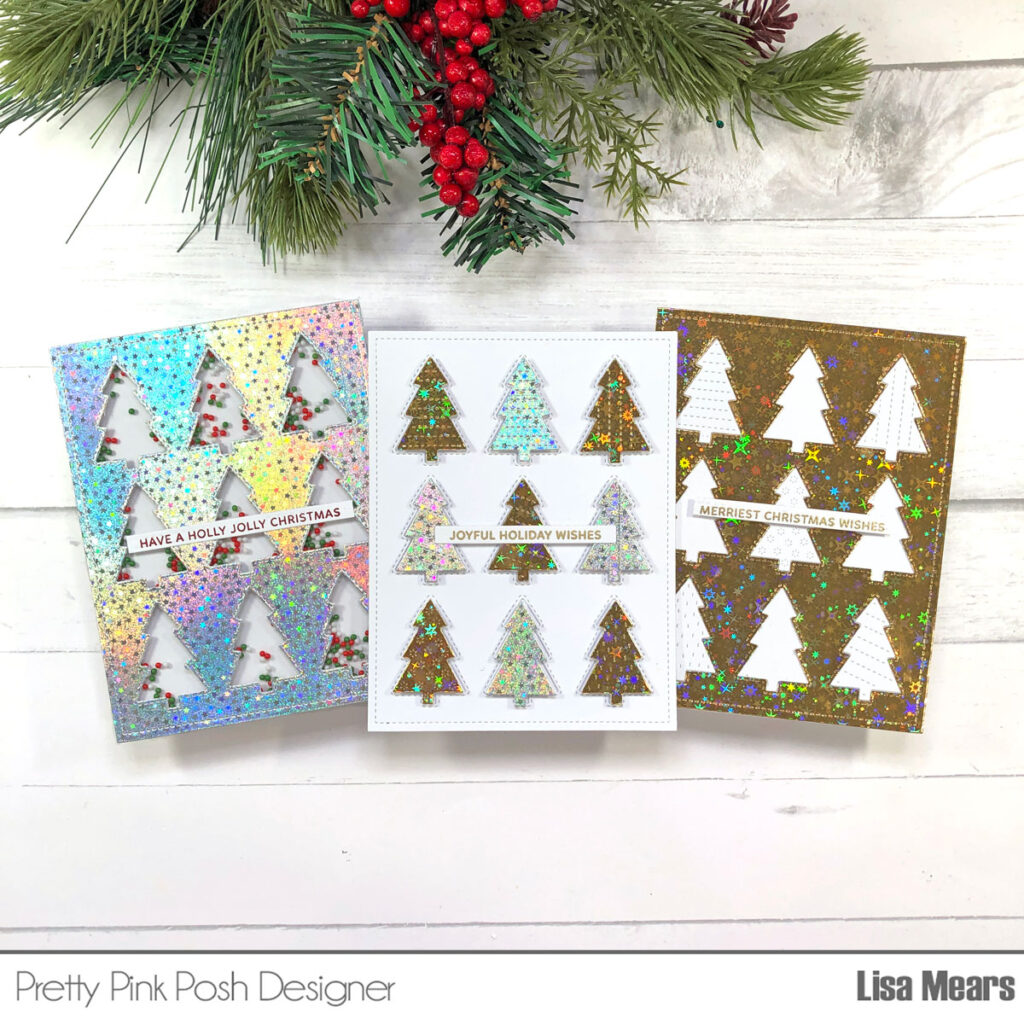
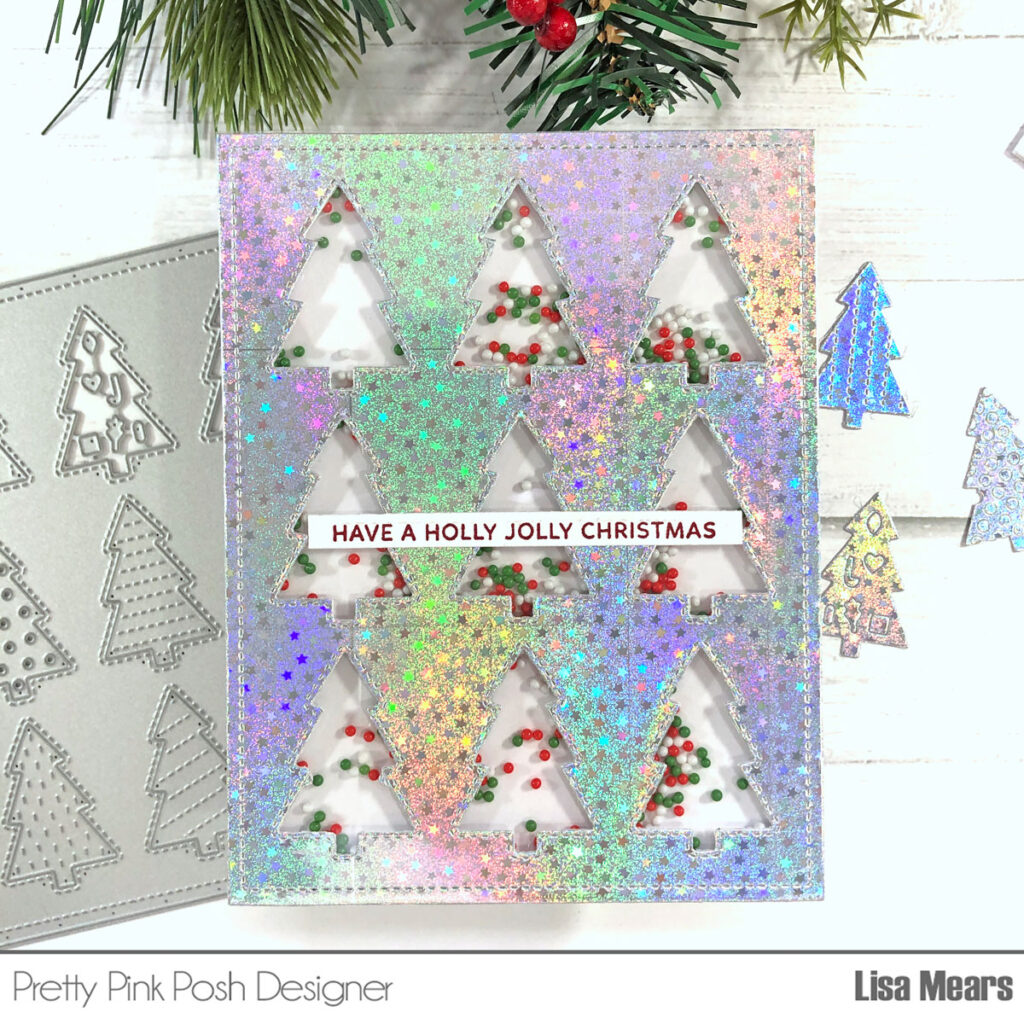
Hello crafty friends. It’s Lisa Mears on the blog today and I’m sharing three cards and three ways that I used the new Tree Cover Plate from Pretty Pink Posh. I’m going to be using some holographic silver and gold cardstock to get a beautiful shine on my cards.
The Tree Cover Plate die is the size of an A2 size card (4 1/4” x 5 1/2”). There are nine Christmas trees that have beautiful stitched designs on them. You can take the Christmas trees out of the die cut or leave them in the die cut for a different look.
I die cut the Tree Cover Plate from white cardstock and then die cut it two more times using Holographic mirror paper in gold and silver. This gave me a total of three cover plate die cuts. I removed all of the Christmas trees from all three die cuts and set them aside.
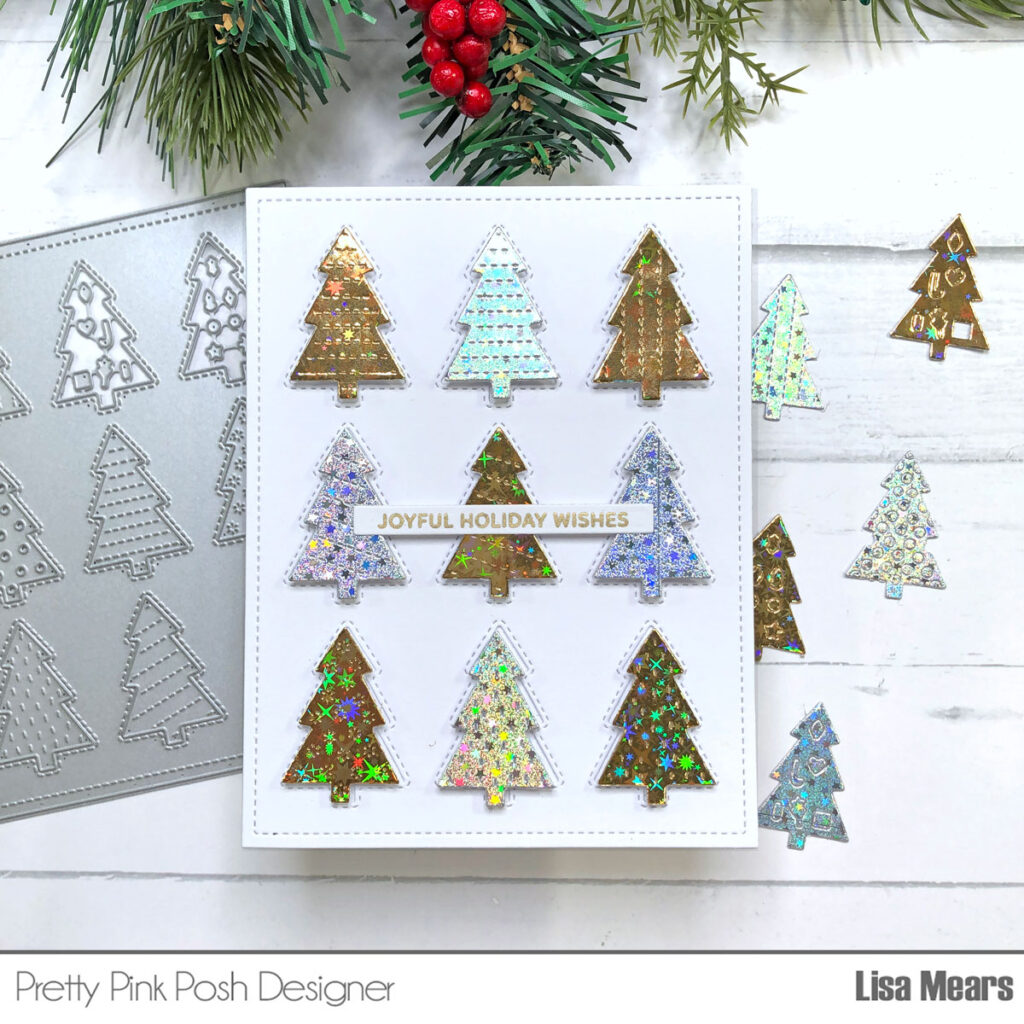
For my first card, I glued the white Tree Cover Plate die cut shape onto an A2 card base and then added the silver and gold Christmas trees to all of the openings on the cover plate. I added dimensional foam to the back of the Christmas trees to give them dimension. I added a sentiment from the Sentiment Strips: Christmas stamp set and used the coordinating dies to cut out the sentiment.
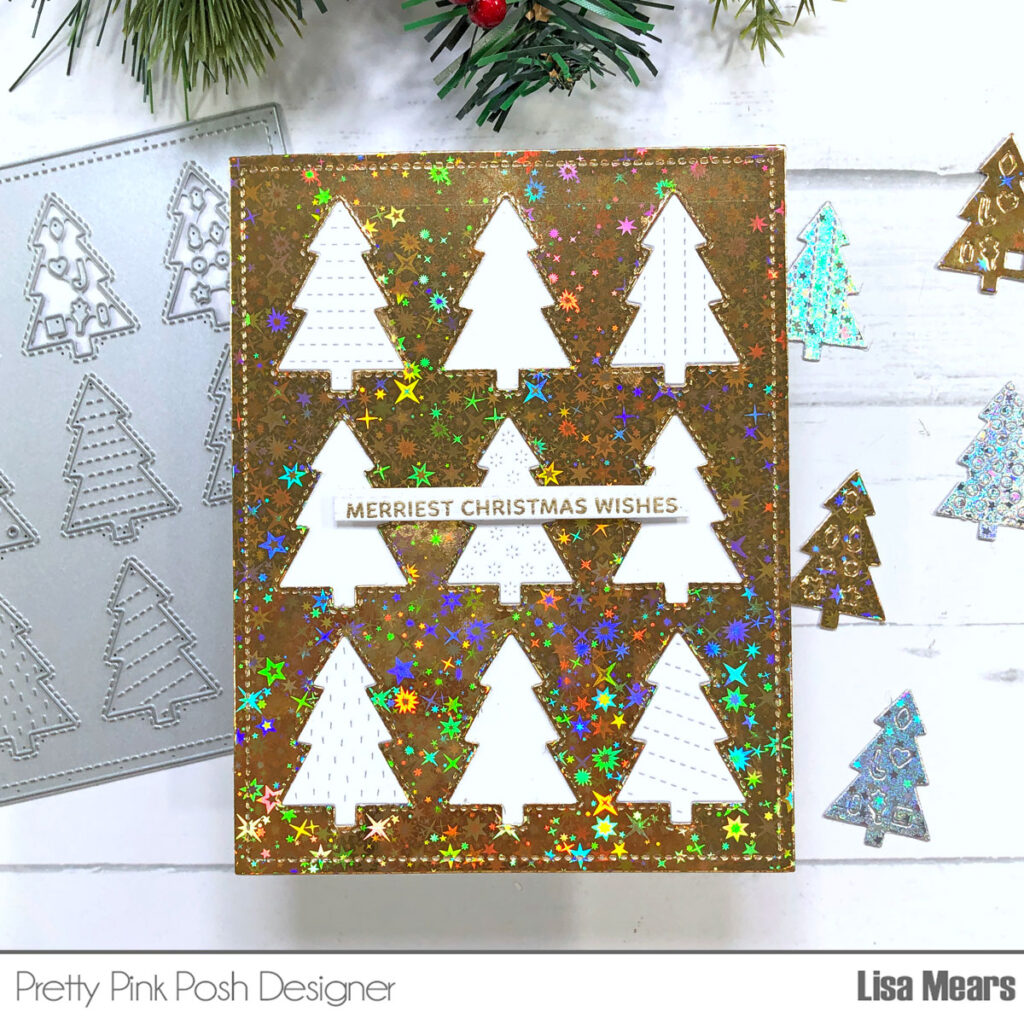
For my second card, I added the gold Tree Cover Plate die cut shape onto an A2 card base and then added five of the white Christmas trees (from the white Tree Cover Plate) to the openings. For this card, I glued the white Christmas trees flat to the card and then added the sentiment with dimensional foam to pop it up.
For my third card, I used the silver Tree Cover Plate die cut shape and turned it into a shaker card! Be sure to watch my video to see how I made the shaker. I used the Christmas Cookie Shaker Beads for the shaker.
I love how you can get so many different looks from just one die! Thank you for stopping by today!
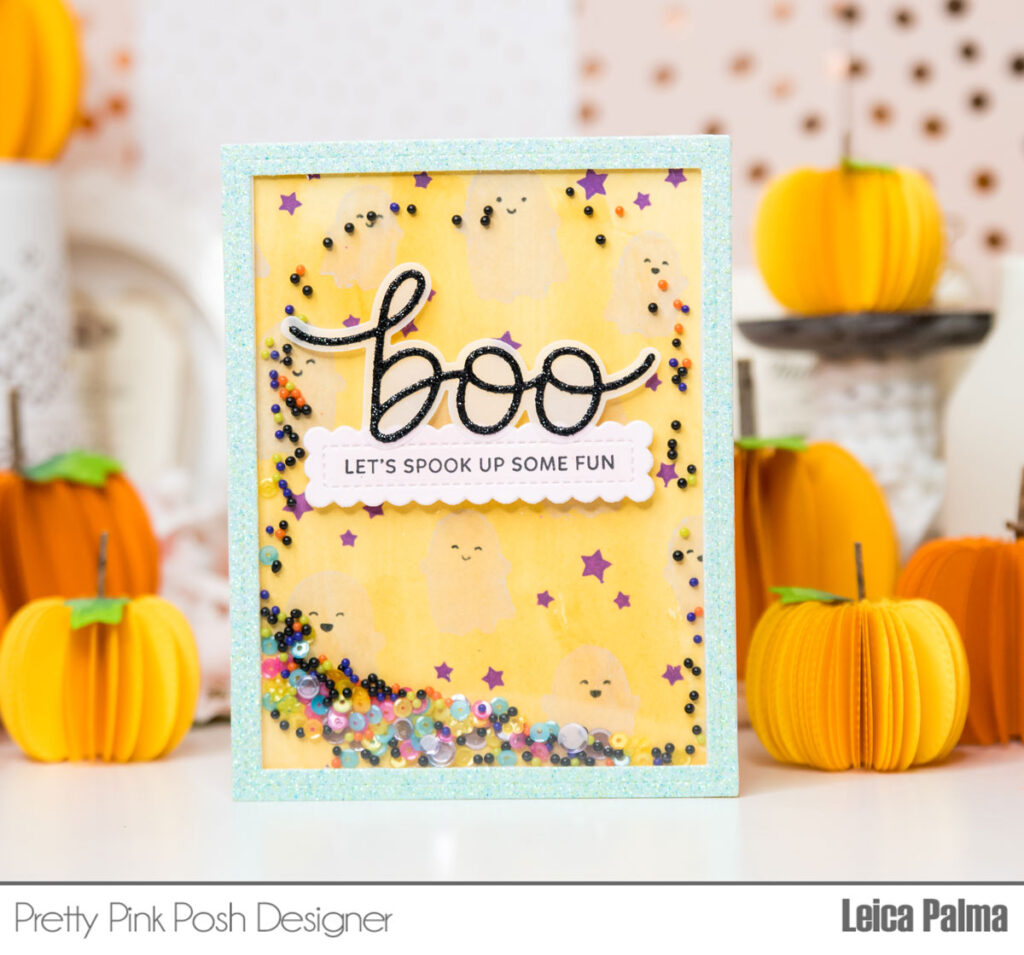
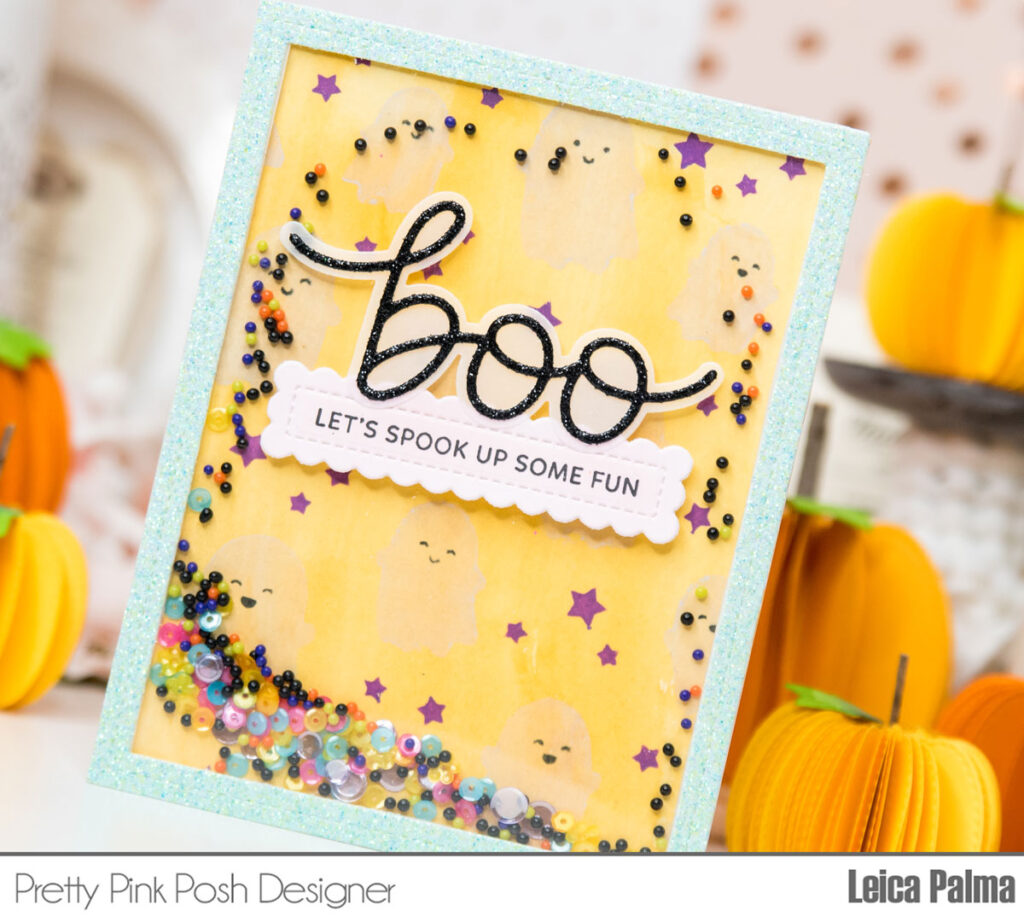
Hey, friends! Leica here. Halloween is quickly approaching and I wanted to share a fun and easy Halloween shaker card using a mix of Pretty Pink Posh products. Let’s jump right in!
To start, I created a cute A2-sized background by applying orange watercolor on watercolor cardstock. Once it dried, I stenciled the adorable ghosts in Lost Shadow Distress Oxide. For their faces, I used Black Soot, and Wilted Violet for the stars. To make the shaker, I cut a frame from teal glitter cardstock, added acetate, and foam tape around it to create the shaker well. Inside, I used a combination of Spooky Glass Beadsand 4MM Summer Sequins Mix as shaker bits.
Since I wanted the ghosts to remain visible, I only added sentiments to the front of the card. I cut the word “boo” from the Large Boo Shadow in black glitter cardstock and the shadow die in vellum. For the sub-sentiment, I stamped one of the sentiments from the Sentiment Strips: Halloween stamp set and cut it using a rectangle scallop die from the Sentiment Strips. Finally, I glued the card panel onto an A2-sized white cardstock, and voila, my card is complete!
Thank you so much for stopping by, and I hope I’ve inspired you to have fun with your stash. Happy crafting!
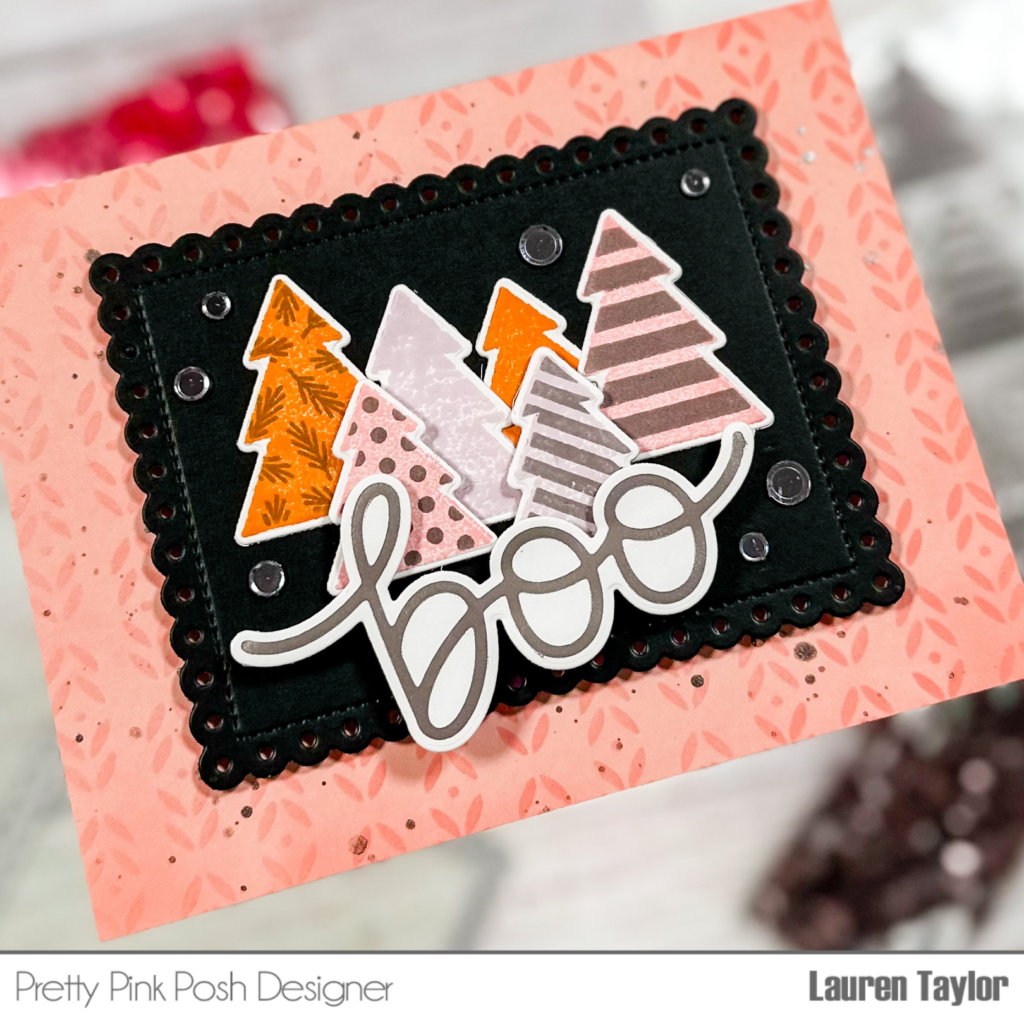
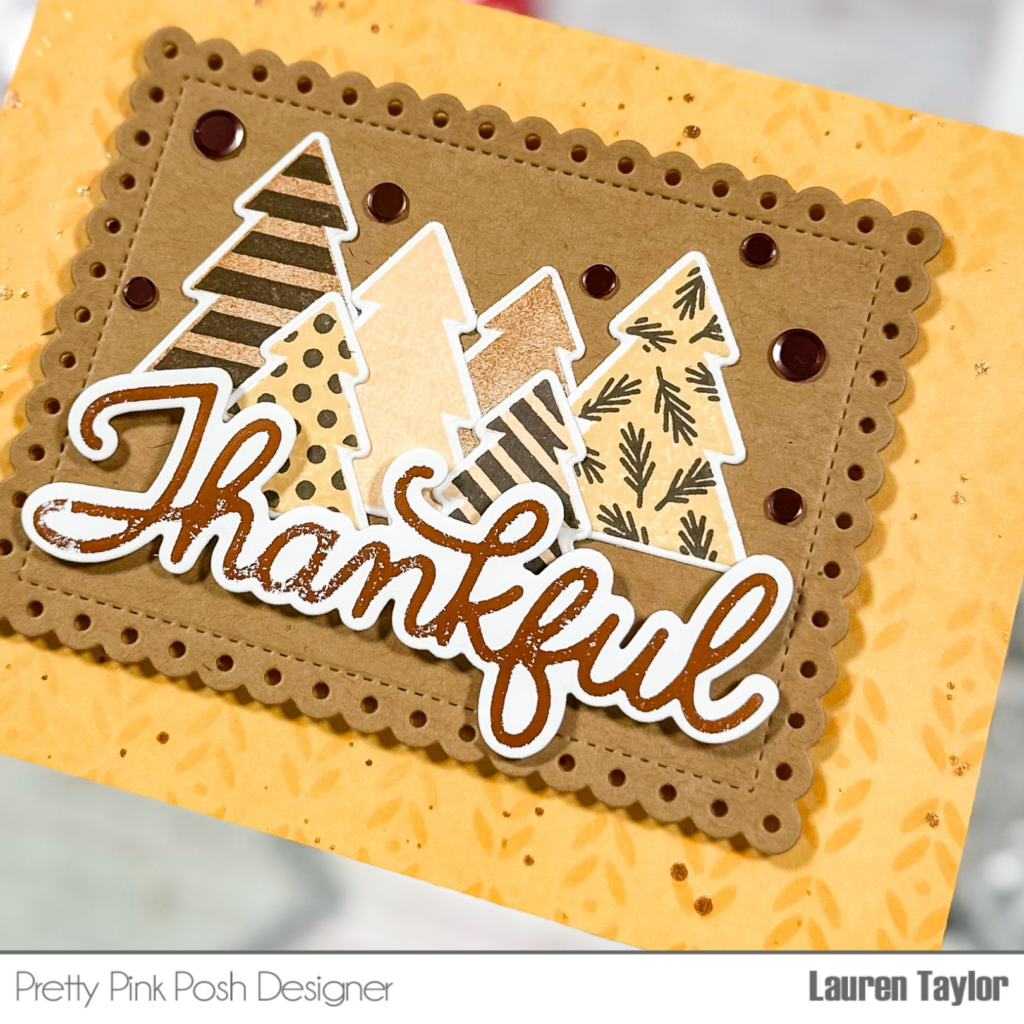
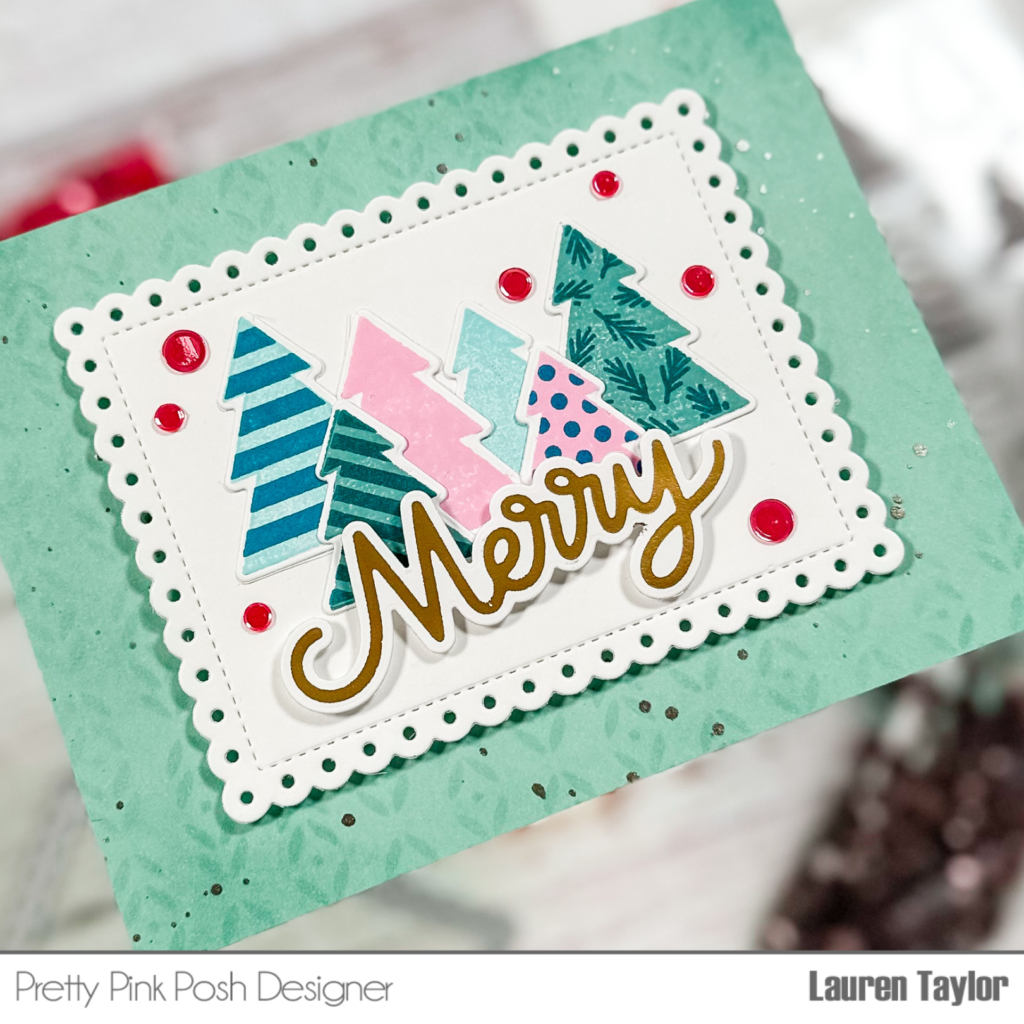
Hi, friends! It’s Lauren and I am back with a new video making three cards – they all have a similar layout, but they’re for a different holiday! The new Holiday Trees Stamp Setand Coordinating Dies make beautiful Christmas cards, but they’re also great for Halloween and Thanksgiving.
For my backgrounds, I have a piece of pink, yellow, and mint blue cardstocks A2 in size. I used the Deco Leaves Stencil to add in a subtle background with Saltwater Taffy, Dried Marigold, and Evergreen Bough Distress Inks respectively. I also added some ink to the edges of the background and used Distress Mica for some beautiful splatter.
While my backgrounds were drying, I started stamping out my trees from the Holiday Trees stamp set for each of my cards. I used four different colors per card and you can see how I stamp each set of trees in today’s video. The Halloween card uses Distress Inks in Milled Lavender, Saltwater Taffy, and Spiced Marmalade as well as Morning Mist VersaFine Clair Ink. The Thanksgiving card uses Distress Inks in Dried Marigold, Scattered Straw, and Vintage Photo as well as Fallen Leaves VersaFine Clair Ink Pad. Finally, the Christmas card uses Distress Inks in Evergreen Bough, Kitsch Flamingo, and Salvaged Patina as well as Warm Breeze VersaFine Clair Ink Pad. When all the stamping was done, I used the Holiday Trees coordinating dies to cut them out.
I assembled each of the cards together similarly as you can watch in today’s video. TheEyelet Rectangles are adhered to the center of the background with foam adhesive, the Holiday Trees added with liquid adhesive and foiled sentiments with foam adhesive. For some final touches I added Purple Shimmer, Espresso, and Strawberry ShimmerConfetti Mixes for some extra shine!
I hope today’s cards bring you inspiration for all kinds of holidays and I would love to know what other holidays you think this layout could also work for… Maybe you’ll see more holidays from me with these trees!
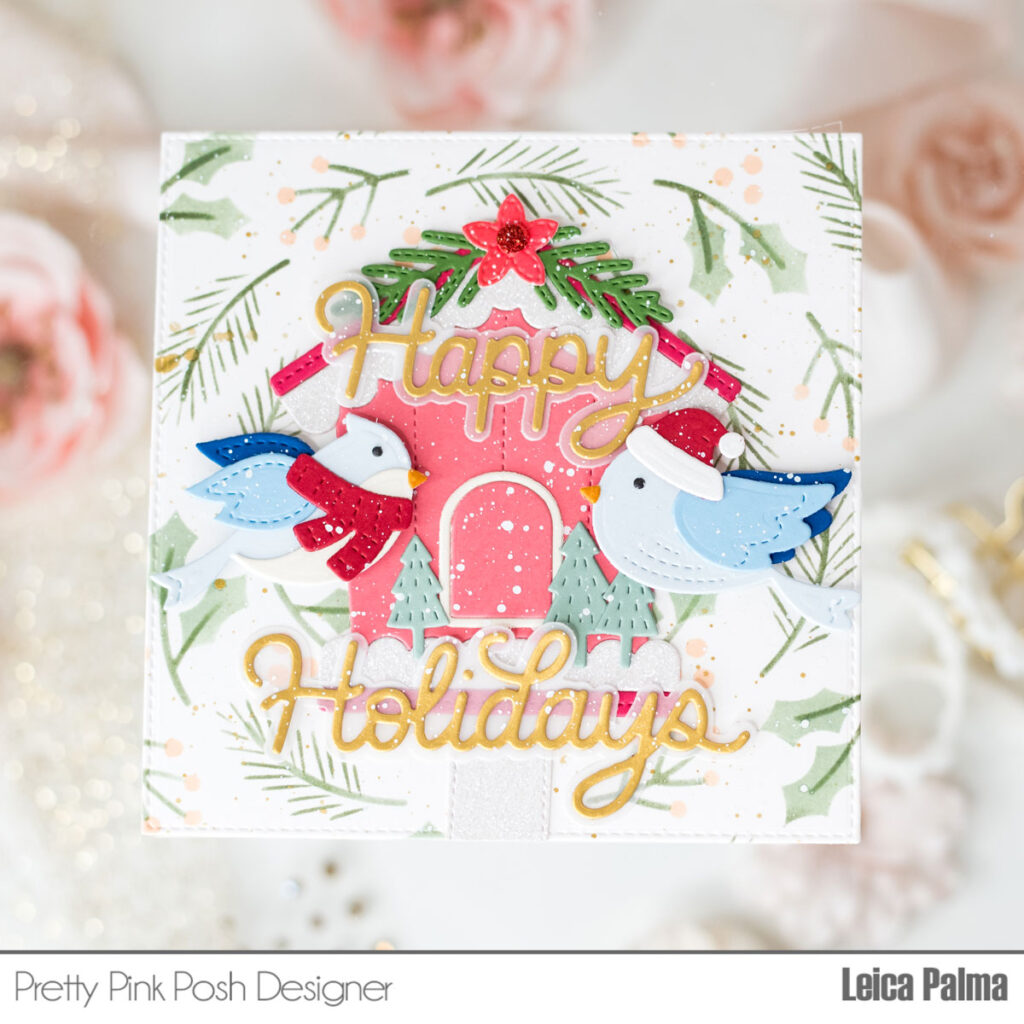
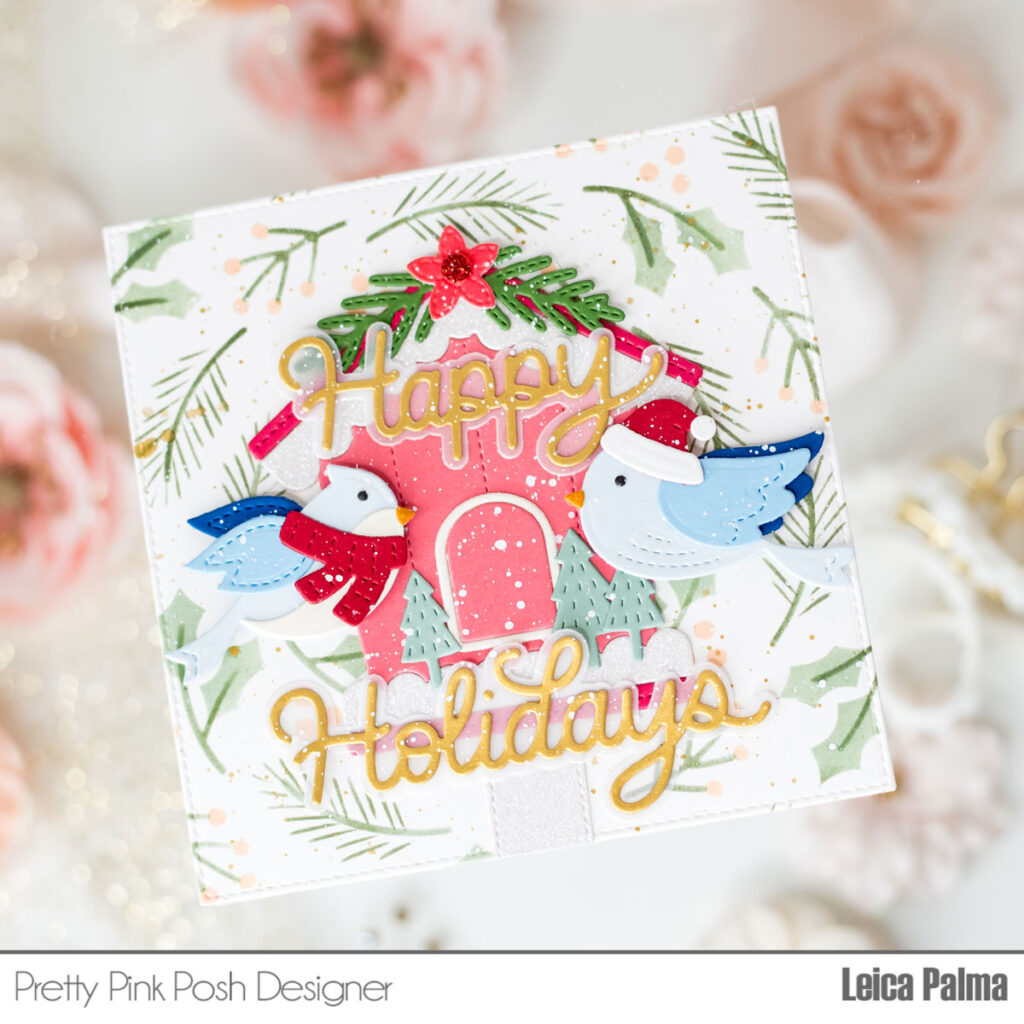
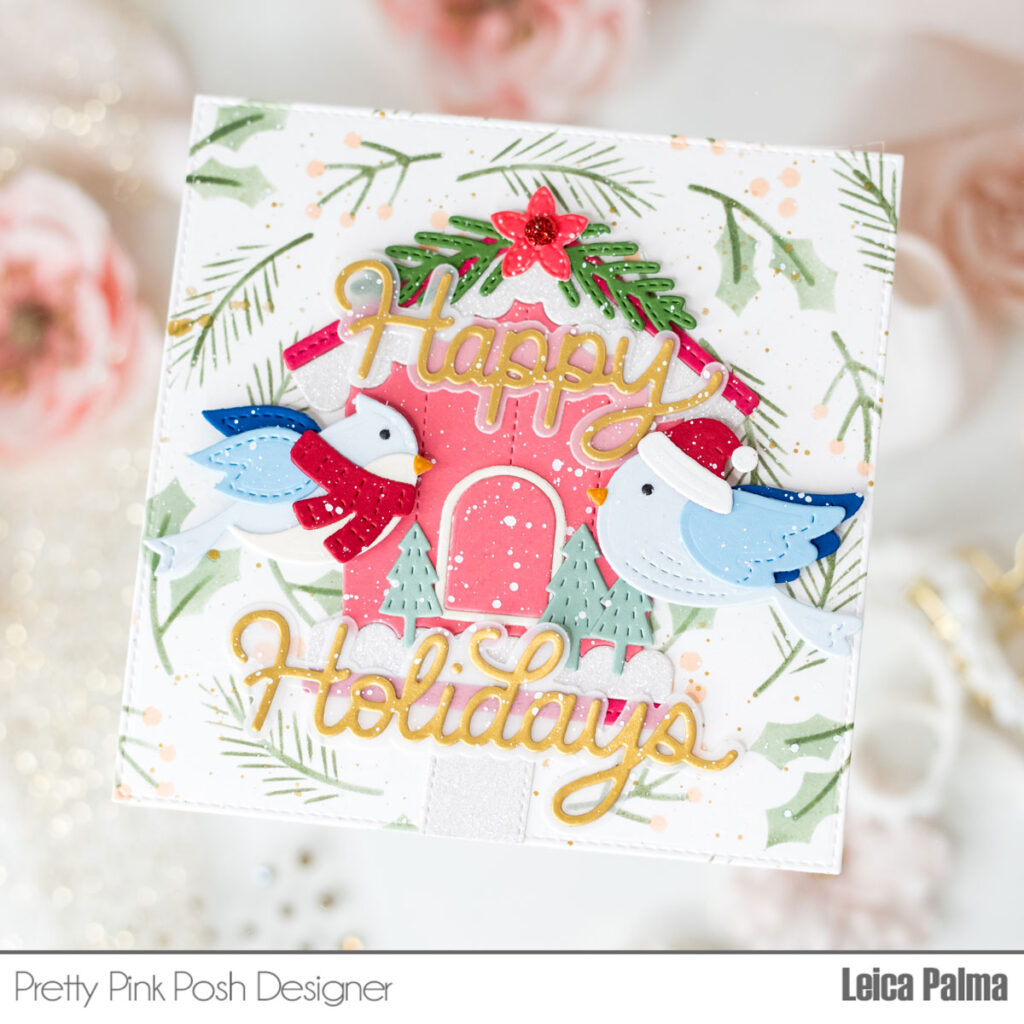
Hi there, crafty friends! It’s Leica, and I’ve got a cozy square Christmas card to share using dies and a stencil from the new October release.
First, I grabbed a white card panel that’s 5 inches square. I made a pretty background using the Layered Winter Wreath and some green inks from Pigment Craft Co. To make things interesting, I added some splatters of gold paint.
For the sentiment, I cut out “Happy Holidays” in gold cardstock and the shadow in vellum. Finally, I glued the card panel onto a 5-inch square card base.
Thanks a bunch for hanging out with me today! Have a blast with your crafting!
Hello! It’s time to announce the three winners of the October blog hop posts HERE, HERE, HERE, and HERE. And the lucky winners of the $30 gift certificates are…
Winners, email me within 7 days to claim your prize!
If you would like even more inspiration with the new release and are on Instagram, we also have a FIVE day Instagram hop with more chances to win a $30 gift certificate if you leave a comment before October 27th!
We hope you were inspired by all the inspiration from the hops!
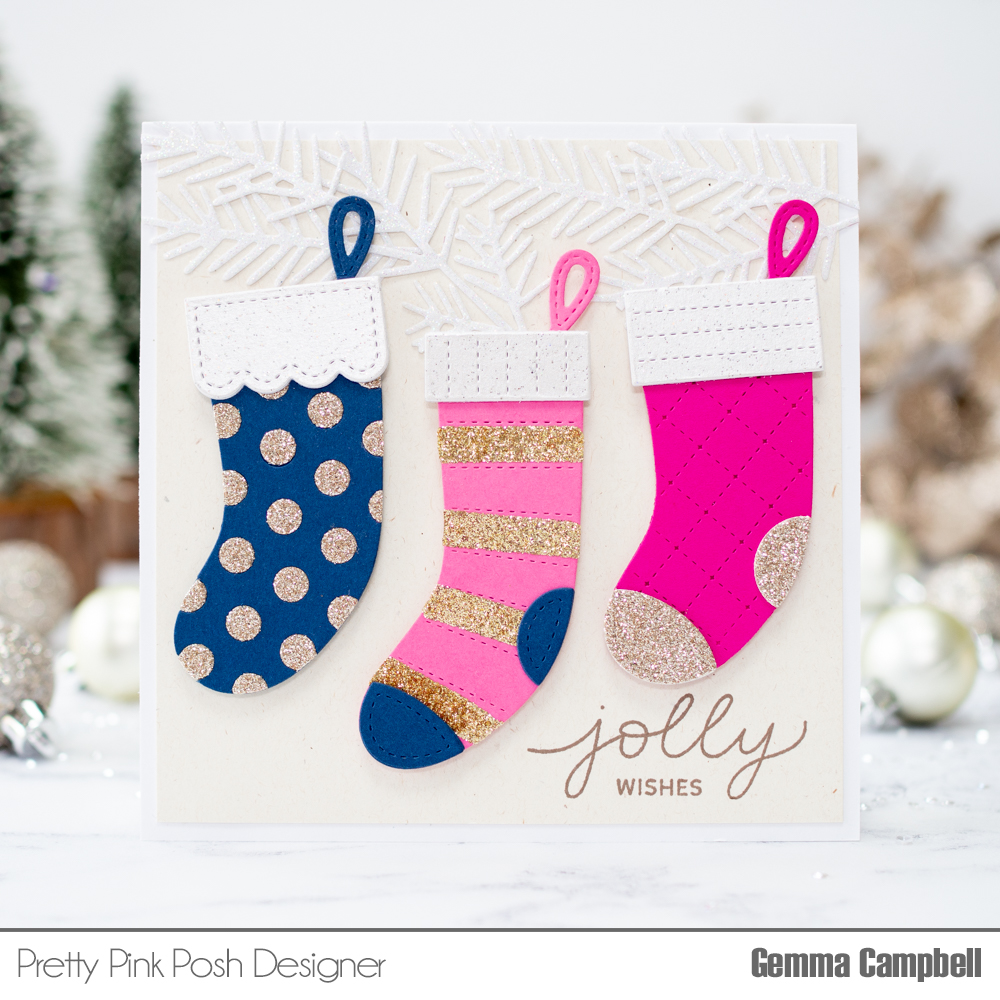
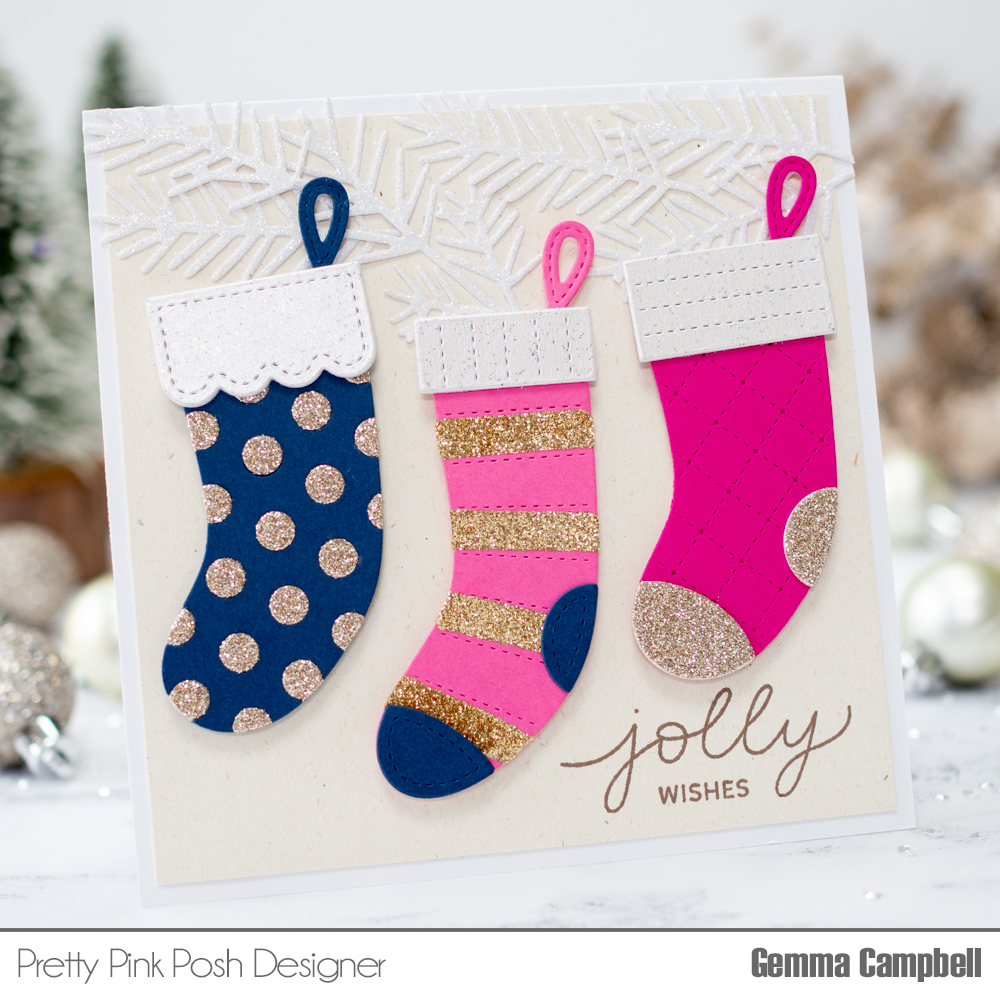
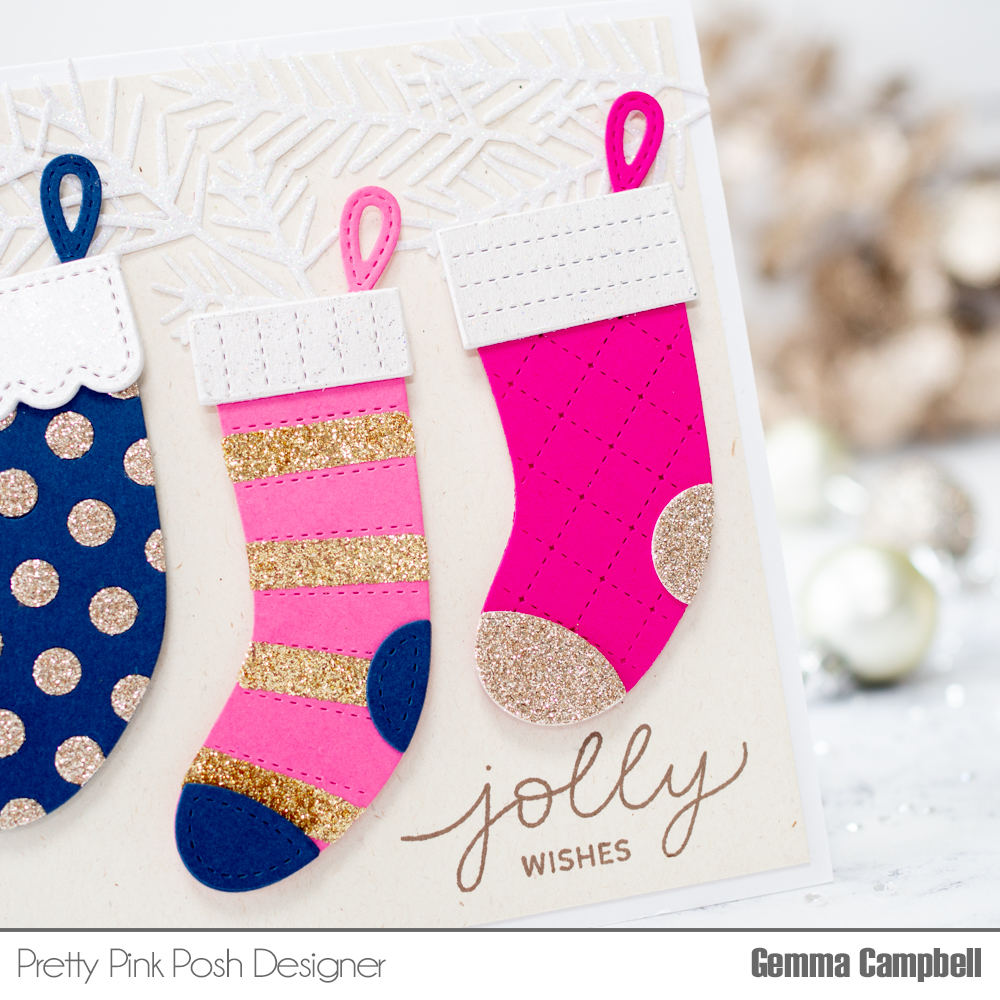
Hello, Gemma here today with a card using one of my favourites from the October release – the Build a Stocking die set.
I love that there are so many different looks that can be created with the Build a Stocking die set. Change the colours, add some sparkle, switch the stocking toppers….so many possibilities! I decided on a colour palette of pink and navy, with gold sparkle accents.
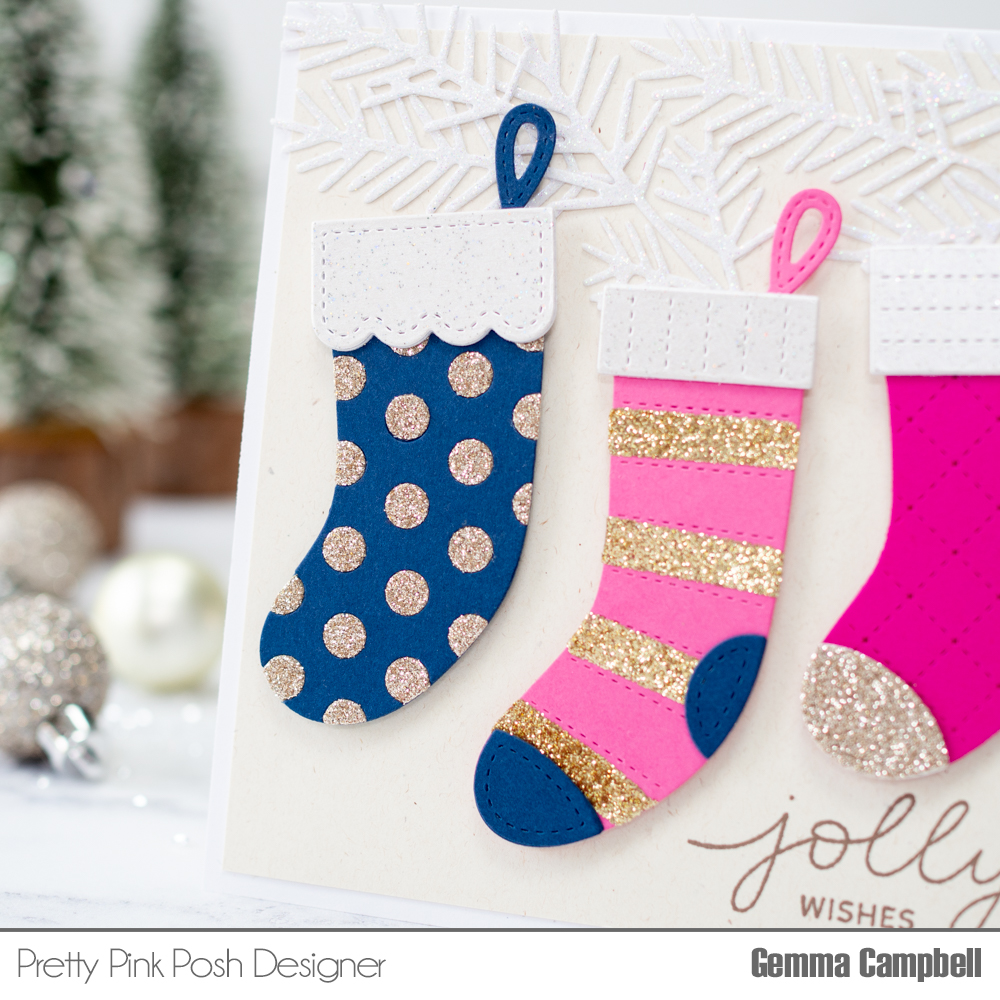
There are backing layer dies for each of the size stockings, then decorative layers to add over the top. As it’s difficult to adhere anything on top of glitter card, for the spotty stocking I cut it from both navy and gold glitter card, so I could inlay the gold glitter spots. You could skip this step if layering over something non-glitter.
To add glitter stripes to the light pink stocking, I first adhered some double sided tape to the stocking, then covered with gold glitter.
On a 5.25” square card base, I adhered a piece of ivory speckled card, slightly smaller than the card base to give a border. On this, I stamped a sentiment from the new Holiday Stockings stamp set, using a brown ink. Next, I added some white glitter foliage, cut using the previously released Pine Sprigs die set.
Finally, I added the three stockings using some foam tape for dimension.
Thanks so much for joining me today! I hope this card inspired you.
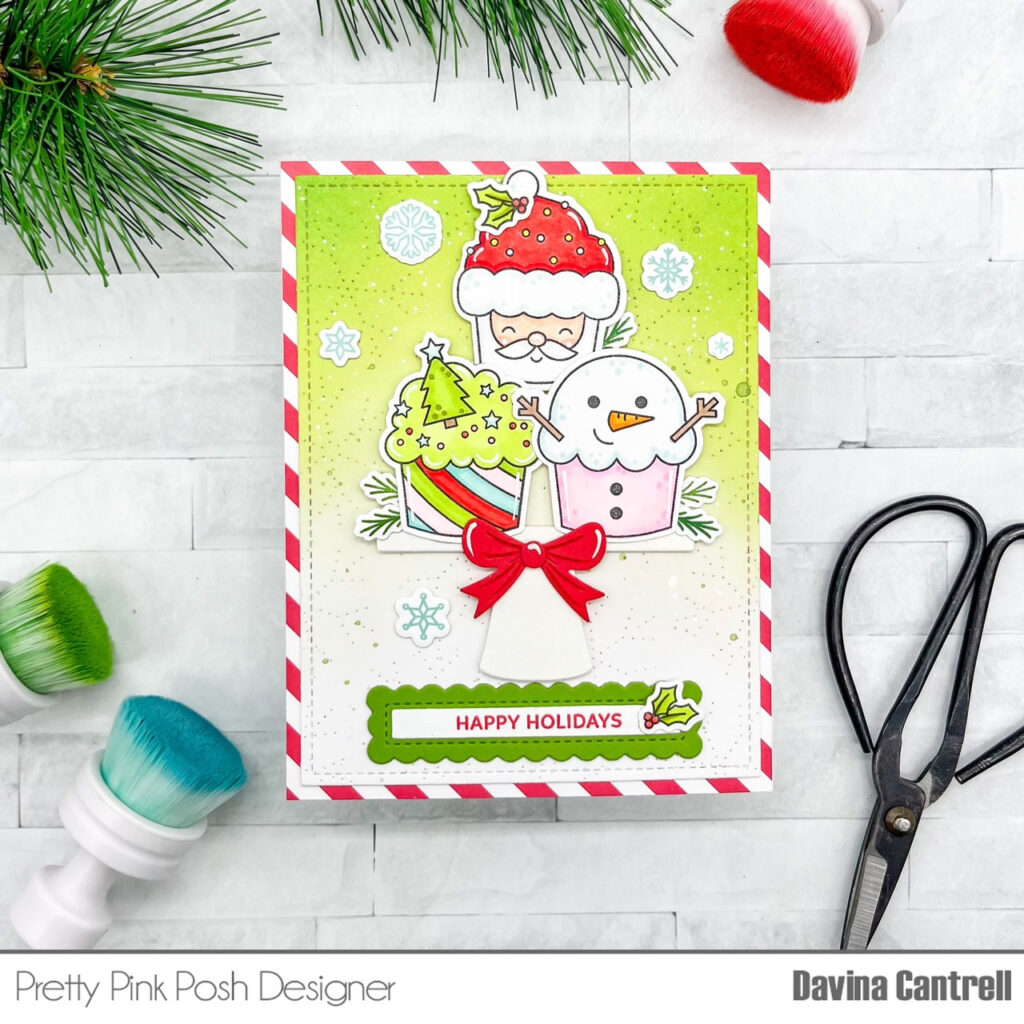
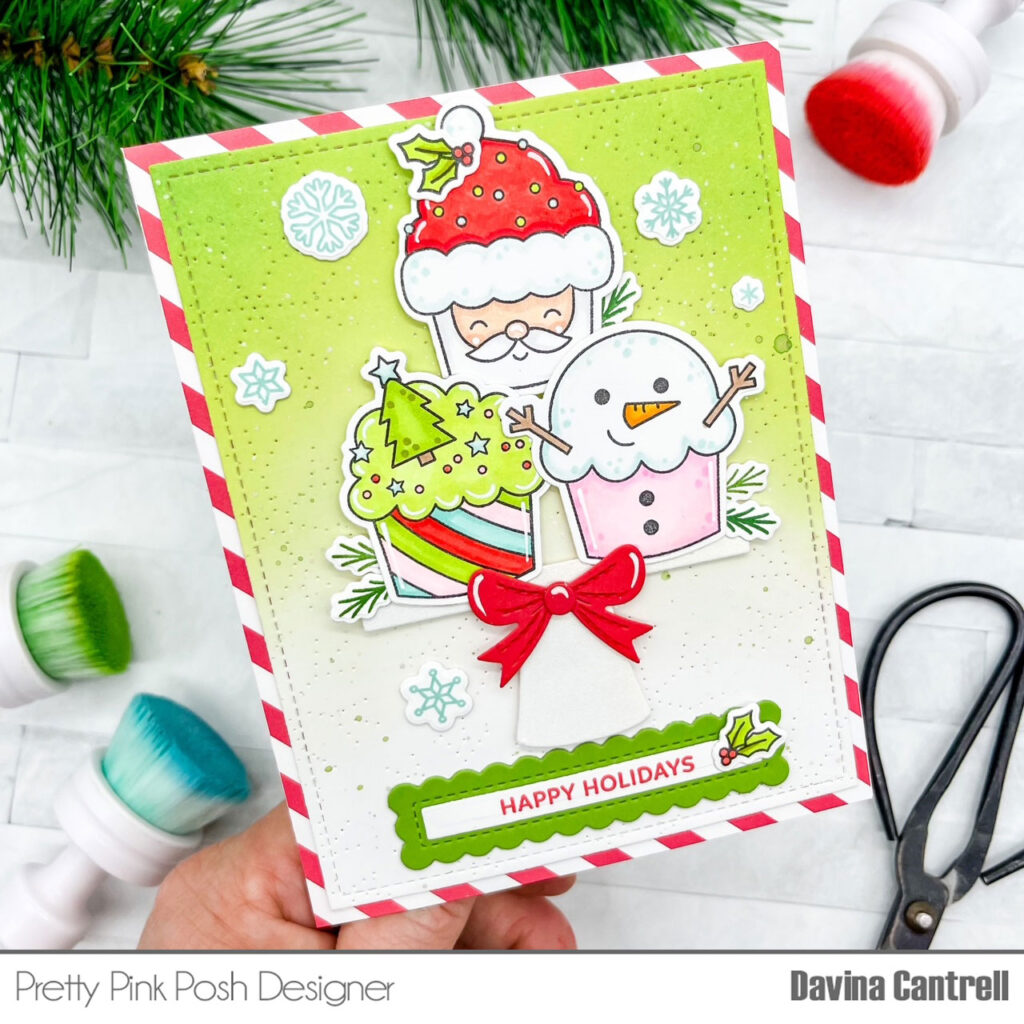
Hello crafty friends, it’s Davina here. The beautiful October release from Pretty Pink Posh is available now and you will love it! This is the largest release ever, and full of so much good stuff to bring your winter and holiday projects to life. I created a tiered cupcake stand using the incredibly cute Christmas Cupcakes stamps and dies. I combined serial other new products and previously released items to being this fun card to life.
I started by using the pretty Pierced Snowflake Plate on Bristol Smooth Cardstock, and inkblending an ombré citrus green background. Once it was completely dry, I trimmed it down 1/4 inch, to make room for a striped patterned paper background layer. I stamped the cute cupcakes and colored them in before cutting them out with the coordinating dies. I used the cake stand from last summers Fancy Cake Dies to pile on my cupcakes, then I added a bow from the new Holiday Mug Additions.
I wanted to add some small stamped details and I found all of the images, and a sentiment, that I needed from one older stamp set. The Holiday Envelopes stamp set from last year had all of the great snowflakes, pine boughs, and the holly with berries images that I used. I stamped some of these in colored ink, including the sentiment, and added them to my treats. Finally, I adhered my images to the inky background, using foam tape behind the cupcake stand, and added my sentiment to a cute scalloped banner from the Sentiment Strips Dies.
There are so many wonderful new products to play with and so much inspiration to see. Make sure you hop along with both the New Release Blog Hop and then the Instagram Hop, to see how magically the Design Team used the products and for your chance to win!
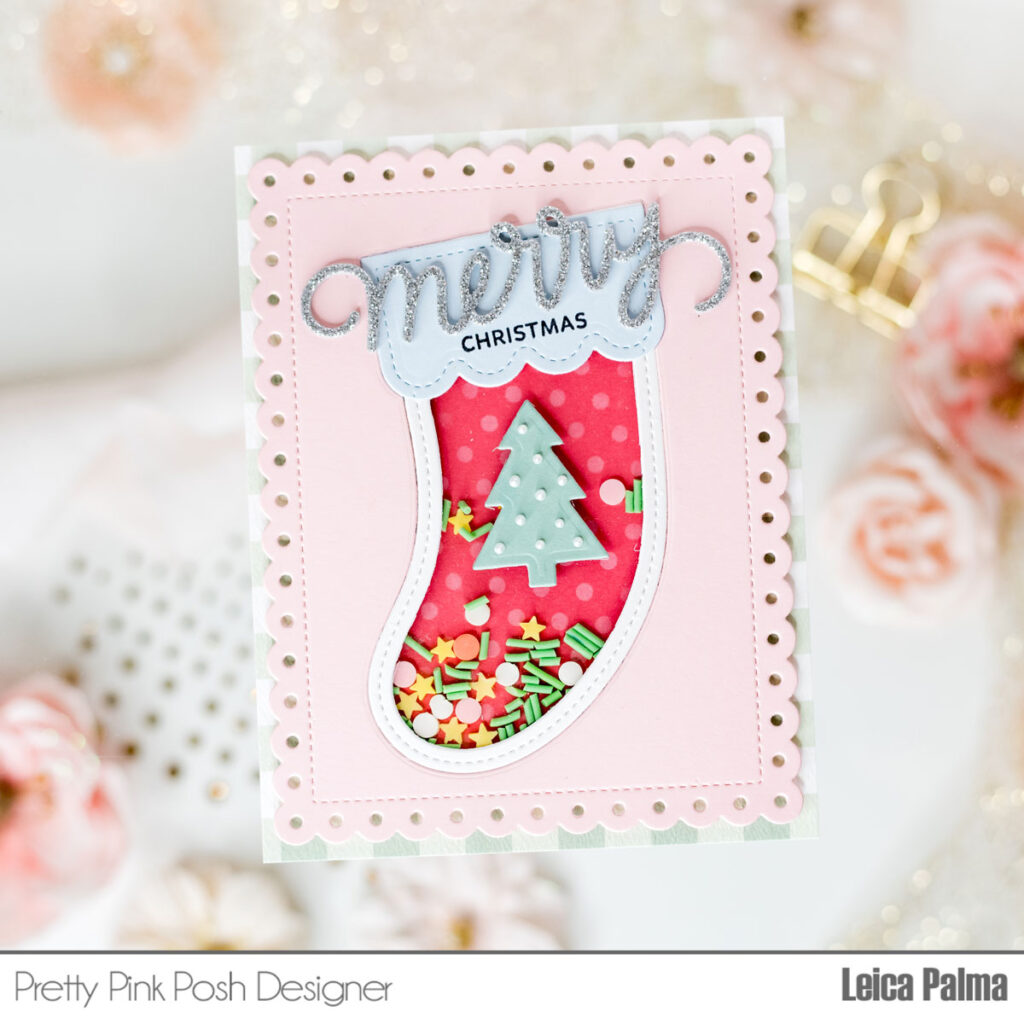
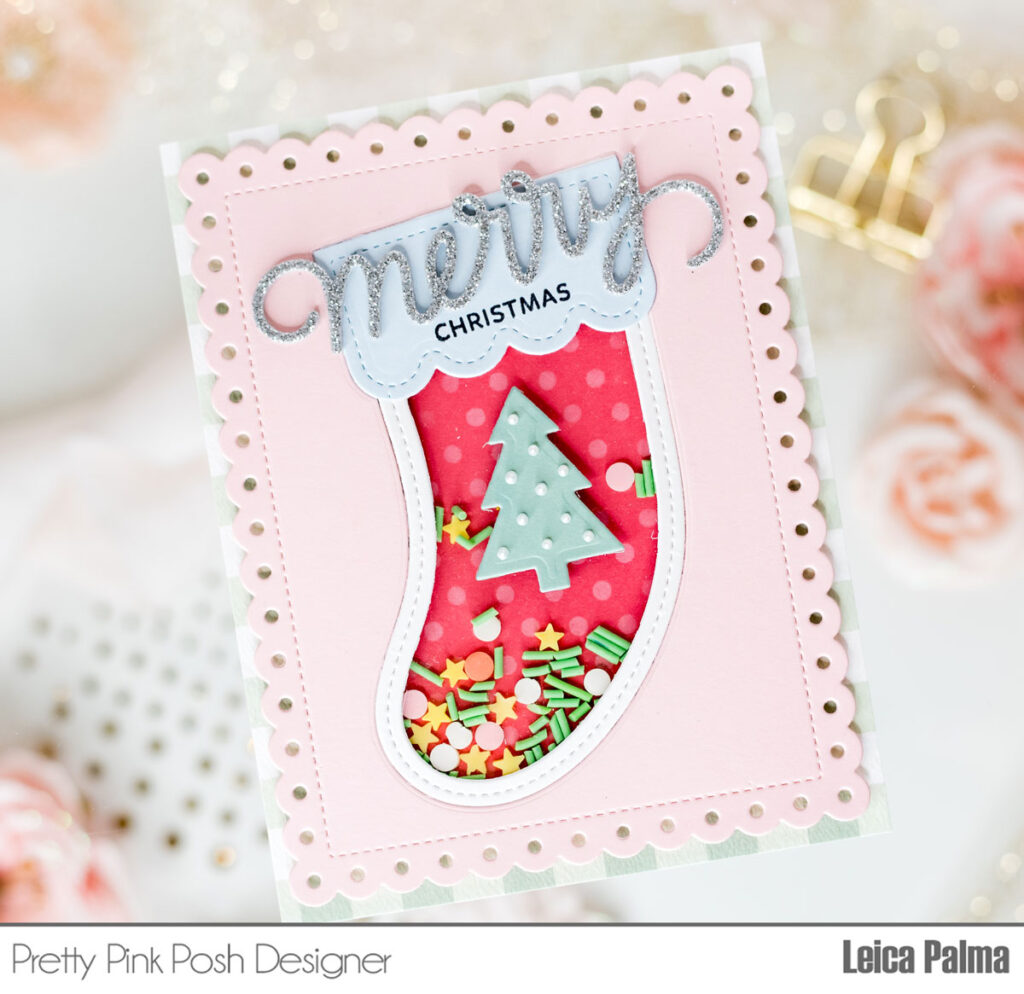
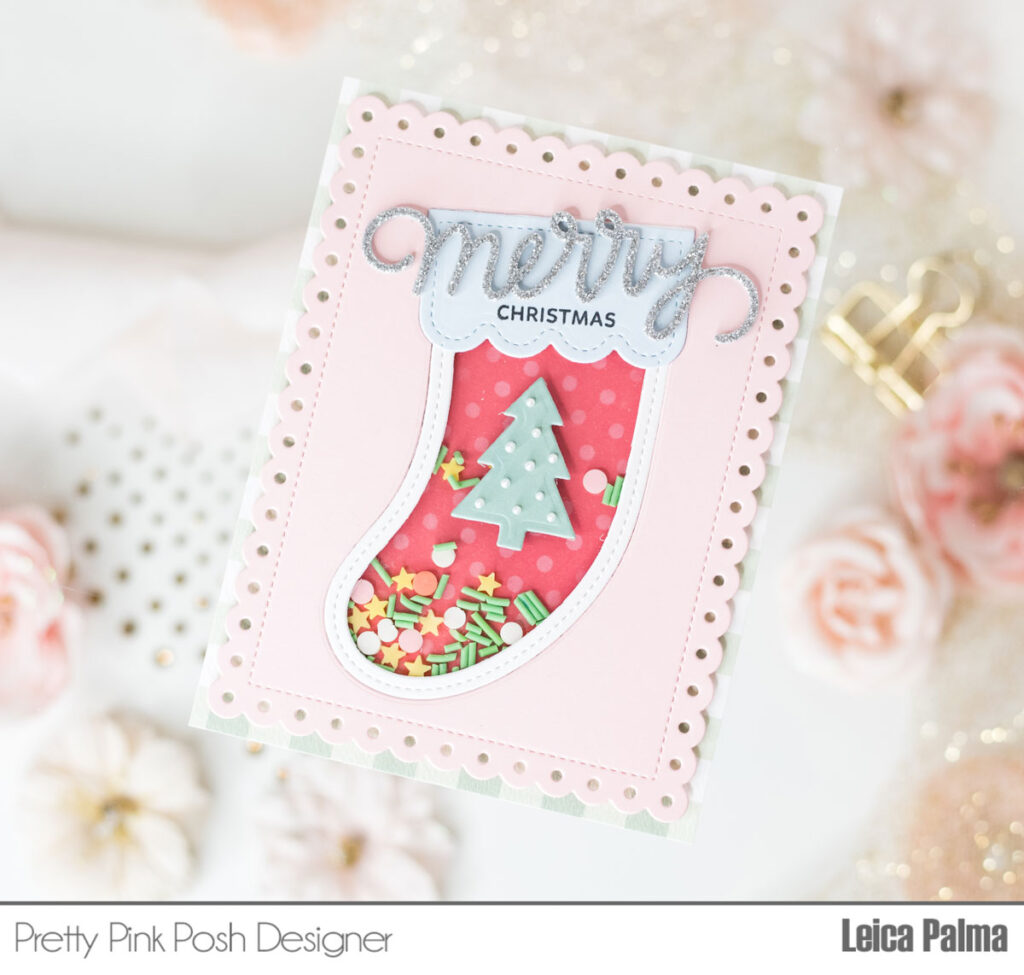
Hello friends! It’s Leica, and today I’ve got a delightful Christmas shaker card featuring the Stocking Shaker Die as the star of the show. This card is a breeze to recreate, so let’s dive right in!
First things first, I took some pink cardstock and cut it into a large rectangle using the Eyelet Rectangles Dies. Then, I used the Stocking Shaker to cut out the center area of the stocking. I taped the edges of the stocking onto the pink card panel and added a piece of clear acetate to the back of the stocking shape. To create the shaker part, I attached foam tape to the back of the card panel and filled it up with the Christmas Tree Mix. For the back of the shaker stocking, I used a piece of red cardstock that I decorated with dots using the Mini Polka Dots stencil.
For the sentiment, I cut out “Merry” in silver glitter foam and stamped “Christmas” in black ink on the top part of the stocking. Next, I cut out a cute Christmas tree from green cardstock, glued it onto the acetate of the shaker, and added some dots using Liquid Pearl in White Opal.
I then cut a piece of patterned paper to fit an A2-sized card and elevated the eyelet rectangle on the card panel using foam. Finally, I glued the panel onto a standard A2-sized card base.
That’s the lowdown on my shaker card! Thanks a million for hanging out with me, and I hope you’re smitten with today’s card share. Have an absolutely wonderful day!