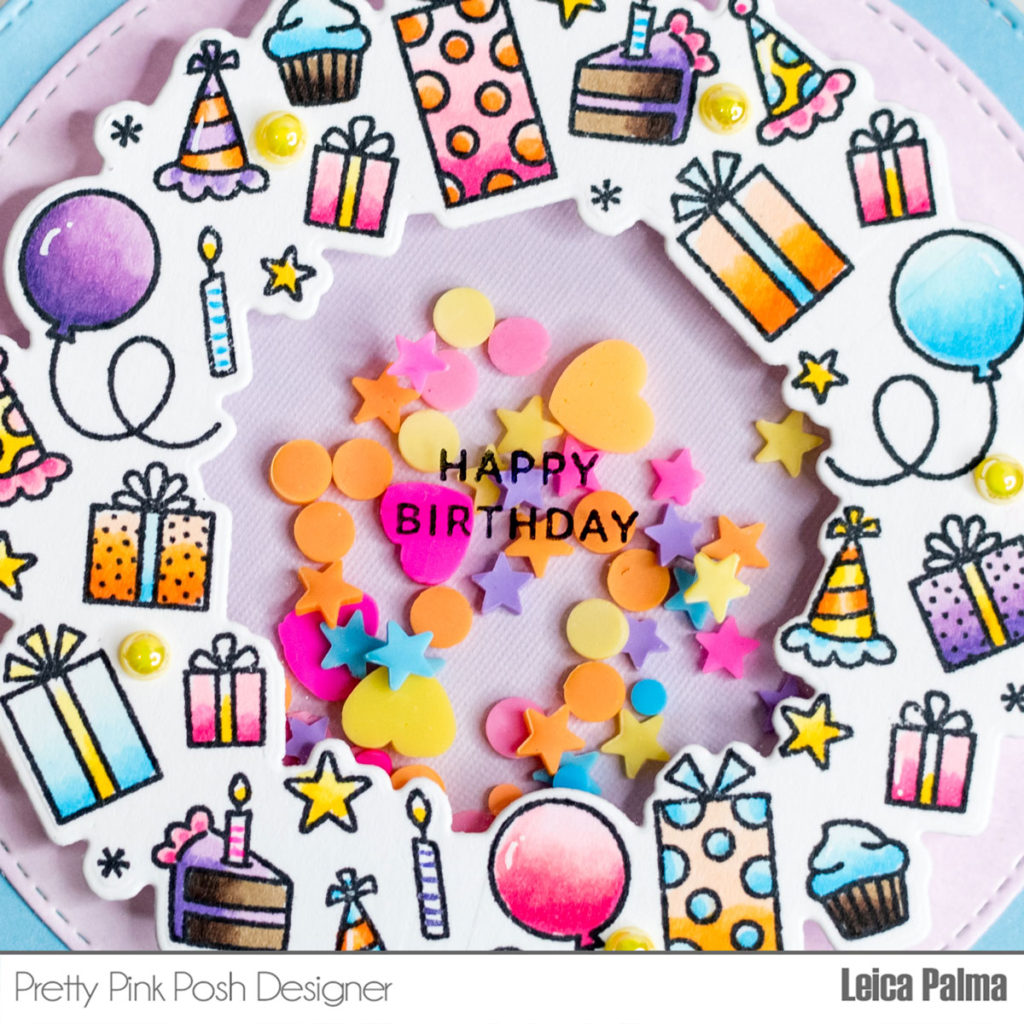
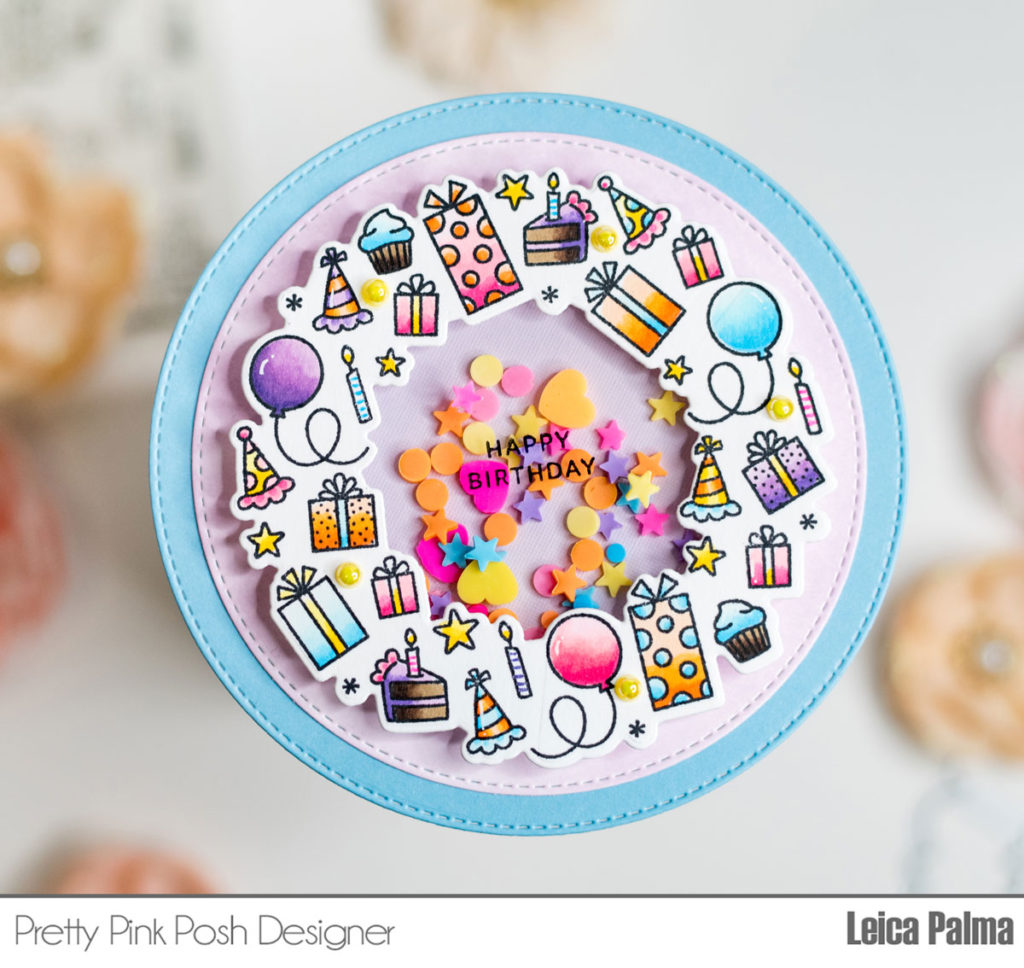
Hello friends, it’s Leica here. There is a new addition to the Pretty Pink Posh wreath sets! Today, I am sharing the Birthday Wreathstamp set with you all. I’ve never made a shaker card with any of the wreath stamps, so I thought I’d try it out and it turned out so cute.
**The new release has been selling like hotcakes! For the first time ever, we are offering pre-orders on some of the sold out items. You can find all of those products HERE. **
Let’s get started! I first cut a 4″ circle in lilac cardstock and layered it with a 4.5″ circle in blue cardstock. I then stamped the wreath onto white cardstock, colored it with Copic markers, and cut with the coordinating die. I used B02/00/000, E44/43, RV25/23/21, V17/15/12, Y18/15/11, and YR07/02/00. I adhered a sheet of acetate onto the back of the wreath and stamped the happy birthday sentiment with Stazon ink. To make a well for the shaker, I added foam tape around the wreath. I used the Piñata Party Mix for the shaker elements.
This confetti mix was my color palette inspiration for my card. I wanted to add some of the new pearls, so I adhered Sunshine pearls on the wreath using liquid glue. Lastly, I adhered the panel onto a 4.5″ circle card base.
That’s all for this super fun shaker card. I hope that you’ll try to make shaker cards with any of the wreath sets. Happy crafting!
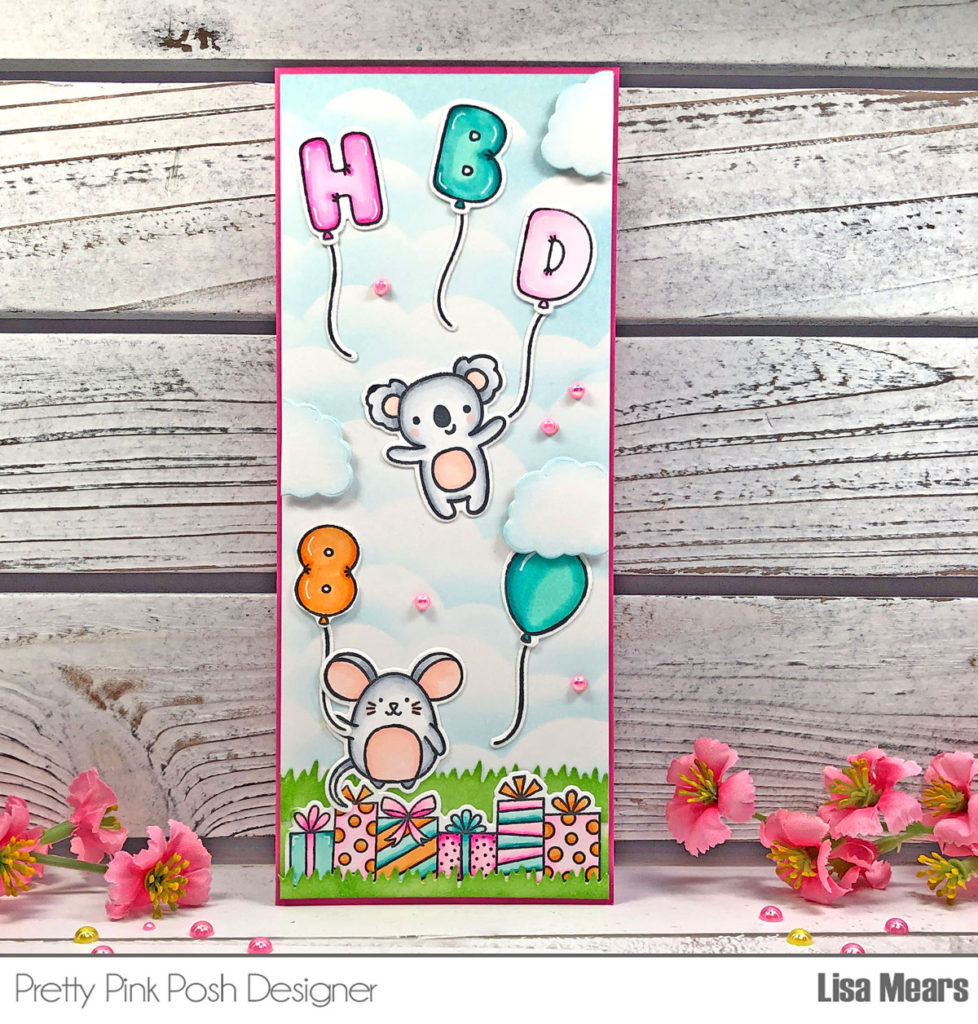
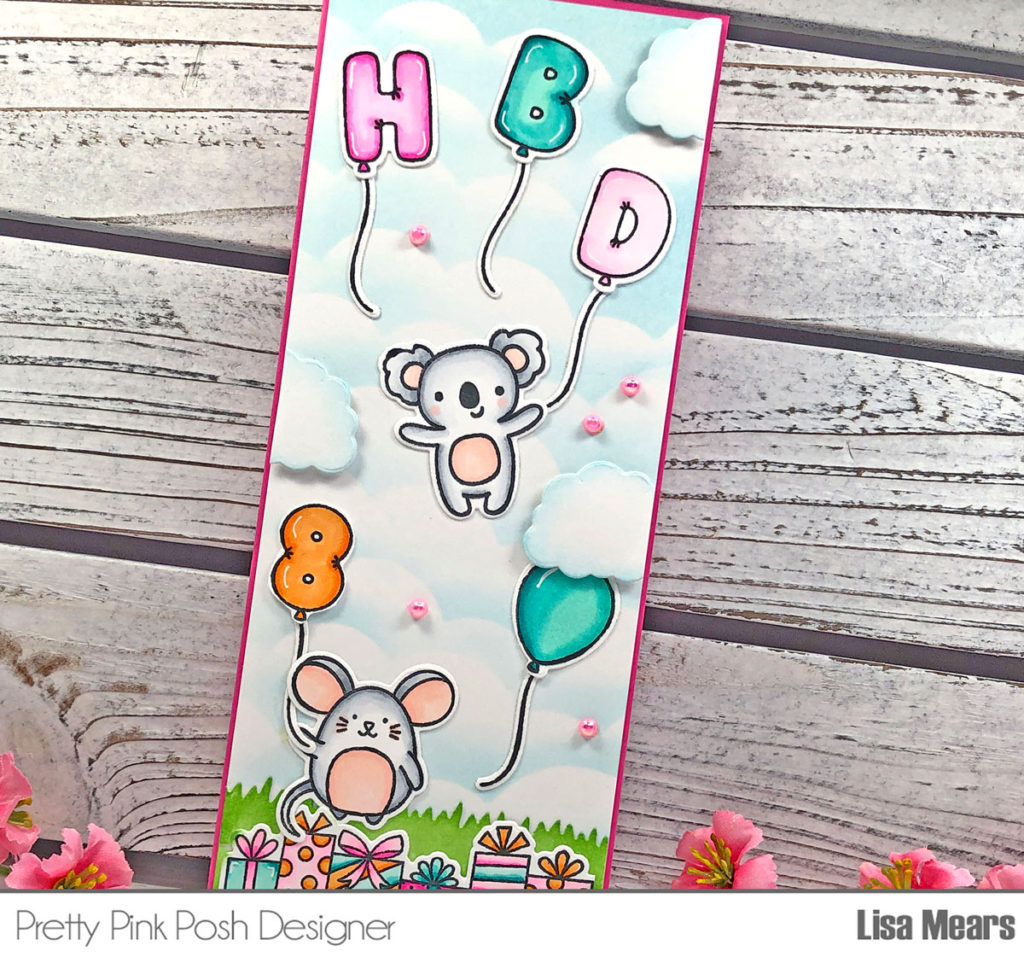
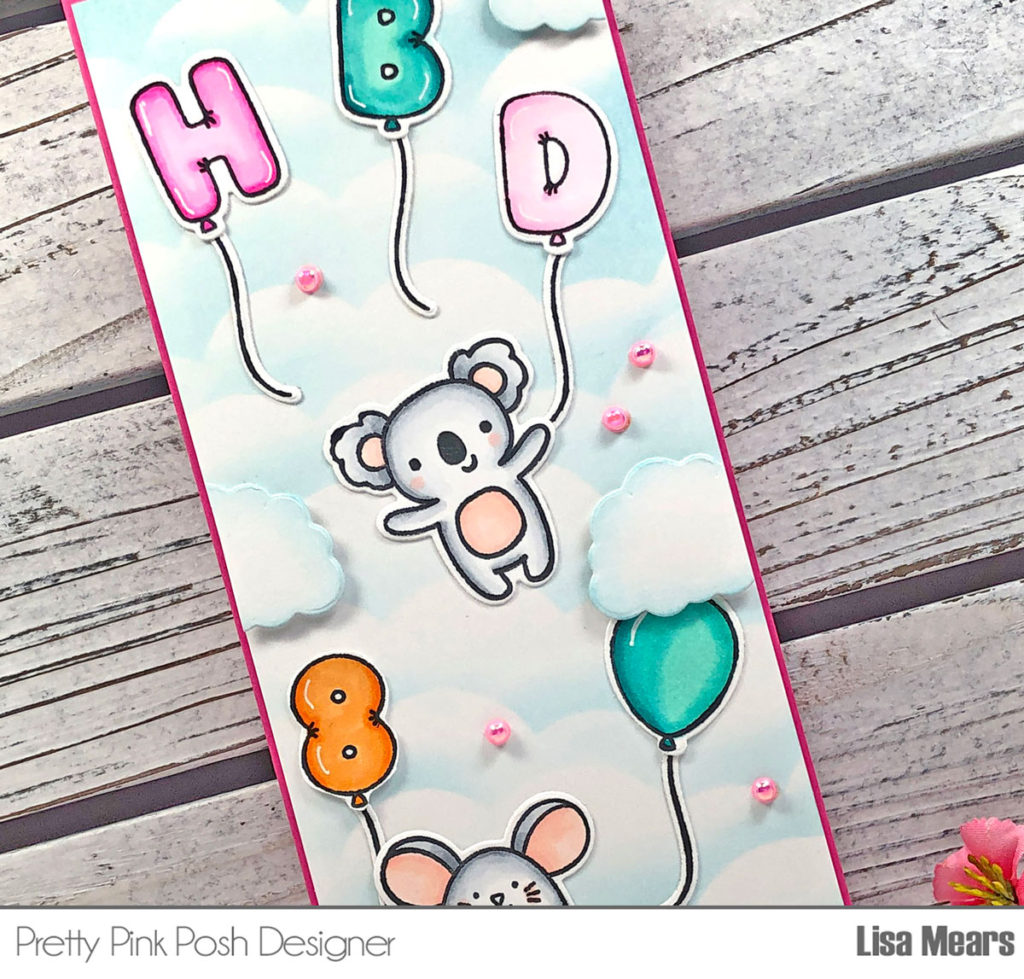
Hello crafty friends. It’s Lisa Mears here. Scene cards are some of my favorite cards to make and there are so many fun products in the Pretty Pink Posh February release that I just couldn’t help myself to make a fun slimline scene birthday card.
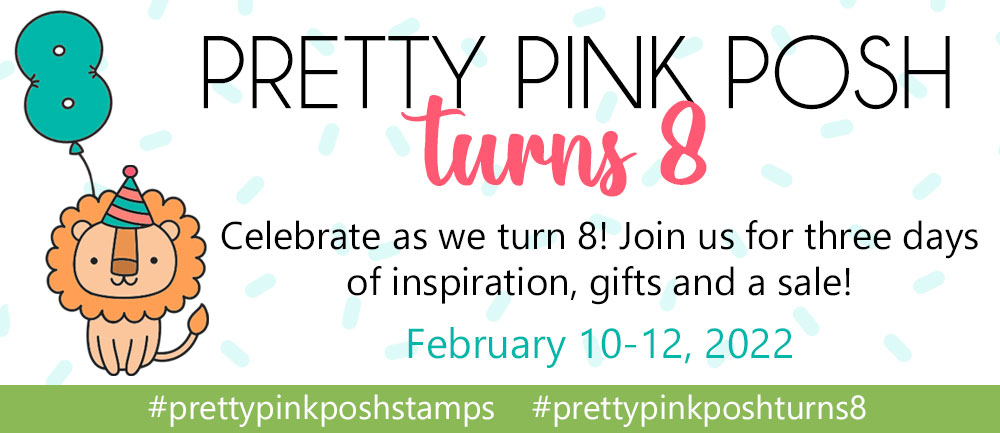
Since Pretty Pink Posh is turning eight years old this month, I decided to make a birthday card to celebrate the occasion.
I started off by stamping the images from the Balloon Alphabet stamp set, Balloon Numbers stamp set, Birthday Borders stamp set, and the Crafty Critters Stamp set. (Note: The Crafty Critters stamp set was a promotional stamp set which has sold out. Stay tuned for when it’ll be released for purchase later this year!)
After coloring my images, I die cut them with the coordinating dies.
Next, I die cut theNature Essential Dies from plain white cardstock and set aside the cloud border and grass borders from this set.
To create the cloud background, I started by cutting a piece of Bristol Smooth cardstock to 3 3/8” x 8 3/8”. Next, I used the cloud border that I die cut from the Nature Essential Dies along with Tumbled Glass Distress Oxide ink to create a cloud background for my card. I also applied Mowed Lawn Distress ink to the two grass border die cuts from the Nature Essential Dies.
Next, I began to assemble my card. I cut the Birthday Borders in half so that only the first six presents were showing. I added one of the grass borders behind the presents at the top of the border. I added the smaller grass border in front of the presents at the bottom of the border. I added some Mowed Lawn Distress ink to the bottom portion of the card panel and then adhered the Birthday Borders to the bottom of the slimline card panel. Next, I added the remaining stamped images to the card panel.
To add dimension to the clouds, I used the Build-A-Cupcake Die Set and die cut two of the frosting dies that resemble a cloud shape from white cardstock. I added Tumbled Glass Distress Oxide ink to the clouds and then cut the cloud die cut in half. I added foam tape to the back of the cloud die cuts and added them to my card. I love how the clouds add dimension to the card.
Finally, I added the card panel to a pink slimline card base that measures 3 1/2” x 8 1/2” and added the Flamingo Pearls to the card front.
Thank you so much for stopping by today. Be sure to check out all of the fun new products in Pretty Pink Posh’s February birthday release.
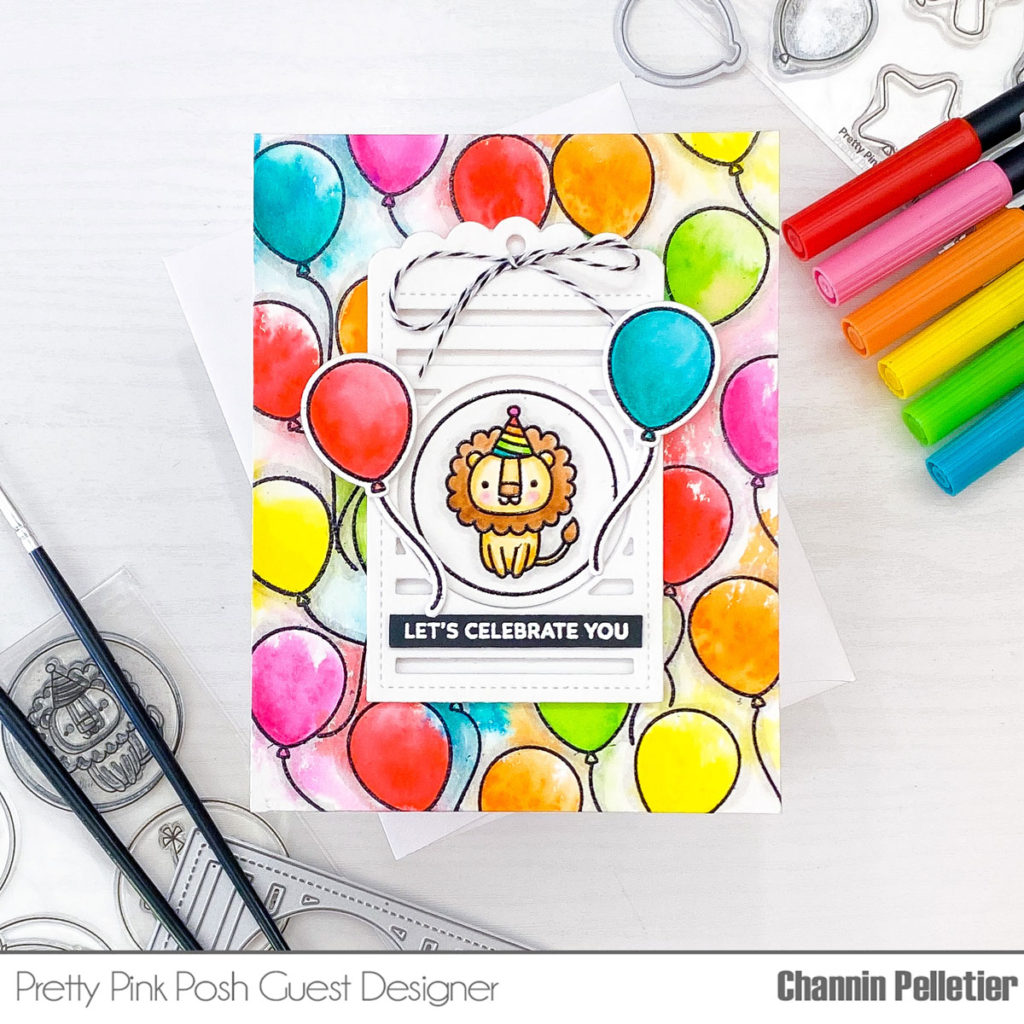
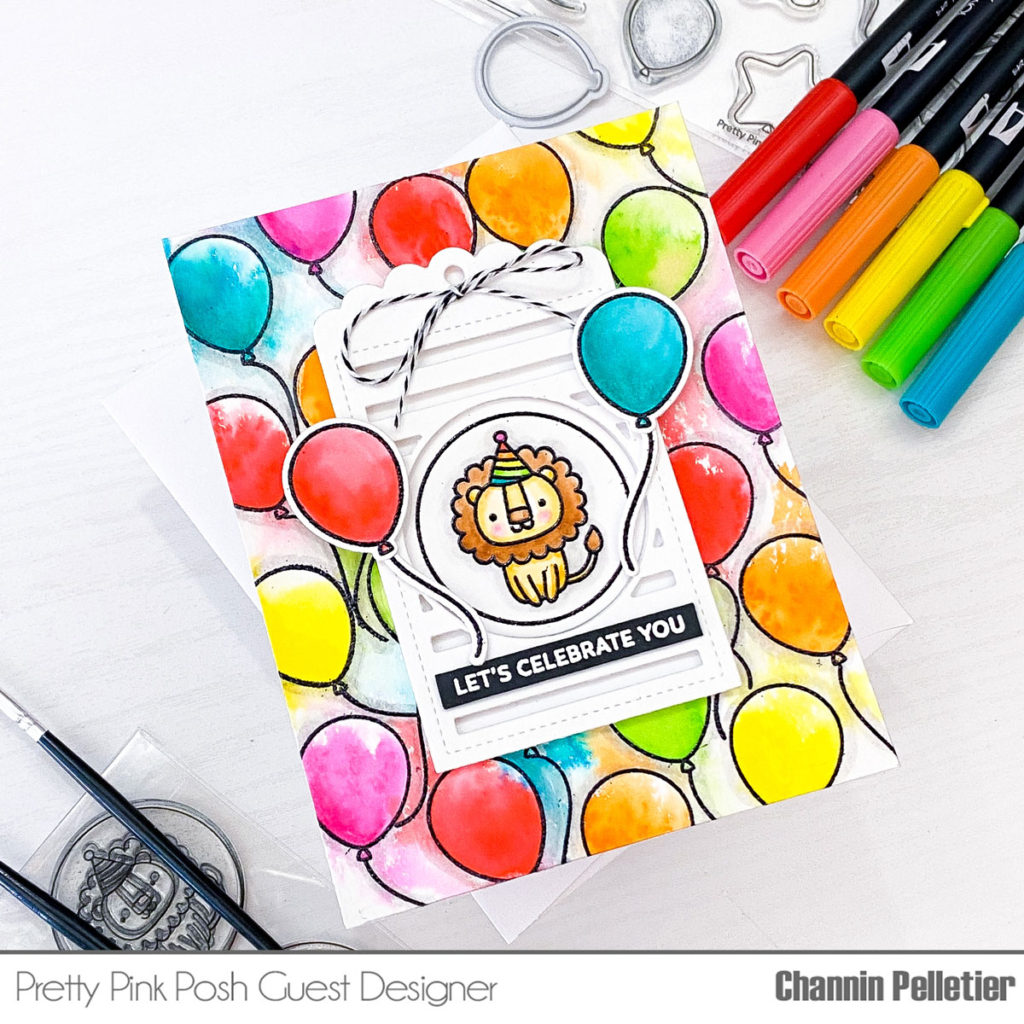
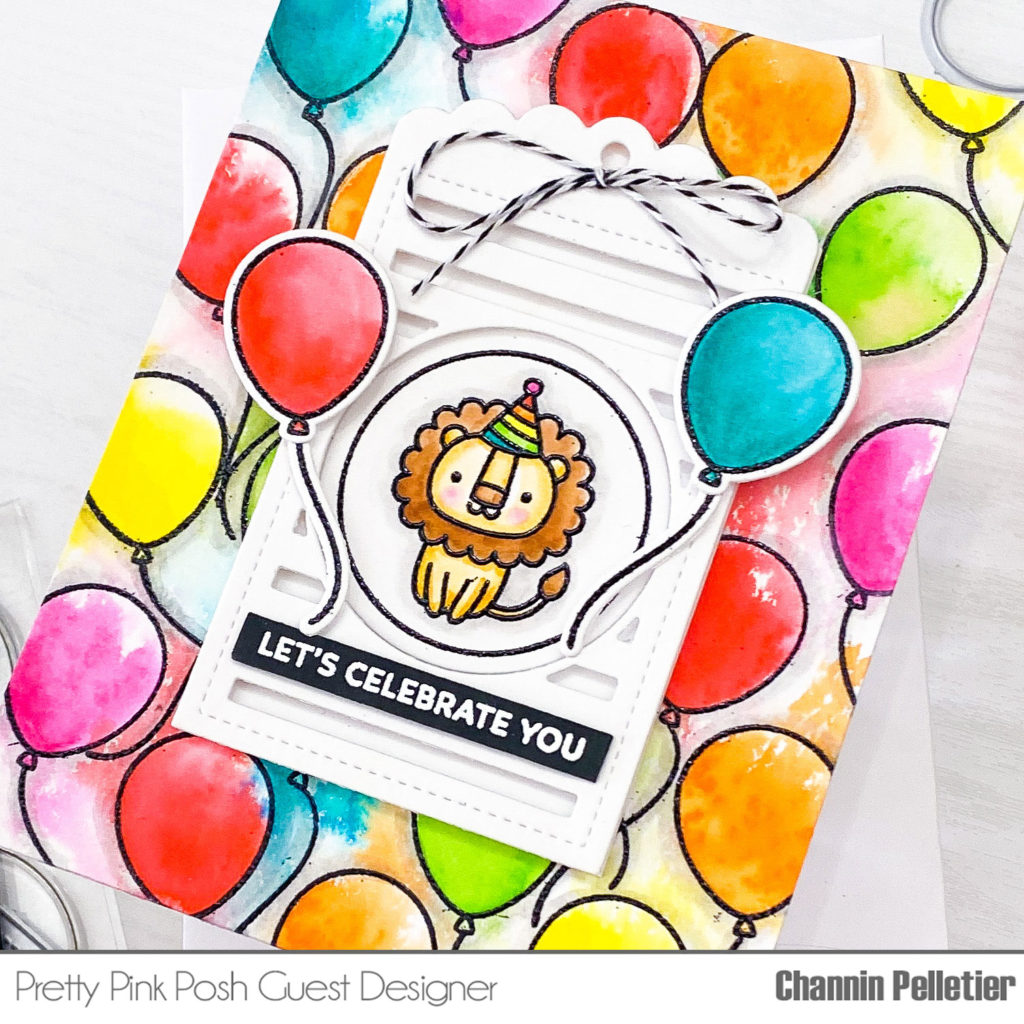
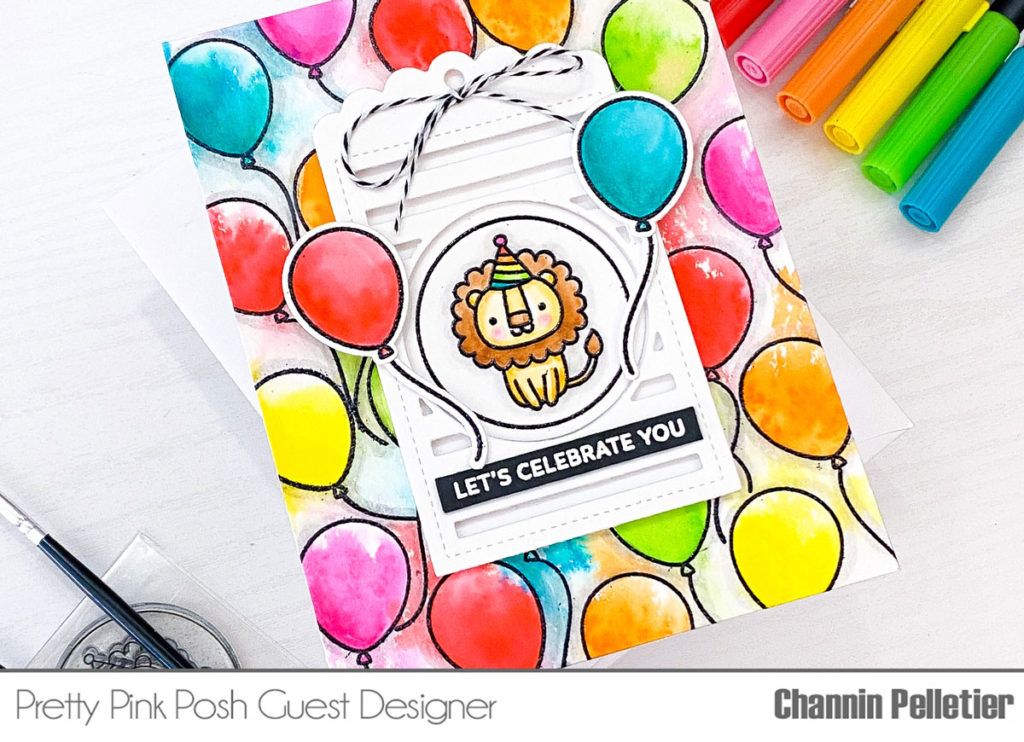
Hello friends! It’s Channin here and I’m so thrilled to be guesting here at Pretty Pink Posh! Today I’m sharing a fun and colorful card featuring several products from the birthday release. In the video I also demonstrate an easy watercoloring technique that creates vibrant splashy background perfect for a birthday card!
To create this card I first stamped a 5 1/4” x 6 1/2” panel of bristol paper repeatedly with the balloon and string stamps from the Balloon Alphabet Stamp Set in Versafine Onyx Black Ink. I then poured black embossing powder over the images and then heat set them with my heat tool. Next, I colored the balloons with a rainbow array of Tombow Dual Brush Pens (703, 885, 933, 055, 173, 373). After I had colored the balloons I then taped the panel down onto scrap of chipboard with painters tape and then spritzed the panel with water. Next, with a rocket air blaster I blew the activated ink around the panel to color in some of the open areas of the panel. When I had moved enough ink around and liked my results I then put the panel aside to dry.
Next, I die cut a tag using the Birthday Circles coordinating dies out of bristol paper. I then stamped and black heat-embossed the lion from the Birthday Circles stamp setonto the circle diecut from the tag. I also stamped and black heat embossed a couple more balloons and balloon strings onto bristol paper. I then watercolored the images using the same rainbow array of Tombow Dual Brush Pens and couple more colors (993 & 947). When I had finished coloring the images I then die cut the balloons and balloon strings out with the coordinating dies.
Next, I created a backing for my tag by tracing around it onto a scrap of white cardstock and then fussy cutting it out. I then adhered the diecut tag on top of its backing with foam adhesive strips and then glued the lion circle inside. I then adhered a tiny black and white twine bow to the top of the tag. Next, I stamped and white heat-embossed a sentiment from the Build a Cupcake stamp setonto black cardstock. I then trimmed the sentiment down to a strip and then adhered two stacked strips of black cardstock to the back to add dimension.
Now that the watercolored panel had dried completely I then trimmed it down to an A2 panel and adhered it onto the front of an A2 top-folding white card base. I then adhered the tag and sentiment to the card front. Next, I adhered the balloons and balloon strings together and then adhered them to the card front with foam adhesive. Lastly, I finished the card by adding shadows around the balloons and lion with a gray (N89) Tombow Dual Brush Pen.
I hope you enjoyed my card and video. Thank you so much for stopping by!
**The new release has been selling like hotcakes! For the first time ever, we are offering pre-orders on some of the sold out items. You can find all of those products HERE. **
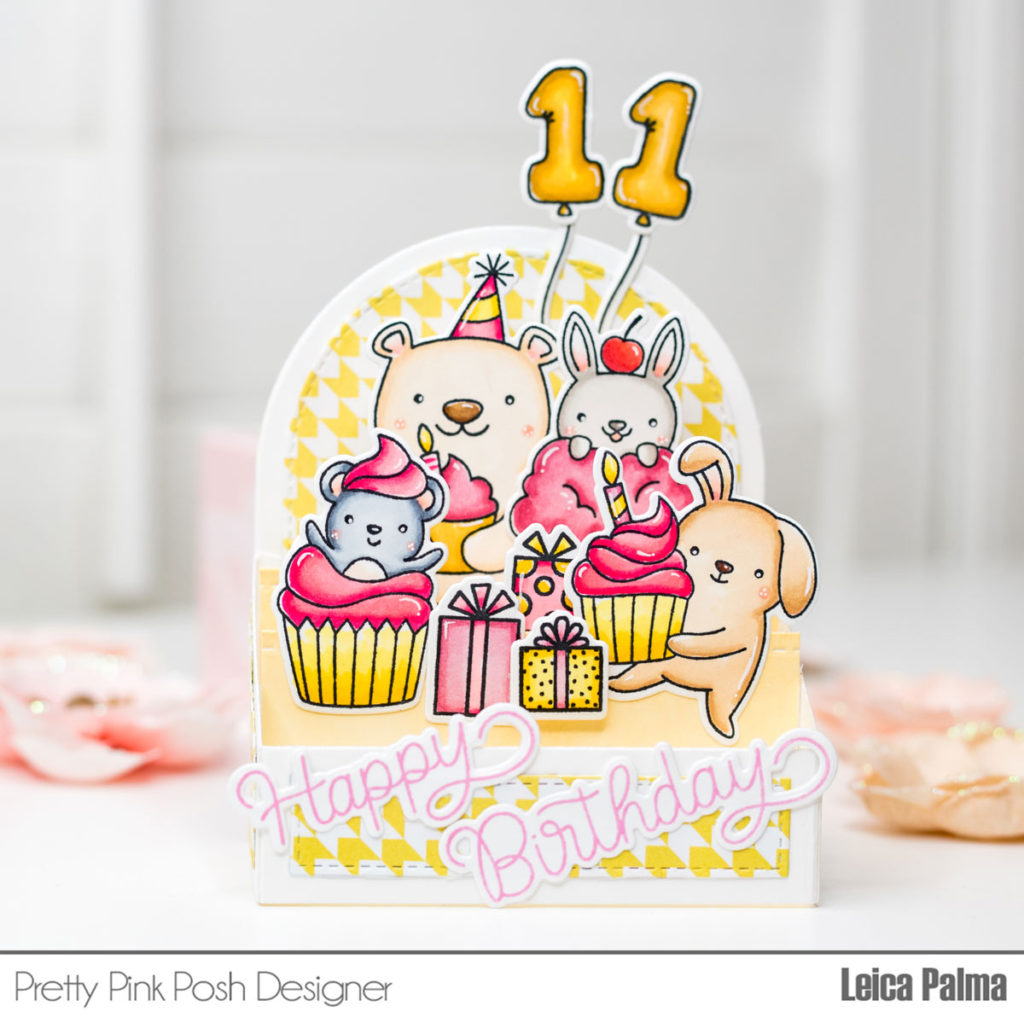
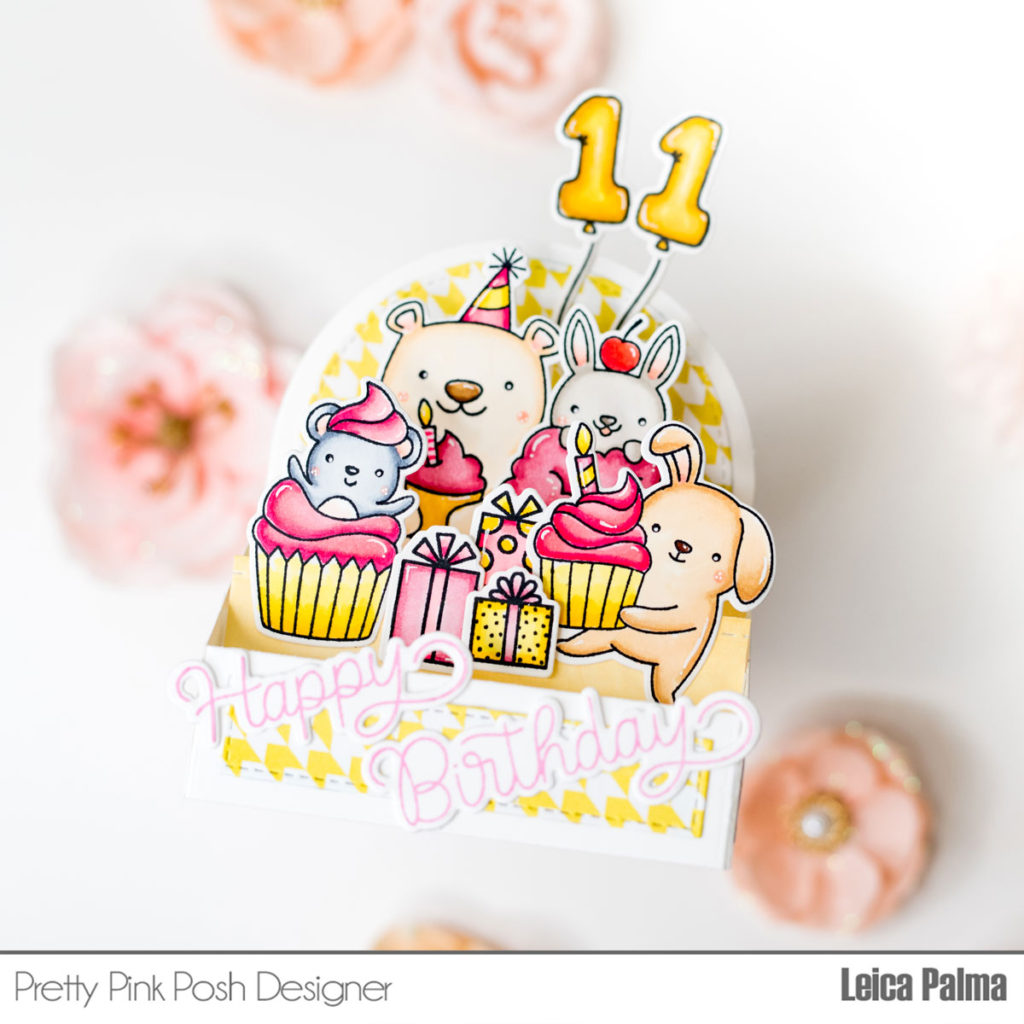
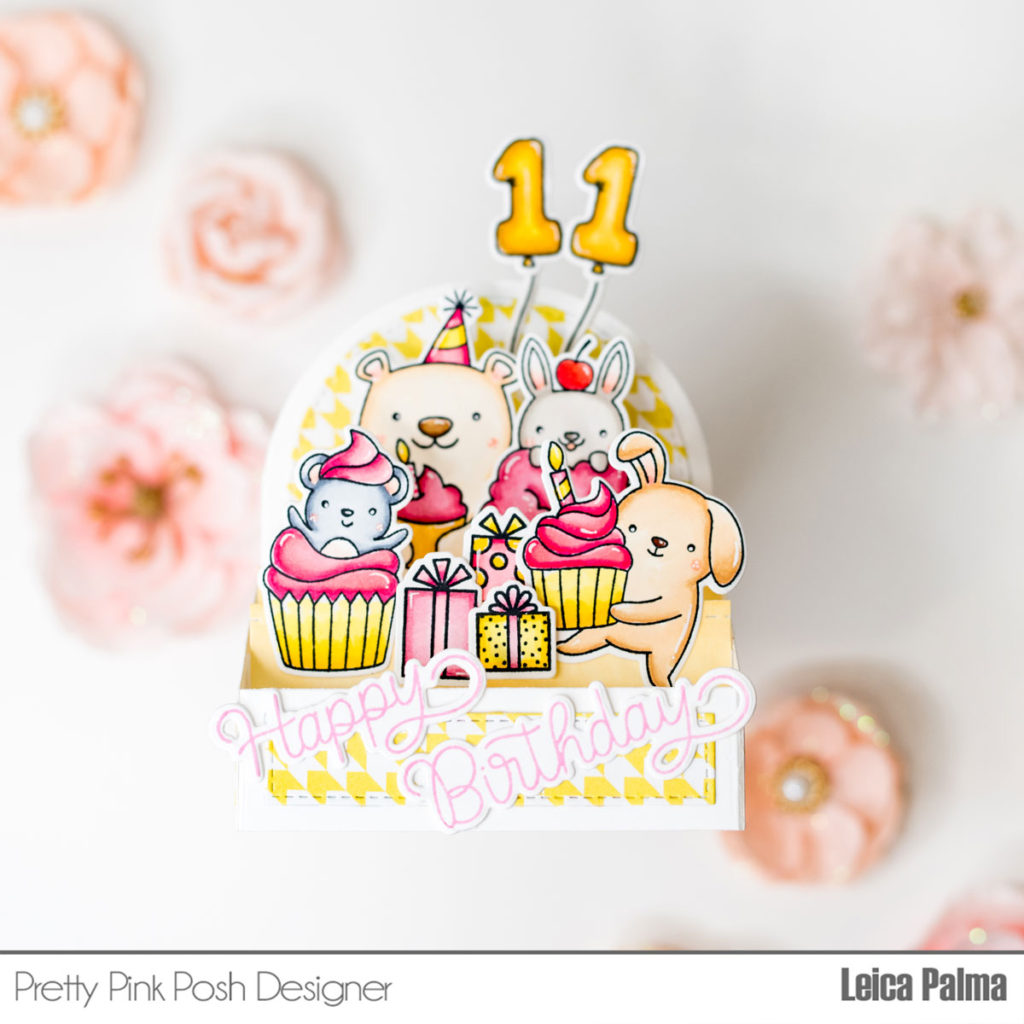
Let’s get started! I first assembled a box card die in white cardstock and used patterned paper for the panels. I then added 2 inserts for all the stamped images.
Next, I stamped, cut, and colored the critters from the Cupcake Critters stamp set, the small gifts from the Birthday Wreath stamp set, the number 11 balloons from the Balloon Numbers stamp set, and Happy Birthday sentiment from the Birthday Scripts stamp set. I used Copic markers – E31/30, 51/50, R85/83/81, RV25/23/21, YY18/15/13, and YR23/21/20. Lastly, I adhered all the stamped elements onto the card front and inserts with liquid glue.
I love making box cards and I hope that I have inspired you to create one. Thanks so much for stopping by today!
Hello! It’s time to announce the three lucky winners of the Birthday Release Blog Hop posts HERE, HERE and HERE. Here are the lucky winners…
Winners, email me within 7 days and I’ll send over the gift certificates so you can shop!
If you would like even more inspiration with the new release and are on Instagram, we also had a three day Instagram hop with three more chances to win a $50 gift certificate if you leave a comment before February 20th!
Thank you to all who hopped along in this blog hop and have been so supportive of us turning 8. Have a great weekend!
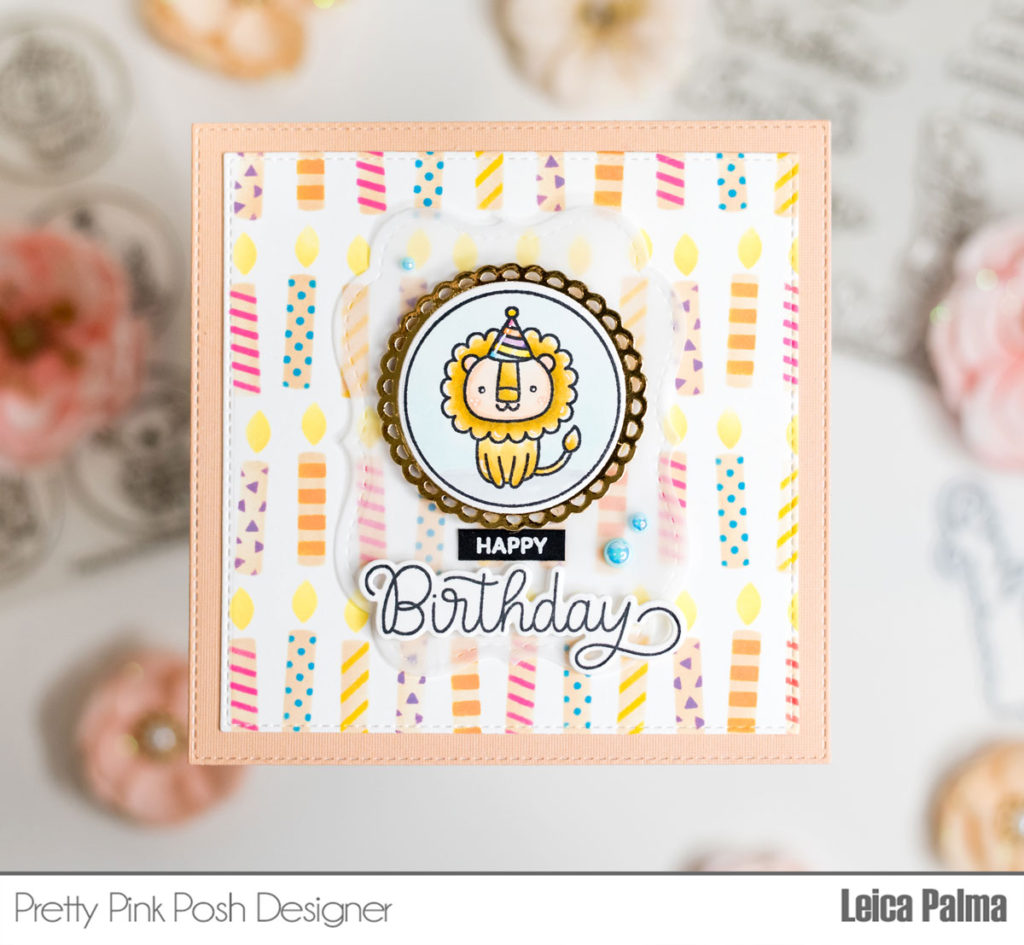
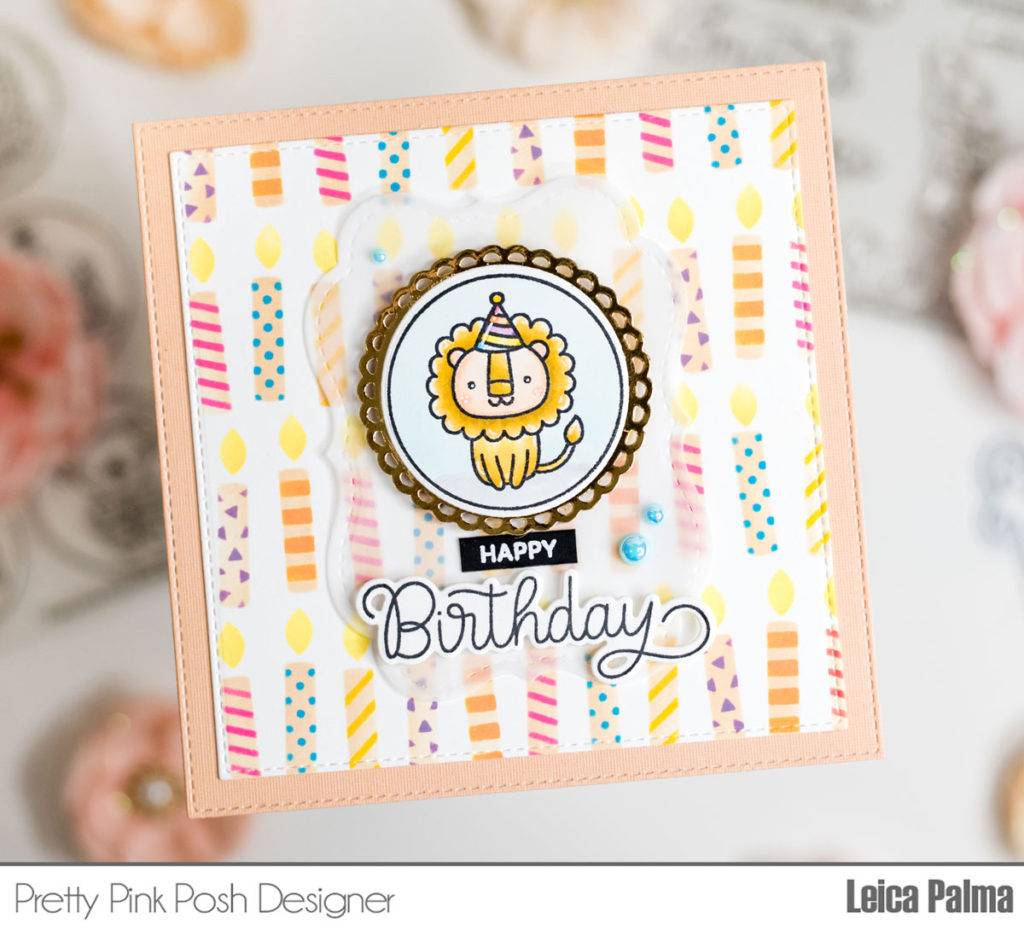
Hi crafty friends! It’s Leica here today with a birthday card to share with you all. For this square-shaped card, I used the new Layered Candles Stencils to make a fun background. Let’s get started!
**The new release has been selling like hotcakes! For the first time ever, we are offering pre-orders on some of the sold out items. You can find all of those products HERE. **
I first cut a 4.5″ square panel in white cardstock and used the A layer to make the candles by inking through it with the Gina K. Warm Glow ink. I then inked through the C layer with Distress Oxides (Peacock Feathers, Picked Raspberry, Salty Ocean, Seedless Preserves, and Spiced Marmalade). Next, I inked Squeezed Lemonade Distress Oxide Ink through the B layer. To add another layer of color, I adhered the panel onto a 5″ square in orange cardstock.
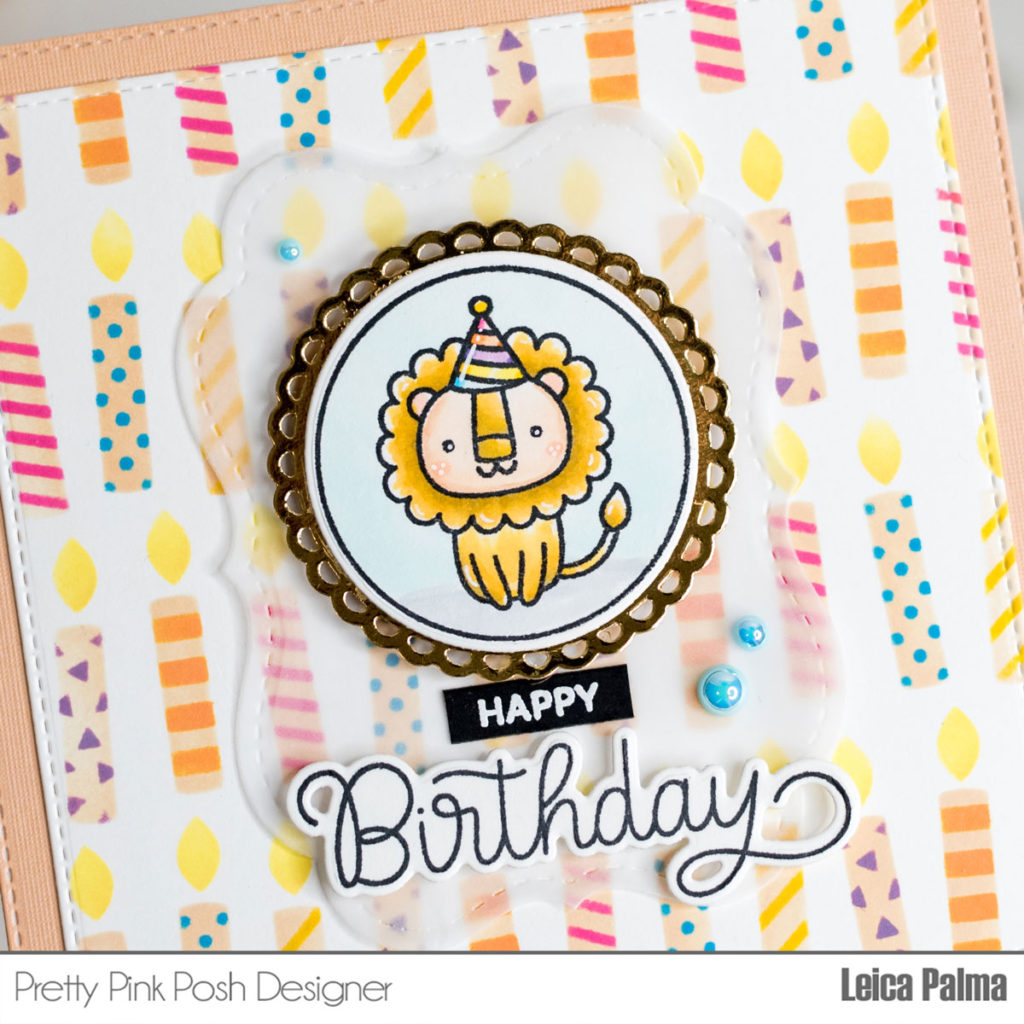
In vellum, I cut the ornate panel from the Fall Circles dies and added an image from theBirthday Circles stamp set that I layered with a gold border using the scallop circle die from the Winter Circles dies. I foam mounted the circle on the panel. For the sentiment, I used the Birthday Scripts stamp set. I also added some pearls in Blue Sky. Lastly, I adhered the panel onto a 5″ square card base.
Thanks so much for stopping by today! I hope that I’ve inspired you to make birthday cards with these new stencils.
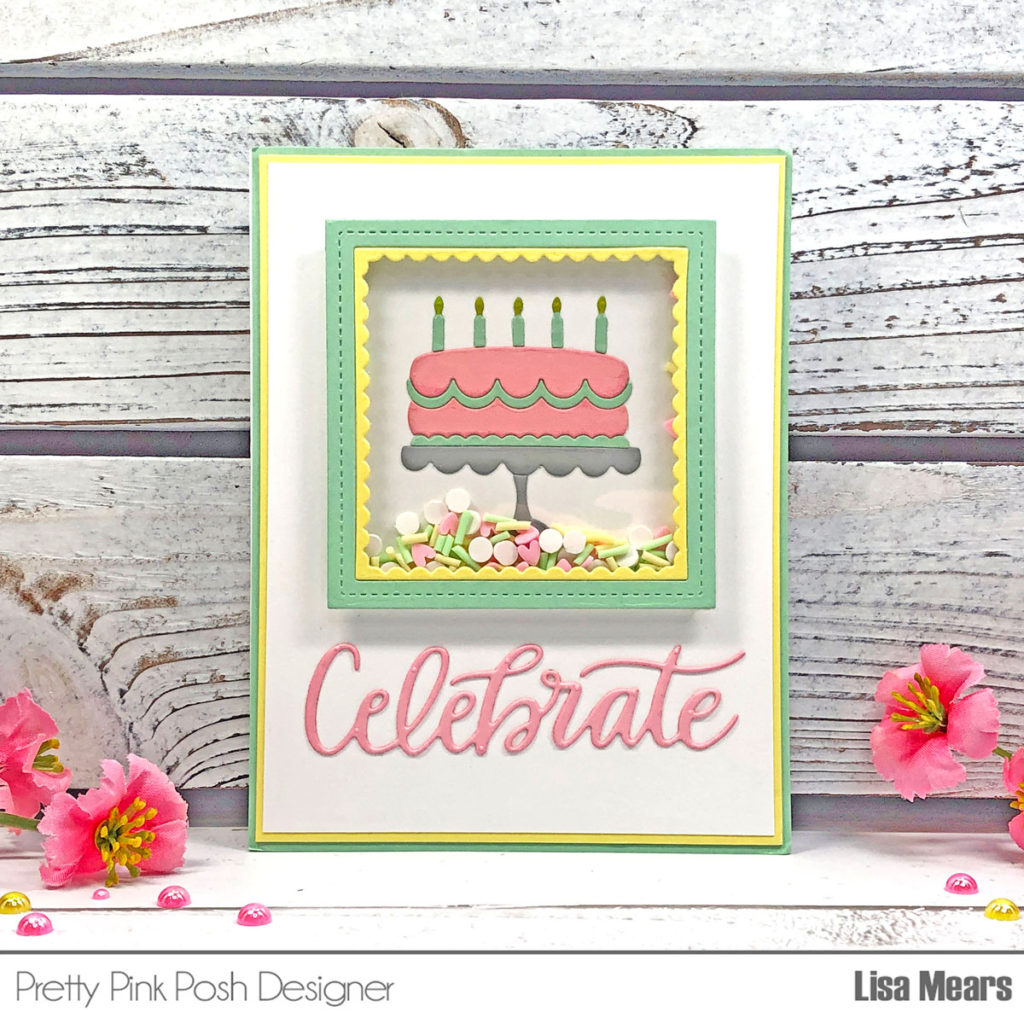
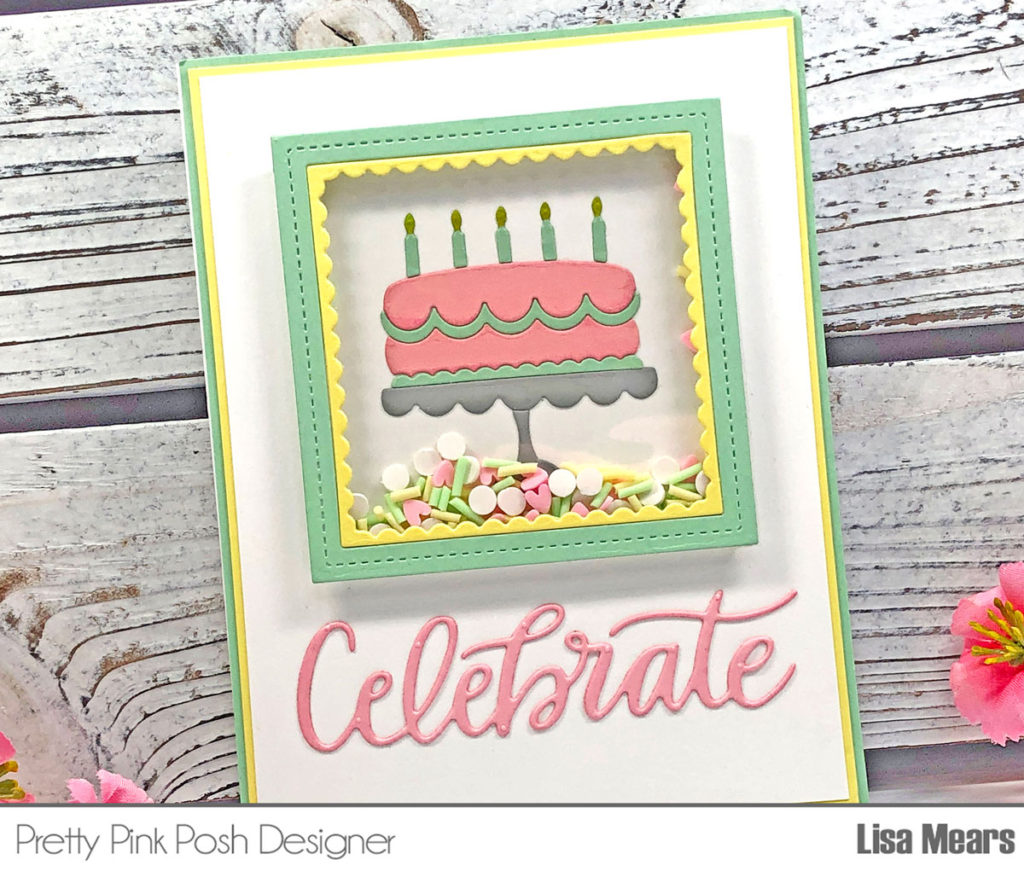
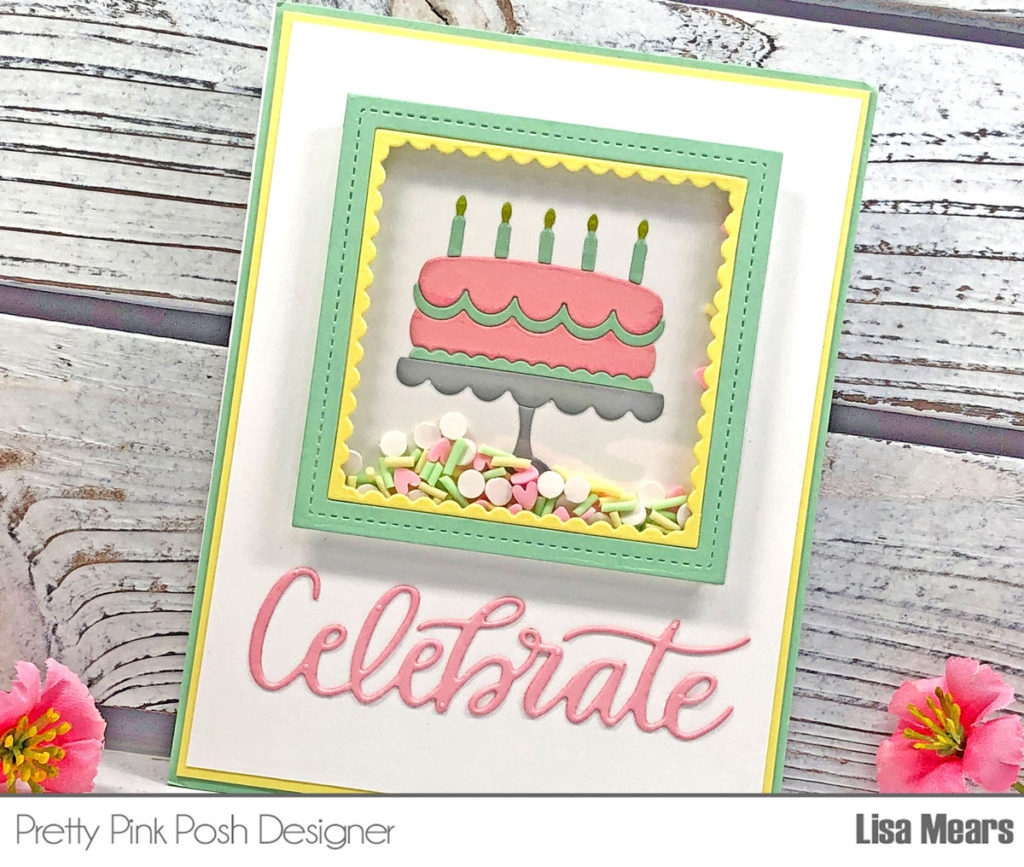
Hello crafty friends. It’s Lisa Mears here. Today I’m sharing a fun birthday shaker card I made using the Party Cake Die Set.
**The new release has been selling like hotcakes! For the first time ever, we are offering pre-orders on some of the sold out items. You can find all of those products HERE. **
This die set comes with a square frame that you can use with or without the inside scalloped edge. It also comes with a cake die. You can use the dies alone or you can use them together to frame the cake like I did in my card.
I started off by using the frame die to die cut a piece of green cardstock and a piece of yellow cardstock. I used the green cardstock piece for the square frame and the yellow cardstock piece for the inside scalloped edge. I added those diecuts to a piece of acetate. On the reverse of the frame, I added double-sided adhesive foam to outline the square frame and then I set it aside.
Using the cake die, I die cut three pieces of cardstock – gray, pink, and green. I assembled the cake starting from the bottom to top onto a piece of white cardstock that measures 3” x 3”. I added the 3” x 3” piece with the cake assembled to the top middle of a piece of white cardstock that measures 4” x 5 1/4”.
Next, I addedSherbert Clay Confetti to the center of the cake and then added the frame to the top to seal in the confetti pieces.
I die cut the Celebrate Script word die with pink cardstock and added it beneath the frame on the card front.
Next, I added the white card panel to a piece of yellow cardstock that measures 4 1/8” x 5 3/8”. I added the yellow panel to a piece of green cardstock that measures 4 1/4” x 5 1/2”. I added the final layer to an A2 white card base.
Thank you so much for stopping by today. Please leave a comment and let me know what you think of my card.
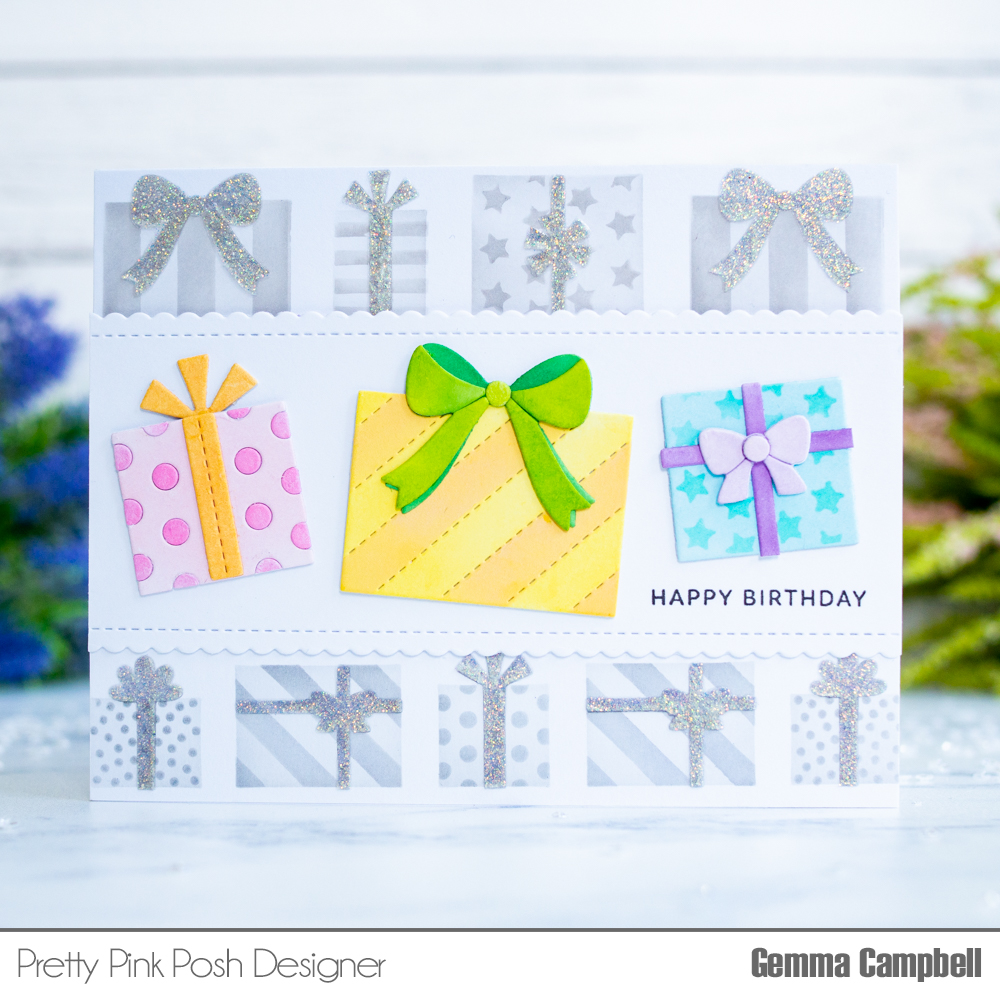
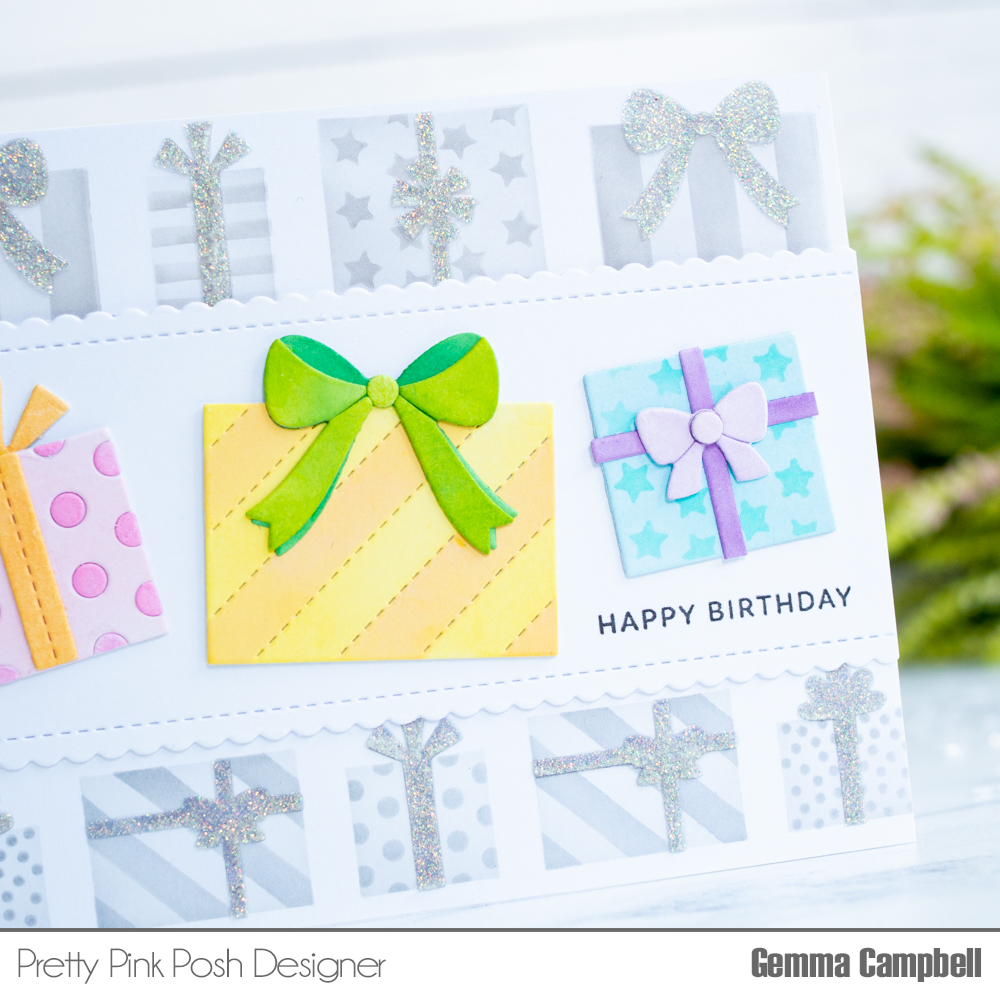
Hello, Gemma here today sharing a card using some new products from the February Birthday release –Build A Gift die set and the Layered Presents stencil set. Using a neutral colour in the background really makes the bright presents pop on this card.
**The new release has been selling like hotcakes! For the first time ever, we are offering pre-orders on some of the sold out items. You can find all of those products HERE. **
I began with the background. Over a white card panel, in turn I lightly inked over the stencils from theLayered Presents set. For the final layer, I also used some glitter embossing paste for a touch of sparkle, then set it aside to dry.
Next, I die cut the Build A Gift die set from white card. I used distress oxide inks to add colour to the presents, then assembled them with liquid glue.
Once my background panel was dry, I cut it with a trimmer to get two borders. I adhered these to my card base, then added a strip of card across the centre, die cut with a scallop border die to add interest. This strip covers the gap on my background and gives me a place for my presents and sentiment to sit.
I stamped a sentiment from the Simple Sentiments stamp set, then adhered the Build a Gift presents to finish.
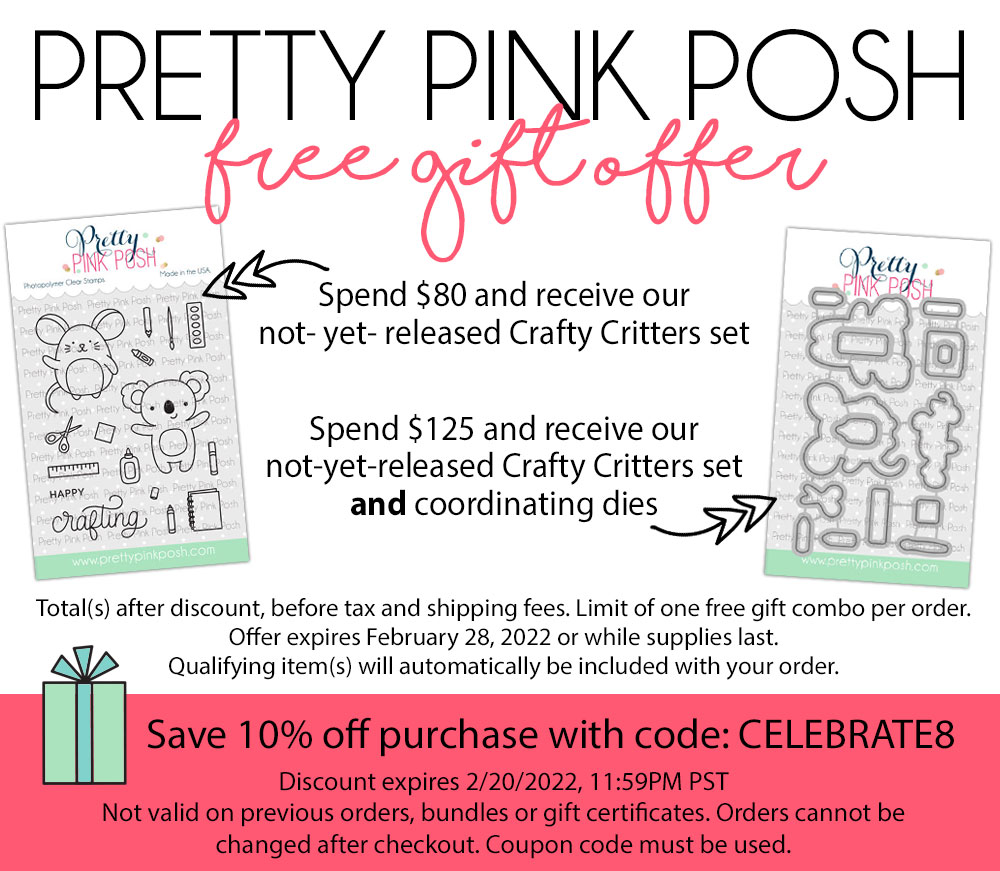
If you missed the news, we’re celebrating turning 8 with a free gift offer and coupon code. Hurry and take advantage of both while you can!
See you tomorrow for another day of inspiration + a video tutorial.
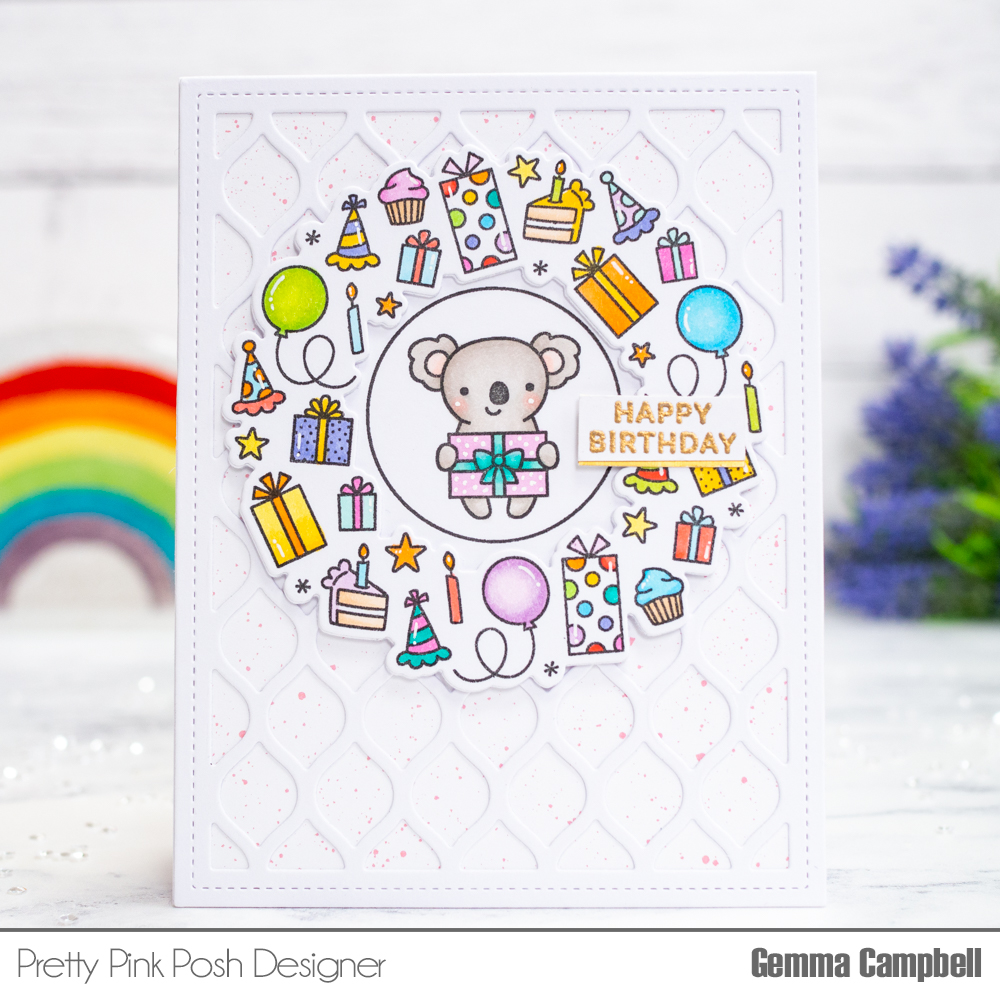
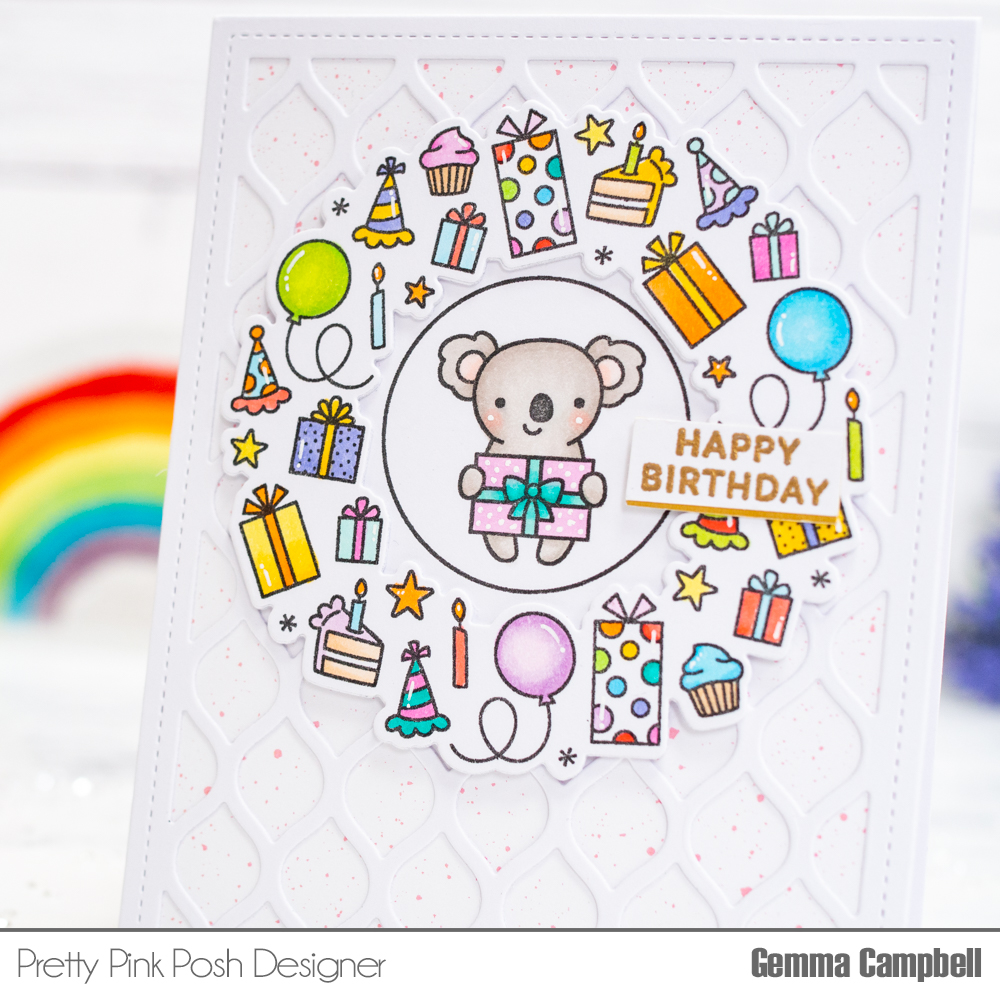
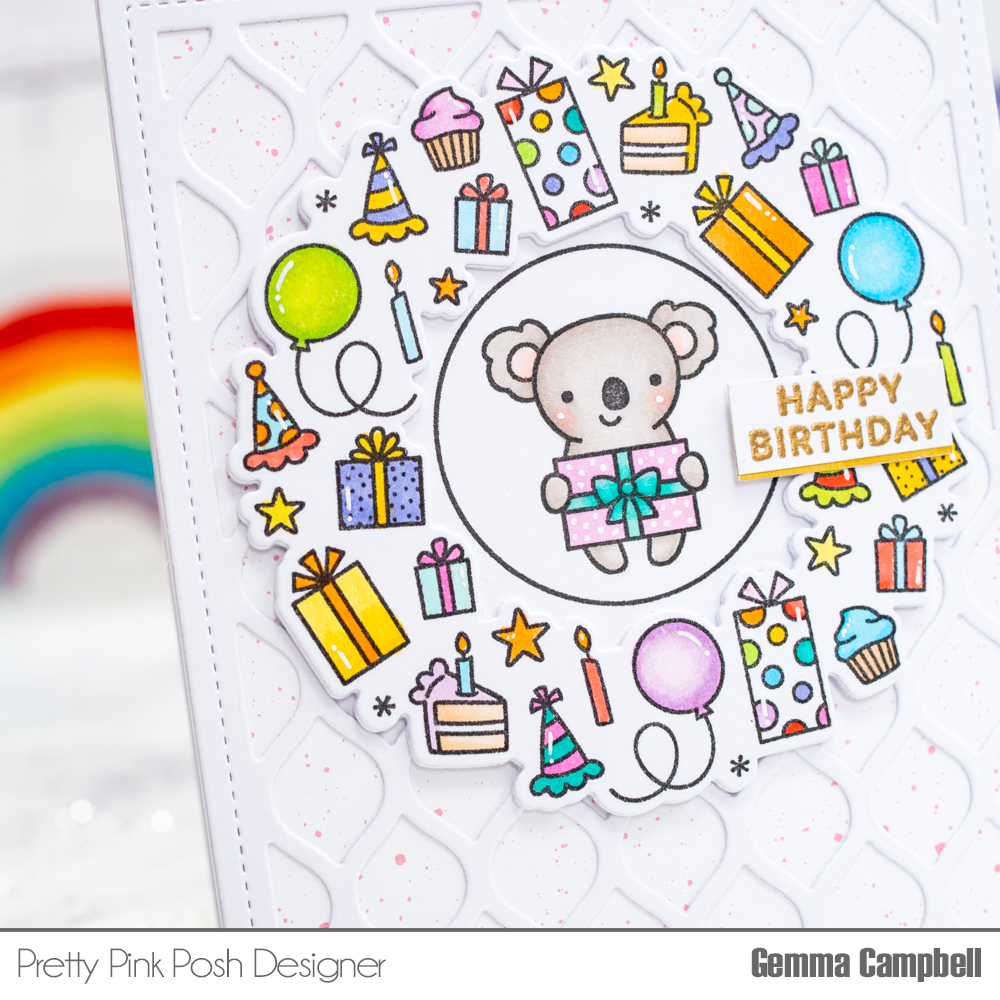
Hello, Gemma here today with a card featuring the new Birthday Wreath and Birthday Circles stamp sets. I thought it would be fun to add a circle image inside the wreath. They go together so well!
I stamped the wreath and circle, then coloured the images with copic markers. I die cut the wreath with the coordinating die, along with an extra die cut layer to add dimension. I cut out the circle image with extra space around the edges, so it could be adhered behind the wreath image.
Next, I worked on the background. I die cut the Pretty Petals Background from white card. I popped out the pieces and adhered it over some patterned paper. I then added this to an A2 card base. This CAS background complements the wreath and circle images beautifully.
I adhered the circle wreath images on the card, then finished by adding a gold heat embossed sentiment, using a stamp from the Simple Sentiments stamp set. I layered it over some satin gold mirror card.
No party would be complete without guests, gifts and a party favor, right? During the celebration, save 10% off your order using the coupon code provided below.
For the celebration, I brought along some very special guests to celebrate with us. Be sure to leave them lots of comments on their blogs and check out their amazing projects!
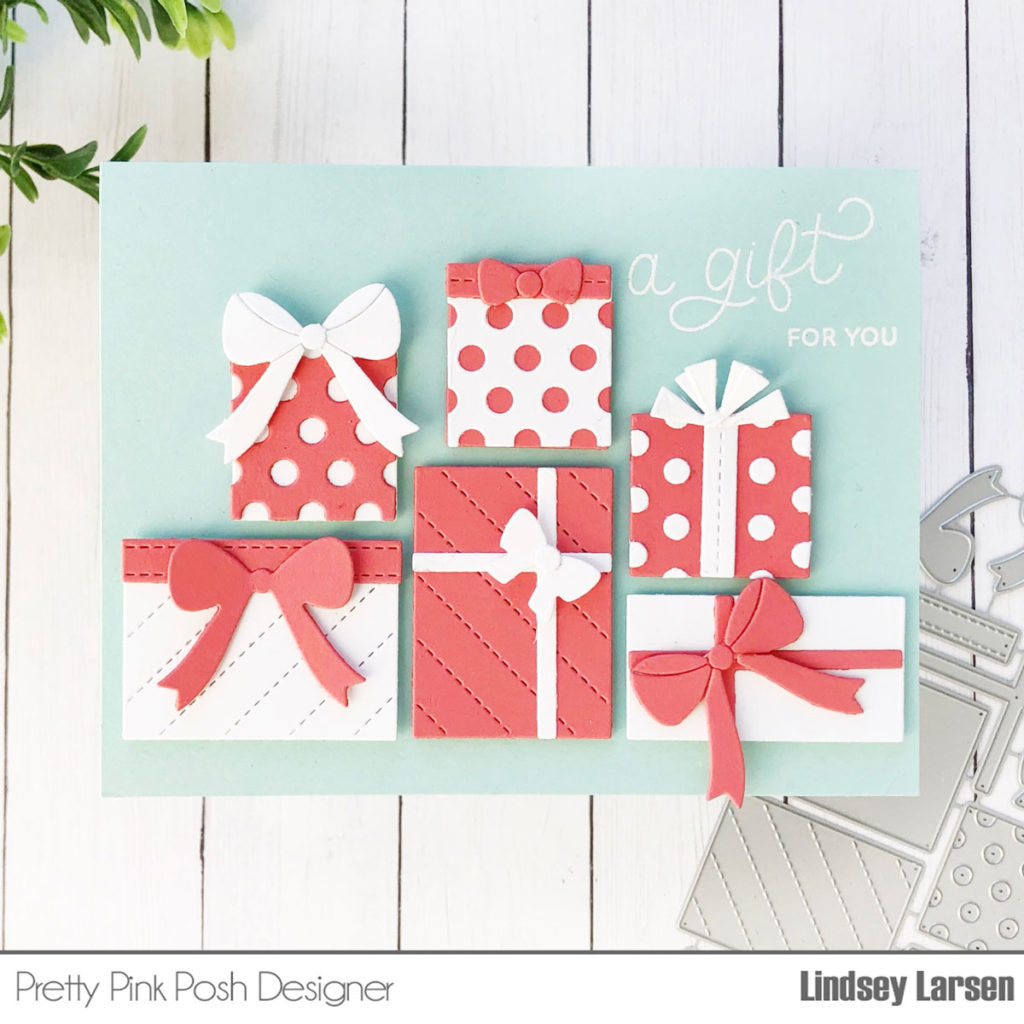
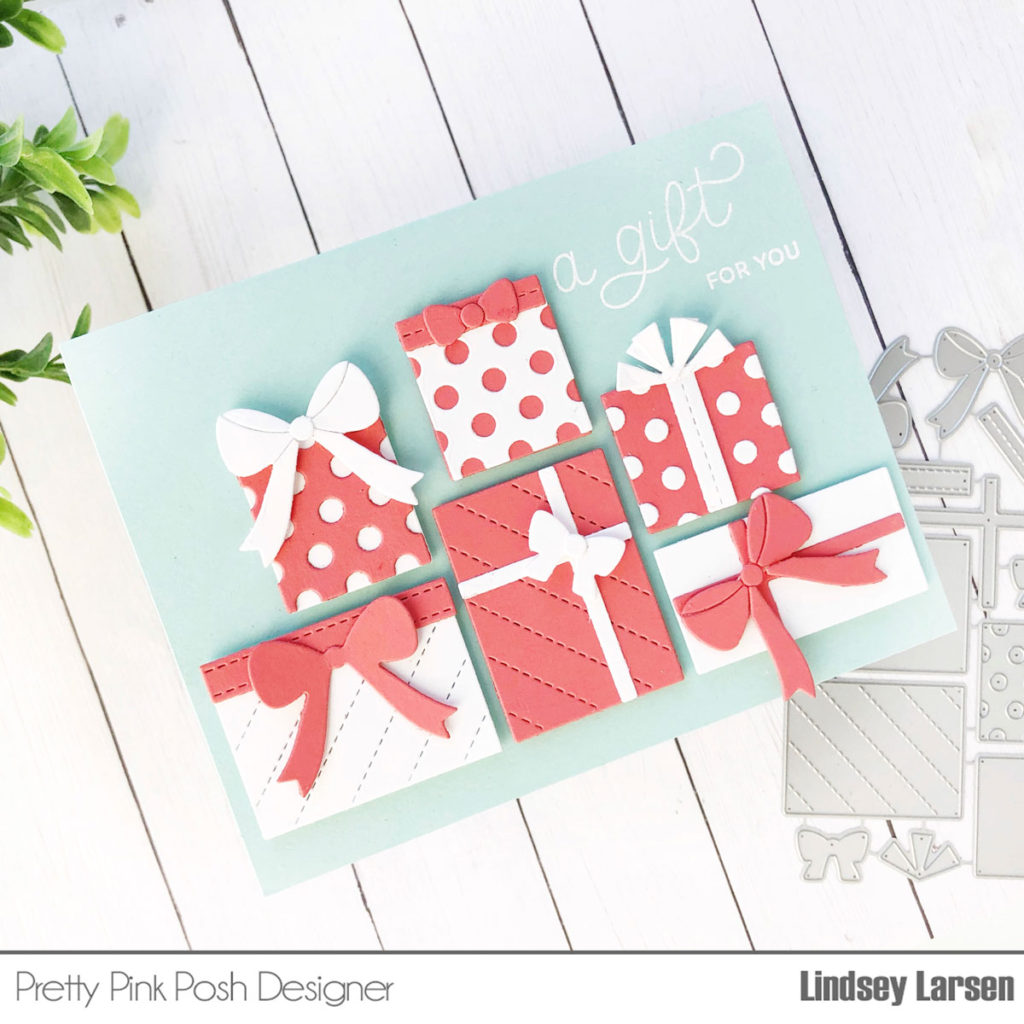
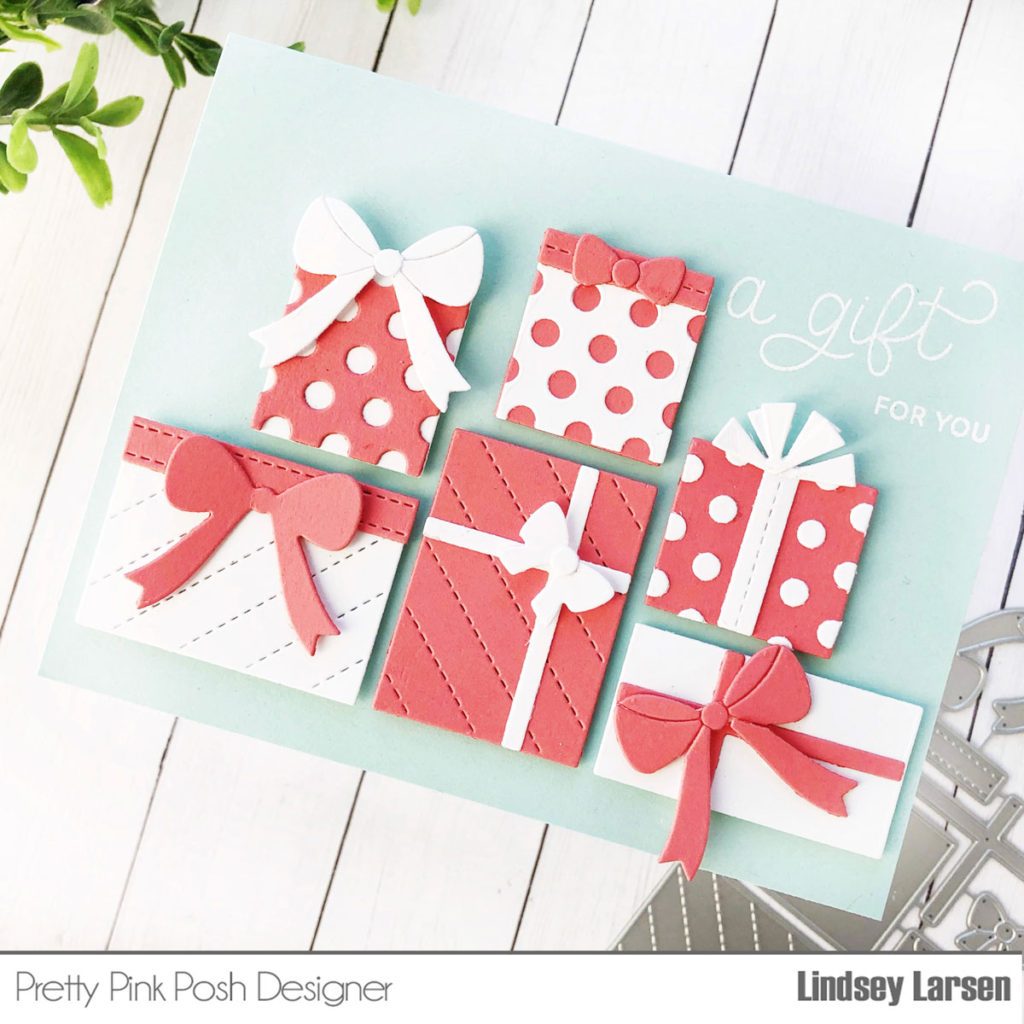
Hello! It’s Lindsey here, and I had a blast making today’s card. Have you seen the newBuild A Gift dies? They are fantastic! These dies are perfect for birthdays but also lots of other celebrations. I’m thinking weddings, graduations, and Christmas to name a few. Lots of possibilities here!
I stuck with a simple color scheme of white, light aqua, and pink sorbet. I ran all the dies through the die machine and cut a set of pink and white, and then mixed and matched until I had a pile of gifts. It was loads of fun!
I wanted each gift to be unique, so I used the tails on some bows but not on others. I also used the negative and positive polka dot cuts. Even a simple change like vertical vs. horizontal orientation added to the variety.
When all my gifts were completed, I popped them up with dimensional foam tape on my aqua card base and embossed a sentiment fromBirthday Scripts in white to finish off the card.
The Build A Gift dies are so much fun! This is definitely a set you will want to add to your collection. I know I will be using mine lots!
We are having a special free gift offer to celebrate our birthday month, while supplies last. During the celebration, save 10% off your order using the coupon code provided below.
PRIZES: be sure to leave comments on each stop. We are giving away 3 $50 gift certificates to three random comments (1 winner each day) left before February 16, 2022 at 11:59 PM PST. I’ll be announcing the winners next week, so be sure to return and see if you are one of the winners!
We have lots of amazing designers in today’s blog hop sharing new inspiration. Be sure to leave them lots of love!