
Easy Ink Blending Tutorial + Video
Hi, it’s Mona here, if you want to know how to heat emboss your die-cuts in bulk, or how to create rainbow images in less than 1 minute per die-cut, don’t miss my newest video tutorial on Pretty Pink Posh YouTube Channel.
Watch the video above I Watch the video in HD on YouTube
For these slimline cards I have used the Hibiscus Stencil with the Hibiscus Flowers stamps and coordinating dies and I can tell you that it was so much fun to play with these products together.
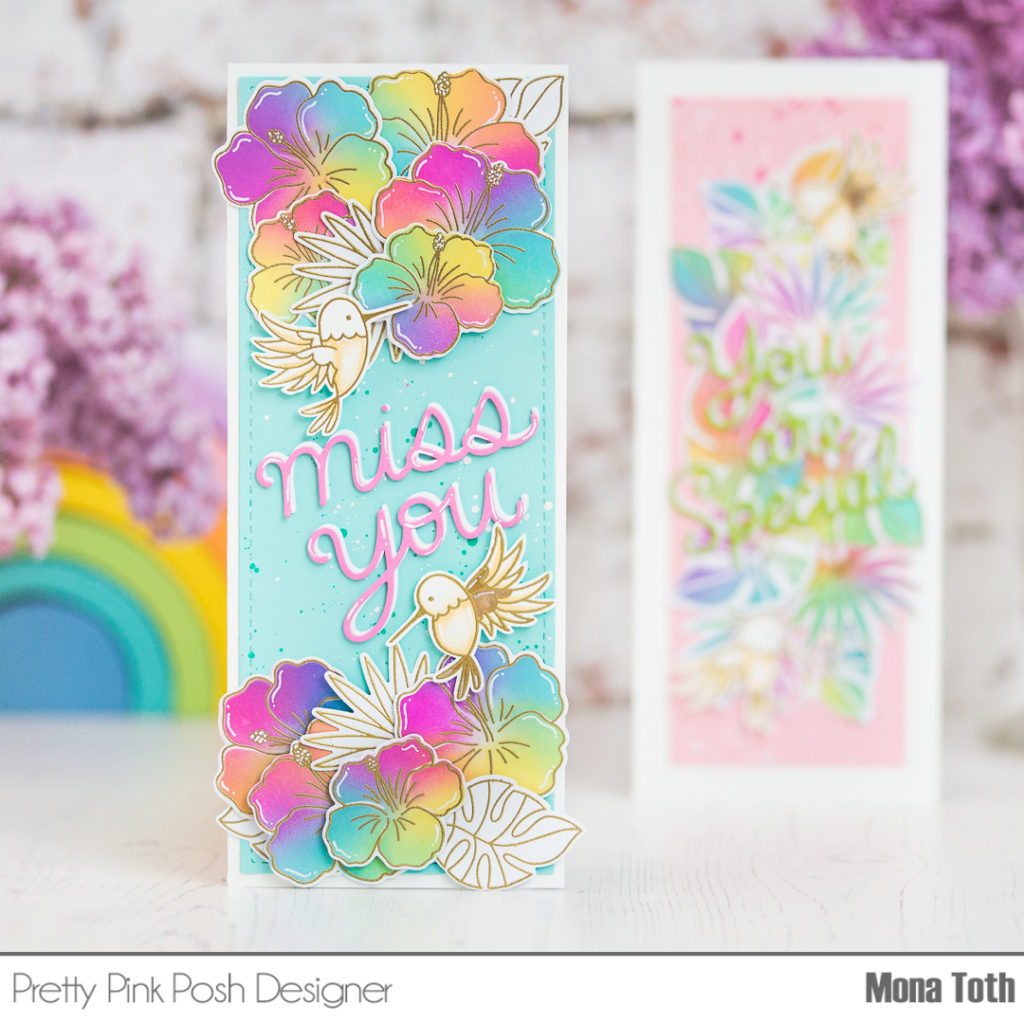
I stamped the images with watermark ink and heat embossed them with white and gold embossing powders. For the useful tips how I did it in bulk and how I saved lots of time, check the video out.
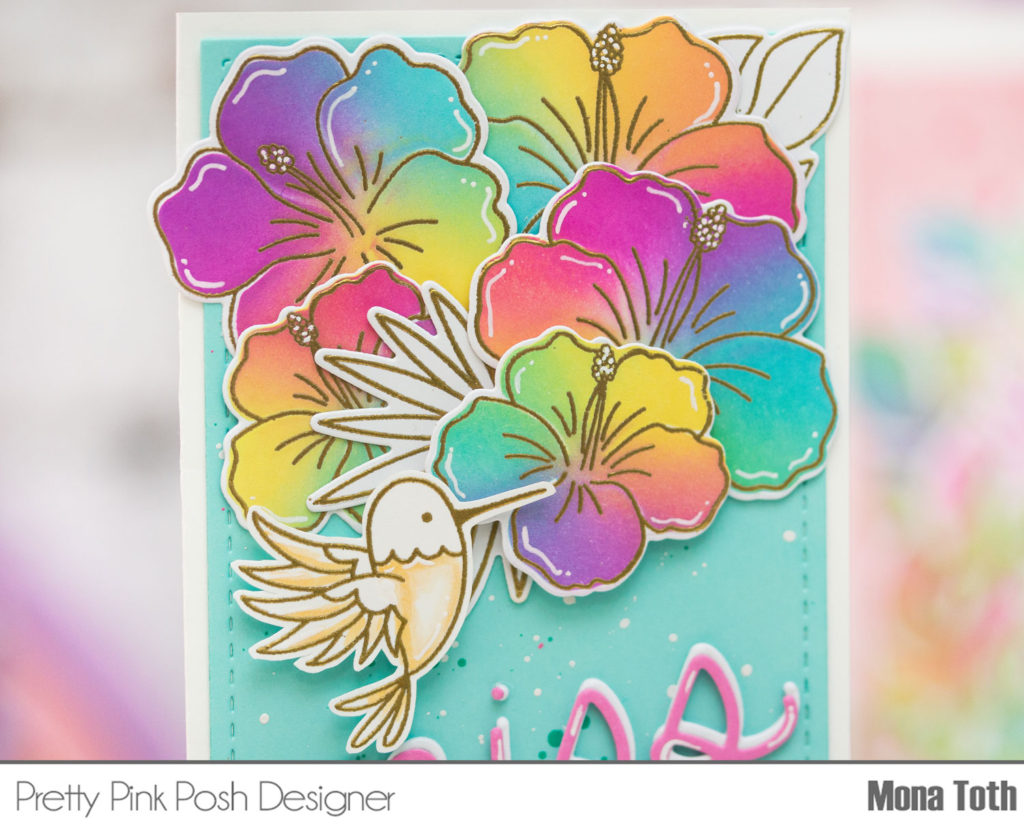
Instead of coloring, I made an ink blending through the Hibiscus Stencil with yellow, turquoise and pink inkpads and blended them together. The result was this pretty rainbow look.

Next, I created the card fronts. I made soft pink and teal die-cuts with the Slimline: Peekaboo Windows die set, then I splattered on them with white, teal and pink watercolors.
I also die-cut the sentiments with the Miss You Script and the You Are Special Script dies.
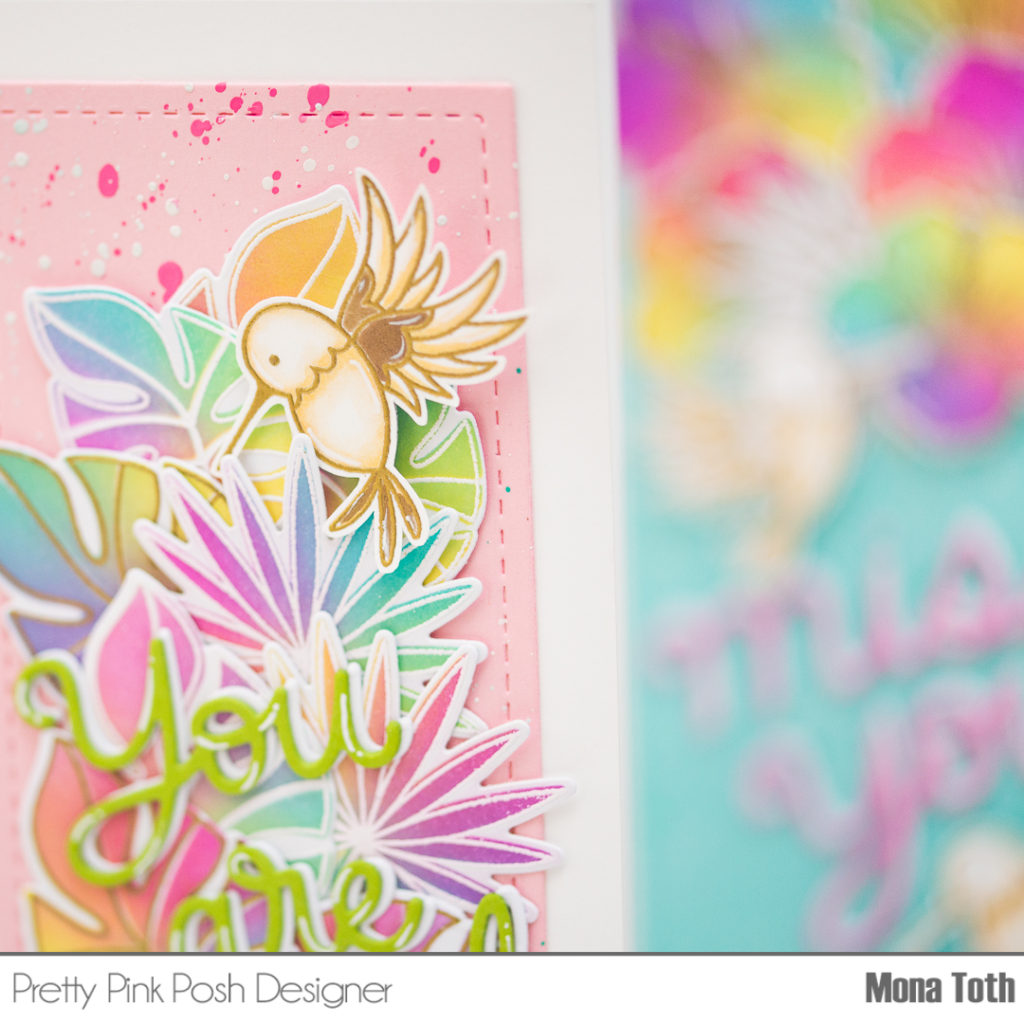
In the end I styled my card and put some heat embossed gold hummingbirds to the cards.
Thank you so much for stopping by, see you next time.
Hugs, Mona
Mona, these cards are amazing! Haven’t watched the video yet, but have too!