Easter Theme Week- Day 3
Hello friends, Raquel here! Welcome to Pretty Pink Posh Easter Theme Week Day 3! From March 28th to April 3rd, we will be showing you lost of inspiration with these super fun products.
There is a 15% discount on all items in our Easter Section during this theme week!
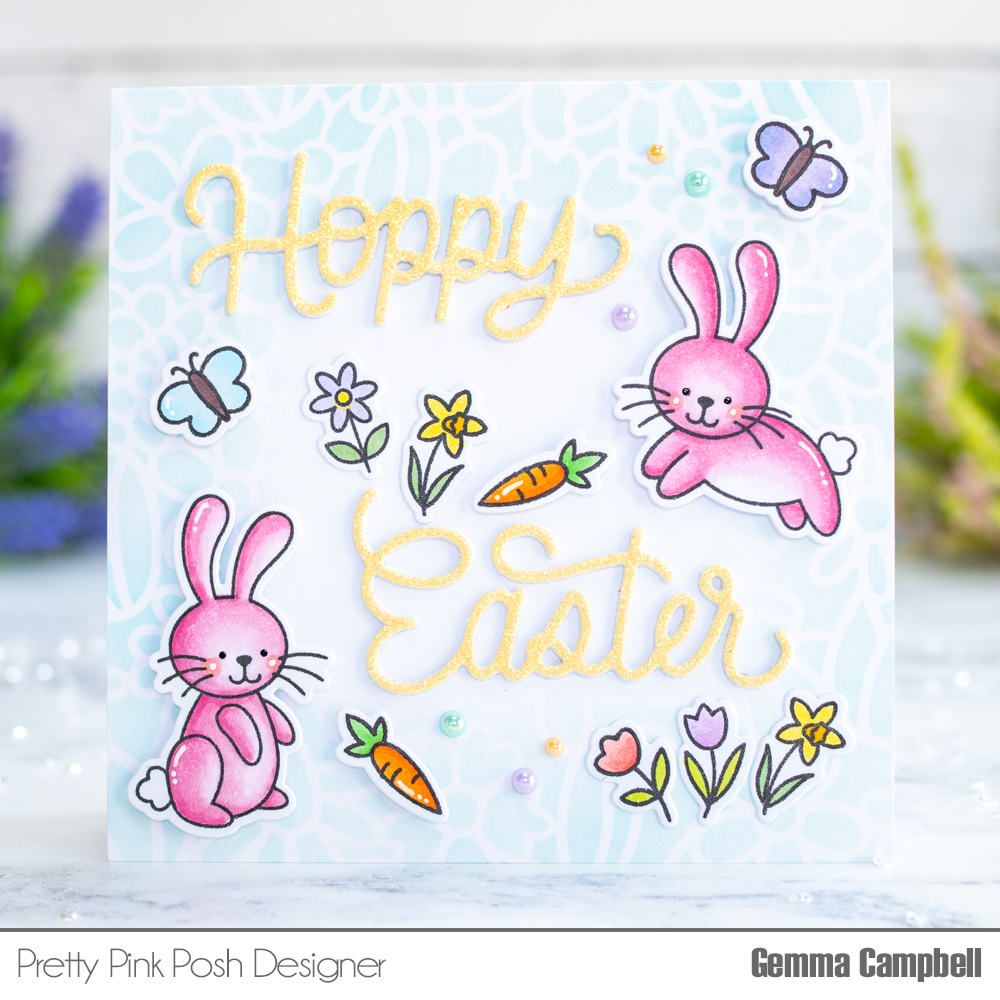
For my project today I used the Decorative eggs dies. I love to create colorful designs so I couldn’t resist to ink blend each egg with a different color.
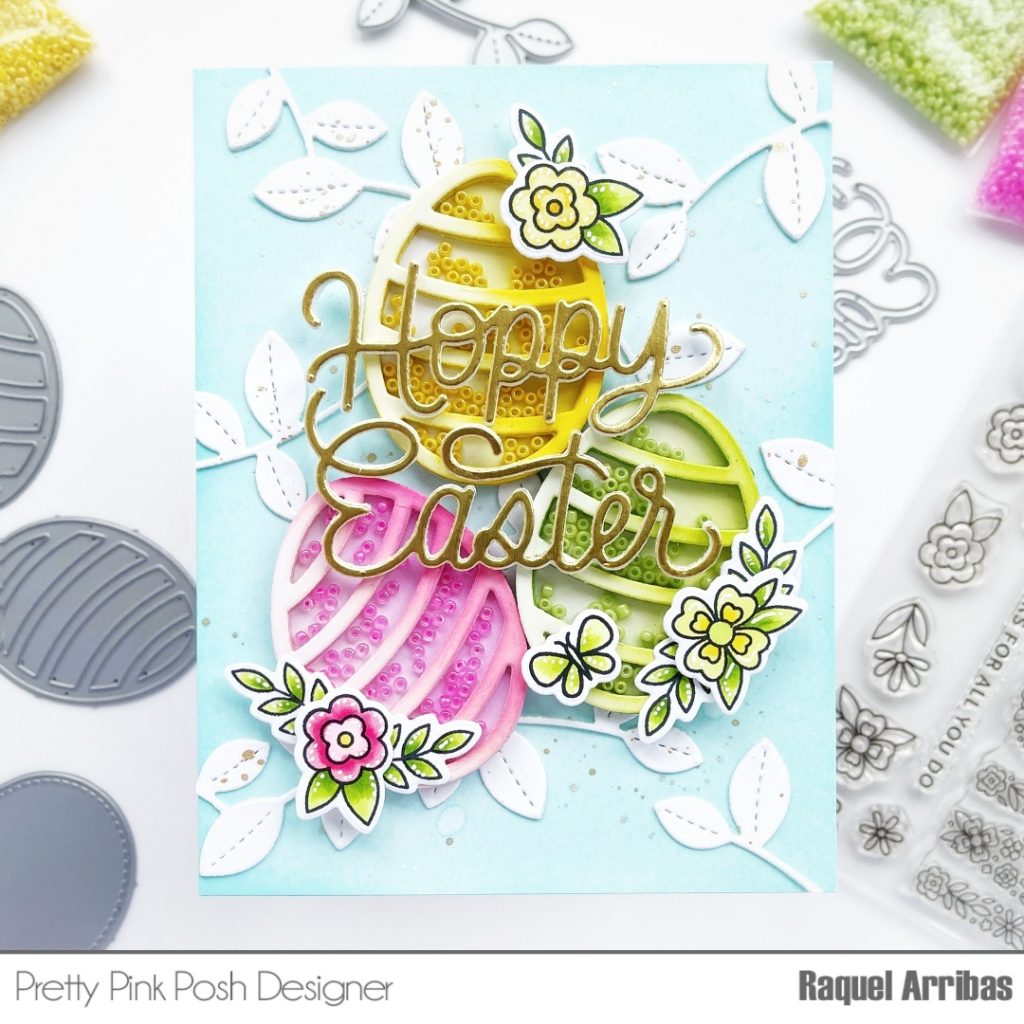
First, I die cut several layers of these eggs out of white cardstock. Then I applied Twisted Citron, Kitsch Flamingo and Mustard Seed Distress inks on the die cut layers. I wanted to create three eggs shakers so after the top layer was colored, I glued an acetate piece and stacked the rest of the layers to achieve the dimension I needed.
Next, I filled these eggs with Petunia, Sunshine and Grass Green seed beads (love love love these small but gorgeous beads for shakers). Then I placed the bottom layer to which I also applied the same ink that I had used on the front layer with a gradient look from left to right.
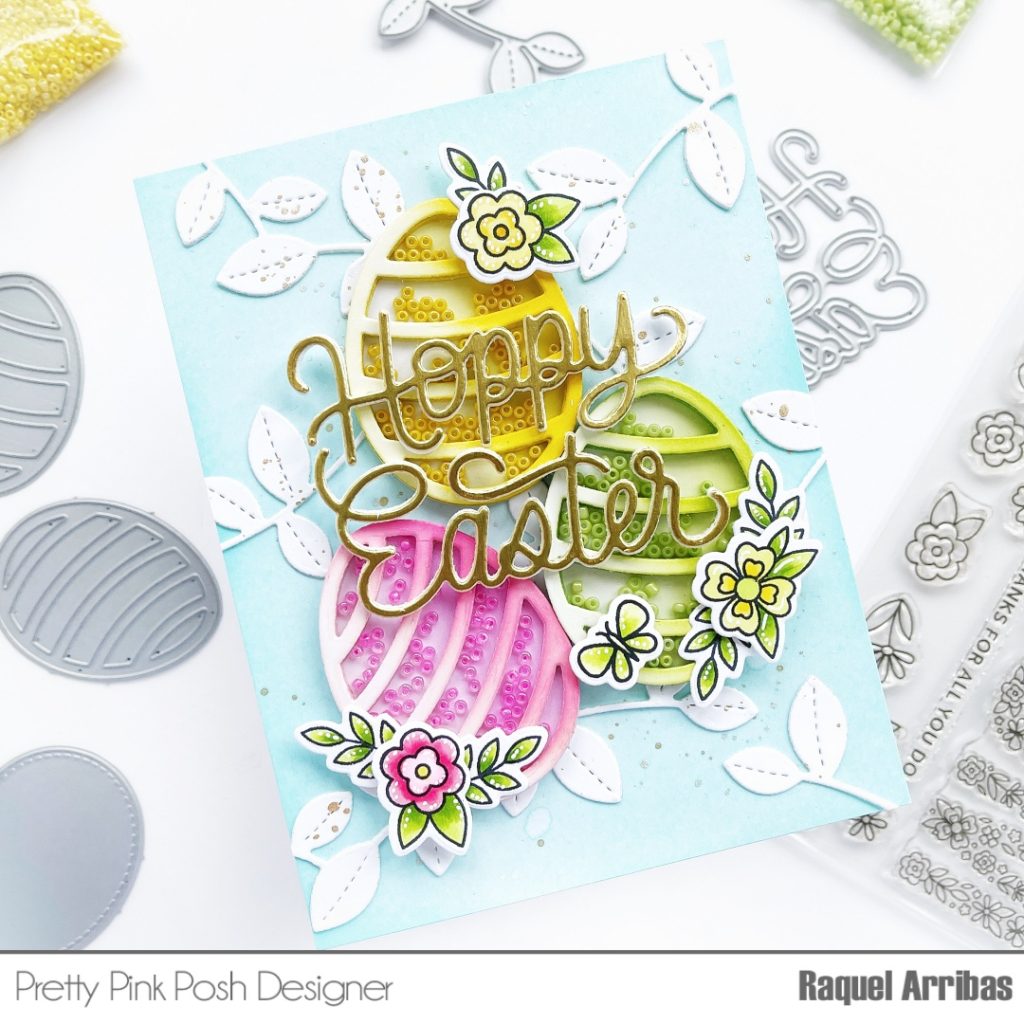
Next, I created a background by ink blending Salvage Patina Distress Ink. To add some extra dimension, I added some white die cut leaves using one of the Stitched Leafy Border Dies and added some splatters of gold watercolor.
Finally, I added some small flowers from the Mom stamp set and used the new Hoppy Easter die for my sentiment using gold foil cardstock.
I had so much fun creating this design and I hope it inspires you to create some projects too! Hope you like this card and visit Pretty Pink Posh Blog for more inspiration throughout this week.
Crafty hugs!
Raquel