
Sparkly Interactive Halloween Card + Video
Hi, it’s Mona here, and I can’t wait to show you how I made this pinky-sparkly Halloween card with an interactive twist! From my newest video on Pretty Pink Posh YouTube Channel you can learn how to easily transform word die-cuts to the wished shape.
Watch the video above I Watch the video in HD on YouTube
I made the glittery background with the Stars stencil on a pale pink cardstock with the Silver Glitz Glitter Gel. In the video I am showing you what is my favorite method for this process.
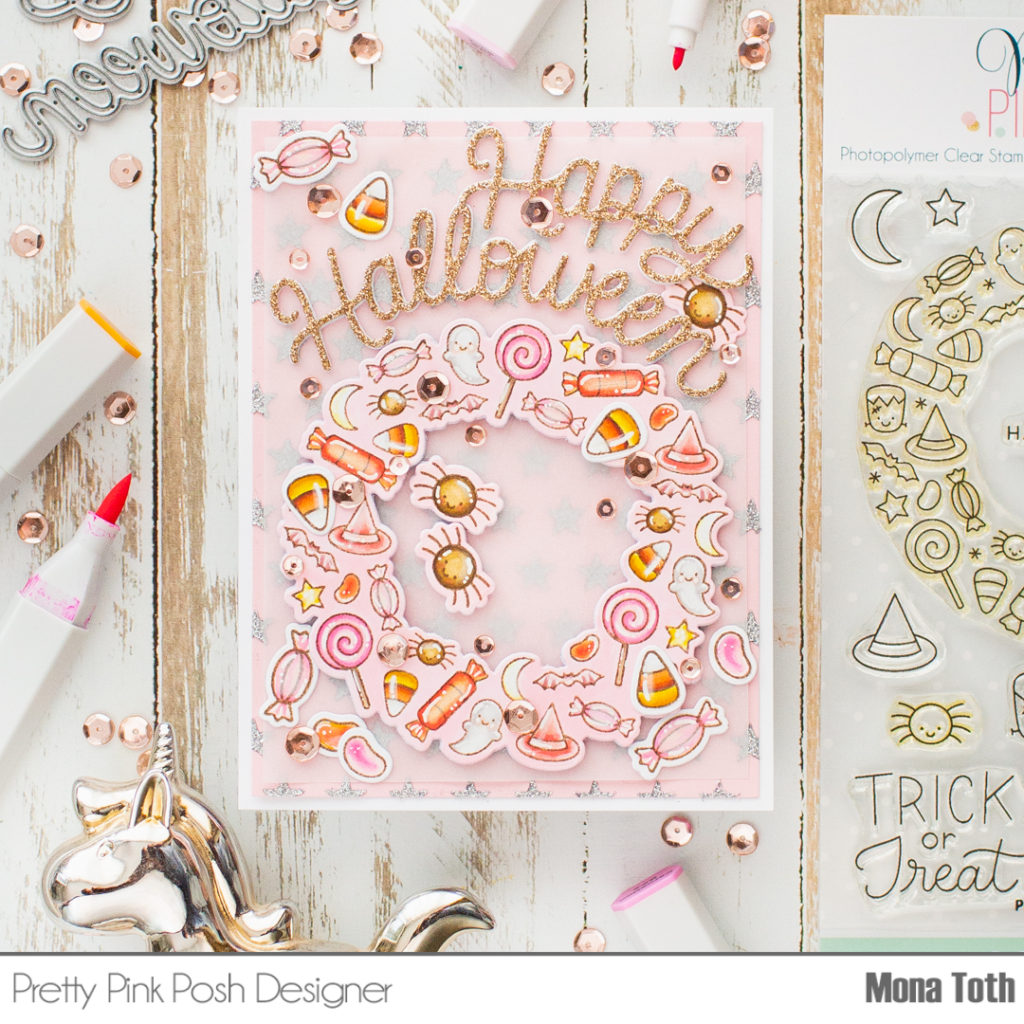
While the background dries, I stamped the Halloween Wreath and the other coordinating images from the same stamp set with brown alcohol marker friendly inkpad to a piece of Neenah Solar White cardstock and colored them with Spectrum Noir Illustrators.
I have used the following colors: CT1, CT2, CT4, GY3, BO1, BO2, BO3, BO4, OR2, OR3, CR1, CR3, CR5, CR7, GB1 GB4, GB6, GB10, RB3, RB1, AP4, AP3, AP2, PP1, FS1, MG1, MG2, BG1, BG2, Blender.
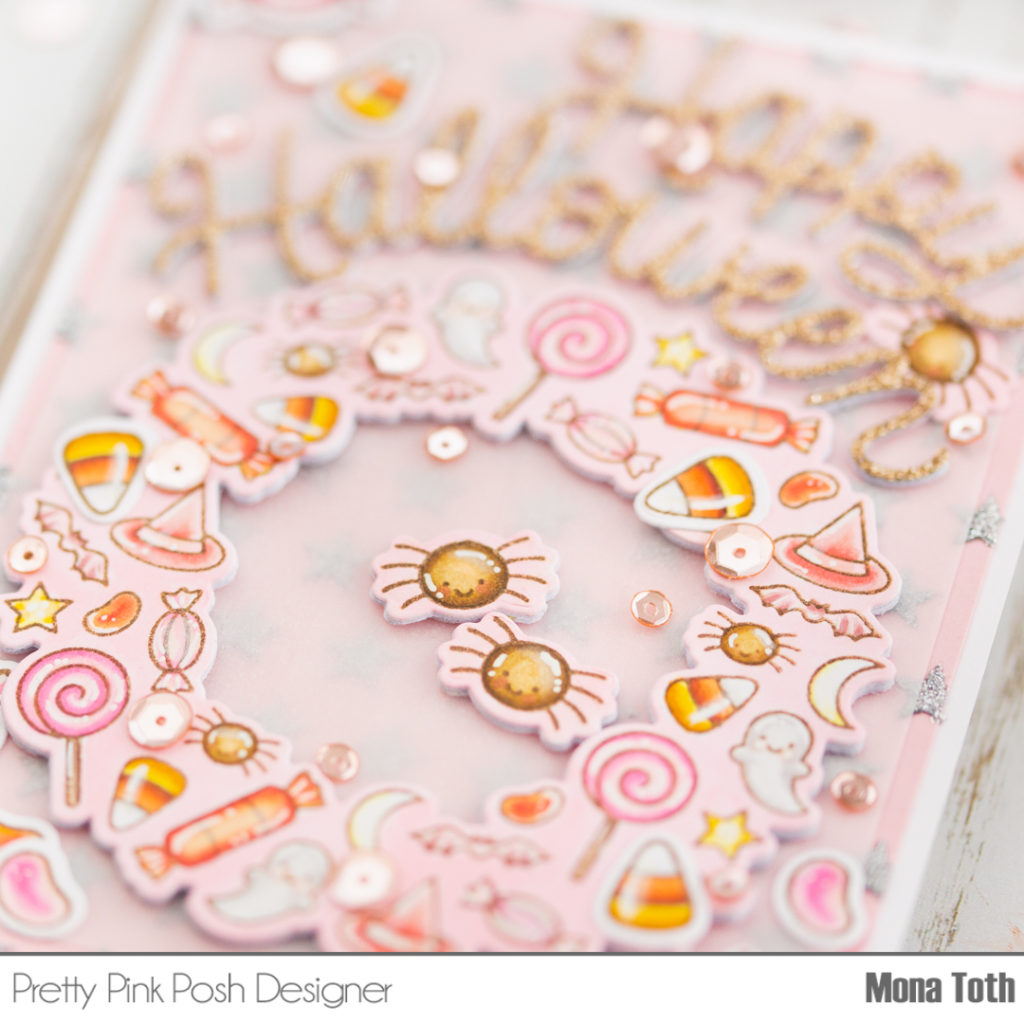
After the coloring I die-cut all the images and I colored the wheel with a pale pink alcohol marker.
Next, I continued with the die-cutting. I made more die-cuts from heavy weight cardstock, because I wanted to add thickness to the wreath and the spiders, in this case the interactive part will be more durable. Then I transformed the Happy Halloween Die-cuts made with the Happy Halloween Script Die. This is a fun way to alter the scripted sentiments, in the video I am describing how.
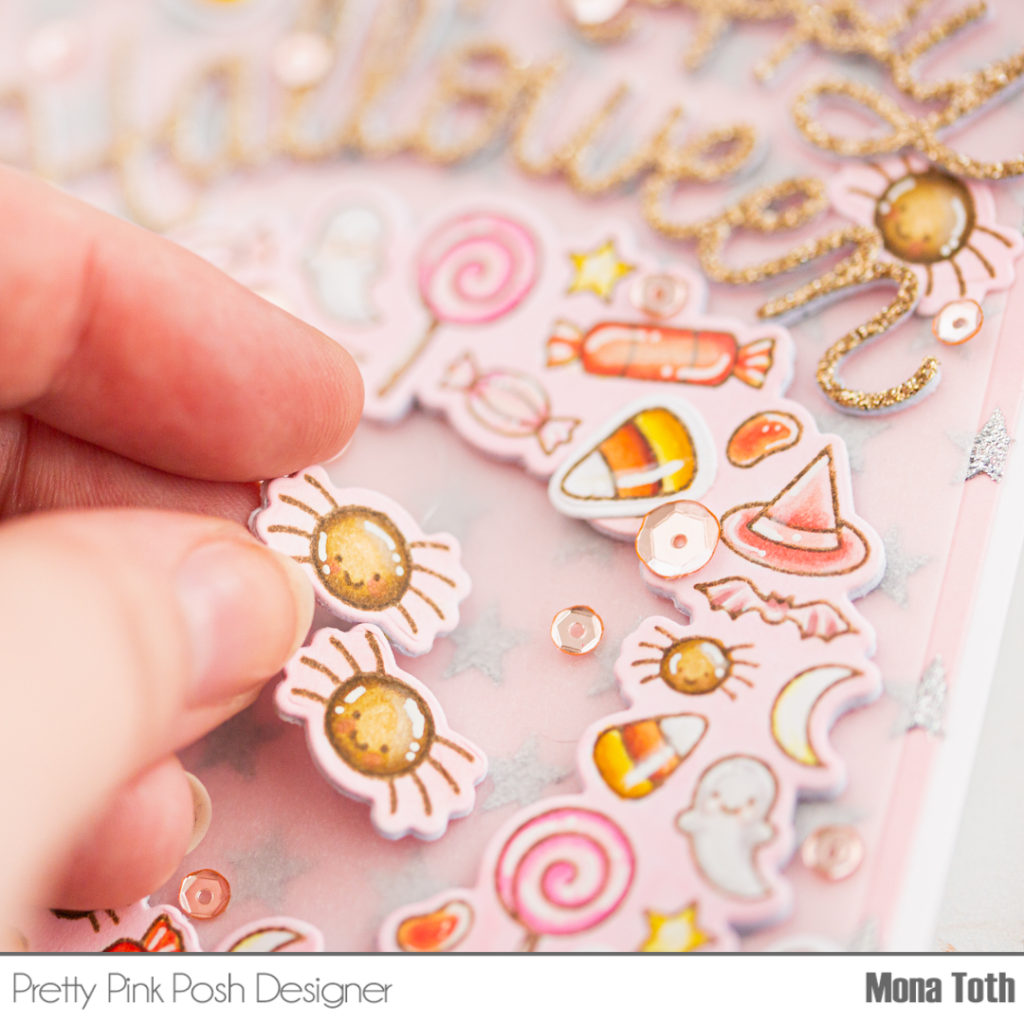
When it was done, I created the interactive element and added the spider to the circle with fishing line, and created the card front. I covered the glittery background with a piece of vellum, and styled the circle, the sentiment and the other elements.
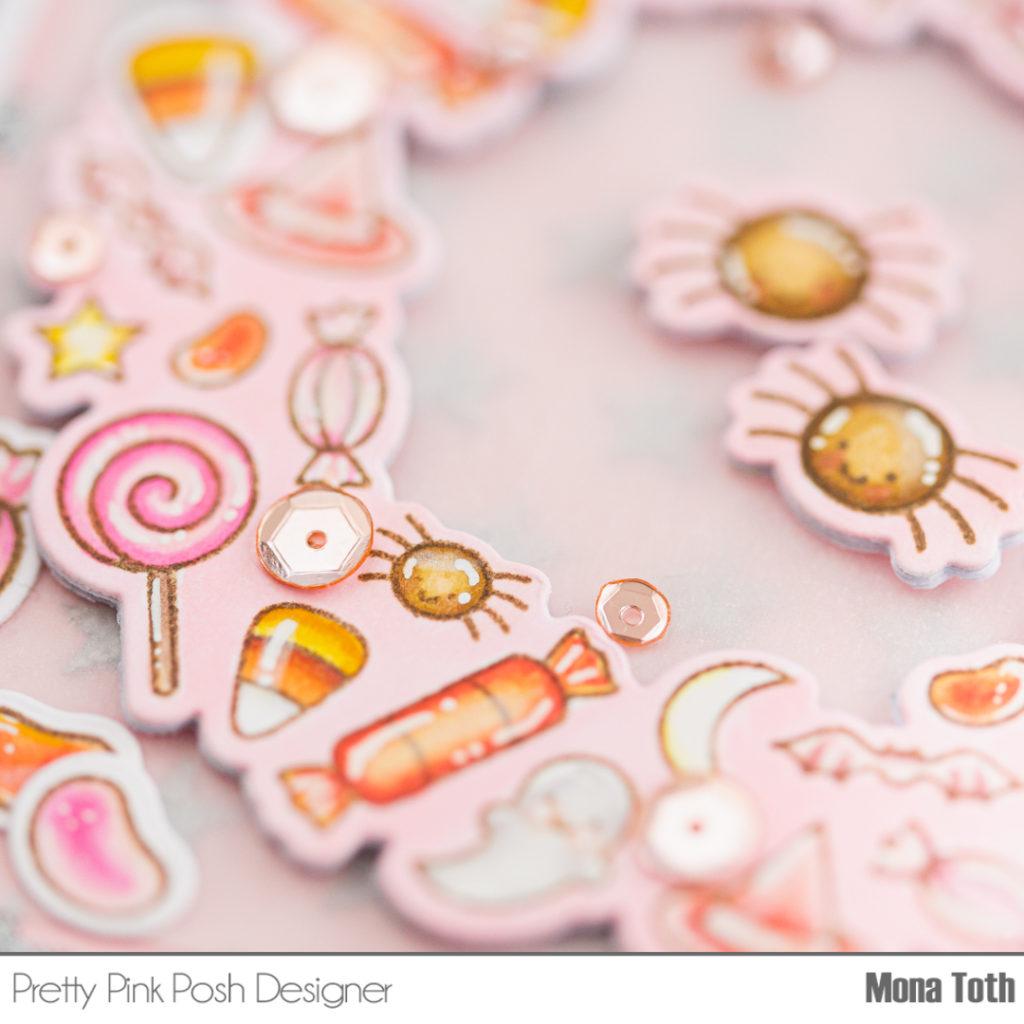
In the end I styled my card and added some Metallic Rose Gold Sequins to it as a decoration. Thank you so much for stopping by, see you next time.
Hugs, Mona
I absolutely adore this card! I’m always looking for non-scary Halloween inspiration for the kids. This card is a gem! Thanks so much for sharing!