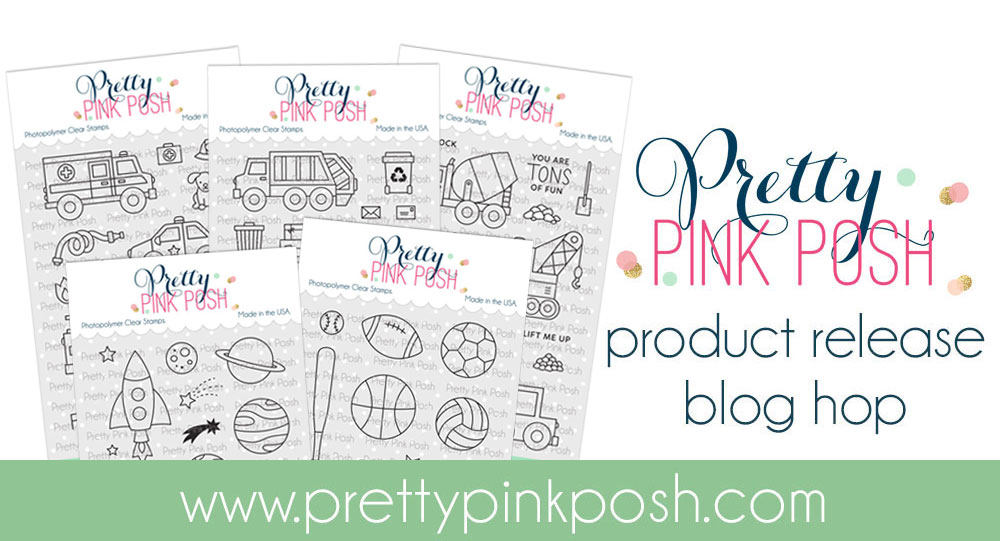
Day 3: June Blog Hop + Giveaway Post
If you missed Day 1 CLICK HERE // If you missed Day 2 CLICK HERE
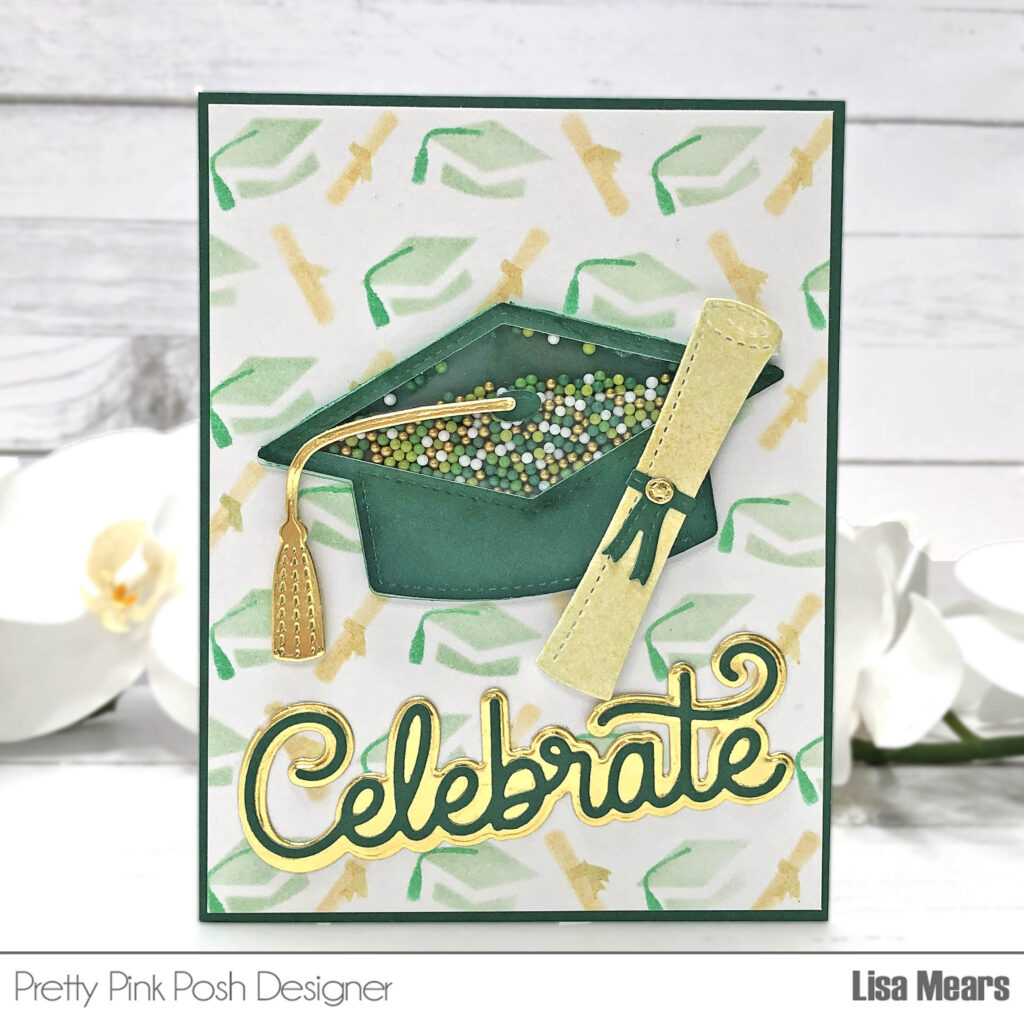
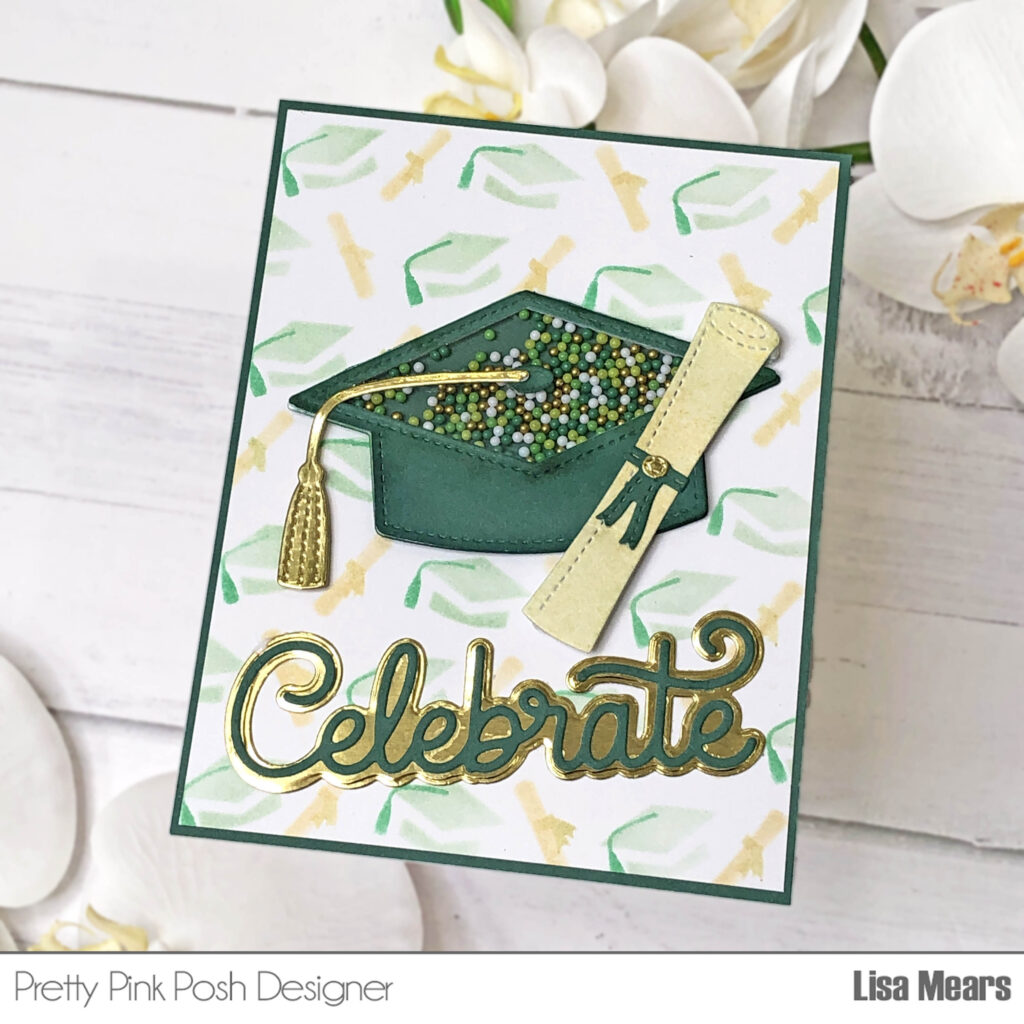
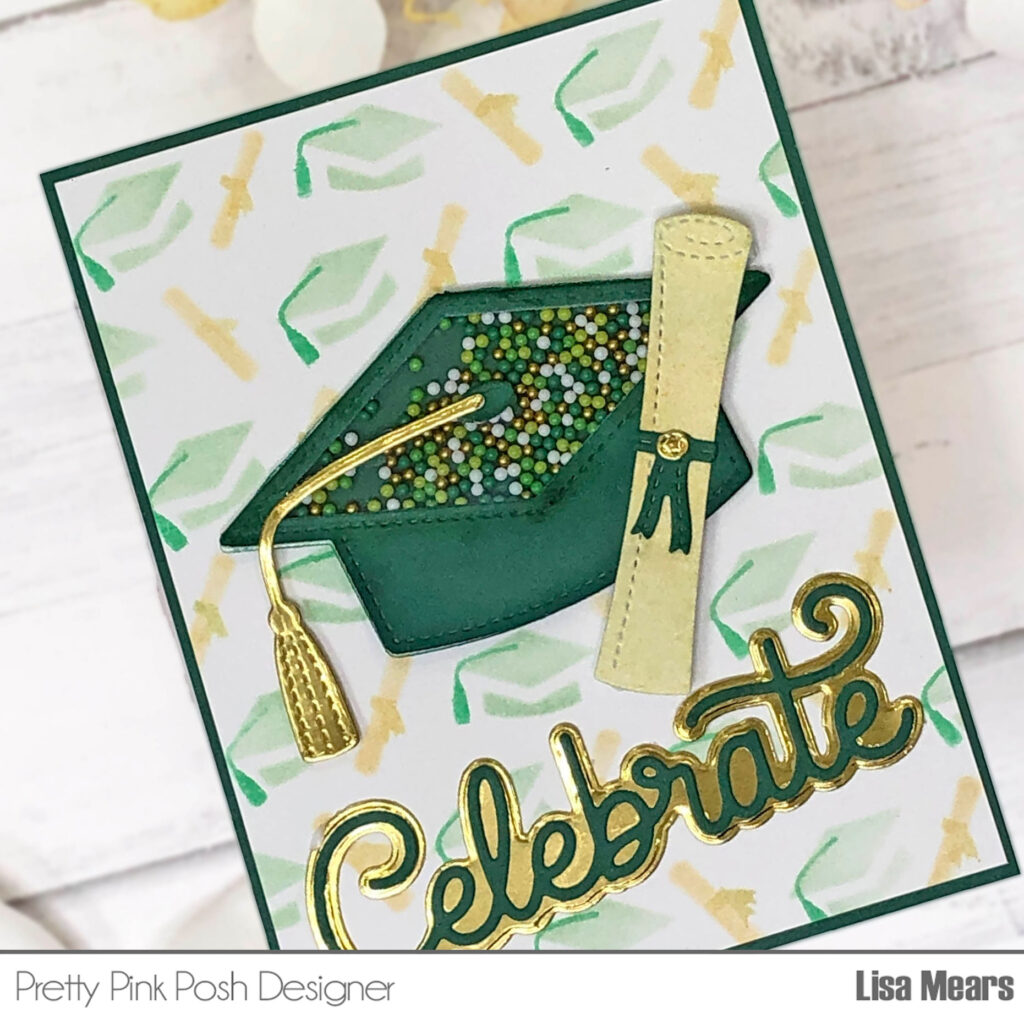
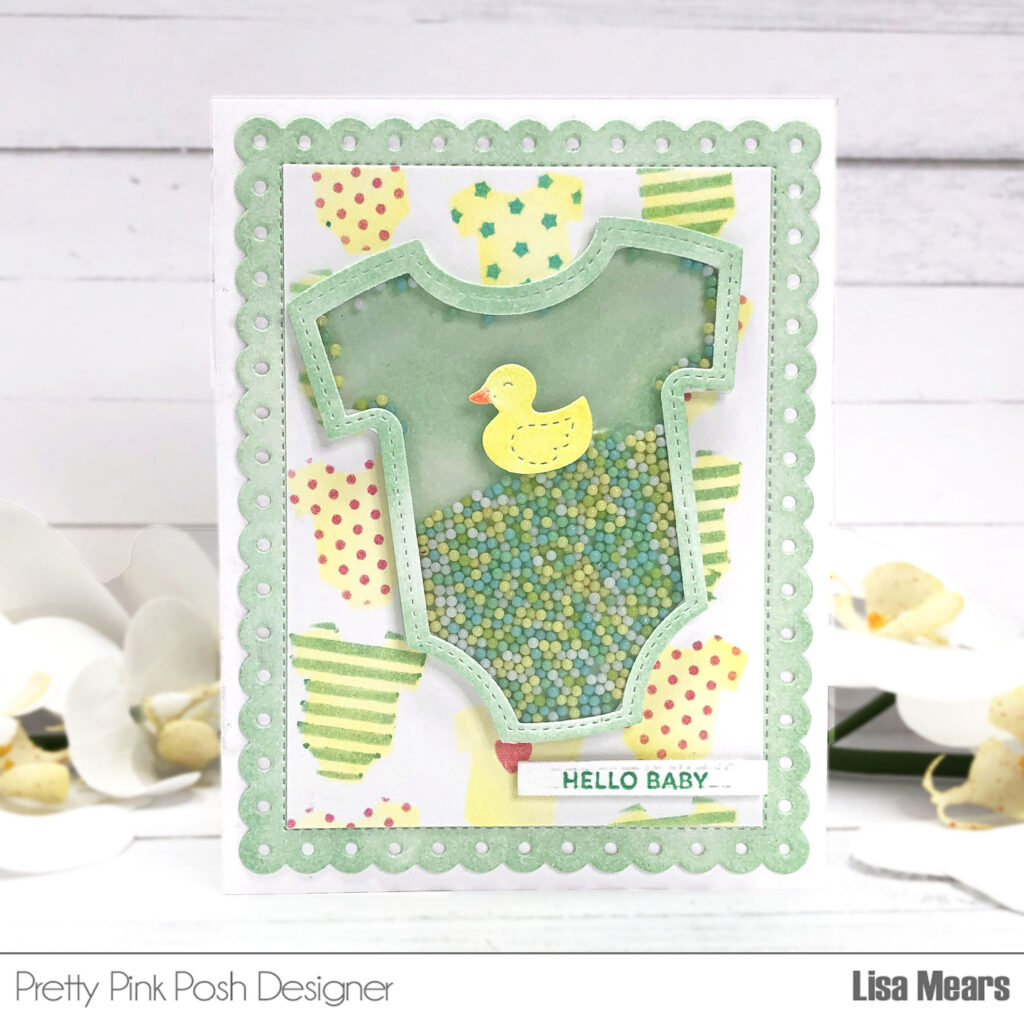
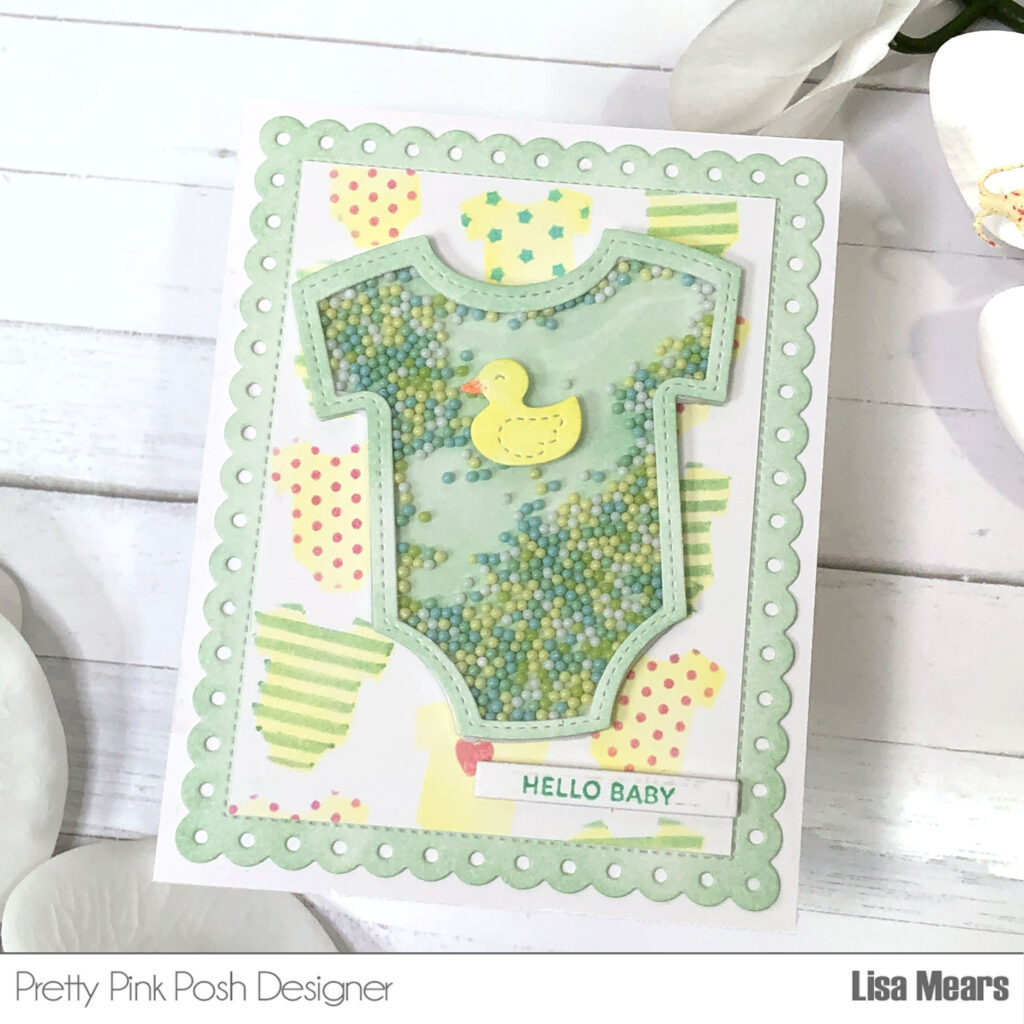
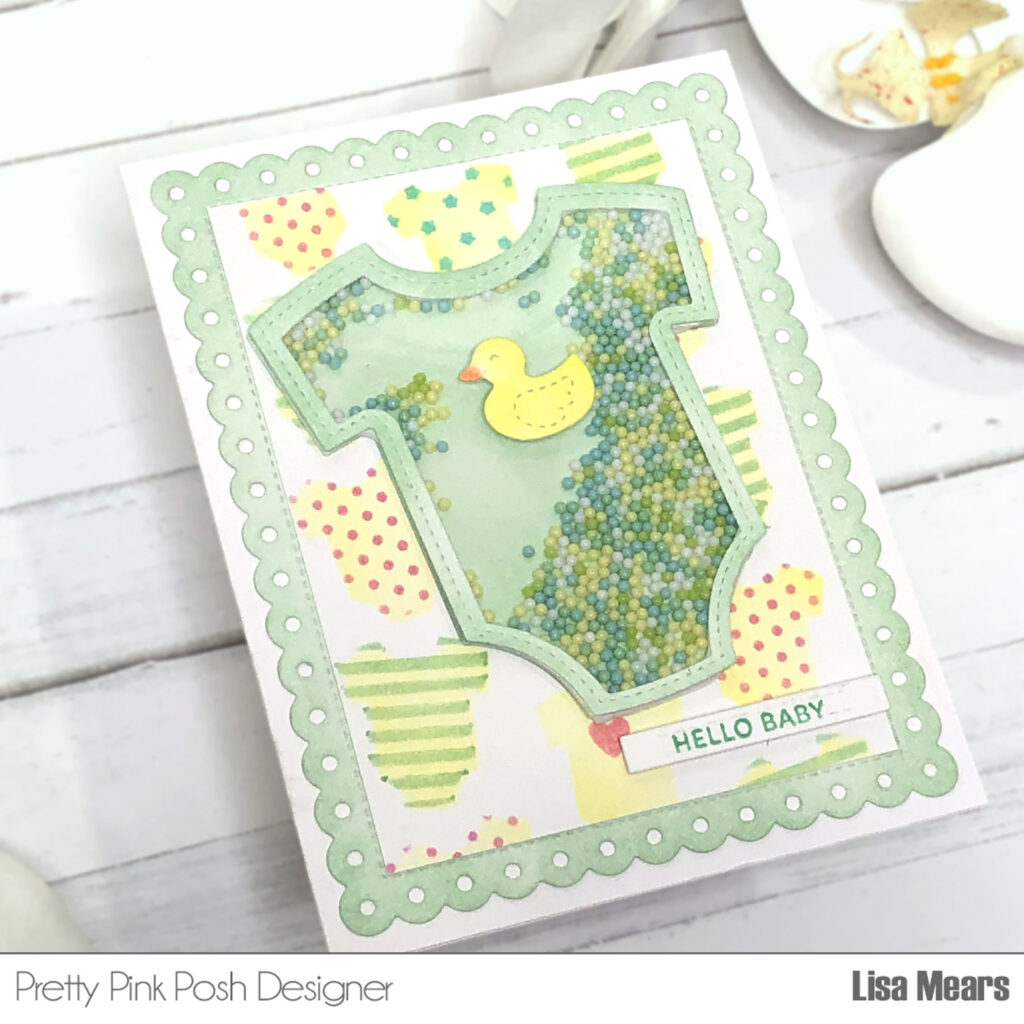
Hi friends. It’s Lisa Mears on the blog today sharing a rocket ship shaker card I made using some products from Pretty Pink Posh’s newest release.
Watch the video above I Watch the video in HD on YouTube
For the focal point of my card, I used the Rocket Ship Shaker die and added the Stargazing Clay Confetti inside. If you would like to see a video showing how I made the rocket ship shaker, watch the video below.
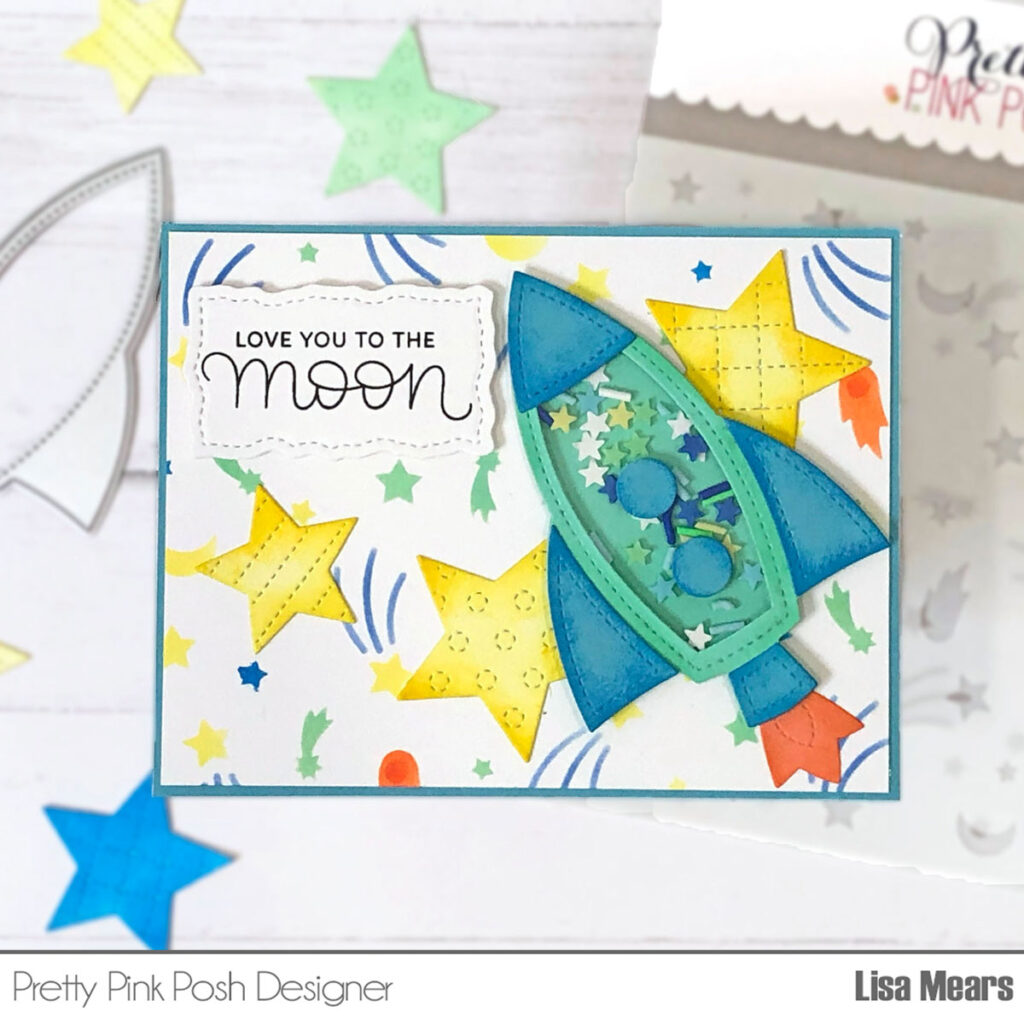
For the background of my card, I used the Layered Shooting Stars Stencil. I used Distress Oxide inks in the following colors: Ripe Persimmon, Cracked Pistachio, Salty Ocean, Prize Ribbon, and Squeezed Lemonade.
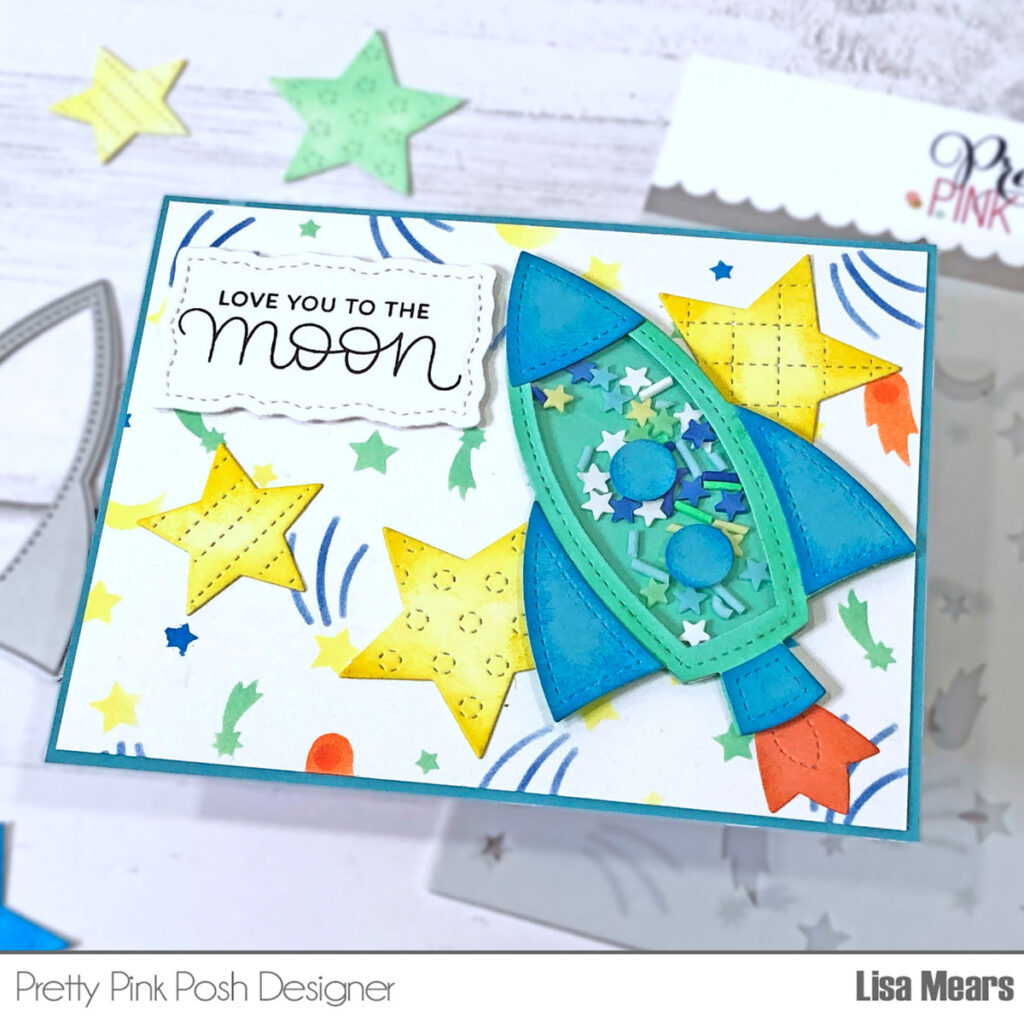
Using the Stitched Stars dies, I die cut three stars from white cardstock and added the Distress Oxide Squeezed Lemonade ink to the top. I added the Distress Oxide Mustard Seed ink to the edges of the stars to add some depth. I added the stars to the stenciled background and added the rocket ship on top.
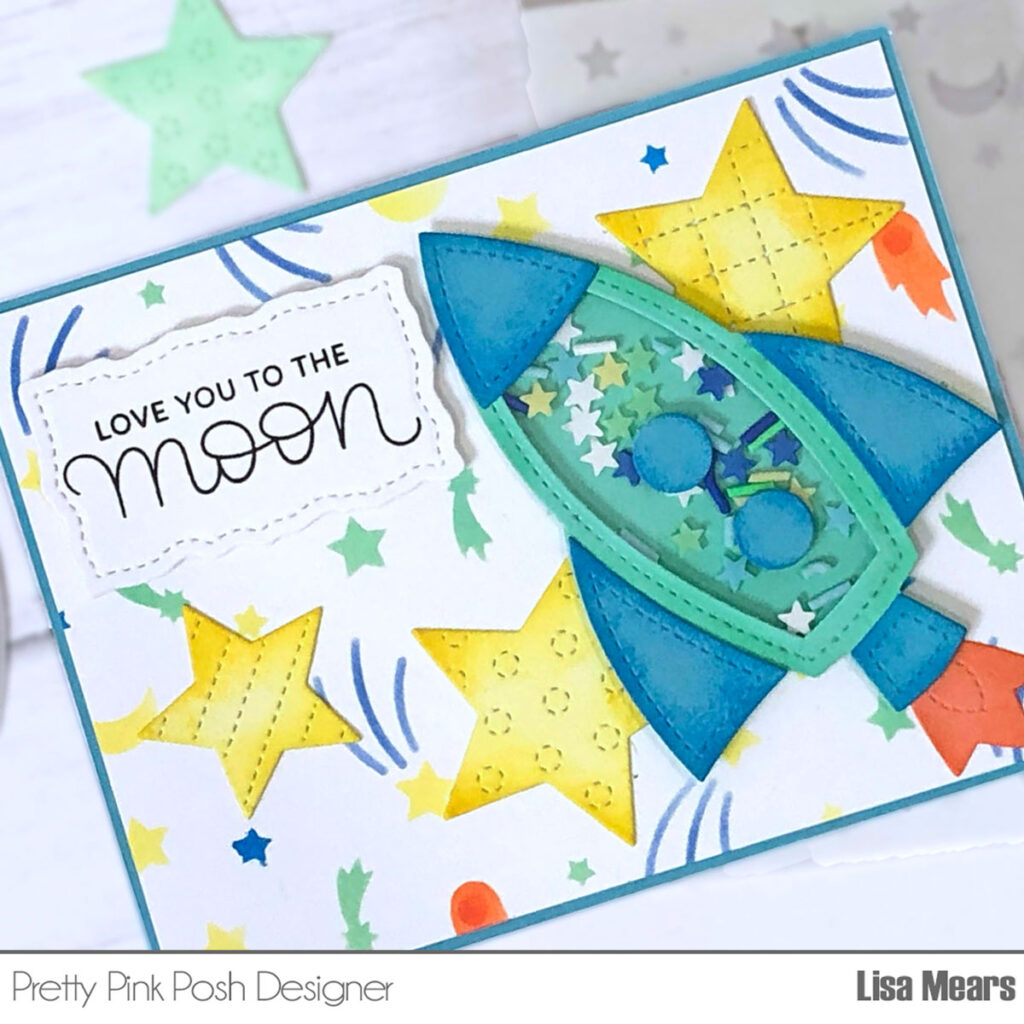
For the sentiment, I stamped one from the Outer Space stamp set and die cut with a Stitched Torn Rectangle die.
PRIZES: be sure to leave comments on each stop. We are giving away 3 $30 gift certificates to three random comments (1 winner each day) left before June 17, 2024 at 11:59 PM PST. I’ll be announcing the winners next week, so be sure to return and see if you are one of the winners.
Pretty Pink Posh blog << you are here
Lindsey Larsen
Zsofia Molnar
Rachel Kleinman
Dana Kirby
Kristie Marcotte
Annette Allen
Laura Evangeline
Thank you so much for stopping by today! Have a wonderful day!
Lisa Mears