
Happy New Year’s Card + Video
Hi, friends! It’s Lauren and I am back with a new video to celebrate the upcoming New Year! It’s hard to believe we’re moving into 2024 and I’m so excited to continue sharing inspiration with Pretty Pink Posh products with you.
Watch the video above I Watch the video in HD on YouTube
After gathering some colored cardstock, I added an A2 piece of dark green cardstock to my card base. I used the largest Eyelet Rectangle Die to cut a piece of dark blue cardstock and adhered it to the center of the card base.
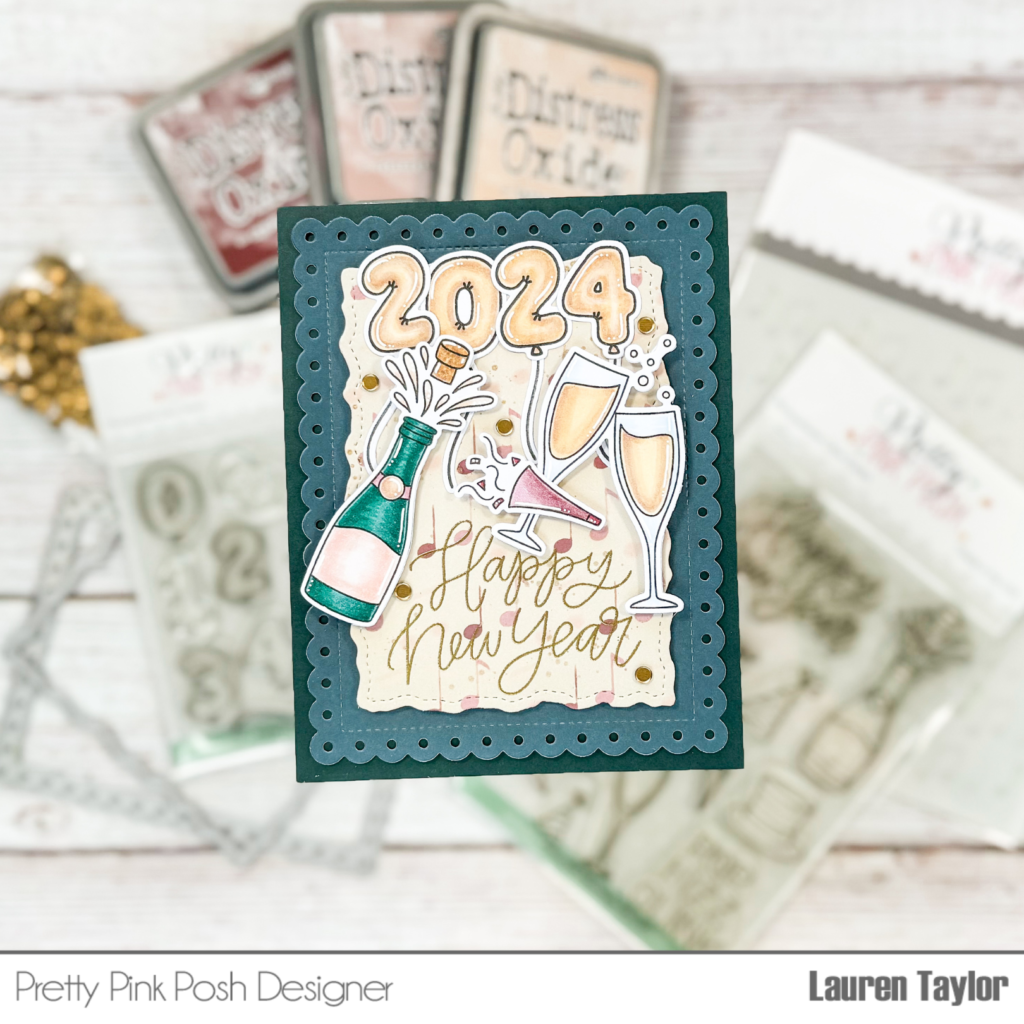
The next layer is a piece of cream cardstock and I stenciled Distress Oxides in Aged Mahogany, Tattered Rose and Victorian Velvet with the Layered Music Notes stencils. I splattered on some champagne gold watercolor to give it some shine and when it dried, I used the second largest Stitched Torn Rectangle Die to cut it out. Before attaching this piece to my card base with foam adhesive, I embossed the “Happy New Year” sentiment in gold from the Happy New Year stamp set.
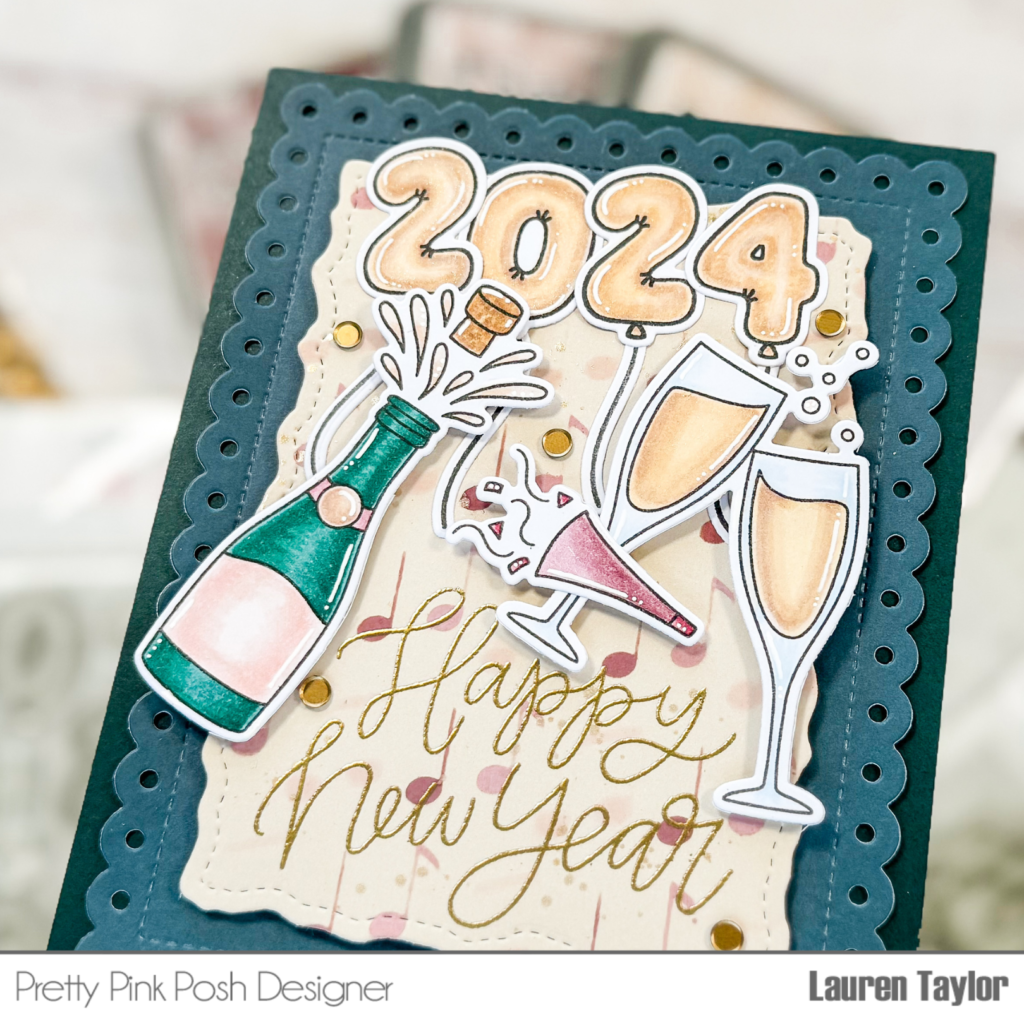
Using the Happy New Year stamp set and Balloon Numbers stamp set, I stamped my images with an alcohol marker friendly black ink. I used Ohuhu Art Markers to color my images; you can watch the video today to see the colors I used as well as how I added some white colored pencil and glitter markers to turn my balloons into mylar balloons! I used the Happy New Year coordinating dies and Balloon Numbers coordinating dies to cut out the images.
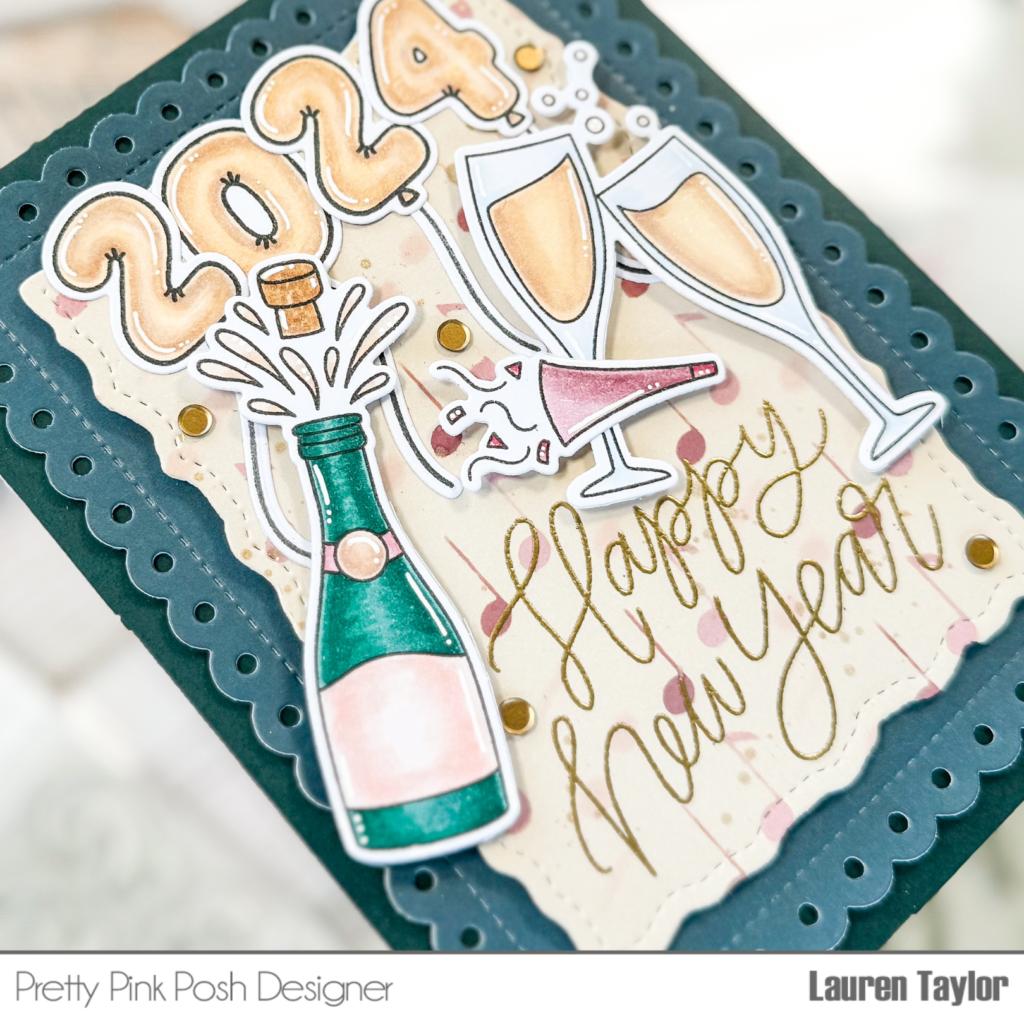
My balloons were added to the card base with liquid adhesive and I layered on the champagne bottle, champagne glasses and party horn with foam adhesive. For some final touches, I added sequins from the Matte Gold Confetti Mix around the card.
I hope you’re having a wonderful holiday season and I wish you a Happy New Year!
Such a card! Love the soft colors and all the details 😍