Clean and Simple Series

| |

Clean And Simple: Hummingbird Birthday

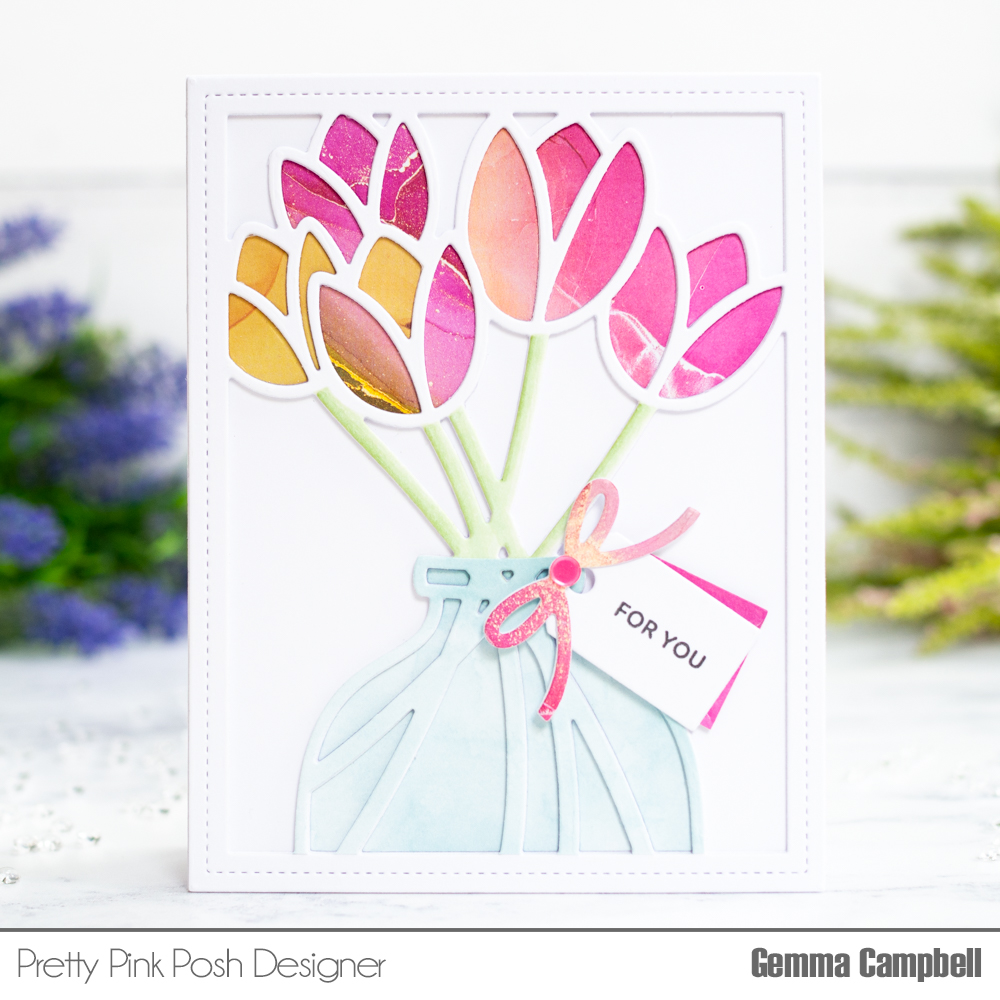
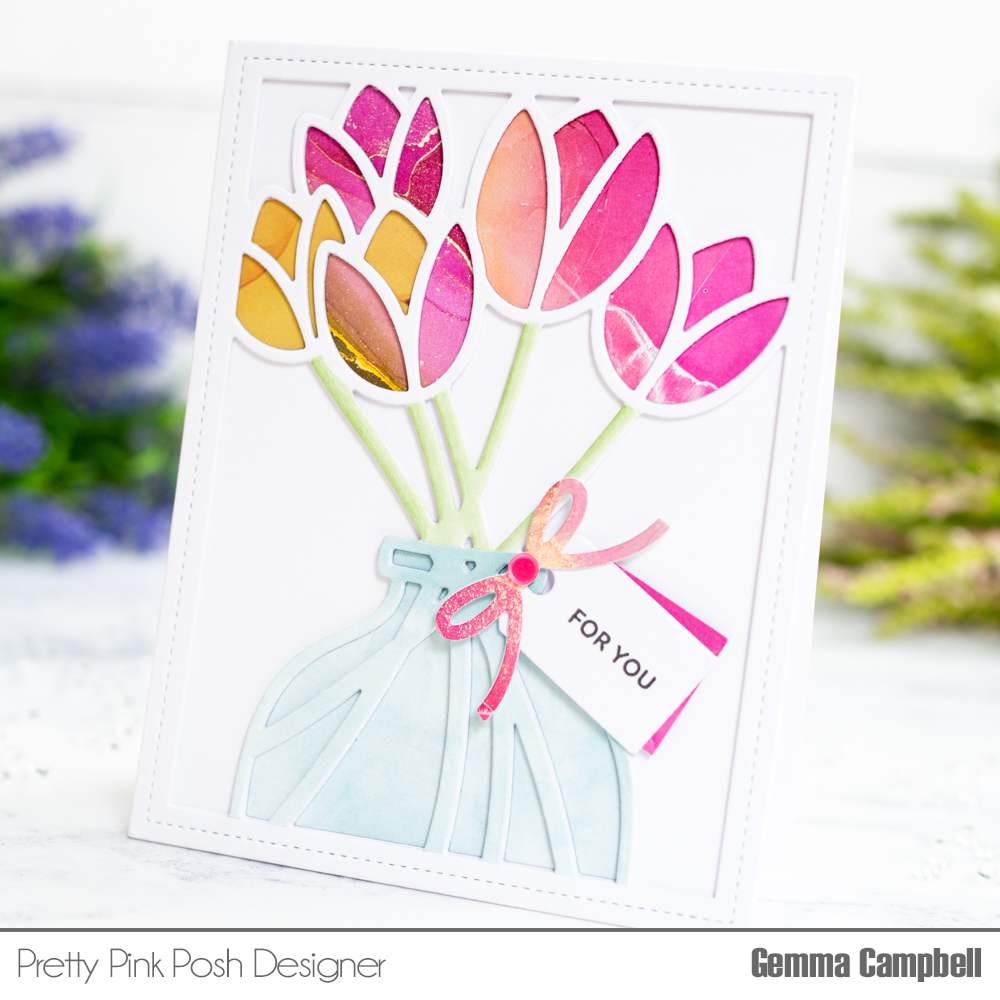
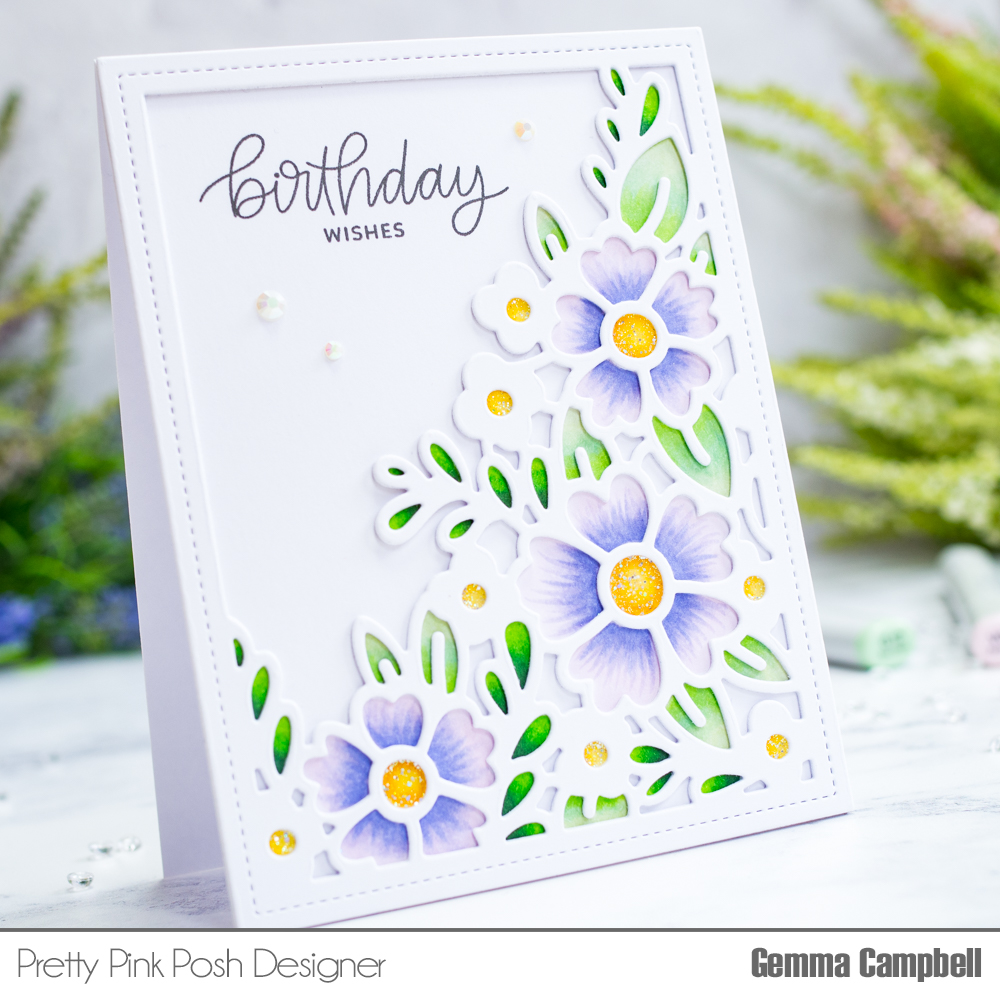
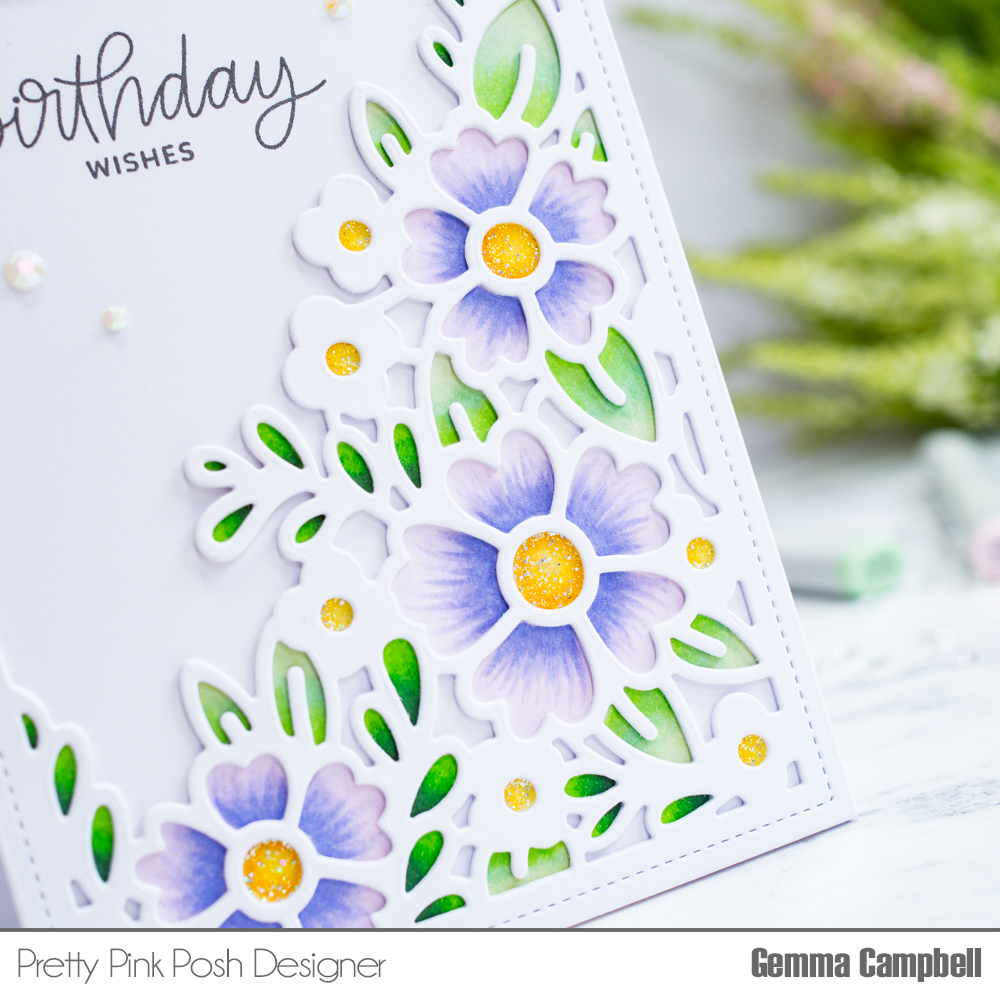
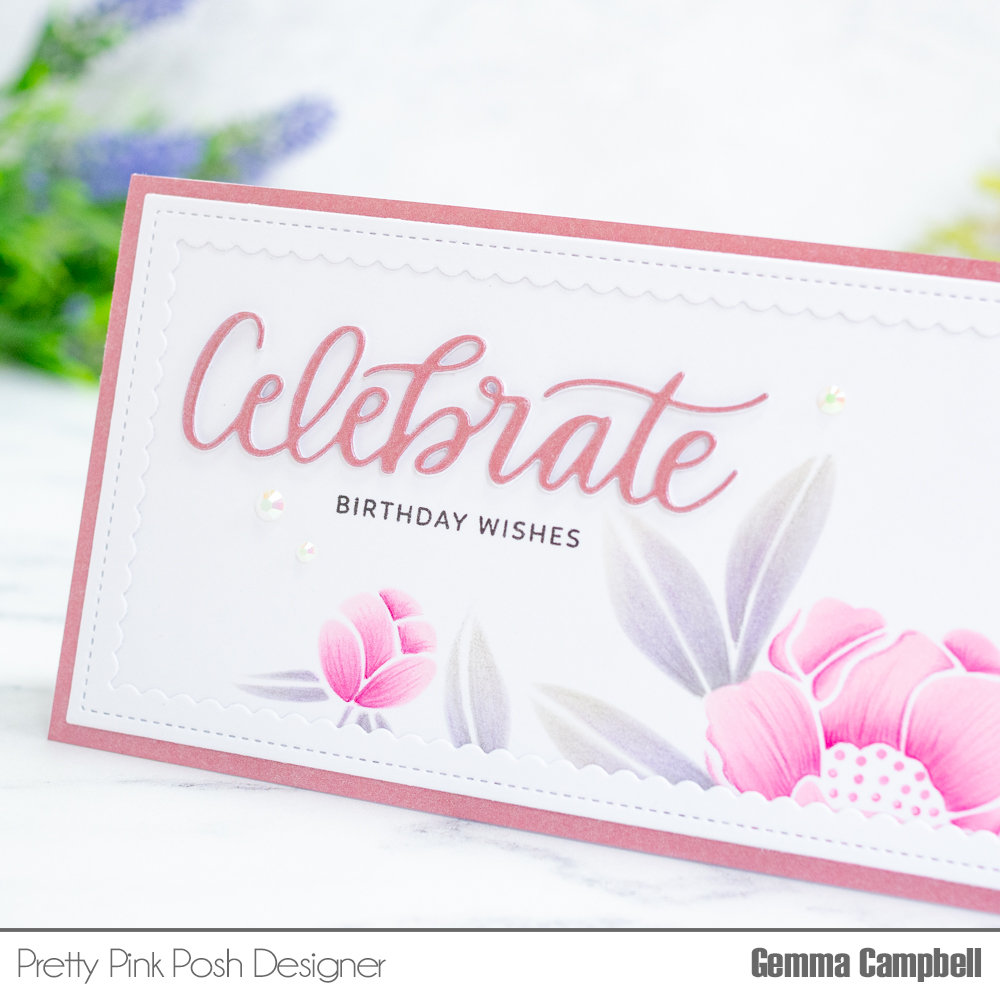
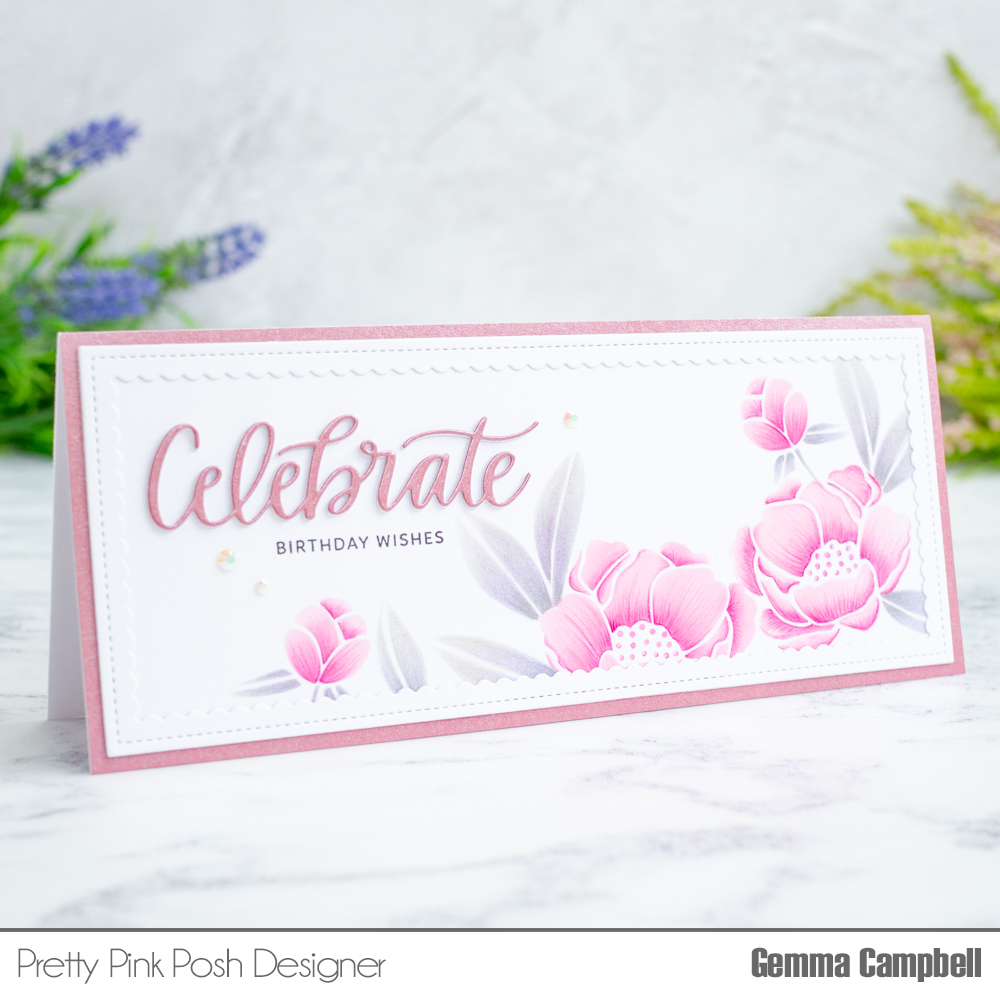
Hello, Gemma here for a new Clean and Simple post. I’ve used the Slimline Floral Cover die on my CAS card today. This pretty and intricate die looks beautiful with a clean and simple look.

Pretty Pink Posh- Clean And Simple: Hummingbird Birthday

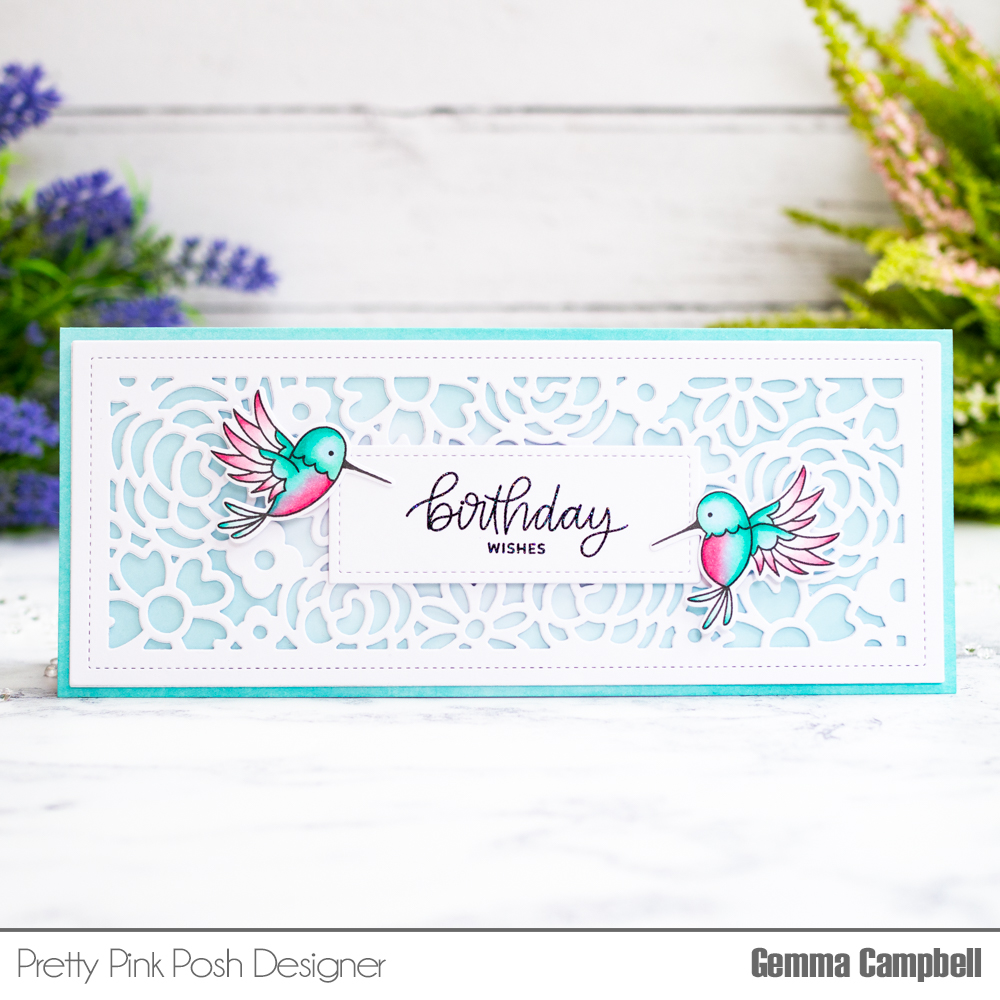
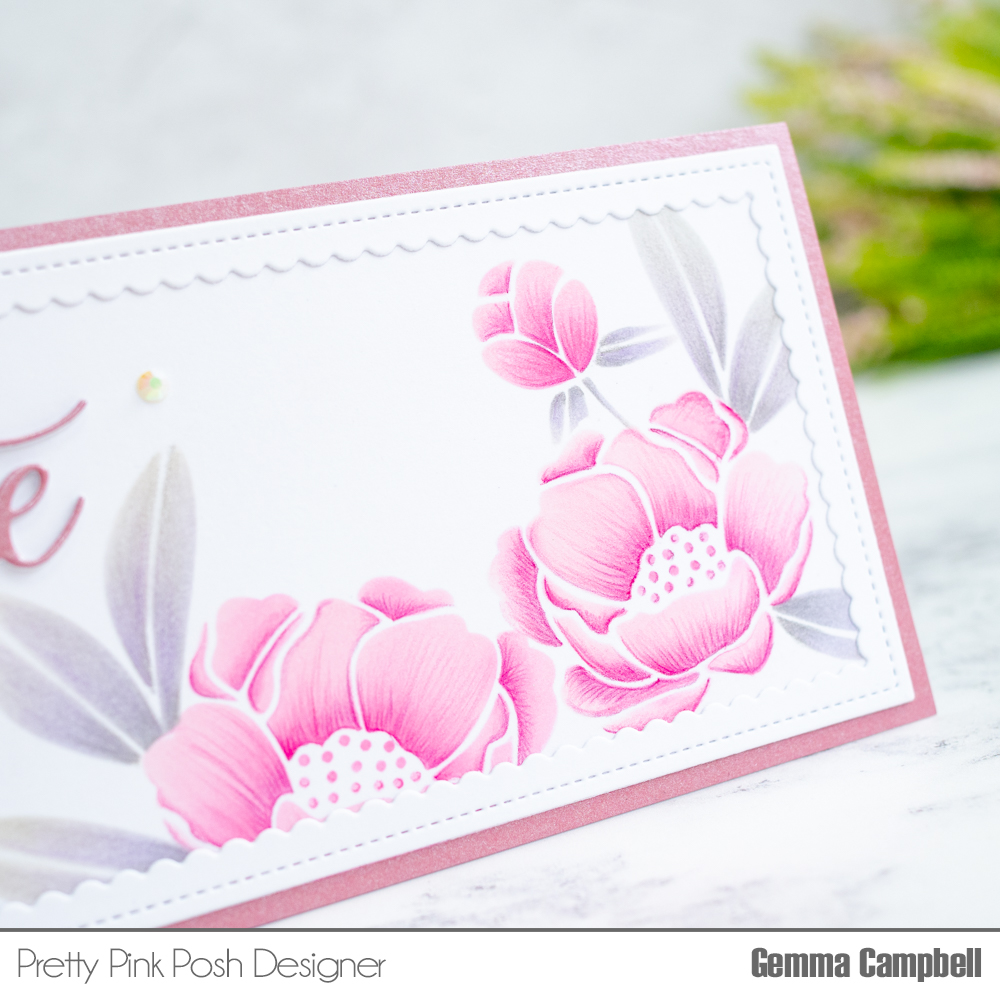
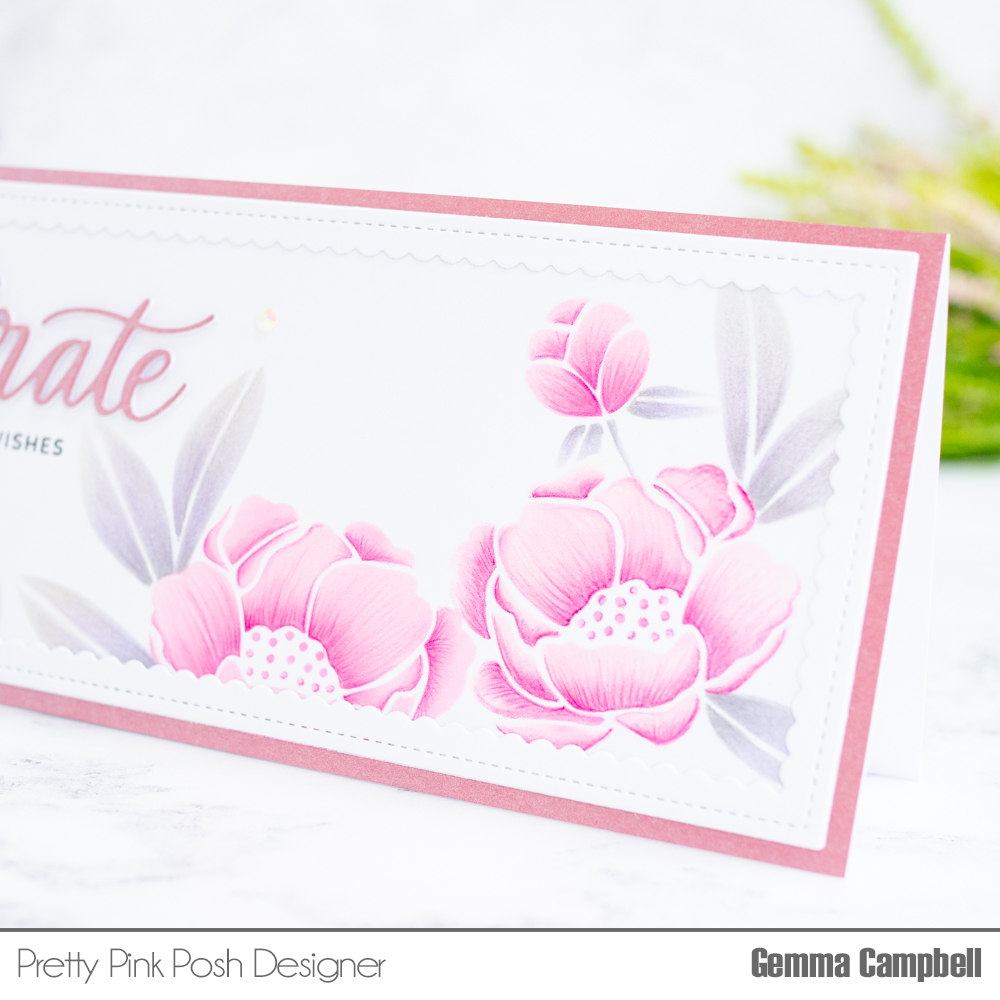
I began by die cutting the Slimline Floral Cover die twice from white card and layering them together for dimension.

On my slimline card base (3.5 x 8.5 inches) I blended on Salvaged Patina distress oxide ink.

Pretty Pink Posh- Clean And Simple: Hummingbird Birthday

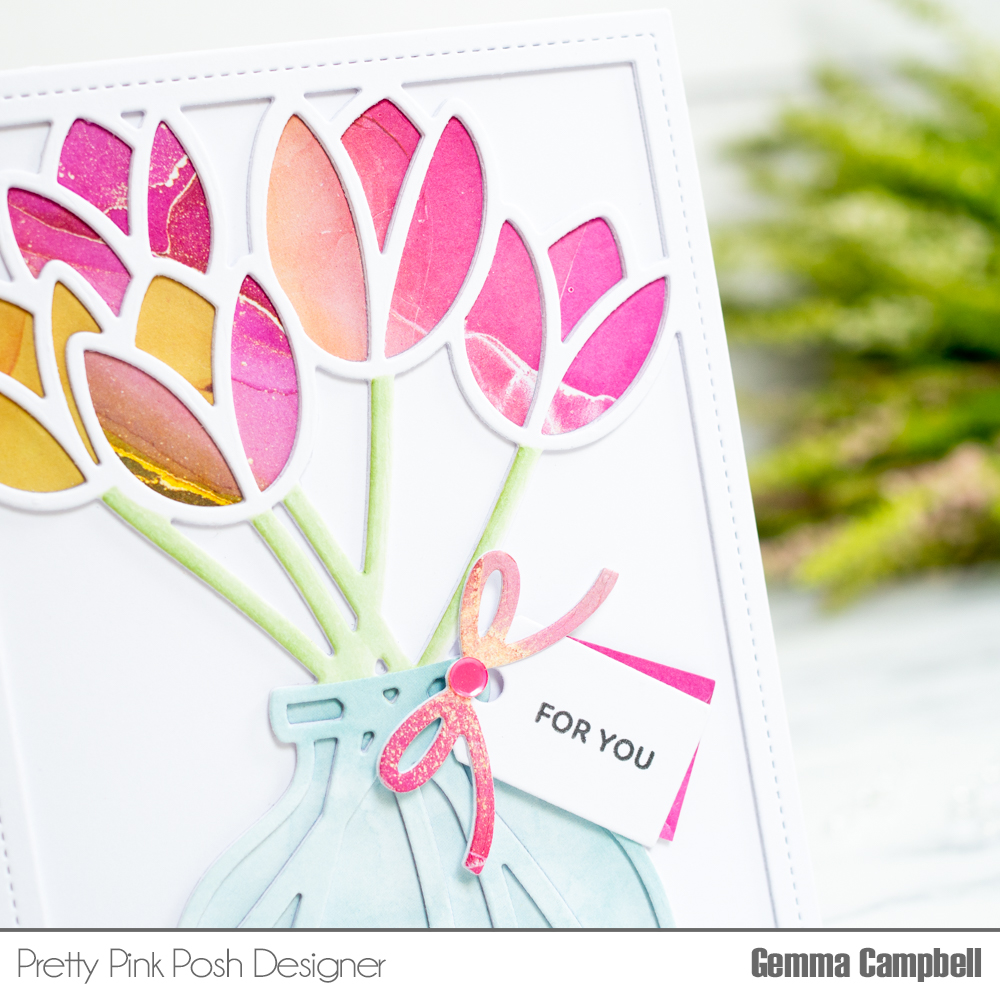
Next, I die cut a vellum panel, using a die from the Slimline Peekaboo Window die set. I adhered this behind the floral panel, before adding them to the card base. The vellum helps to diffuse the colour underneath.

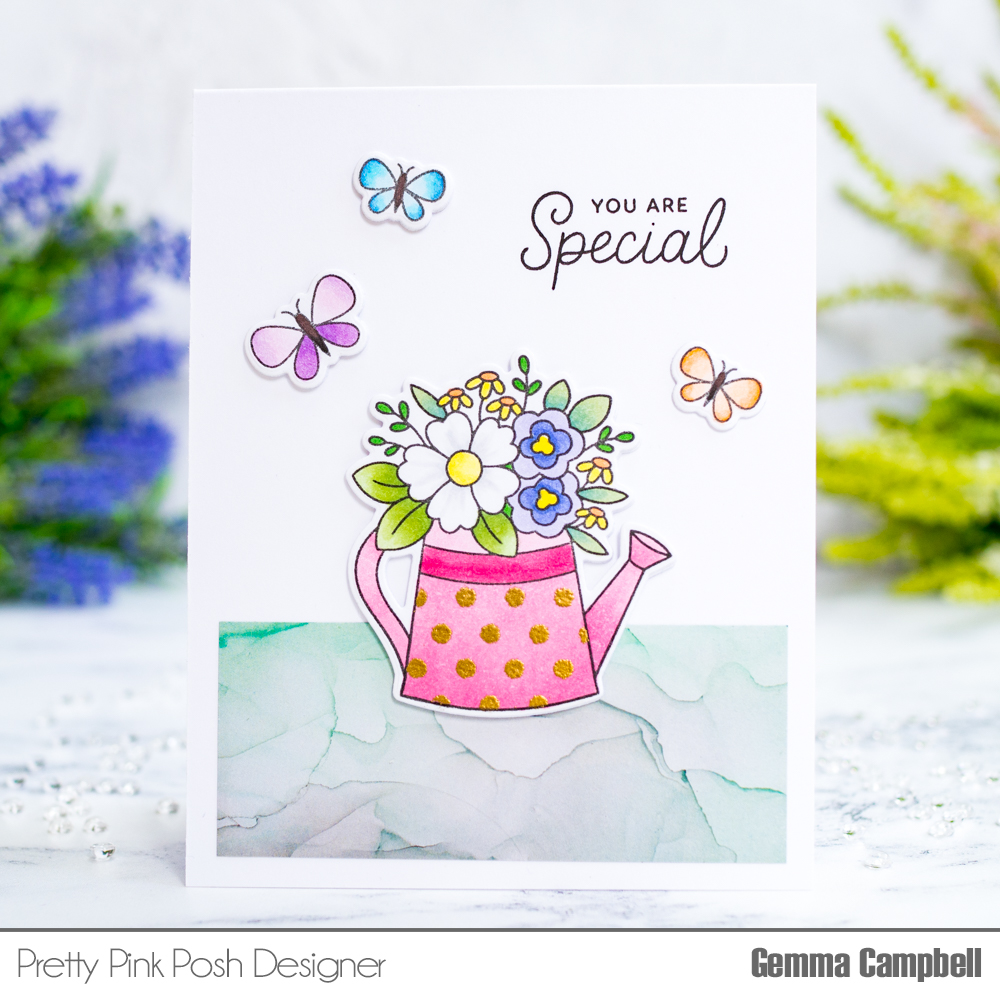
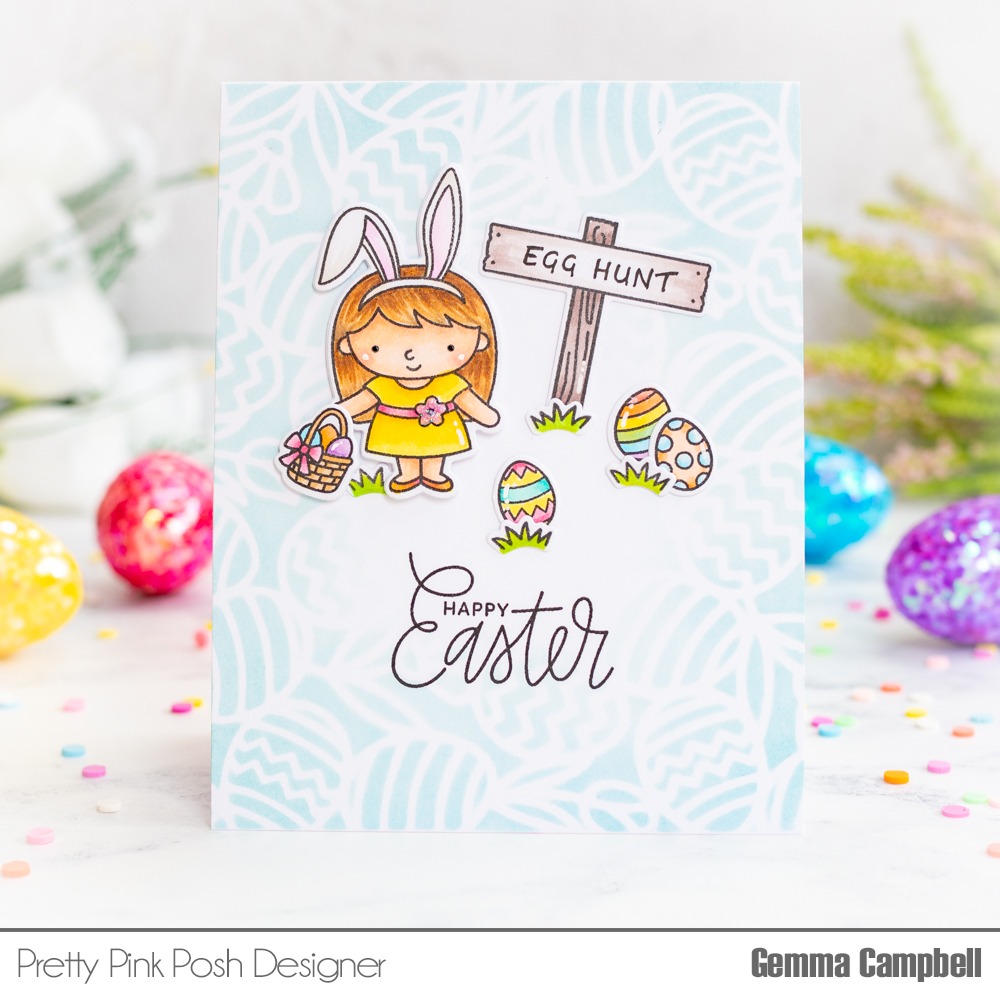
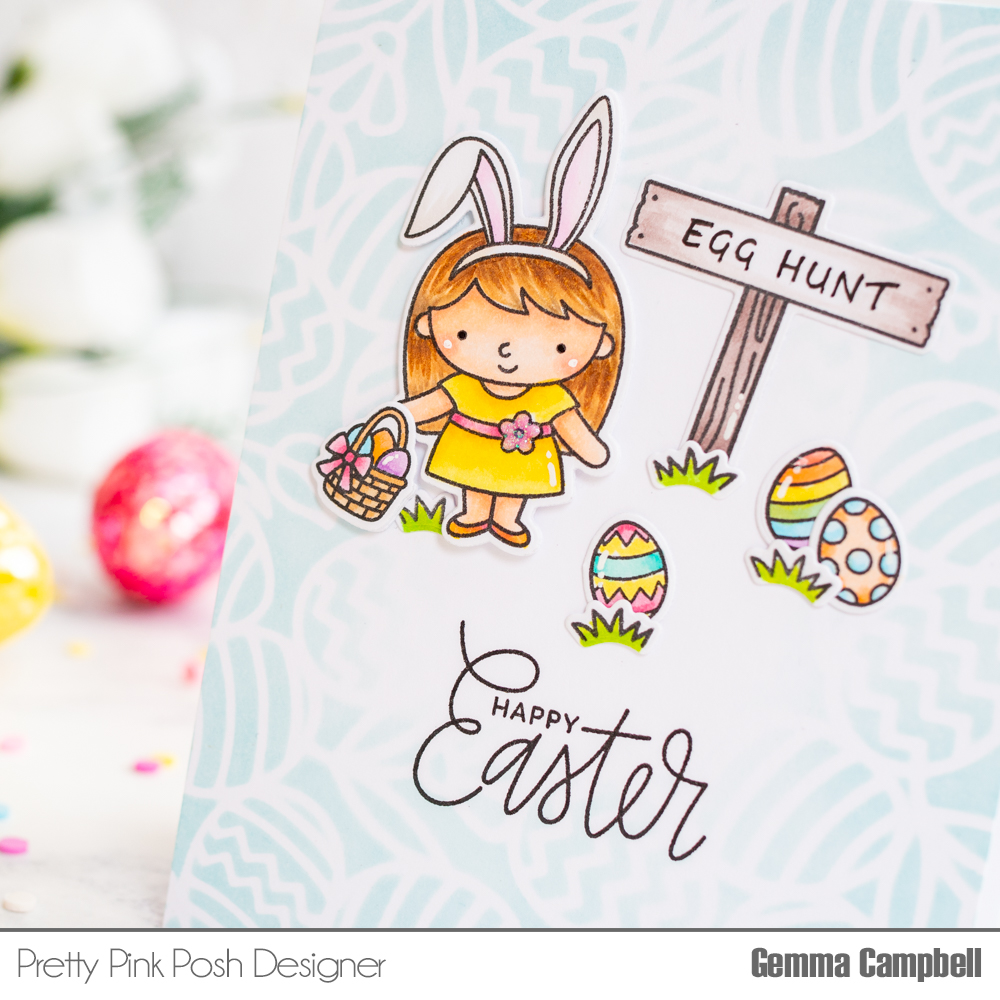
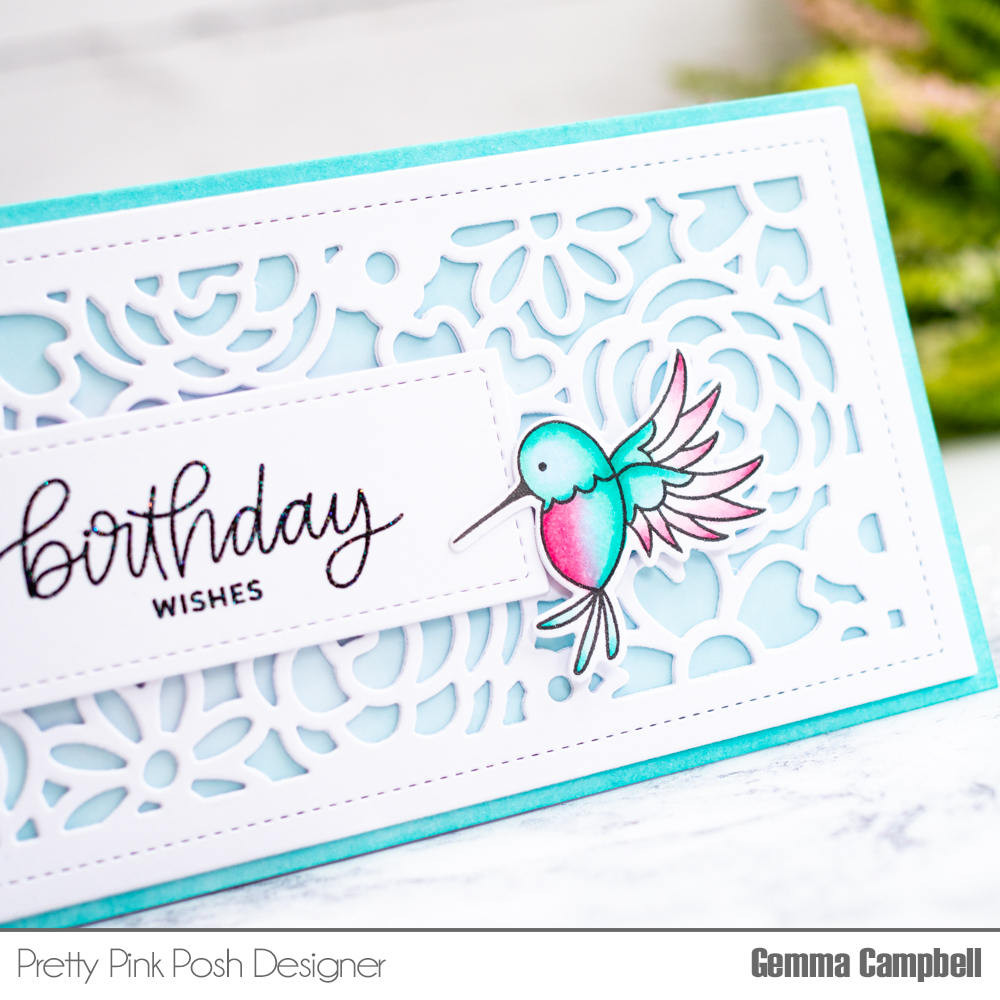
I stamped images from the Hummingbird Thanks stamp set and coloured them with copic markers (R81, R83, R85, BG000, BG11, BG13). I used the coordinating dies to cut them out.

Pretty Pink Posh- Clean And Simple: Hummingbird Birthday

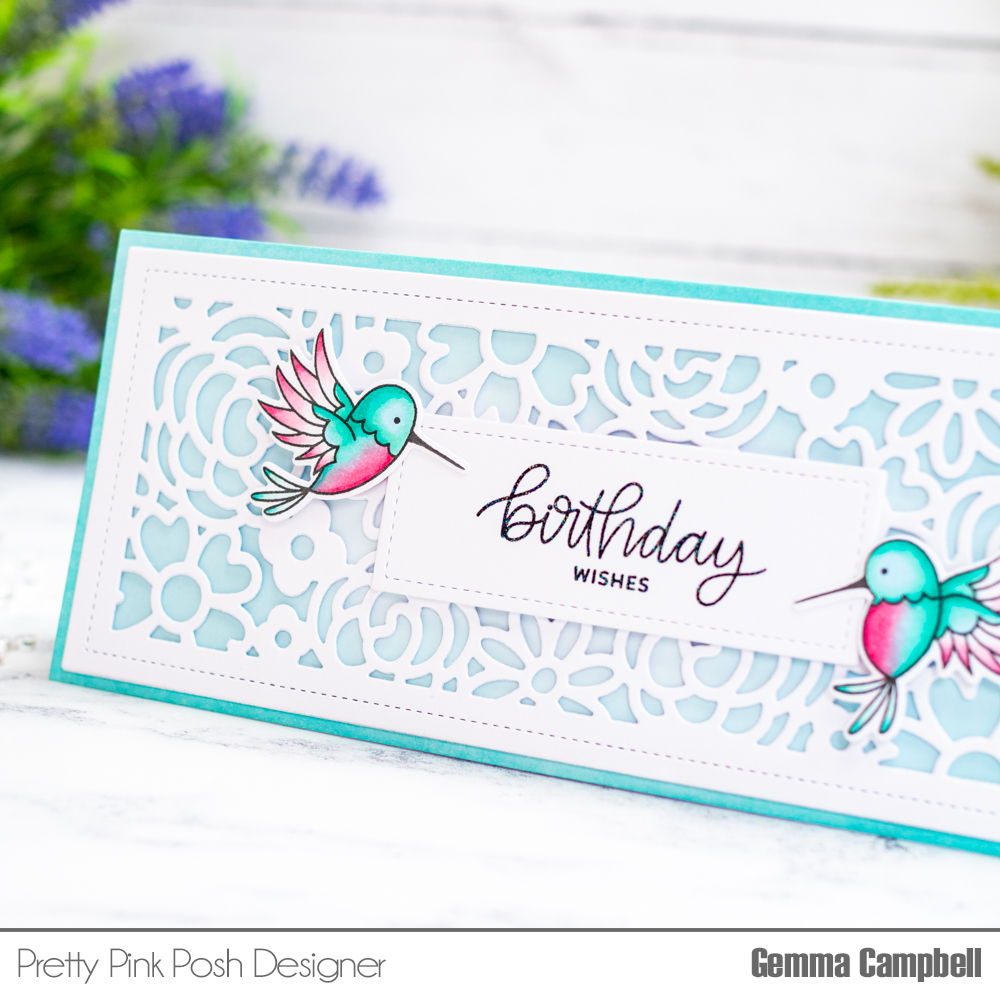
I found the perfect stitched rectangle for my sentiment from the Storybook 2 die. I die cut it three times from white card. On one of the pieces, I stamped a sentiment from Birthday Friends with Versafine Onyx Black ink, then heat embossed with a clear embossing glitter.

Pretty Pink Posh- Clean And Simple: Hummingbird Birthday

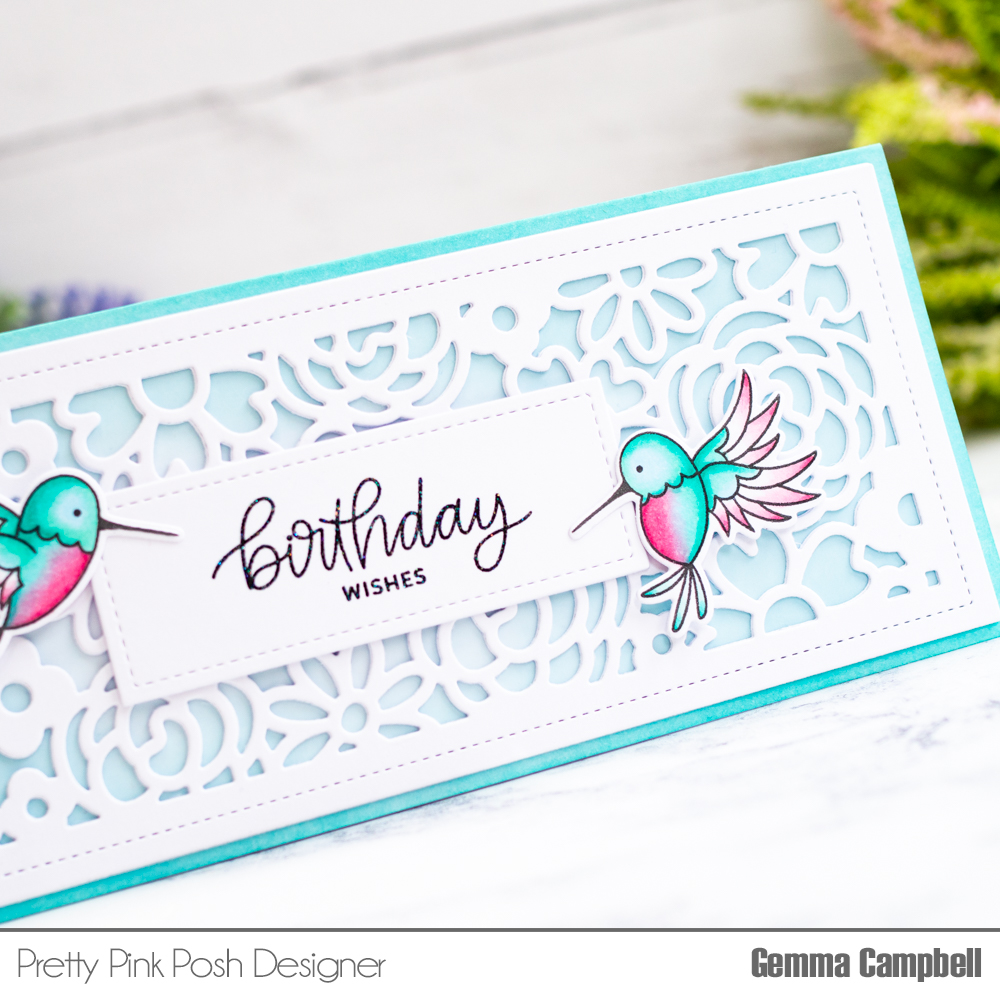
I adhered the three layers together for dimension, then added to the centre of my slimline card. Finally, I used foam tape to add the hummingbirds either side of the sentiment panel.

Thank you for stopping by today!

| |

Clean and Simple: Pretty Tulips

Pretty Pink Posh- Clean and Simple: Pretty Tulips

Hello, Gemma here for a new Clean and Simple post. Today I have a floral CAS card to share, using the Tulip Cover Plate die. This beautiful die is perfect for clean and simple cards. I love the possibilities for adding colour to the flowers.

Pretty Pink Posh- Clean and Simple: Pretty Tulips

I die cut 3 layers of the Tulip Cover Plate die from white card. This gives some great dimension to the card.

Pretty Pink Posh- Clean and Simple: Pretty Tulips

I used a light green copic marker to add some colour to the tulip stems. For the tulips and the vase, I die cut some patterned paper to piece into the cover die.

Pretty Pink Posh- Clean and Simple: Pretty Tulips

The Tulip Cover Plate die includes a tag and a bow die. I layered a patterned paper bow over a white card bow for stability. For the white tag, I stamped a sentiment from the Let’s Party stamp set, then layered it over a patterned paper tag, offset for a spot of colour behind.

Pretty Pink Posh- Clean and Simple: Pretty Tulips

I adhered the tag and bow, and added a sequin from the Valentine confetti mix in the centre of the bow to finish.

Thank you for stopping by today!

| |

Clean and Simple: Flower Bouquet

Pretty Pink Posh- Clean and Simple: Flower Bouquet

Hello, Gemma here for a new Clean and Simple post. Today I’m using the new Flower Bouquets stamp set from the May release on my card today. These beautiful floral arrangements make it so easy to create simple but pretty CAS cards.

Pretty Pink Posh- Clean and Simple: Flower Bouquet

I stamped one of the images from the Flower Bouquets stamp set and coloured it with copic markers. These are the colours I used:

  • BG72, YG61
  • G07
  • G40, G43, G24
  • BV00, BV02, BV04
  • R81, R83, R85
  • N0, N1
  • Y11, Y13, Y15
  • YR02
Pretty Pink Posh- Clean and Simple: Flower Bouquet

In addition, I stamped some butterflies from the previously released Mom stamp set. I used the following copic colours:

  • YR000, YR02
  • B000, B00, B34
  • V01, V12, V15

After die cutting the images with the coordinating dies, I added some extra layers for dimension.

Pretty Pink Posh- Clean and Simple: Flower Bouquet

I thought the watering can would look fun with a pattern. Using the new Mini Polka Dots stencil, I inked through the stencil with clear embossing ink, then heat embossed the pattern with gold embossing powder. I used some simple masking with washi tape so I only inked the area of the watering can that I wanted the pattern on.

Pretty Pink Posh- Clean and Simple: Flower Bouquet

On my A2 card base, I stamped the sentiment from the Flower Bouquets stamp set. To help ground my floral image, I cut a piece of patterned paper to adhere to the card base. Finally, I added my flower bouquet and butterflies to finish my card.

Thank you for stopping by today!

| |

Clean and Simple: Fun Celebration

Pretty Pink Posh- Clean and Simple: Fun Celebration

Hello, Gemma here today with a fun celebration CAS card. My card base is 4.75 inches, which is a size that I’m enjoying using at the moment.

Pretty Pink Posh- Clean and Simple: Fun Celebration

I began with a square card panel at the same size as my card base. As I’m embossing, I like to work on a separate panel which I can then adhere to my card base. It means I don’t warp the card base with the heat of the embossing tool.

I heat embossed, in gold, a border from the Love Borders stamp set along the bottom of the card panel. On a separate piece of white card, I embossed the wine glasses from the Happy New Year stamp set.

Pretty Pink Posh- Clean and Simple: Fun Celebration

I used Zig real brush markers to colour the images. The colours I used are:

  • 201 Pink Haze, 200 Almond Pink
  • 302 Haze Blue, 36 Light Blue
  • 55 Pale Yellow, 51 Lemon Yellow
  • 73 Vanilla, 54 Pale Orange, 52 Bright Orange
  • 303 Shadow Mauve, 806 Pale Violet
  • 49 Green Shadow, 45 Pale Green
Pretty Pink Posh- Clean and Simple: Fun Celebration

I die cut the glasses with the coordinating die, adding two die cut layers behind for dimension.

The sentiment is from the Happy New Year stamp set. I love this fun sentiment. I stamped it with black ink, then adhered the wine glasses underneath.

Pretty Pink Posh- Clean and Simple: Fun Celebration

I added the panel to my card base, trimming away anything overhanging the edges. I also added some clear glitter pen to the glasses. Although it’s tricky to capture this in the photos, it’s very pretty in real life.

I think this design could work for many celebrations, including birthdays, engagements, weddings, and anniversaries.

Thank you for stopping by today!

| |

Clean and Simple: Die Cut Window

Pretty Pink Posh- Clean and Simple: Die Cut Window

Hello, Gemma here. It’s time for a new installment of Clean and Simple. For my CAS card today, I’m using the new Floral Corners stamp set. By using a die cut window, it’s easy to create a corner for the beautiful floral image to sit upon.

Pretty Pink Posh- Clean and Simple: Die Cut Window

I stamped the Floral Corners image in grey ink, which gives a softer look to the image than regular black ink. I coloured the image with copic markers, using the following colours:

Pretty Pink Posh- Clean and Simple: Die Cut Window
  • Leaves: YG01, YG03, YG17, G46
  • Pink flowers: RV00, RV10, RV52, RV34, RV66
  • Yellow flowers: Y13, Y15, Y38, YR27
  • Blue flowers: B91, B52, B34

I die cut the image with the coordinating die, layering two more die cuts behind for dimension.

Pretty Pink Posh- Clean and Simple: Die Cut Window

To ground the floral corner on my card, I die cut a Stitched Diamond from a piece of white card. I allowed it to go off the edge of the panel for interest.

On my card base, I blended Spun Sugar and Kitsch Flamingo distress oxides over the Pretty Petals stencil. This gives a soft pattern visible through the diamond window when the panel is adhered to the card.

Pretty Pink Posh- Clean and Simple: Die Cut Window

I stamped a sentiment from Simple Sentiments over the stenciled area on the card, with some Pearl White jewels added around it for sparkle. I then adhered the Floral Corners image on the edge of the diamond window to finish.

Thank you for stopping by today!

| |

Clean and Simple: Spring Corner Frame

Pretty Pink Posh- Clean and Simple: Spring Corner Frame

Hello, Gemma here with a new post for my Clean and Simple series.

My card today features the pretty Spring Corner Frame die. I love cover dies as they are so versatile. They work with lots of different colouring mediums and you can create beautiful CAS cards quickly and easily.

Pretty Pink Posh- Clean and Simple: Spring Corner Frame

I die cut the Spring Corner Frame die three times from white card. I had added some double sided adhesive sheet behind the white card pieces before die cutting, as this makes it really easy to adhere the layers together.

I adhered one layer of the die to an A2 panel of white card. You could adhere it directly to a white card base, but as I am colouring with copic markers, I didn’t want the colouring to show through to the inside of the card.

Pretty Pink Posh- Clean and Simple: Spring Corner Frame

Using copic markers, I added colour to the open areas of the die cut. It doesn’t matter if you colour on the die cut accidentally, as it’ll be covered up with more die cuts later. Just try not to colour outside of the die cut.
I used the following copic colours:

  • Flower petals: V000, BV00, BV02
  • Flower centres: Y11, Y13, Y15, YR23
  • Leaves: G40, G12, YG05 (lighter leaves), YG05, G07, G28 (darker leaves)
Pretty Pink Posh- Clean and Simple: Spring Corner Frame

Next, I adhered the second layer, which hides any messy colouring, giving a beautiful clean look. I added this panel to a white card base.

In the centre of the flowers, I added some Nuvo Crystal Glaze. Over the glaze, I sprinkled some glitter so the flower centres would have a sparkly look. I then left the panel to dry.

Pretty Pink Posh- Clean and Simple: Spring Corner Frame

Once dry, I adhered the final layer of the die cut. This is optional but I like the extra dimension it gives. To finish, I stamped a sentiment from the Birthday Friends stamp set and added some Pearl White jewels.

The Spring Corner Frame die is a beautiful cover die to have in your collection. I think it’s perfect for so many occasions. If you love to paper piece, you could use coloured card stock or even patterned paper for the flowers and leaves. So many possibilities!

Thanks for stopping by, I hope you were inspired!

| |

Clean and Simple: Sweet Easter

Hello, Gemma here with a new post for my Clean and Simple series.

Stencils are a great way to add interest to a CAS card. By keeping the inking soft and just around the edges, the eye is drawn towards a focal area in the centre of the card. Perfect for a sweet Easter scene.

Over my white A2 card base, I layered the Easter Background Stencil. I blended tumbled glass distress oxide through the stencil, inking just the edges and leaving the centre white.

I had an idea for an Easter egg hunt scene. I found the perfect sign post in the Camping Friends stamp set. After copic colouring the image, I wrote my own message on the board using a copic multi-liner pen. I also got the grass images from the same stamp set.

The sweet girl, Easter eggs, basket and sentiment are all from the Easter Friends stamp set. I coloured the images with copics and die cut them out with the coordinating dies.

I adhered some extra layers behind the girl and her basket, so there’s some dimension in the scene. For finishing touches, I added white gel pen details and some Nuvo White Blizzard glitter drops to the flower.

Thank you for stopping by today!

| |

Clean and Simple: Off the Edge Cutting

Pretty Pink Posh- Clean and Simple: Off the Edge Cutting

Hello, Gemma in for another installment of my series. For my CAS card today, I’ve used a technique that Jennifer McGuire showcased a few years ago, called Off-The-Edge Die Cutting. I tried this technique out at the time and really loved the effect. It works really well for CAS cards too.

Pretty Pink Posh- Clean and Simple: Off the Edge Cutting

I’m using the new Party Days stamp set and coordinating dies for my off-the-edge die cut CAS card. I began with a piece of card cut to 8.5 x 5.5 inches, and I drew a pencil line down the centre of the longest edge at the 4.25 inch point.

Pretty Pink Posh- Clean and Simple: Off the Edge Cutting

I used washi tape to temporarily adhere the cupcake border coordinating die so it sits with part of the die underneath the pencil line, but most of it above. As I want to partially die cut this border, I placed the edge of my die cutting plate along the line, and ran it through my die cutting machine so it only cuts above the pencil line.

Pretty Pink Posh- Clean and Simple: Off the Edge Cutting

For the areas between the cupcakes that didn’t cut, I used a metal ruler and a craft knife. I am then left with a piece of card with the cupcake border cut at the top. The panel can be trimmed down to 4.25 inches high so it will still fit in a standard sized envelope.

At this point, you can stamp directly on to the die cut edge, but I decided to stamp and die cut a separate cupcake border to adhere over the top. By layering over the top, the partial die cut edge gives stability and the separate border means the copic colouring doesn’t show up on the reverse.
I coloured the cupcakes border with a pastel rainbow of copic markers, then die cut it with the coordinating die. Before adhering it to my die cut panel, I blended some spun sugar distress oxide ink onto the panel, fading it out to white.

Pretty Pink Posh- Clean and Simple: Off the Edge Cutting

I trimmed the panel down to shorter than 4.25 inches so I could add a patterned paper border. I adhered some rainbow paper on a landscape A2 card base, then adhered the panel so the cupcake border sits above the fold of the card. I adhered a thin black strip of card along the edge of the patterned paper.

To finish my card, I stamped a sentiment from the Let’s Party stamp set, then adhered a die cut Celebrate word die above it. I stacked the die cut with 3 layers for dimension, and partially inked the sentiment with picked raspberry distress oxide ink to tone in with the background.

Pretty Pink Posh- Clean and Simple: Off the Edge Cutting

Do check out Jennifer McGuire’s video for Off-The-Edge Die Cutting, to see this fun technique in action.

Thank you for stopping by today!

| |

Clean and Simple: Sweet Valentine

Pretty Pink Posh- Clean and Simple: Sweet Valentine

Hello, Gemma here with a new post for my Clean and Simple series.

Adding texture to the background is one of my favourite ways to add interest on a clean and simple card. My card today features a tone on tone stamp and embossed heart background.

Pretty Pink Posh- Clean and Simple: Sweet Valentine

On a white panel of card, I stamped the heart images from the new Valentine Hearts stamp set with a clear embossing ink. I then heat embossed the images with a white pearl embossing powder. This gives a lovely pearly sheen in the light. You could use a clear embossing powder as an alternative.

Pretty Pink Posh- Clean and Simple: Sweet Valentine

To add even more texture, I used the Valentine Hearts coordinating die set to dry emboss around each image. To dry emboss with your dies, you need a tan embossing mat for your die cutting machine. This stops the die from cutting when you run it through the machine and embosses the shape into the card instead. As the die is slightly larger than the stamped image, it gives an embossed outline around the image.

Pretty Pink Posh- Clean and Simple: Sweet Valentine

Next, I stamped an image from the Floral Heart stamp set and coloured it with copic markers. I used these colours: Y14, YR23, B63, B66, R81, R83, R85. I then die cut the image with the coordinating die set, along with two plain die cuts to layer behind it for dimension.

To compliment the colours in the floral heart, I added some colour to a scrap of white card using the wide nib from my copic markers. This is easier than finding card stock to match. I die cut thin strips using the Stitched Strips die set and adhered them to the bottom edge of my A2 card base.

Pretty Pink Posh- Clean and Simple: Sweet Valentine

I trimmed down the embossed heart background panel, then adhered on my card base. Before adding the floral heart, I stamped a sentiment from the same stamp set on the panel. I then adhered the floral heart so the sentiment showed in the centre to finish.

I hope you were inspired by this clean and simple Valentine’s Day card!

| |

A New Series by Gemma!

Pretty Pink Posh: A New Series by Gemma

If you missed Gemma’s series from last year- Create A Scene- CLICK HERE.

Hello, Gemma here and I’m excited to be sharing a card today for my new series here on the Pretty Pink Posh blog called Clean & Simple.

Pretty Pink Posh: A New Series by Gemma

I love creating clean and simple (CAS) cards. When I think of CAS, I think of white space and a focal image or area on a card. This style can be very minimal, with few layers and embellishments, but I also love to create mini scenes on my CAS cards. I’ll be sharing a variety of clean and simple looks in this series and I hope they will inspire you to try the CAS style too.

I’m using some new January release products on this card. I began by die cutting a slimline rectangle using the largest die in the Slimline: Peekaboo Windows set.

Pretty Pink Posh: A New Series by Gemma

I positioned the Peonies stencil over the top of the panel, masking it so I could blend ink through one of the flower images. I lightly blended spun sugar distress oxide first, then used a smaller blending tool to add some picked raspberry distress oxide ink for shadow areas, blending out with the spun sugar oxide ink again. For the leaves, I used pumice stone and hickory smoke distress oxides, but also added some shaded lilac oxide ink which adds a lovely purple hue to the leaves.

I repeated these steps, moving the stencil around, masking different flowers and leaves and inking through the stencil, creating a floral scene on the slimline panel.

Pretty Pink Posh: A New Series by Gemma

The ink blending alone own looks lovely and you could defiantly stop there, but I decided to add some details with my colouring pencils. I picked light, medium and dark shades of pencils for both the flowers and leaves. I added details to emphasise the shadows, blending out to the lighter areas. You can use the pencils to define edges too.

I cut a panel of pearlescent card, which picks out the pink tones on my flowers. I layered this on my card base, then added the stencilled panel on top.

Pretty Pink Posh: A New Series by Gemma

Next, I die cut a scalloped frame from white card, using the new Slimline Scallop Frames set. I layered this on to the card to add some pretty detail but still keep the design clean and simple.

I stamped a small sentiment from the Simple Sentiments stamp set. Above this, I added a die cut Celebrate, using the same pearlescent card as the base. I stacked this with two white die cuts for dimension. To finish, I added a few of my favourite Pearl White jewels around the sentiment.

Pretty Pink Posh: A New Series by Gemma

I hope you enjoyed this first installment of the new series. If there is a specific product you’d like me to try to feature in the future, feel free to leave a comment below!