
Clean and Simple: Die Cut Window

Hello, Gemma here. It’s time for a new installment of Clean and Simple. For my CAS card today, I’m using the new Floral Corners stamp set. By using a die cut window, it’s easy to create a corner for the beautiful floral image to sit upon.
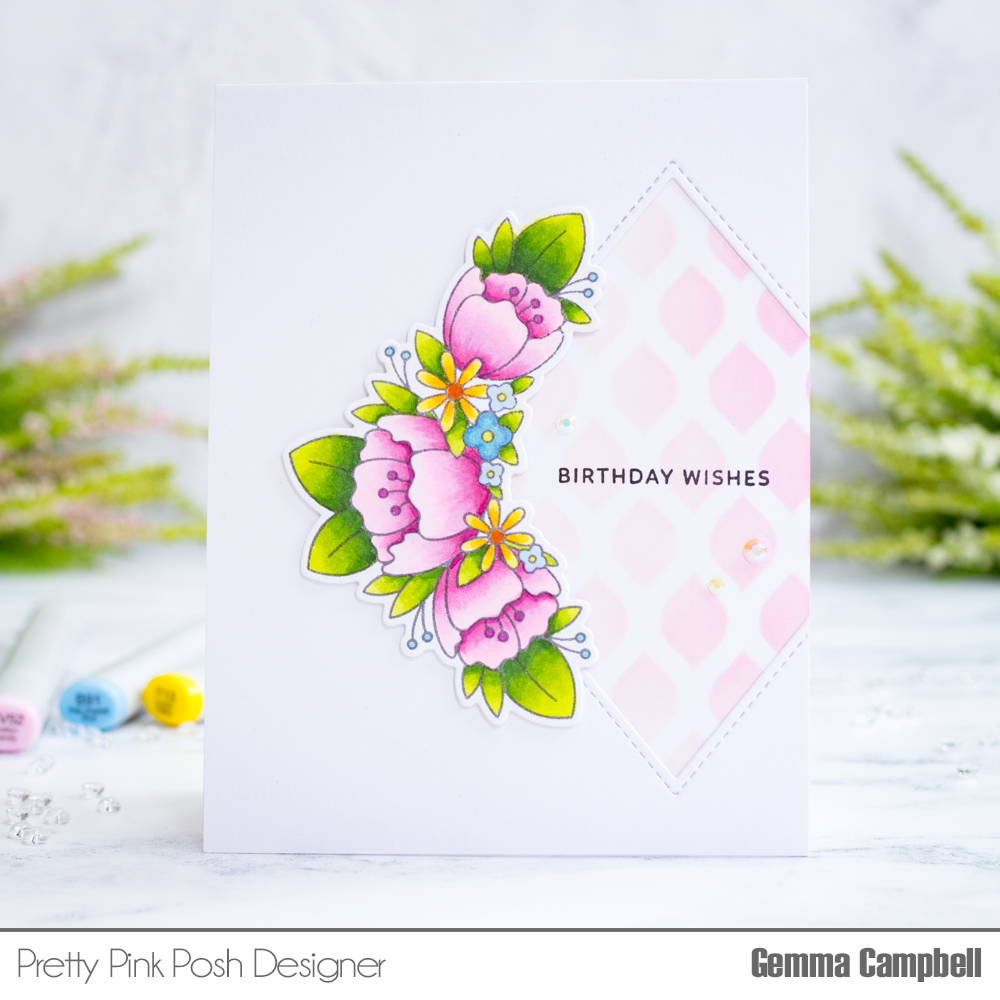
I stamped the Floral Corners image in grey ink, which gives a softer look to the image than regular black ink. I coloured the image with copic markers, using the following colours:
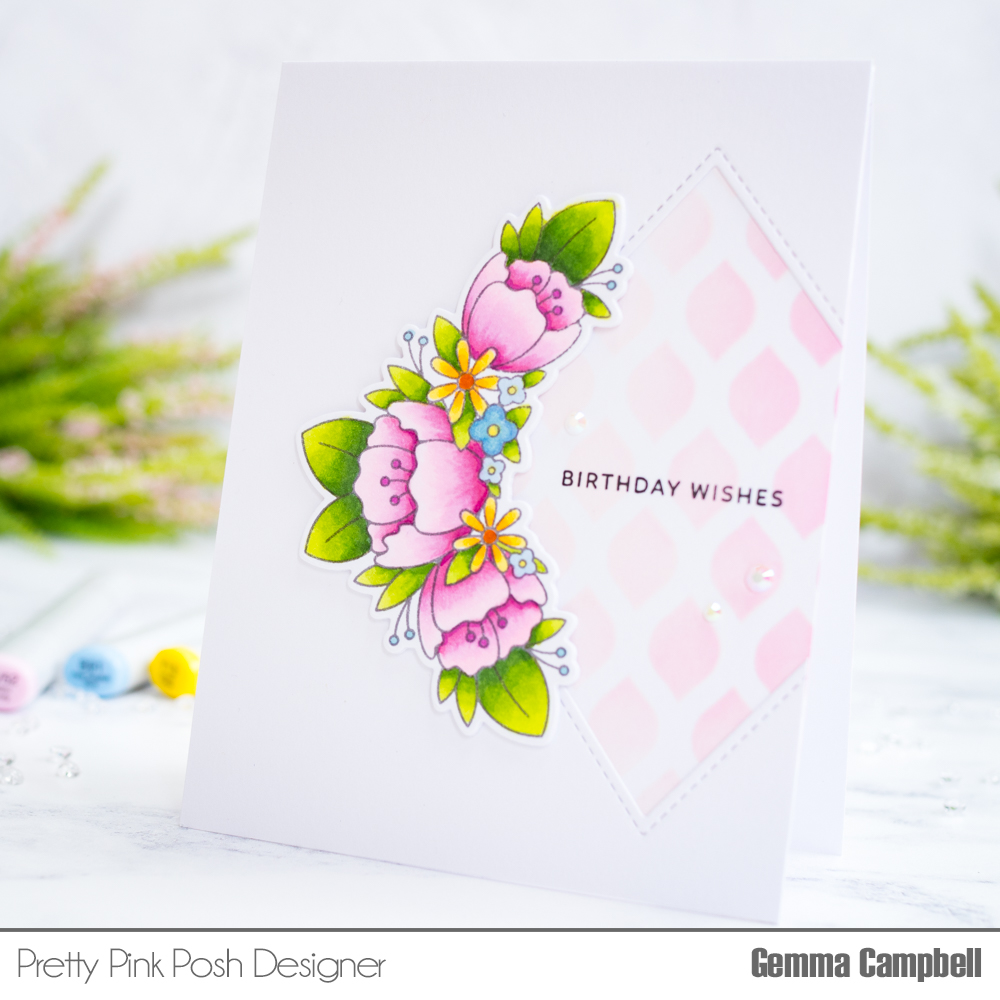
- Leaves: YG01, YG03, YG17, G46
- Pink flowers: RV00, RV10, RV52, RV34, RV66
- Yellow flowers: Y13, Y15, Y38, YR27
- Blue flowers: B91, B52, B34
I die cut the image with the coordinating die, layering two more die cuts behind for dimension.
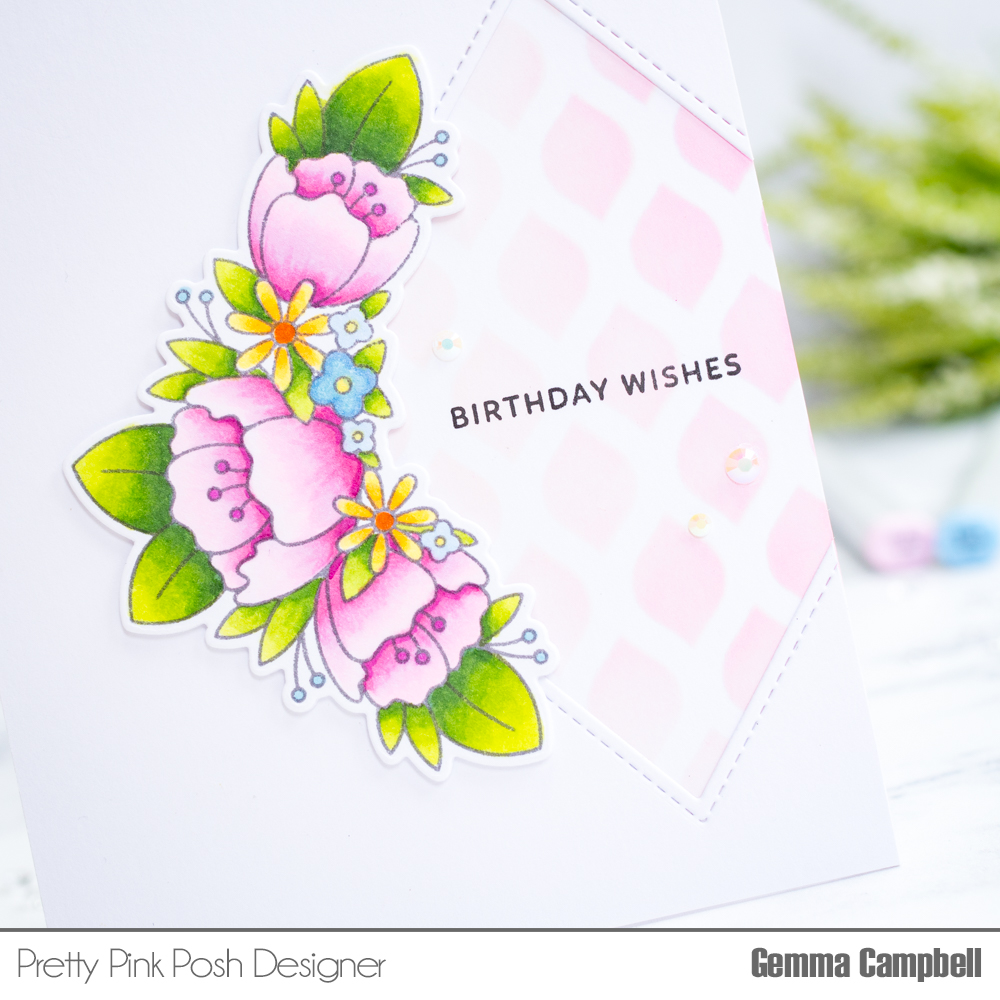
To ground the floral corner on my card, I die cut a Stitched Diamond from a piece of white card. I allowed it to go off the edge of the panel for interest.
On my card base, I blended Spun Sugar and Kitsch Flamingo distress oxides over the Pretty Petals stencil. This gives a soft pattern visible through the diamond window when the panel is adhered to the card.
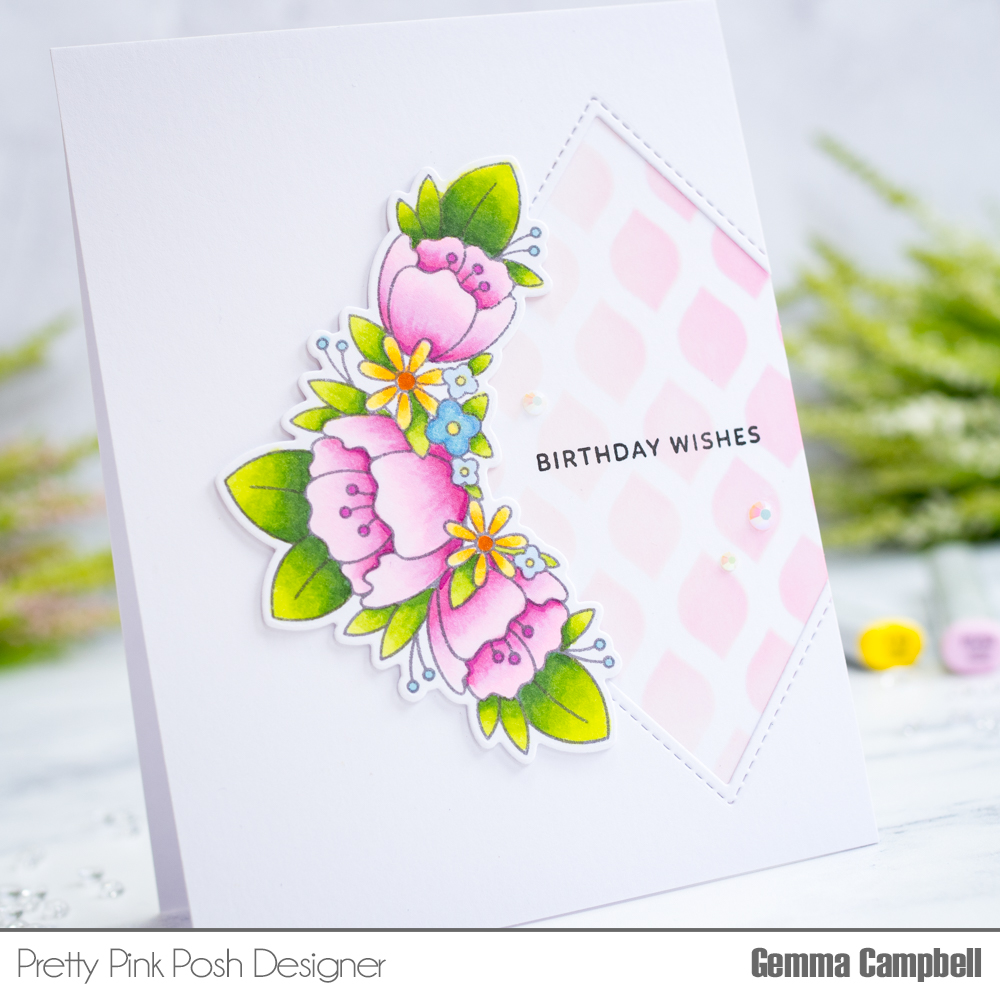
I stamped a sentiment from Simple Sentiments over the stenciled area on the card, with some Pearl White jewels added around it for sparkle. I then adhered the Floral Corners image on the edge of the diamond window to finish.
Thank you for stopping by today!
I absolutely adore this! The pinks are so lovely.