
Clean and Simple: Pretty Tulips

Hello, Gemma here for a new Clean and Simple post. Today I have a floral CAS card to share, using the Tulip Cover Plate die. This beautiful die is perfect for clean and simple cards. I love the possibilities for adding colour to the flowers.
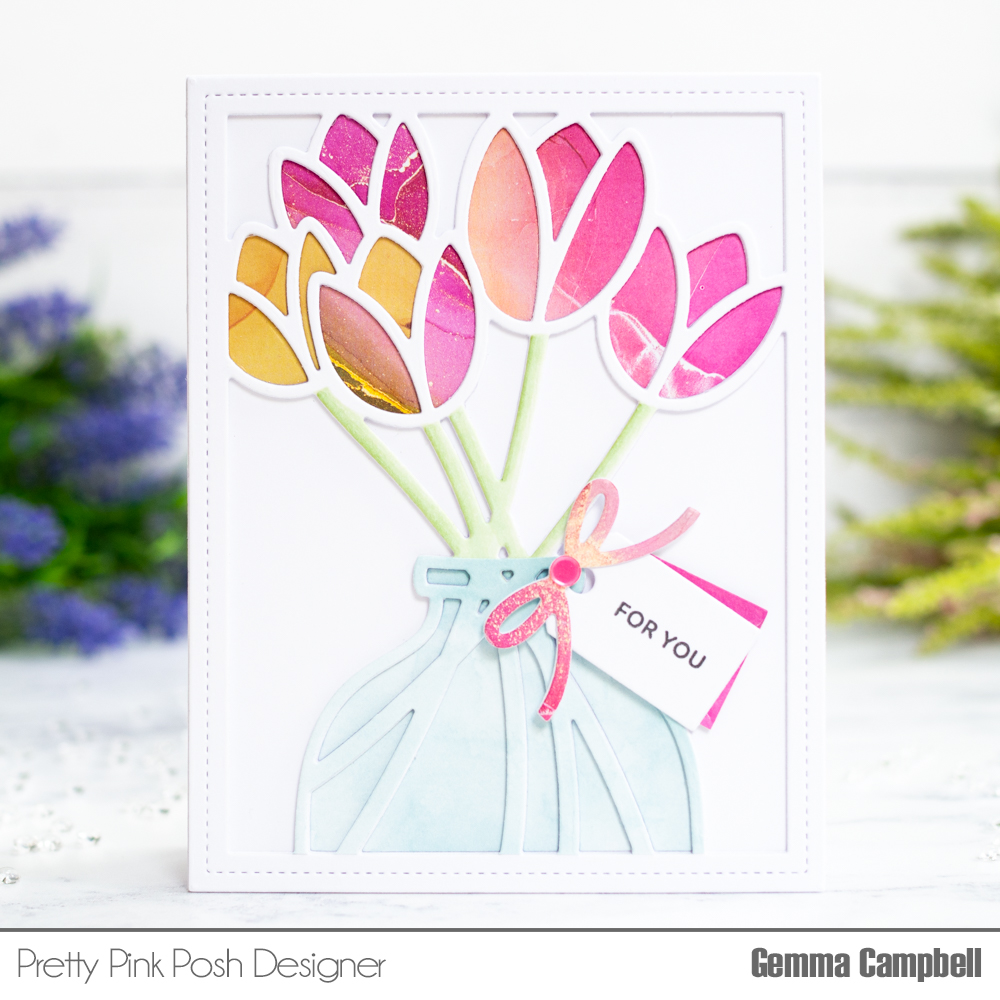
I die cut 3 layers of the Tulip Cover Plate die from white card. This gives some great dimension to the card.
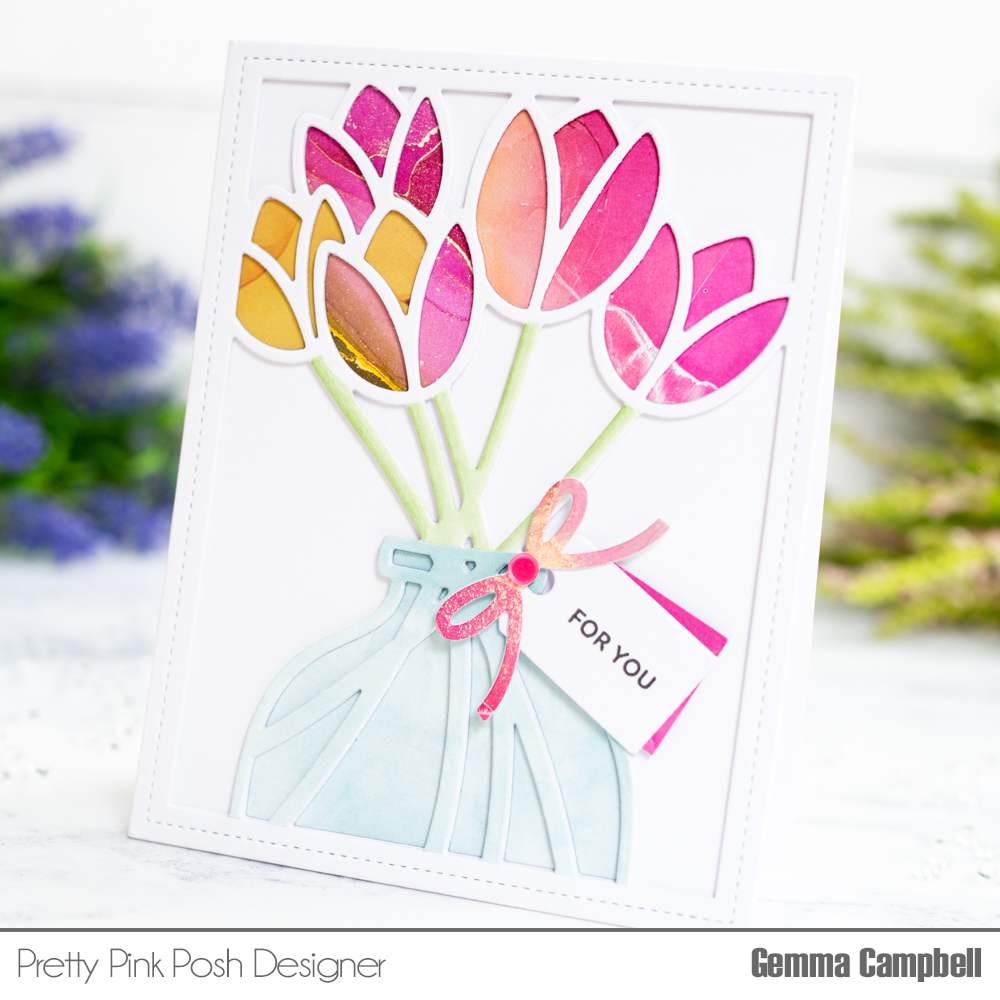
I used a light green copic marker to add some colour to the tulip stems. For the tulips and the vase, I die cut some patterned paper to piece into the cover die.
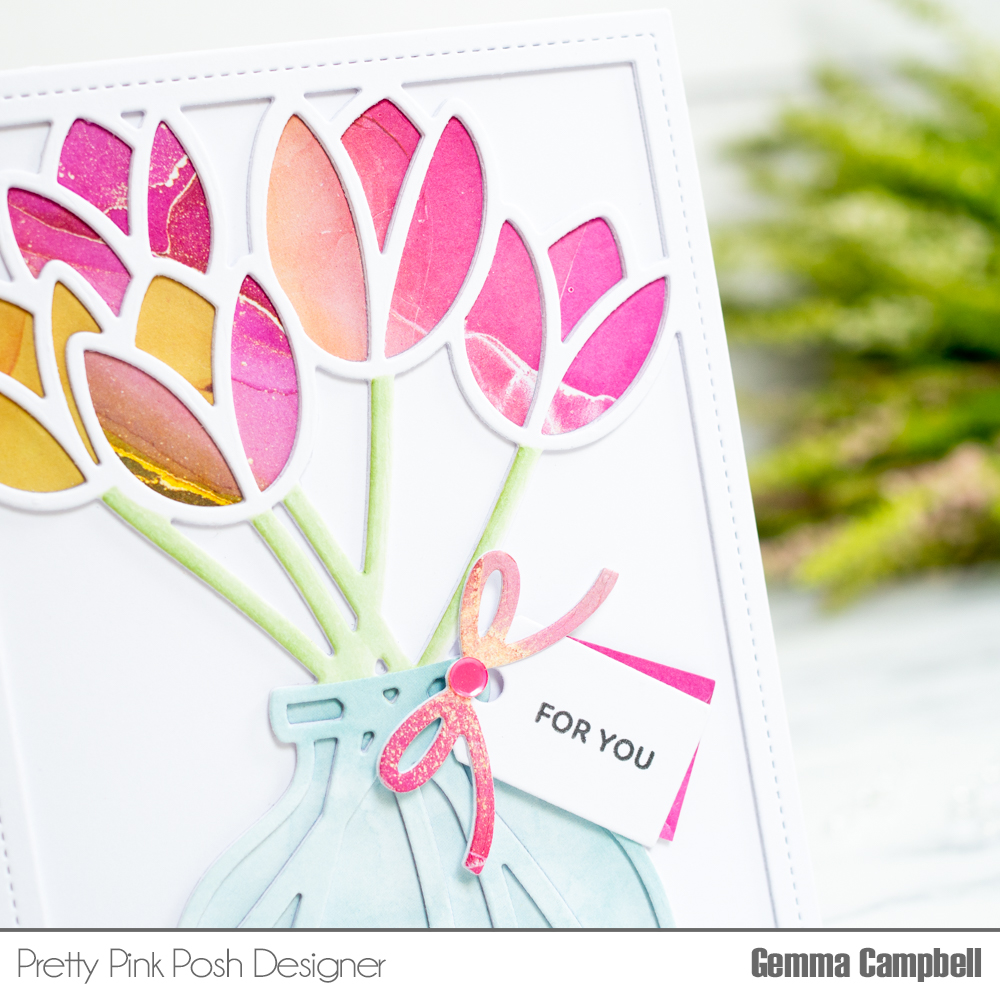
The Tulip Cover Plate die includes a tag and a bow die. I layered a patterned paper bow over a white card bow for stability. For the white tag, I stamped a sentiment from the Let’s Party stamp set, then layered it over a patterned paper tag, offset for a spot of colour behind.

I adhered the tag and bow, and added a sequin from the Valentine confetti mix in the centre of the bow to finish.
Thank you for stopping by today!