Create A Scene

| |

Create A Scene: Winter Woodland

Create A Scene: Winter Woodland

Hi there, Gemma here for a new Create A Scene feature.

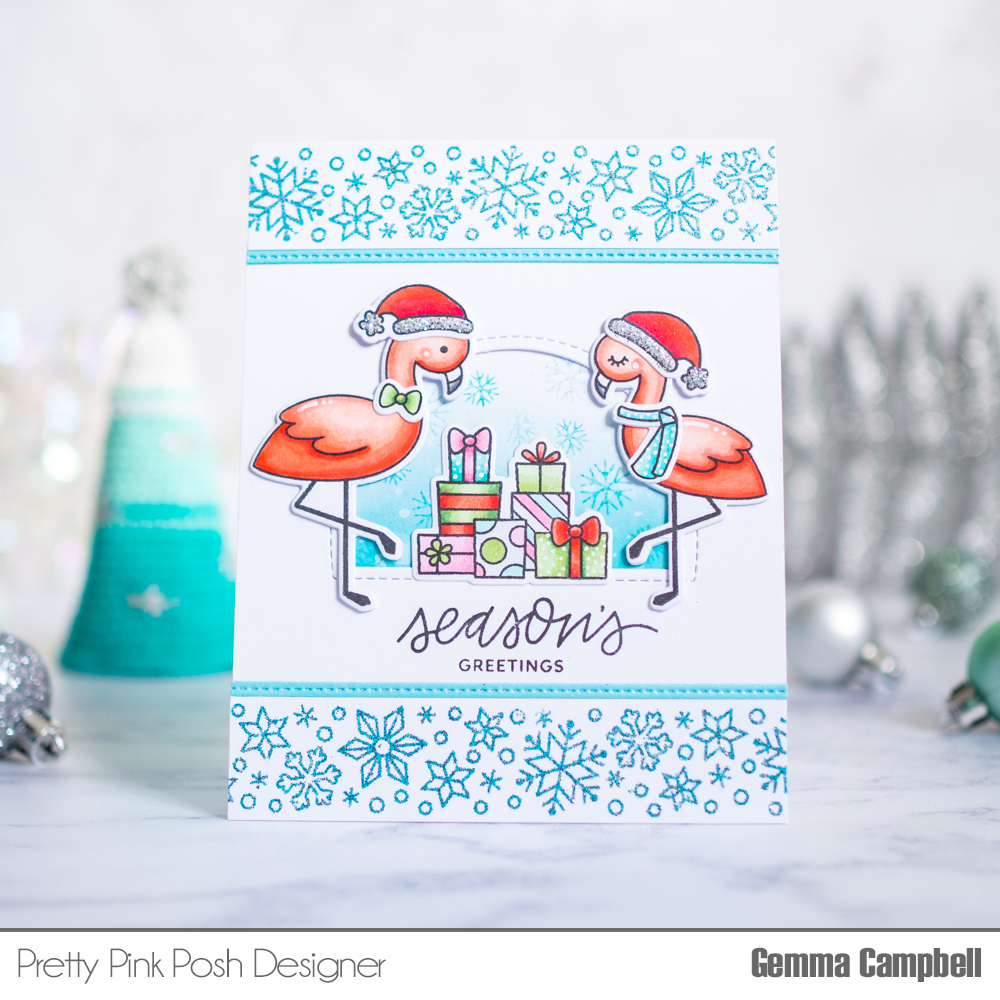
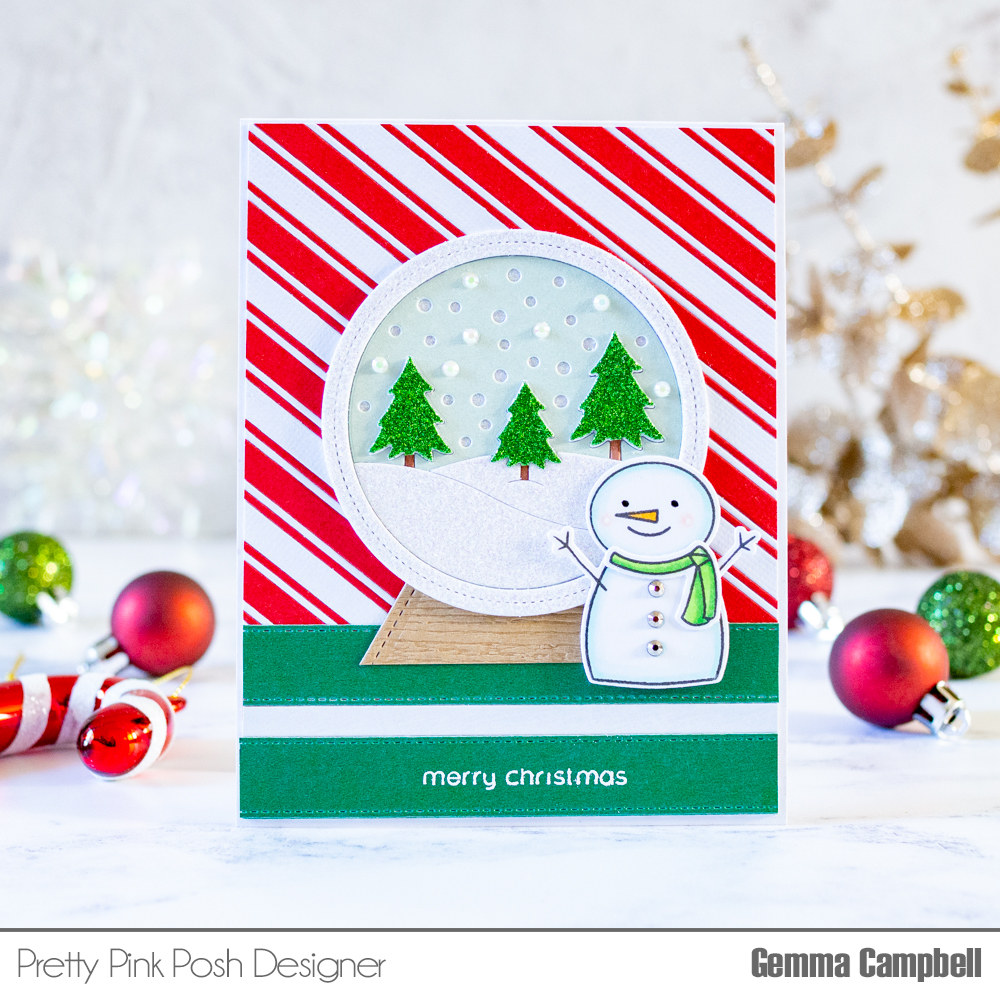
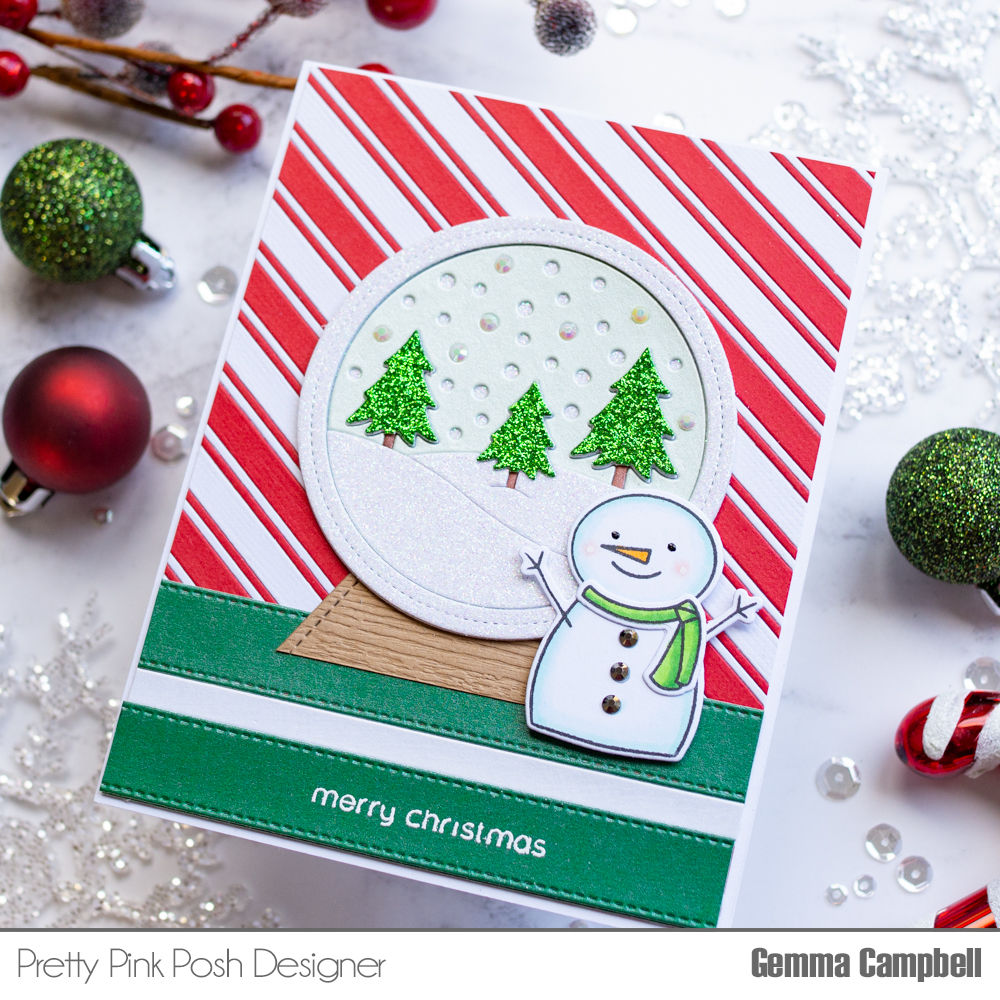
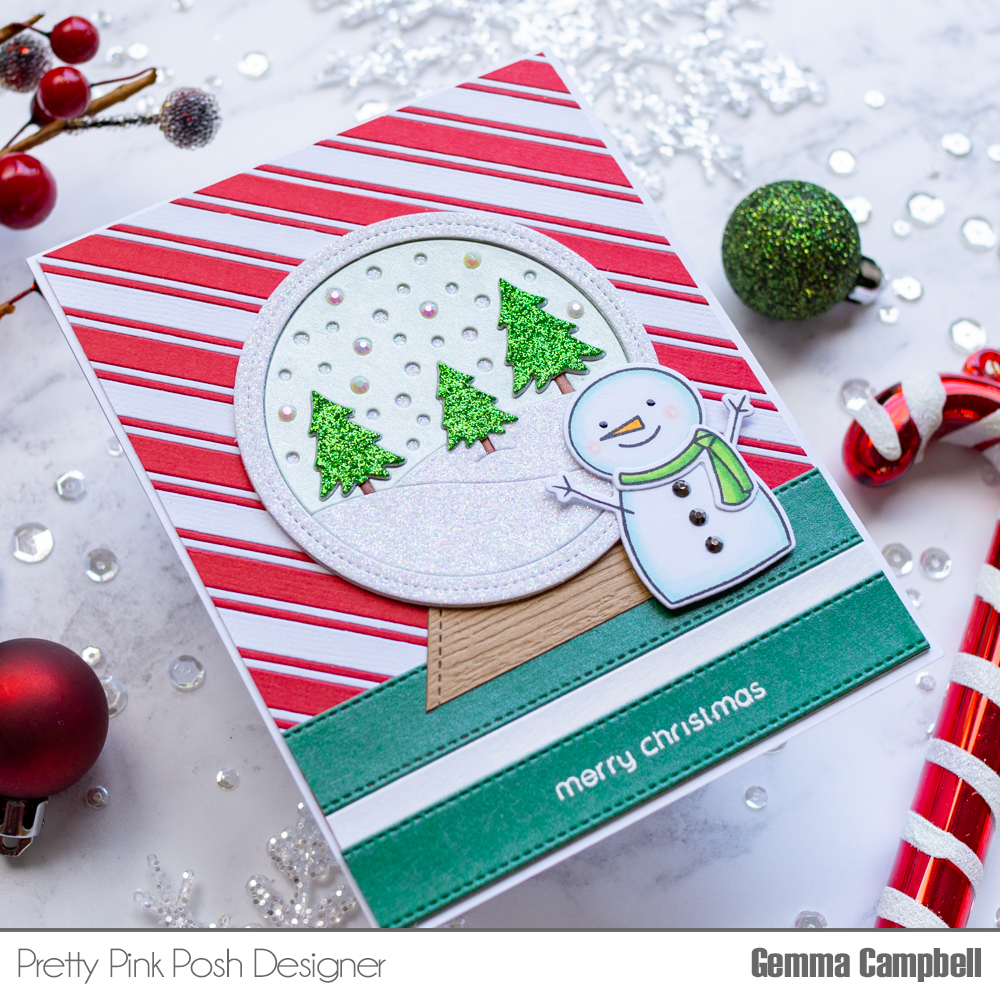
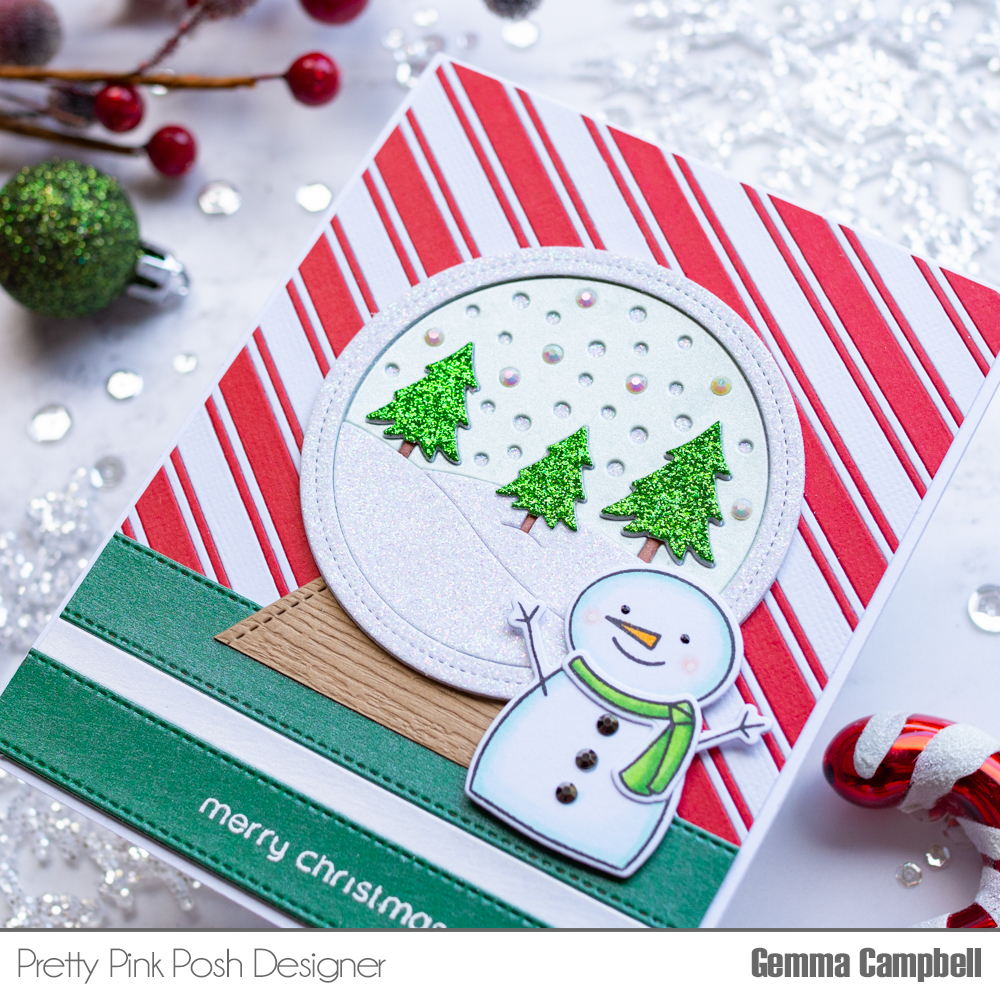
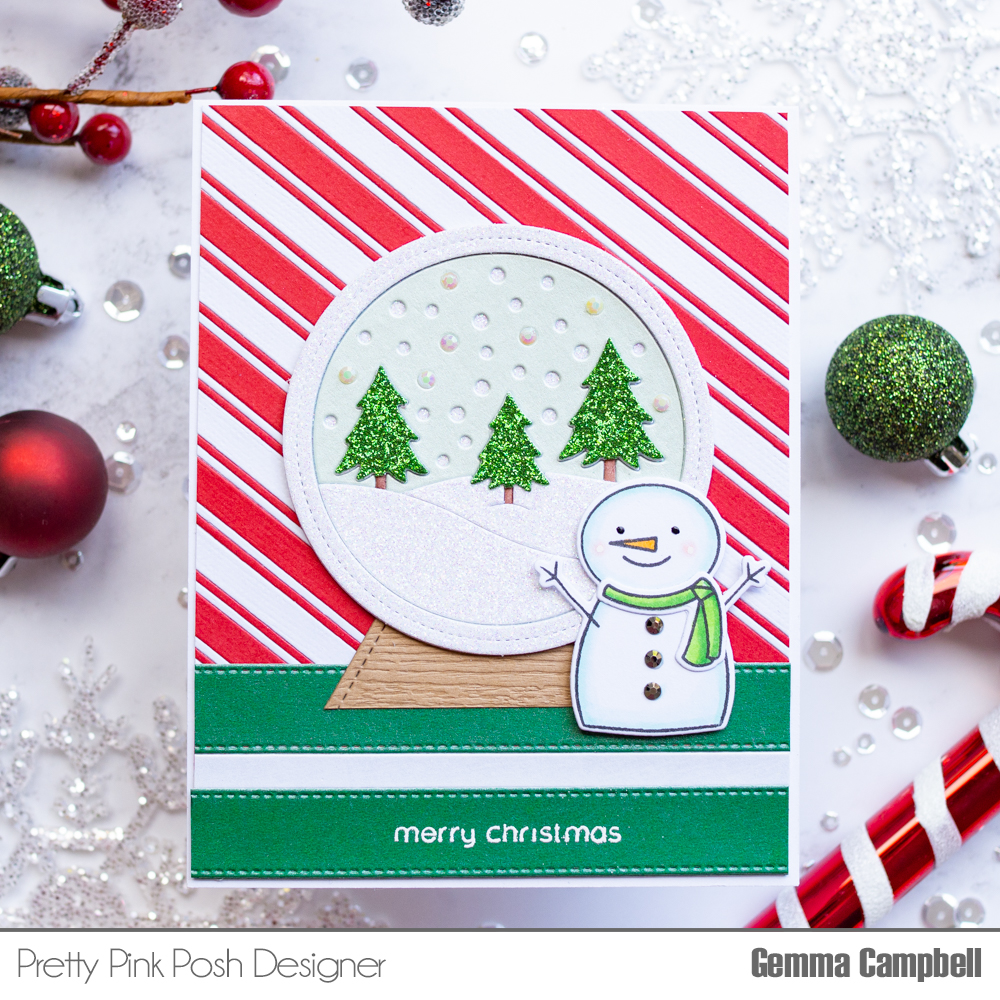
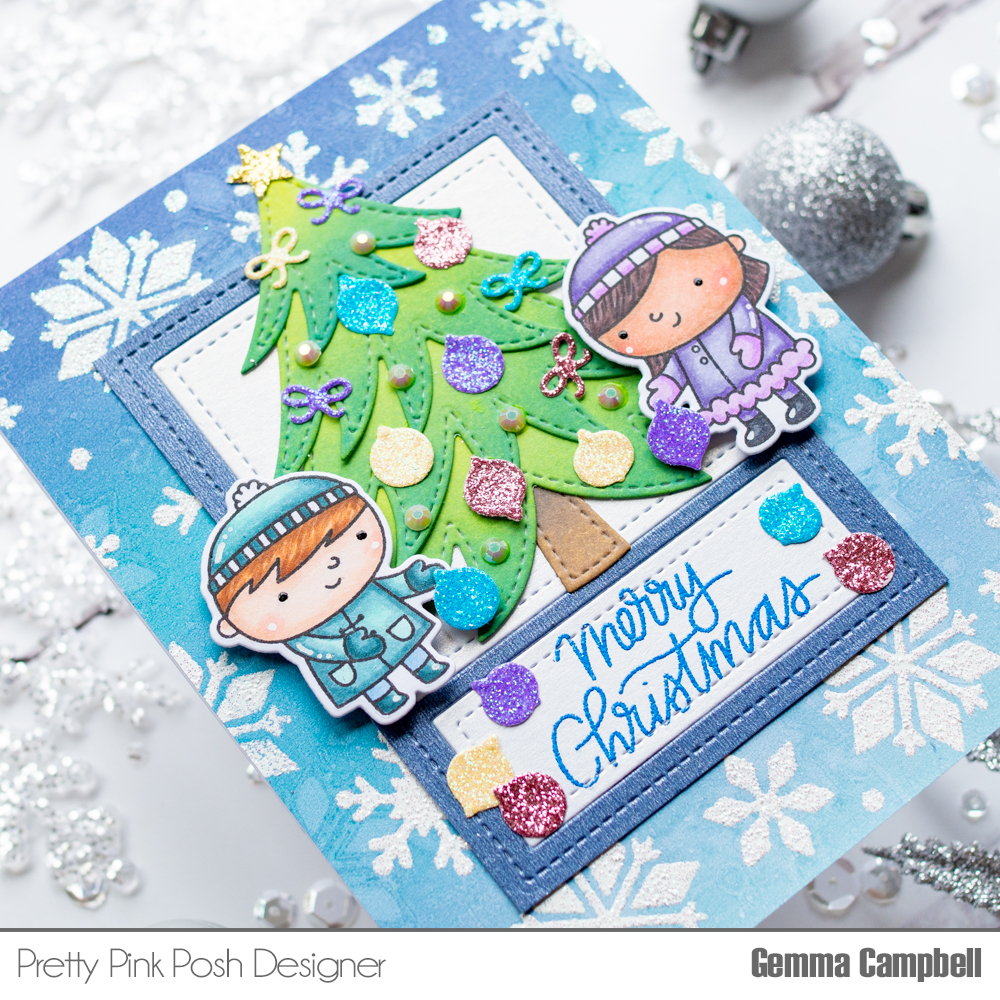
For my scene card today, I’m using the sweet Winter Woodland stamp set. Adding some baubles to the tree adds some Christmas fun.

Create A Scene: Winter Woodland

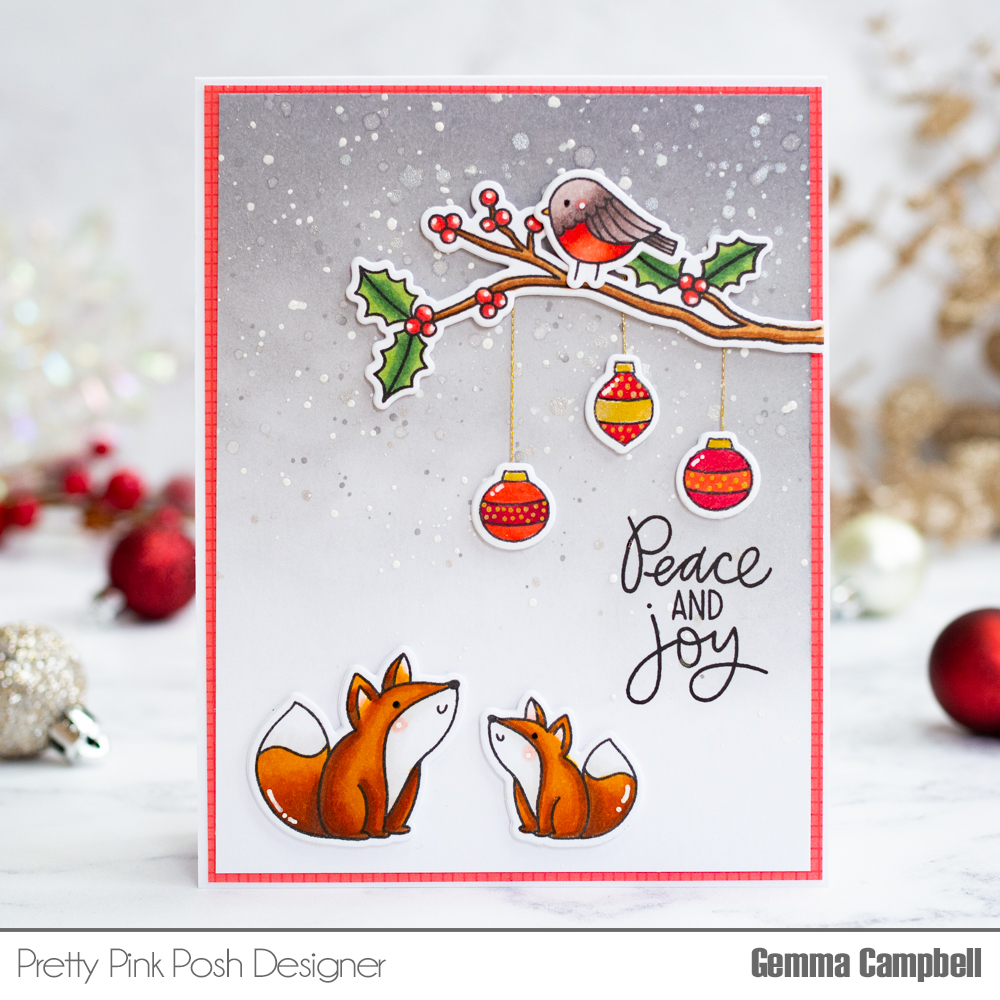
I began with the background, blending some Hickory Smoke distress oxide ink on to my white card panel. I faded the grey into the white for my wintry scene.

To add texture and the look of snow fall, I flicked the panel with white acrylic paint mixed with water. I also added some flicks with a sparkle spray. For some darker drops, I flicked Hickory Smoke distress oxide ink over the panel too.

Create A Scene: Winter Woodland

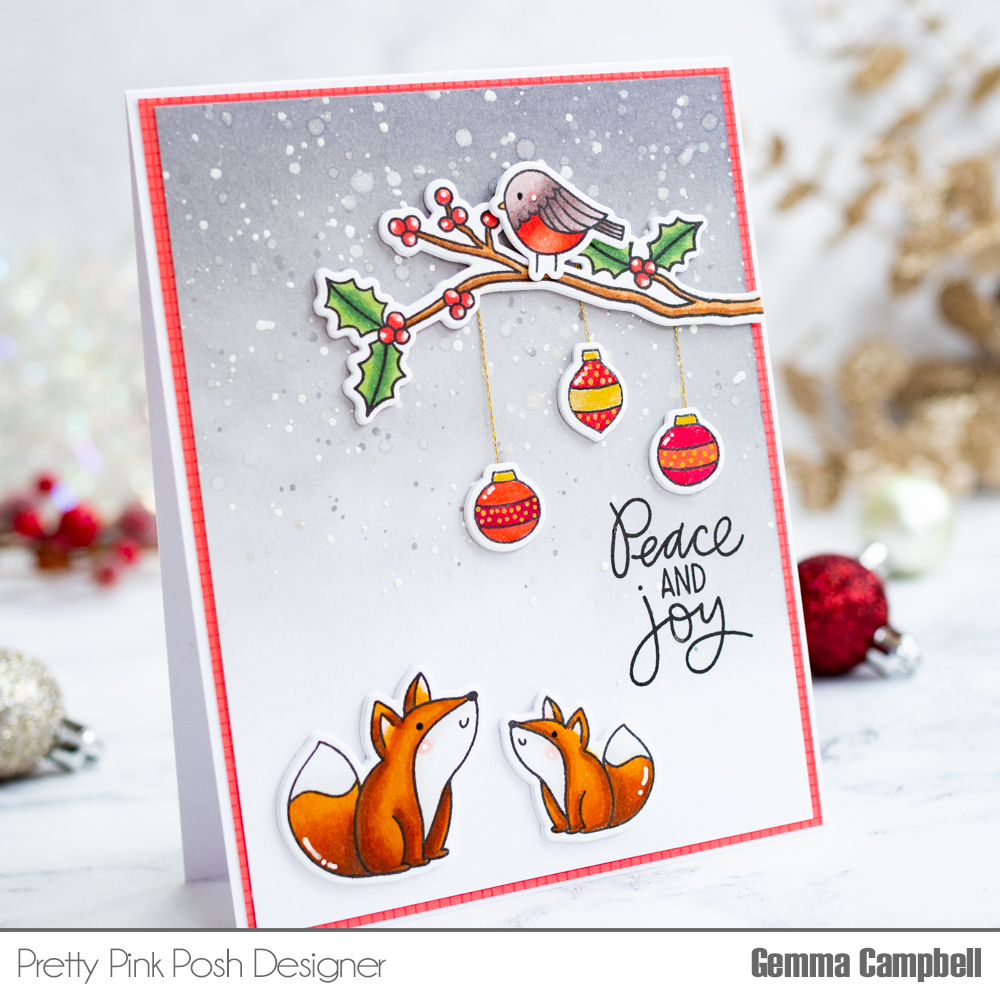
Once dry, I layered the panel over a piece of red patterned paper. I stamped a sentiment from the Holiday Greetings stamp set before adhering the panel to a card base.

Create A Scene: Winter Woodland

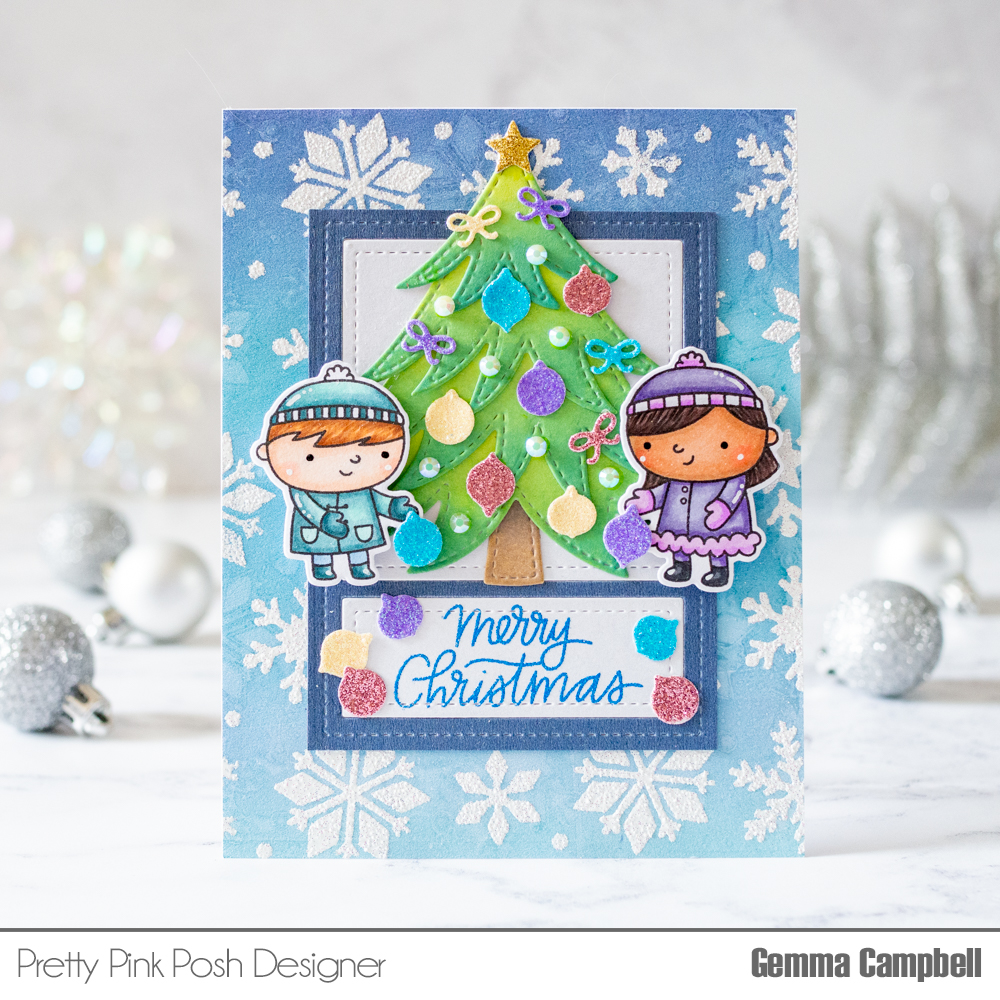
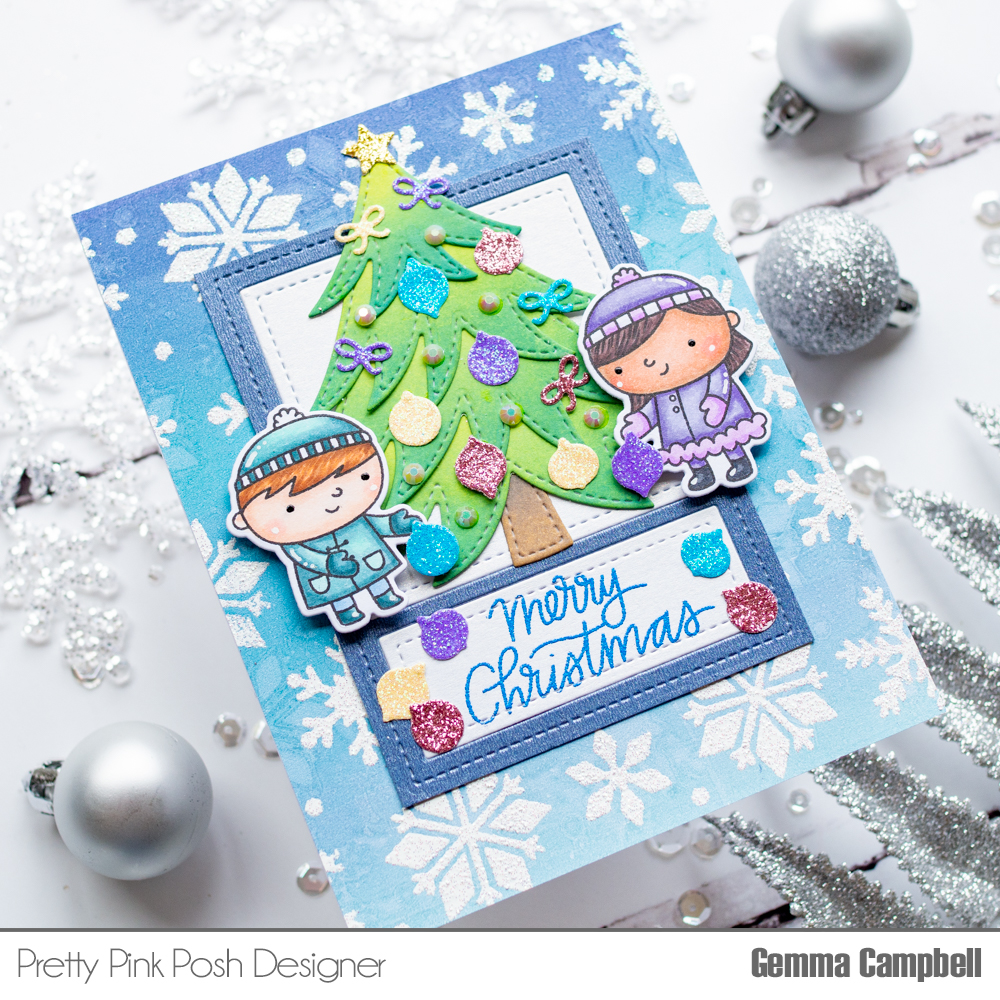
Next, I stamped images from the Winter Woodland stamp set, coloured them with copic markers and die cut them with the coordinating dies. To add dimension, I adhered some plain die cuts behind the images.

Create A Scene: Winter Woodland

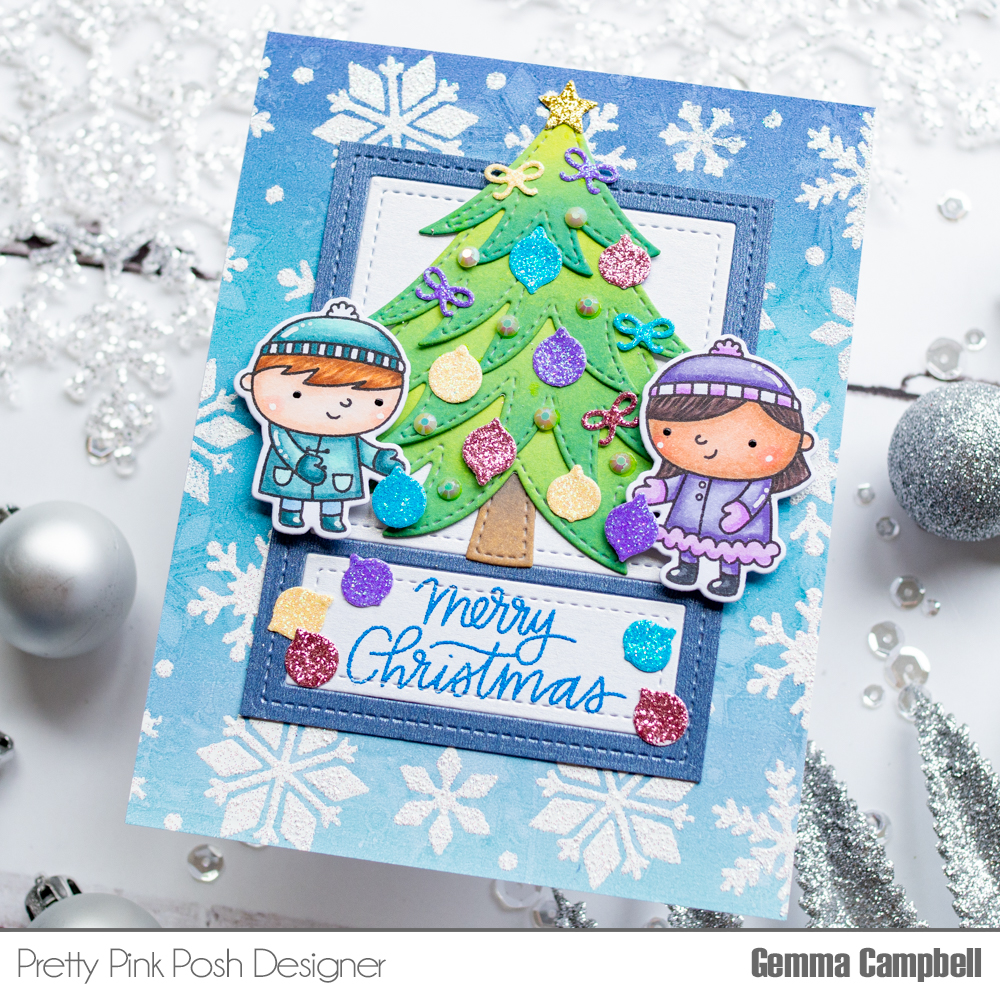
The baubles are from the Angel Friends stamp set. I coloured them with copics and added some metallic gold pen details. Layering them with plain die cuts for dimension, I adhered some gold thread behind each bauble, then attached the other end of the thread behind the branch.

Create A Scene: Winter Woodland

I then adhered all the images to the card to finish my winter woodland Christmas scene.

I hope you enjoyed this winter scene. Thank you for stopping by!

| |

Create A Scene: Holiday Flamingos

Create A Scene: Holiday Flamingos

I thought it would be fun to create a Christmas card using critters from a summer stamp set. With a few accessories, these flamingos are perfect for a festive scene.

Create A Scene: Holiday Flamingos

Let’s begin with the background. On an A2 card base, I blended some Peacock Feathers distress oxide ink on to the centre of the card, fading out to white. I flicked some shimmer spray over the ink to create sparkly droplets. Once dry, I stamped some snowflakes from the Holiday Greetings stamp set, using 2nd and 3rd generation stamping with Peacock Feathers distress oxide ink.

Create A Scene: Holiday Flamingos

From the centre of a white card panel, I cut an opening with one of the Window Frames dies. I then layered this onto my card base.

To add some sparkle, I stamped the snowflakes border, from the Winter Borders stamp set, in clear embossing ink. I then heat embossed it with a turquoise embossing glitter. I embossed two borders, then I trimmed them down and adhered them onto my card.

Create A Scene: Holiday Flamingos

I cut two thin strips of pearlescent blue card, using the Stitched Strips dies, to adhere to my card. I like the neat finish this gives to the embossed borders. I then stamped a sentiment from the Christmas Friends stamp set to finish the background.

I found some flamingos, from the Tropical Birds stamp set, that I had previously coloured with copics and die cut. I always have images left over from other projects so it’s great to find ways to use them on different cards. To dress the flamingos up for Christmas, I added some Santa hats and a bow from the Reindeer Friends stamp set. Some glitter on the hats adds lots of Christmas sparkle.

Create A Scene: Holiday Flamingos

The scarf on the other flamingo is from the Happy Snowman stamp set. The scarf was too wide for the flamingo, so I trimmed off the left edge, then adhered it over the top to make it fit better. By adjusting it this way, you still get the nice white die cut edge all around the scarf.

Create A Scene: Holiday Flamingos

I adhered some Christmas presents above the sentiment – these are from the Reindeer Friends stamp set. I then added the flamingos to finish my Christmas scene.

Thanks for visiting today!

Gemma

| |

Create A Scene: Winter Snowglobe

Today I have a snowglobe scene card to share. By adding a simple shaped die, the Winter Scene can be transformed into a snowglobe. I think it would be fun to turn this snowglobe into a shaker card too.

Create A Scene: Winter Snowglobe

I began with the candy cane background. I used the fabulous Simple Strips die set. The variety of sizes in this set make it easy to create different patterns. 

I die cut two different width strips from red and white card. On a piece of thin copy paper, I adhered some stick-it adhesive. I gradually removed the backing, revealing the adhesive, and added the die cut strips to create my pattern. I then trimmed down my homemade patterned paper and adhered it to a white card base. 

Create A Scene: Winter Snowglobe

Next, I die cut the Winter Scene die three times – from white and pearlescent green card, along with white glitter card. I also die cut a separate circle from white glitter card to adhere the scene pieces. I layered the three frames together on the circle die cut, with the glitter frame at the top. 

On the white die cut trees, I used a brown copic marker to colour the tree trunks. I then adhered the white card hills and trees to the card, along with the pearlescent green sky.

Create A Scene: Winter Snowglobe

By layering elements of the scene, it adds dimension. I cut the trunks off the white glitter trees, then adhered them and the white glitter hills to my scene. I then changed my mind and decided I wanted green glitter trees instead, so die cut them and added them to the scene.

To turn the Winter Scene die into a snowglobe, I die cut a Stitched Hexagon die from woodgrain card. I cut the hexagon in half to create the stand for my snowglobe, adhering it behind the Winter Scene.

Create A Scene: Winter Snowglobe

I die cut some Stitched Strips from dark green pearlescent card, along with a white pearlescent Simple Strip, which I’ll use to ground my snowglobe in the scene. I white heat embossed a sentiment from the Happy Snowman stamp set.

You could finish the card here but I decided to add a Happy Snowman next to the snowglobe. I coloured him with copic markers and die cut him with the coordinating die, then used foam tatape to add him to the scene.

Create A Scene: Winter Snowglobe

For some finishing touches, I gave the snowman some Graphite jewels buttons and added some Pearl White jewels to the snowglobe sky.

Thanks for visiting today! The holiday season is coming soon and I hope I was able to inspire you.

Gemma

| |

Create A Scene: Christmas Decorating

Today I have a fun Christmas scene card to share. The Christmas Friends are enjoying decorating their tree for the holidays. 

Pretty Pink Posh- Create A Scene: Christmas Decorating

I began with the background, using one of my current favourite techniques – gel plate printing. On a 6×6 gel plate, I added distress oxide inks in the colours speckled egg, peacock feathers and chipped sapphire. I used a brayer to blend the colours together, then took a print using some smooth white card. I love the textured effect you get with gel printing.

Pretty Pink Posh- Create A Scene: Christmas Decorating

I added the same colours to the gel plate again, this time layering the Snowflakes stencil over the top. As I want lighter coloured snowflakes on my background, I first need to take a print on another piece of card to remove the colour where the snowflakes show through the stencil. I can then remove the stencil from the gel plate and print again on my original card. This will add more colour to the card everywhere but where the snowflakes would be, leaving lighter coloured snowflakes on my background.

To add even more texture to the background, I layered the Snowflakes stencil over my panel, inked through it with a clear embossing ink, then heat embossed the snowflakes with WOW Sparkling Snow embossing glitter. I trimmed the panel down and adhered to my card base.

Pretty Pink Posh- Create A Scene: Christmas Decorating

Next, I die cut the Storybook 5 die from pearlescent navy card, trimming down the card so I was left with a skinny frame. I repeated this with pearlescent white card, just keeping the frame inserts for this card. I adhered the navy frame and larger white insert onto my card.

Pretty Pink Posh- Create A Scene: Christmas Decorating

On the smaller white frame insert, I stamped a greeting from the Holiday Greetings stamp set in clear embossing ink. I then embossed the image with WOW Metalline Dark Blue embossing powder, to compliment the background colours, before adhering to the card.

The Layered Tree die set is one of my favourites for holiday cards. I die cut it from white card and added colour using twisted citron, mowed lawn and pine needles distress oxide inks for the tree, and frayed burlap and black soot distress oxide inks for the trunk. I adhered it to the card, then added some glitter card decorations using the smaller ornament dies from the set.

Pretty Pink Posh- Create A Scene: Christmas Decorating

Next, I stamped some images from the Christmas Friends stamp set and coloured them with copic markers. I die cut them with the coordinating dies and adhered to my card with foam tape.

I gave them each a bauble for decorating the Christmas tree, then added some more baubles around the sentiment. I finished my card with some Pearl White jewels on the tree for extra Christmas sparkle.

I hope you enjoyed this installment of the Create A Scene series. Thanks for stopping by!

| |

Create A Scene: Watercolor Sunflowers

Create A Scene: Watercolor Sunflowers

Today I thought I’d share a watercolour floral scene card. Pretty Pink Posh has some amazing floral stamp sets and it’s easy to use to use masking to stamp a beautiful one-layer scene to colour. Sunflowers are a favourite of mine – the colours are just perfect for the season.

Create A Scene: Watercolor Sunflowers

I began by cutting a panel of watercolour card. I use an economy card when I watercolour. As a beginner, I just want to have fun without worrying that I might waste expensive card on mistakes. The card I use is 300gsm cold pressed surface card, and I use the smooth side.

To stamp my scene, I used Antique Linen distress oxide ink. I began with the largest sunflower from the Sunflowers stamp set, then created a mask using a full post-it note. I covered the sunflower with the mask, then stamped a second sunflower to the side of that.

Create A Scene: Watercolor Sunflowers

I continued creating my scene, masking the second sunflower, then stamping some leaves from the same set. To add some variety, I also stamped some leaves and berries from the Autumn Wreath stamp set.

I used the Altenew Artists Watercolour pan set to paint my images. I began with a light colour wash, allowing it to air dry fully, then building up layers of stronger colour. I like to take my time, gradually adding more layers of colour, and enjoying the relaxing process of watercolour.

Once I’d finished with the watercolour and the panel was dry, I added some finer details with my Faber-Castell Polychromos pencils, along with some white gel pen highlights on the berries.

Create A Scene: Watercolor Sunflowers

I love the add splatter on my watercolour cards for more texture. I mixed some perfect pearls with water and used a small paintbrush to flick the panel.

I trimmed the panel down, then adhered a frame around the edge, cut from brown pearlescent card using the Nature Essentials die. In the corner of the scene, I heat embossed in gold a sentiment from the Birthday Friends stamp set.

Create A Scene: Watercolor Sunflowers

I thought a kraft card base would work well with the colours in the scene, and I finished my card with some Espresso jewels to compliment the colour of the frame. 

Thanks for visiting today! I hope I inspired you to create some floral scenes.

Gemma

| |

Create A Scene: Pumpkin Patch

Create A Scene: Pumpkin Patch

I have an autumnal card to share today. I enjoyed combining images from different sets to create my scene.

I began with the background of my card. I temporarily taped the Pumpkin Background stencil over a panel of white card, then inked through it with clear embossing ink.

Create A Scene: Pumpkin Patch

I removed the stencil, then sprinkled embossing powders in red, orange and green over different areas of the panel. I melted the powders with my heat tool, then adhered the panel to my card base. The embossing gives the background lots of colour and texture.

Next, I die cut the Spooky Fence from navy card. The navy gives a softer look than black and complements the other colours on the card. I adhered the fence to my card base over the embossed panel.

Create A Scene: Pumpkin Patch

I wanted to add a stamped greeting so cut a piece of vellum using the Decorative Tag 2 die. The vellum will help soften the colourful embossed background so the sentiment shows up over the top.

I heat embossed a sentiment on the vellum from the Pumpkin Patch Critters stamp set with gold embossing powder. To adhere the vellum panel to my card, I used drops of liquid glue where I knew other elements of my scene would hide the adhesive.

Create A Scene: Pumpkin Patch

To build the rest of my scene, I stamped some images from the Pumpkin Patch Critters and Fall Signs stamp sets. I coloured the images with copic markers and used the coordinating dies to cut them out.  On the scarecrow’s sign, I also stamped a sentiment from the Fall Signs stamp set.

I arranged the images on my scene, using foam tape to add dimension to some of the images.

Create A Scene: Pumpkin Patch

As a finishing touch, I adhered some Espresso jewels on the vellum panel. This is another way of hiding the adhesive used to secure the vellum, plus it adds some sparkle to the scene.

Thanks for visiting today!

Gemma

| |

Create A Scene: Spooky Halloween

As the weather turns more autumnal, I’m reaching for the fun Halloween sets from Pretty Pink Posh and have a spooky cute scene card to share today.

Create A Scene: Spooky Halloween

The Stitched Duo tags are great for creating window scenes. I used the Stitched Duo 1 and Stitched Duo 3 dies on my card and enjoyed creating both the inside and the outside parts of my scene.

I began by cutting a piece of patterned paper for the wallpaper. I chose a black and white print for a strong contrast. From the patterned paper, I die cut the Stitched Duo 3 tag (without the window frame portion of the die).

Create A Scene: Spooky Halloween

I temporarily layered the patterned paper over my card base, to help me position a circle mask for the moon. I then removed the patterned paper and blended distress oxide inks to create a spooky sky. I used squeezed lemonade, carved pumpkin and abandoned coral, blending out in a circles around the mask. Removing the mask leaves a bright white moon in the sky.

I adhered the patterned paper to my card base. Next, I die cut the Stitched Duo 3 die from white card for the tag and window frames from Stitched Duo 1. At the top of the tag, I stamped the sentiment from the Trick or Treat Friends stamp set with black pigment ink and heat embossed it with a sparkling clear embossing powder.

Create A Scene: Spooky Halloween

The Nature Essentials die has some great elements for my Halloween scene. I die cut it from black card, then adhered the tree and grassy border behind the white tag.

Next, I stamped images from the Trick or Treat Friends stamp set and coloured them with copic markers. I adhered the bird behind the white tag and then added the tag to the card. I love the bird looking in at the window.

Create A Scene: Spooky Halloween

I thought the witch and pumpkins needed something to help ground them on the card, so I cut a piece of white woodgrain patterned paper for the floor and adhered it to my scene. I then added the images to my card with foam tape to complete my spooky cute Halloween scene.

Thanks for visiting! I hope you were inspired by this Halloween card.

Gemma

| |

Create A Scene: Polka Dot Birthday

Today I have a fun birthday scene card to share. I made this colourful card for my niece, who celebrated her 7th birthday this month.

One of my tips when creating scenes is to choose a limited colour palette.

Create A Scene: Polka Dot Birthday

For this card, I chose purple, yellow, blue and orange. These pairs are opposite on the colour wheel so work well together. Neutrals can also be added too.

I stamped and coloured images from Birthday Friends with copic markers, then used the coordinating dies to cut them out.

Create A Scene: Polka Dot Birthday

I wanted to use the same colours on the background and also add some sparkle. I layered the Medium Polka Dots stencil over a panel of white card, then inked through the stencil with an embossing ink. I used some colourful embossing glitters to add diagonal stripes, then melted the embossing powders with my heat tool.

Create A Scene: Polka Dot Birthday

The Storybook dies are great for creating scene cards. The different squares and rectangles can be used as areas for images or sentiments. I die cut the Storybook 4 die from white card, trimming down the panel to get a frame for my card. I layered the Polk dots embossed panel, then the Storybook 4 frame on my card base.

I blended distress oxides in similar colours on the smaller pieces from the Storybook 4 die, then adhered them on my card. On the larger rectangle piece, I stamped a greeting from the Birthday Friends stamp set before adhering it on the card too.

Create A Scene: Polka Dot Birthday

I used foam tape and liquid adhesive to add my images. I finished with some extra sparkle, using a clear glitter pen on some of the images, along with white gel pen highlights.

I hope you were inspired by this birthday card. Thanks for visiting!

Gemma

| |

A New Series…

Hello, Gemma here. Today I’m excited to share the first card in a new series here on the Pretty Pink Posh blog called “Create A Scene”. I’ll be sharing how to create different scenes using a mix of older and newer sets from Pretty Pink Posh. For my first scene card, I’m heading to the beach!

Pretty Pink Posh: A New Series...

I began by stamping images from Summer Friends, Summer Surfboards and Tropical Birds stamp sets. I coloured the images with copic markers, choosing a colour palette of pink, blue, orange and turquoise. Having a limited colour palette to work with really helps me when creating scenes as I know all the images will look great together.

Pretty Pink Posh: A New Series...

Once all the images were die cut with the coordinating dies, I started working on my background.

On a slimline card base, I added some tumbled glass and speckled egg distress oxide inks to the top portion. I also stamped a sentiment from the Tropical Birds stamp set. The slimline card format gives me lots of room to build my scene.

Pretty Pink Posh: A New Series...

For the sand, I blended antique linen and frayed burlap distress oxide inks onto white card. I flicked the panel with water and some of the frayed burlap ink to add lots of sandy looking texture. Once the panel was dry, I used a die from the Stacked Edges 1 die set to cut 6 borders, layering them on my card for the sand dunes.

Pretty Pink Posh: A New Series...

I used a similar method to create the waves. I used distress oxide inks in blueprint sketch, peacock feathers and mermaid lagoon. I added lots of water droplets too. Using another die from the Stacked Edges 1 die set, I cut out 3 waves and adhered them to my card with liquid glue. I made sure to leave space to tuck in some images between the waves.

Pretty Pink Posh: A New Series...

I added my images to the card, some flat on the card base with liquid glue, and others with foam tape for dimension. As a finishing touch, I added some white and black gel pen details.

Pretty Pink Posh: A New Series...

I hope that you enjoyed this card and are excited for this series. Thanks for stopping by!