
Create A Scene: Christmas Decorating

Today I have a fun Christmas scene card to share. The Christmas Friends are enjoying decorating their tree for the holidays.
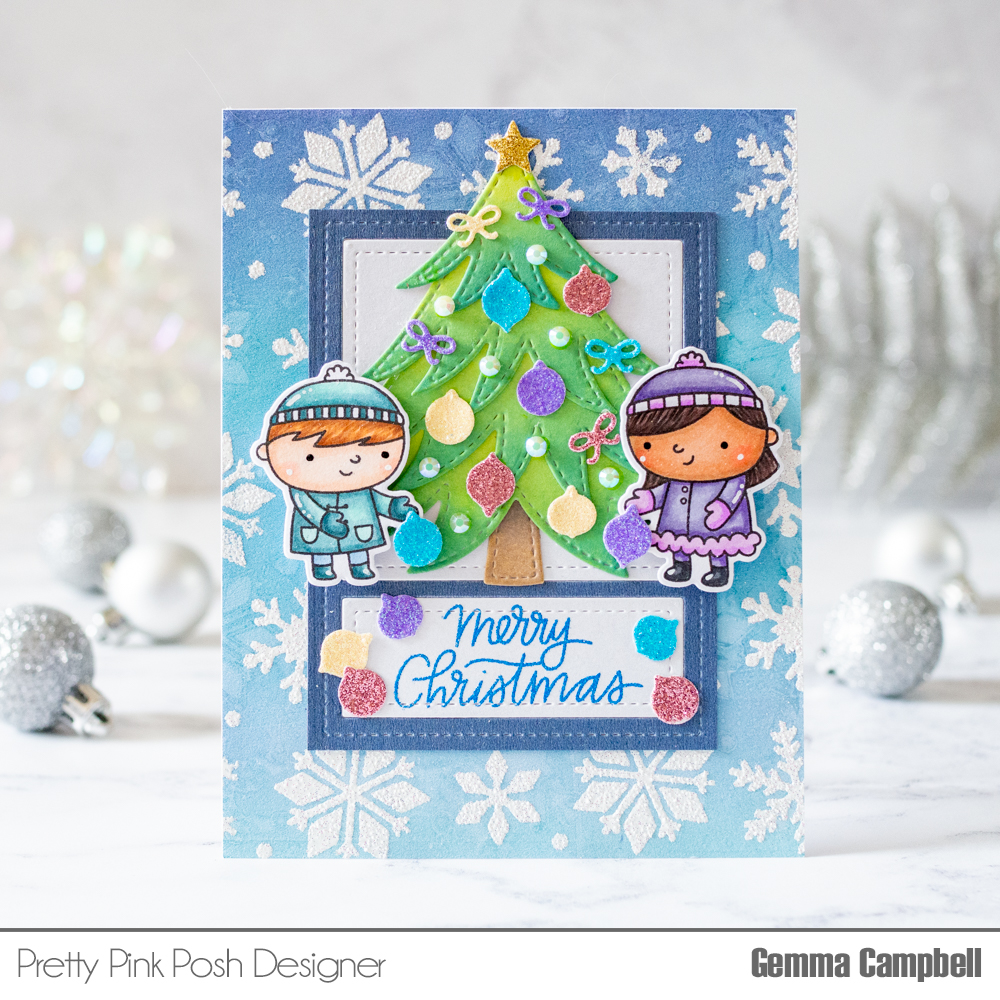
I began with the background, using one of my current favourite techniques – gel plate printing. On a 6×6 gel plate, I added distress oxide inks in the colours speckled egg, peacock feathers and chipped sapphire. I used a brayer to blend the colours together, then took a print using some smooth white card. I love the textured effect you get with gel printing.
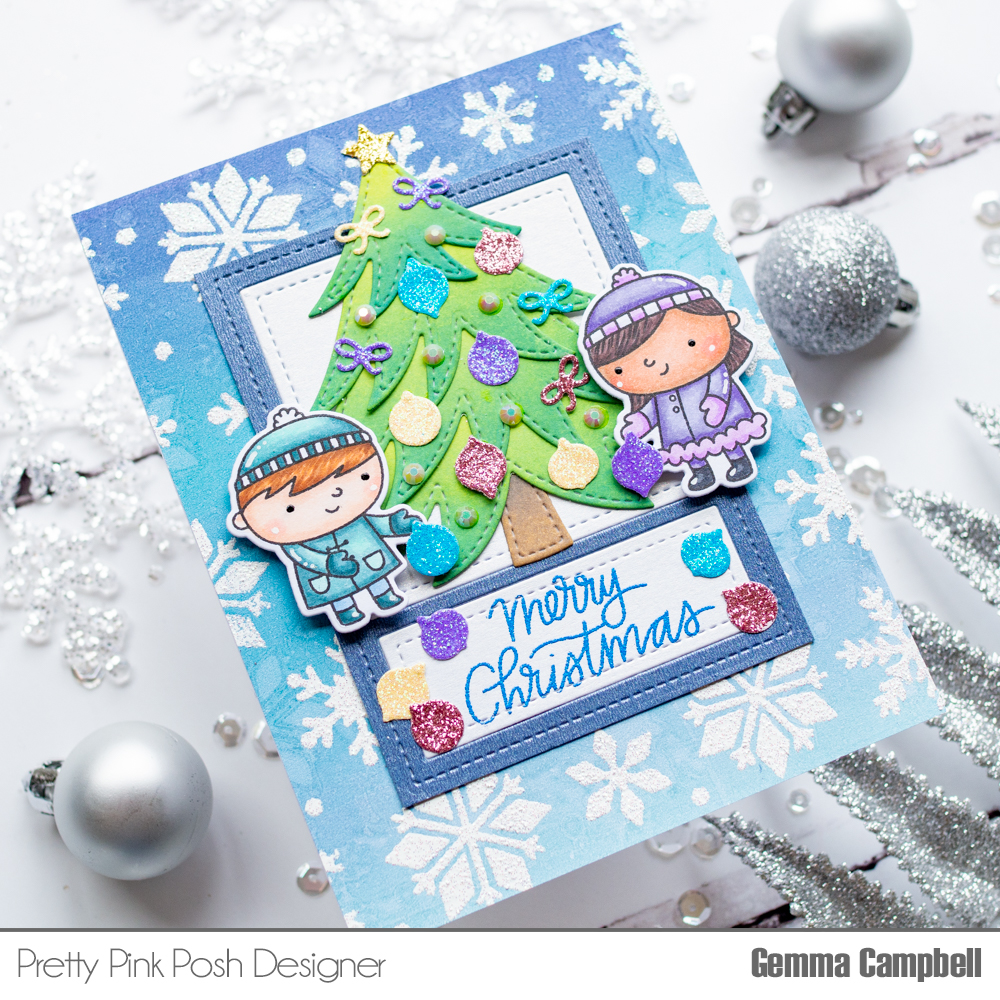
I added the same colours to the gel plate again, this time layering the Snowflakes stencil over the top. As I want lighter coloured snowflakes on my background, I first need to take a print on another piece of card to remove the colour where the snowflakes show through the stencil. I can then remove the stencil from the gel plate and print again on my original card. This will add more colour to the card everywhere but where the snowflakes would be, leaving lighter coloured snowflakes on my background.
To add even more texture to the background, I layered the Snowflakes stencil over my panel, inked through it with a clear embossing ink, then heat embossed the snowflakes with WOW Sparkling Snow embossing glitter. I trimmed the panel down and adhered to my card base.
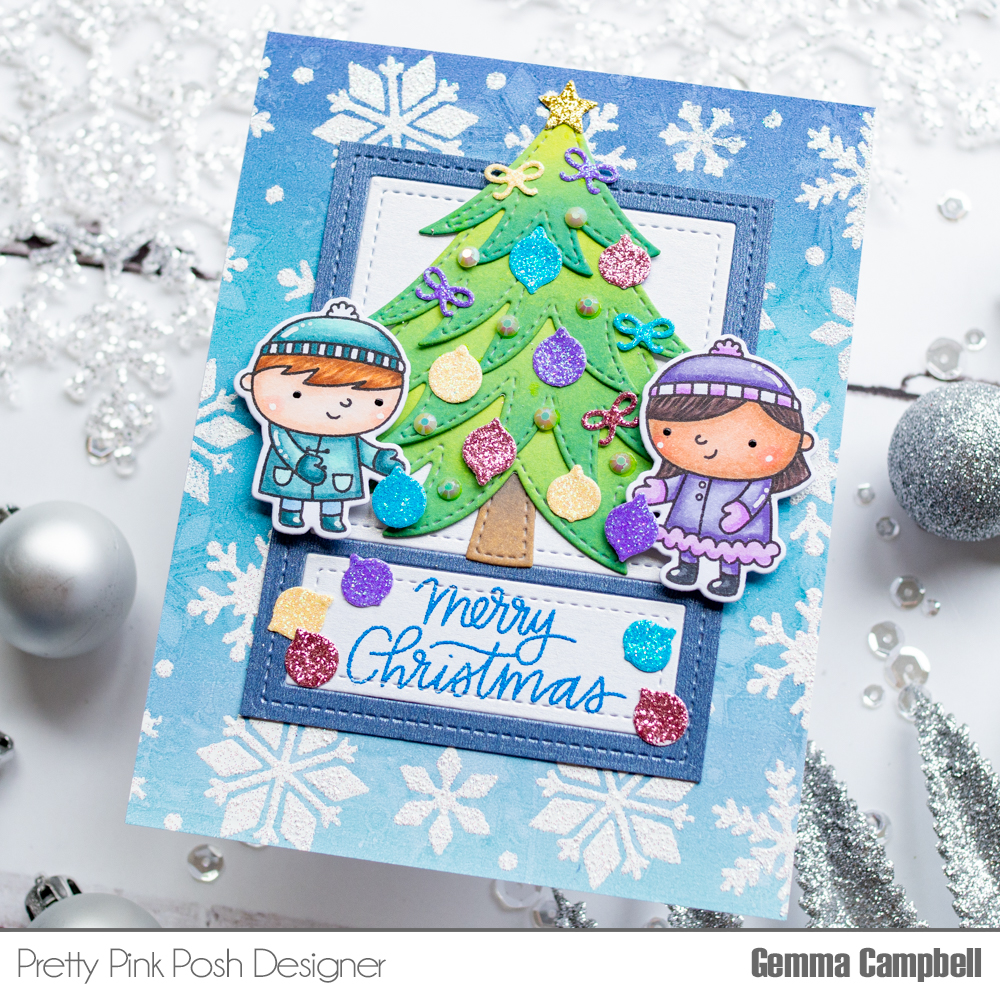
Next, I die cut the Storybook 5 die from pearlescent navy card, trimming down the card so I was left with a skinny frame. I repeated this with pearlescent white card, just keeping the frame inserts for this card. I adhered the navy frame and larger white insert onto my card.

On the smaller white frame insert, I stamped a greeting from the Holiday Greetings stamp set in clear embossing ink. I then embossed the image with WOW Metalline Dark Blue embossing powder, to compliment the background colours, before adhering to the card.
The Layered Tree die set is one of my favourites for holiday cards. I die cut it from white card and added colour using twisted citron, mowed lawn and pine needles distress oxide inks for the tree, and frayed burlap and black soot distress oxide inks for the trunk. I adhered it to the card, then added some glitter card decorations using the smaller ornament dies from the set.
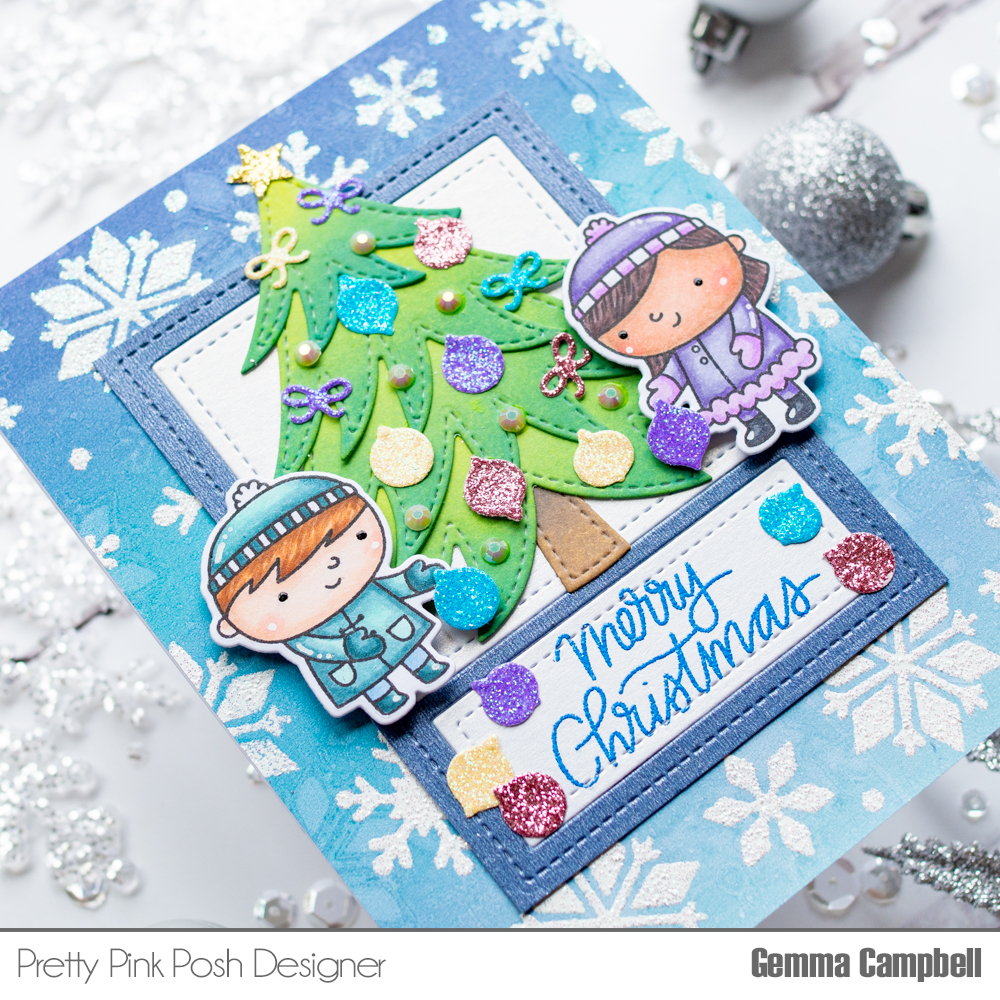
Next, I stamped some images from the Christmas Friends stamp set and coloured them with copic markers. I die cut them with the coordinating dies and adhered to my card with foam tape.
I gave them each a bauble for decorating the Christmas tree, then added some more baubles around the sentiment. I finished my card with some Pearl White jewels on the tree for extra Christmas sparkle.
I hope you enjoyed this installment of the Create A Scene series. Thanks for stopping by!
So cute!!! This would make a great standup slider card!!!
This is Absolutely ADORABLE!!!!!!
This is adorable ! I love the pretty Christmas Tree in this sweet scene!