
Create A Scene: Winter Snowglobe

Today I have a snowglobe scene card to share. By adding a simple shaped die, the Winter Scene can be transformed into a snowglobe. I think it would be fun to turn this snowglobe into a shaker card too.
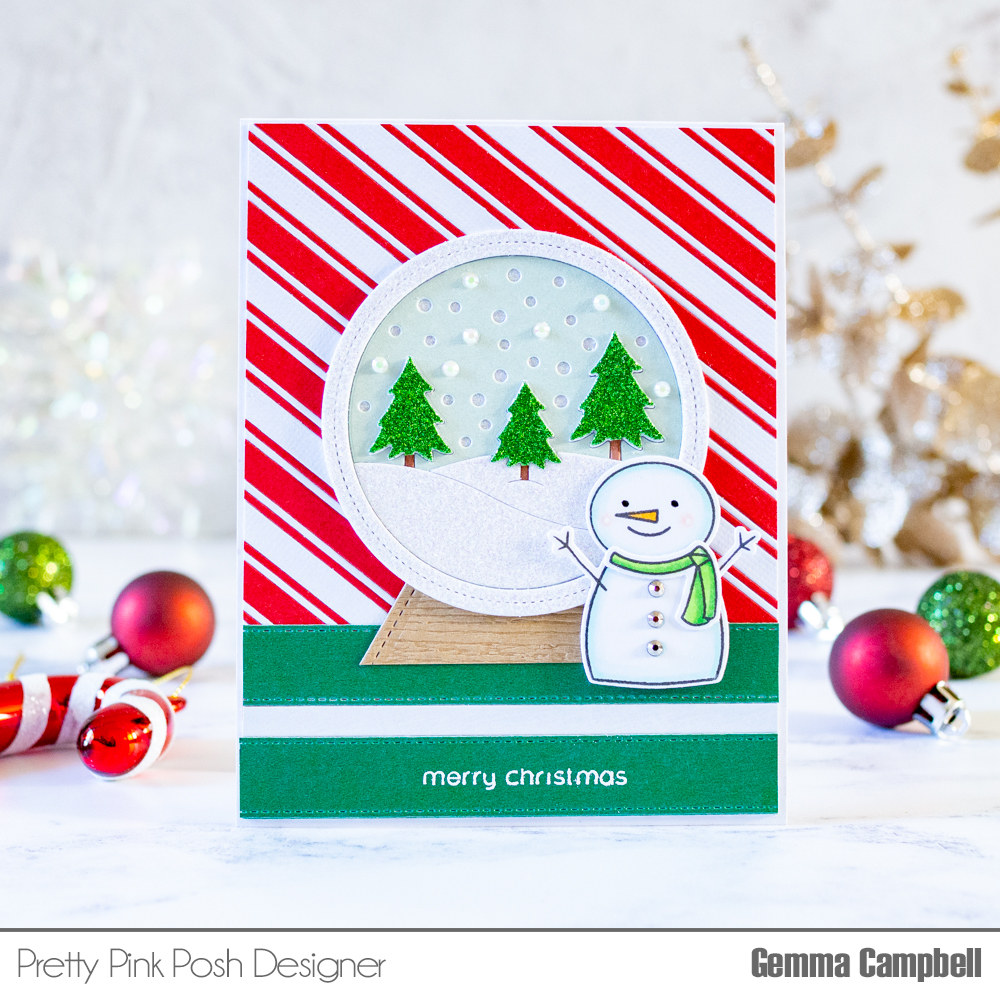
I began with the candy cane background. I used the fabulous Simple Strips die set. The variety of sizes in this set make it easy to create different patterns.
I die cut two different width strips from red and white card. On a piece of thin copy paper, I adhered some stick-it adhesive. I gradually removed the backing, revealing the adhesive, and added the die cut strips to create my pattern. I then trimmed down my homemade patterned paper and adhered it to a white card base.
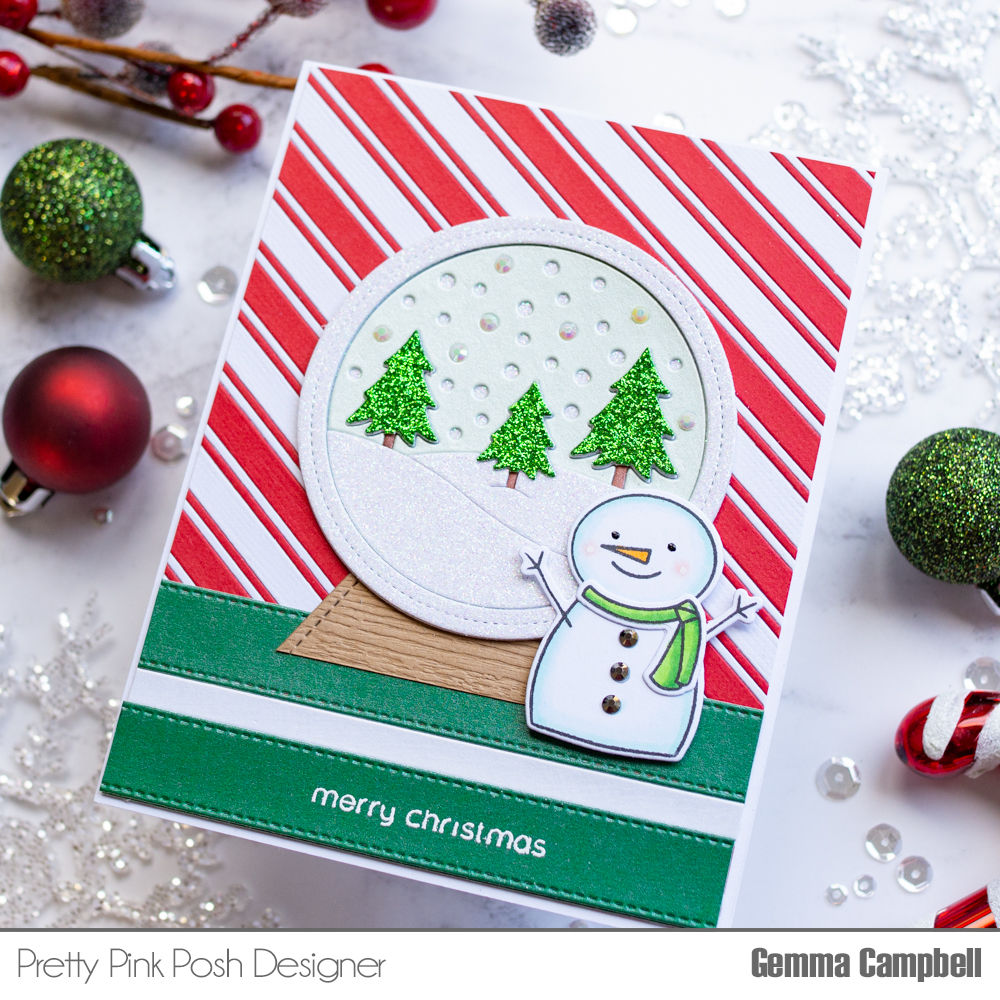
Next, I die cut the Winter Scene die three times – from white and pearlescent green card, along with white glitter card. I also die cut a separate circle from white glitter card to adhere the scene pieces. I layered the three frames together on the circle die cut, with the glitter frame at the top.
On the white die cut trees, I used a brown copic marker to colour the tree trunks. I then adhered the white card hills and trees to the card, along with the pearlescent green sky.
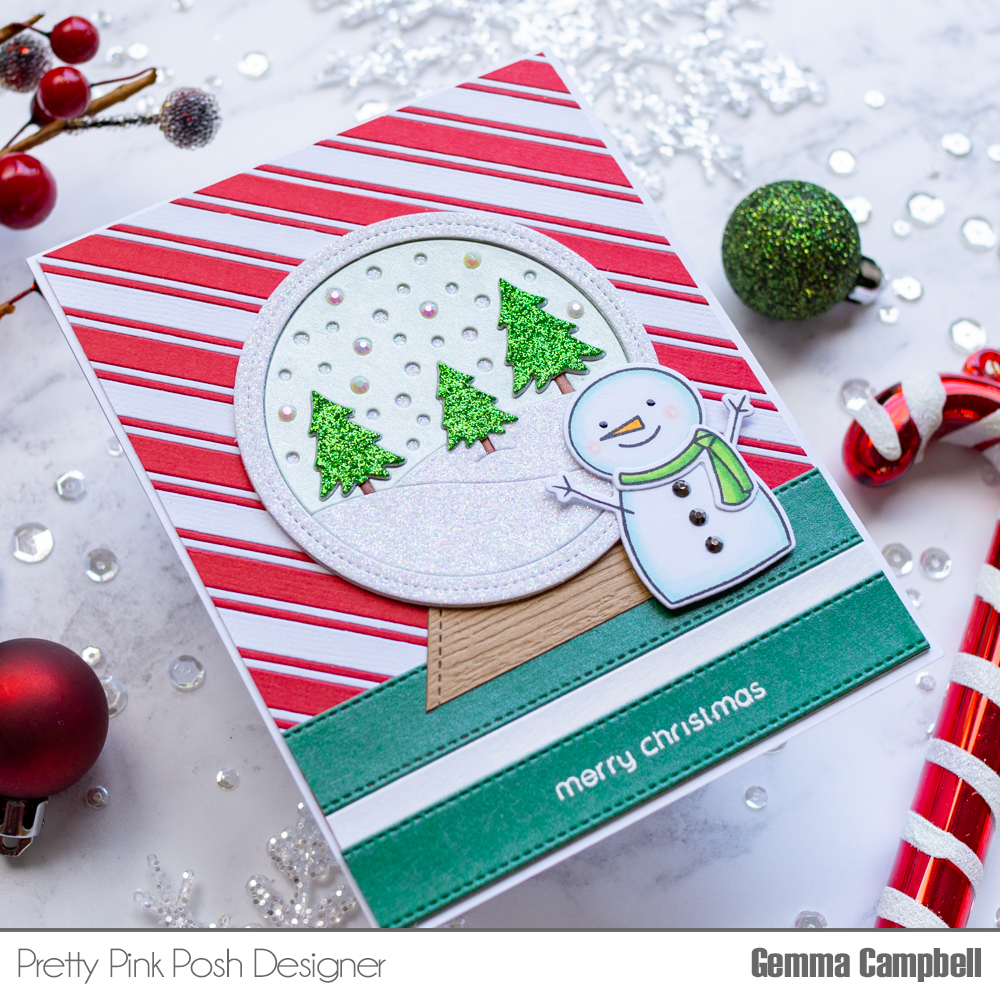
By layering elements of the scene, it adds dimension. I cut the trunks off the white glitter trees, then adhered them and the white glitter hills to my scene. I then changed my mind and decided I wanted green glitter trees instead, so die cut them and added them to the scene.
To turn the Winter Scene die into a snowglobe, I die cut a Stitched Hexagon die from woodgrain card. I cut the hexagon in half to create the stand for my snowglobe, adhering it behind the Winter Scene.
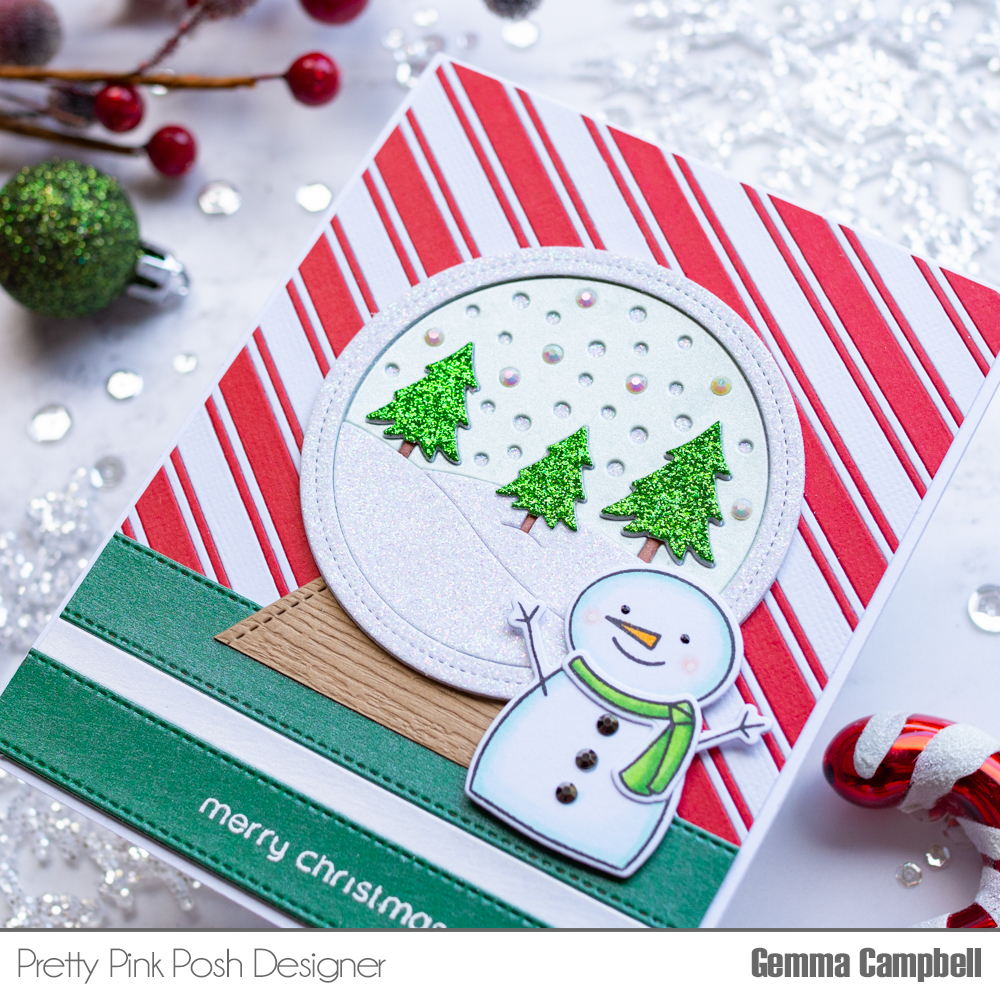
I die cut some Stitched Strips from dark green pearlescent card, along with a white pearlescent Simple Strip, which I’ll use to ground my snowglobe in the scene. I white heat embossed a sentiment from the Happy Snowman stamp set.
You could finish the card here but I decided to add a Happy Snowman next to the snowglobe. I coloured him with copic markers and die cut him with the coordinating die, then used foam tatape to add him to the scene.
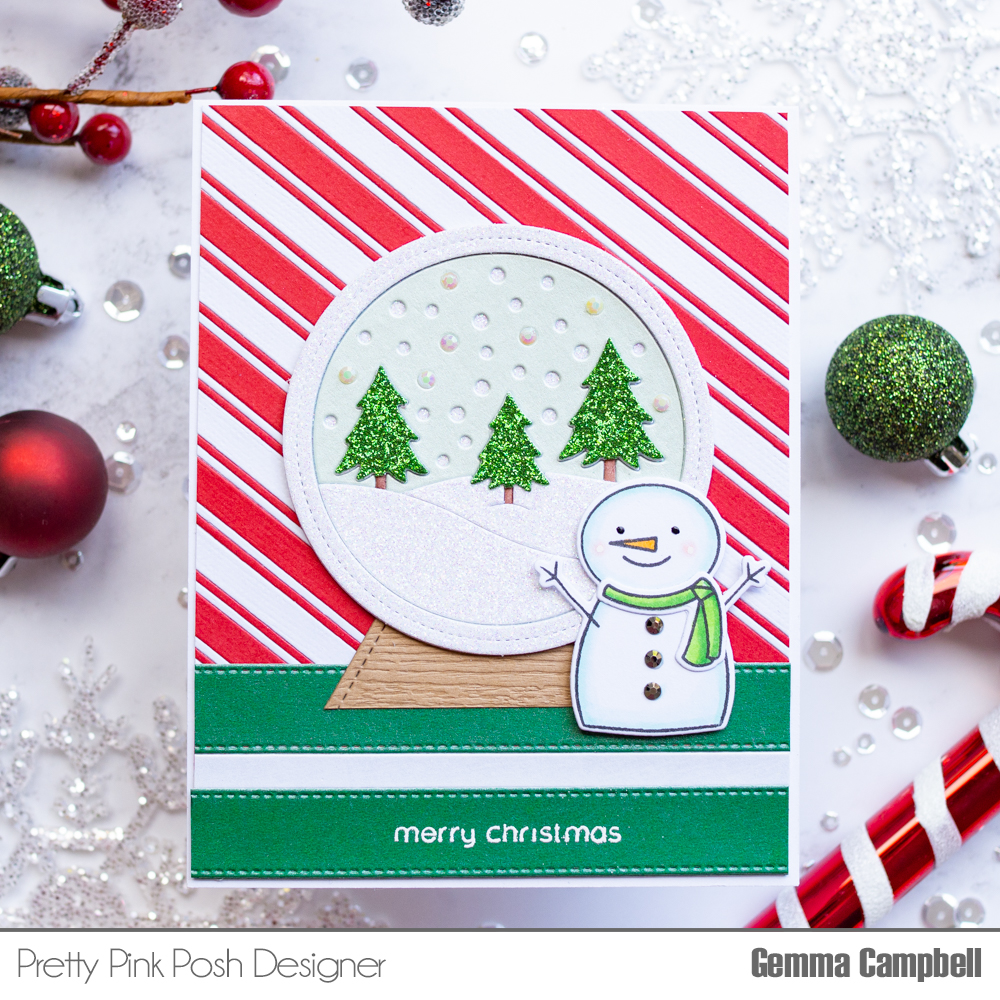
For some finishing touches, I gave the snowman some Graphite jewels buttons and added some Pearl White jewels to the snowglobe sky.
Thanks for visiting today! The holiday season is coming soon and I hope I was able to inspire you.
Soooo Cute!!!
What a fun card! I love this!
Wonderful card. Love the colors and darling image and dies. Love the jewels on the snowman. I have to remember this
Such a super cute card! Thank you so much for sharing! I love your creative use of all the dies! So clever! :)