Valentine Theme Week- Day 3

Hello, it’s Gemma here today for Valentine Theme Week.
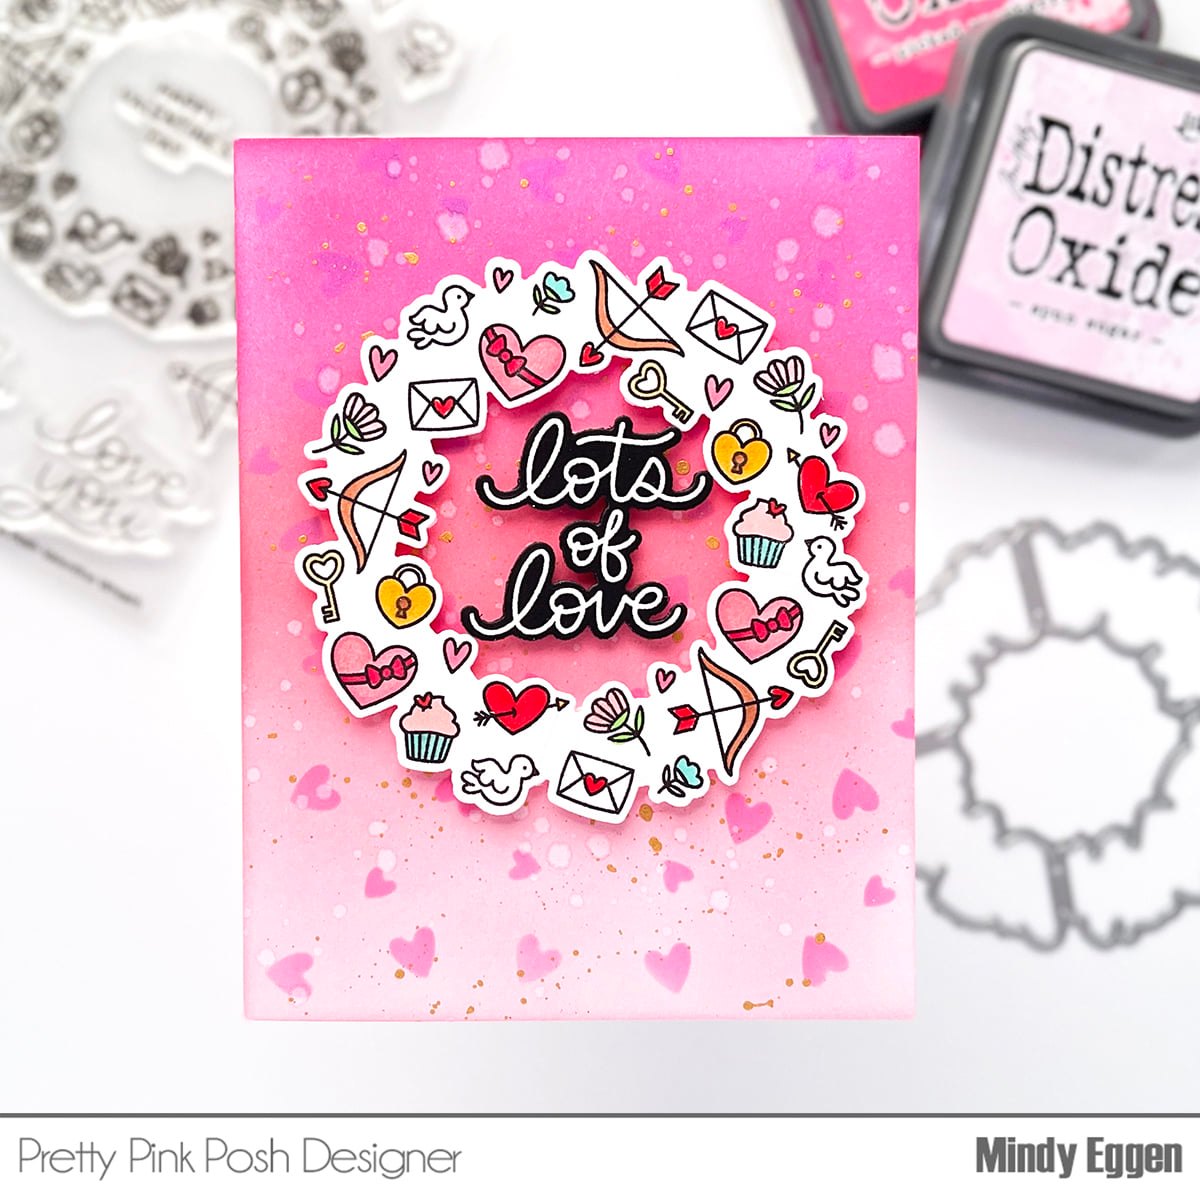
The new Valentine Wreath stamp set is showcased on my card today. I offset the wreath for a fun alternative design. I began with the background, using the new Scattered Hearts stencil to dry emboss a pattern on the right side of a card panel. The plate sandwich will depend on your die cutting machine, so experiment to get the desired look. You may want to add shims for a deeper impression.
Be sure to stop by the Valentine section as all items there are 15% off this week!

Affiliate links are used for products that are not sold in the Pretty Pink Posh Shop.
I then lightly used a blending brush to add Spun Sugar and Kitsch Flamingo distress oxide ink colours. I started from the right hand side, fading out the colour as I went. The ink highlights the embossed details nicely. I adhered this panel to my card base.
Copic marker colours
Wreath: E40 E41 R20 R22 R81 B91 BG72 Bird: R00 R81 RV34 B91 B34 R20

Next, I stamped images from two new stamp sets – Valentine Wreath and Sending Love. I coloured them with copic markers and die cut them with the coordinating dies. I used foam tape to adhere the bird and wreath to the card.
For the sentiment, I stamped a greeting from the Valentine Wreath stamp set with Versafine Onyx Black ink on a piece of white card. I then heat embossed it with a clear shimmer embossing powder.

I die cut the sentiment and added layers behind for dimension, then adhered to my card to finish.
Thank you so much for stopping by, see you next time.