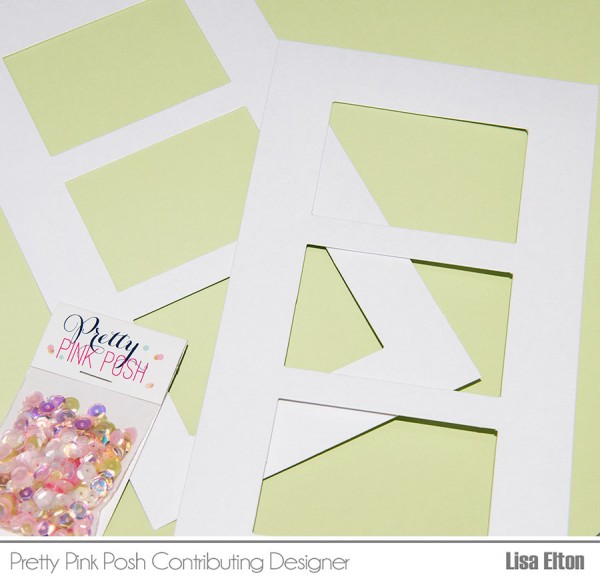
I selected frames with matting included. You’ll see this has space for three photos.
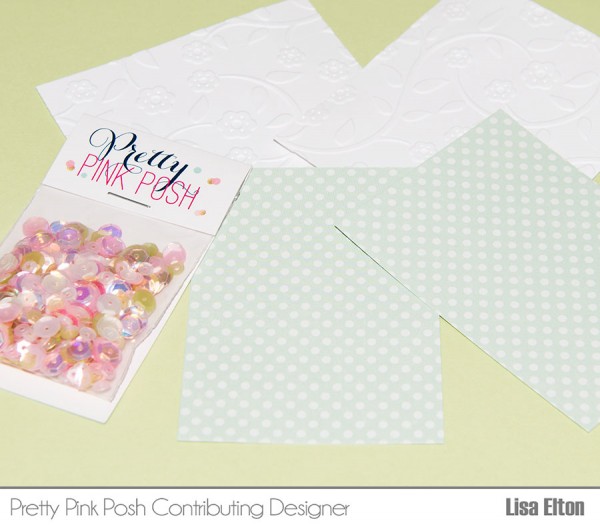
I cut two panels of patterned paper, and two from white cardstock. The white panels were dry embossed with a floral pattern. These were added to the two mats with tape runner adhesive.
The fun began here with the placement of the images! I added the two black and white photos then the Sweet Pea Sequins. This will be a little gift to my granddaughter for her nursery!
We hope that today’s post and project inspired you to think outside of cards and stretch your stamps, dies and embellishments; the possibilities are endless!
Thanks so much for stopping by and have a great day!
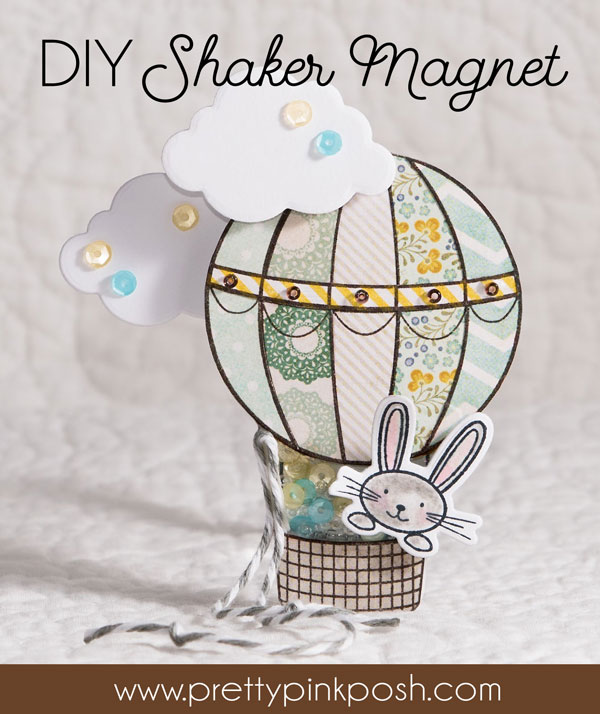
I’m back to share another project using sequins and seed beads on something other than a card. This month I have a refrigerator shaker magnet for you!
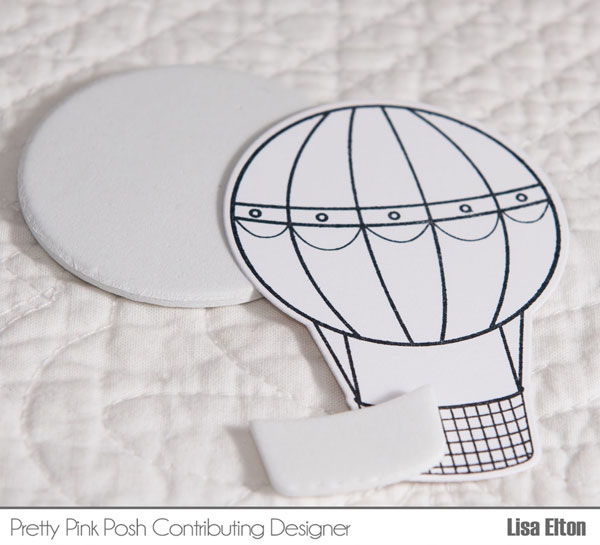
This project begins by stamping and die cutting all of your necessary pieces. I’ve used stamps and dies from the Darling Friends (previously released) and Rainy Days sets. You’ll need one die cut balloon as your backing, one as your base, one from acetate and one to paper piece. Cut four small clouds and one little furry friend.
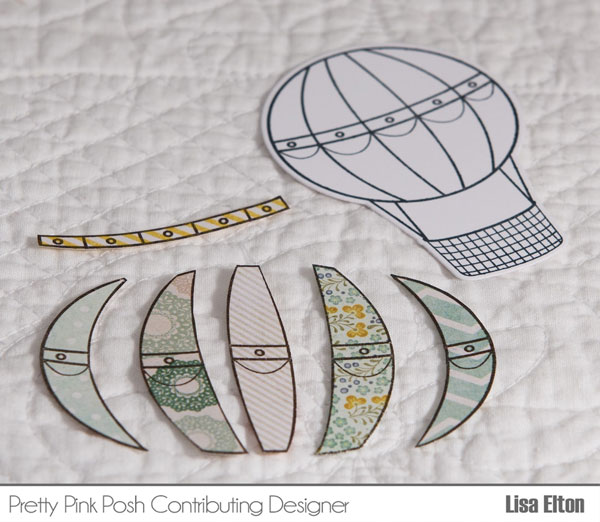
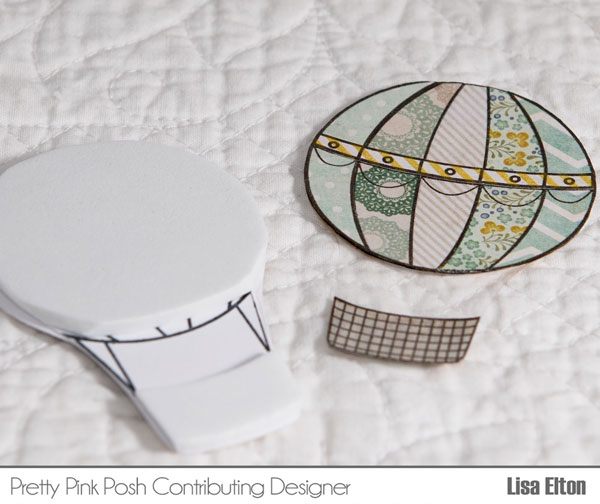
Next, stamp your balloon onto patterned paper to be trimmed out and paper pieced. You’ll see that I’ve stamped on five different patterned papers and once more for the horizontal band. This is a great way to use up little scraps. If paper piecing is not your thing, you can color the balloon!
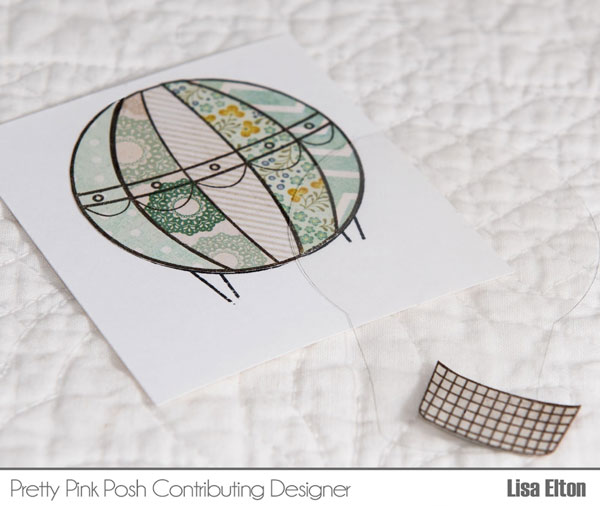
Glue your balloon together then trim off all of the white cardstock.
To add dimension for a shaker, die cut the balloon from fun foam. You will only need the top circle and basket portions. Foam tape would work here as well.
Adhere the blank balloon die cut to the back of the stamped one. I took this step for added stability. Add fun foam to the stamped/die cut balloon. Adhere the paper pieced balloon and basket to the die cut acetate.
Note: The die cut pieces are larger than the paper pieced balloon & basket. Trim excess acetate, fun foam and paper.
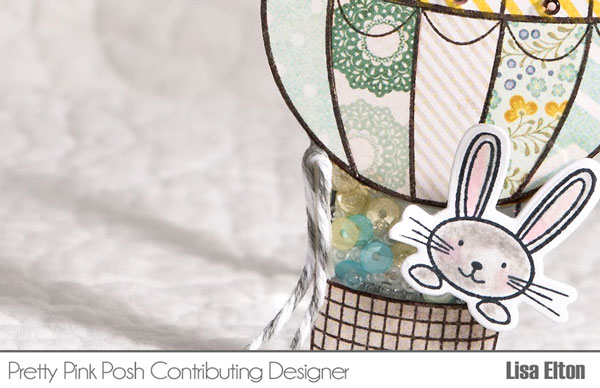
Use a thin strip of foam tape on the outer stamped ropes to create the shaker portion of the magnet. Fill this area with 4mm sequins (Lemon Meringue & Aquamarine) and Sparkling Clear Seed Beads. Sandwich balloon pieces together with adhesive or glue. Add a magnet to the back.
To cover the foam tape showing through the acetate, glue on twine as tie down ropes. The other side can be covered with the furry passenger!
Glue two die cut clouds together (from the Rainy Days coordinating dies) then add one to the front of the balloon and one to the back for added dimension. Decorate the balloon with seed beads and the clouds with sequins.
Below are the links to the Darling Friends set, which PPP designed exclusively for Simon Says Stamp.
There are many dies and sequins in the shop that would make great refrigerator magnets. The possibilities are endless!
Thanks so much for visiting today. See you next month!
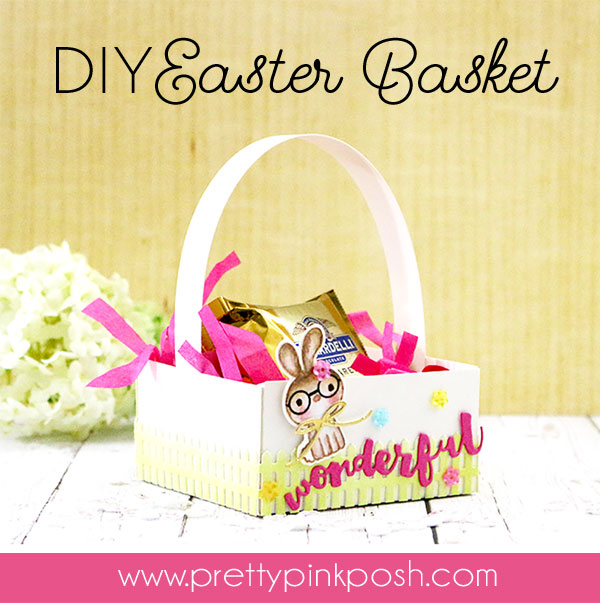
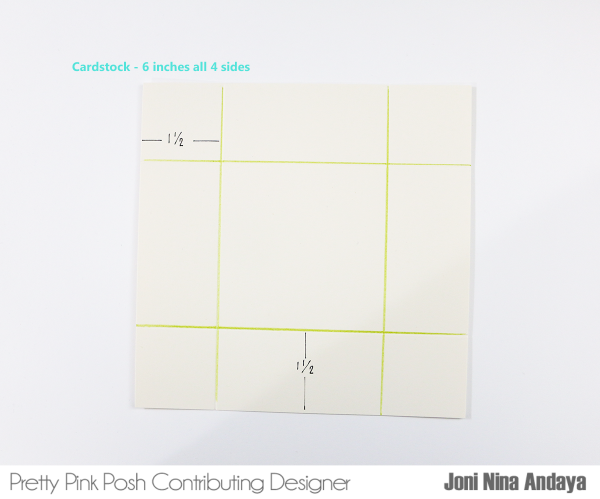
Hello everyone, Joni here with another tutorial. Today I’ll be showing you how to create a DIY basket for your Easter goodies.
To begin, I cut my cream cardstock to measure 6×6 inches and scored each side by 1 ½ inches.
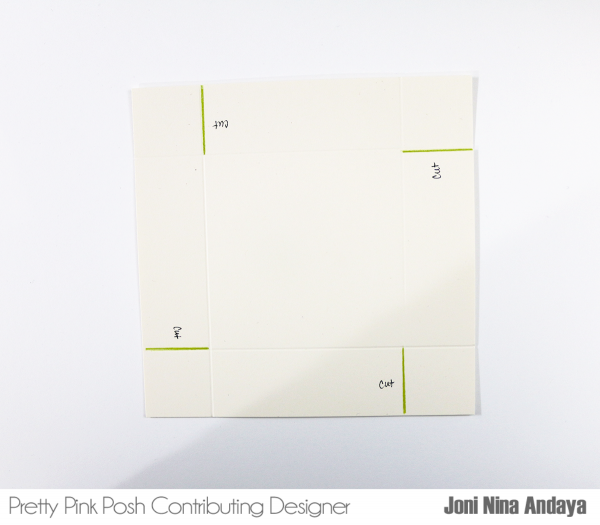
Next, I cut all four sides. Just as the green lines I drew on this cardstock below.
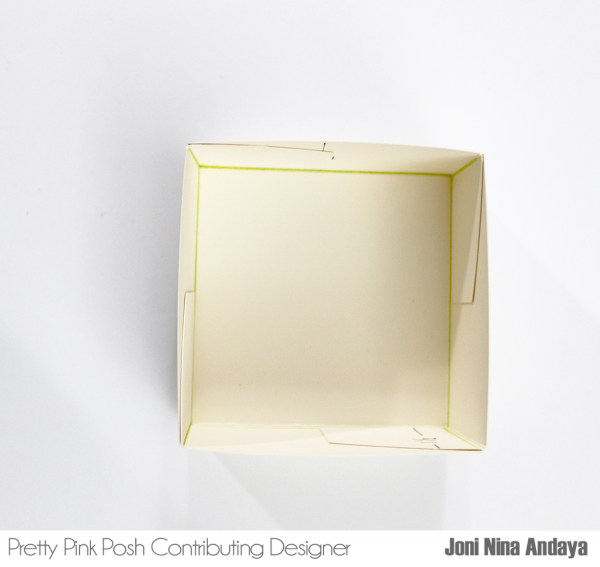
Next, fold the sides of the cardstock that was cut to make it into a box for a basket.
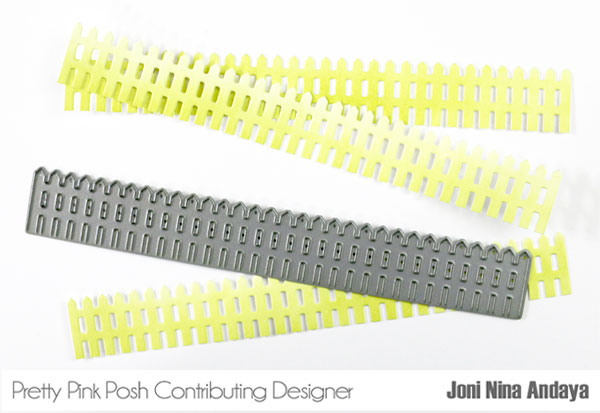
To add decorations on the basket I die-cut the picket fence from Pretty Pink Posh Picket Fence die. This will be added at the bottom of the box for added interest.
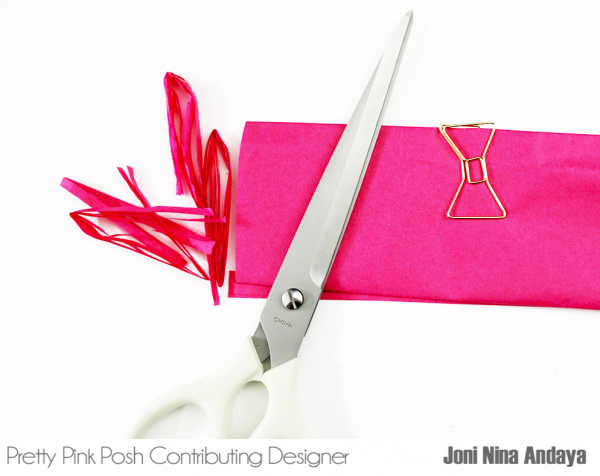
I also added this fuchsia tissue paper to put inside the basket after cutting into strips. This would be so nice too if you have a green tissue paper (to look like a grass).
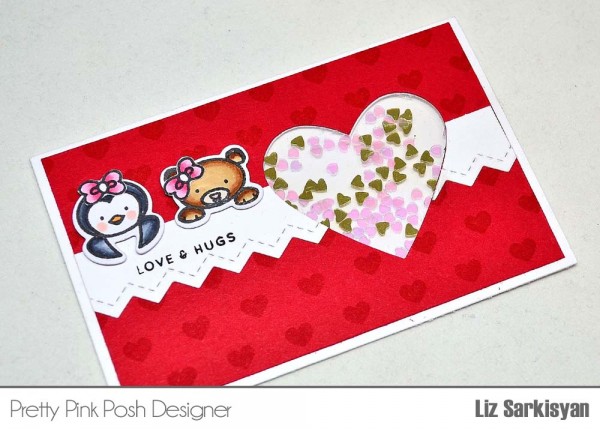
I’m so excited to have Liz here on the blog sharing a tutorial on how to create easy shaker cards using the new Mini Heart Confetti! No need for fun foam or thick mounting tape with this tutorial…
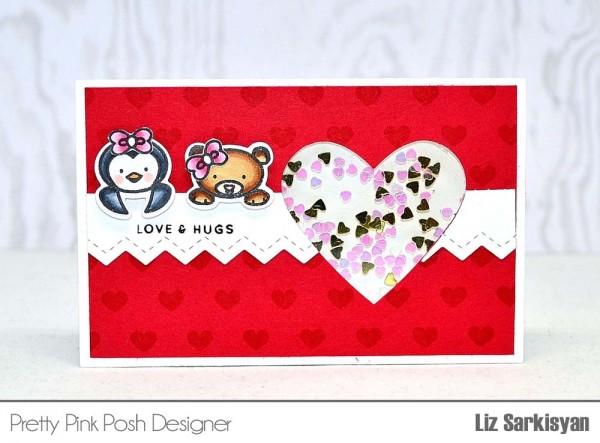
I do love this time of the year, and as Valentine’s Day approaches, I thought what better way to send to family and friends, a small card filled with adorable mini hearts in the form of a flat shaker so that I could easily mail out.
Here, I used this adorable little penguin and bear from the Winter Friends stamp set along with adding a tiny bow on each one. I must say, this set is one of my favorites and can be used all year round. Not just for Christmas.
These are so much fun to make and go quickly for creating several of them. You won’t want to stop with just one. Also, it’s so much fun to play with these adorable Mini Heart Confetti in Iridescentand Gold colors. Here is a little tutorial along with measurements.
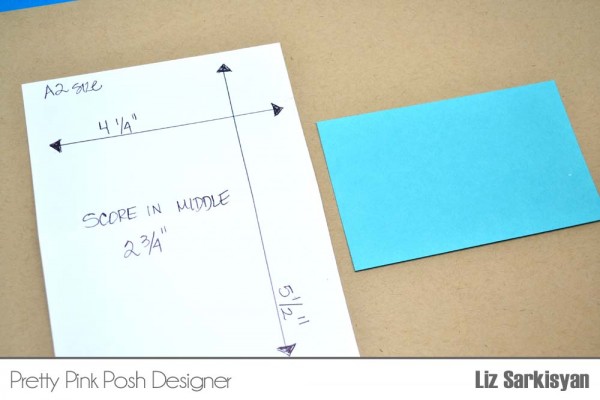
Step one: Cut a piece of card stock A2 size ( 4 1/4″ x 5 1/2″) and score in the middle at 2 3/4″
Step Two: Cut a smaller piece of cardstock ( 2 1/2 ” x 4″) that will be used for decorating
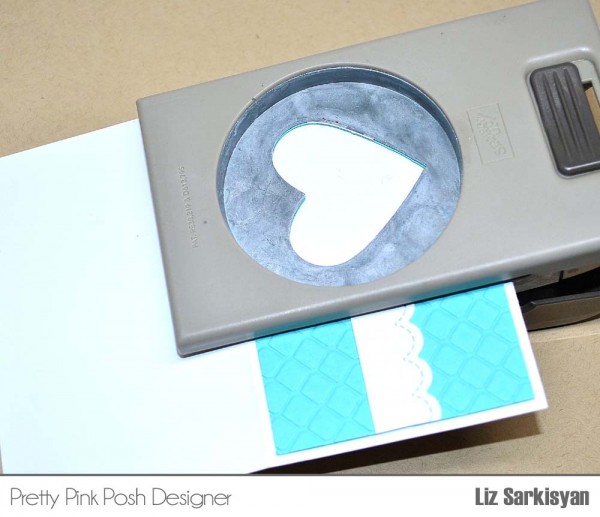
Step Three: Punch out a heart on the right hand side or desired area using a punch or die
Step Four: Next, I embossed the blue rectangle using We R Memory folder called Chain and added this adorable scallop border from the Stitched Border 1die collection from Pretty Pink Posh and adhered it to the cardstock.
Step Five: Since I needed to punch out another heart directly on the card base, I used the blue cardstock to help me align where I needed to punch out the heart. Keep in mind, do not glue it down, but instead use it as a placement to help you.
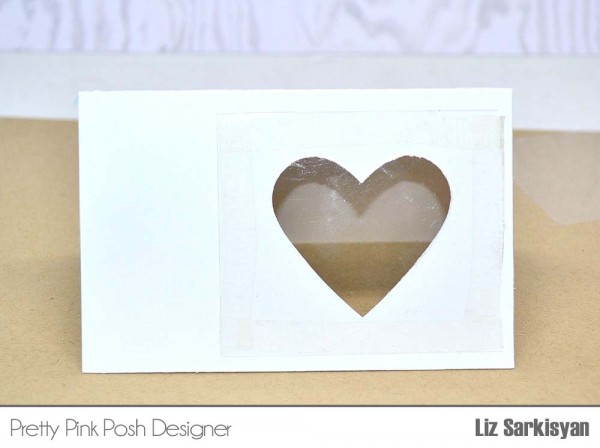
As you can see, now you have the card base with the heart punched out along with the smaller blue card stock as well.
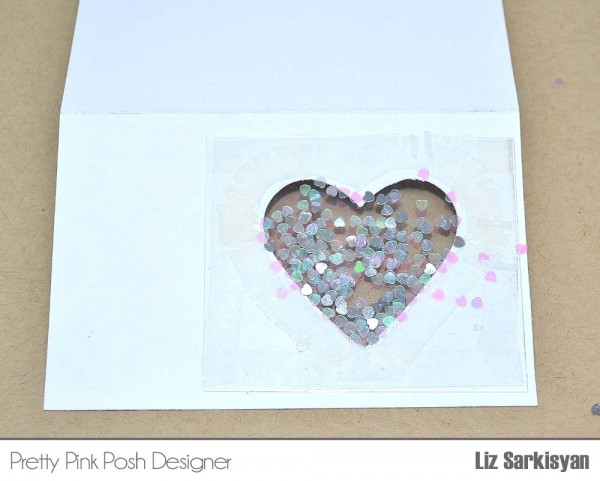
Step Six: Add a piece of acetate on top of the heart to cover it. Here, I cut approximately 2 3/4″ x 2 rectangle.
Step Seven: Now add adhesive on top of the acetate starting around the entire heart, than along the sides of acetate. Think like you were adding foam mount and creating a wall around the heart to keep the sequins in. Here, I added in these adorable Mini Hearts from Pretty Pink Posh in Iridescent andSilver which I love how it sparkles.
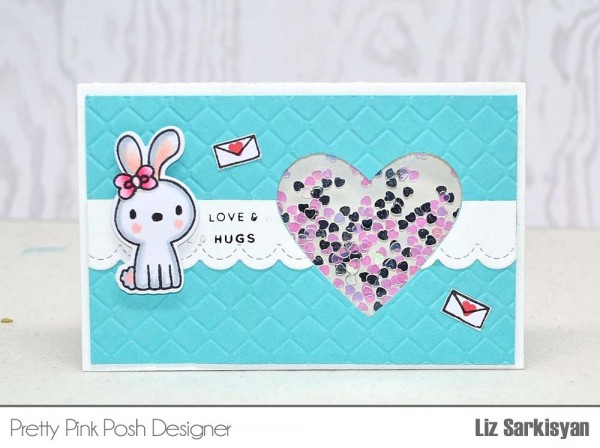
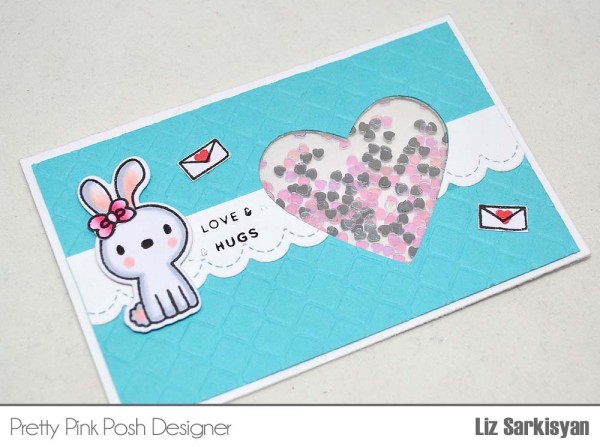
Final Step: Add the smaller card stock on top of the card base aligning it with the heart shape and finish decorating. Here I used a sentiment from the Sending and Wishing set from Simon Says Stamp along with this adorable bunny from the Holiday Palsset from Pretty Pink Posh. Again, this set is not just for Christmas as you can see.
Don’t want to forget, I also added in these adorable little mini envelopes from the Birdie Notes set (releasing in March) where I also used the little tiny heart it came with.
If you want another great Valentine post, Liz created an additional tutorial over on her blog for a candy treat holder. It’s absolutely darling and uses the same stamps from this post! Read her post HERE.
I’ll be back on Valentine’s Day with my next Favorite Free Fonts feature. It’s been a while since I did the last one and I know you all love them!
From the design team and I, we hope you have a LOVE-ly weekend.
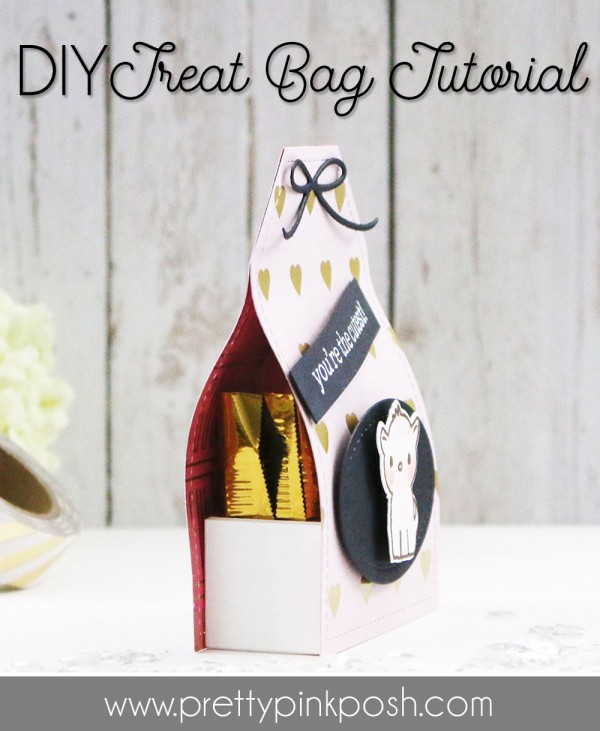
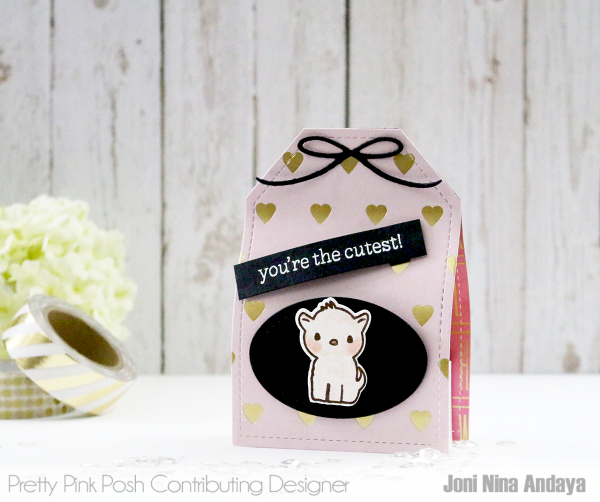
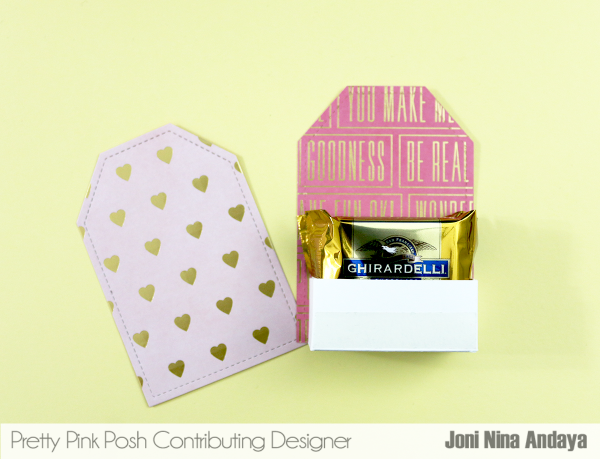
Hello Everyone, Joni here for a treat bag tutorial for Valentine’s Day (but you could adapt it for other occasions). You can simply change the color of the patterned paper and sentiments to make it work to the theme of your choice.
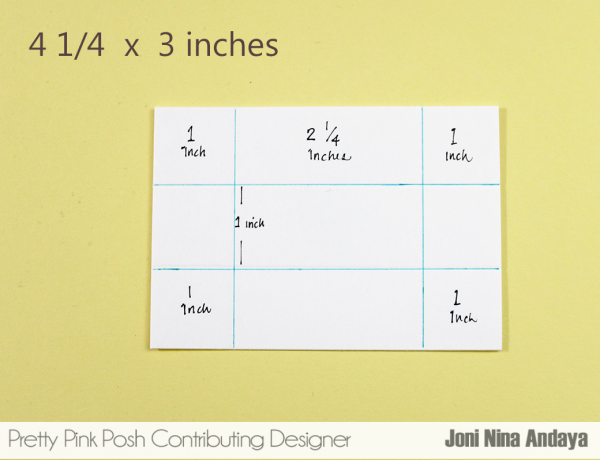
For this project I cut a piece of cardstock like the image below 4 ½ by 3 inches.
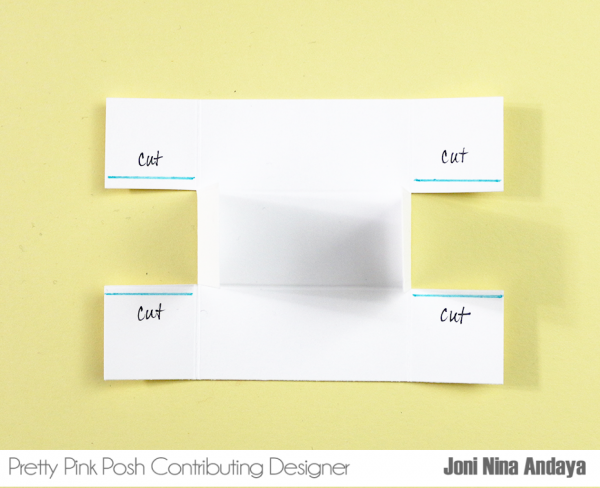
Next, I cut the middle side of the piece of cardstock like the image below, then fold to make a box.
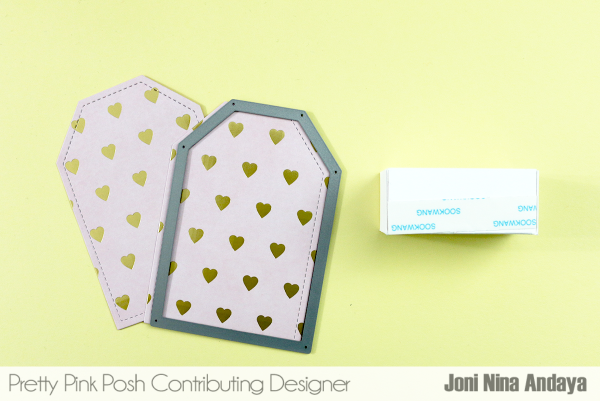
Next, I put a double sided tape on both sides of the box and cut the tag using the Stitched Duo 1 dies.
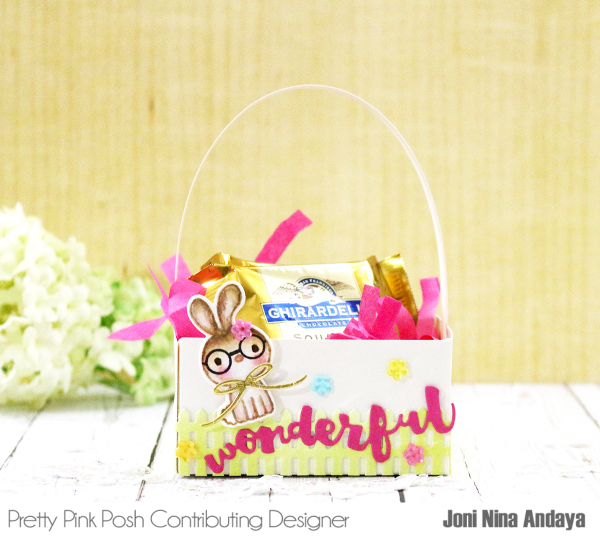
For assembling, I adhered both of the tags on both sides of the box. This box can hold 3 Ghirardelli chocolate square.
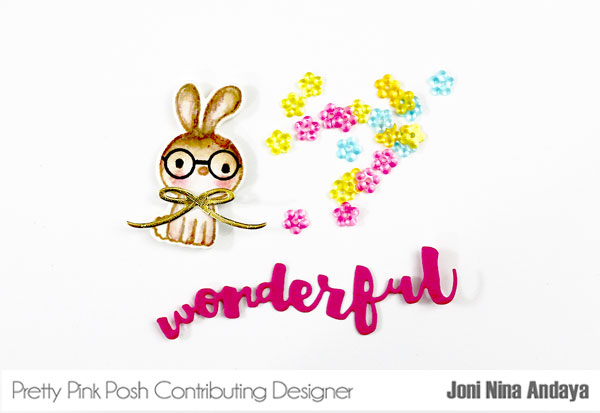
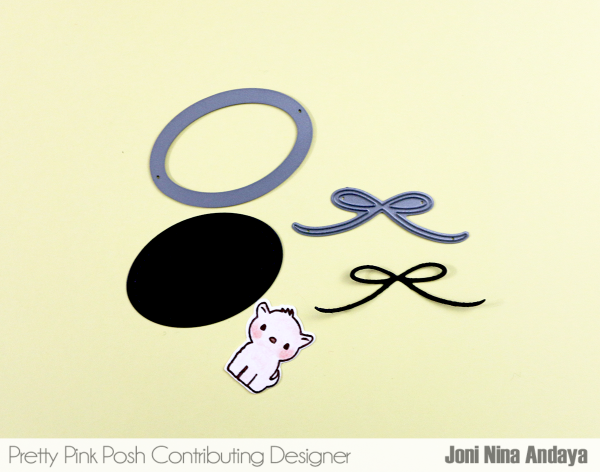
To decorate my box, I kept it simple. I die-cut a black cardstock using the oval tag from Stitched Tags die and I also used the bow die-cut from Twine and Bows dies. I also used the stamp and dies from Holiday Pals for the tag.
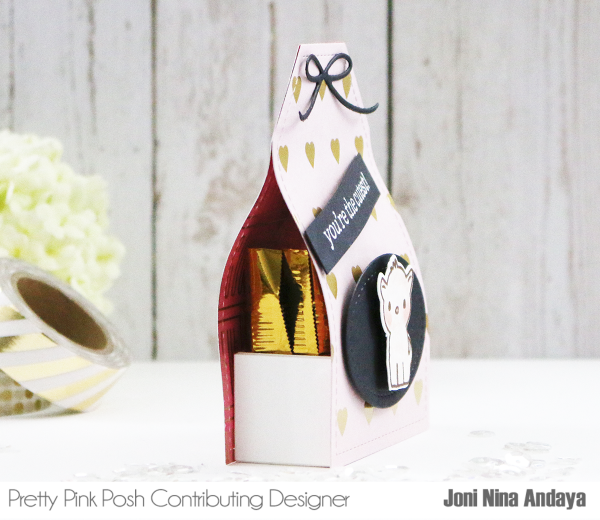
Here’s the look of the finished goodie tag side view.
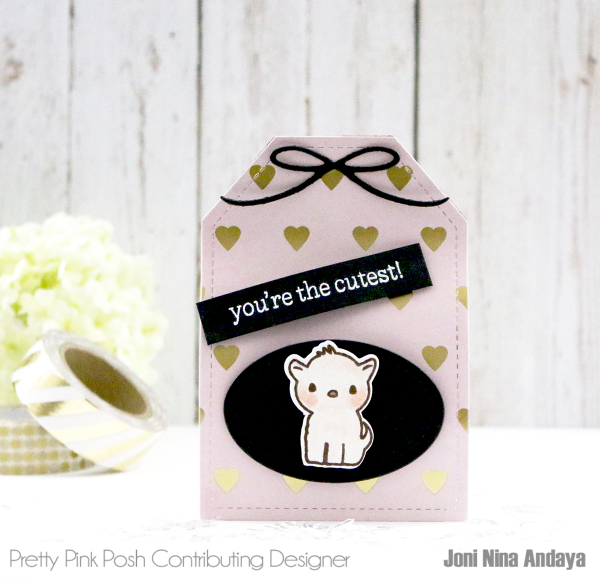
Here’s the front view.
I hope you guys enjoyed this tutorial for your next goodie project. Thank you so much for stopping by and don’t forget to tag #prettypinkposh on Instagram with your projects featuring our stamps, dies and sequins!
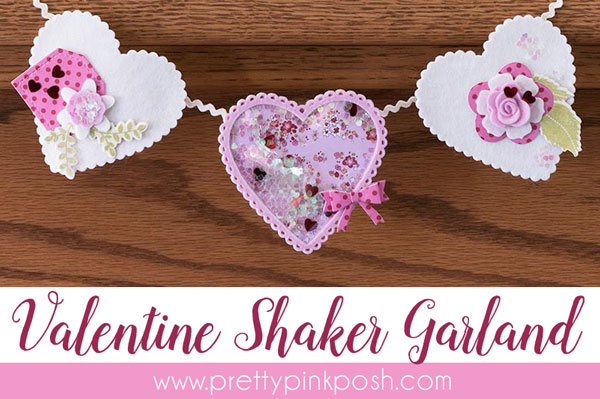
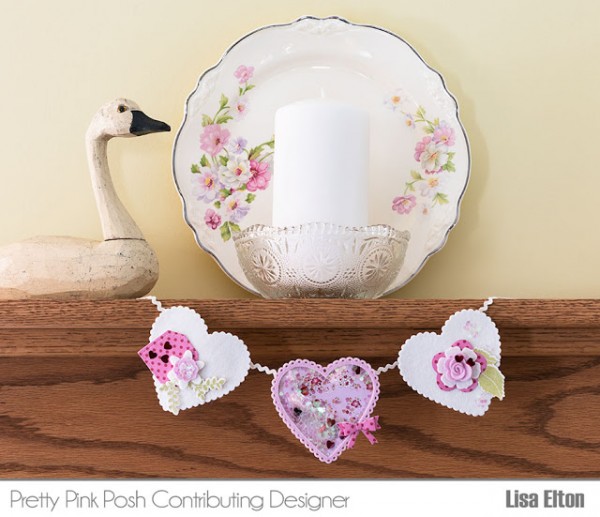
Hello! I’m delighted to be sharing my first feature post with all of you! Each month I’ll have a project showcasing sequins, confetti or seed beads in a unique way on something other than a card. With Valentine’s Day quickly approaching my mind was on hearts! I’ve created a small garland perfect for a mantle, shelf or door.
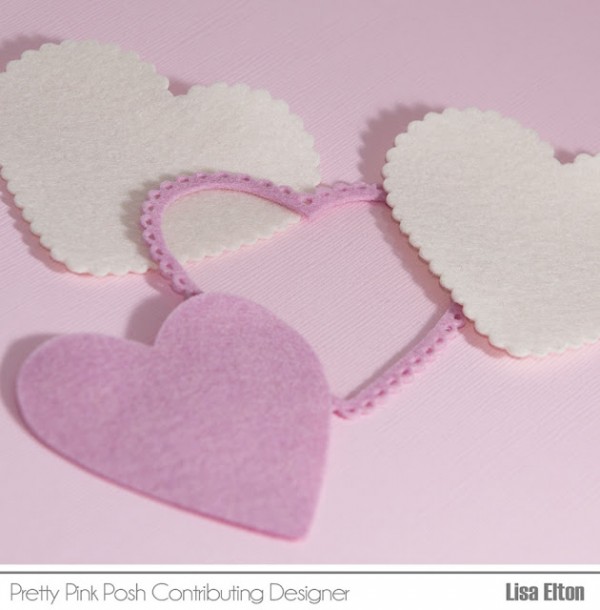
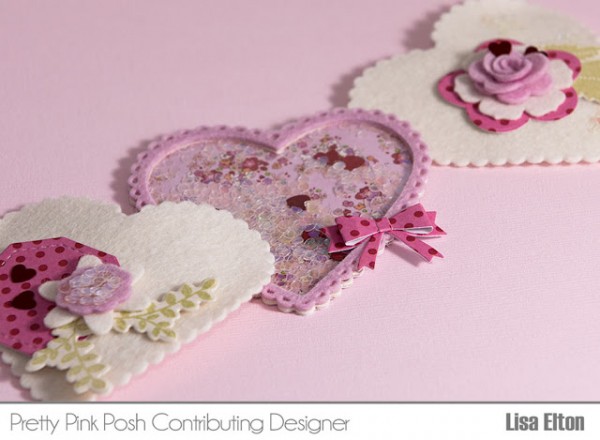
To begin, die cut three felt hearts. (This shape can easily be switched out for other holidays or everyday use). One of the hearts will become a shaker so you will need to cut an opening in that shape.
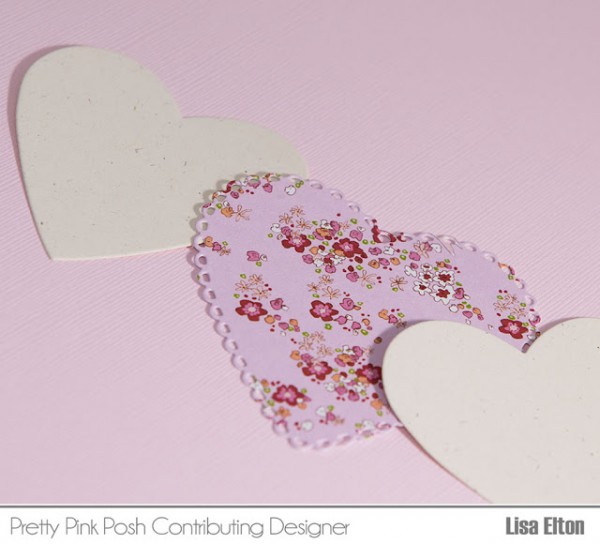
Next you’ll need three paper backing heart shapes. One of these will back your shaker. I chose a pretty floral paper for this purpose. The other two will not be seen. Plain cardstock, poster board or chipboard will work just fine.
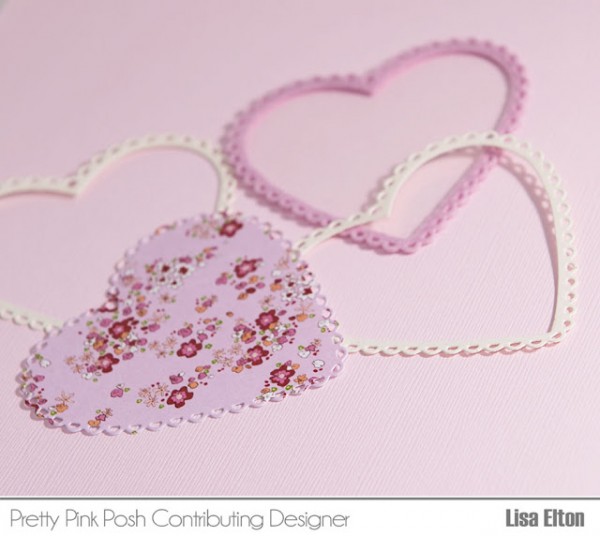
Adhere this paper backing to the reverse side of each cream felt heart for added stability.
The shaker will be filled with Confetti so the form for it doesn’t need to be very thick. I used two cardstock spacers. If using Sequins or Seed Beads, you’ll need to use foam tape or fun foam. Remember to die cut one acetate heart as well for your shaker window..
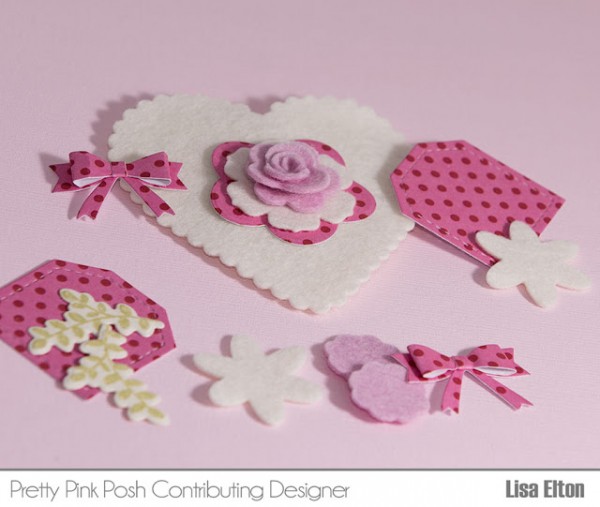
Die cut and stamp several items (mini tags, flowers,leafy sprigs, bows) to decorate the other two felt hearts.
Glue clusters of die cut items onto each of the plain hearts. Add confetti as accents. Fill your shaker withIridescent Mini Heart Confetti(coming soon!) and Red Heart Confetti.
The possibilities for this little garland are endless! I made mine to match my great grandmothers plates. Aren’t they pretty!!
If you have missed any of the previous posts, click on the photos below to see the post from that day.
We hope that you enjoyed the Valentine theme week!
Welcome to a whole week of Valentine inspiration here at Pretty Pink Posh. Every day this week we will have some tutorials and inspiration that you can use for the upcoming festivities.
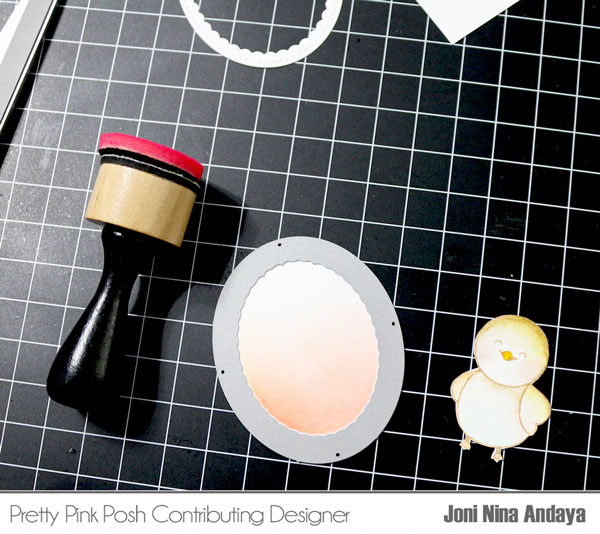
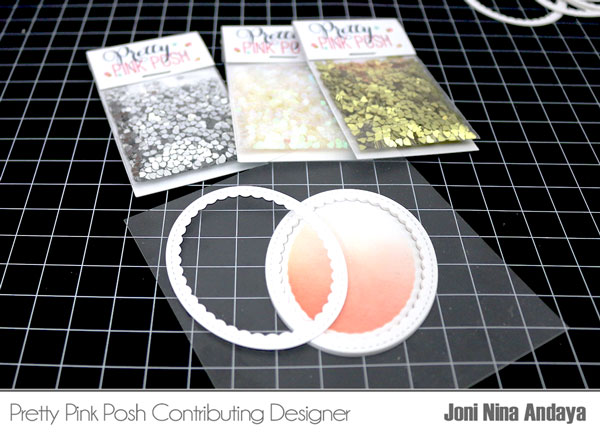
To begin, die-cut the oval scallop from Pretty Pink Posh Decorative Tag 1 dies and while it’s still with the die I then distressed it with PTI Summer Sunrise ink pad to give the color for the background. Once its distressed I then taped the back of the scallop border with the inside of the scallop. This will help me make a small oval shaker that I can add to a tag or a card.
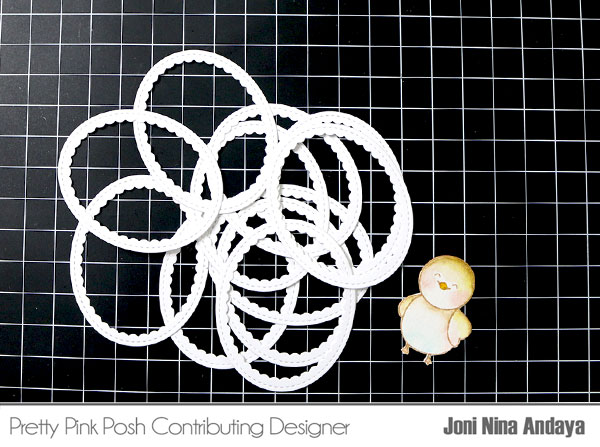
For this project I die-cut lots of oval scallop border and I usually stack 3 (glued) and adhered on the top of the oval scallop. Because the border is thin, it’s easier this way for me to hold those awesome new Mini Hearts Confetti coming your way. But if you like to cut a thin foam tape, this will work too.
Next, I glued another scallop border on top of the clear acrylic and filled the scallop shaker with this yummy new Mini Hearts Confetti along with other Pretty Pink Posh sequins. The Mini Hearts Confetti will be available this coming February 1st.
After filling the scallop shaker, I then glued the back of the acrylic following the lines on the scallop border and adhered on the top of the scallop shaker. I trimmed the excess acrylic from the scallop shaker with scissors.
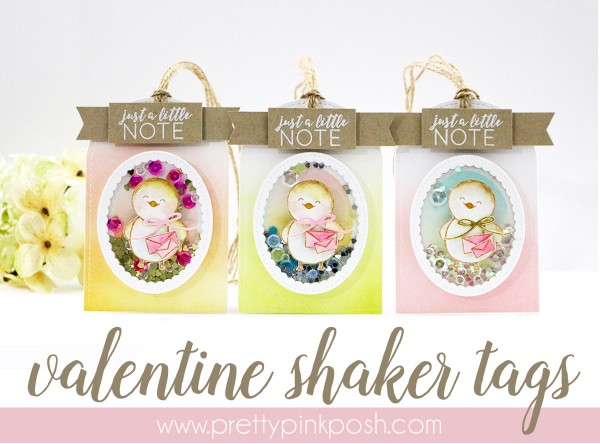
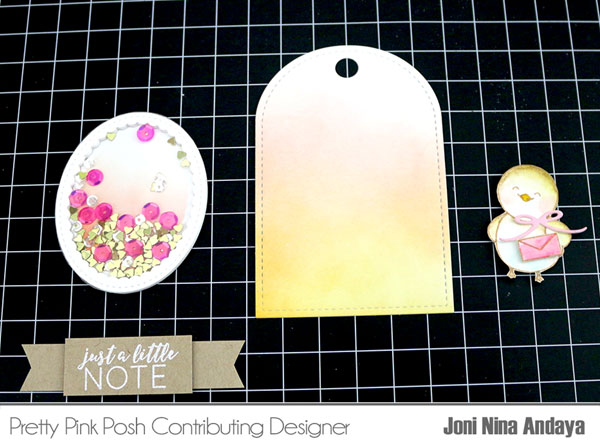
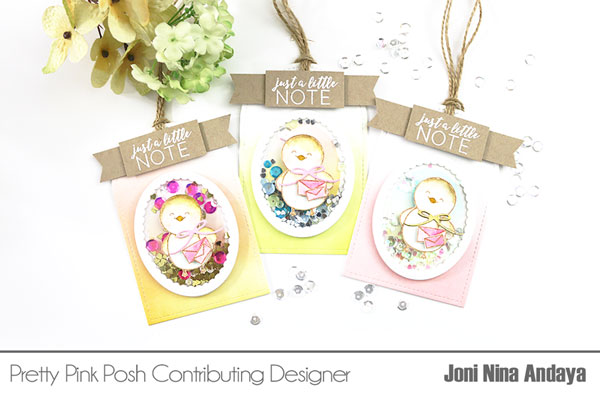
For this tag I used the Stitched Duo 3 dies and distressed. You can use other PPP tag dies for different looks too. The little cute chick is from the free stamp set Birdie Notes that was released from the recent PPP January Birthday Celebration, which I watercolored using the 60 Zig Clean Color Real Brush.
I stamped the sentiment on a strip of Kraft cardstock from the Birdie Notes with white embossing powder and heat set. I cut the sentiment into rectangle added a foam tape and adhered on top of the strip of Kraft cardstock that I snipped on both ends with scissors.
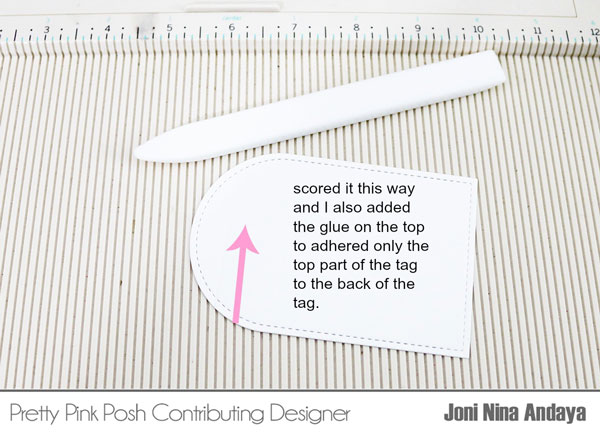
To create the note backing for the tag, I die-cut another white cardstock using the tag from Stitched Duo 3 dies and scored the top of the tag. After, I added glue on top and adhered on the back of the decorative tag.
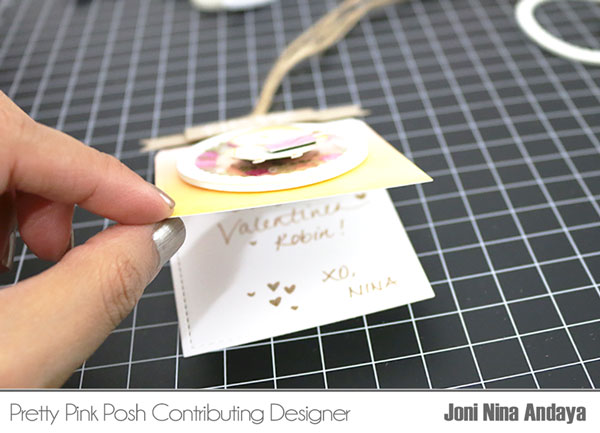
Here’s to show you when the backing is ready for your written notes.
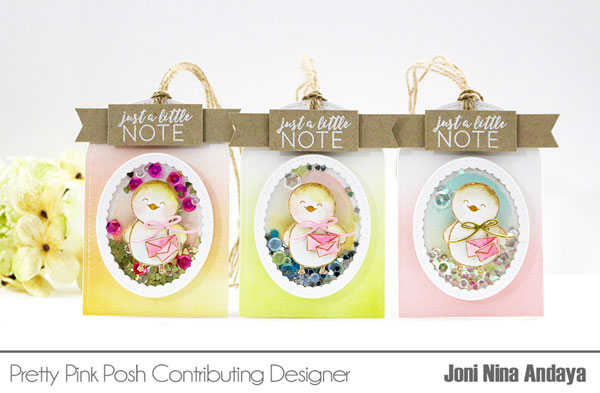
They are so fun to make and so cute. For the first tag on your left I used the new Gold Mini Confetti Heart with 6mm Fairytale Fuchsia Sequins and 4mm Sparkling Clear. On the second tag I used the new Silver Mini Confetti Heart and Share Kindness Sequin Mix. For the third tag I used the new Iridescent Mini Heart Confetti and Sparkling Clear sequins.
Here they are in close-up using the new Mini Confetti Hearts.
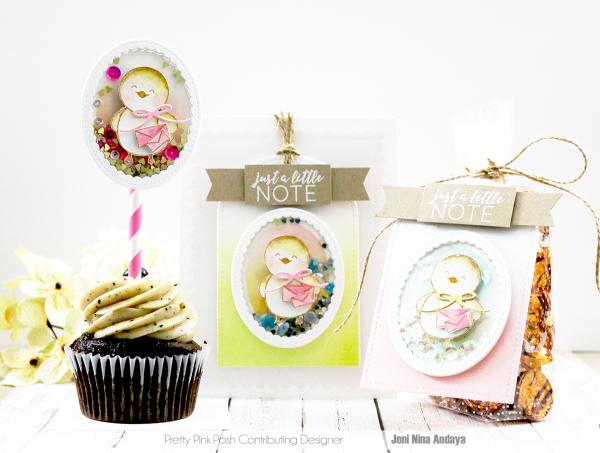
Here’s a snapshot of the little party scene I created. You can use the same concept and create darling cupcake or treat toppers. I hope you guys enjoyed and got inspired.
If you create some fun Valentine’s Day projects with Pretty Pink Posh, be sure to hashtag #prettypinkposh. We cannot wait to see your projects for Valentine’s Day!
Remember to check back here tomorrow for more Valentine inspiration. Have an AWESOME week!
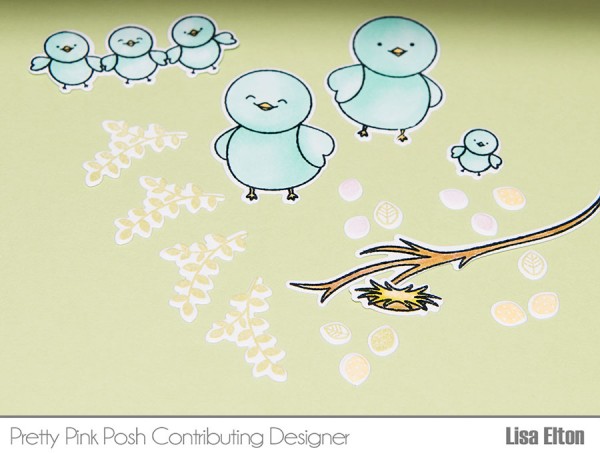
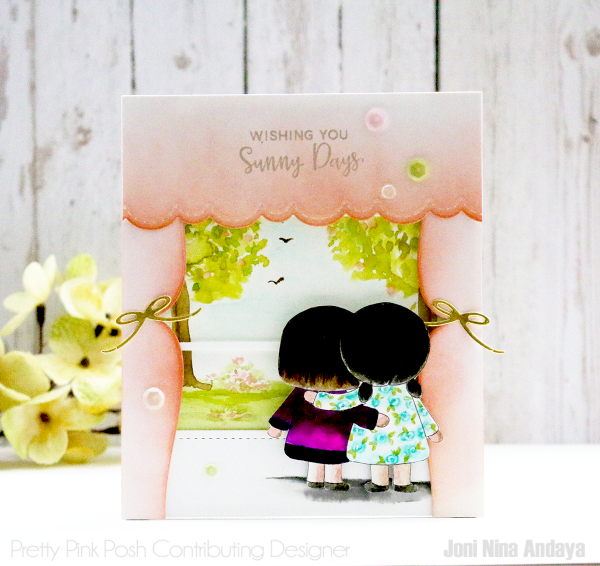
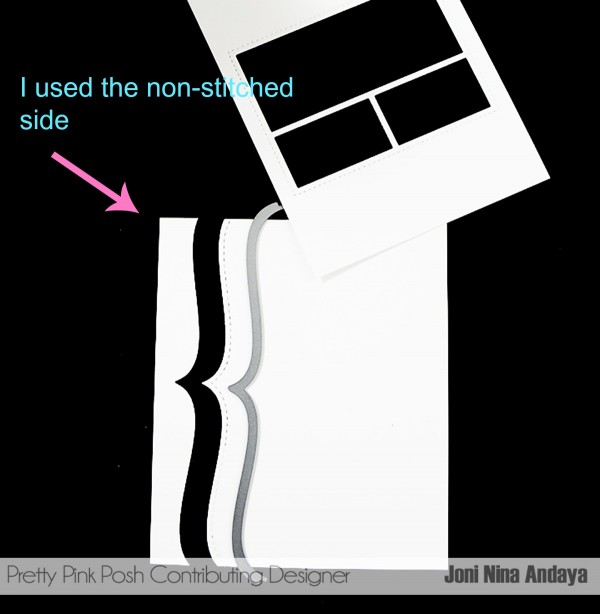
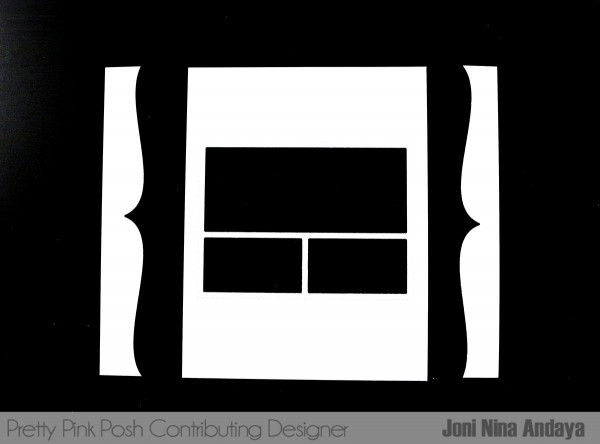
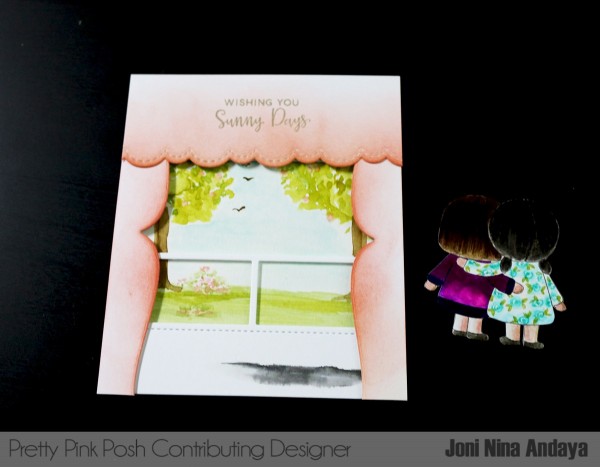
To begin, I first die-cut the white cardstocks using the Storybook 3 dies and one of the Stitched Border 3 dies for the curtains (see picture below). I used the non-stitched one for the curtains.
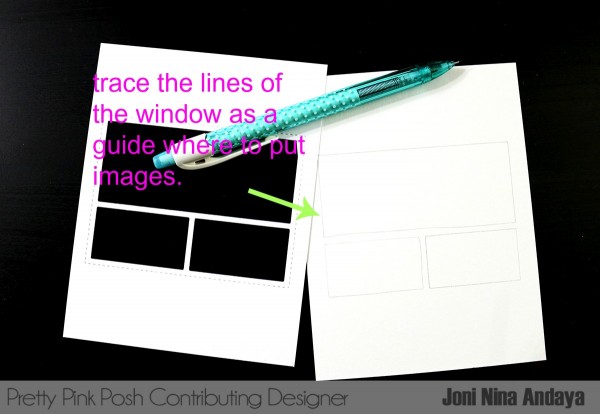
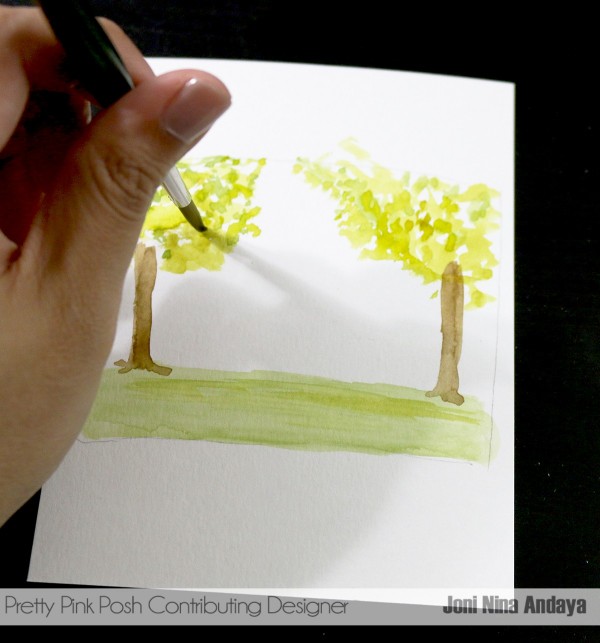
Next, I used the Storybook 3 dies die-cut as a guide to traced the lines on the watercolored paper, this will help as a guide on where to watercolor some images for the scene outside the window.
Next, I watercolored some grass and trees. To create the leaves for the trees, I just used the tip of the 6 round brush to create the leaves. This does not have to be perfect, it’s more like creating an imperfect round or oval.
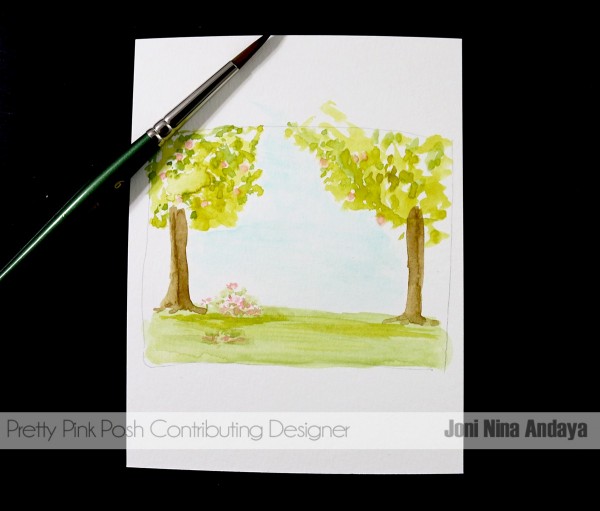
For the flowers and fruits for the trees, same concept is applied. I used the tip of the brush to create small circles for the flowers and fruits.
TIP: for easy application, use the tip of the ZIG Clean Color Real Brush for a much precise shape drawn image and just move the image with a wet tip watercolor brush.
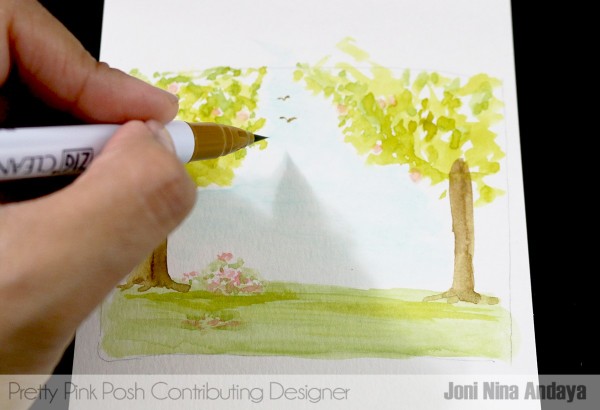
Using a ZIG Clean Color Real Brush in brown, I created the birds flying in the sky.
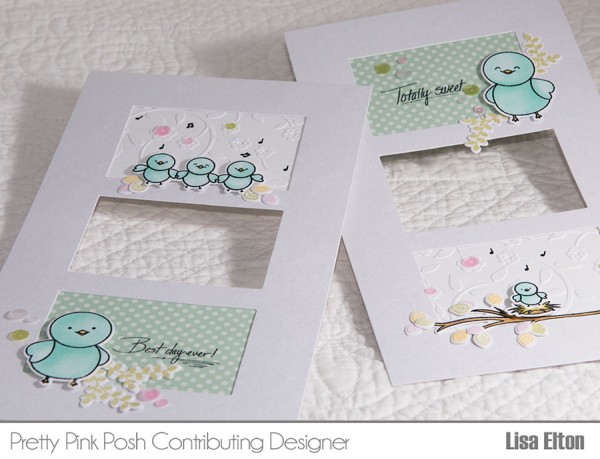
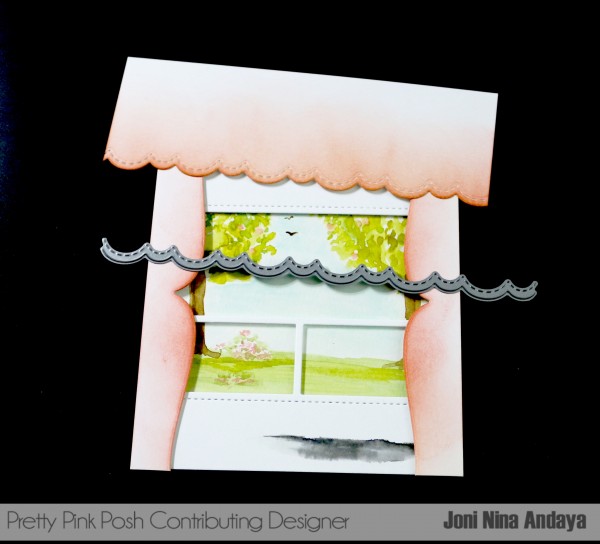
Next, to cut the drape for the window, I die cut one of the stitched scallops from Stitched Border 3 dies and distressed it using a melon colored ink on the curtains and then adhered with foam tape.
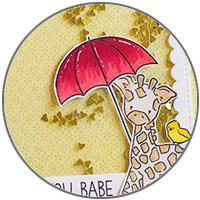
For the sentiment I used was from the Rainy Days stamp set. The two girls by the window is available on my blog at HERE.
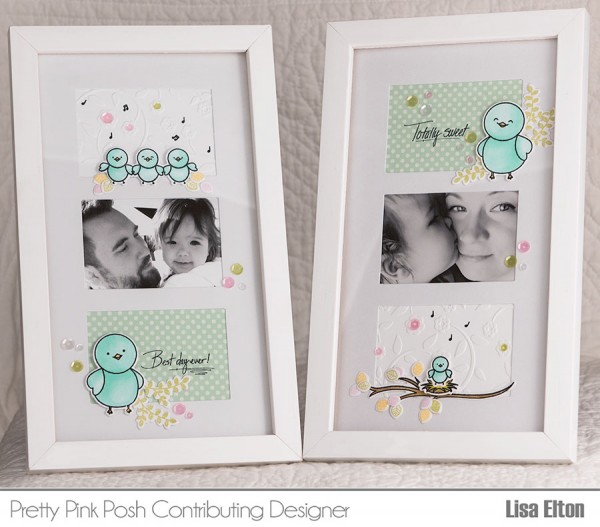
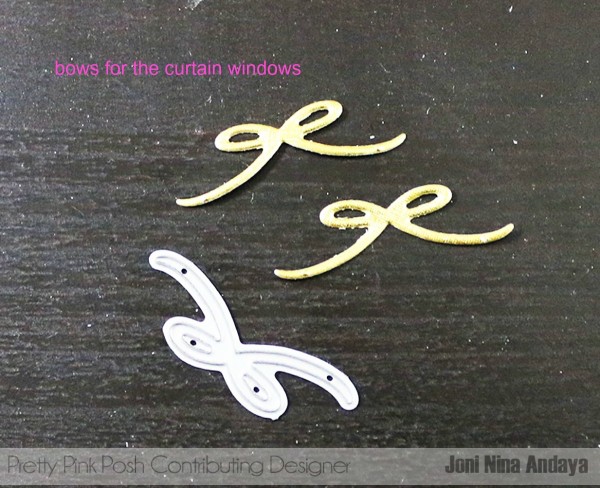
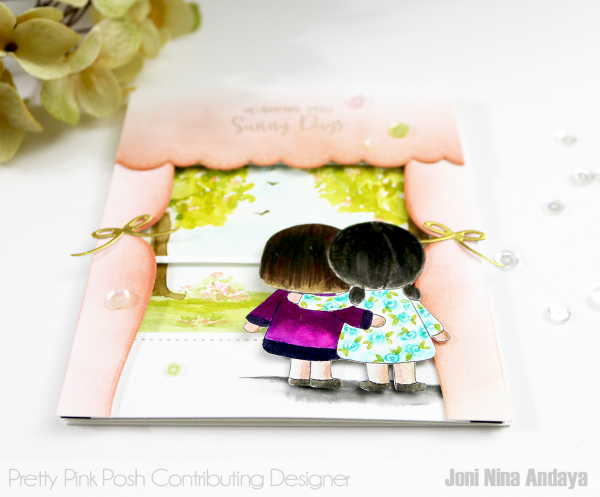
The curtains, drapes, girls, and the window were all adhered with foam tape. I also used some of the new Sweet Pea Mixsequins for added touch.
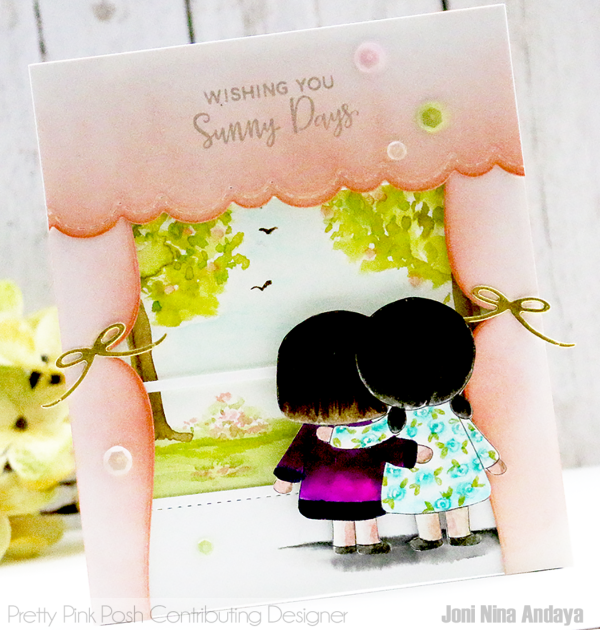
Another look of the whole card.
If you didn’t know, we’re celebrating Pretty Pink Posh turning 2 later this week and Paulina has a special event page on Facebook sharing sneak peeks and giveaways. Be sure to join us as there will be lots of guests and prizes.
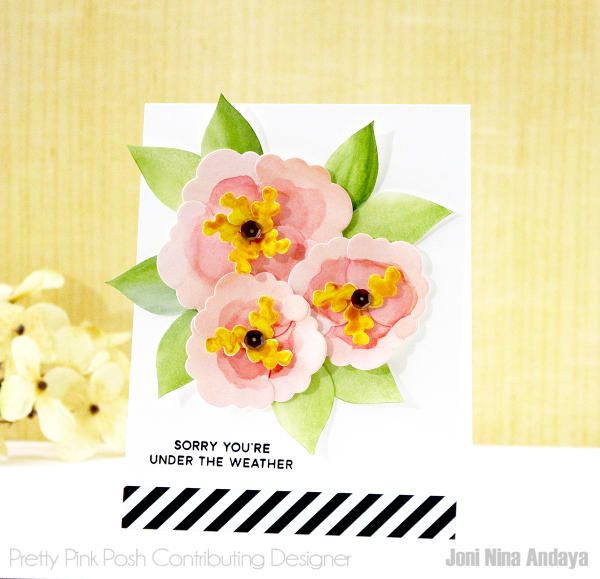
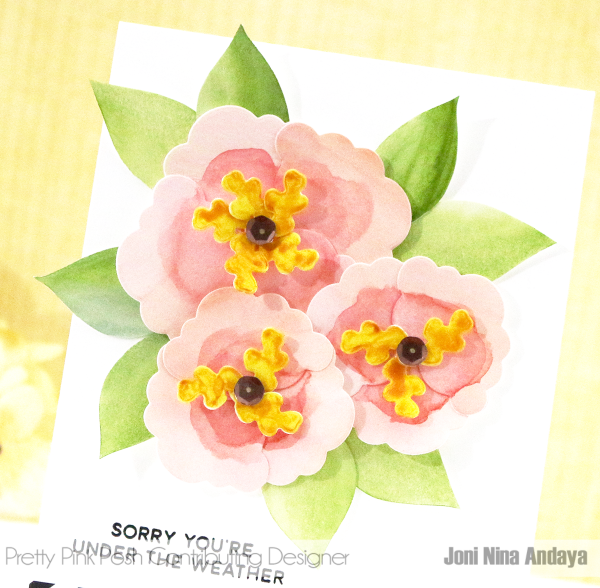
I hope everyone enjoyed their holiday. I am back with more inspiration using Pretty Pink Posh products. It is still cold here in California and I’m already wishing for spring. With that in mind, I created a project that you can design a watercolor flower card using Rainy Days Coordinating die set.
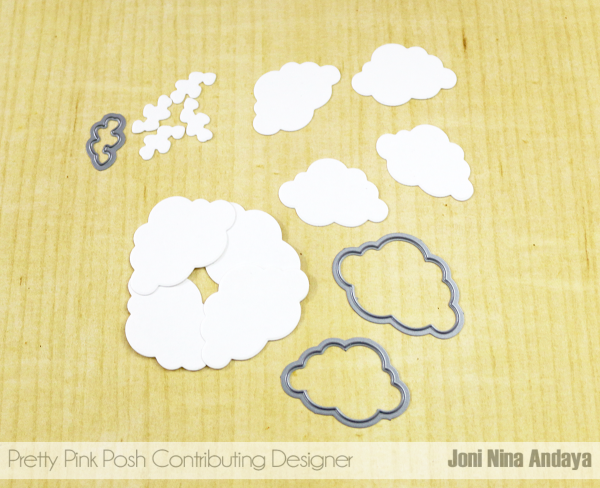
To begin, I die-cut some of the clouds (flowers) and hearts (flower center) from the using Rainy Days Coordinating die set. I used the Matte Multi Medium to adhered the flower petals then watercolored them using the Zig Clean Color Real Brush set.
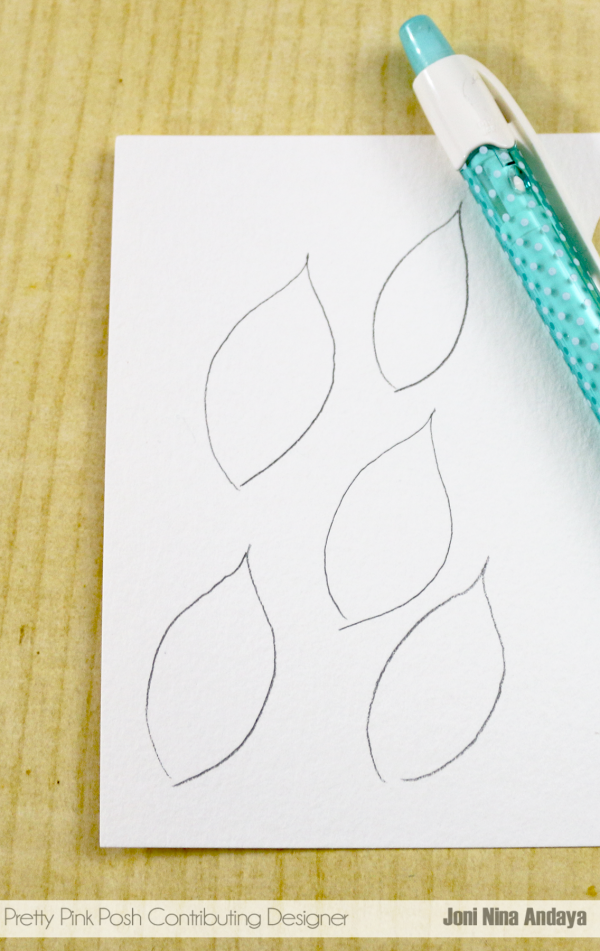
For the leaves for the flowers, I simply drew a leaves image on a watercolor paper then fussy cut each one and watercolored.
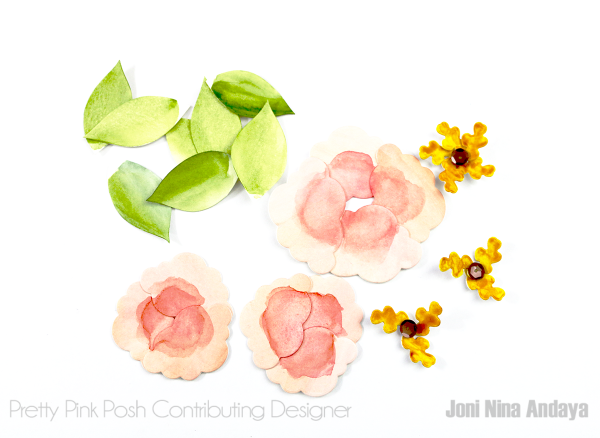
Here’s the finished look after the die-cuts have been watercolored. I also added a 6mm Espresso sequin to the center of the flowers for a little dimension and contrast.
Next, I assembled the flowers on the white cardstock then adhered with foam tape, the leaves were adhered with Matte Multi Medium.
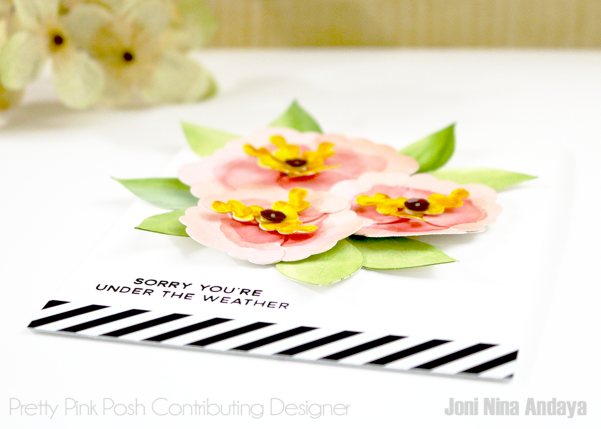
Then, I added a strip of an old white and black patterned paper at the bottom of the card and stamped the sentiment “sorry you’re under the weather” from Rainy Days stamp set to finish off the card.
Here’s another look of the finished card.
Paulina wants to give you the opportunity to win some of her favorite watercolor markers and brushes. All you have to do is enter below leaving a comment with your favorite color combination to use on your crafts!
Thank you so much for stopping by. I hope I have inspired you to look at your dies in a different way. Have a wonderful week and good luck on the giveaway!
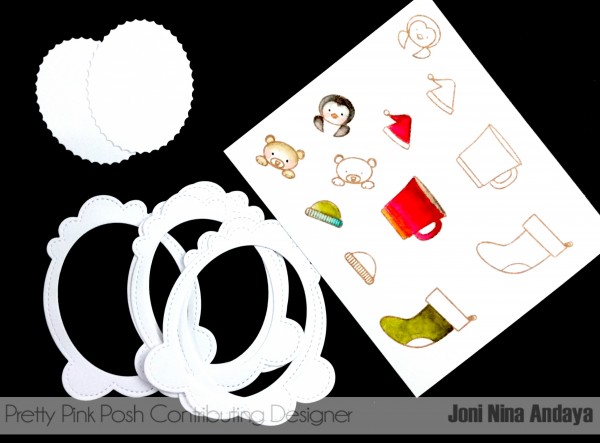
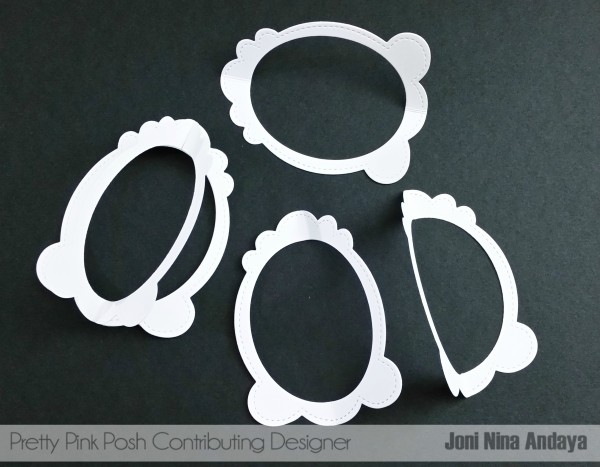
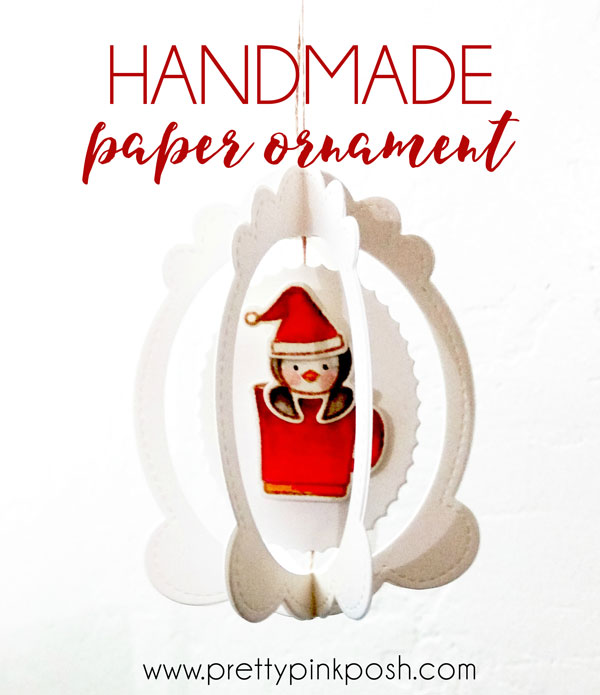
To begin I die-cut the tag die 6 times and removed scallop die-cut but left the middle part of the tag like the picture below, you just need 2. I also stamped the critters from Winter Friends stamp set on a watercolor paper and used the Zig Clean Color Real Brush, 60 setto color the images in.
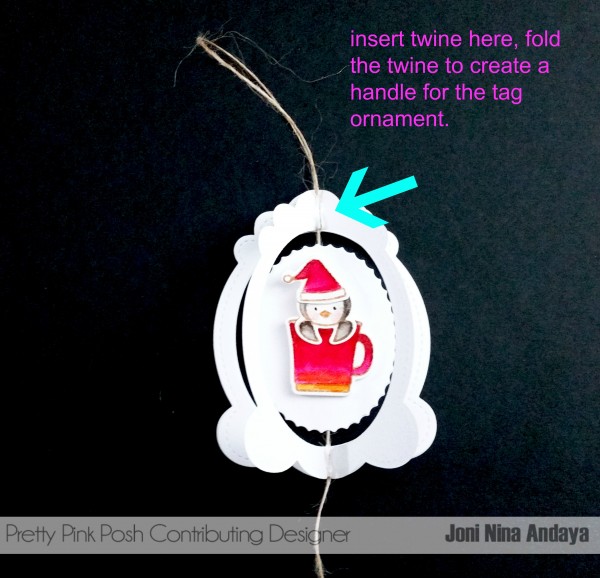
Next, I scored the middle of the tag and adhered the 3 together and another 3. This will help you insert the middle part for your tag ornament.
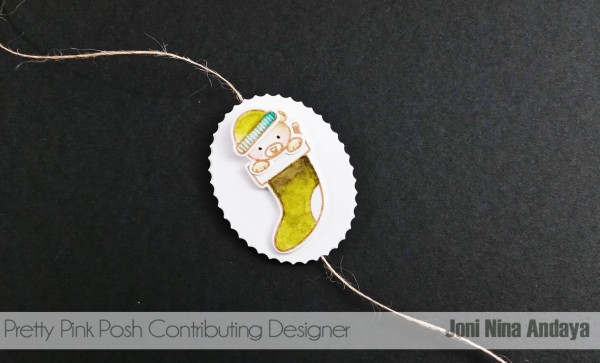
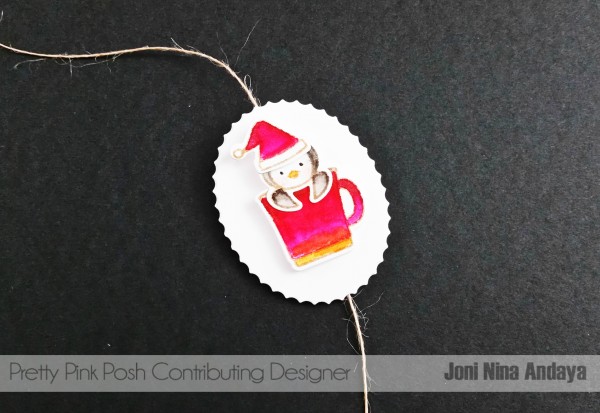
Next, I adhered the critter on one side and adhered the twine below.
Next, I adhered the other middle portion of the tag die with another critter to sandwich the twine in the middle.
Next, I inserted the twine in the fold of the die-cut, once the twine was secured, I adhered the other half of the tag ornament to finish off the ornament tag.
If you missed the newsletter over the weekend, we have a sale on all the stamp sets and coordinating die sets until December 16, 2015 in the Pretty Pink Posh Shop. Hurry, while supplies last!
I hope you guys enjoyed this tutorial! Thank you so much for stopping by.


 Hi friends, Lisa here today!
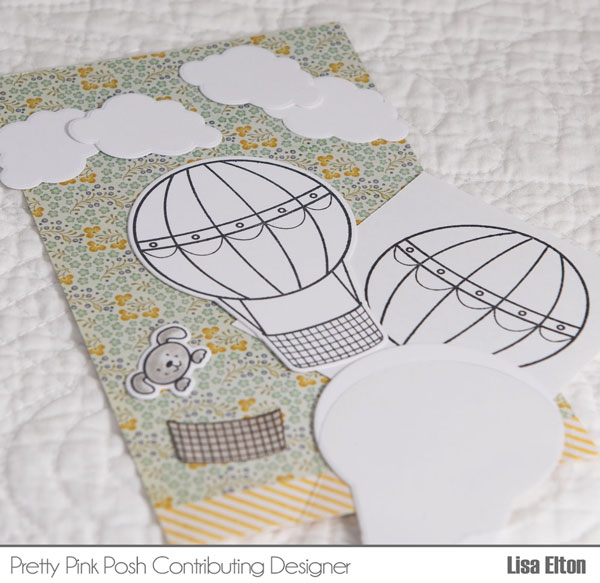


 To begin I die-cut the tag die 6 times and removed scallop die-cut but left the middle part of the tag like the picture below, you just need 2. I also stamped the critters from Winter Friends stamp set on a watercolor paper and used the