Tutorial

| | |

Tutorial: Watercolor Gift Card Holder + Giveaway

Hello Everyone, welcome back for another Pretty Pink Posh tutorial.

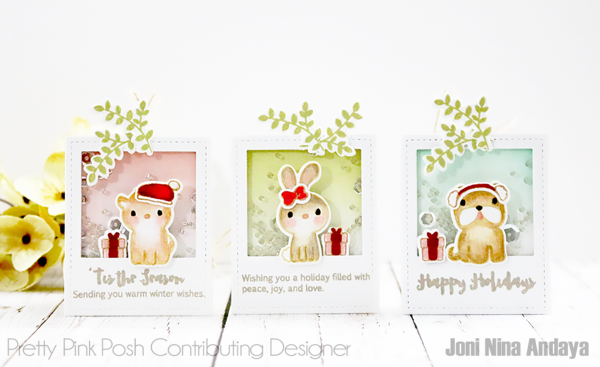
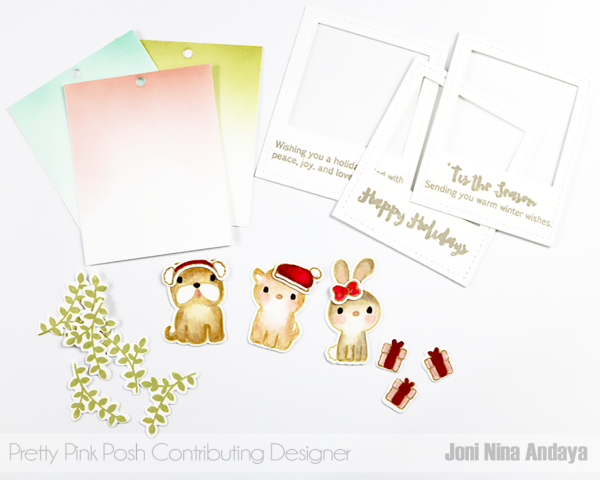
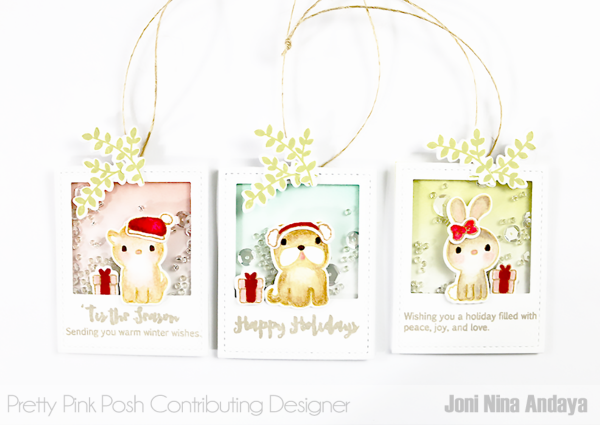
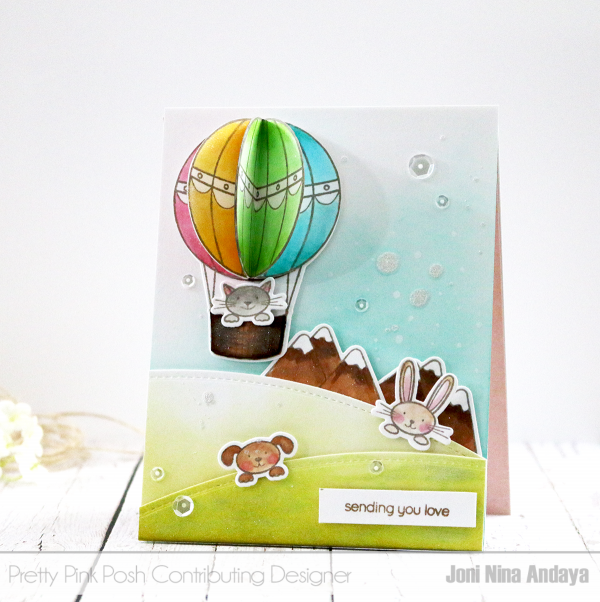
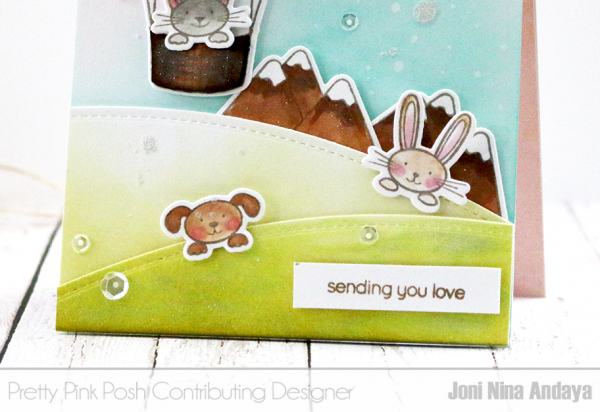
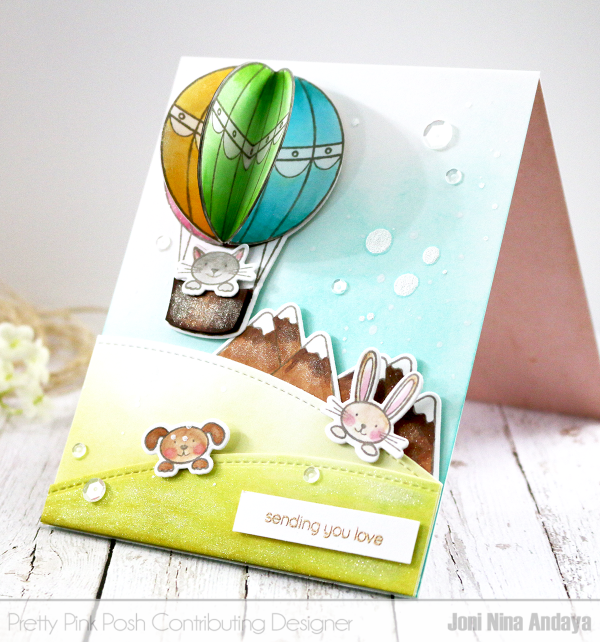
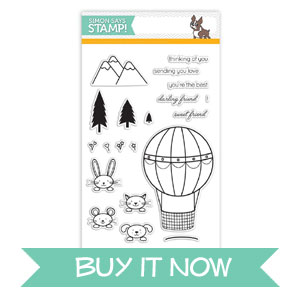
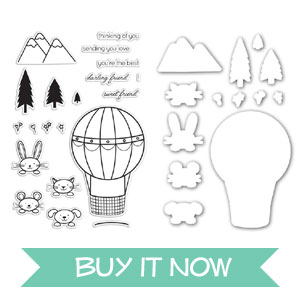
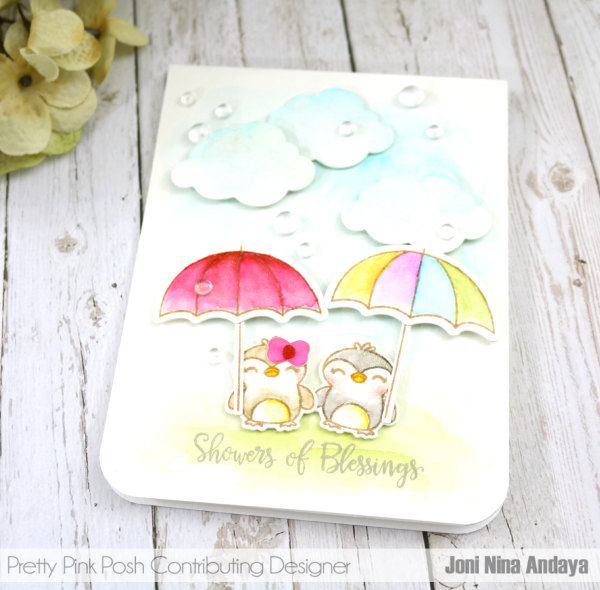
The holidays are coming up and some may be opting for gift cards instead of gift wrapping. This tutorial will help you use your different die-cuts that you might already have on hand to create a holder for gift cards. For this project I used the new released Holiday Pals stamp set, Holiday Pals coordinating dies, Rainy Days stamp set, Rainy Days coordinating dies, along with the 6mm Clear Droplets and 4mm Clear Droplets.

Pretty Pink Posh

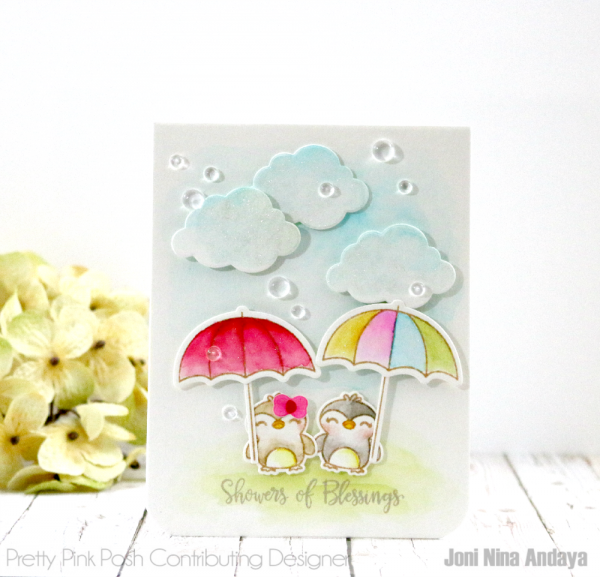
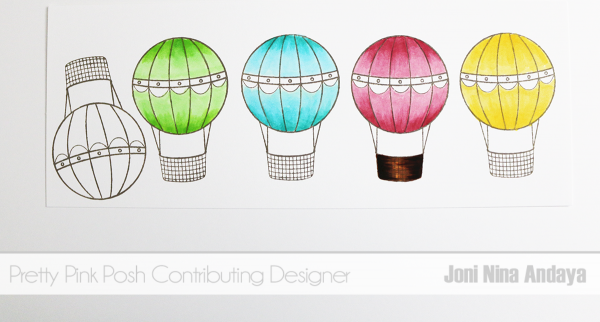
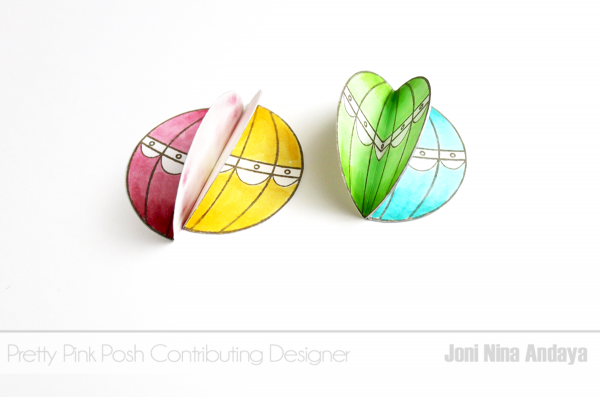
To begin, I first watercolored the background for my card panel. Then I stamped the images from Holiday Pals and Rainy Days stamp sets on a watercolor paper and watercolored each image and used the coordinating die-cuts for each one. To watercolor each images I used the Zig Clean Real Brush 60 set, which really versatile. If you don’t want to color it directly on the watercolor paper you can put down the color on the acrylic block and use your wet paint brush to get the color from the block and start watercoloring this way.

Pretty Pink Posh

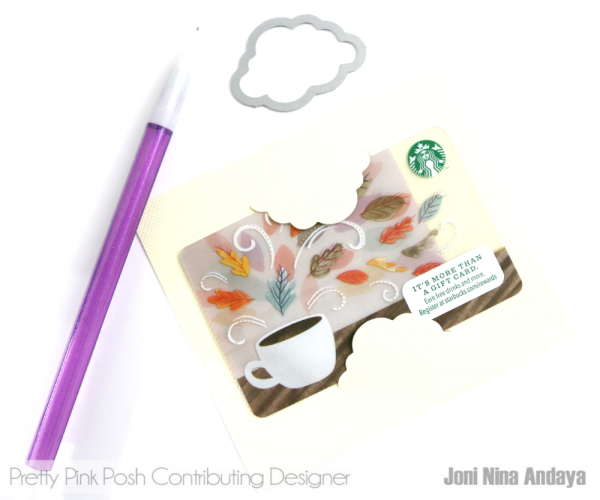
To begin my holder for the gift card, I cut a piece of cardstock bigger than the gift card and traced the lines using the gift card and used the lines as guide on where to put the die-cut.  Like the picture below, I left the top part of the cardstock and the die-cut hanging,  this will avoid cutting when you ran the plate through the machine.

Pretty Pink Posh

The cloud die cut from the Rainy Days coordinating dies is really pretty holding the Gift Card. You can try using different kinds of die-cuts to create your own designs for your Gift Card holder.

Pretty Pink Posh

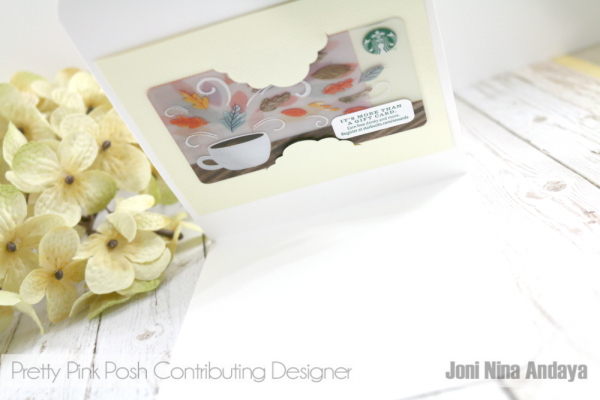
This is just another look of the Gift Card adhered inside of the card.

Pretty Pink Posh

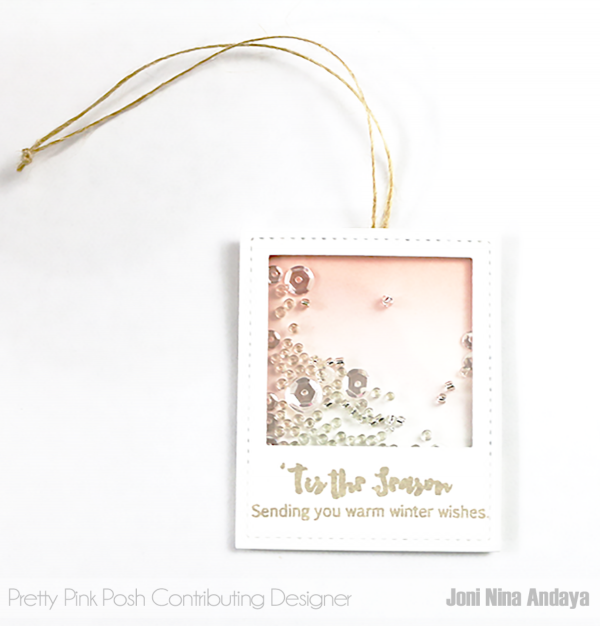
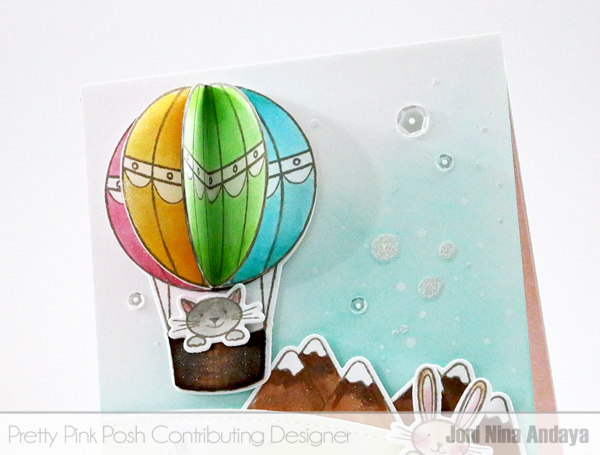
Finally, I adhered the pieces from Holiday Pals and Rainy Days using foam tape and finished it off with lots of 6mm & 4mm Clear Droplets using the Multi Medium Matte adhesive. It’s the best for little embellishments!

Pretty Pink Posh

Want to win the Rainy Days stamp set, coordinating dies and droplets? Paulina is giving one away in today’s post! It’s a great way to add to your collection, or it would make a fun Christmas present to a crafty friend!

a Rafflecopter giveaway
I hope you guys enjoyed today’s tutorial! Have a wonderful Thanksgiving.

sig name

Tutorial: Shaker Tags

Hello everyone, Joni here!

I am back with another inspiration using the new Pretty Pink Posh released products. For today’s project I want to show you another way to use the new Stitched Photo Frame dies. With the holidays fast approaching, I want to create something that we already have in our stash and just use it a different way. Using the Stitched Photo Frame dies I create a tag that can be hung on the Christmas Tree or just simply a tag for a present.

Pretty Pink Posh: Shaker Tags

To begin I first assembled the pieces using the Stitched Photo Frame dies, I used large frame die to die-cut on a white cardstock and adhered a plastic sheet behind it. I also added the sentiment on the frames from Holiday Pals stamp set. Next I cut the same size white cardstock for the backing of the Stitched Photo Frame dies and distressed each one to add color for the background of the frame tag. I also added the hole on top of the backing using the circle hole shape from the Stitched Labels 1 dies.

Next, I stamped the images from Holiday Pals on a white cardstock and colored the images with color pencils except the ferns. I stamped the ferns using the Papertrey Ink in Spring Moss. After all the images have been colored I used the Holiday Pals die set to die-cut each image.

Pretty Pink Posh: Shaker Tags

Next, I added the foam tape on each of the frame die like the picture below, this will help the sequins and the seed beads move around on the frame. I also added a hole on the backing of the frame and added the twine. Then I added some of the Sparkling Clear sequins and Silver Shimmer Seed Beads on the frame. Then I removed the adhesives on the foam tape and adhered the backing.

Pretty Pink Posh: Shaker Tags

Here’s the look after adhering the backing on the frame.

Pretty Pink Posh: Shaker Tags

Next, I adhered the die-cut pieces from Holiday Pals to finish off the tags.

Pretty Pink Posh: Shaker Tags

I hope you guys enjoyed! Thank you so much for stopping by.

sig name

| | |

New Blog Contributor + Giveaway

Hello and Happy Monday!

I am so very excited to share that Pretty Pink Posh designer, Joni, will be sharing tutorials here on the blog. I know you all love tutorials and with the busyness of orders and behind-the-scenes work, I’m not able to do them often. I knew I needed to fill this void and Joni so graciously offered to do a feature twice a month. She’ll be sharing how to do different techniques, start-to-finish cards and there may be some surprises in between!

With that intro, let’s get into her first official blog post here.

Pretty Pink Posh II Darling Friends

To begin my card I first stamped the hot air balloon image from the Darling Friends stamp set on a white cardstock a few times, then colored them with Copics.Pretty Pink Posh II Darling Friends

Next, I fussy cut the top of the balloon, scored the middle, folded, and adhered it with glue. Then I adhered the balloon like an accordion on top of the die-cut hot air balloon image. Pretty Pink Posh II Darling Friends

Before adhering the die-cut hot air balloon and kitty, I first distressed the white card based with Distress ink in Peacock Feather then splattered it with Studio Calico Mister Huey’s in Shine. Pretty Pink Posh II Darling Friends

Next, I die-cut the hills for the scene using the Stitched Border dies 1 and distressed it with Distress ink pad in Crushed Olive. Then adhered on the distressed card based with foam tape with dimension. Next, I adhered the mountain die-cut image then added the dog and bunny as if they are peaking through the hill.

For the sentiment, I stamped it on a white cardstock and gold heat embossed cut the strip then adhere at the bottom of the card panel using foam tape.Pretty Pink Posh II Darling Friends

For the final touches I added some of the Sparkling Clear Mix sequins and Clear Wink of Stella for added shine. Pretty Pink Posh II Darling Friends

borderIn celebration of Joni becoming a blog contributor and the popularity of the STAMptember Darling Friends set, I thought it would be fun to do a giveaway in today’s post.


a Rafflecopter giveaway

Over the weekend I received word that Simon Says Stamp restocked the Pretty Pink Posh STAMPtember exclusive set! This is VERY rare for the exclusive sets, but I am thrilled more of you are able to get it for a limited time. If you missed out the first time, hurry and get these while you can!

set1 set2
I hope you guys enjoyed Joni’s first feature. Be sure to leave her lots of love and encouragement! I’ll be back later this week… have a good one!