Projects

|

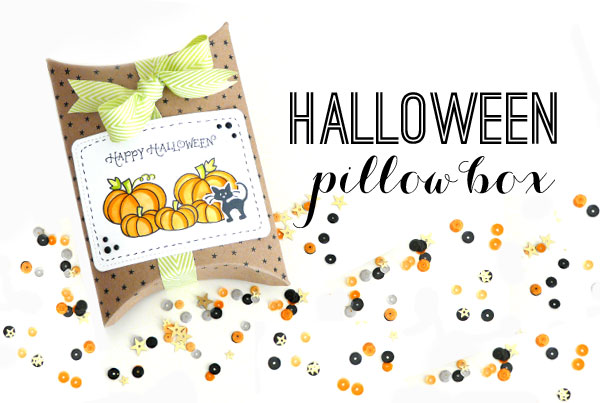
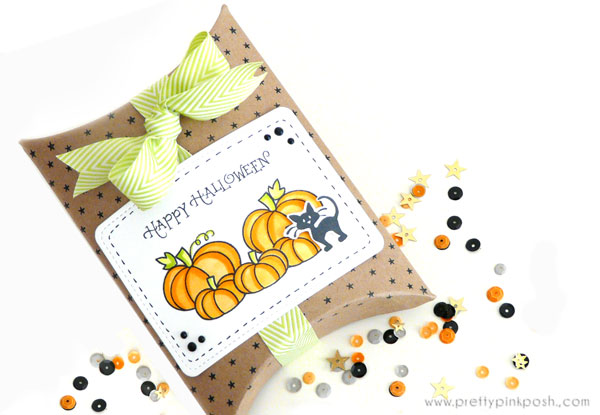
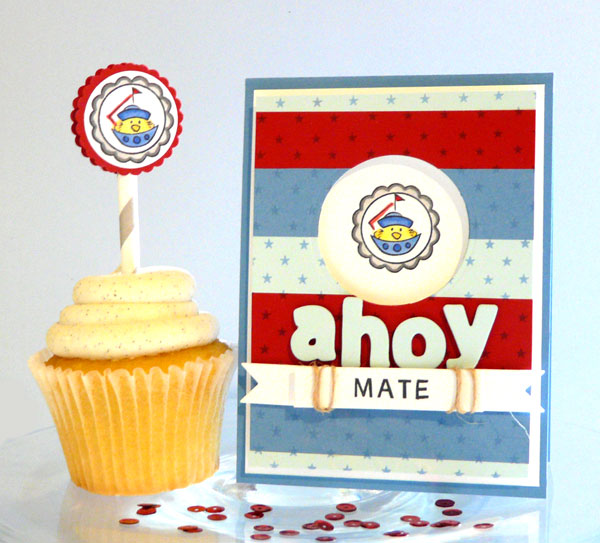
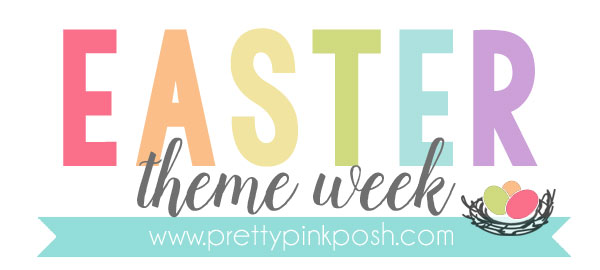
Easter Theme Week- Day 1

Pretty Pink Posh

Hello everyone, Joni here sharing inspiration for the upcoming Easter holiday.

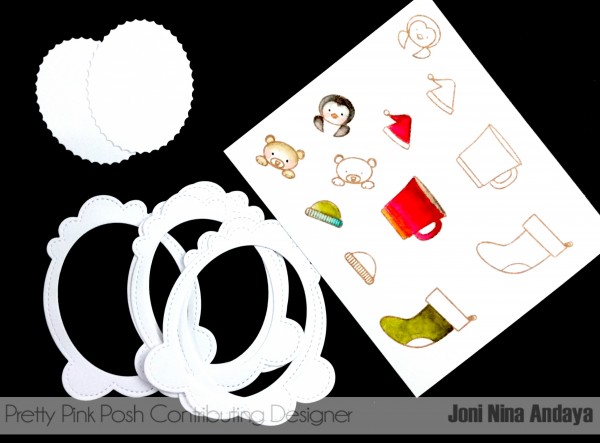
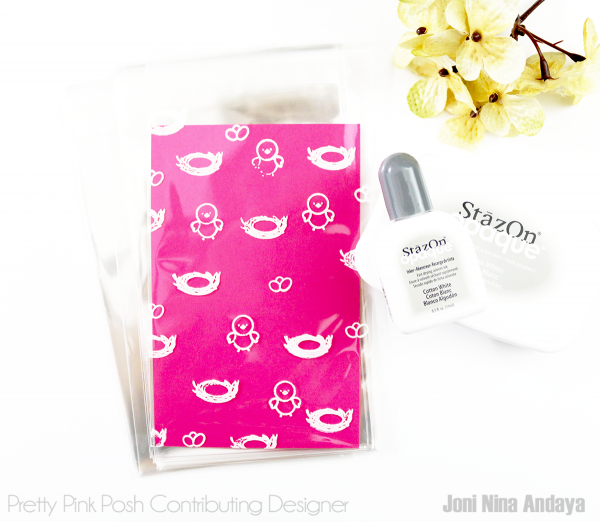
You can easily create this project  using the following Pretty Pink Posh products: Birdie Friends stamp set, Birdie Friends coordinating die set, Stitched Borders 4 dies, Scallop Circles dies set, and my all time favorite the Twine & Bows dies set.

Pretty Pink Posh

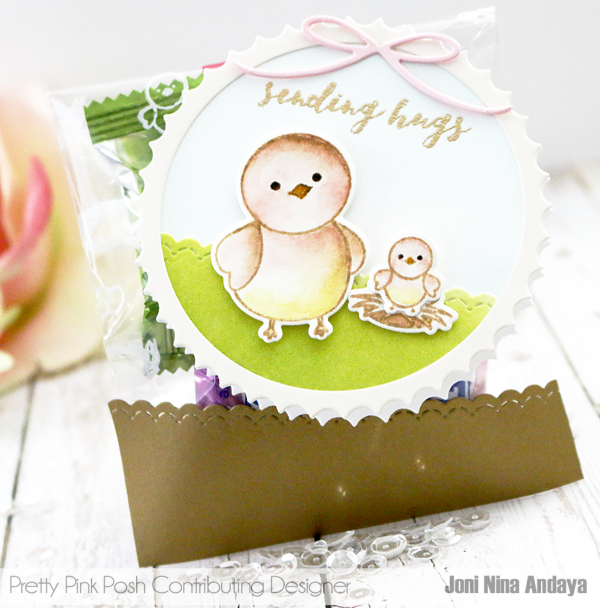
To begin, I first stamped my clear cellophane bags with white StazOn ink using the cute images from Birdie Friends stamp set. Just make sure to clean your stamps with Hero Arts Ultra Clean as this will be sure to remove the white ink on your stamps.

Pretty Pink Posh

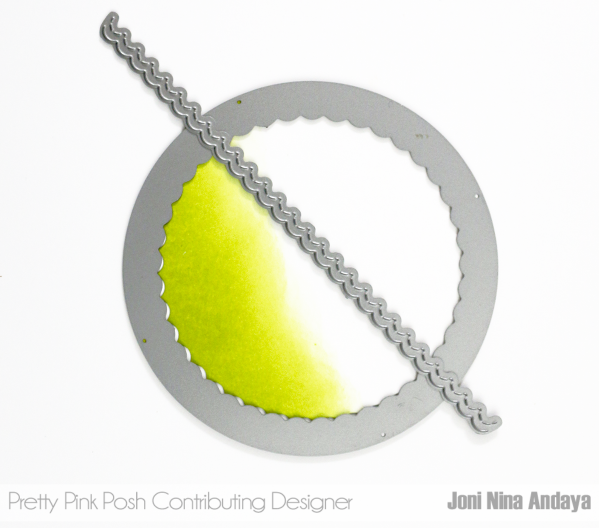
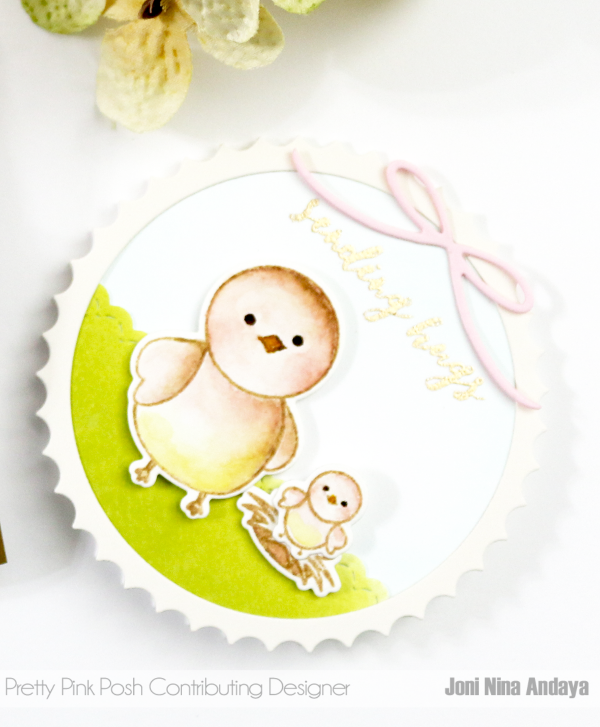
Next, I die-cut white cardstock using the Scallop Circles dies set then distress the sides with Tumbled Glass distress ink, but instead of using the scallop portion, I used the negatives. I also used the negative of the large scallop and use the small circle scallop to create a cream border for my card tag (see the picture below).

To create a card tag I simply die-cut another negative circle and scored the top portion of the circle and adhered with glue. The distress on top and the scored portion on the bottom.

Pretty Pink Posh

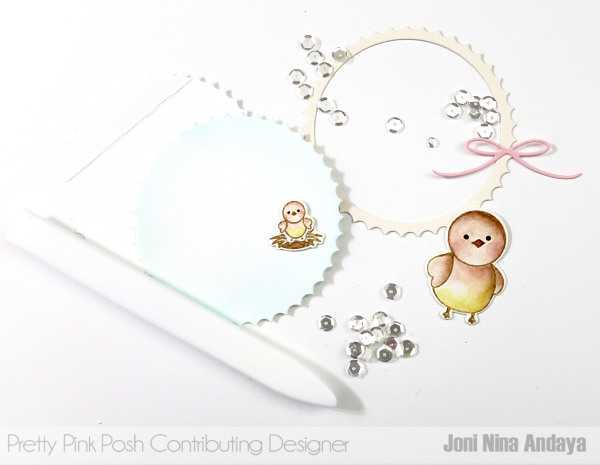
To create my grass for the tag I distressed the white cardstock and used the large scallop die to die-cut and get the negative. Then die-cut negative on the green portion using the tiny scallop border from Stitched Borders 4 dies.

Pretty Pink Posh

The look of the tag card.

Pretty Pink Posh

For the goodie bag, I die-cut an antique gold cardstock using the tiny scallop border from the Stitched Borders 4 dies and adhered at the bottom of the cellophane for added touch on the bags.

Pretty Pink Posh

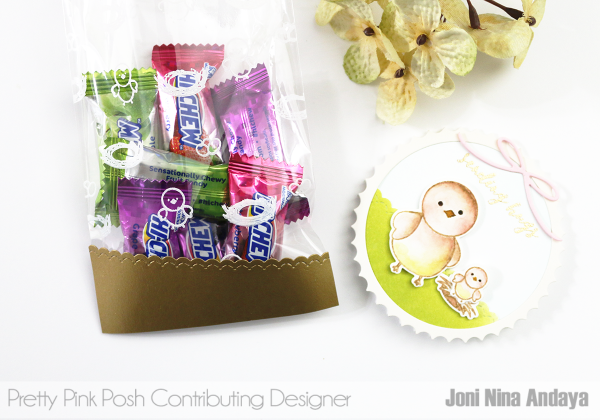
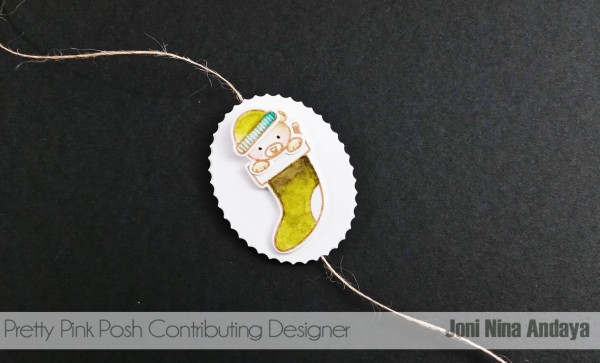
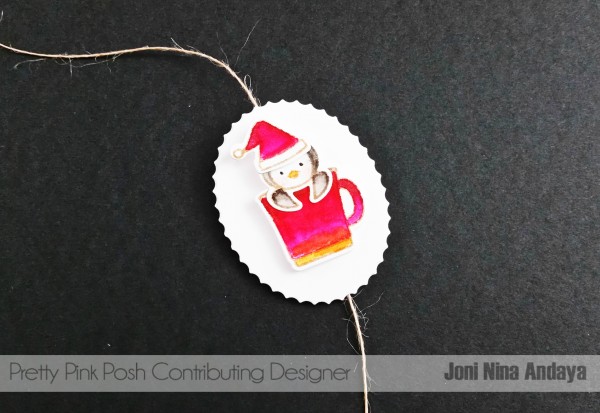
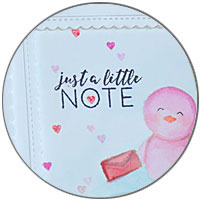
On the tag card, I stamped the sentiment “Sending Hugs” from the Birdie Friends stamp set using gold embossing powder. The cute birdie images are from the same stamp set they were watercolored using ZiG Clean Color Real Brush 60 and die-cut with their coordinating dies.

I also added my favorite bow from the Twine & Bows die set to finish it off.

Pretty Pink Posh

Pretty Pink Posh

I hope you guys enjoyed! Stay tuned- all week we will have Easter inspiration using Pretty Pink Posh products!

easter1 easter3 easter4
sig name

Tutorial: Shaker Magnet

shakermagnet1Hi friends, Lisa here today!

I’m back to share another project using sequins and seed beads on something other than a card. This month I have a refrigerator shaker magnet for you!

This project begins by stamping and die cutting all of your necessary pieces. I’ve used stamps and dies from the Darling Friends (previously released) and Rainy Days sets. You’ll need one die cut balloon as your backing, one as your base, one from acetate and one to paper piece. Cut four small clouds and one little furry friend.

shakermagnet2

Next, stamp your balloon onto patterned paper to be trimmed out and paper pieced. You’ll see that I’ve stamped on five different patterned papers and once more for the horizontal band. This is a great way to use up little scraps. If paper piecing is not your thing, you can color the balloon!

shakermagnet3

Glue your balloon together then trim off all of the white cardstock.

shakermagnet4

To add dimension for a shaker, die cut the balloon from fun foam. You will only need the top circle and basket portions. Foam tape would work here as well.

shakermagnet5

Adhere the blank balloon die cut to the back of the stamped one. I took this step for added stability. Add fun foam to the stamped/die cut balloon. Adhere the paper pieced balloon and basket to the die cut acetate.

Note: The die cut pieces are larger than the paper pieced balloon & basket. Trim excess acetate, fun foam and paper.

shakermagnet6

Use a thin strip of foam tape on the outer stamped ropes to create the shaker portion of the magnet. Fill this area with 4mm sequins (Lemon Meringue & Aquamarine) and Sparkling Clear Seed Beads. Sandwich balloon pieces together with adhesive or glue. Add a magnet to the back.

shakermagnet7

To cover the foam tape showing through the acetate, glue on twine as tie down ropes. The other side can be covered with the furry passenger!

Glue two die cut clouds together (from the Rainy Days coordinating dies) then add one to the front of the balloon and one to the back for added dimension. Decorate the balloon with seed beads and the clouds with sequins.

shakermagnet8

Below are the links to the Darling Friends set, which PPP designed exclusively for Simon Says Stamp.

Pretty Pink Posh Pretty Pink Posh

There are many dies and sequins in the shop that would make great refrigerator magnets. The possibilities are endless!

Thanks so much for visiting today. See you next month!

lisa2

|

Valentine Theme Week- Day 5

valentinethemeweek

Hello! I’m delighted to be sharing my first feature post with all of you! Each month I’ll have a project showcasing sequins, confetti or seed beads in a unique way on something other than a card. With Valentine’s Day quickly approaching my mind was on hearts! I’ve created a small garland perfect for a mantle, shelf or door.

garland

To begin, die cut three felt hearts. (This shape can easily be switched out for other holidays or everyday use). One of the hearts will become a shaker so you will need to cut an opening in that shape.

16 0117 0003 copy

Next you’ll need three paper backing heart shapes. One of these will back your shaker. I chose a pretty floral paper for this purpose. The other two will not be seen. Plain cardstock, poster board or chipboard will work just fine.

Adhere this paper backing to the reverse side of each cream felt heart for added stability.

16 0117 0002 copy

The shaker will be filled with Confetti so the form for it doesn’t need to be very thick. I used two cardstock spacers. If using Sequins or Seed Beads, you’ll need to use foam tape or fun foam. Remember to die cut one acetate heart as well for your shaker window..

16 0117 0001 copy

Die cut and stamp several items (mini tags, flowers, leafy sprigs, bows) to decorate the other two felt hearts.

_DSC8990 copy

Glue clusters of die cut items onto each of the plain hearts. Add confetti as accents. Fill your shaker with Iridescent Mini Heart Confetti (coming soon!) and Red Heart Confetti.

16 0120 0001 copy

The possibilities for this little garland are endless! I made mine to match my great grandmothers plates. Aren’t they pretty!!

16 0124 0001 copy

If you have missed any of the previous posts, click on the photos below to see the post from that day.

valentine4valentine2  valentine1
We hope that you enjoyed the Valentine theme week!

lisa2

|

Tutorial: Handmade Ornament

Hello everyone, Joni here!

I am back for another tutorial using Pretty Pink Posh stamps and die sets. For this project I used the recent released Winter Friends stamp set, Winter Friends coordinating die set, and Decorative Tag 1 die set. This tag is really awesome to use to create your own ornament for your tree, along with the countless ideas for cards!


Pretty Pink Posh II Handmade Paper Ornament
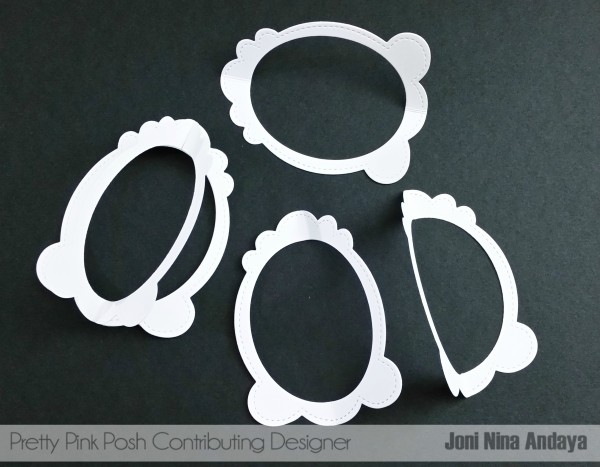
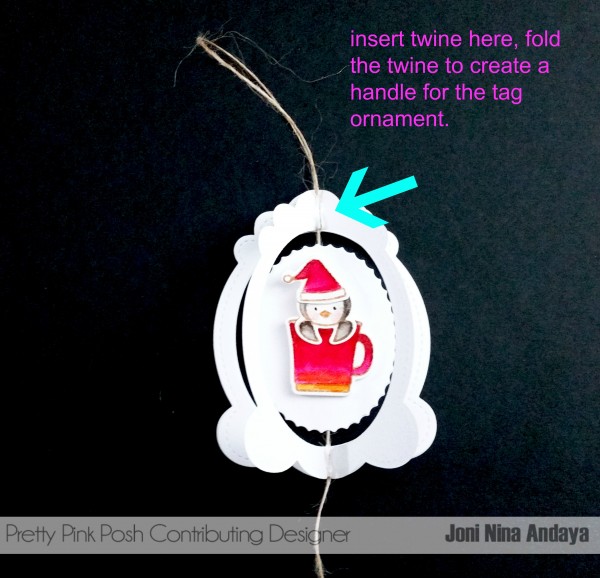
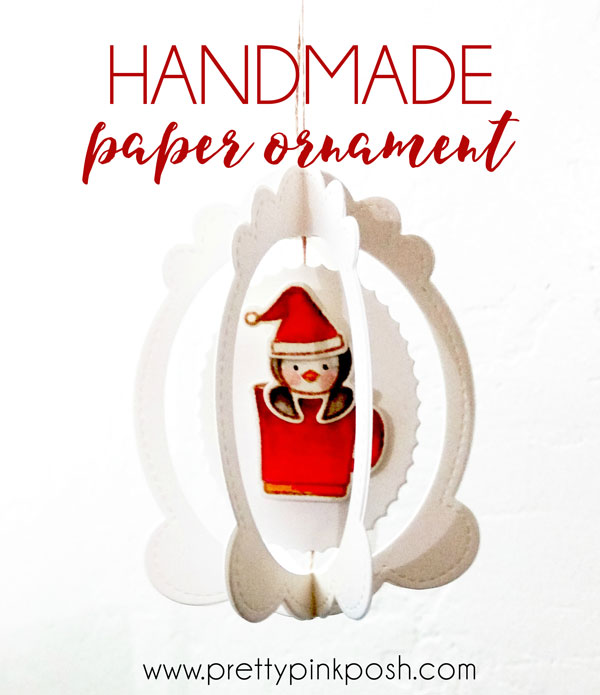
To begin I die-cut the tag die 6 times and removed scallop die-cut but left the middle part of the tag like the picture below, you just need 2. I also stamped the critters from Winter Friends stamp set on a watercolor paper and used the Zig Clean Color Real Brush, 60 set to color the images in.

Pretty Pink Posh II Handmade Paper Ornament

Next, I scored the middle of the tag and adhered the 3 together and another 3. This will help you insert the middle part for your tag ornament.

Pretty Pink Posh II Handmade Paper Ornament

Next, I adhered the critter on one side and adhered the twine below.

Pretty Pink Posh II Handmade Paper Ornament

Next, I adhered the other middle portion of the tag die with another critter to sandwich the twine in the middle.

Pretty Pink Posh II Handmade Paper Ornament

Next, I inserted the twine in the fold of the die-cut, once the twine was secured, I adhered the other half of the tag ornament to finish off the ornament tag.

Pretty Pink Posh II Handmade Paper Ornament

If you missed the newsletter over the weekend, we have a sale on all the stamp sets and coordinating die sets until December 16, 2015 in the Pretty Pink Posh Shop. Hurry, while supplies last!

stamps2

I hope you guys enjoyed this tutorial! Thank you so much for stopping by.

Have a WONDERFUL week.

sig name

|

Springtime Party

Pretty Pink Posh  I  Springtime Party

I am so very excited to share today’s post with you. It’s a project that has been in the works for a little while and thanks to my amazing assistant, it finally is making it’s appearance here on the blog.

For those who visit my blog often, you know I’m a card maker. I love the fact that cards can be made in one session and each one can be unique and as detailed, or simple, as your creativity allows. However, every now and then, it’s fun to stretch yourself and create outside of a card.

Pretty Pink Posh  I  Springtime Party

One of the things I really wanted to showcase in this post was the versatility of sequins and confetti. Not only do they look super cute on cards, but they also are perfect for parties! Whether you decorate your table with them, add them to the inside of your clear balloons, or use them on cupcake toppers, they will make every aspect of your party shine. Plus, with the wide array of colors I carry in the Pretty Pink Posh Shop, you can match them to whichever color palette you choose!

TIP: since this was the first time adding them to balloons, we learned that star confetti isn’t the best choice (due to the points). The circle or heart confetti with a mixture of sequins would be the ideal option.

Pretty Pink Posh  I  Springtime Party

In the past, I’ve created cupcake toppers with stamps (see HERE, HERE and HERE) . Today, I set aside the stamps and brought out some die cuts, sequins and confetti for these cupcake toppers. Since we were going for a spring party, I used a butterfly die, but you can easily change it to match whichever theme you are throwing for your party.

Pretty Pink Posh  I  Springtime Party

I’m totally in love with the cupcake topper on the big cupcake. The little tissue tassels, plus the threading of sequins and confetti had me squealing with delight when it was finished. Oh and that aqua? We just wrapped washi tape around the wooden skewer!

Pretty Pink Posh  I  Springtime Party

Products used: 6mm Pink Peonies Sequins, 6mm Pansy Purple Sequins, 6mm Lemon Meringue Sequins, 6mm Metallic Silver Sequins, Silver Star Confetti and 6mm Silver Confetti

Pretty Pink Posh  I  Springtime Party

Since we had this fun set-up, I thought I’d snap a few product photos, too. I just love the way they turned out. My favorite part is the martini glasses filled with sequins!

Pretty Pink Posh  I  Springtime Party

We had so much fun creating this post. I hope you were inspired to add sequins and confetti to projects outside of paper crafts. All sequins and confetti found in this post can be found in my shop- Pretty Pink Posh.

Did you enjoy today’s post? Let me know if you want to see more party ideas in the future; we have lots of fun ideas if you’d like to see more!


| |

Halloween Pillow Box

I know I’m cutting it close to Halloween with this post….however, it’s better than waiting until next year, right? I actually have attempted taking photos of this project three times, but with the gloomy weather here in Seattle, I just wasn’t having any luck. Thankfully, three times was the charm for this project! pillowbox1

If you watched my latest haul video, you’ll recognize these kraft pillow boxes. Lately I have been admiring pretty packaging and with the holidays coming up, I’ll definitely be highlighting some of my own packaging ideas here on the blog. I love the size of this particular pillow box- they’re big enough to fit cookies or candies, or you can put in travel size toiletries! Hello stocking stuffers! pillowbox3

If you follow me on my various social media sites (which I hope you do!), I mentioned briefly that I’ll be making some changes on the site. There are some ideas that I’ve been wanting to incorporate on my site to make it a little more user friendly, but it was a little outside of my scope of knowledge and my current server has been a nightmare. I’m hoping that some of these changes will slowly start rolling out within a week or two and there shouldn’t be too much downtime. Since blogging isn’t my full-time job and funding is minimal, I’m having to do things in stages. In the end, I hope to have this site be easy to maneuver, and hopefully a place that will continue to inspire you and your loved ones.

I’m curious, are there any changes you hope I’ll make to the site? Do you have requests for future tutorials or projects? I have all sorts of ideas, but I also want to make sure if there are certain aspects of my site you enjoy, I keep them! *wink*

| | |

Ahoy Mate

While I can be quite girly, I have had a thing for nautical themed items for quite some time. In fact, back in my early high school years, my room was red/ white/ blue and had a semi nautical/ patriotic feel to it. {Don’t ask…I honestly couldn’t tell you why I chose that over a girly theme}

Recently, I was fulfilling an order at work and saw the Sailboat Chickie. How could I push this little guy aside for so long?! Over the weekend, I was at the store and saw these delicious looking cupcakes. Instantly I knew I wanted to create little cupcake toppers and a matching card featuring this little guy.

ahoy_1c

Did you spy my newly purchased Quinn’s ABC’s dies? These little letters are so much fun to use! If you haven’t seen it already, head on over to THIS POST to see the stamp set used, along with a video on the matching dies. {They are currently out of stock at Ellen Hutson, but they should be restocked soon!}

ahoy_1f

One of my March sponsors, Little Free Radical, carries a large variety of paper straws that are swoon worthy. Last month, I created a cupcake topper and card featuring a green straw {see here} and decided I wanted to use a grey straw today. I won’t lie, I literally am looking for any excuse to use one- they just make me so happy!

ahoy_1e

I hope that these little creations brought a smile to your face and inspired you. I’ll be back tomorrow- hope to see you then!