Projects

| | |

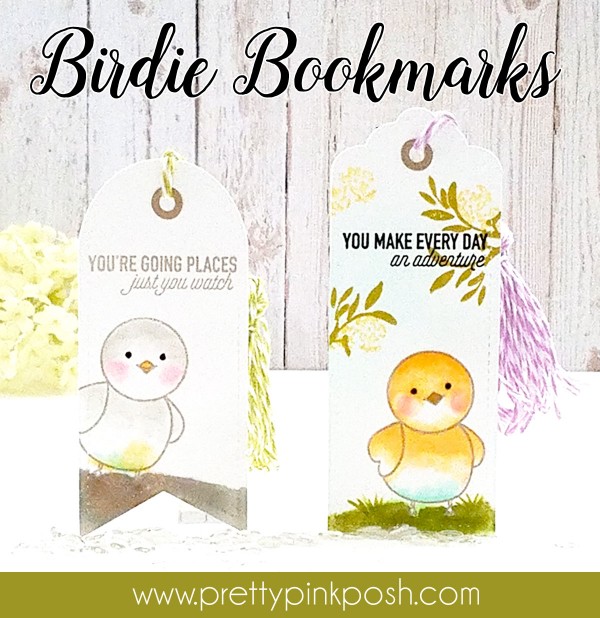
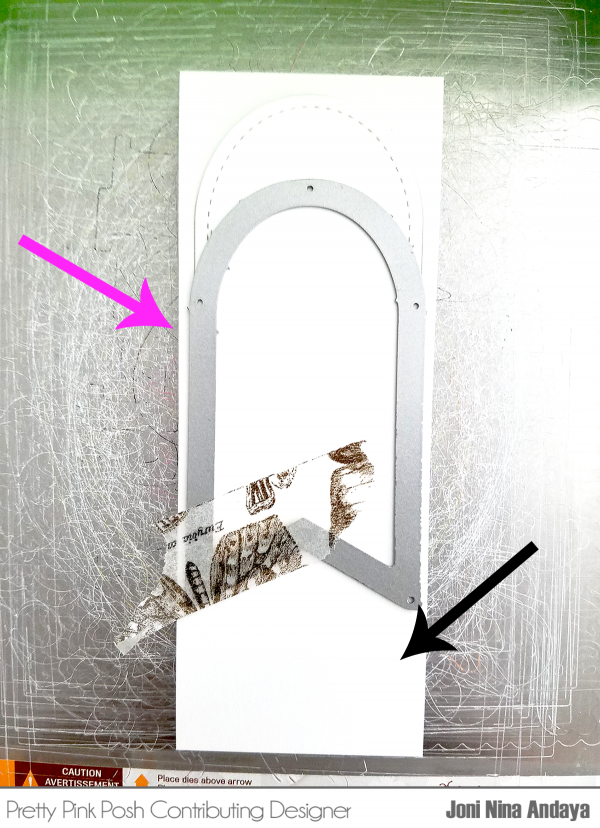
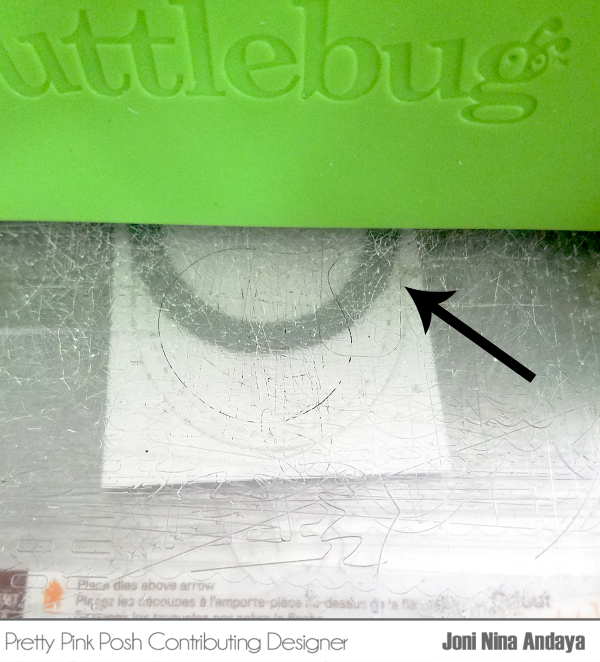
Stretching Your Die Cuts+ Video

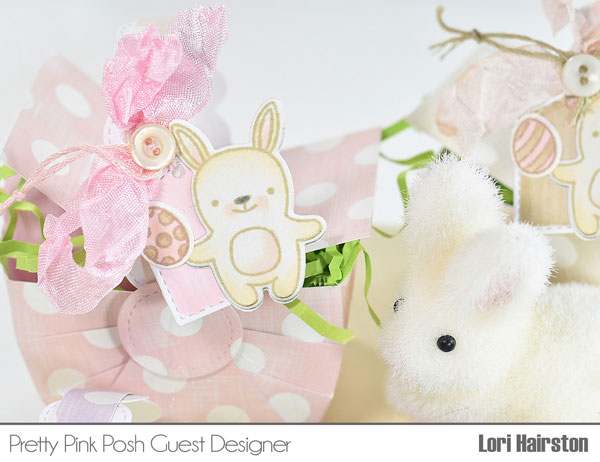
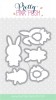
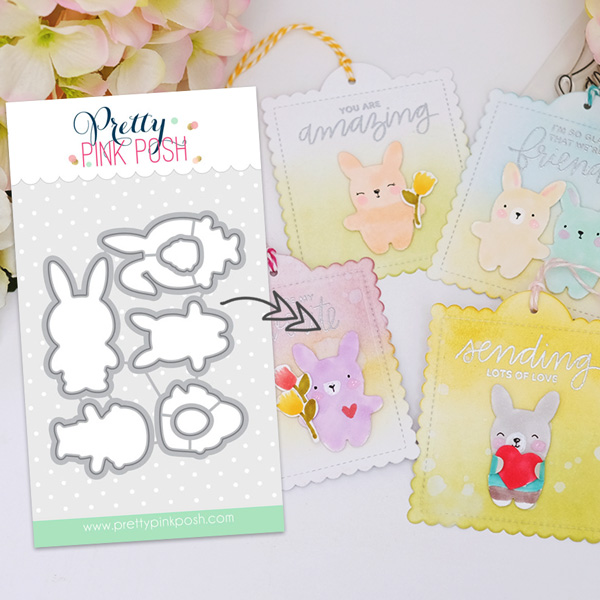
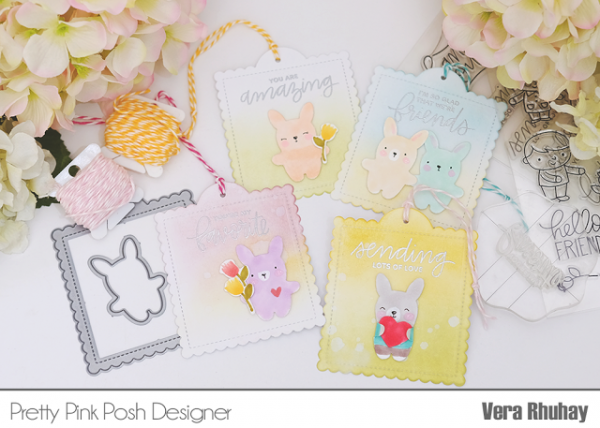
Hello everyone, Vera here sharing another way to use Easter Friends coordinating dies as a non–Easter project. With a little imagination, you can create all sorts of characters with some of the dies you may already have in your stash!

For this project, I also used Friends Forever Coordinating Dies, Friends Forever Stamp Set and Everyday Greetings Stamp Set.

This is super fun project and I encourage you to try it!

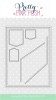
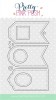
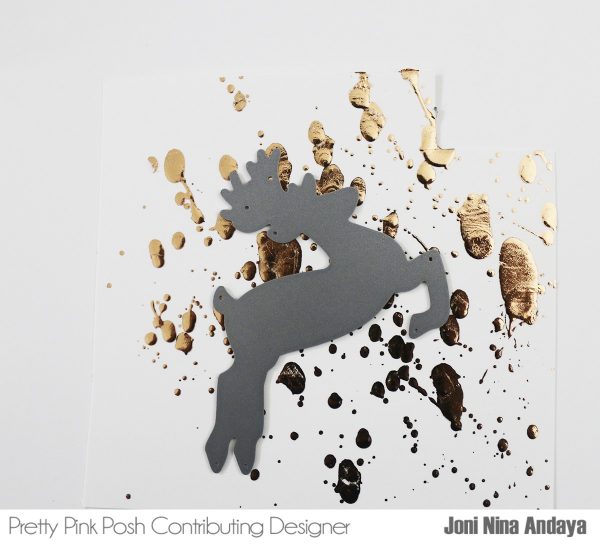
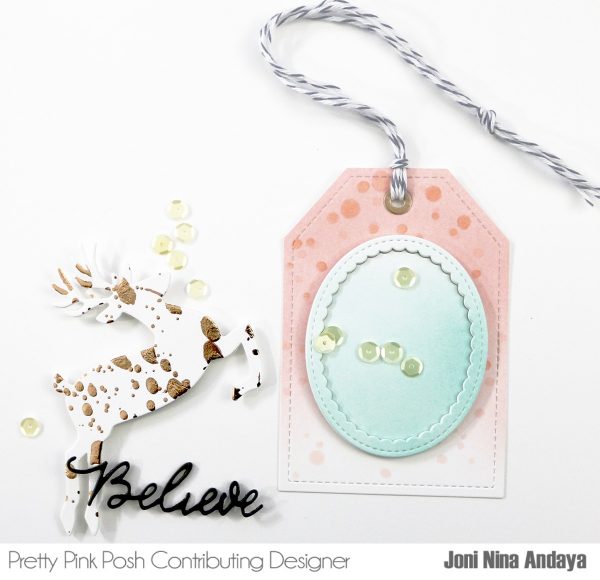
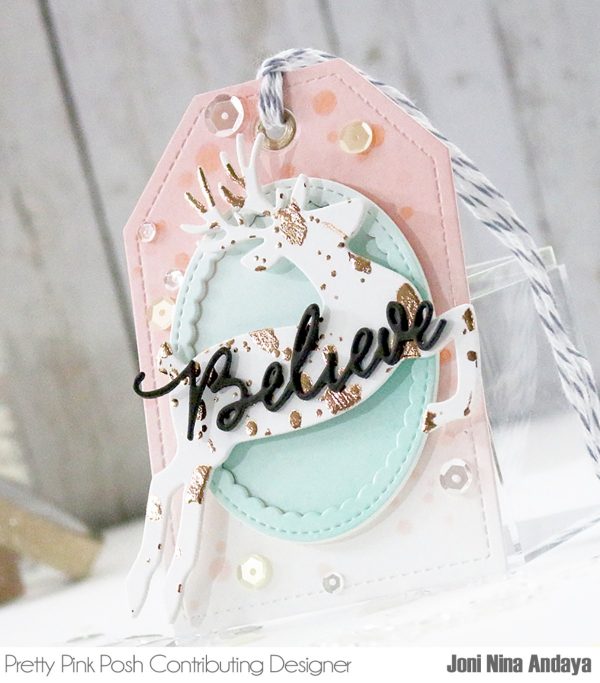
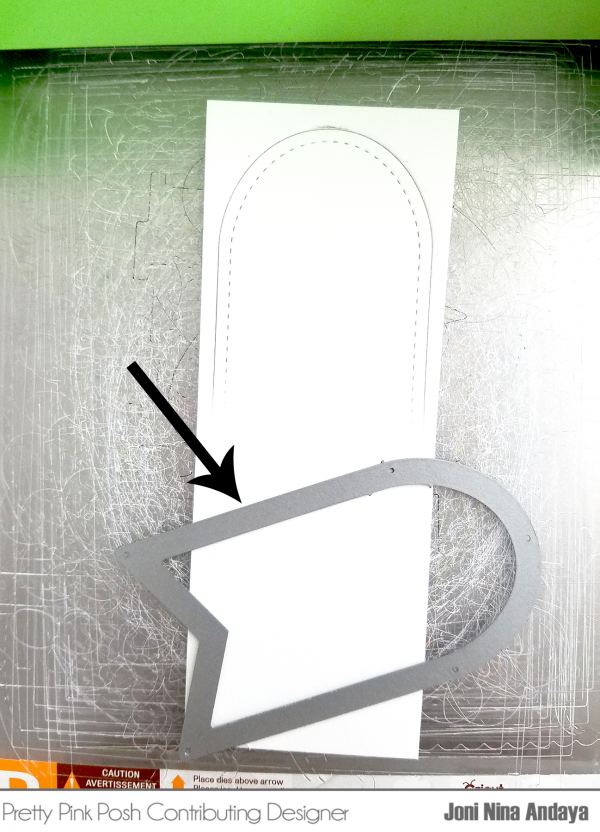
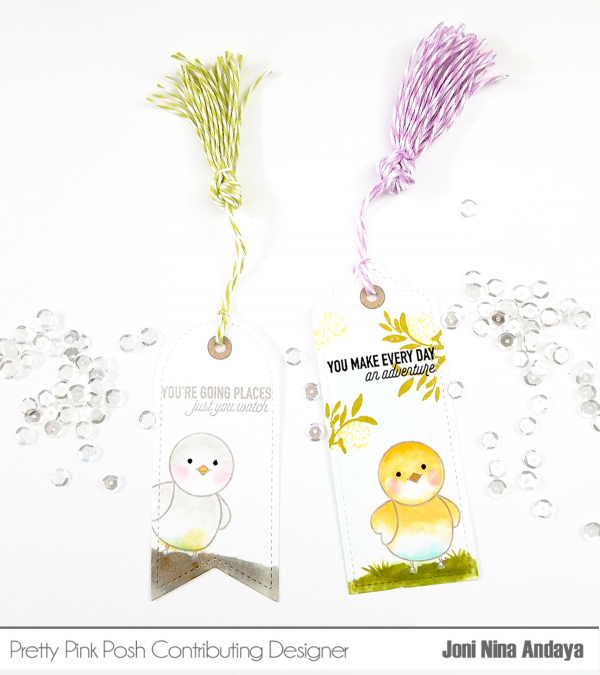
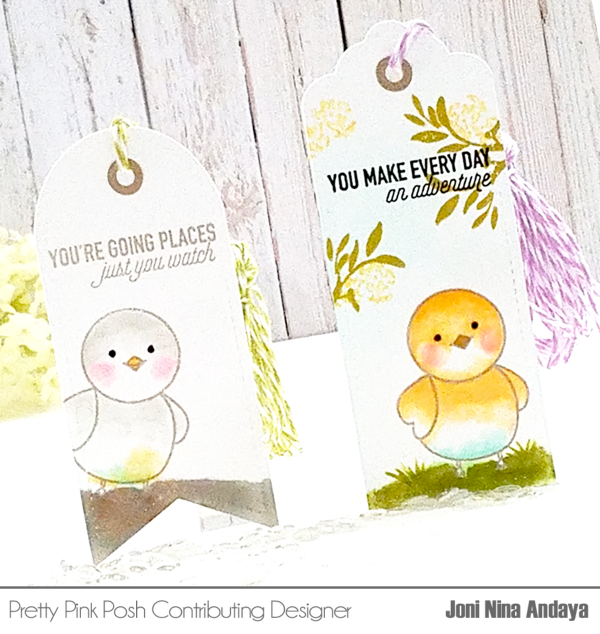
First, I die cut the bunny from Easter Friends coordinating dies on bristol paper, and die cut the heart and the flowers from Friends Forever Coordinating Dies and Scallop Square Tags on white card stock. I used Copic Markers for coloring all the die cuts.

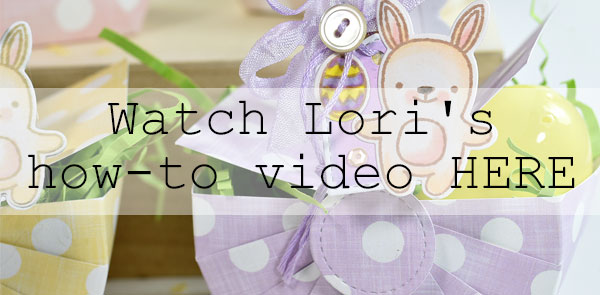
 To watch the creation of these tags from start to finish, click HERE or watch below.

Watch the video above   I  Watch the video in HD on YouTube
border
We hope that today’s post and video has inspired you to think of new ways to use your die cuts!

| | |

Layered Pastel Easter Card

Today we have another special post by Lori Hairston. She created these darling Easter tags using both new and old Pretty Pink Posh products.

Let’s take a look at her post and video, shall we?


Hi, there!  I’m hopping by with an Easter card featuring two cute Pretty Pink Posh bunnies from the Easter Friends stamps and coordinating dies.


You might notice that one bunny is sporting a cute pair of glasses.  You can find those on the Holiday Pals stamp set.

The card base and front are die cut using the largest die from the Scallop Square Tags dies. The pieces aren’t really attached just held together with a white clothespin.  The inside sentiment is stamped on the smaller scallop square.


If you would like to see more, like how to draw the fun banner and how to watercolor the plaid, click the graphic below to watch it!


Happy Easter!

| | |

DIY Paper Easter Baskets

Today we have a special post by Lori Hairston, one of the guests in our March blog hop. She showed me a picture of these handmade baskets that don’t require a fancy die and I knew we had to showcase it here on the blog.

Let’s take a look at her post and video, shall we?

Hi, there! I’m happy to be here to share these mini Easter picnic baskets.  So fun to make and they turn out adorable, especially when topped off with that sweet little bunny from the Easter Friends stamp set!  The bunny and egg are cut out with the coordinating dies and the tag is part of the Stitched Notes Dies.


What is it about Easter baskets?  I’ve always loved them.  When I was little I used the same one every year.  One that was passed down from my uncle.  My daughter, Lauren, used the exact same Easter basket and I’m keeping it for Louisa.  She’ll be the fourth generation to use it.  It’s old, it’s worn, but I love it!

I’ve sized these to hold 2 plastic eggs.  Even though they’re mini, they’ll hold plenty to give as an Easter treat.


You can check out the video to see how easy the baskets are to make and there’s a couple of quick tips on the tag, too.Click the graphic below to watch it!


Louisa (even though she’s only 4 1/2  months old) is definitely getting one of these.  Her momma can keep it and put it out every year.  If you make an Easter Picnic Basket to give away, I bet it will be loved enough to keep from year to year.

Have fun creating Easter projects with Pretty Pink Posh goodies!


| |

Christmas Theme & Giveaway Week- Day 2

Christmas Theme & Giveaway Week- Day 2

Hello friends!! Amy L. here today with a special project. I have made a set of Christmas ornaments. They are so adorable and so easy to create. Let’s get started right away!

Christmas Theme & Giveaway Week- Day 2

More details on my ornaments:

  1. Die cut the frames with Window Frames Dies from different card stocks
  2. For the background, I blended Altenew inks in Frosty Pink, Sea Glass, Mango Smoothie and Frayed Leaf to match the frames
  3. Assemble the shaker tags with the frames, acetate sheets, foam tape and 6mm Sparkling Clear sequins and 3mm Sparkling Clear sequins
  4. Stamp images from STAMPtember Winter Bird Stamp Set, Birdie Friends Stamp Set, Fox Friends Stamp Set and Winter Wonderland Stamp Set. Color with Copic markers. Add highlights with white gel pen. Die cut out with the coordinating dies
  5. Mount everything in place with foam tape. Embellish with ribbon, twine and jingle bells to finish

Christmas Theme & Giveaway Week- Day 2Christmas Theme & Giveaway Week- Day 2 Christmas Theme & Giveaway Week- Day 2Christmas Theme & Giveaway Week- Day 2

Now it’s time for our second giveaway of the week. We are giving away the two exclusive STAMPtember sets we designed for Simon Says Stamp that are sold out and no longer available!

a Rafflecopter giveaway
Thank you so much for stopping by! Be sure to join us again tomorrow for new inspiration and another giveaway!

| |

Tutorial: 12 Tags of Christmas (with a Feminine Twist)

Hello everyone, Joni here sharing a tag project in collaboration with Pretty Pink Posh and Ellen Hutson using foil. Foil is a trendy product these days and you can use it in a lot of different ways. I’ll show you a way to use it that’s easy, but you still get beautiful results.

Pretty Pink Posh: 12 Tags of Christmas with a Feminine Twist

First, I distressed the white cardstock with Tim Holtz Distress Ink pad in Tattered Rose. Then die-cut it with the Pretty Pink Posh Stitched Duo 1 dies.

Pretty Pink Posh: 12 Tags of Christmas with a Feminine Twist

Next, I distressed another white cardstock and distressed it with Tim Holtz Distress ink pad in Evergreen Bough. Then die-cut it with the small oval scallop die from the Decorative Tag 1.

Pretty Pink Posh: 12 Tags of Christmas with a Feminine Twist

Next, I die-cut more white small oval scallop (x3), I only used the oval frame stacked with glue, below the distressed small oval scallop die-cut.

Pretty Pink Posh: 12 Tags of Christmas with a Feminine Twist

Next, I put a hole on top of the tag using the hole reinforce from Decorative Tag 1. Then, I added some dot background using Copic markers in E02 and R000.

Pretty Pink Posh: 12 Tags of Christmas with a Feminine Twist

To add foil on the deer, I splatter the MINC Reactive Mist on a cardstock and let it dry.

Pretty Pink Posh: 12 Tags of Christmas with a Feminine Twist

Next, I put over the Rose Gold Foil on top of the splattered cardstock then run it to the MINC machine.

Pretty Pink Posh: 12 Tags of Christmas with a Feminine Twist

Once you removed the foil, it gives you a foiled splattered effect. Then I die-cut the Leaping Deer on the splattered foil.

Pretty Pink Posh: 12 Tags of Christmas with a Feminine Twist

Then, I adhered the deer with foam tape. The Believe die-cut was adhered with glue on top of the deer.

Pretty Pink Posh: 12 Tags of Christmas with a Feminine Twist

Finally, I added some sequins in Sparkling Clear and Lemon Meringue sequins.

Pretty Pink Posh: 12 Tags of Christmas with a Feminine Twist

We hope you were inspired by today’s feminine tag.

sig name

| |

Thanksgiving Theme Week- Day 4

Pretty Pink Posh: Thanksgiving Theme Week Day 4
Hi! It’s Melody here on the blog today sharing my project for the Thanksgiving Theme Week! I am going to my sister’s house for Thanksgiving and wanted to bring her a little gift for hosting us all. I am using the Giving Thanks Stamp Set and the Giving Thanks Coordinating Dies for my project.

Pretty Pink Posh: Thanksgiving Theme Week Day 4

I started with a kraft gift bag and randomly stamped leaves from the Giving Thanks Stamp Set. This a quick and easy way to dress up a simple bag.

Pretty Pink Posh: Thanksgiving Theme Week Day 4

Next I covered a tag with watercolor paper. I stamped the sentiment in gold ink and embossed with gold embossing powder and then used distress inks to create the background. I colored a variety of pumpkins, acorns and leaves with Copic Markers and die cut with the Giving Thanks Coordinating Dies and attached them to the tag. I used 6mm Metallic Gold Sequins and 4mm Metallic Gold Sequins to finish off the tag.

Pretty Pink Posh: Thanksgiving Theme Week Day 4

I used the smaller die in the Scallop Frames Dies to create the shaker. I cut the frame four times from kraft card stock to get the depth I needed. I added acetate behind the top layer. I added leaves to the background and dropped in 6mm Metallic Gold Sequins4mm Metallic Gold Sequins, and sequins from the 4mm Autumn Harvest Sequins Mix.  I used foam tape to attached the adorable pilgrims.

Pretty Pink Posh: Thanksgiving Theme Week Day 4

I used one of the dies in the Mini Tags Dies, ribbon, and twine to dress up the candle.

Pretty Pink Posh Giving Thanks setMini Tags die set
Yankee Pumpkin Candle 4mm Gold SequinsCopic Markers
border

If you have missed any of our other Thanksgiving cards and projects, click on the photos below to see the post from that day.

thanksgiving_1 thanksgiving_2thanksgiving_2

Thanks for stopping by! I hope I have inspired you to create a fall project of your own!

| | |

Tutorial: Magnetic Bookmarks + Video

Pretty Pink Posh: Magnetic Bookmarks + Video

Hi everyone! This is Vera and today I have Hexagon Magnetic Bookmark to share with you featuring the Pretty Pink Posh Stitched Hexagons Dies.

Pretty Pink Posh: Magnetic Bookmarks + Video

Magnetic bookmarks are popular lately and they’re so easy to make! When I saw the Pretty Pink Posh Stitched Hexagons Dies I knew that there were so many options for both cards and other projects.

Pretty Pink Posh: Magnetic Bookmarks + Video

To create these magnetic bookmarks, I used white cardstock and flexible magnet sheet (you can use flexible magnet tape too). The images are Pretty Pink Posh clear stamps : Camping Friends | Holiday Pals | Rainy Days and the sentiments are from the Birdie Friends Stamp Set.  I blended the hexagon die cut with dye ink pad and colored the images using Zig Clean Color Real Brush. On the back side, you can write the words as desired using a black marker and white gel pen.

Pretty Pink Posh: Magnetic Bookmarks + Video

Here’s a video to show how I created these bookmarks from the start to finish.

Watch the video above   I  Watch the video in HD on YouTubeborderstitchedhexagonsmagnets
stampsets1
Thanks so much for joining me today! Hope you have a wonderful weekend!

| |

Tutorial: Birdie Bookmarks

Hello everyone, Joni here for peak of the new upcoming Stitched Essentials 1 dies that release tomorrow, May 1st.

For this project I created a bookmark using this cute tag dies and coordinate using the cute chicks from the Birdie Friends stamp set. The chicks were stamped directly on the bookmarks and colored it with Copics. The sentiments I used were from Wplus9 Going Places stamp set.

Pretty Pink Posh: Birdie Bookmarks

To begin, I die-cut he tag only to where the black arrow is pointing.

Pretty Pink Posh: Birdie Bookmarks

Next, I die-cut again to prolonged the tag and make it in to a bookmark. The pink arrow is showing where the cut is supposed to stop. The black arrow shows that you have to flip the plate and cut this way.

Pretty Pink Posh: Birdie Bookmarks

This picture is just showing you where the cut should stop.

Pretty Pink Posh: Birdie Bookmarks

Next, I created a tassel for the bookmark. If you want a video tutorial, I used THIS one as a guide to make a proper tassel.

Pretty Pink Posh: Birdie Bookmarks

Here’s another look.

ppp - last pic

Pretty Pink Posh: Mini Tag Shakers

Don’t forget: tomorrow the new release is available in the Pretty Pink Posh Shop!

I hope you guys enjoyed this tutorial!

sig name

| |

Recipe Card Gift Idea

Pretty Pink Posh: Recipe Card Gift Idea

Hi friends, Lisa here today! I have a cute project featuring sequins and seed beads along with the Birdie Friends and Rainy Days stamps and dies. With wedding season upon us, I thought this would be a fun shower gift!

Pretty Pink Posh: Recipe Card Gift Idea

I began with a Soft Stone card stock cut to recipe card size. Using the Stitched Tabs Dies, I cut the tops of the panels for divider tabs.

Pretty Pink Posh: Recipe Card Gift Idea

Next, I dry embossed portions of the dividers using a complimentary embossing folder.

Pretty Pink Posh: Recipe Card Gift Idea

I made a small pouch from an office supply product. This had several small pouches on one sheet that would fit into a notebook. I cut one of the pouches leaving two of the pre-adhered sides intact. I stitched the bottom with my sewing machine then filled it with 6mm Marigold Sequins, 4mm & 6mm Marshmallow Sequins, 10mm Sparkling Clear Sequins and Silver Shimmer Seed Beads. The top was stitched shut and the pouch was added to the front divider with Thermo Web adhesive.

Pretty Pink Posh: Recipe Card Gift Idea

The sweet bird from the Birdie Friends stamp set was stamped, die cut and water colored. It’s added to the decorated panel with two layers of foam tape. A bit of Wink of Stella was added for good measure!

Pretty Pink Posh: Recipe Card Gift Idea

Everything was tied together with Yellow Chevron Twill ribbon. Using a Stitched Tags Die, I stamped a sentiment from the Rainy Days Stamp Set then decorated it with matching sequins and seed beads.

Pretty Pink Posh: Recipe Card Gift Idea

Thanks so much for stopping by and have a great day!

lisa2

| |

DIY Framed Art

Pretty Pink Posh

Hi friends, Lisa here today!

I have a fun framed project featuring the Sweet Pea Sequins Mix along with the Birdie Friends & Birdie Notes stamp sets.

Pretty Pink Posh

I selected frames with matting included. You’ll see this has space for three photos.

I cut two panels of patterned paper, and two from white cardstock. The white panels were dry embossed with a floral pattern. These were added to the two mats with tape runner adhesive.

Pretty Pink Posh

Next came the stamped images from Birdie Friends and Birdie Notes. After stamping and coloring them, they were die cut using the coordinating die sets (Birdie Friends & Birdie Notes). I’ve also used the little leafy sprig from the Holiday Pals stamp set and the coordinating die.

Pretty Pink Posh

The fun began here with the placement of the images! I added the two black and white photos then the Sweet Pea Sequins. This will be a little gift to my granddaughter for her nursery!

Pretty Pink Posh

Pretty Pink Posh

border

We hope that today’s post and project inspired you to think outside of cards and stretch your stamps, dies and embellishments; the possibilities are endless!

Pretty Pink Posh

Thanks so much for stopping by and have a great day!

lisa2