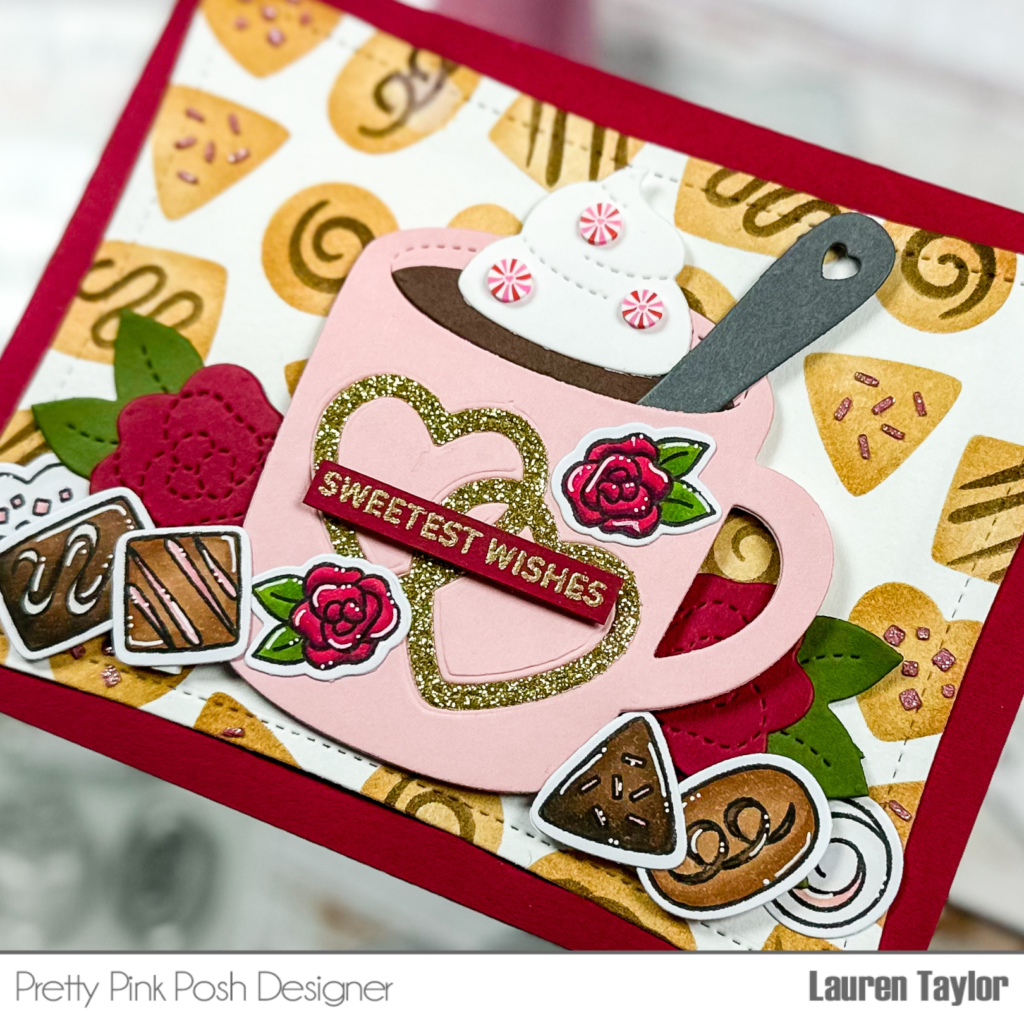
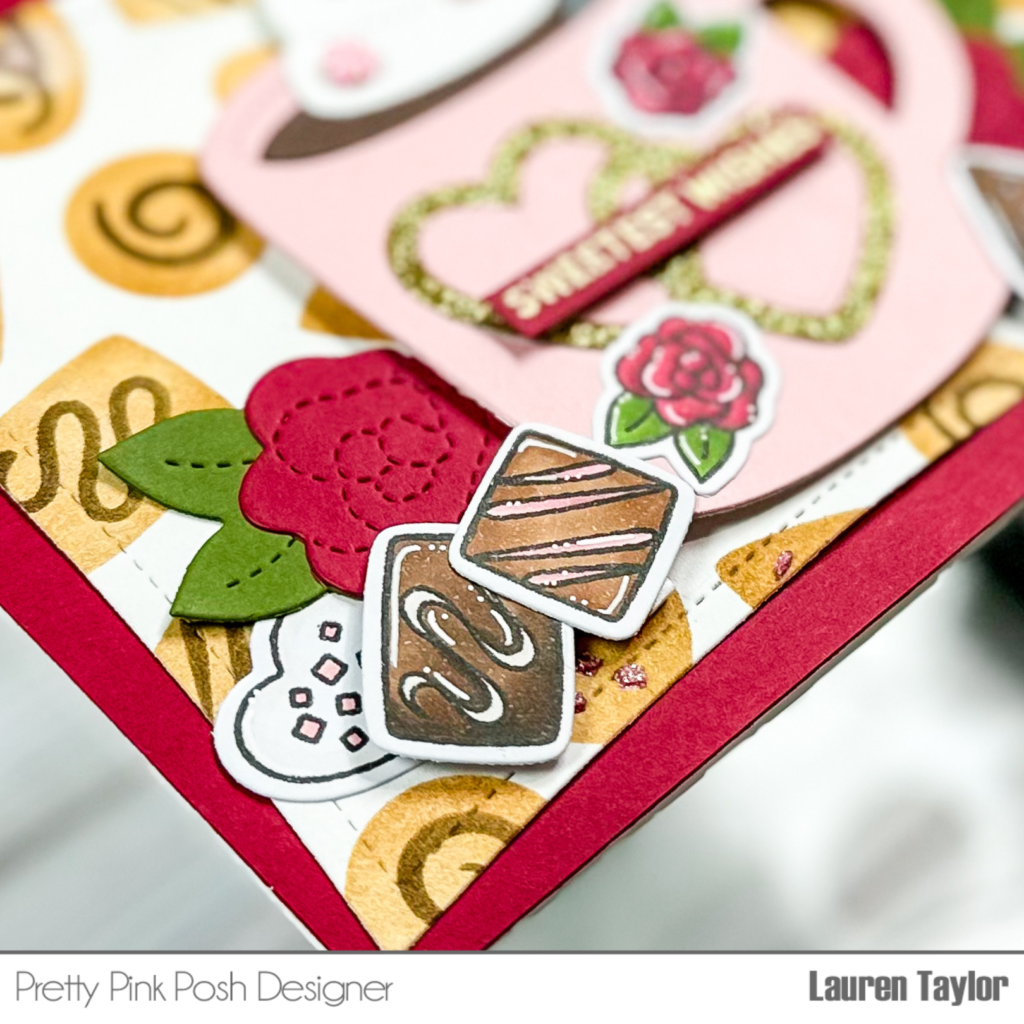
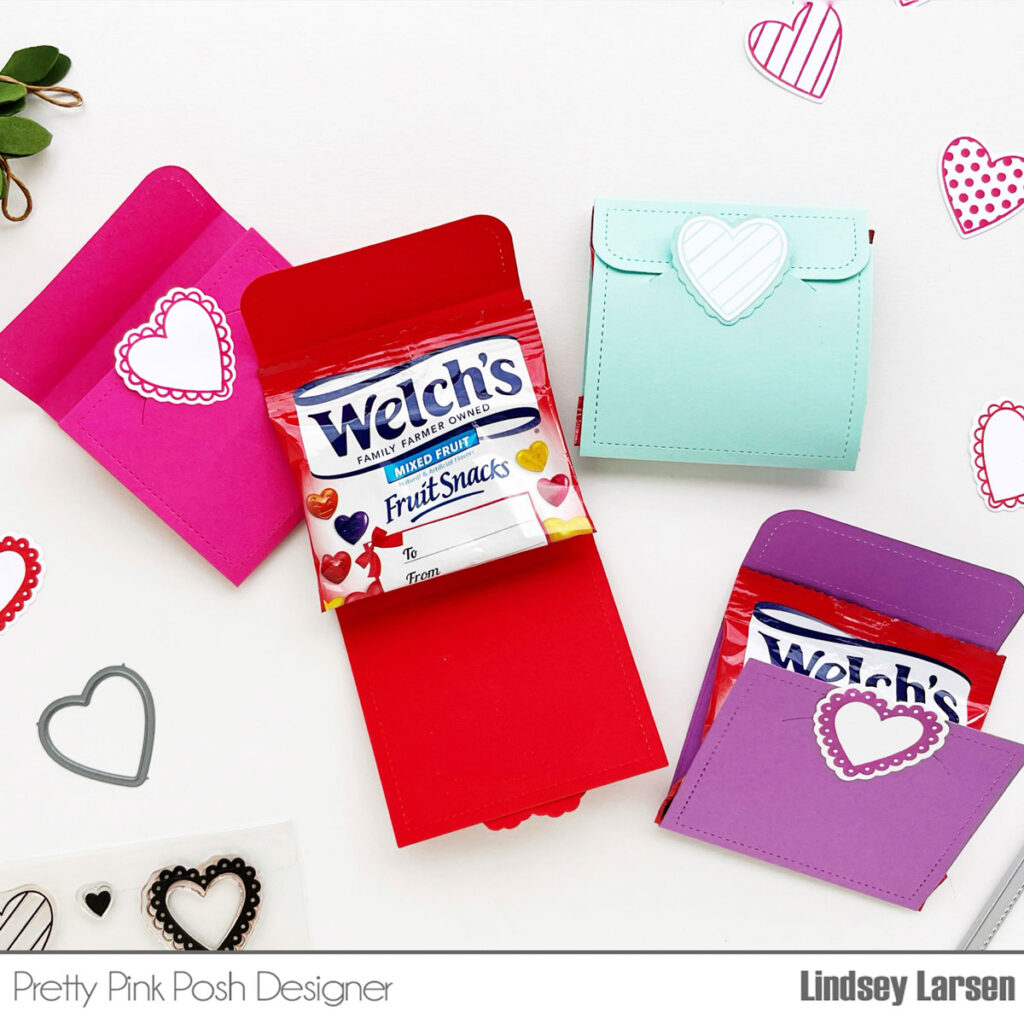
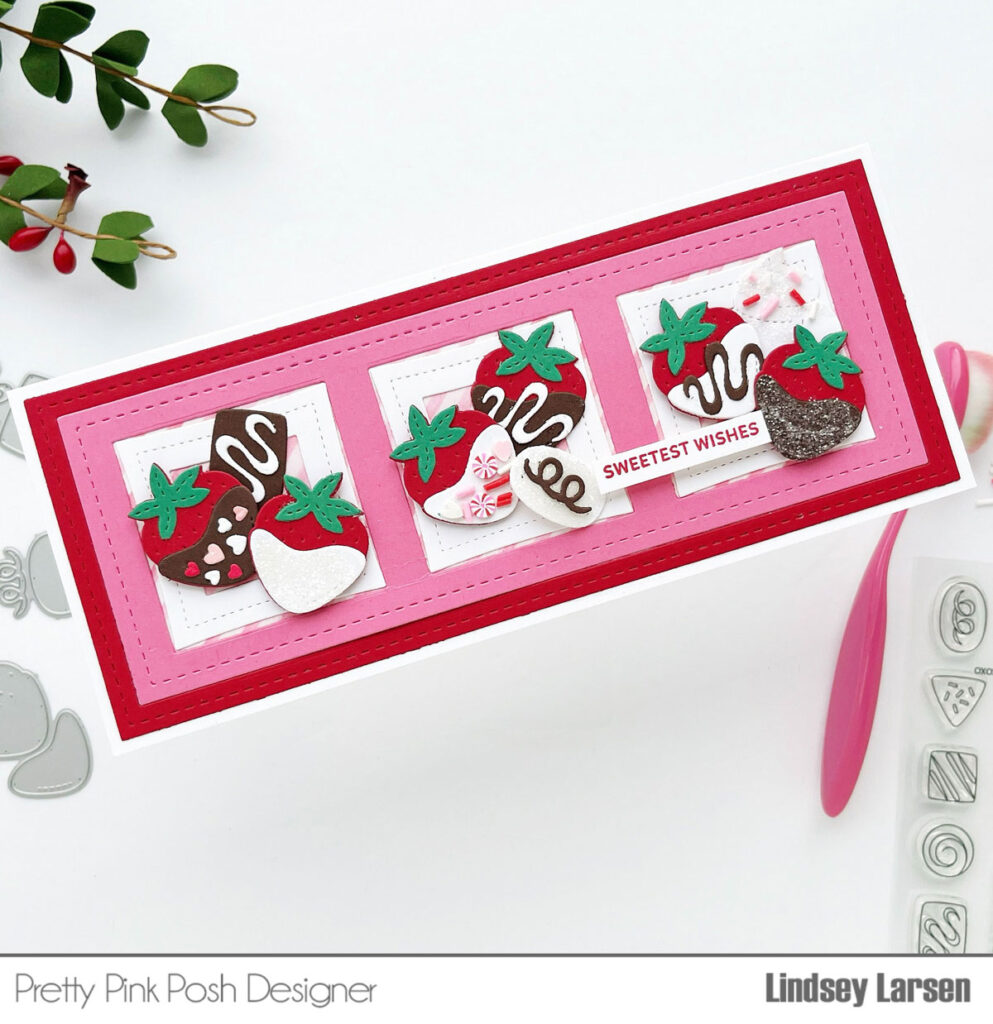
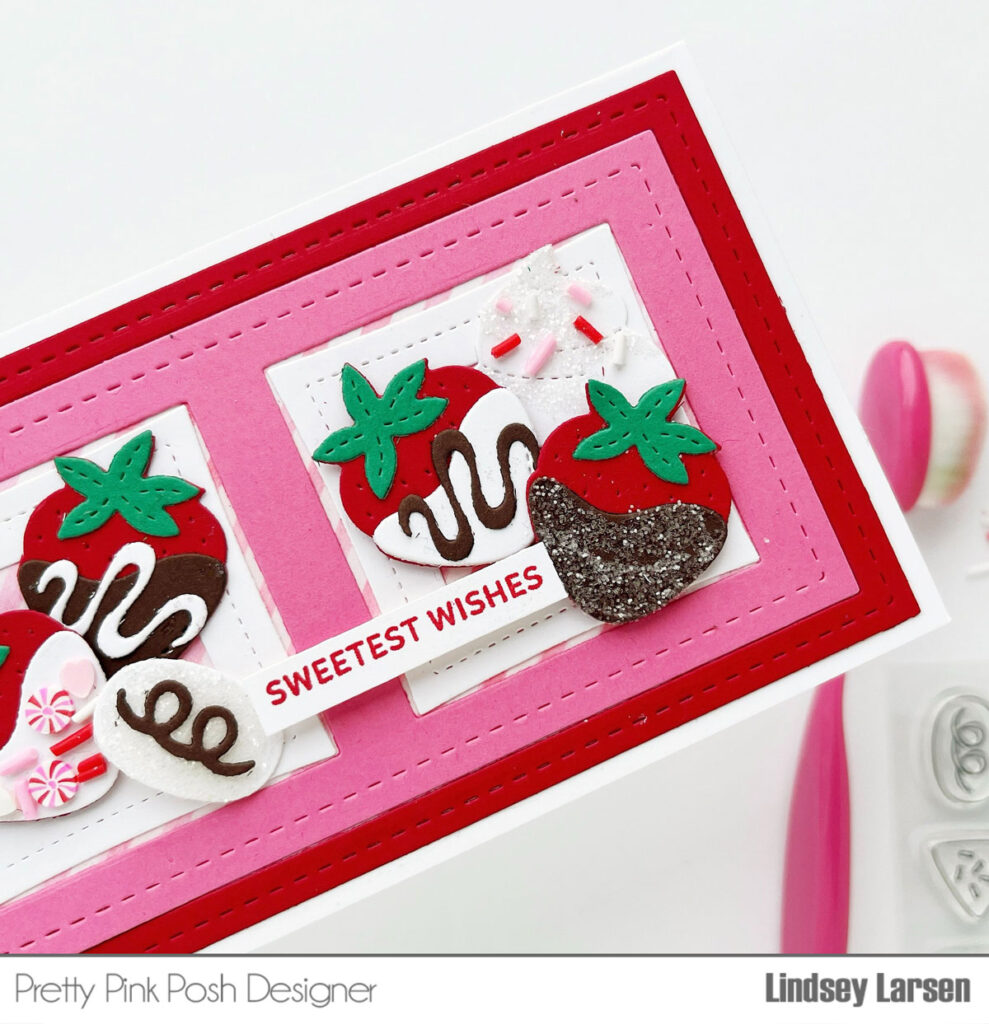
Valentine Mini Cards + Video
Hi, friends! It’s Lauren and I am so happy to have my first video on the Pretty Pink Posh YouTube channel! I’m sharing how you can use the Sweet Note Dies to create valentines for your kiddo to color and share with their classmates or friends.
Watch the video above I Watch the video in HD on YouTube
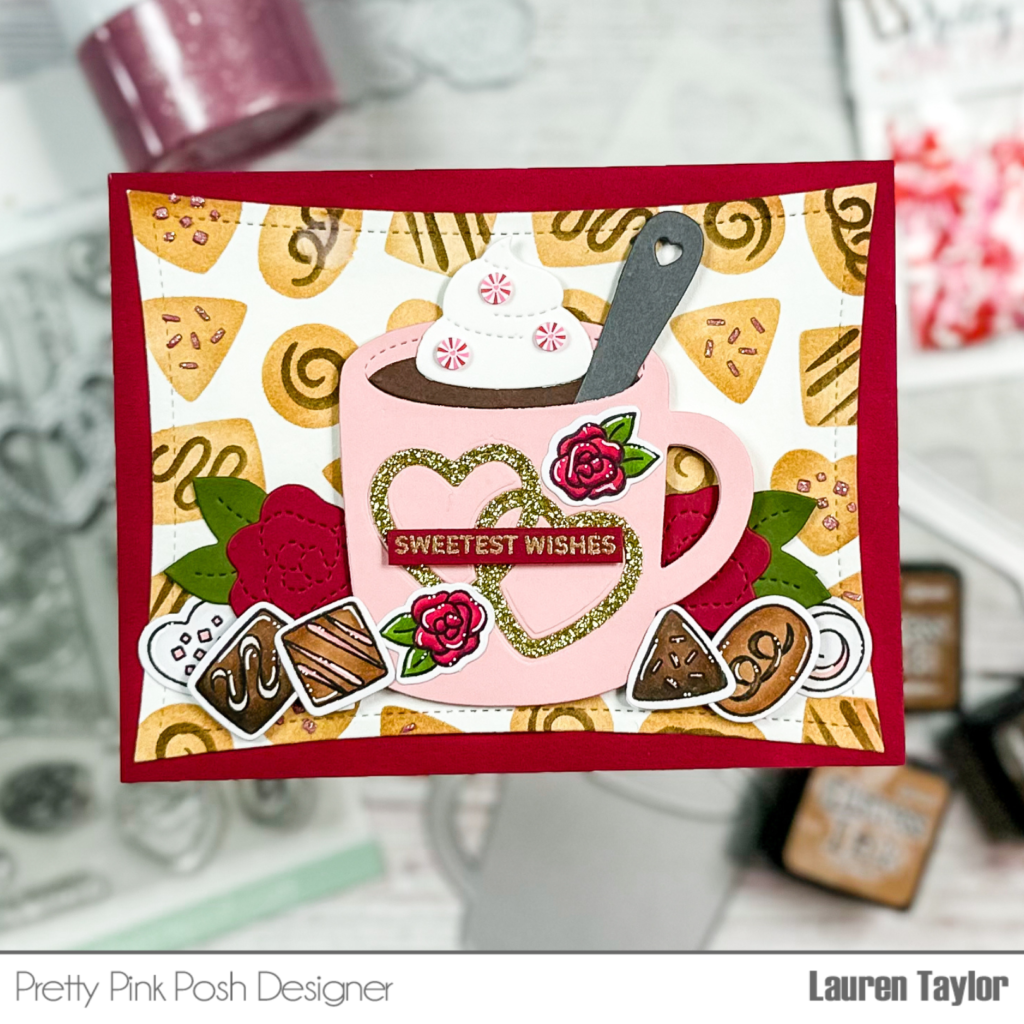
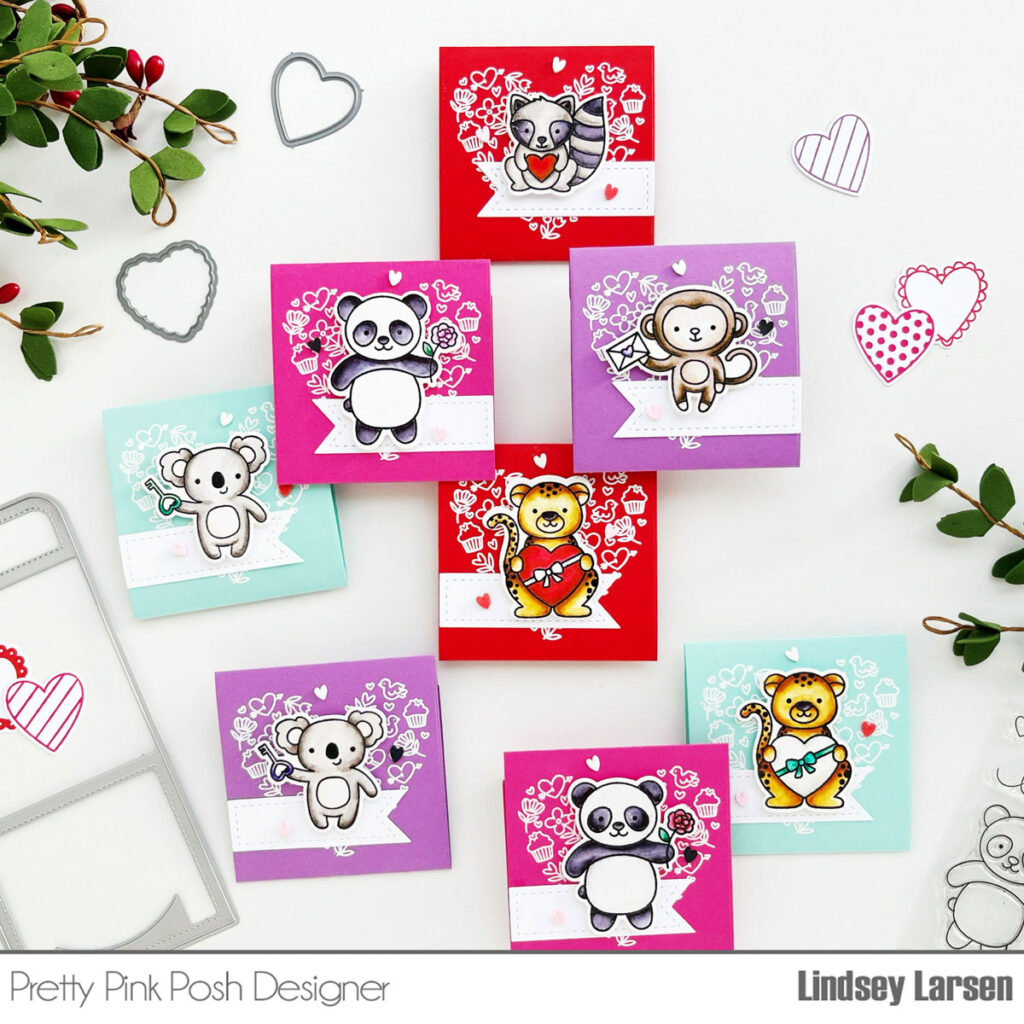
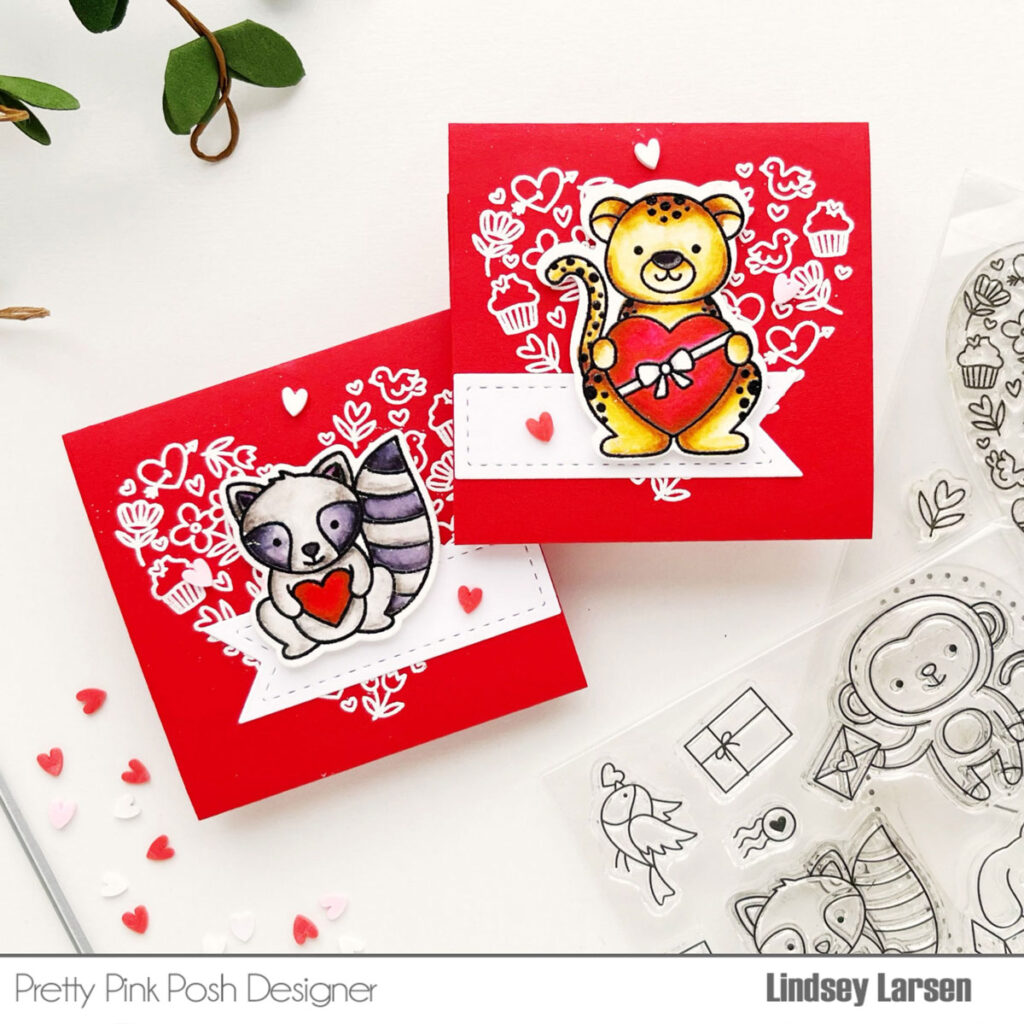
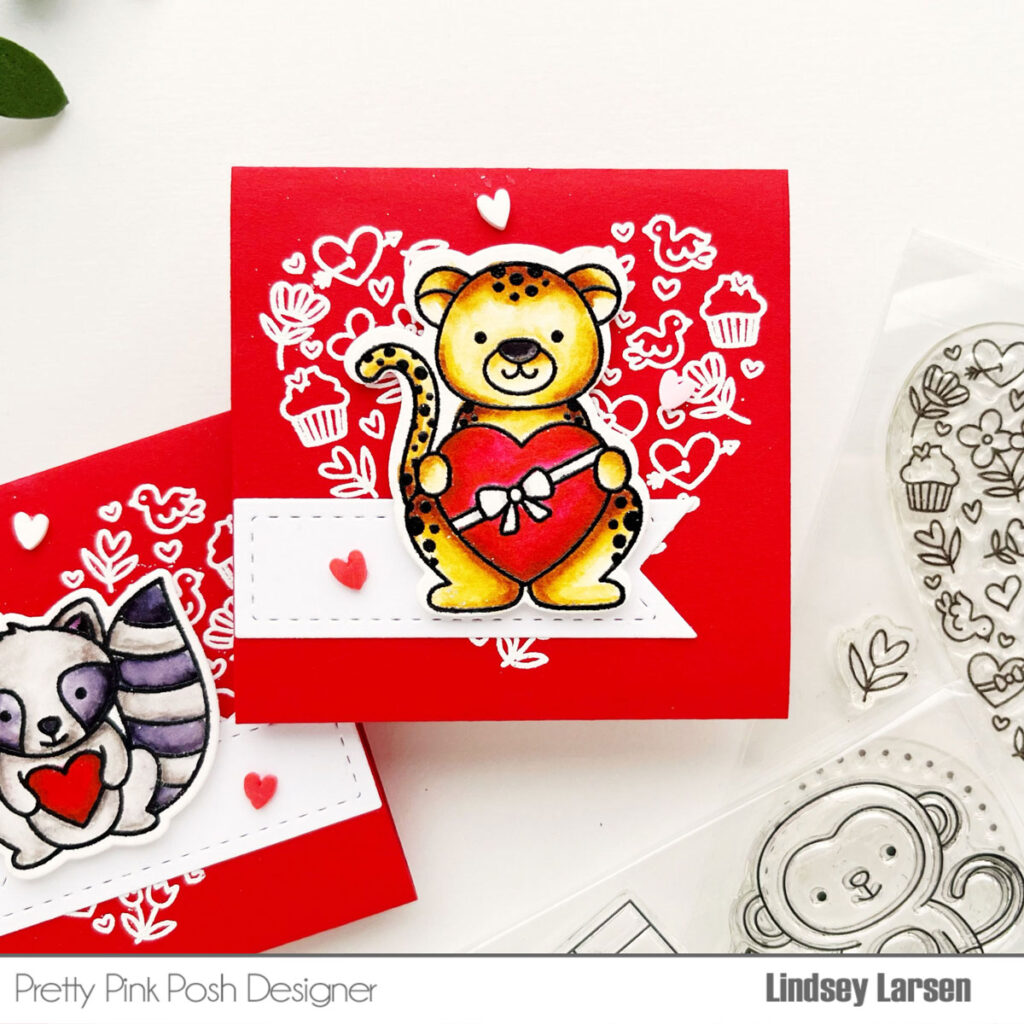
I started with stenciling the solid hearts from the Layered Valentine Hearts Stencils with Spun Sugar, Saltwater Taffy and Worn Lipstick Distress Oxides. In my video, I die cut the 6×6” background four times with the square die from the Sweet Note Dies before the next stencil, but I should have added Picked Raspberry Distress Oxide through the striped hearts first!
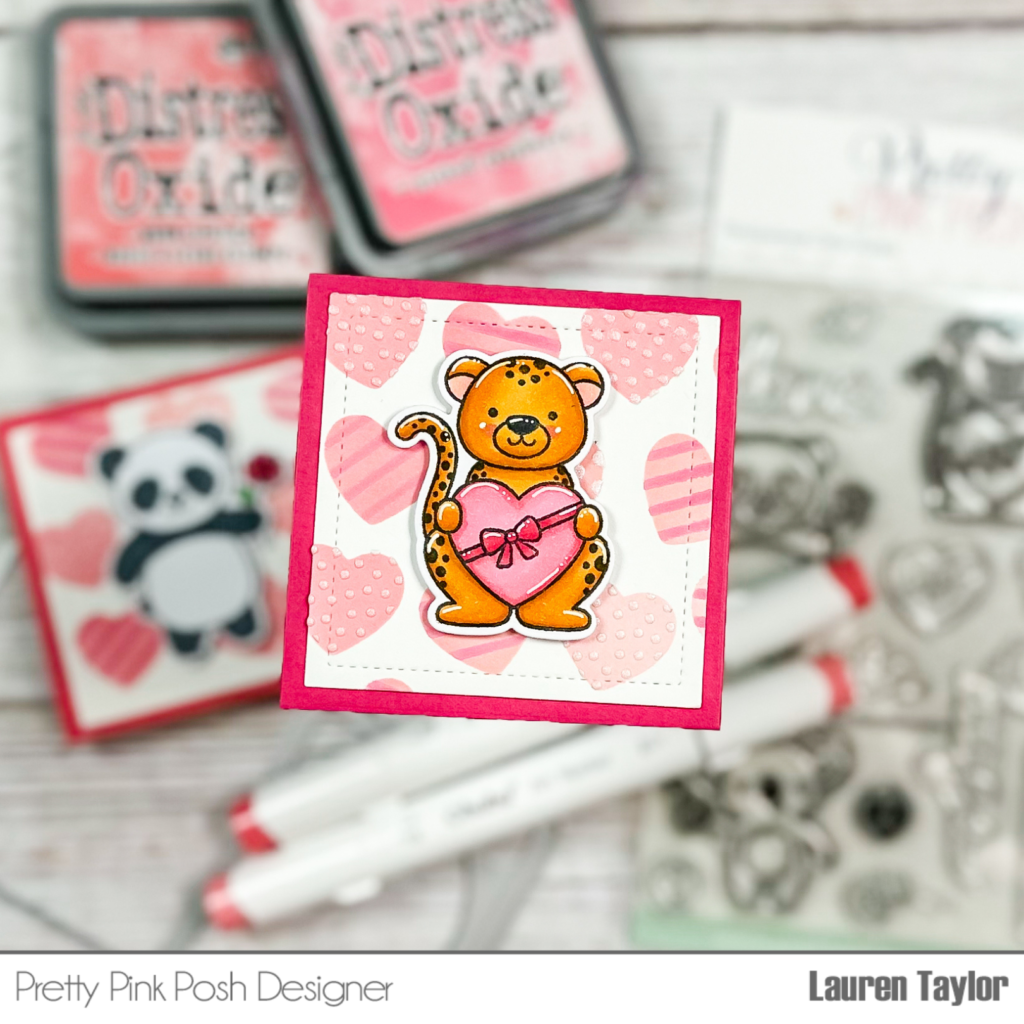
After I have the squares with the first two layers, I used the Layered Valentine Hearts Stencil with polka dots hearts with Pearl White Stardust Butter to add some shine and texture to the backgrounds. I added this after die cutting so it would have plenty of time to dry and avoid any stencil paste from sticking to my die.
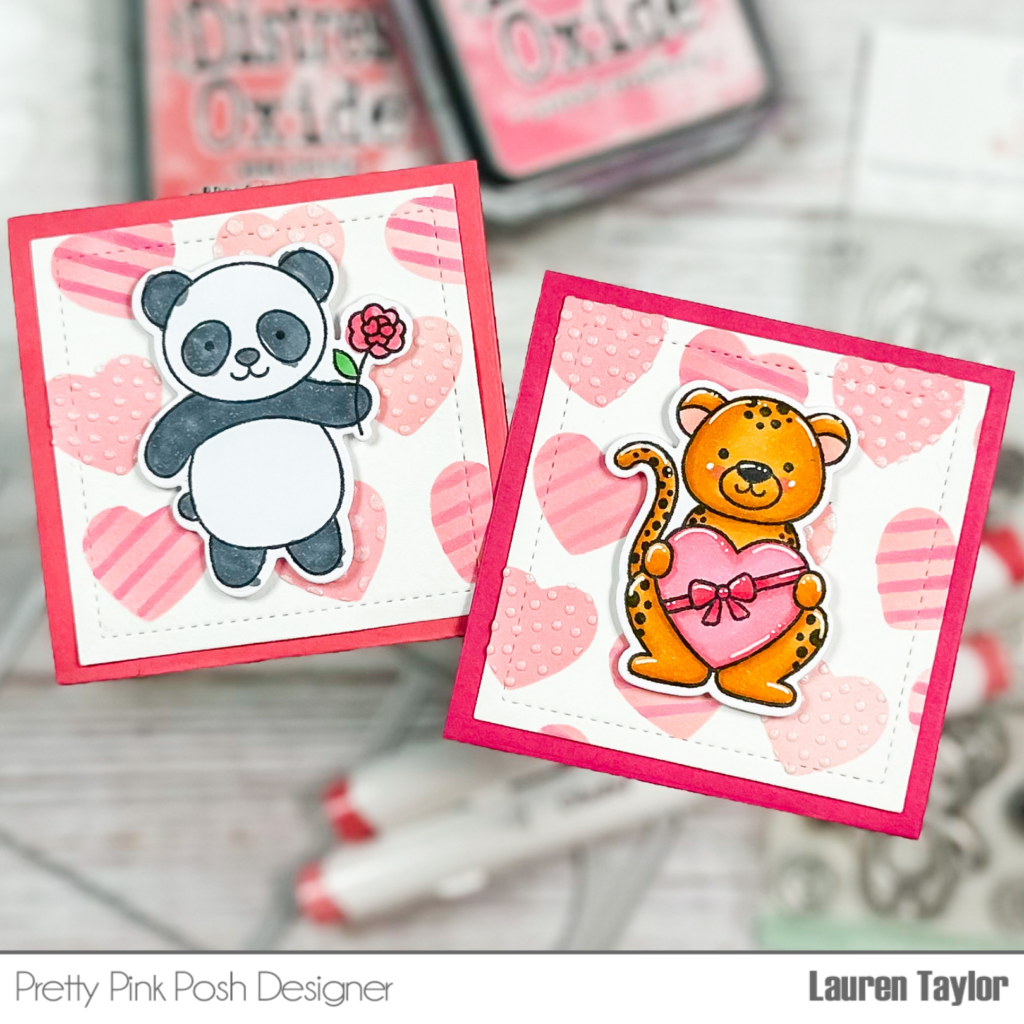
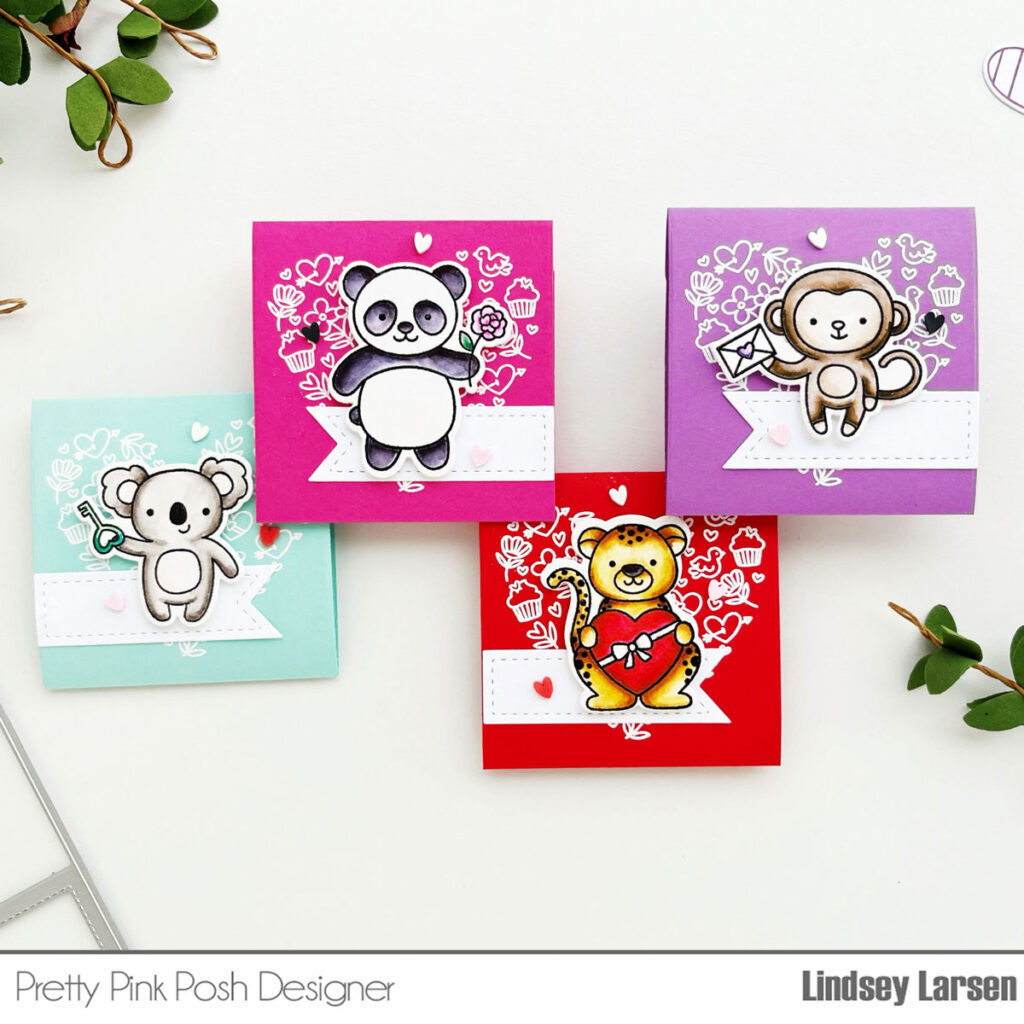
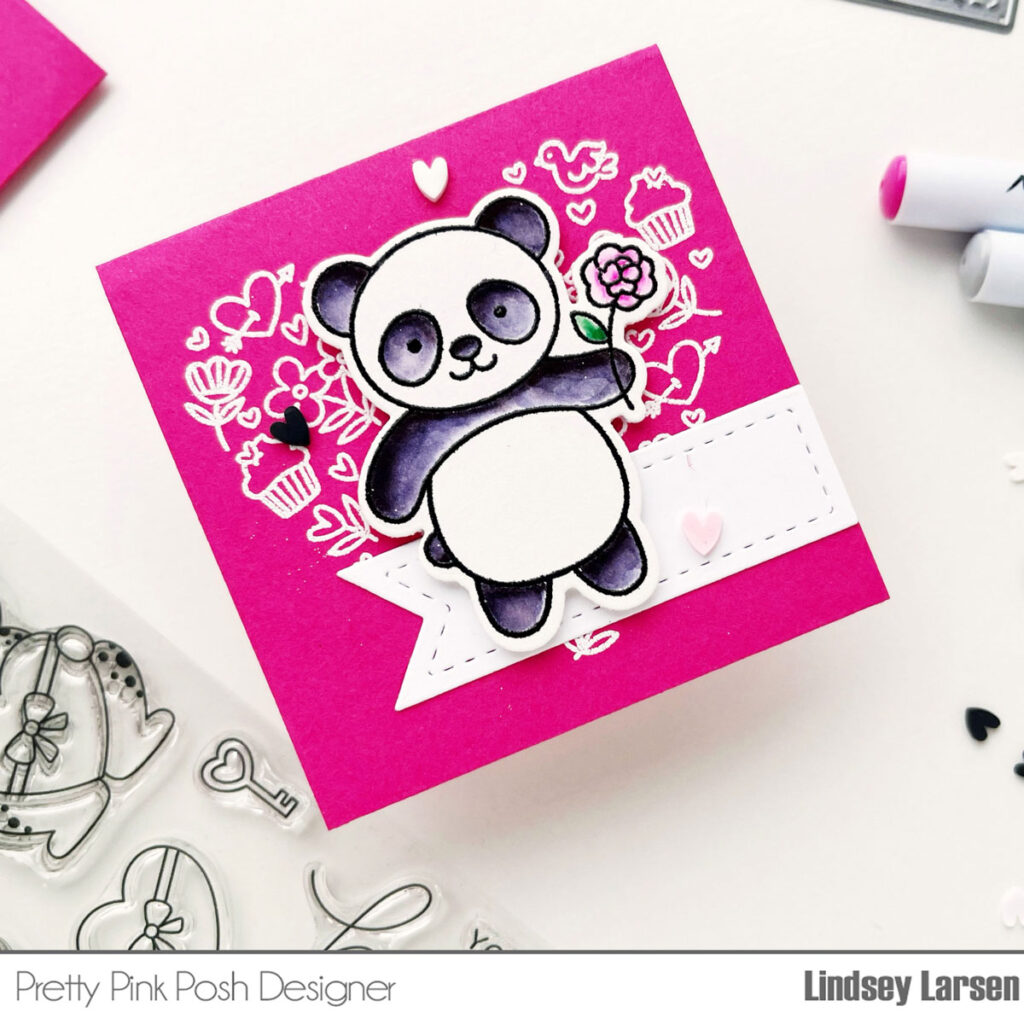
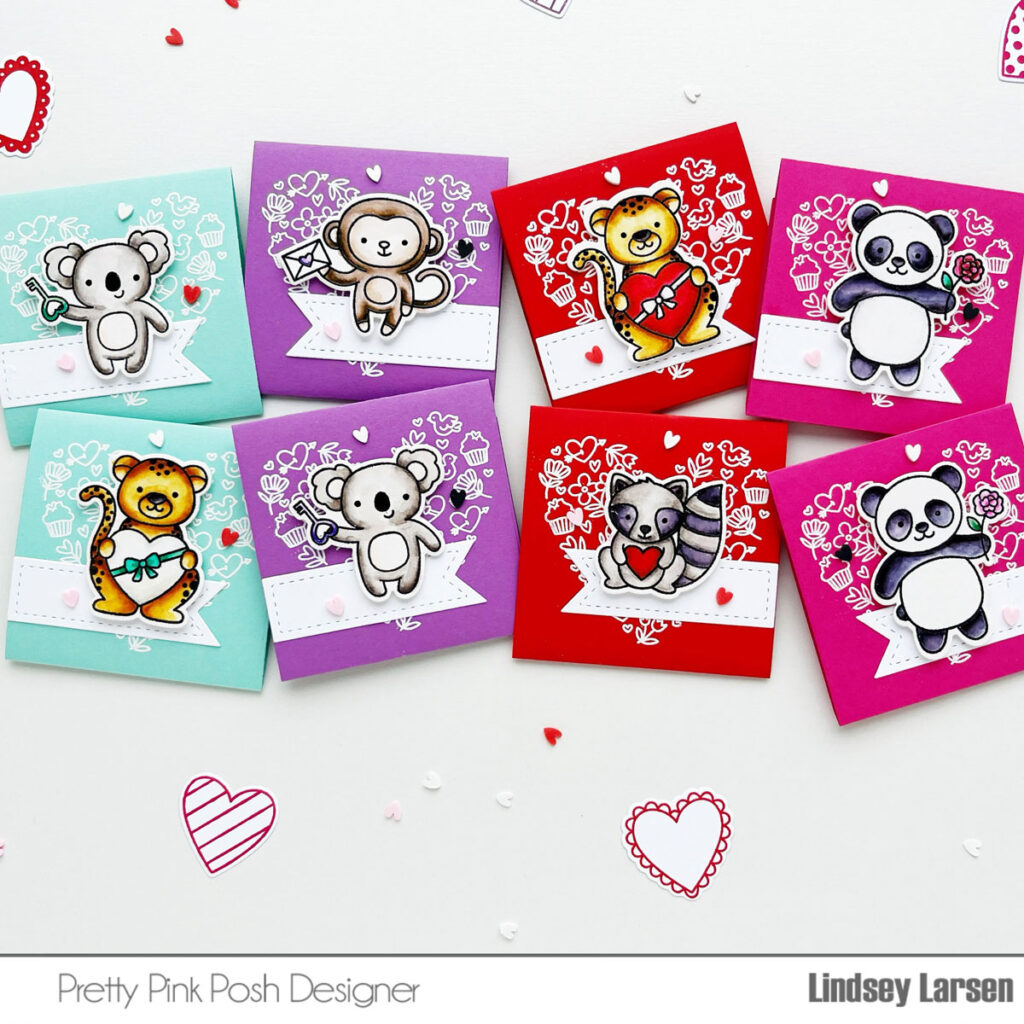
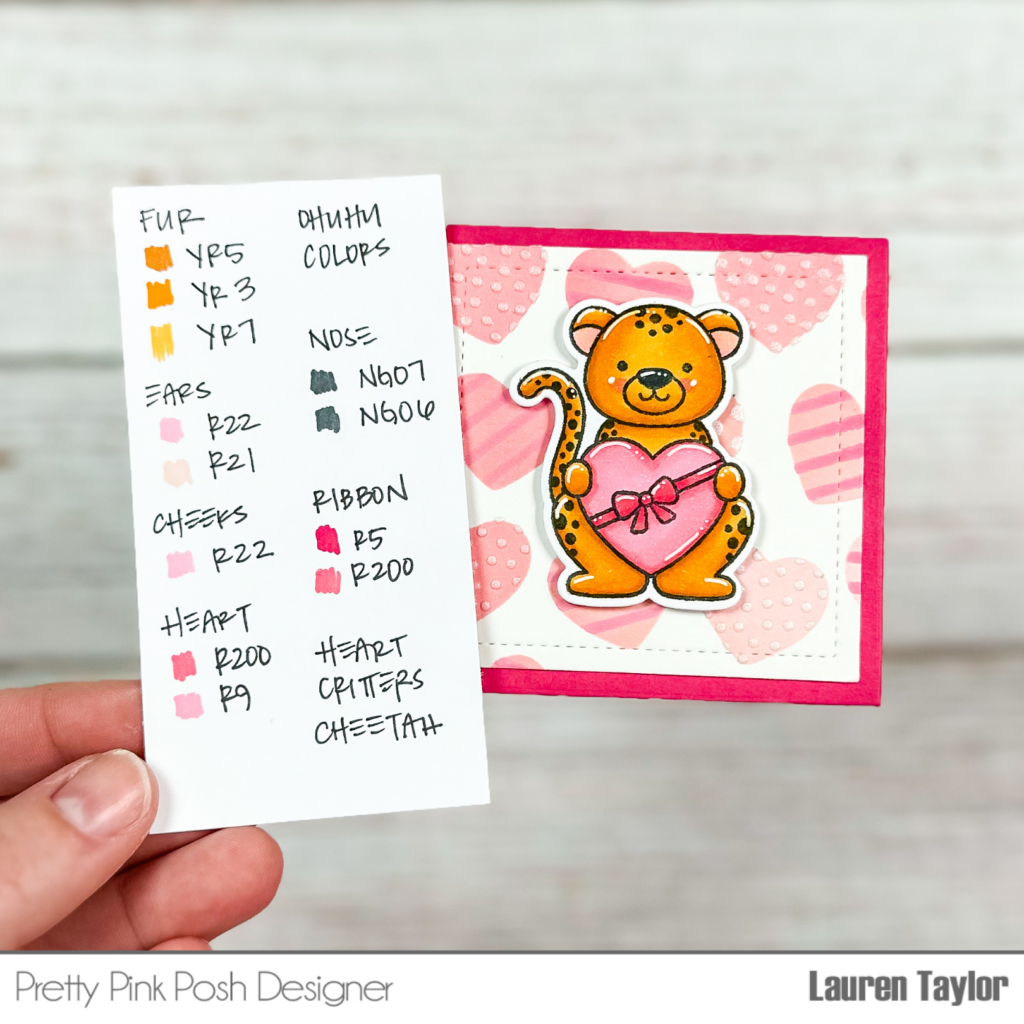
Next I stamped the cheetah from Hearts Critters stamp set and cut it out with the coordinating die. Using Ohuhu Art Markers, I colored in the sweet critter with its heart shaped treat box and you can find the colors listed in the image below!
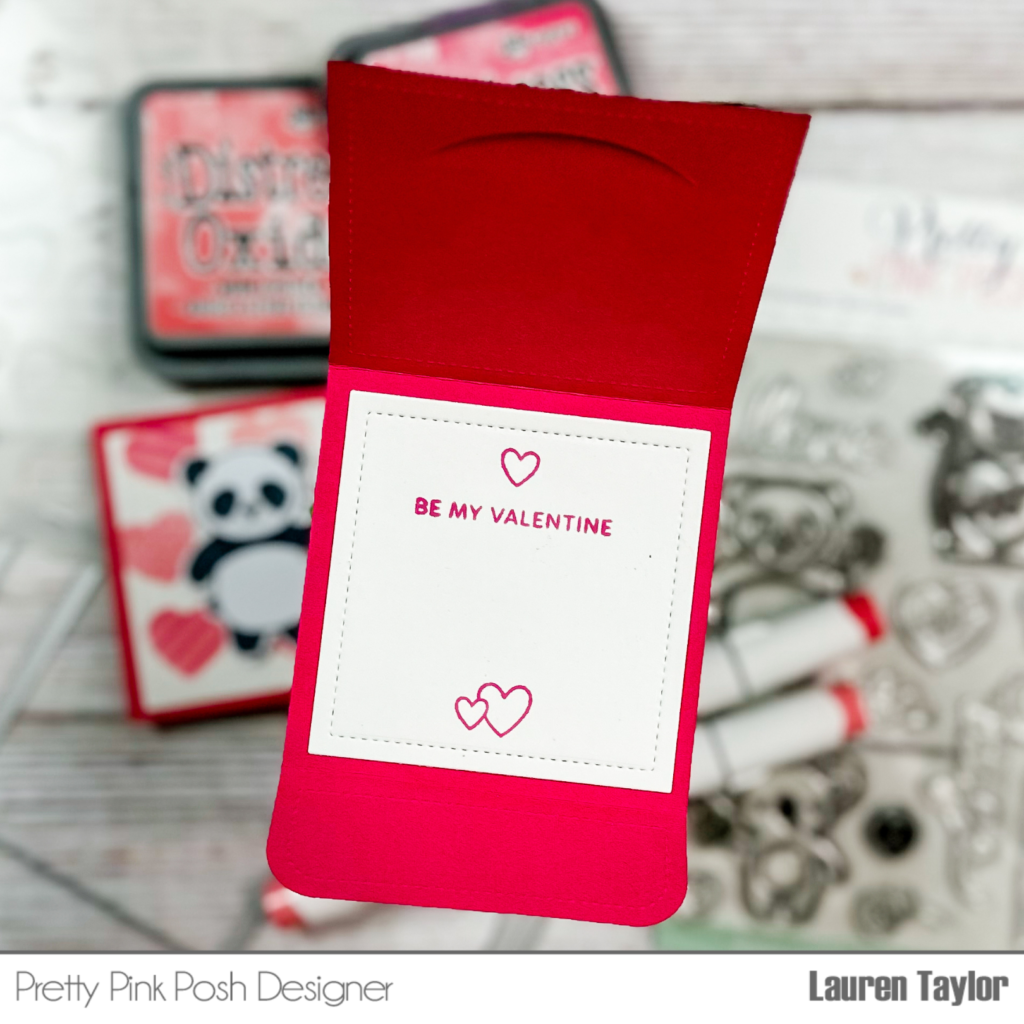
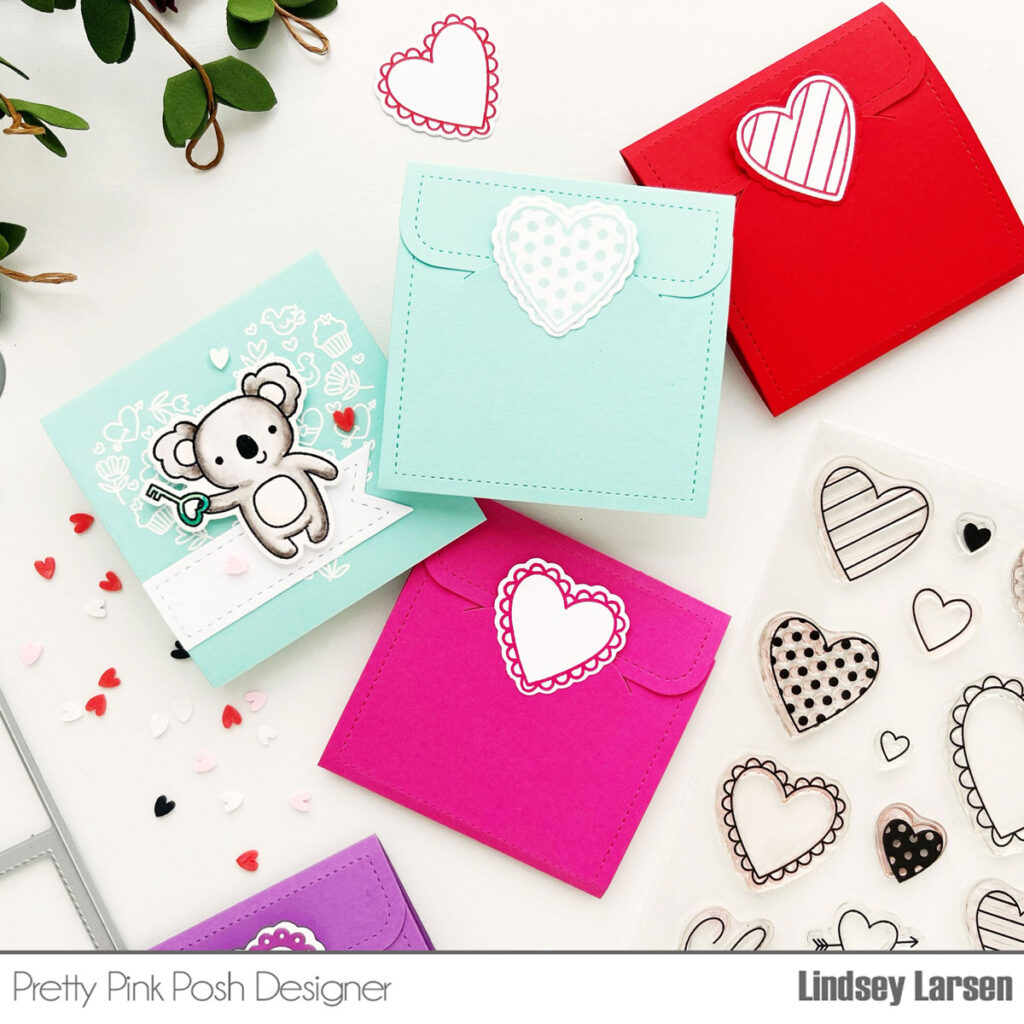
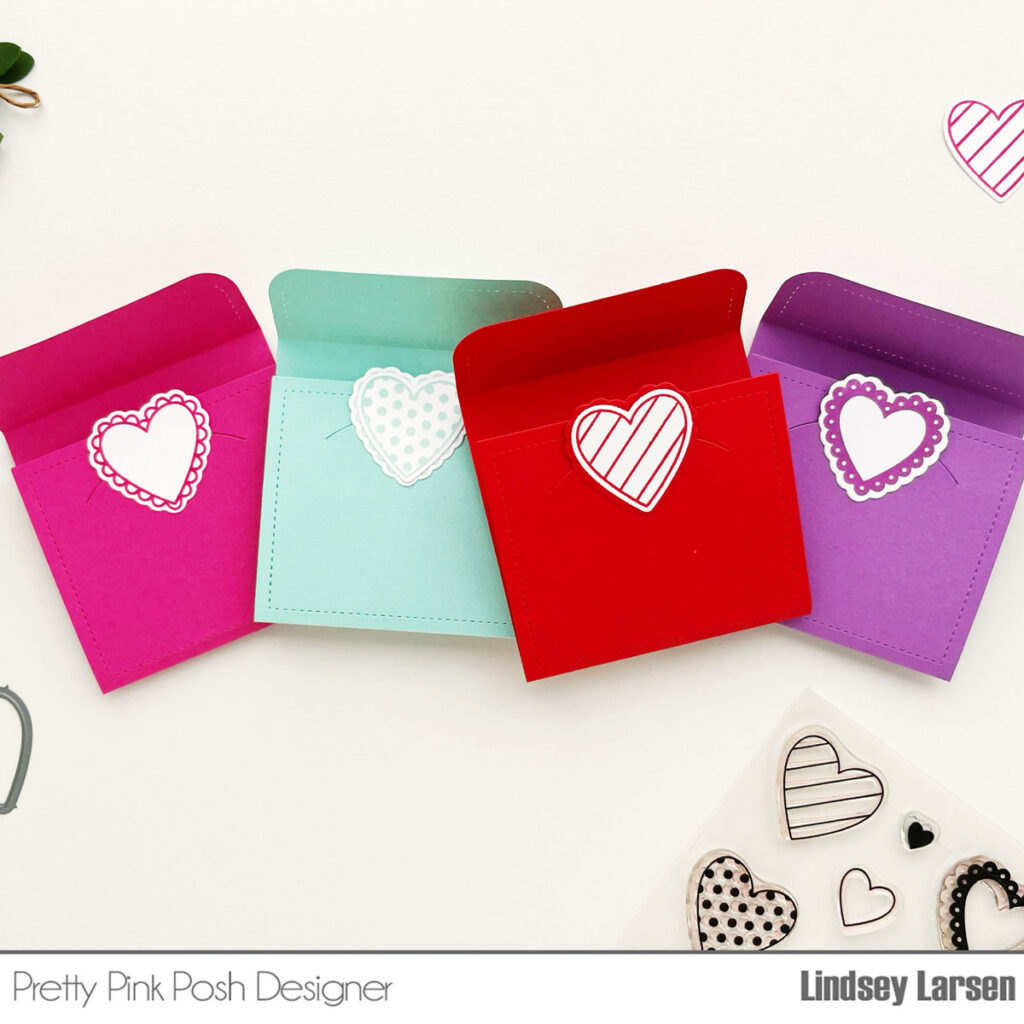
Now that all of the elements of my valentines are done, I die cut the Sweet Note envelope out of some pink cardstock and another square out of white cardstock and stamped my sentiment on the white square. I left plenty of room for my daughter to sign her name! I adhered the stenciled background square on the outside of my envelope and the sentiment square on the inside. My critter is popped up with some foam adhesive on top of the pink hearts to add a bit of dimension to the valentines.
My daughter wanted to color in her own critter so she used my Ohuhu Art Markers to color in her sweet Panda with a flower, also from the Heart Critters stamp set.
I hope you enjoy today’s project and video and that it brings you inspiration for crafting with your kiddos for their classroom valentines!