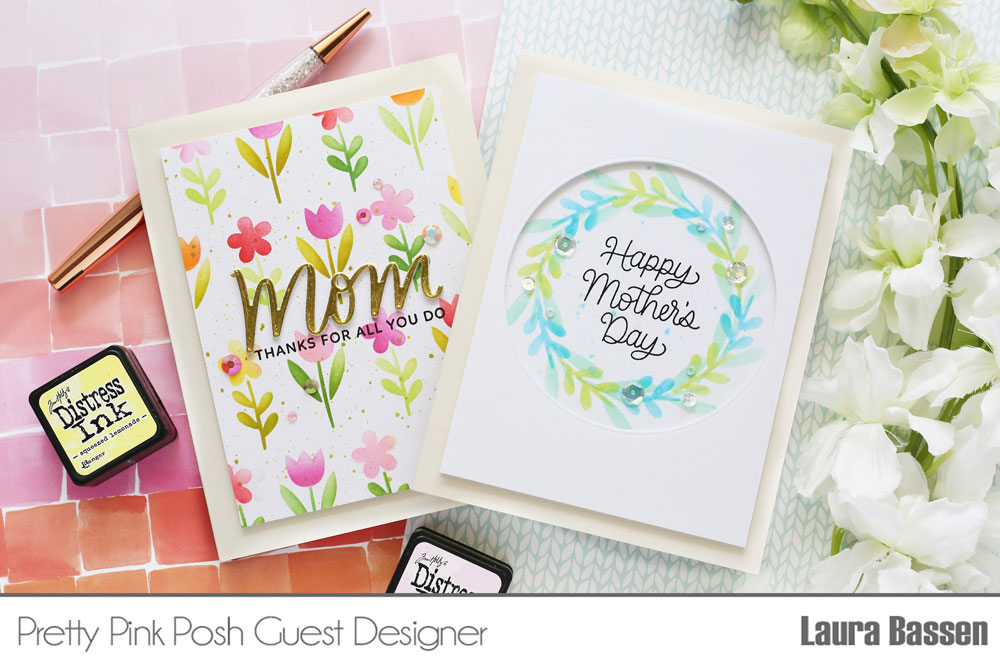
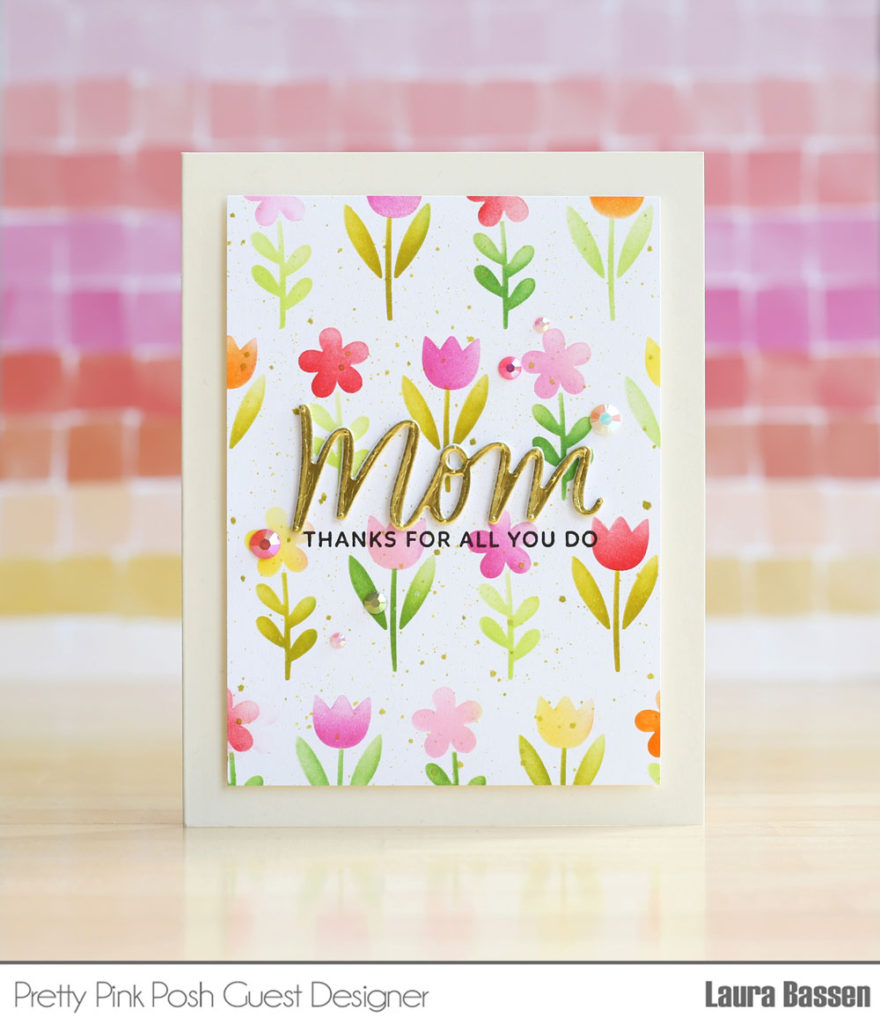
For this first card I used the Spring Flowers Stencil Set in the traditional sense. First I blended three different green distress inks using the leaf stencil, and then I used the stencil with the blooms and added some warm floral colors. I also added a few flicks of Crushed Olive to the blended panel.
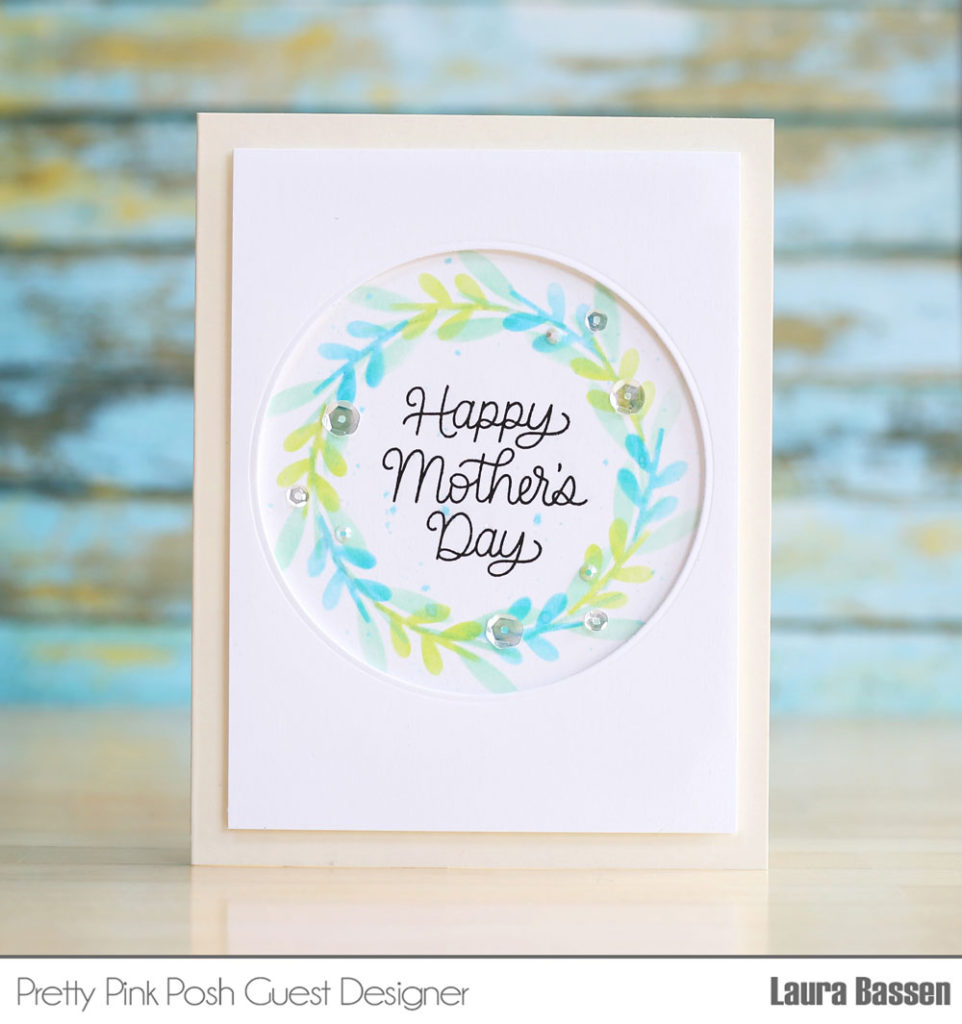
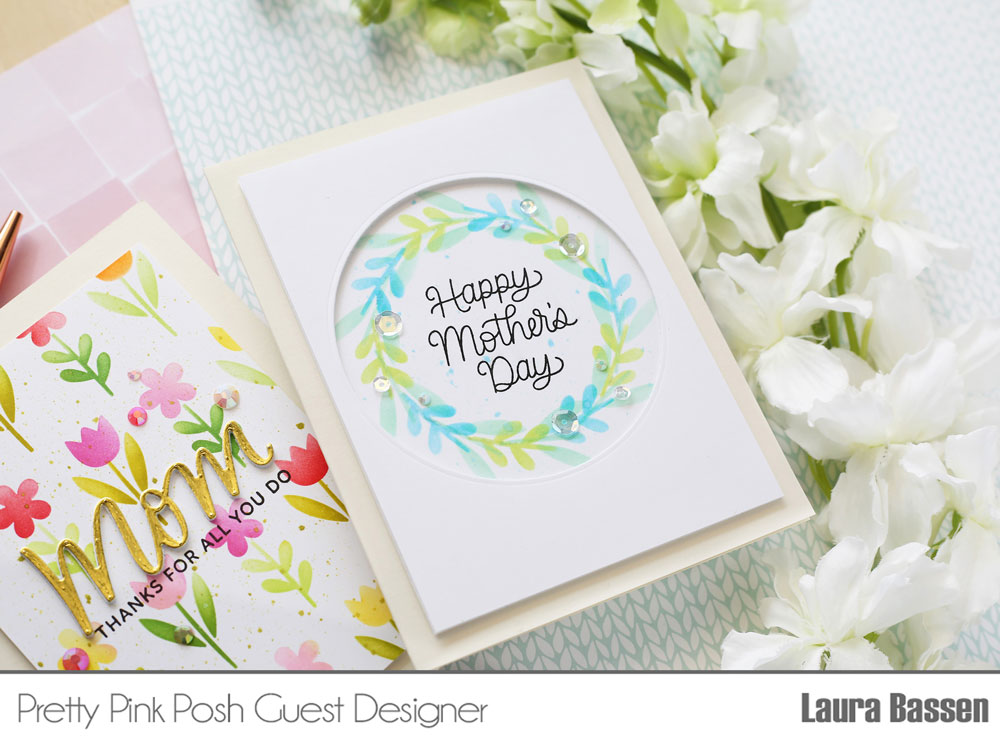
For this next card I used the Spring Flowers Stencil Set in a more unexpected way. I created a wreath using only the leaf stencil.
I flicked a bit of Mermaid Lagoon distress ink on the blended panel, and for the sentiment I used the Mom Stamp Set. For embellishment I used a mixture of Sparkling Clear Sequins & Ivory Jewels.
I hope you were inspired by today’s video tutorial. Thanks for stopping by!
I stamped the images with alcohol friendly inkpad and colored the images with Spectrum Noir Illustrator Markers. I have used the following colors: PP1, MG2, MG3, PL1, PL2, PL3, CT1, CT2, CT3, GY3, TN3, TN5, TN6, TN8, FS8, FS7, FS6, CG2, AG2, AG3, BT1, BT2, BT3, BT4, BT5, BG1, BG2, BG3, BG4, Blender, as well as CG05, TN05, BG05, PL05, MG05 from the Classique’s. You can watch the coloring process in the video. After the coloring I added white highlights with white pen and pencil.
Next, I created this basket with the Easter Basket die from a wood textured cardstock. I have also created a couple die cuts from white cardstock with the MOM script die, and adhered them together with liquid adhesive to have a heavy chipboard looking sentiment. I have also created green grass with the Nature Essentials dies.
The following step was to create the background, so I made a blue-violet gradient ink blending with Shaded Lilac, Peacock Feathers and Broken China Distress Oxide Inks. I have also made a quick ink blending on the grass die-cut with the same Peacock Feathers Distress Oxide Ink.
When it was done, I stamped the “grateful for you” sentiment from the Simple Sentiments set with watermark ink to a piece of pink cardstock. Then I heat embossed it with white detailed embossing powder and cut it to the right size.
In the end I put my card together and the result is this cute and bright card with a touch of spring which is a perfect card for Mother’s Day. Thank you so much for stopping by, see you next time.
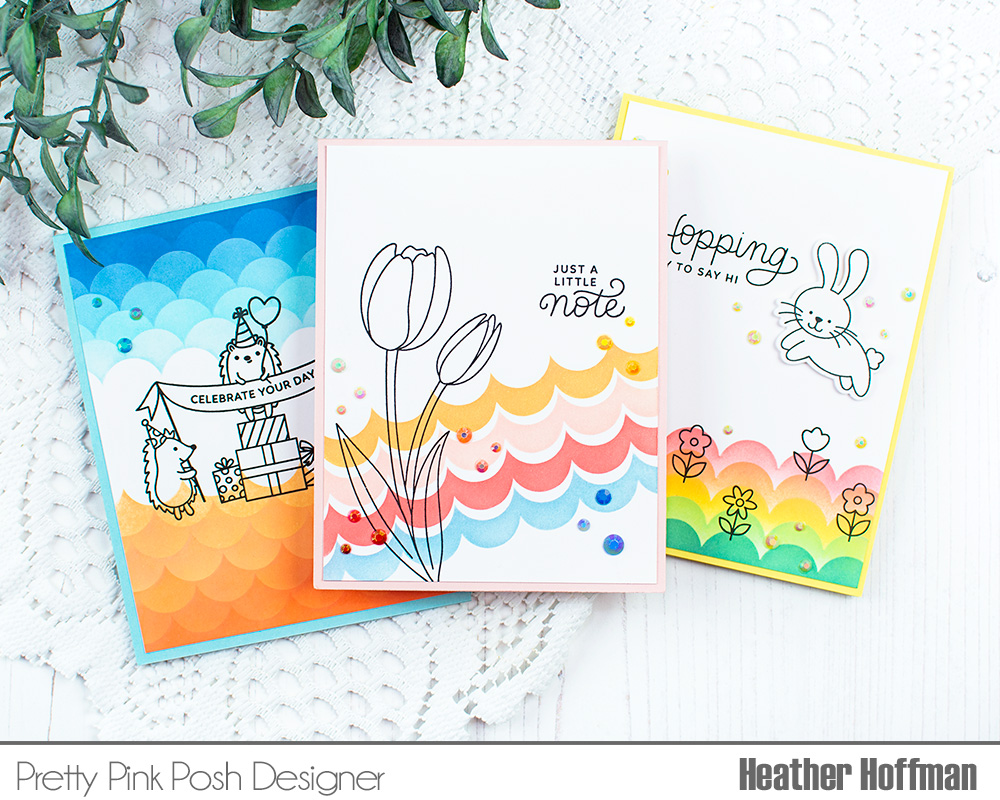
Good morning Pretty Pink Posh friends! Heather Hoffman here today with a look at the new Scallop Edges Stencil – this is a two piece stencil, and I’ve created a video showing how to use each piece on it’s own, as well as a way to combine them together. The possibilities with this stencil are endless when you add in that there are 4 different sizes to the scallops, and I only used the largest size to create my cards!
Here is a video for these cards, so you can see how they all came together:
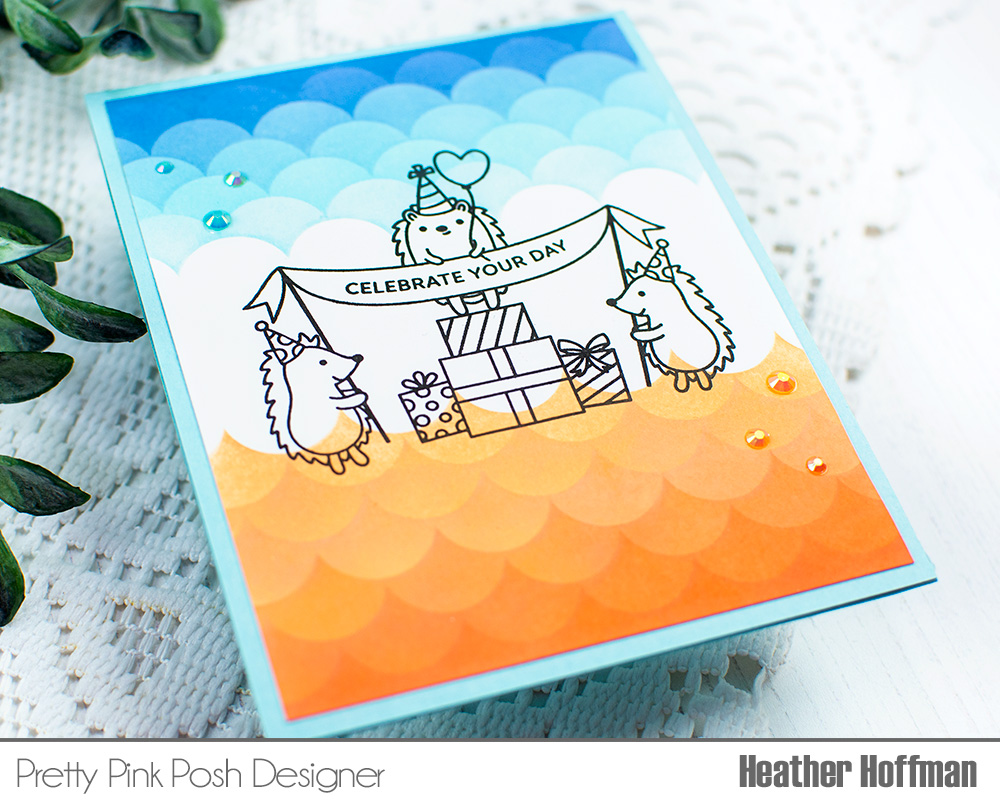
For this first card, I used the stencil that has the scallop facing outwards. I also alternated where I placed the scallop to get this fun background pattern! I used Dried Marigold, Ripe Persimmon, Tumbled Glass, and Faded Jeans Distress Oxide inks to create the background.
I finished this card off with the adorable Hedgehog Birthday stamp set(not released yet), and a few sparkly jewels in Buttercreamand Sea Glassbefore mounting on a coordinating blue cardbase.
This second design uses the stencil where the scallops face inwards. For this one I used it to create a border along the bottom, and this time I did not alternate the stencil, so it gave a more uniform pattern. I used Worn Lipstick, Dried Marigold, Squeezed Lemonade, Cracked Pistachio, and Evergreen Bough Distress Oxide inks for this one.
I created a scene on this card using Easter Bunnies stamp set – the bunny was stamped and cut out with the coordinating dies, and I stamped the sentiment and the flowers directly on the card panel. A liberal does of Pearl White jewels add a bit of fun sparkle, and I mounted that panel on a soft yellow cardbase.
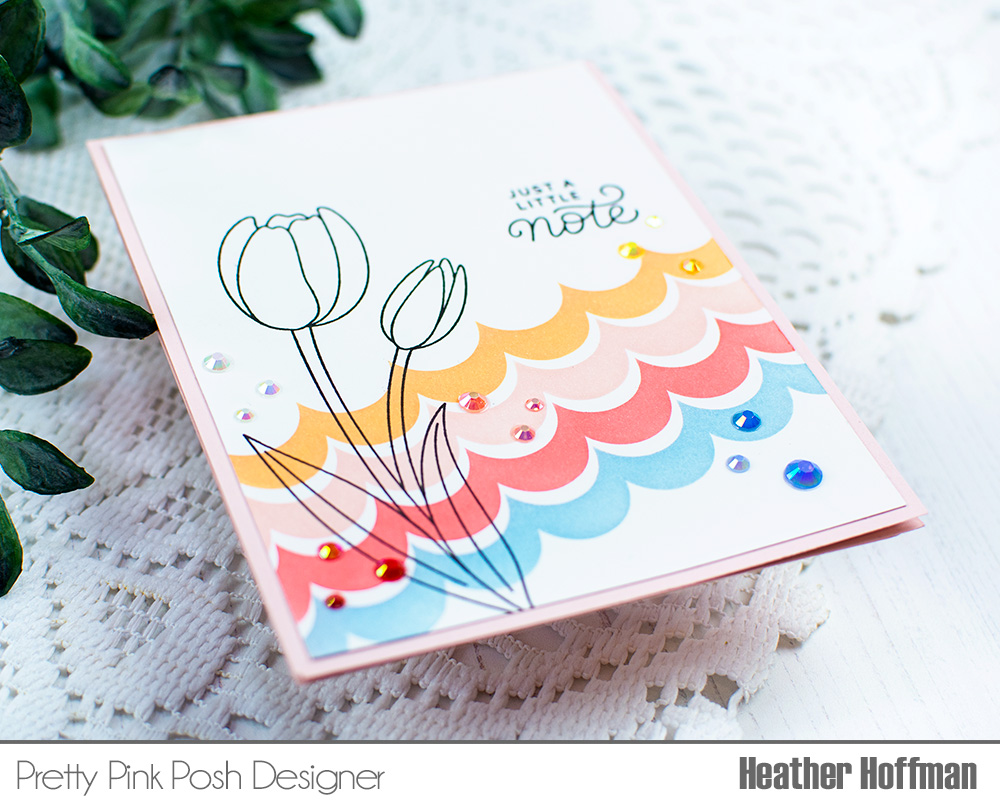
Finally, the last card used both portions of the stencil to create this fun graphic design. I used Post It Tape to hold the stencils pieces together to ensure a uniform stripe design, and stenciled this one with Dried Marigold, Tattered Rose, Abandoned Coral, and Tumbled Glass.
Hello everyone! This is Yana Smakula, thank you for joining me!
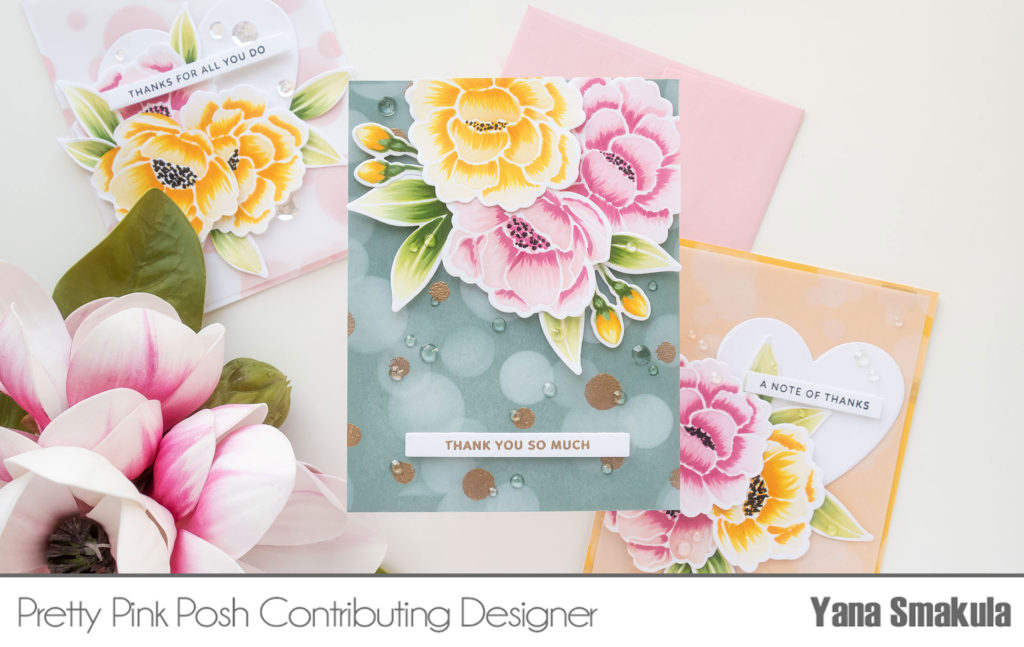
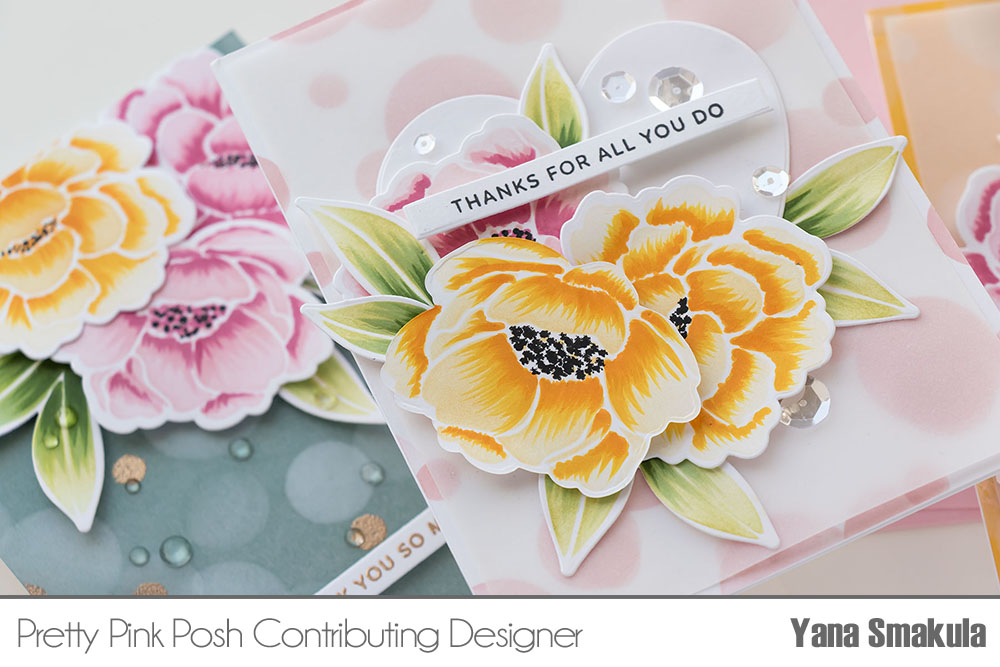
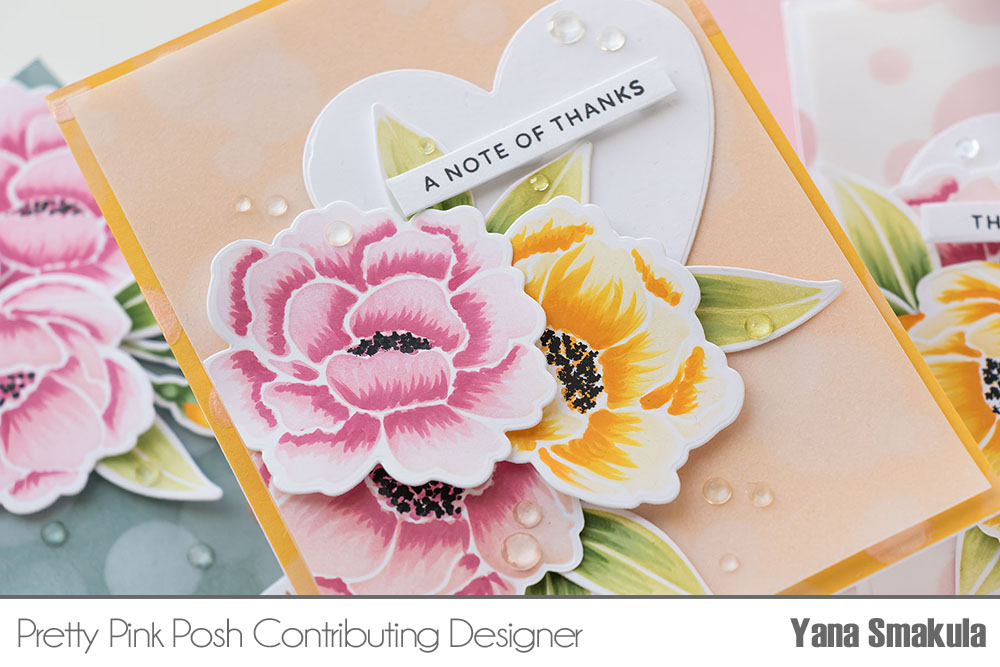
Today’s video takes a different look at the Peonies Stencil and shares a fun way to add detail to these beautiful blooms. Peonies stencil is a 5 7/8″ x 5 7/8″ stencil designed to create beautiful peony flowers. You have several floras, one flower bud, and 3 leaves. Two of the flowers are mirror images of each other.
There is also a Peonies stamp set with identical images, the size of these matches, allowing you to stamp the outline in black or any other ink color and blend the petal color using the stencil. It is a brilliant combination, really. There is also a set of coordinating dies that work with both the stamp set and the stencil. How cool is that?
In this video, I’m going to show you how you can combine the stencil with the coordinating dies. I also have a video on my Youtube channel showing how to combine all 3 products to create phenomenal flowers.
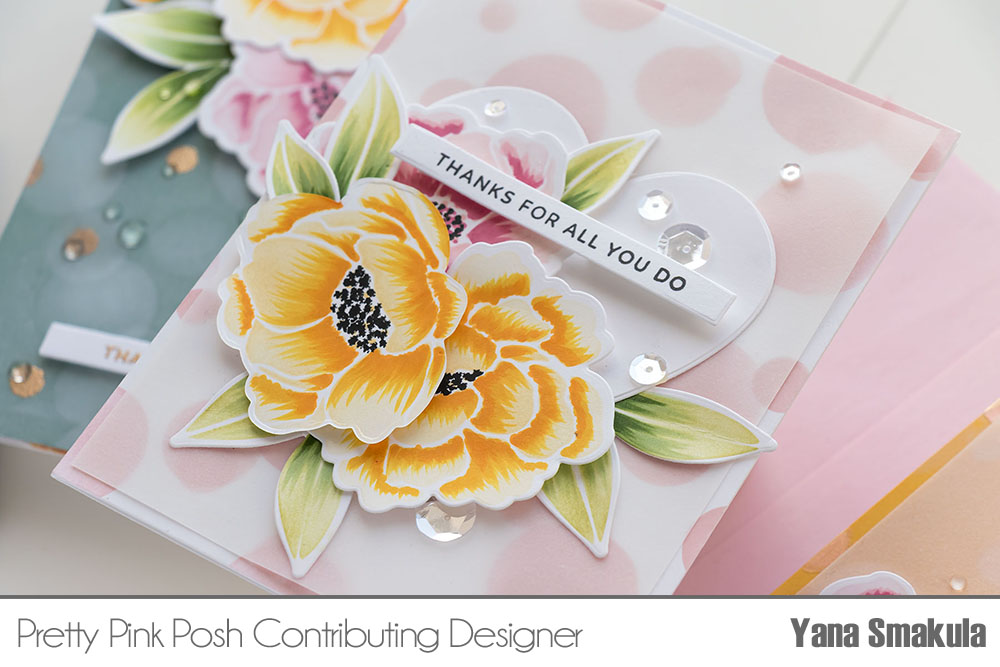
I started by ink blending the flowers and leaves using a blending brush and various colors of ink. I used dye ink for this video, but of course, these can be blended with any type of ink, and of course, any color.
Next, to add detail to these images I used Copic markers. The idea is to use a flick style coloring method and flick the color onto each petal adding veins and beautiful detail. I matched the colors of the markers to the colors of the ink blending. You don’t have to use alcohol markers for this step, you can also use colored pencils if you prefer.
Think of this as a way to do no-line coloring. When you want to do a no-line coloring technique with your stamps, you stamp the image with a very light ink color, the kind of color that is just barely visible for you to do your coloring. This ink blending and flick style coloring technique is somewhat similar – we first ink blend a light color of ink to give us the general flower or leaf shape and then we add detail using a marker.
Next, I used the coordinating dies and cut these images out. Isn’t it clever, to have coordinating dies for stenciled images? I think it is quite brilliant.
Now, there are more flowers in the stencil, than there are in the stamp set. One flower is mirrored. That means you can still cut that flower out using a coordinating die, but you need to position the die from the back of the paper. You do get a bit of a different edge to the flower you cut from the backside, but it is hardly noticeable. The edge is sharper, compared to the regular cut flower and if the sort of edge bothers you, you can flatten it using your scoring you – just go over that edge with the tool you use to create card bases and burnish that edge. That should do the trick.
I decided to make the flower centers black, so I used a black pen from my stash and just dotted black marks inside the flowers.
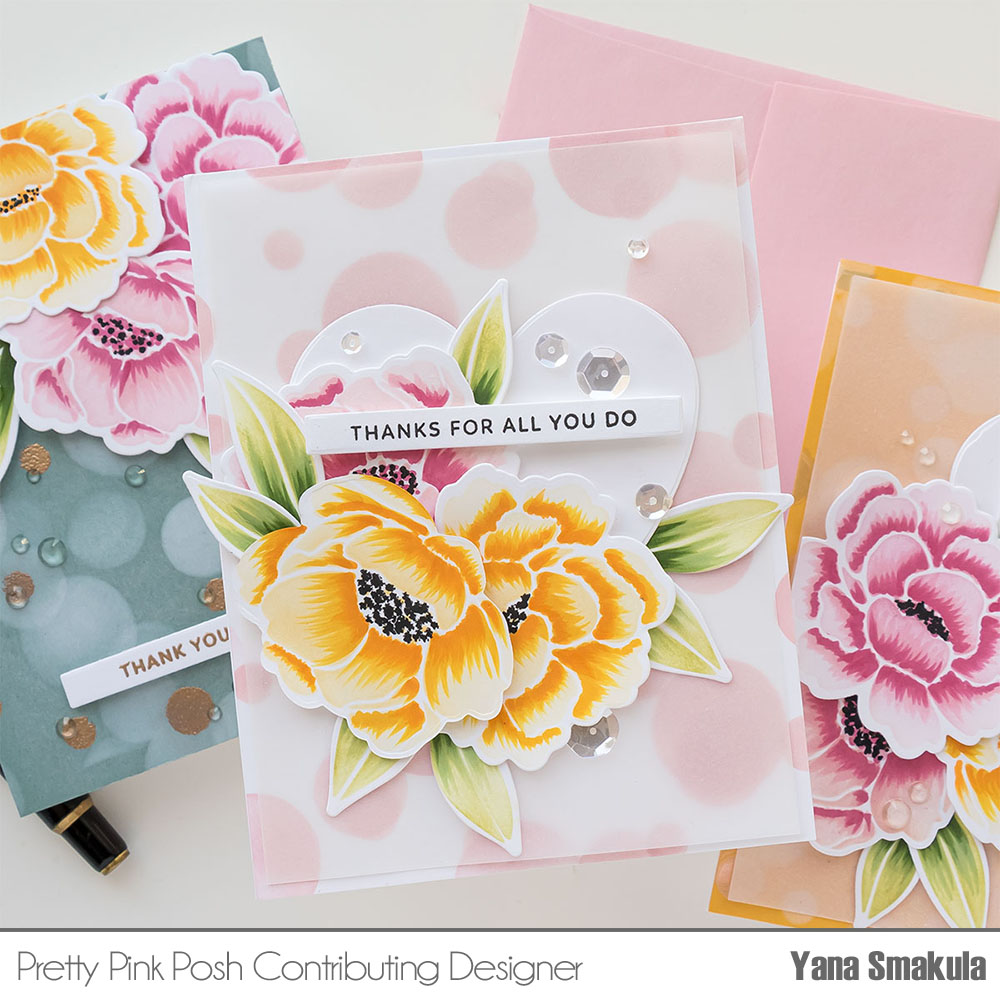
Another fabulous product from Pretty Pink Posh is a set of stencils to create a bokeh background.
The bokeh stencil is a 3 stencil set with large, medium, and small dots. When you overlap the dots you get a beautiful bokeh result.
Because it is a stencil, you of course can use all of the stencil techniques out there. So not just ink blending, you can add paste, emboss, and use various mediums to get different results.
I wanted to have some gold embossed dots on my background so I started by adding those first. As with any heat embossing, I treated the panel with anti-static powder first, I applied a very generous layer of powder to the entire background. Next, I tape the stencil in place using low tack tape. I didn’t want to use a sticky spray, as that can leave a bit of a sticky residue on the paper, not enough to notice the residue, but enough for the embossing powder to stick to. So better to use tape, at least for this step of the process.
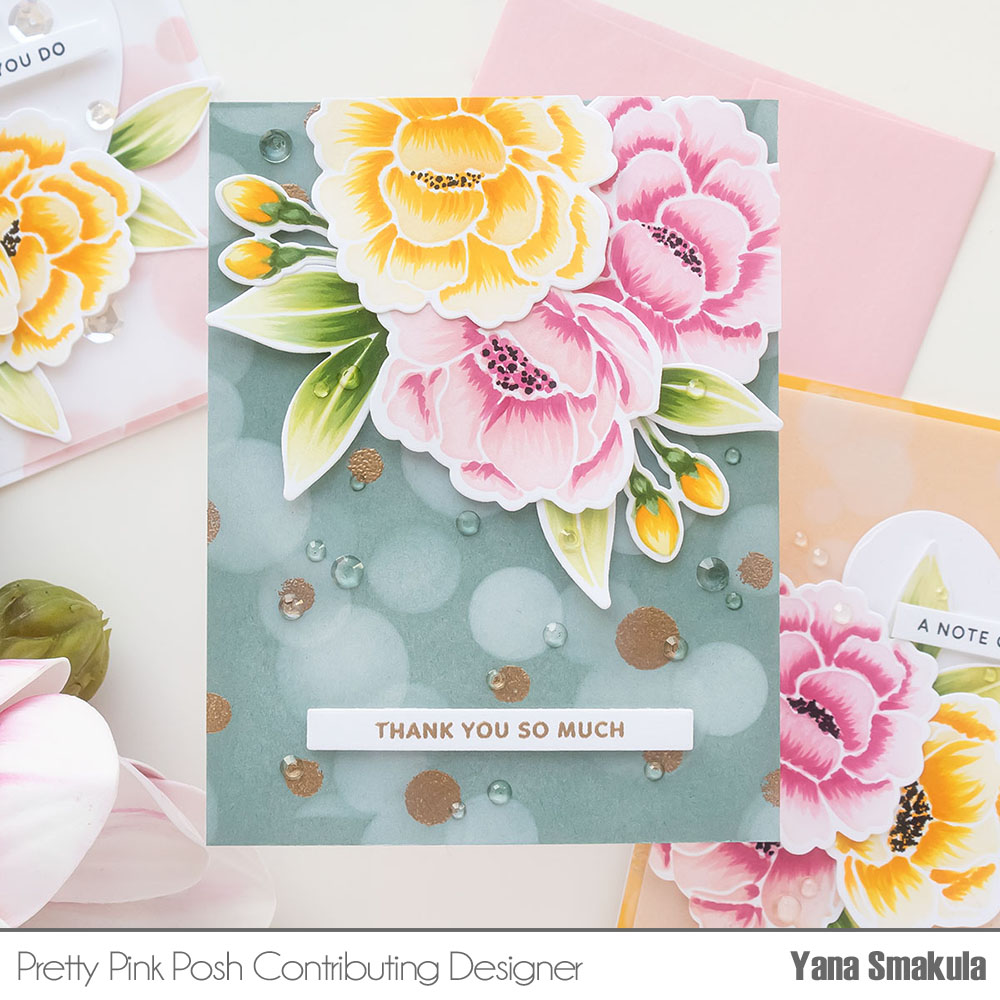
Next, I ink blended the dots using clear embossing ink. I used an ink blending – a dauber type, not a brush, tool and I pounced the ink onto the stencil using my tool. I did go a bit heavy-handedly, but not so heavy, that the ink would seep from under the stencil. Having applied the ink through all the openings on the stencil, I removed it and added Antique Gold embossing powder over the background. I then used my heat tool and heat set the powder in place to melt it. So this created the first layer of my bokeh background. Now the heat embossing wasn’t absolutely perfect, but I didn’t mind, as I knew I’d be adding additional ink blending on top and I’d also pop the flower on a portion of this background so I was okay with some imperfections.
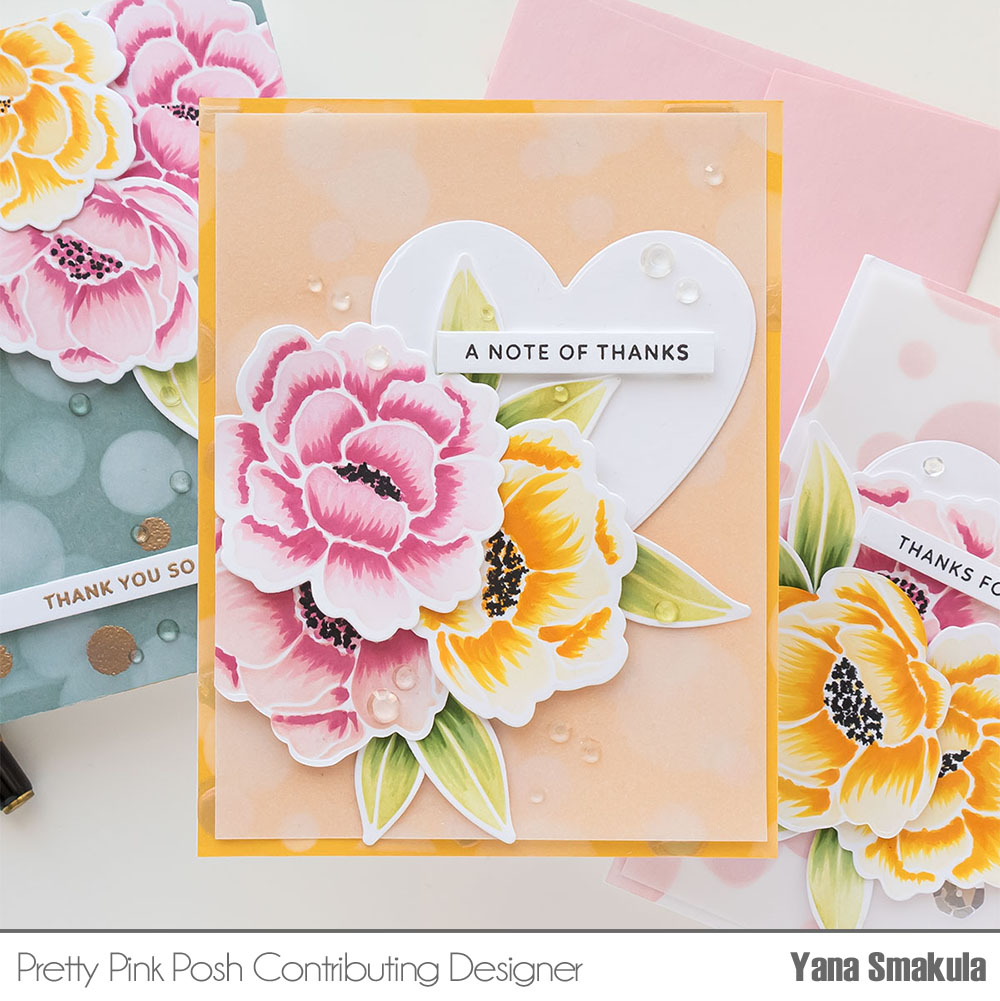
I placed the 2nd layer stencil on top and ink blending white pigment ink. My entire idea for this card was to use a darker color cardstock for the background, heat emboss a part of the bokeh background in gold, and ink blend the rest in white. Where the ink blending overlapped the gold embossing, it muted it significantly, creating a stunning result.
If you want to re-create this background, it is important to heat emboss first, as the rest of ink blending happens with pigment ink, and pigment ink takes a very long time to dry.
I kept on blending the background and used the 3rd layer stencil in the same way. I also went back to the 2nd layer, to add a few additional dots to fill the background in.
You can use the stencil as intended, carefully layering each layer, but you can also go rogue, and layer and blend it in your own way. This is what I did. And I love the result!
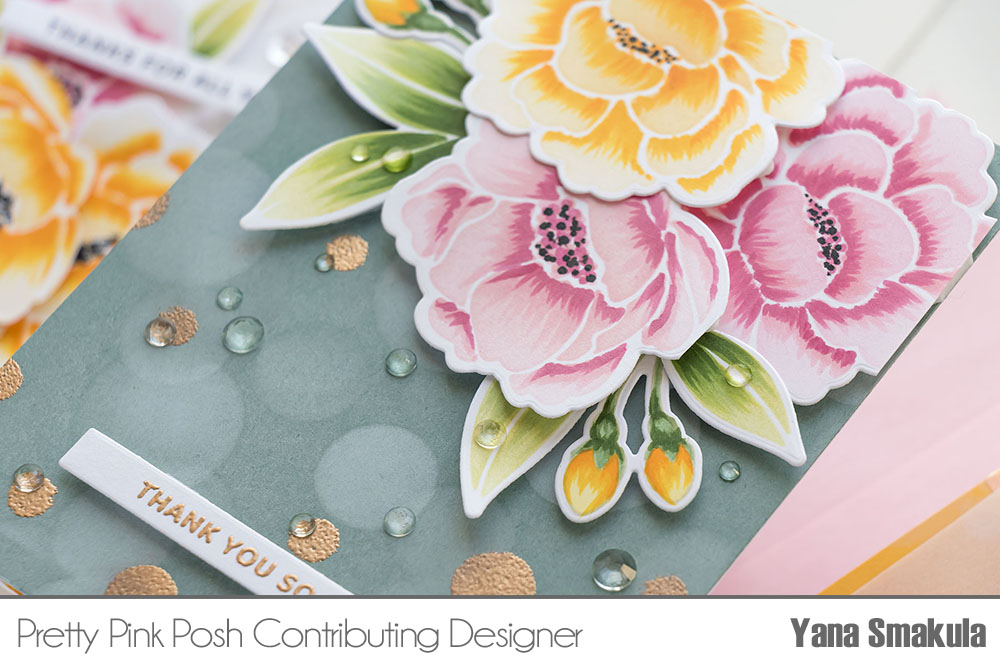
I adhered my background on an A2 white side folding card base and foam mounted my fresh floral cluster on top.
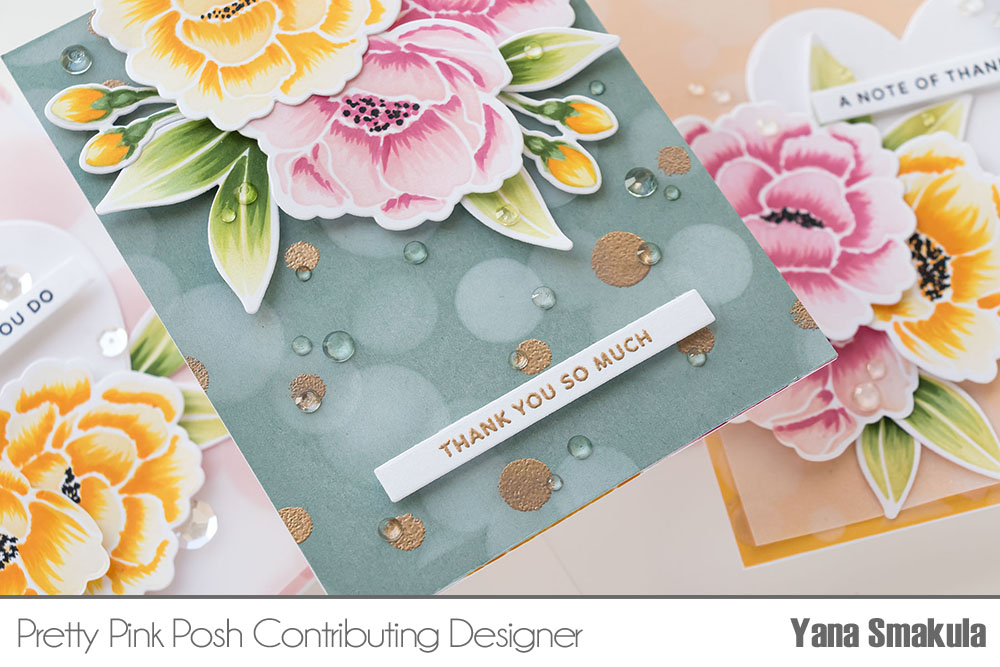
I used my scissors and trimmed the excess flowers off so that there was no overhang. Next, to add a sentiment for this card, I went with a skinny strip heat embossed one – it reads Thank You So Much. But of course, you can add any type of sentiment to this card. This one comes from the Simple Sentiments stamp set. I used a skinny strip from adhesive to add it onto the card and I first thought about adding it over the florals but ended up adding it over the bottom part of my card.
I had quite a few leftover flowers, and I didn’t want them to go to waste, so I added them to the inside of this card. I also used Sparkling Clear jewelsand scattered them over the background adding to the overall bokeh look.
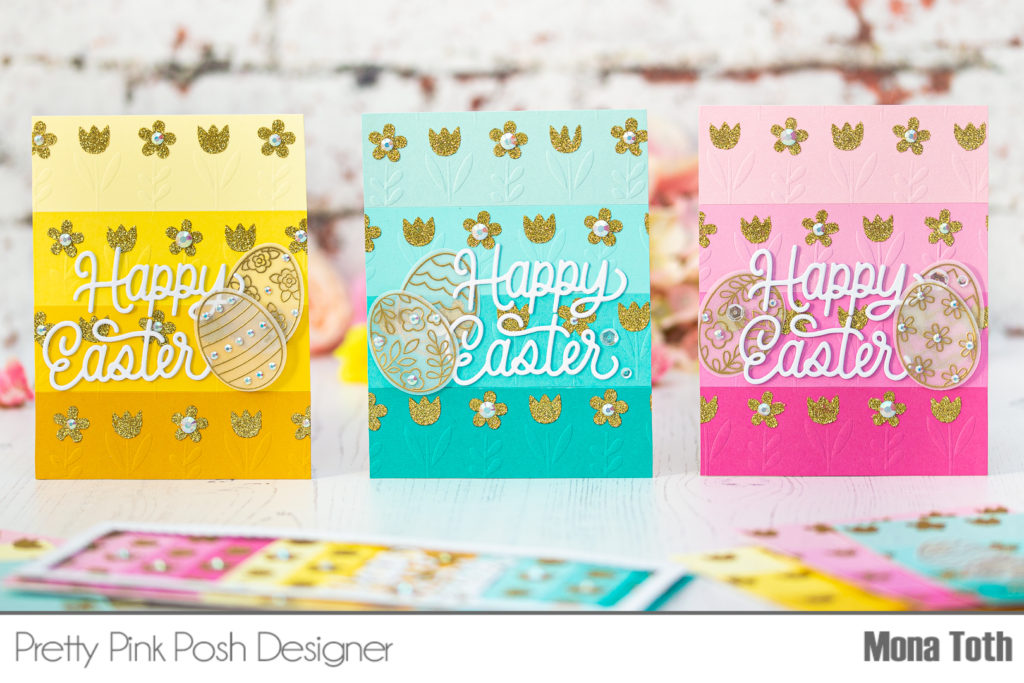
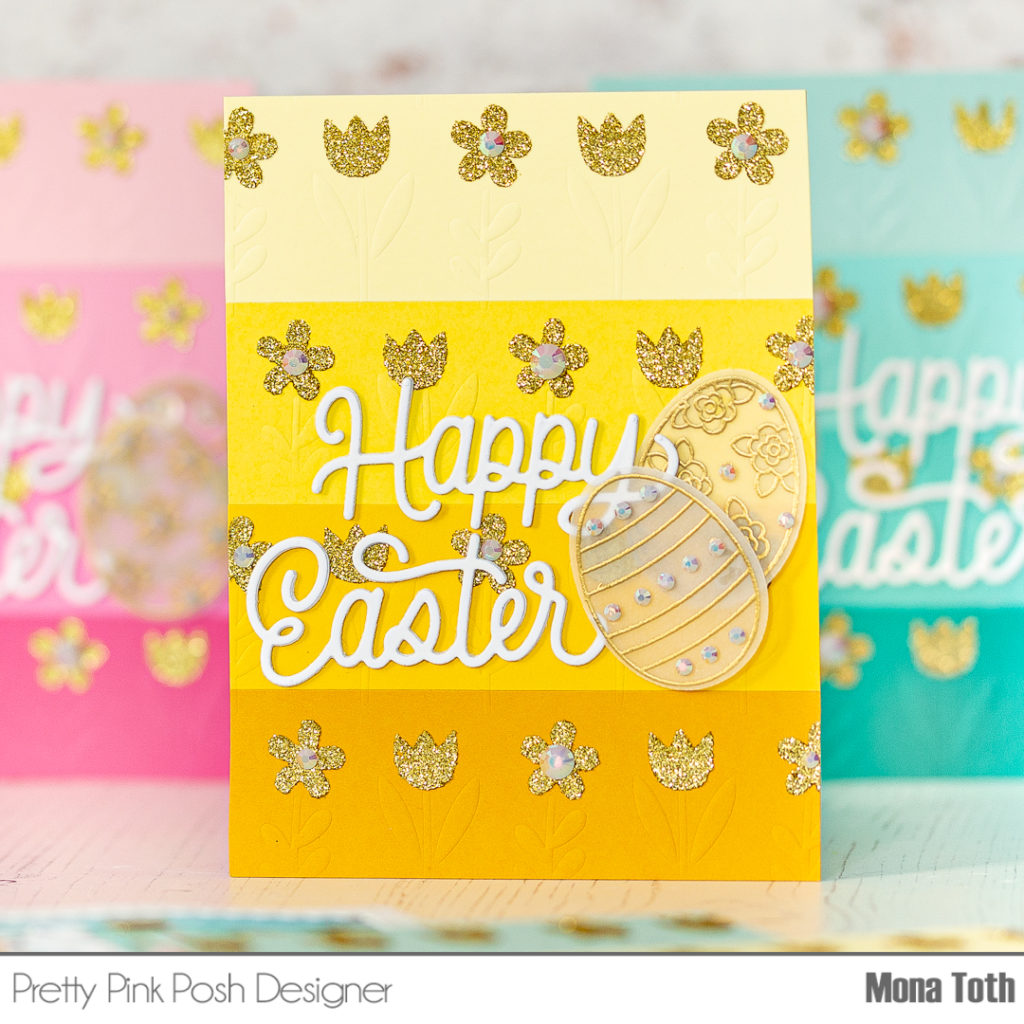
Hi crafty friends! It’s Mona here, today I am sharing with you a fun, ombre color blocking technique. If you need lots of cards at once, then this bulk cardmaking tutorial is for you!
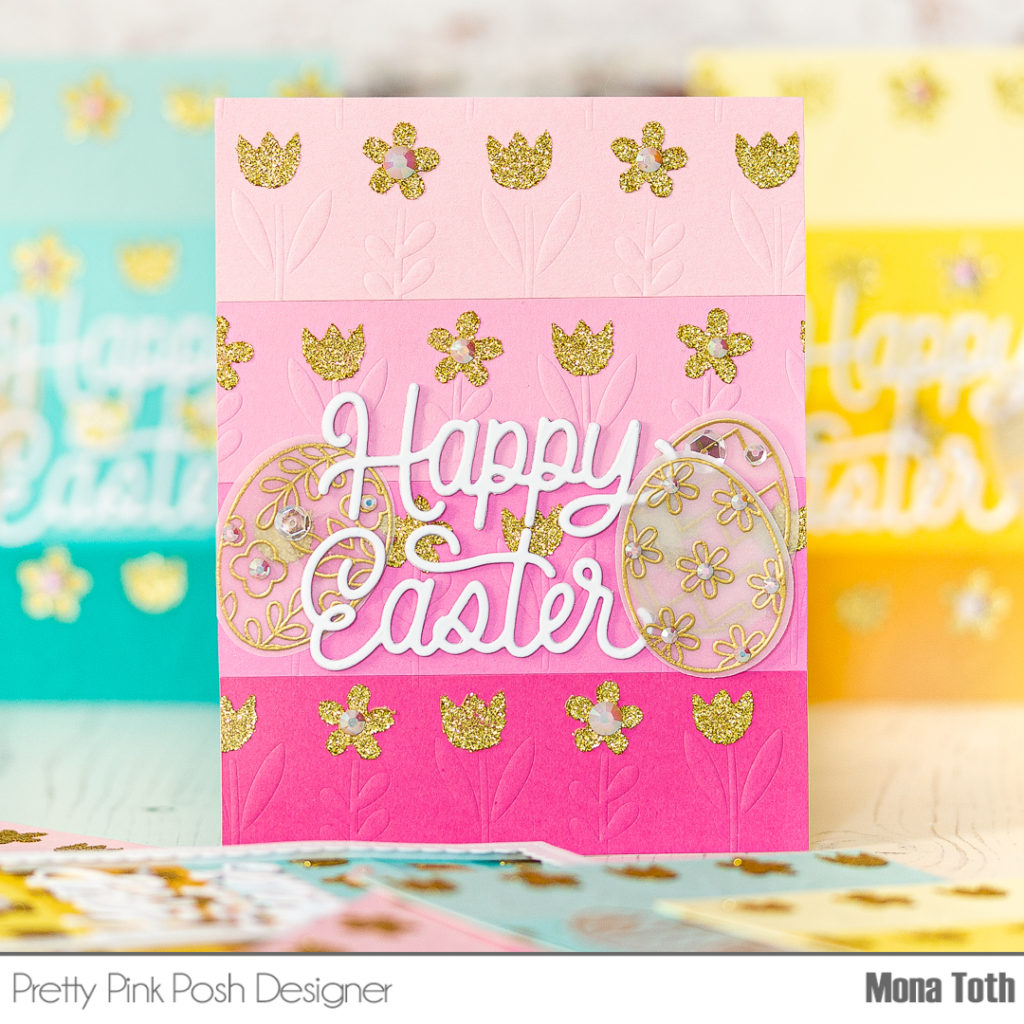
For these cards I have used these beautiful Spring Florals Stencils, the Spring Eggs stamp and coordinating die set as well as the Fancy Easter Script die. I prepared heavyweight cardstocks in different colors and shades for the ombre monochromatic look. Once it was done, I made dry embossing with one of the stencils from the set. You can find this process in the video.
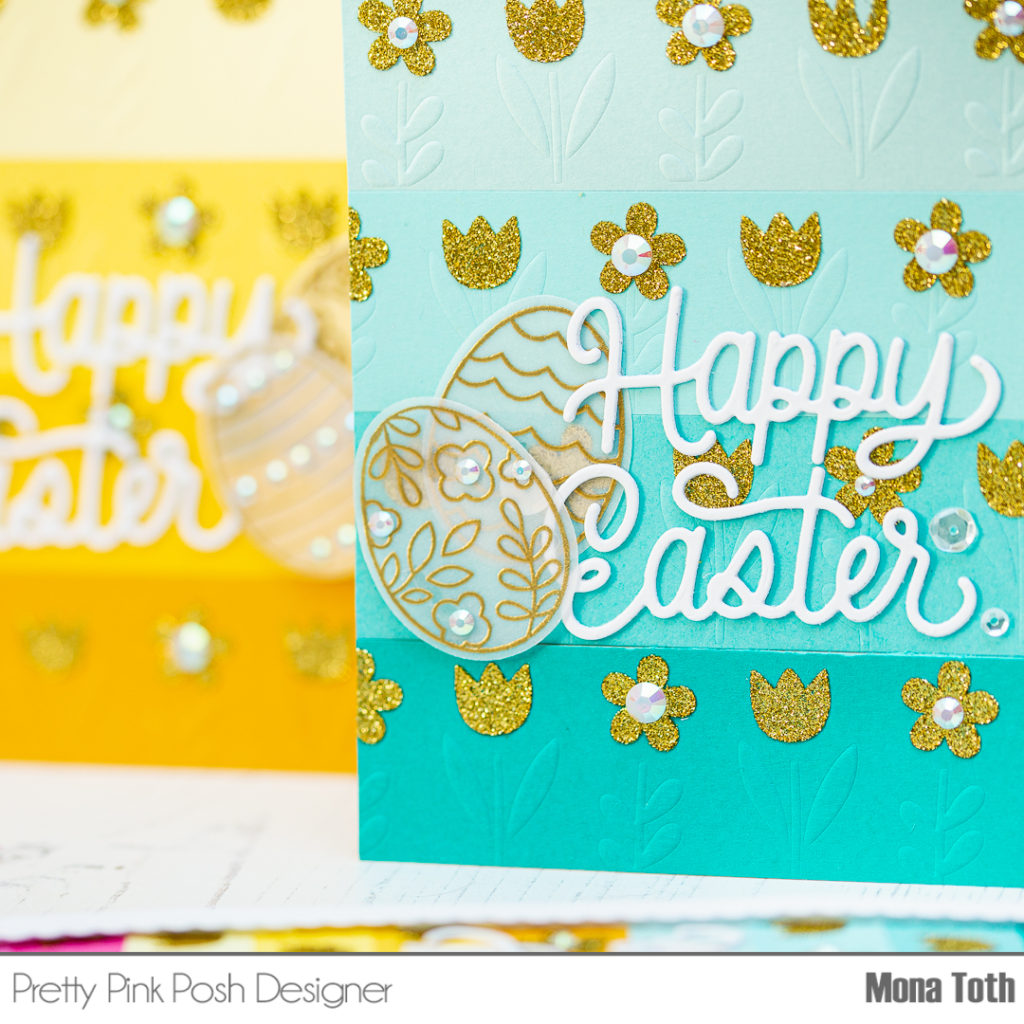
Next, wanted to add an elegant touch to the dry embossed base with the gold glitz glitter gel. First, I am spraying pixie spray on the stencil. This will keep the stencil on its right place, and I can reuse the stencil many times.
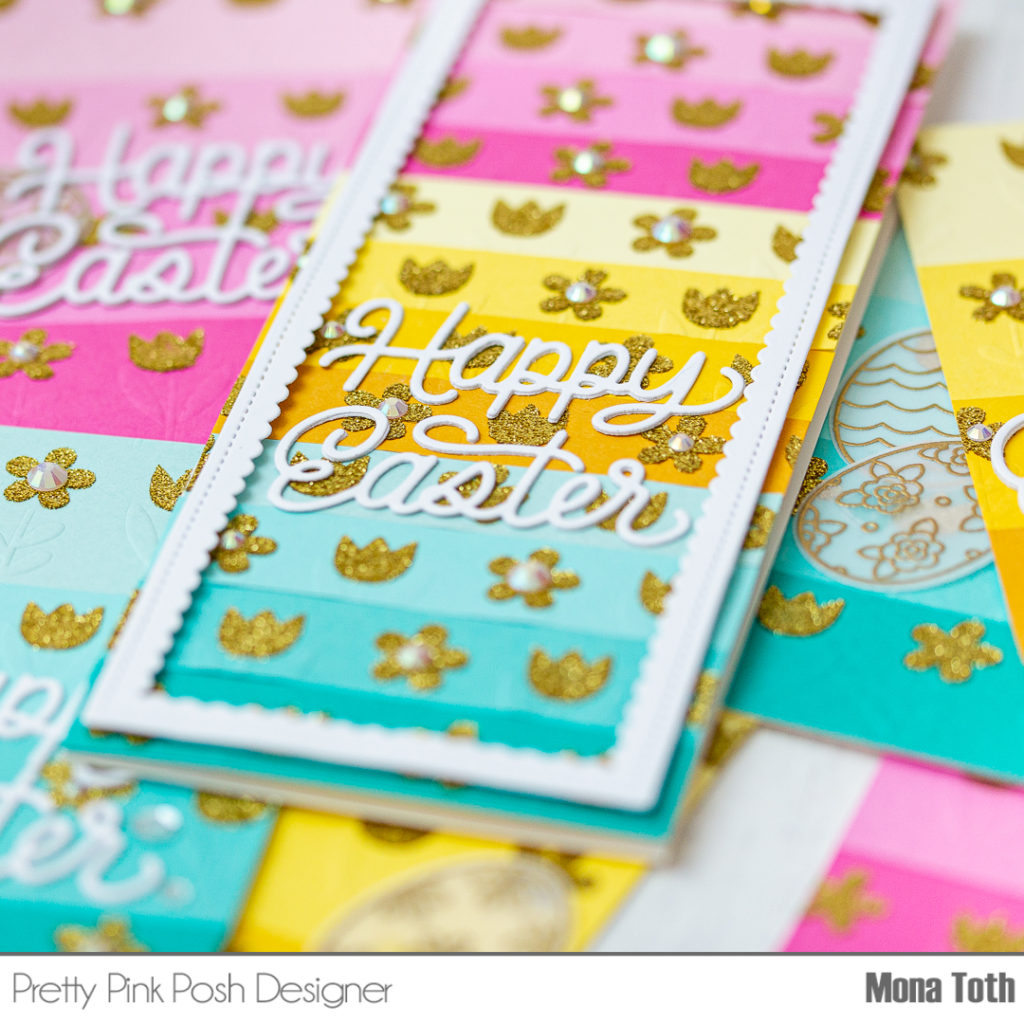
When the last cardstock is done, I am letting them air dry for one hour. I am washing the stencil and the tools with soapy water immediately and the stencil looks like a new again.
While the glitter gel background dries, I created the Happy Easter Sentiment from a white heavy weight cardstock and adhered 3 pieces together to have a heavy chipboard looking sentiment.
Because this is going to be an easter card, for me eggs are a mandatory part. I am going to use this beautifulSpring Eggs Stamp setwith its coordinating dies. I am going to stamp these eggs with VersaMark watermark ink to a piece of vellum with the help of my MISTI. Next, I am heat embossing it with gold fine embossing powder and a heat gun. I am in love with them and they look so amazing without coloring too.
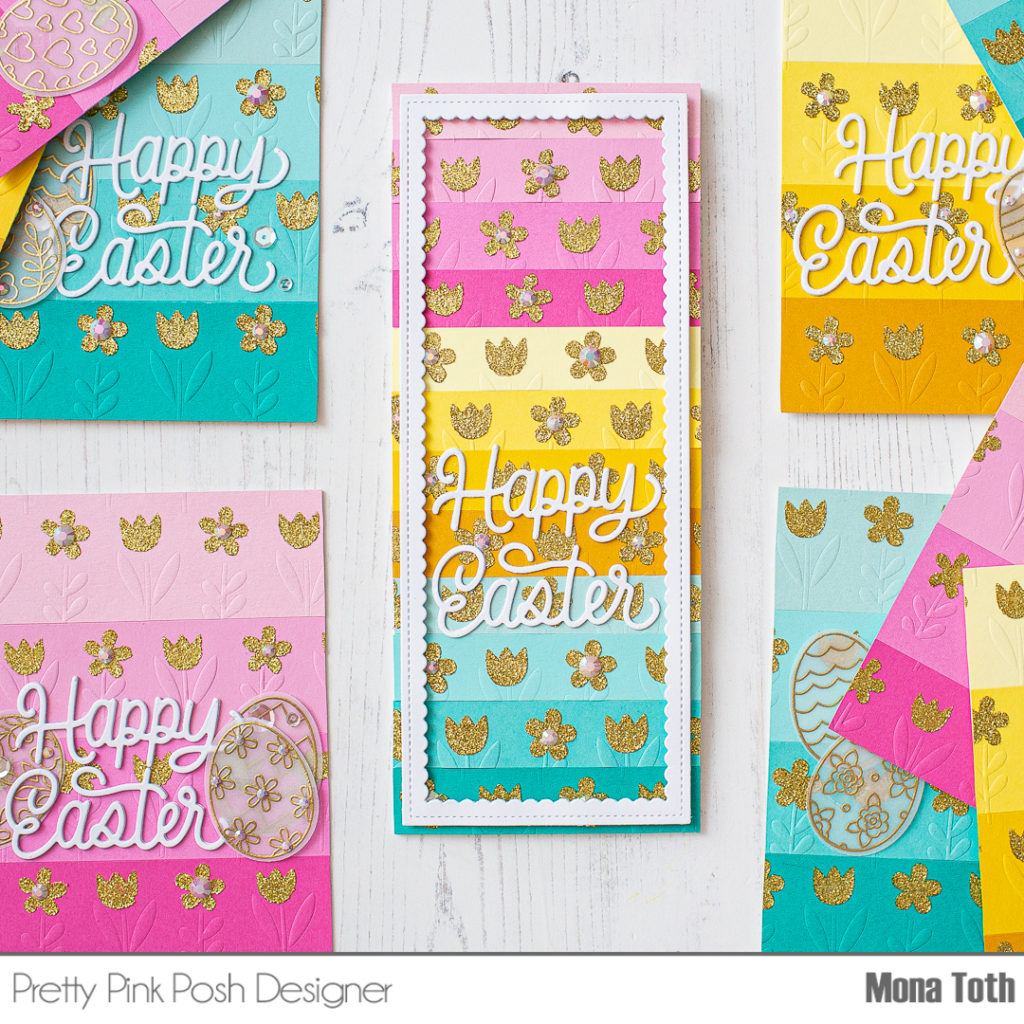
Now I have everything to put together my cards. In the end I embellished my cards withPearl White Jewels as well as Sparkling Clear Sequin Mix too. With the leftover cardstock I have created a slimline card as well.
Thank you so much for stopping by. See you next time.
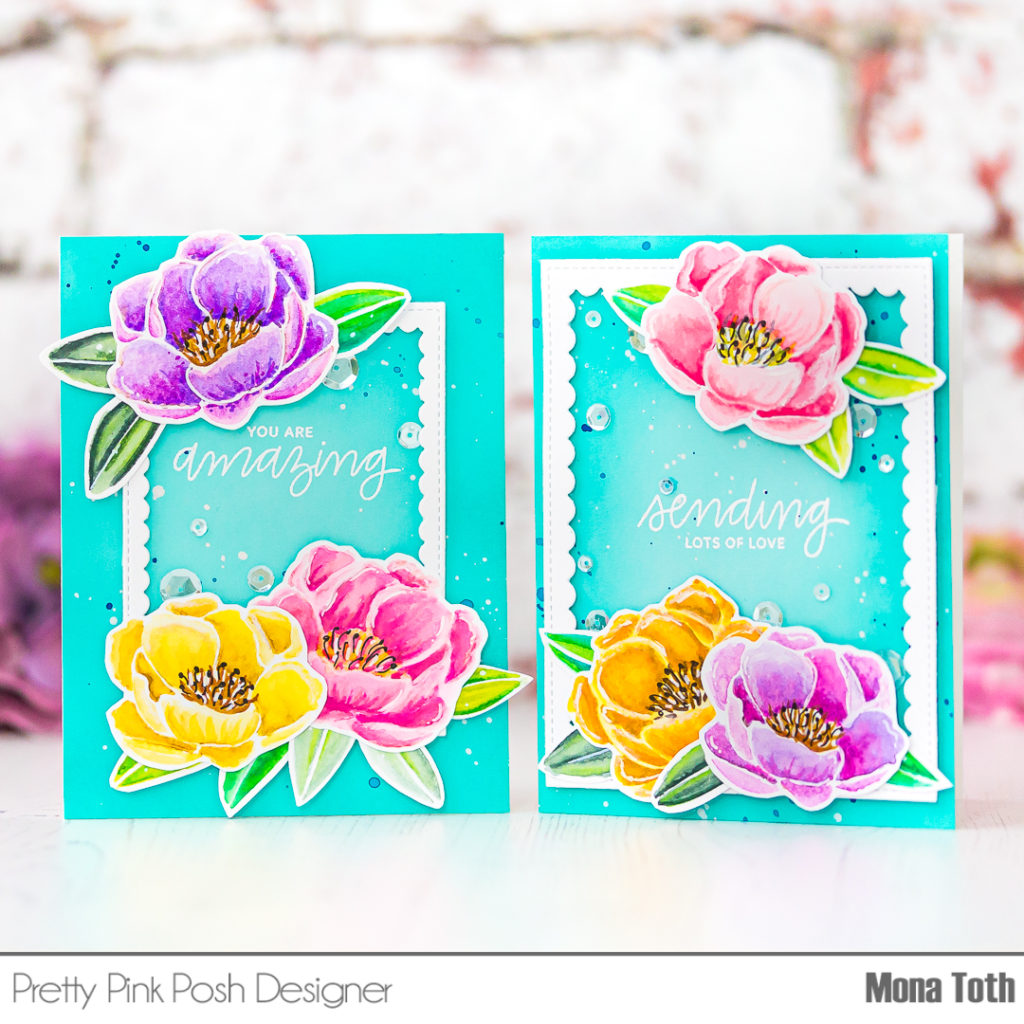
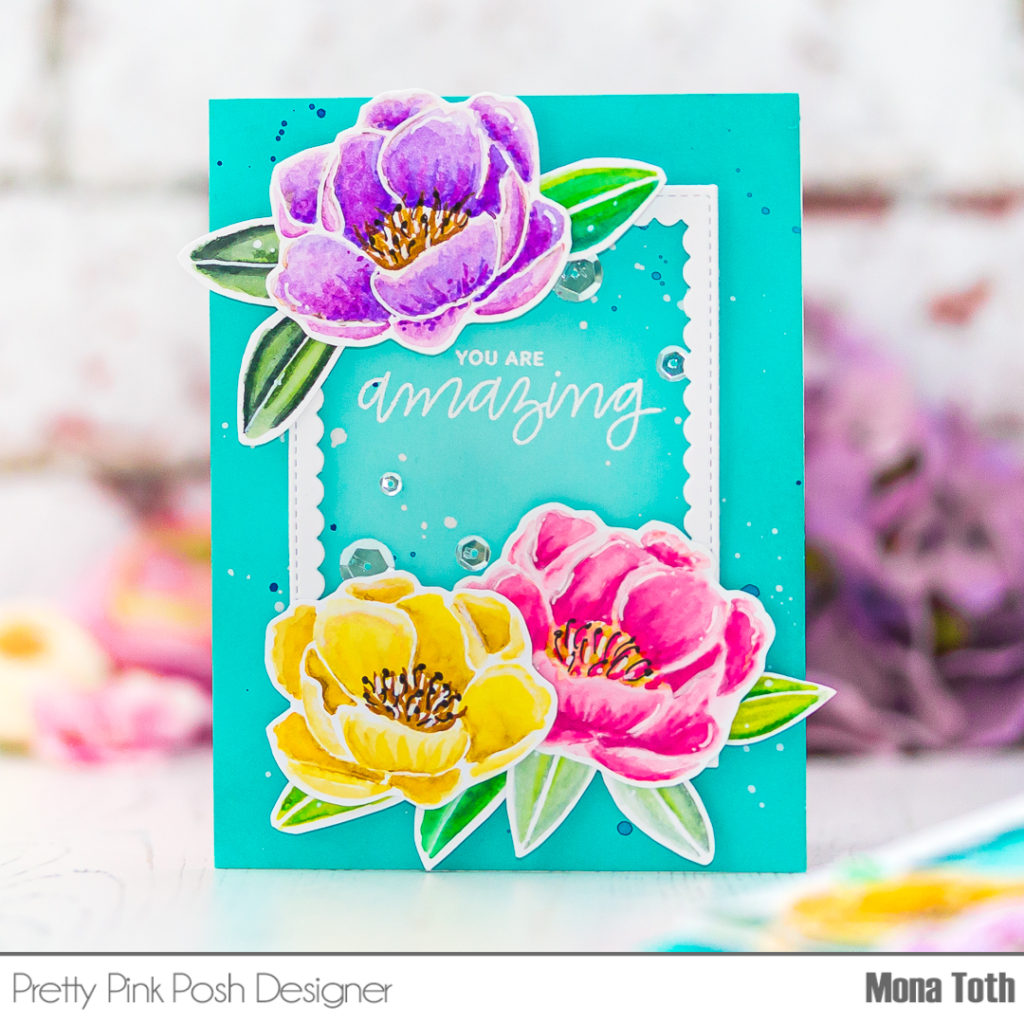
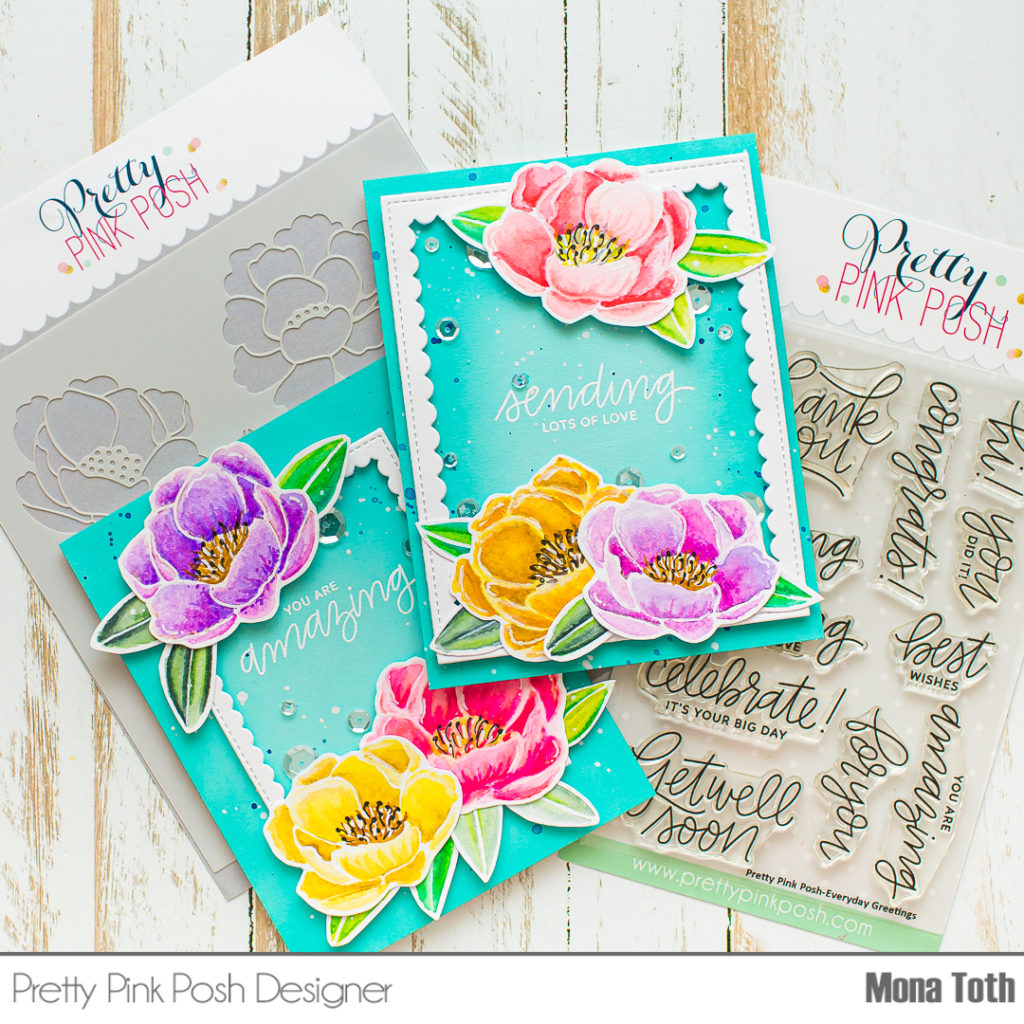
Hi crafty friends! It’s Mona here, today I am sharing with you a fun technique video where you will learn how to create amazing water-colored flowers using only stencils and watercolor mediums.
The key for this project is to have a floral stencil like the beautiful Peonies Stencil from the latest release.
For this project you will also need watercolor paper, a low tack tape, brushes, paper towel, mixing palette, water-based mediums and water. You can use either your brush markers or your watercolor palette. Just use what you like more, but I will show you both options in my video tutorial.
For the entire coloring process with tips and tricks watch my video tutorial below and learn how to create amazing water-colored flowers like a pro, without stamping.
When the coloring was done, I continued with fussycutting and die-cutting all the colored images. Then I picked a light turquoise cardstock in size 5.5 by 4.25”.
The following process was the ink blending. I have used Peacock Feathers Distress Oxide ink and blended the edges of the card front from outside to inside.
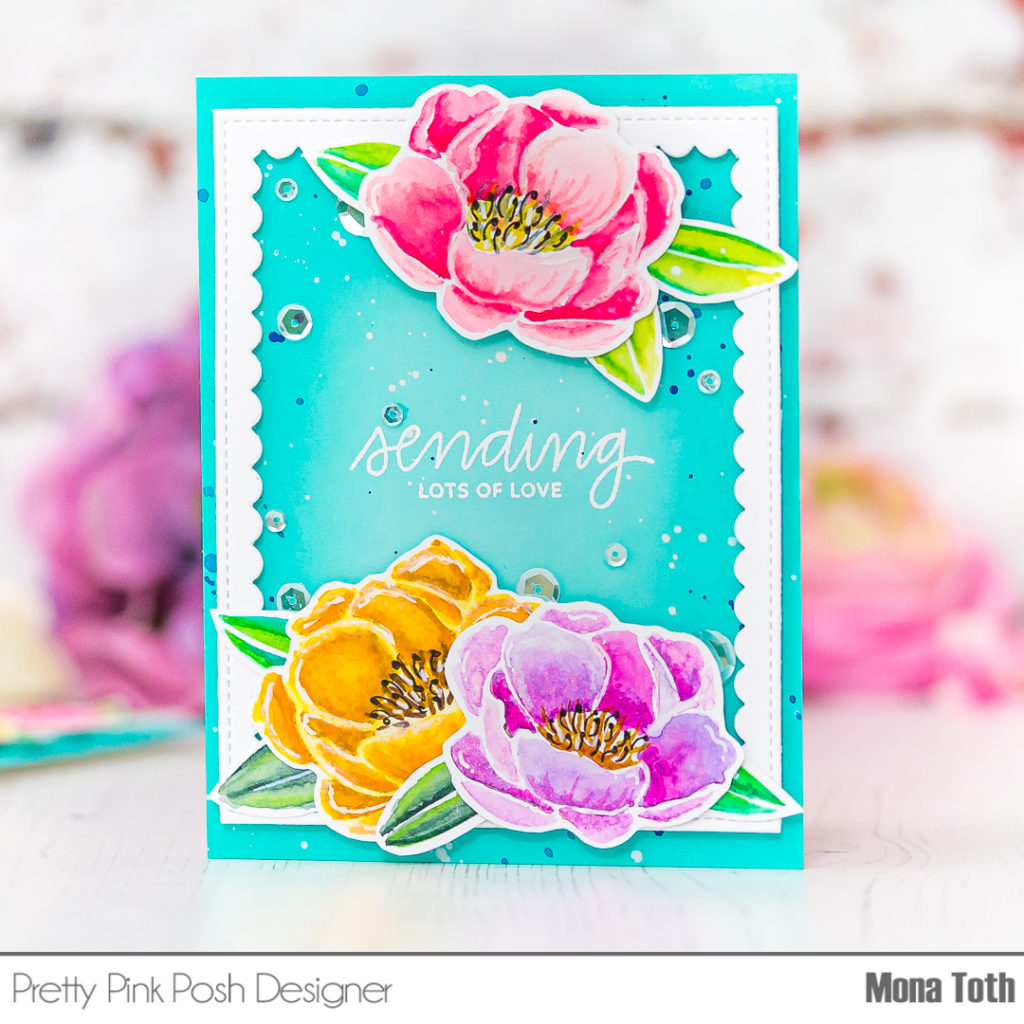
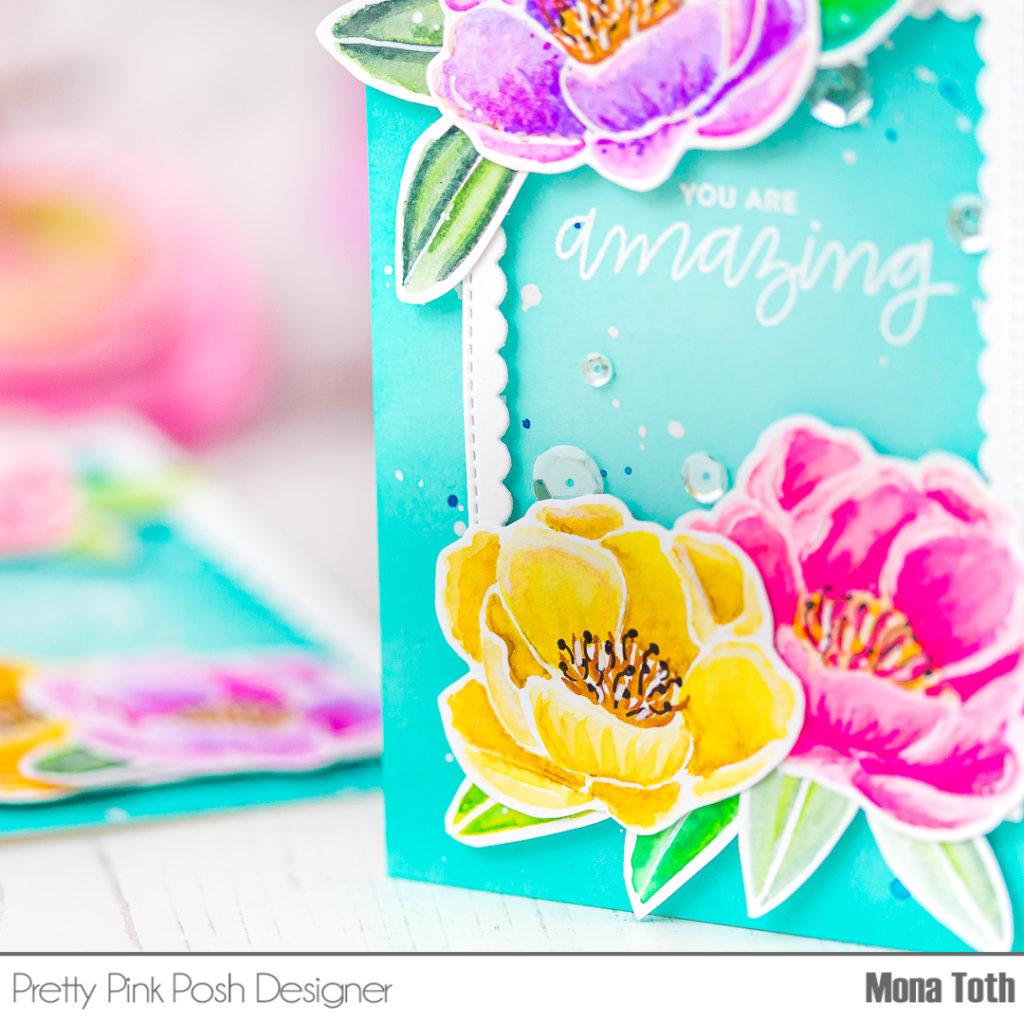
Next, I stamped the You Are Amazing and the Missing You So Much sentiments with watermark ink from the Everyday Greetings stamp set. Next, I heat embossed it with white fine embossing powder. When it was done, I splattered on it with white, and blue watercolors and let them air dry.
Because I wanted to break the background, I decided to create a white die-cut with the Scallop Frames Dies. I adhered the flowers to the frames with liquid adhesive, then I adhered the floral frame to the card with 3D foam squares.
In the end I embellished my cards with Sparkling Clear sequins. If you feel like it, give it a try, it’s so relaxing and I know the result will be amazing. Thank you so much for stopping by, see you next time.
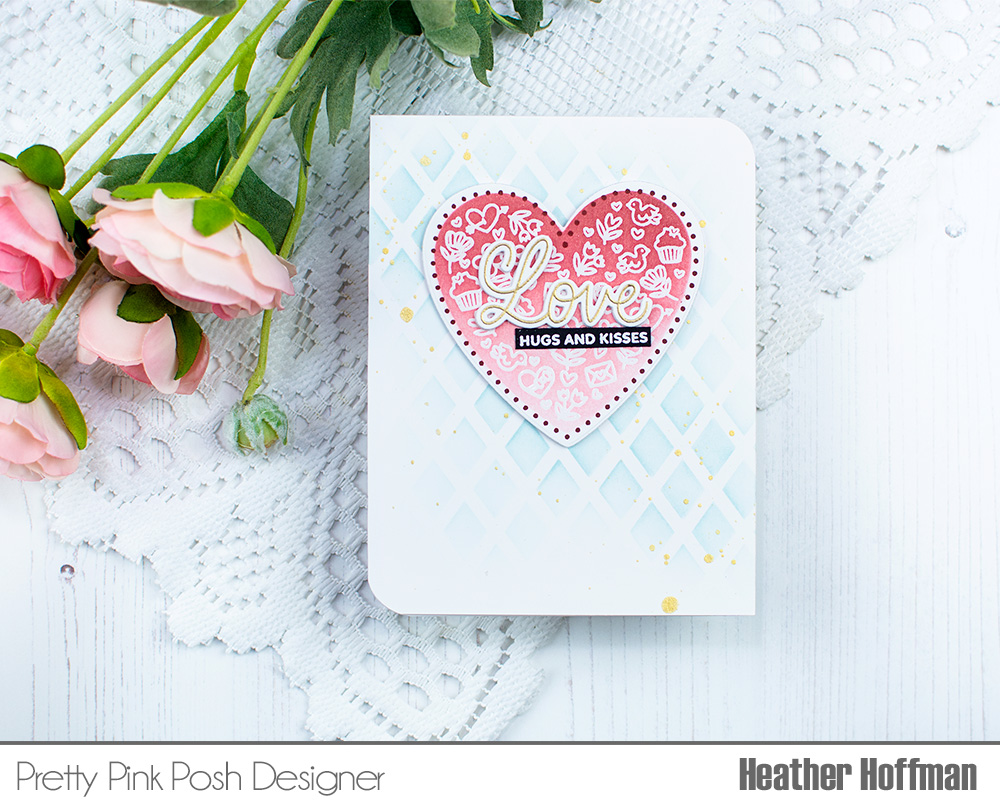
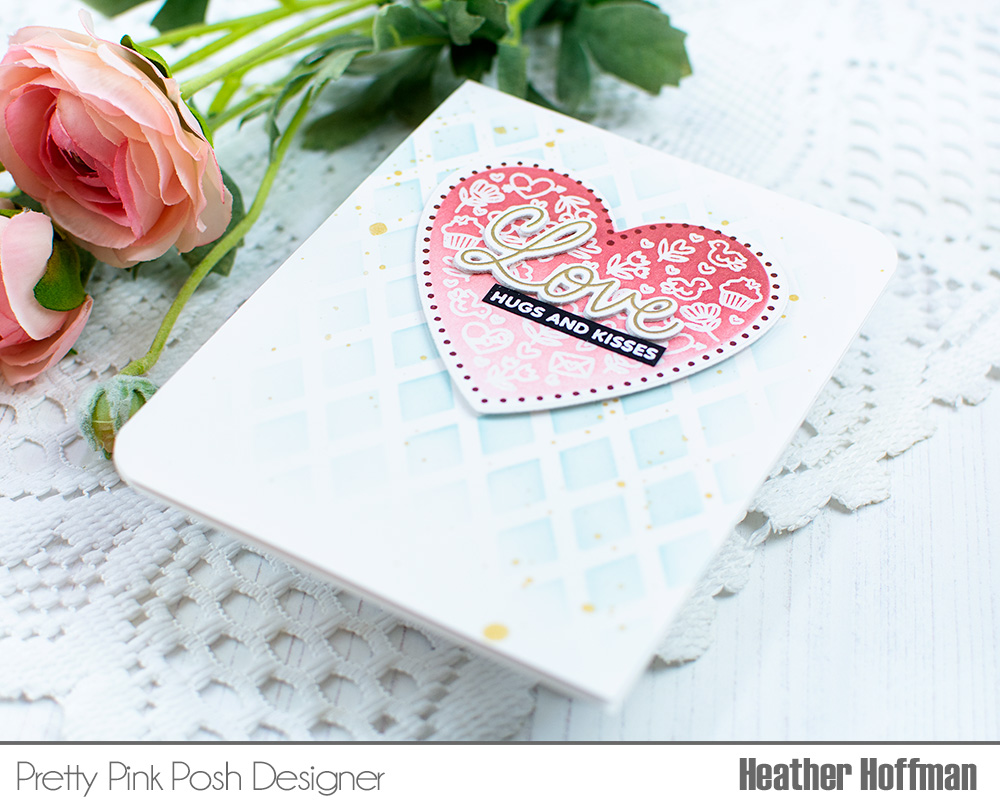
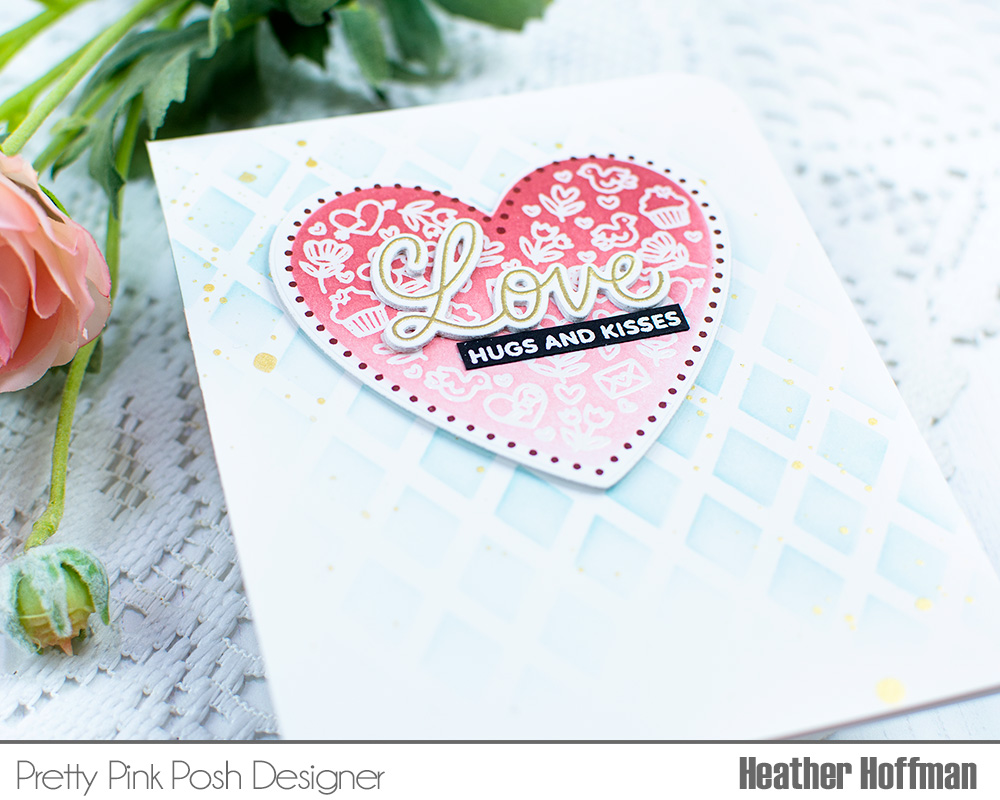
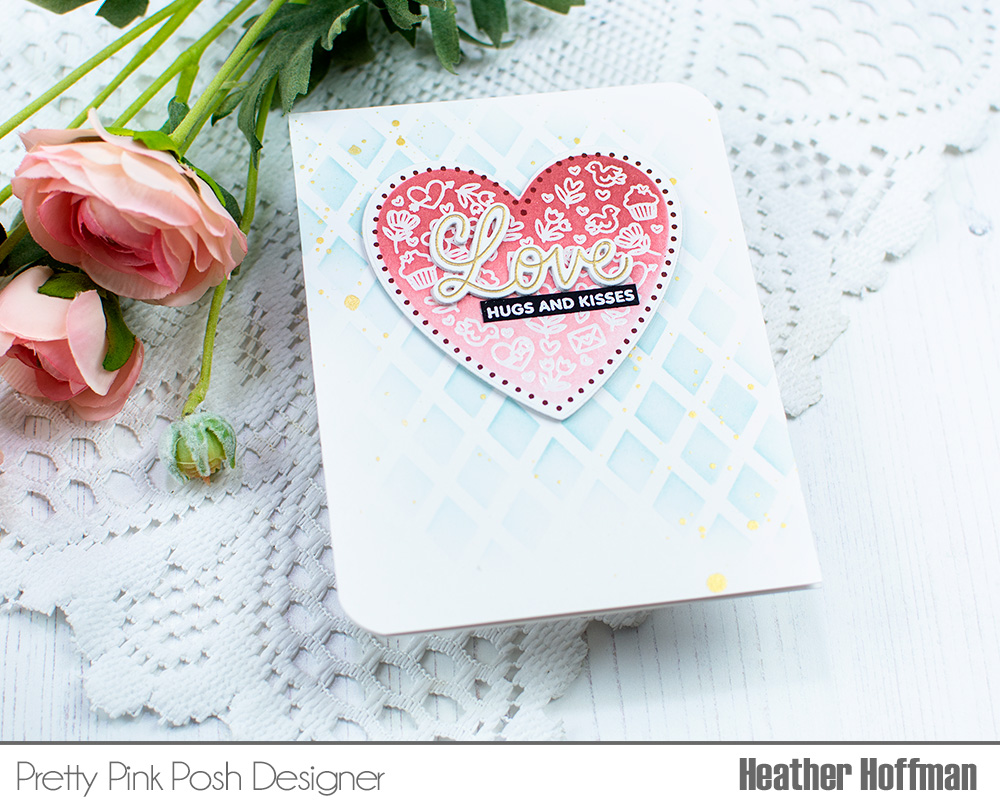
Good morning Pretty Pink Posh friends! Heather here today with a clean and simple Valentine’s or love theme card using some of the newest Pretty Pink Posh release! I also have a video to share showing how this card came together!
Here is a video for this card, so you can see how it all came together.
I used the All My Love stamp set, along with the coordinating dies in a bit of a unique way for this card. I started off by stamping the center portion of the heart from All My Love on white cardstock, and heat embossing with clear embossing powder. I then created a stencil with the smaller size heart die from the coordinating Die set, and blended Tattered Rose and Aged Mahogany distress inks over the heart. Next, I stamped the dotted hearts around that image, and die cut the entire thing out with the larger heart die in the set.
The sentiment was created using both the All My Love stamp set(for the smaller supporting sentiment), and Valentine Hearts stamp set. I love that the word “Love” has a coordinating die! I stamped and heat embossed it in gold on white cardstock, die cut it out, and then die cut two more times to layer together for a bit of dimension.
Finally, the background was created using the Lattice Stencil and Speckled Egg distress ink. I blended the pattern softly over my white cardbase. I added some gold splatters with my Gansai Tambai Starry Colors palette to pull coordinate with the gold embossing on the word “Love”, then adhered everything down, using foam adhesive for the heart. Finishing touch was to round the top right and lower left corner.
Thanks so much for stopping by today – have an absolutely wonderful day!
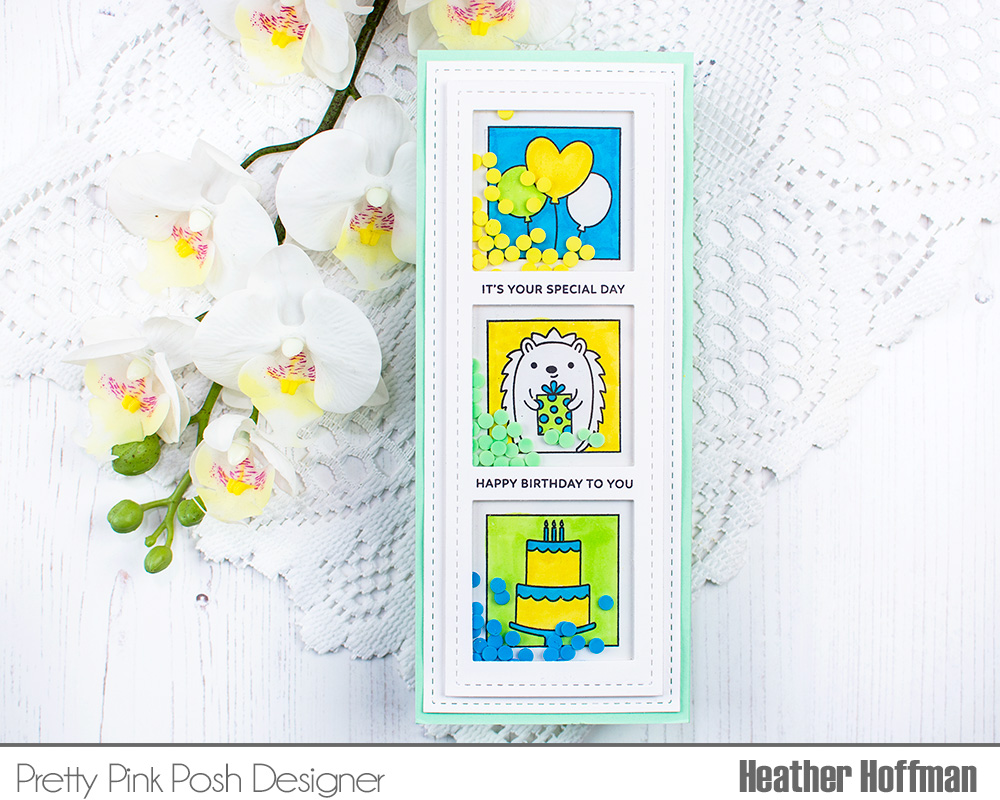
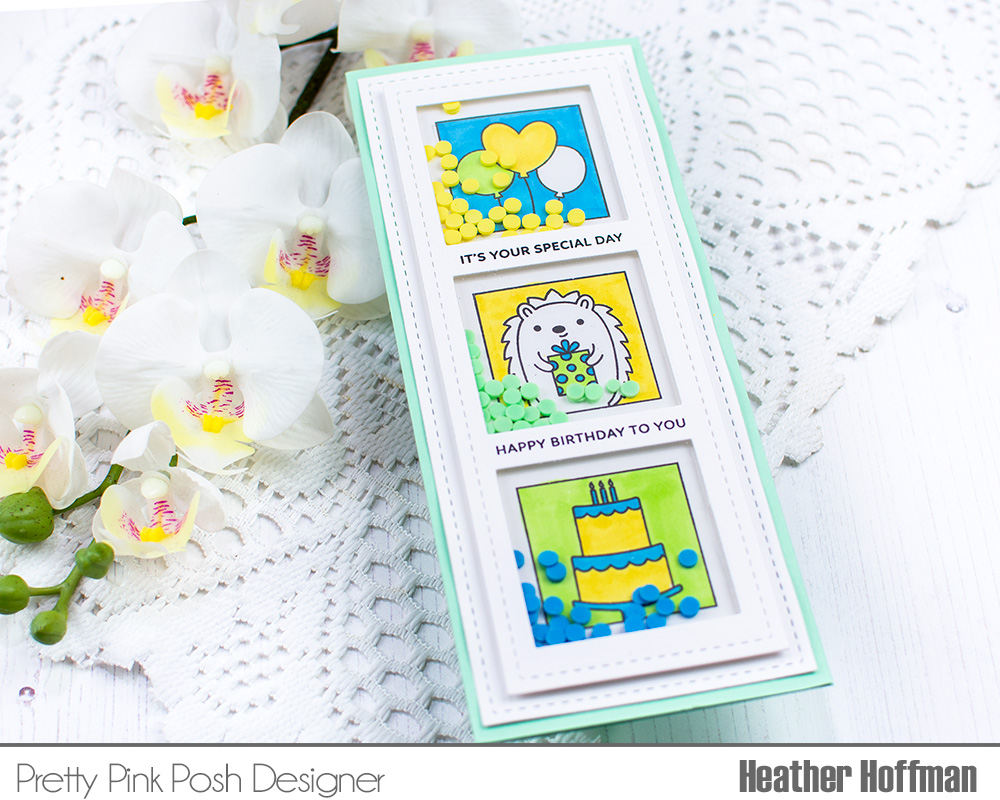
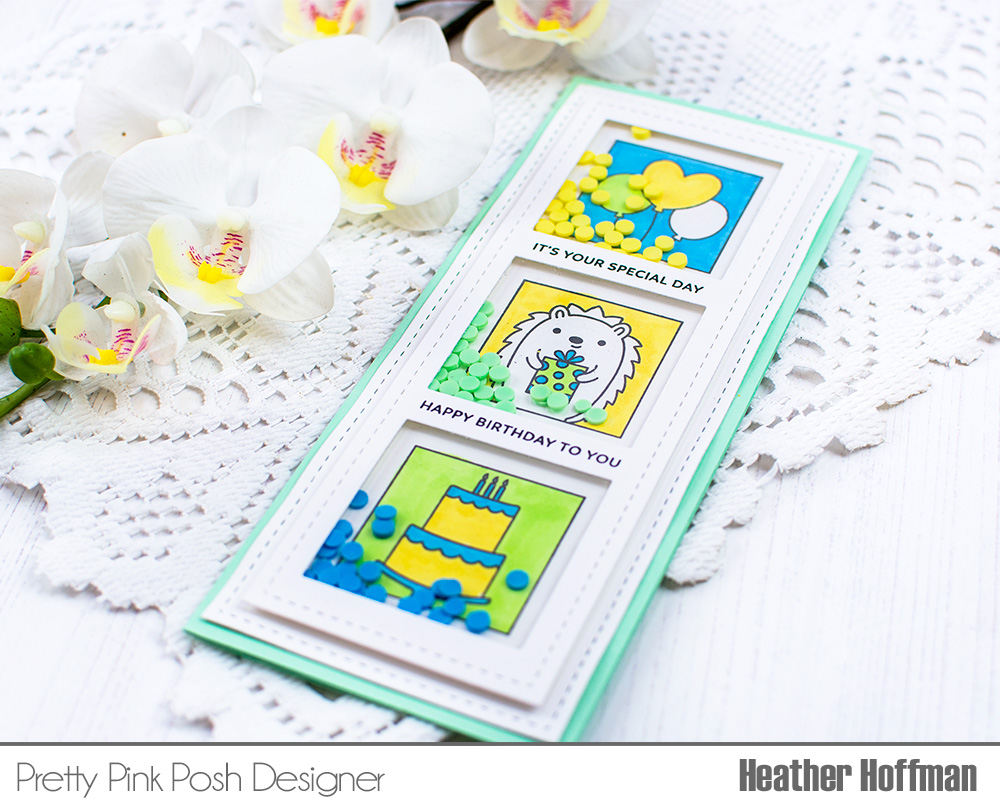
I used several of the layers of Slimline: Peekaboo Window Dies – and I love how perfectly the fun square images from Party Days stamp set fit inside those windows! I used all 3 images in that stamp set, and then used the fun new Clay Confetti Wheel #1 to custom fill each section of my shaker with a different color of confetti, coloring up the images to coordinate with my color palette.
The sentiments were stamped on the outer layer of the shaker using Let’s Party stamp set – love how perfectly sized those sentiments were for that purpose. Finished off by mounting everything on a coordinating mint colored slimline cardbase sized 3 1/2″ x 8 1/2″ – love how perfectly that largest rectangle mats onto that size of card!
Thanks so much for stopping by today – have an absolutely wonderful day!
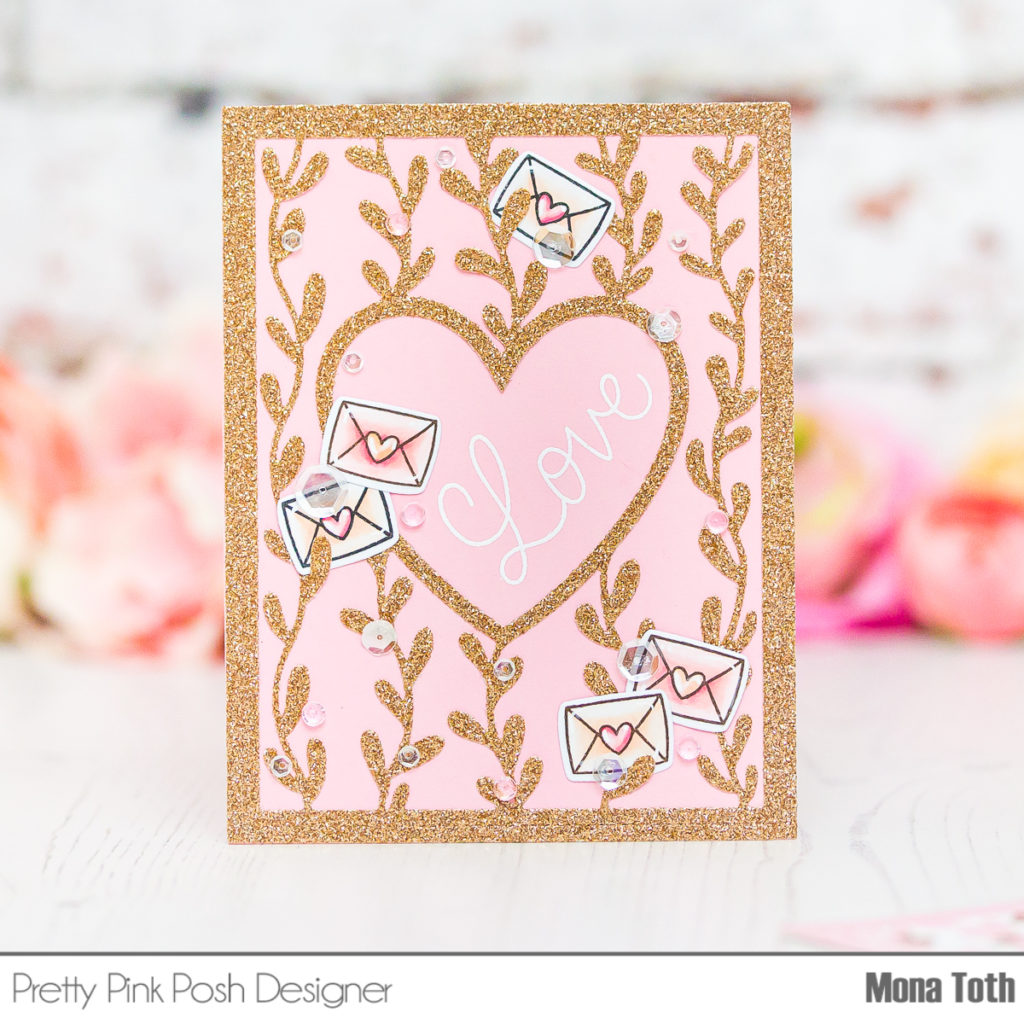
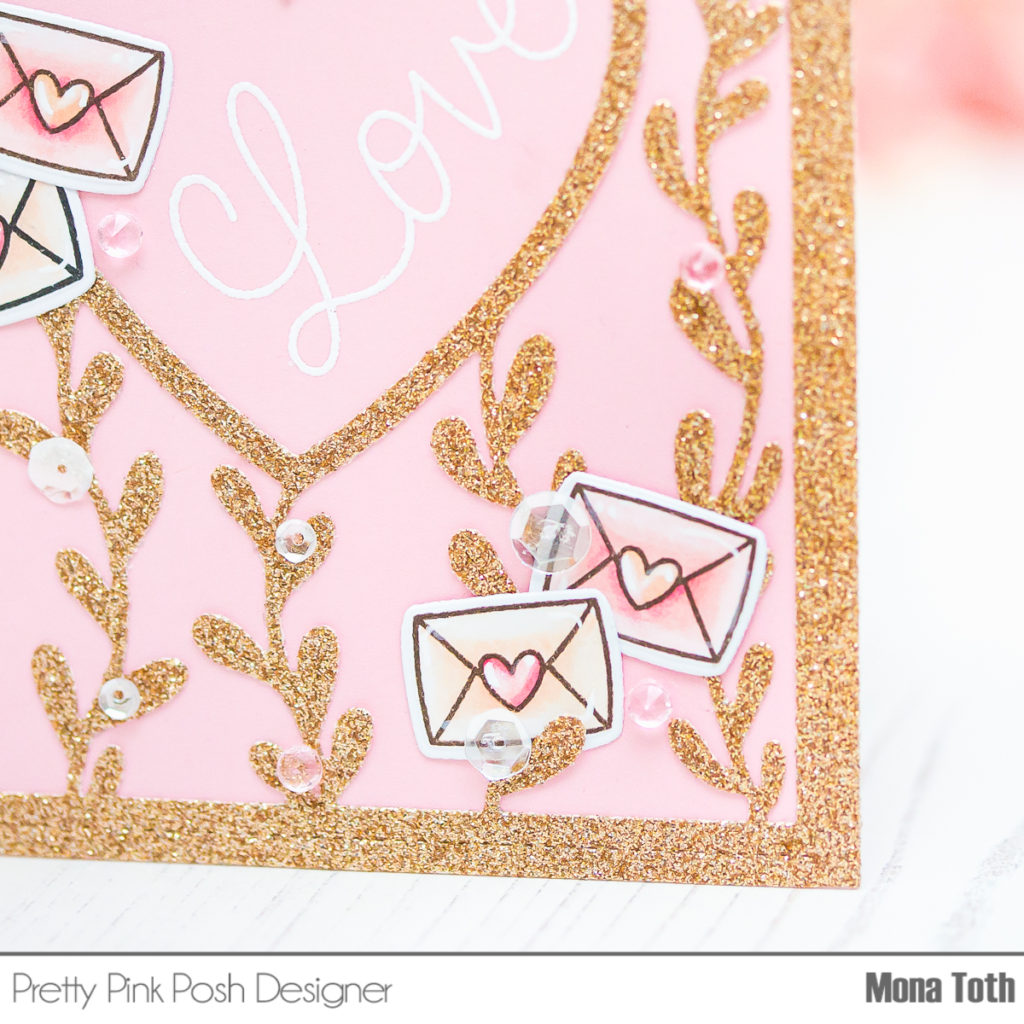
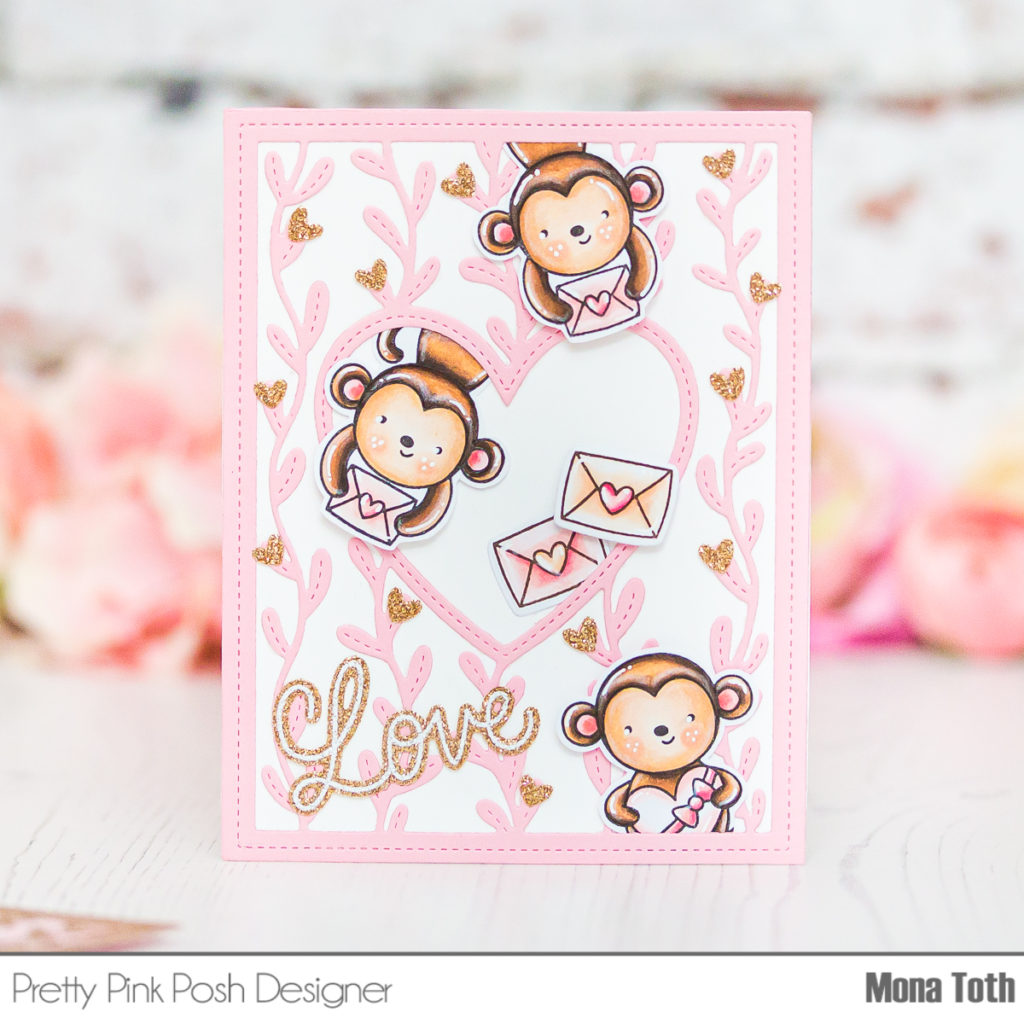
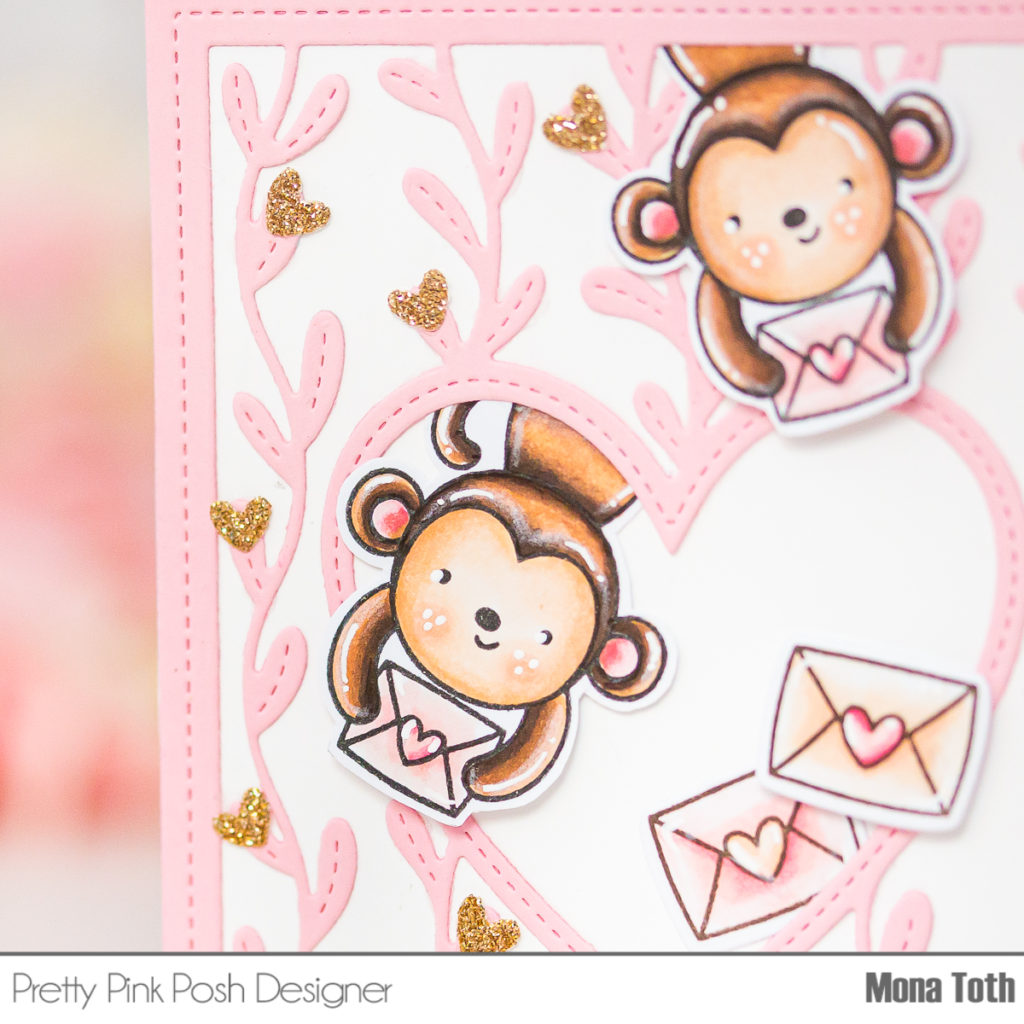
I really love the versatility of this beautiful Valentine Circles stamp set. First of all, the coordinating dies for this set are amazing. You have a circle shape to die-cut the image as well as this cute scalloped one. It’s really versatile and not only with the circle stamps. I love it, it’s perfect for creating circle tags too. If you are like me and you like to decorate your envelopes, then don’t forget to use this set on them, it will make them super cute! But what I like the most about this set, is that you can fussy cut the image, and you get a totally unique look from one stamp set
Watch my video tutorial below to learn how I created these cute, but also elegant cards including the coloring with alcohol markers.
I started the cardmaking with stamping the images with alcohol marker friendly black inkpad. When it was done, I made a quick heat set for my images and I continued the coloring process.
For the coloring I have used the following colors from Spectrum Noir Illustrators:
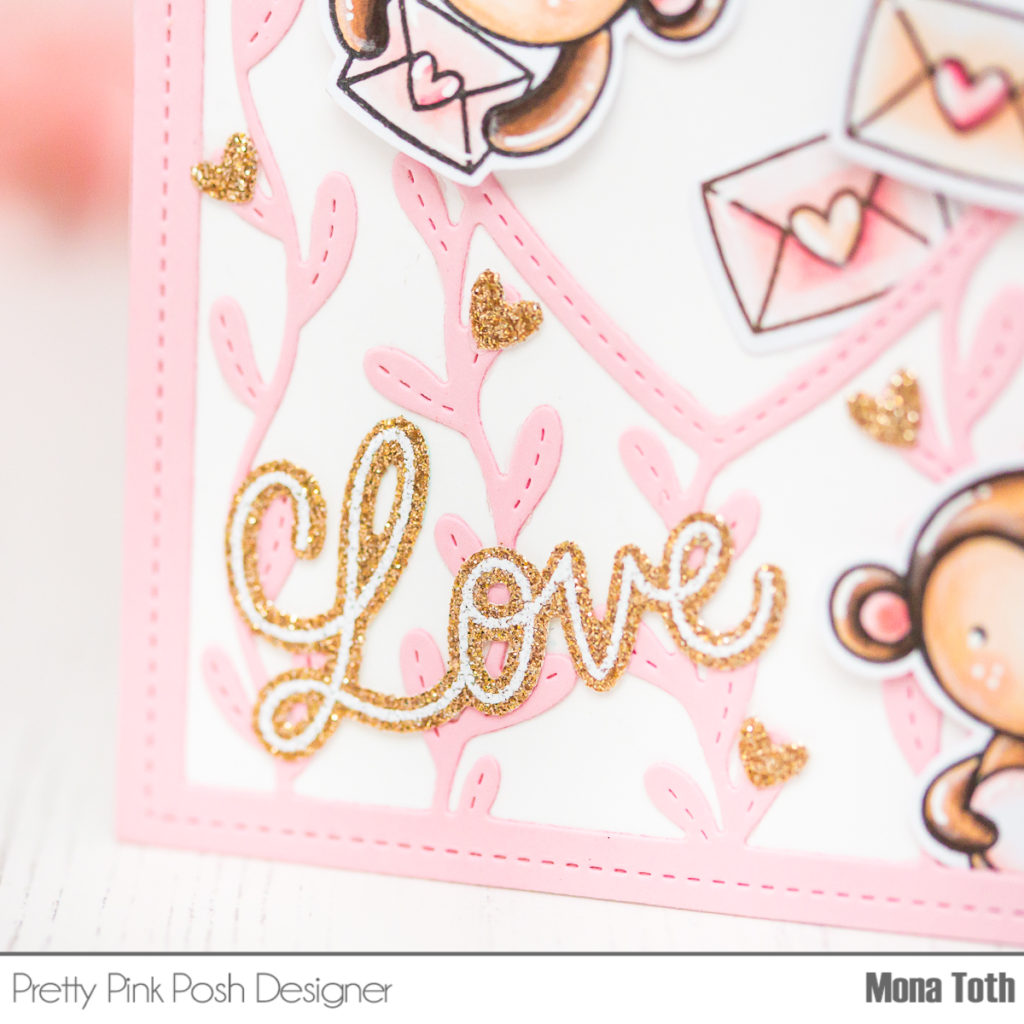
When the coloring was done, I continued with fussy cutting and die-cutting all the colored images. I have also created one soft pink and one gold glittery die-cut with the beautiful Heart Vines cover plate.
Before I have adhered the die-cuts and the images to its right place, I heat embossed the Love sentiment from the Valentine Hearts stamp set. Once to a pink cardstock, once to a gold glitter cardstock, which I run through my die-cut machine with its coordinating dies. Then I adhered all the parts together with liquid adhesive and 3d foam squares.
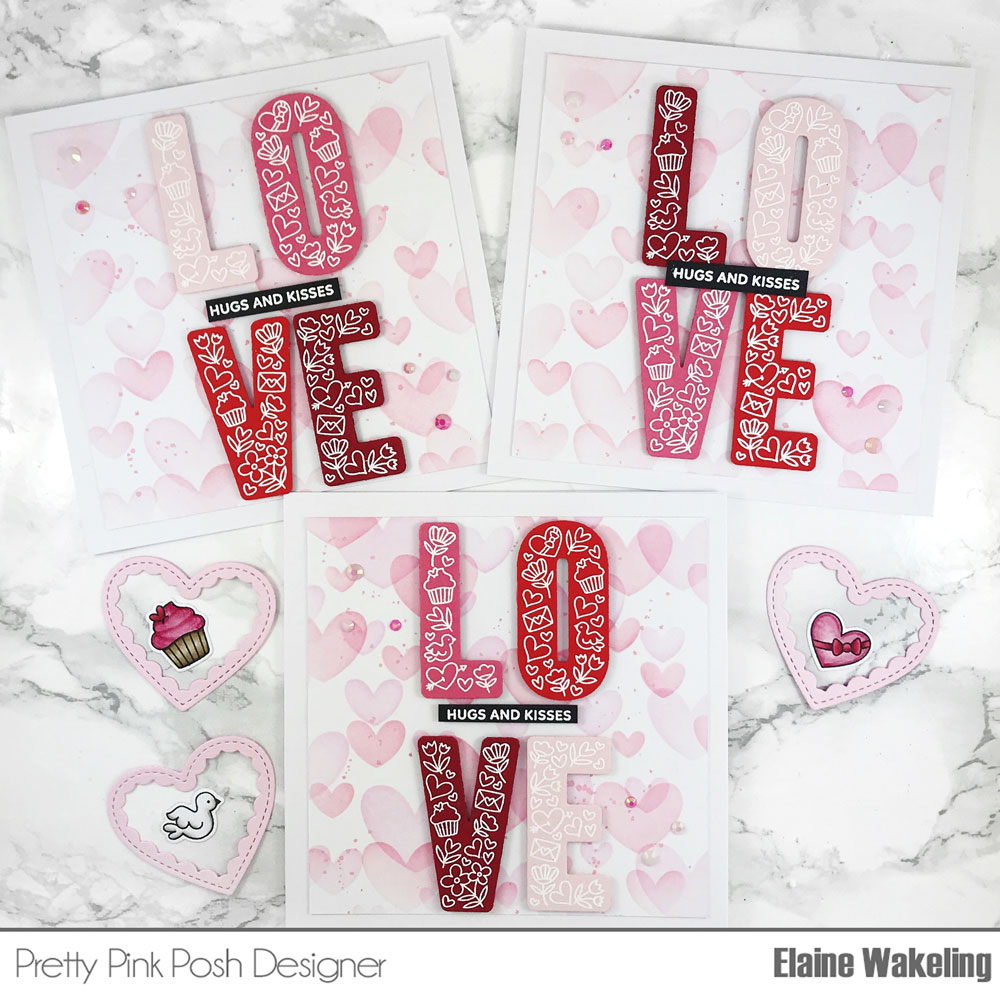
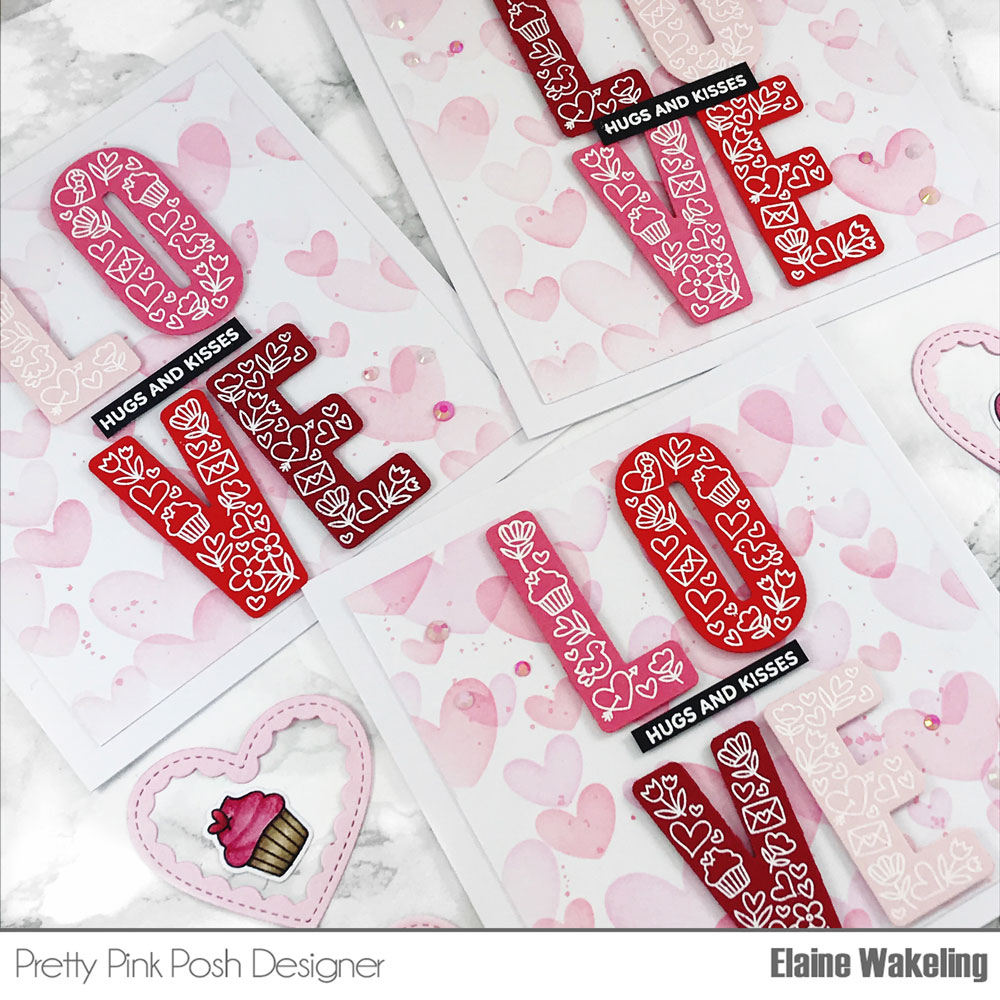
Hello everyone, Elaine here today on the Pretty Pink Posh blog to share a card for Valentine’s theme week. For my project I created a collection of cards using both older and newer Pretty Pink Posh products.
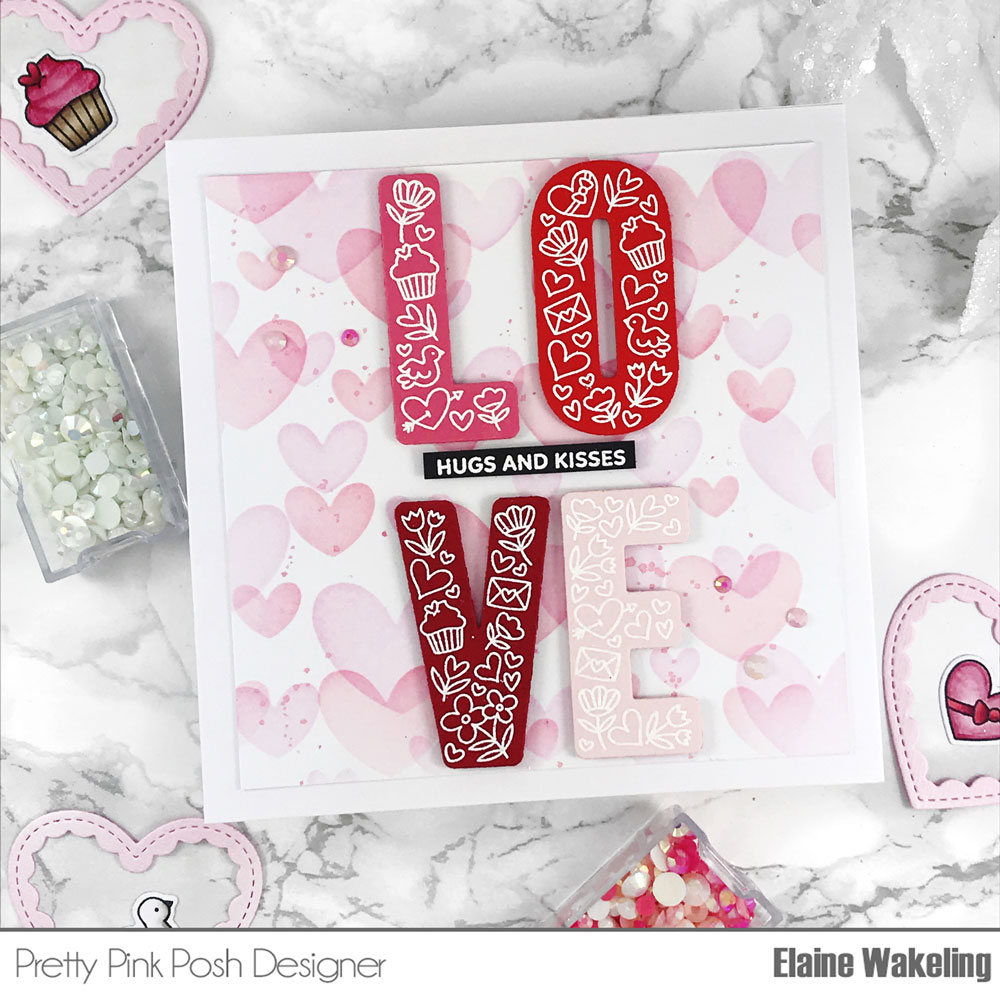
To start with I cut 4 different shades of pink and red card stock down to 5 ½” x 2 ¾“ pieces. Using my stamp positioner, I stamped the LOVE stampfrom the ‘Love’ stamp set on to each of the coloured card panels with Versamark Ink, not forgetting to treat each piece with an antistatic powder tool before inking. I coated each of the panels with white embossing powder and heat set until glossy.
To cut out the LOVE embossed letters I used the LOVE coordinating die. Setting the die cut letters aside, I started creating the background of the cards using white card stock cut to 4 ½” x 4 ½” (the finished cards are 5” x 5”). Using stencil ‘A’ from the ‘Layered Hearts’ stencil set I slowly ink blended on Spun Sugar Distress Ink. Through stencil ‘B’ from the stencil set I blended on Worn Lipstick Distress Ink. To add some extra interest to the panel I flicked on some ink splatters using a small paint brush and watered-down Worn Lipstick Distress Ink. I set aside to dry.
Small strips of foam tape were applied to the back of the letters and secured to the heart stencilled panels. I used one letter of each of the cardstock colours.
For the sentiment running through the centre of the card I white heat embossed ‘Hugs & Kisses’ multiple times from the new ‘All My Love’ stamp set on to black card stock and trimmed each one into a small strip. More thin strips of foam tape were added to the back of each strip and secured to the card. The whole card panel was adhered to a white 5” x 5” card base.
For some extra sparkle I used the Valentine Jewel Mix to adhere a few jewels in various sizes with tiny dots of liquid adhesive.
Thank you for joining me here today, I hope this collection of cards gives you some inspiration for your own creations.