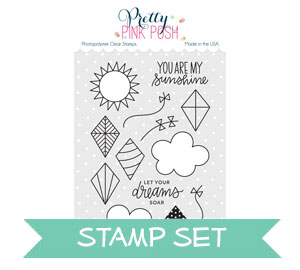
Hello, Pretty Pink Posh fans! This is Yana and today I am sharing a video tutorial showing how create a dreamy watercolor scene using stamps from the new Fly A Kite set.
I started working on my card by stamping 2 clouds and a sentiment from the Fly A Kite stamp set in Versafine Onyx Black Ink onto Distress Watercolor Paper (in my video I am using Arches Hot Pressed Paper). Next, I stamped 3 kites and kite strings as well as a number of tiny florals and leaves from the Bold Blooms stamp set onto a separate panel.
Watch my video tutorial below to learn how I made this card.
I’ve been slowly growing my Daniel Smith watercolor collection and I was anxious to play with new colors so I used them to color this card. I went with Cobalt Teal Blue to watercolor the sky as well as one of the kites and some flowers. I also used Quinacridone Rose and Magenta colors to color the two other kites and the rest of the flowers and finally Sap Green to color the leaves. For this card I used the Silver Black Velvet Brush Size 8.
I did my coloring a several layers – after I had applied the first, light, wash of color I intensified the areas I wanted to appear darker. After my coloring was done I used coordinating dies and cut these images out in my Platinum 6 die cutting machine.
I used a lot of foam adhesive and also a bit of glue to adhere my die cuts onto the card. I foam mounted the kites and flowers and used glue to adhere the leaves.
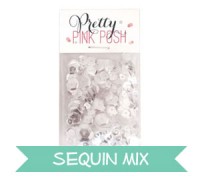
To add a bit of sparkle and shine I used sequins from the Mermaid Sequin Mix and adhered them onto my card. Lastly, I coated several flowers with Wink Of Stella glitter pen and Nuvo Crystal Glaze to make them dimensional and shiny.
Happy cardmaking! I hope you enjoyed today’s video and post.
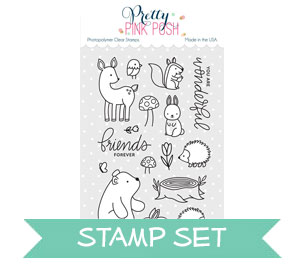
Hi everyone, Eloise here and today I have another 3 cards 1 stamp set video for you all. It was a big hit last time and people seemed to really enjoy it so I thought I would do another one using the Woodland Critters stamp set which definitely seemed to be a favourite from the May release!
To begin my cards today I first stamped and coloured in all my images in with Copic Markers and used the coordinating dies to cut them out.
To begin my first card I pulled out the Stitched Borders 1 dies and used the curved stitched border to cut out two sections of my white cardstock panel. I only needed the top and bottom of my panel left so the middle section could be open for colour and my scene. I then took another piece of cardstock and blended some Broken China and Peeled Paint Distress Oxide Inks onto the background, to make sky and land. Once I blended on my colour I sprinkled over some water and heat set it with my heat tool.
I then added adhesive to the back of the inked panel and adhered it down to a scrap piece of paper cut to the same size as my final panel. I then added foam tape onto the back of my white panel piece and adhered it to the same scrap paper piece leaving the opening for the colour to show through. I then added adhesive onto the back of my critters that I was using and added them into the scene. I stamped the ‘Friends Forever’ sentiment from the set with some black ink onto the top right hand side of my panel and finally adhered my panel to a kraft card base.
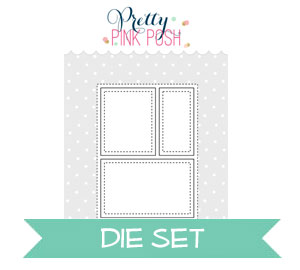
For my second card I pulled the Storybook 1 die to use as the focal point on my card. I then took the same Stitched Borders 1 dies and used the same curved die to cut a piece of green cardstock. Once my piece was cut I also grabbed some blue cardstock and cut it down to size. I used some Mowed Lawn Distress Ink and ink blended a little on the top of the green cardstock piece to give it some shading and used Broken China Distress Ink to ink the blue piece the same way. This is a way to give a little extra to your flat colours of cardstock. I then die cut the Storybook die from some white cardstock.
I then adhered together my background and hill piece and then adhered down the Storybook frame onto my panel. I used foam tape and flat adhesive to adhere down all the critters I chose to use also. I then stamped the ‘You Are Wonderful’ sentiment onto the bottom of the panel and finally adhered the piece to a white card base.
For my final card I used the Scallop Circle Tags dies to cut a white tag. I then used a circle die to also cut out an additional two circles to fit inside my tag. I cut one circle down to a small hill and coloured that using Mowed Lawn and then used Broken China for the full circle. I adhered the two together and then used foam tape to adhered the coloured circles to my tag. I arranged a small scene using a few of the critters that were left onto the circle and adhered them down into place. For my background of my card I used some plaid paper from Lawn Fawn and adhered it down to a white card base. Then to make the tag feel like it fit with the card I poked a hole through the top centre of the card and also cut a slit in the fold of the card so I could thread some hemp cord through and tie it in a bow, anchoring the tag to the card.
I added some adhesive to the back of the tag so it would sit in place instead of moving around and then for the sentiment I white heat embossed the ‘Friends Forever’ sentiment onto some black cardstock, heat set it, trimmed it down and foam mounted it onto the bottom right hand side of the card.
To completely finish off all the cards, I pulled some Sparkling Clear Sequins out of my stash and scattered them around each of my cards to pull them altogether.
Thanks so much for stopping by today, I hope you enjoyed the three cards I made today. I always have a lot of fun making these videos as I love to create multiple cards especially when you have most of the supplies out already. They’re all quite simple cards, but have a similar vibe I feel.
Anyway, thanks again, I hope you got inspired and I’ll catch you all next time!
Good morning! Heather here to share a tutorial on these two cards on which I attempted to create a background for my card similar to a Batik fabric (if you have no idea what that is, click HERE or HERE to see a couple examples, or do a quick search on Pinterest!) The two different methods I tried gave me two slightly different results – one a bolder look, and one a softer effect. I can’t decide which one I like better!
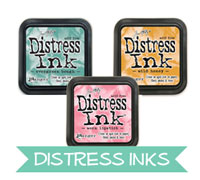
I started off by picking two shades of distress ink, and applying it to my backgrounds – first the lighter shade, then the darker. I purposely went fairly random in my patterns going for an “imperfect” look intentionally.
Next, I added some flicks of water to react with the distress ink for more texture. At this point I heat set the entire panel. IMPORTANT: You want it to be NICE and dry after this step – so either give it lots of time to dry or zap it good with a heat gun!
Now to add the leaf images to the background. I picked several of the solid images from the new Build a Bloom stamp set – including some of the single little leaves to fill in the holes. The softer one on the right I stamped with Clear Embossing ink and heat embossed with Clear Embossing Powder. The bolder one on the left I stamped with both shades of the same distress ink I used on the background, deliberately layering and overlapping the leaves on that one. I then quickly sprinkled on some embossing powder on that one so it stuck to the newly stamped leaves. The distress ink stays wet long enough to do that if you work quickly. THIS is why you wanted those backgrounds thoroughly dry so that the embossing powder doesn’t stick anywhere that you don’t want it too!
Finally, I applied some more distress ink to the softer colored one – the way the colors overlap it gives two tones of color the the card exactly like I was hoping! On the darker bolder card, I applied a little white pigment ink on some spots to add some more texture and color variation.
Next I built the sentiment portion using the gorgeous new sentiment kit, Thoughtful Greetings, and the fun new addition to the scallop dies, Scallop Hexagons! The sentiments I heat embossed in white on some soft gray cardstock, and framed them with the white scallop frames.
Finished off by mounting those sentiment panels with foam adhesive, then added some Sparkling Clear Confetti Mix. Here is a closer look at the softer one – can you see the shine from the embossing powder?
And then here is the bolder one:
This was so much fun to create – and I can imagine so many different color combinations that would be fun too!
Thanks so much for stopping by today! Have a wonderful day!
Hello everyone, Joni here sharing my take on the Summer Coffee Lovers Blog Hop using the new Summer Friends stamp set and Summer Friends coordinating dies (releasing on July 10th).
To begin, I drew pencil lines to create sand and sea as a background.
Next, I colored the pencil lines with Copic markers.
Next, I drew a half circle with a pencil mark and Colored it with Copic. Then, I added both sun ray images from Rainy Days Additions stamp set to create the sun for the background.
Next, I colored and die-cut the images from the new Summer Friends. I colored the frapp images to fit the challenge.
Then, I die-cut the whole background with Stitched Notes die set. I used the frame and adhere it with foam tape for dimensions
Then, I stamped the sentiment “happy summer” also from Summer Friends stamp. Next, I added some of the new Mermaid Sequins Mix. I put all my die-cut images on a foam square for dimension.
I hope you enjoyed this cute new Summer Friends stamp set coming soon! Until next time, have a great day!!!
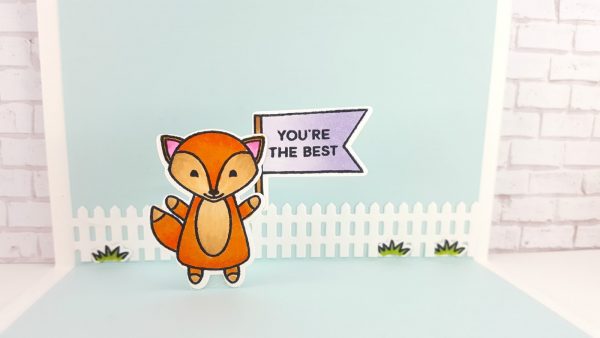
Hi Pretty Pink Posh friends! Shannon here today to share a pop up card with you! I kept the outside of the card clean and simple and put a cute pop up scene on the inside. I often focus my attention on the outside of the card and neglect the inside so this is a way to change that for me.
I started by creating a card base like usual with light blue card stock but cut it slightly smaller than an A2 sized card. I then put my card into my paper trimmer at 1 and 1/2 inches and cut a slit up to the 1 ” mark. I moved my card into the trimmer touching the 2” mark and again cut a slit down to 1”, this is how I created the slit in my card to allow the pop up piece.
I used the Picket Fence die and and adhered into my background under the pop up piece and also added some blades of grass from the Camping Friends stamp set. I then stamped my fox and flag from the Fox Friends stamp set, colored in with Copic markers and cut out using the coordinating dies. I adhered my flag behind my fox and cut an additional fox die cut out from white card stock to adhere onto my stamped fax just to make that piece a little more sturdy for my pop up. I then Adhered my fox onto my pop up piece and adhered my blue card base inside a white card piece creating my pop up when you open the card.
For the outside of card I kept it very simple stamping my images from the Camping Friends stamp set and coloring in with Copic markers. I then cut some blue clouds using the Rainy Day Coordinating dies and added some 3mm Sparkling Clear Sequins on them.
Decorating the inside of the card was fun and I must do it more often.
Thanks for stopping in! We hope you enjoyed today’s fun card.
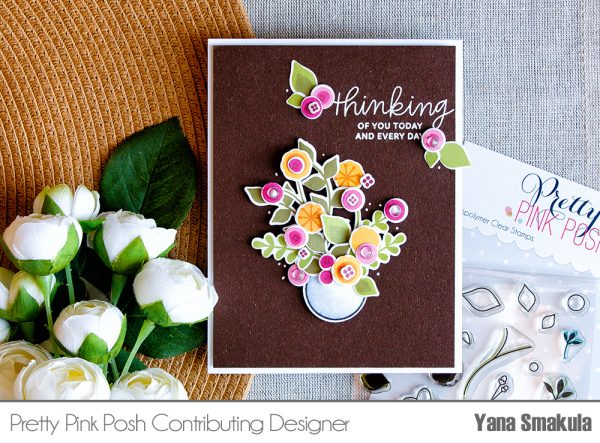
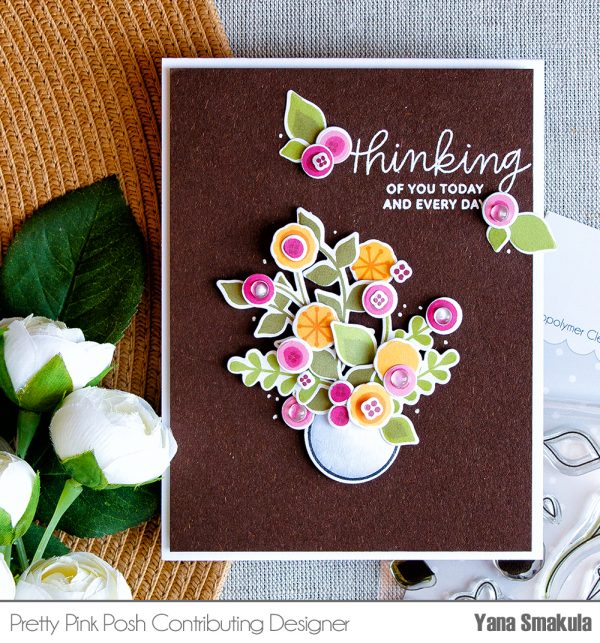
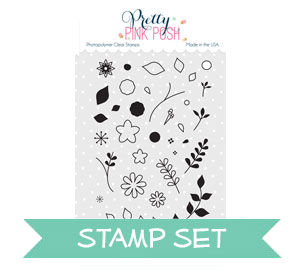
Hello, Pretty Pink Posh fans! This is Yana and today I want to share a floral card using the Build A Bloom stamp set.
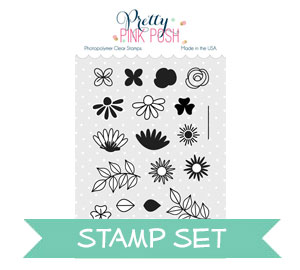
This set features a number of parts and pieces to create your own unique flowers, leaves and floral arrangements. There are outline and corresponding solid images and also just outline and just solid images that don’t necessarily go together. So with this set you can chose to stamp your flowers and leaves outlines and color them using your favorite coloring mediums or stamp solid images using colored ink and have instant flowers and leaves. You can also combine a lot of these to have an outline and solid stamped color.
So quite a lot you can do and many different looks you can have. There is a set of coordinating dies available and these cut pretty much each and every shape out.
Watch my video tutorial below to learn how I made this card.
I started working on my card by die cutting the shapes out first. With tiny dies like these I prefer to keep them connected and cut them all at once first and do my stamping later. I feel this way I am saving a lot of time as for me it is easier to align a stamp over a small die cut shape versus align a die over a small stamped image.
I die cut a number of shapes out, I think I cut all of them 2 or 3 times and later had additional florals cut to have more flowers for my card.
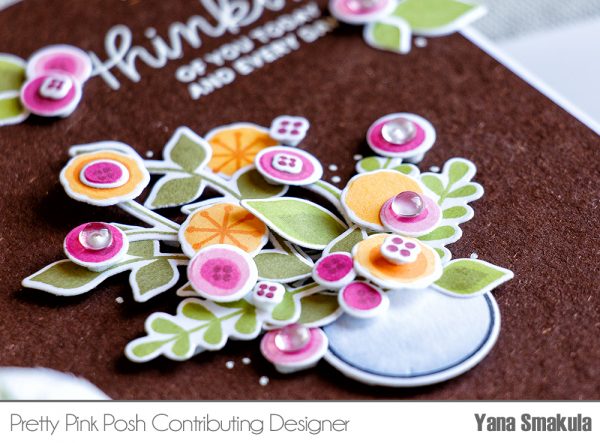
Next I used various colors of ink and stamped my images. I picked 2 shades of green, 2 shades of yellow and 3 shades of pink for my stamping. I first stamped layers using lighter color of ink and later came in added a detail layer onto some of my images using a darker shade. So in a way this stamp set can be used as a color layering one where you build your flower using individual layers and different colors of ink.
To create a vase for my floral arrangement I used a Christmas ornament from the Winter Friends stamp set. I turned it upside down and colored using C3, C1 and colorless blender Copic markers.
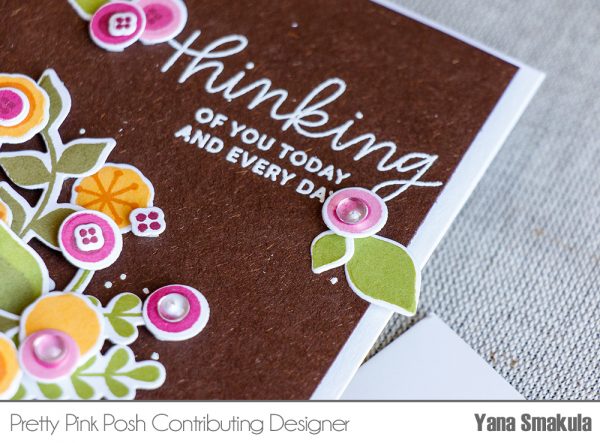
I made my floral arrangement heavy on one side as I wanted to add a sentiment to the other side. I went with “Thinking Of You Today and Every Day”from the Thoughtful Greetings stamp set, but of course you can go with any other message you like.
Next I foam mounted my panel onto an A2 top folding card base and since I had some additional die cuts left I used them to add some flowers and leaves around the message. I also used small clear droplets and adhered those onto some of the flower centers for additional interest.
To begin, I first cut the 8 ½ x 11 cardstock to 5 ½ x 11. Then, score it 2 times using the Martha Stewart large score board. I scored it from 3 ½ and 7 ¼. Then distressed the inside using Tim Holtz Peacock Feather Distress Ink Pad. I also used the scallop from Stitched Borders 3 dies to cut the distressed strip of paper for the ground. I bottom was distressed with Tim Holtz Crushed Olive.
Next, I also stamped both cloud images from Rainy Days stamp set.
Here’s the look of having them placed all together on the scene. I stamped the sentiment using Everyday Greetings stamp set. Then, splattered it with Gansai Tambi Pearl Colors from the set I used the White Gold and Pearl Cobalt Blue.
For the front of the card here’s the look. Its the same concept as above except I added two strip of the scallop instead of one. For the front I also used the girl from Friends Forever stamp set and Friends Forever Coordinating die set. I also added some Sparkling Clear only on the front to finish the card. I did not add any sequins on the inside to avoid bulkiness when folded.
I hope you guys enjoyed! Thank you so much for stopping by!
For my card today I’m going to be using the watercolour stamping technique with Distress Inks to create a fun wreath using the flowers in both of the new stamp sets.
To begin my card today I first stamped out all my outline images with Versafine Onyx Black Ink onto some watercolour paper. I stamped out a ton of images since my wreath that I’m going to be making is going to be super full. I then pulled some colours of Distress Inks out and began my watercolour stamping. I first found the coordinating solid stamp, pressed it down into the ink pad and then spritzed it with a little water to reactivate that ink and then stamped it down onto the coordinating image. I repeated this step until I had coloured all my images. I love this technique, it’s super fast and I love how it never looks the same. You get dark and light spots, spots that aren’t always covered completely, it’s really fun!
Now that all my images had been stamped and dried completely, I cut them out using both sets of coordinating dies and set them to the side for later. I then took a piece of watercolour cardstock, and die cut the edge of it using the rounded die in the Scallop Border 2 die set. The mini scallops are so cute!
Now my panel was ready to assemble. I first traced around a circle (I used a bowl) with a pencil so it was easier to make my wreath circular. I then laid down all my images around the circle to make my wreath. When arranging all the images I worked in odd numbers and a triangle pattern, to make it appealing to the eye. It’s rule of thumb that things looks better in odd numbers and threes, so that’s what I went for. Once all my images were laid out around my wreath with all the colours spread out evenly, I could stamp my sentiment. I needed to lay down all my images first to see how much space I had left. I used the Thoughtful Greetings stamp set and used the sentiment ‘Thank You For Everything You Do’ and stamped it in the center of my wreath with Versafine Onyx Black Ink. Now my sentiment had been stamps, I could adhere down my images. For all my leaves I used liquid adhesive and then used the foam tape for the flowers.
Once everything was adhered down I took a piece of yellow patterned paper and adhered it to the bottom of my card base. I then took a piece of fun foam and adhered it down to my panel and then to my card base so it could have some dimension. To finish up my card completely I used some Wink of Stella in the clear and also some Clear Droplets in the 4mm and 6mm size.
Hello, Pretty Pink Posh fans! This is Yana and today I wanted to share a quick technique video to show you how easy it is to add details to colored images.
I started working on my card by stamping and coloring 3 images from the Friends Forever stamp set. I used Simon Says Stamp Intense Black ink for stamping and double stamped images using MISTI stamp positioner to have the blackest black outline possible.
There are coordinating dies available for this set so I cut my images out and quickly colored them using Copics. I used E79, E37 and E33 to color hair; E00 and E000 to color skin; R20 to add blush. To color outfits I used RV14, RV13 and RV10 for pinks; B05, B02 and B000 for blues; YG67, YG17 and YG03 for greens.
While my images looked great as is I decided to add little details to make them unique and a bit more personal. Think about it this way – in real life we all wear fabrics with different patterns. So I wanted to translate some of those patterns onto these images. There are a number of ways this can be done, some are simple, some not so much, I used the most simple and easy way – a white gel pen.
If you don’t have a white gel pen – you can also use a black pen or you can even use a Copic colorless blender to add detail. If you have a colorless blender in a bottle you can look for a piece of fabric with some texture, say burlap, wet that fabric with colorless blender and use it to stamp over the outfits of these images – that will transfer the texture of the fabric onto the image and will create same looking texture on your images.
I used a white gel pen and added little dots, vertical and horizontal stripes. You want to make sure to wait for your Copic coloring to dry, especially if you have really saturated paper with the marker as it (the marker) might eat up your white pen, I’ve had that happen in the past, so before adding the white detail – make sure image is dry.
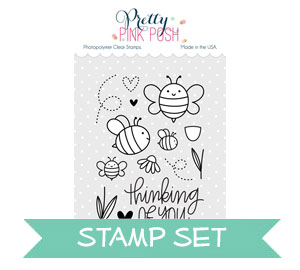
I ink blended a hill to create a scene and foam mounted my friends on top. I also added little bees from the Bee Friends stamp set I adhered several sequins from the Sparkling Clear Mix and I also added clear droplets on top. I love to combine the two together as this way I feel my droplets look even more dimensional.
Watch my video tutorial below to learn how I made this card.


 I used the


 Hello, Pretty Pink Posh fans! This is