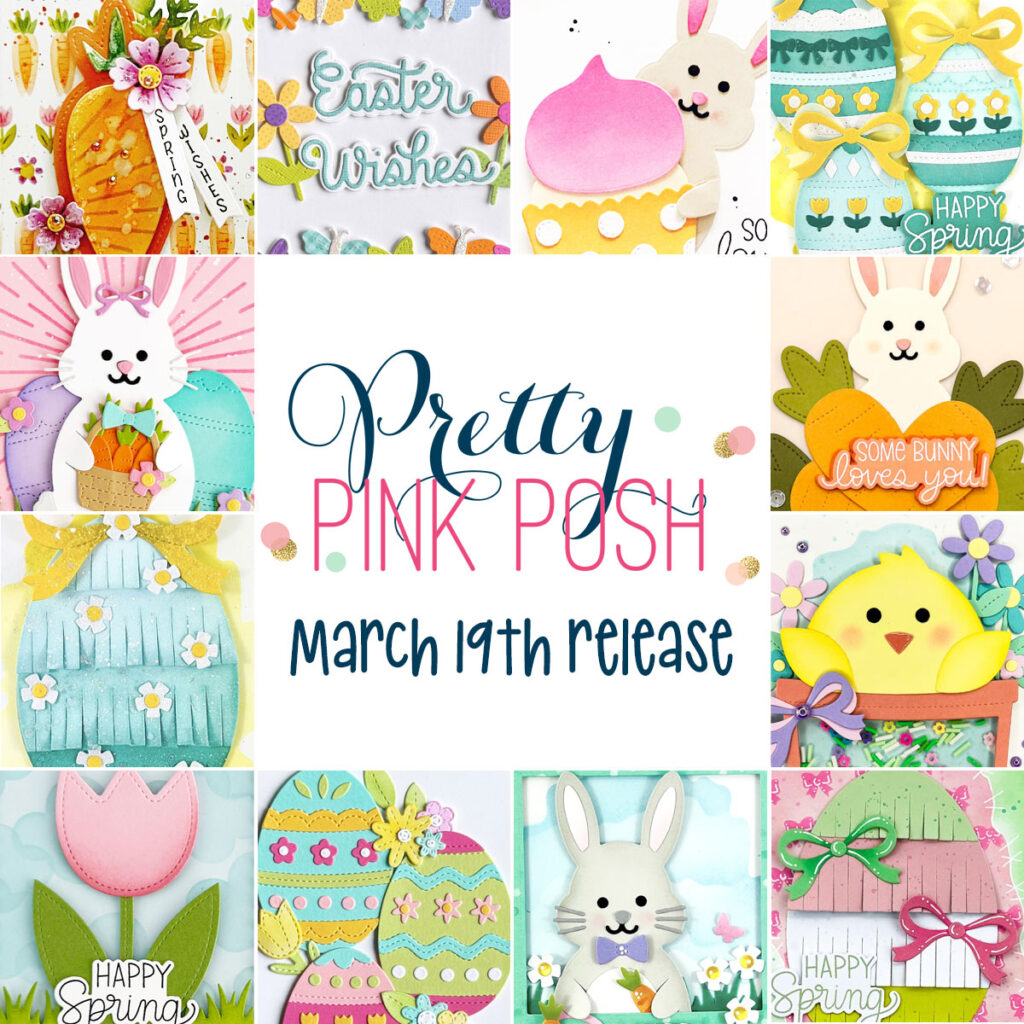
June Intro: New Stamps + Shoreline Borders
Welcome to the first day of sneak peeks for our June 5th release! This release includes five stamp sets (four with coordinating dies), five stencils, ten standalone dies, and four embellishments.
New release will be available June 5th
Watch the video above I Watch the video in HD on YouTube
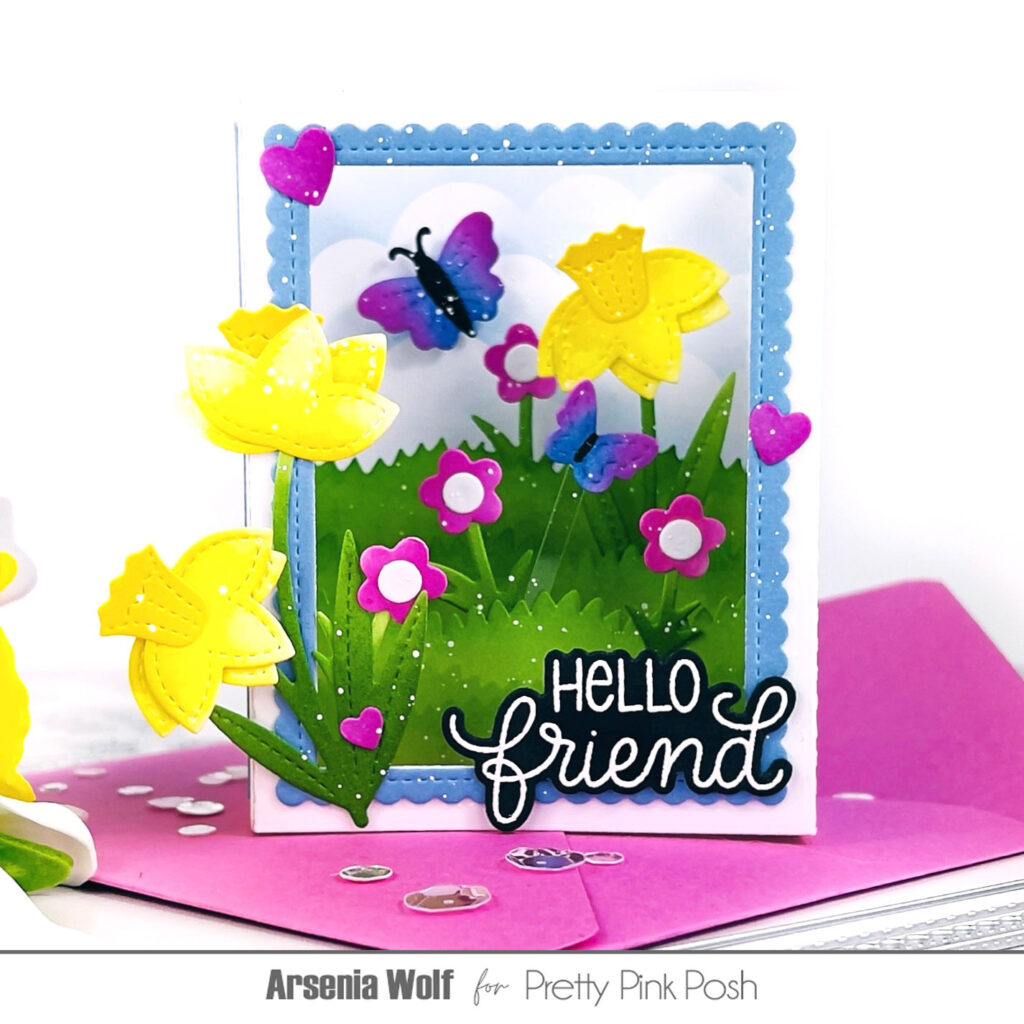
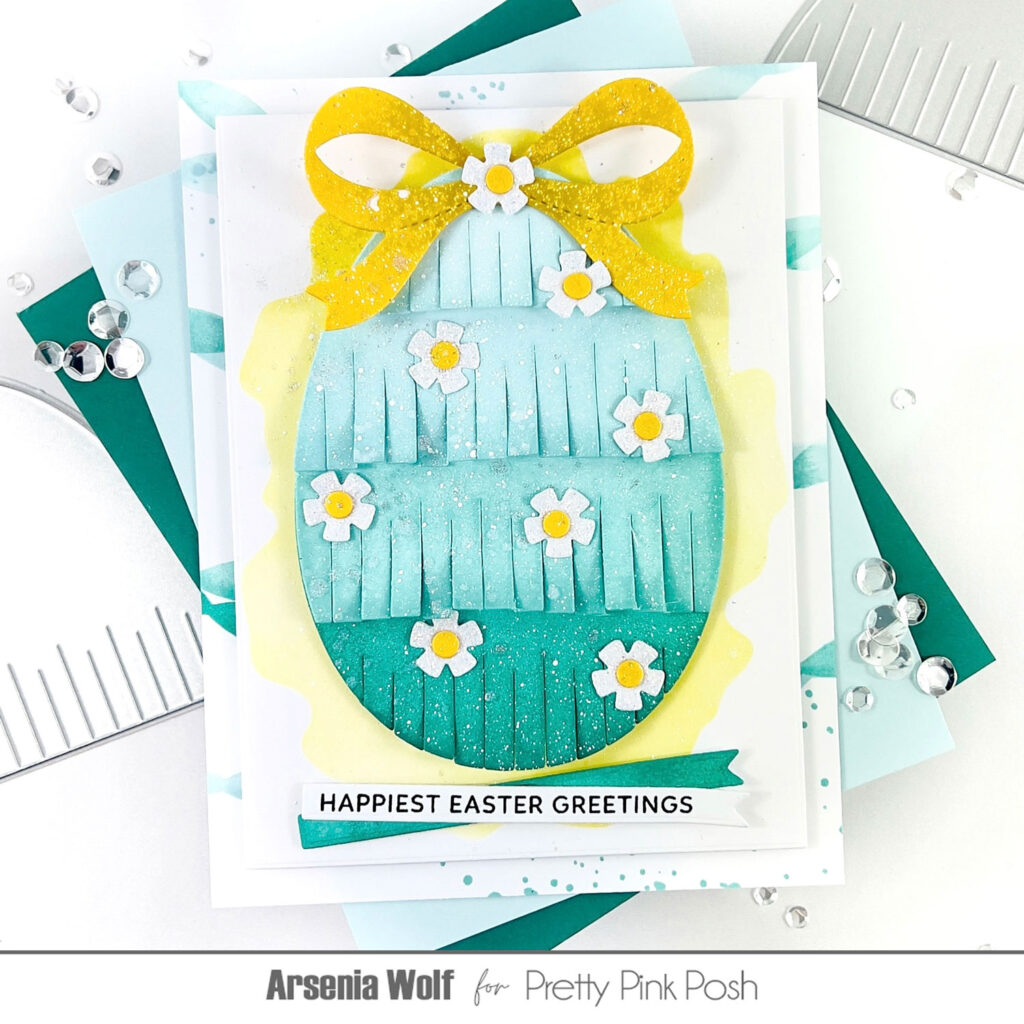
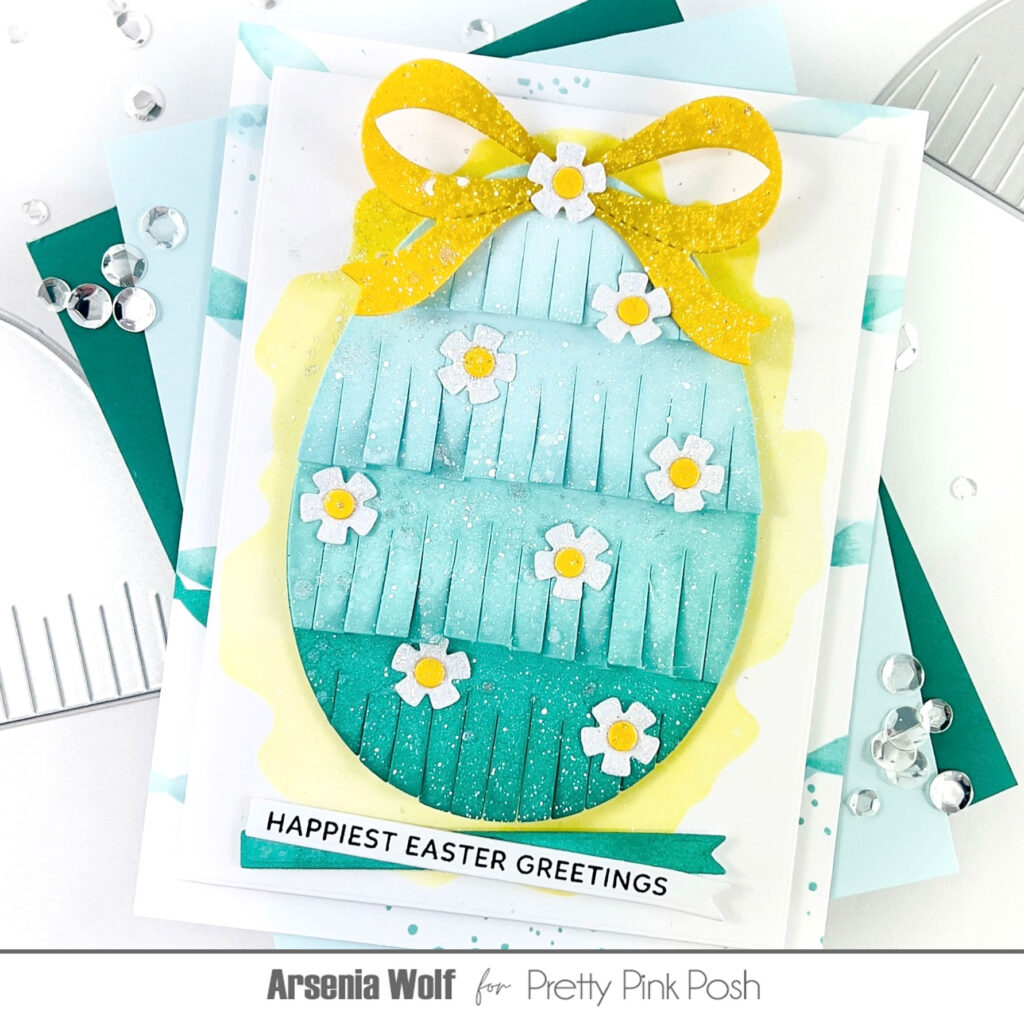
Hey there, crafty crew — it’s Arsenia here, and I’ve got a splash of sneak peeks to share using some seriously adorable new goodies: the new Seashells stamp set, Seashell Wreath stamp set, and Shoreline Border Dies. I created two ocean-inspired cards, and guess what? No alcohol markers in sight! Yep, I’m showing you how to make a big, colorful impact without picking up a single coloring pen.
I kept things bold and bright using just four dye ink colors — proof that less can definitely be more. Let’s dive right into the fun!
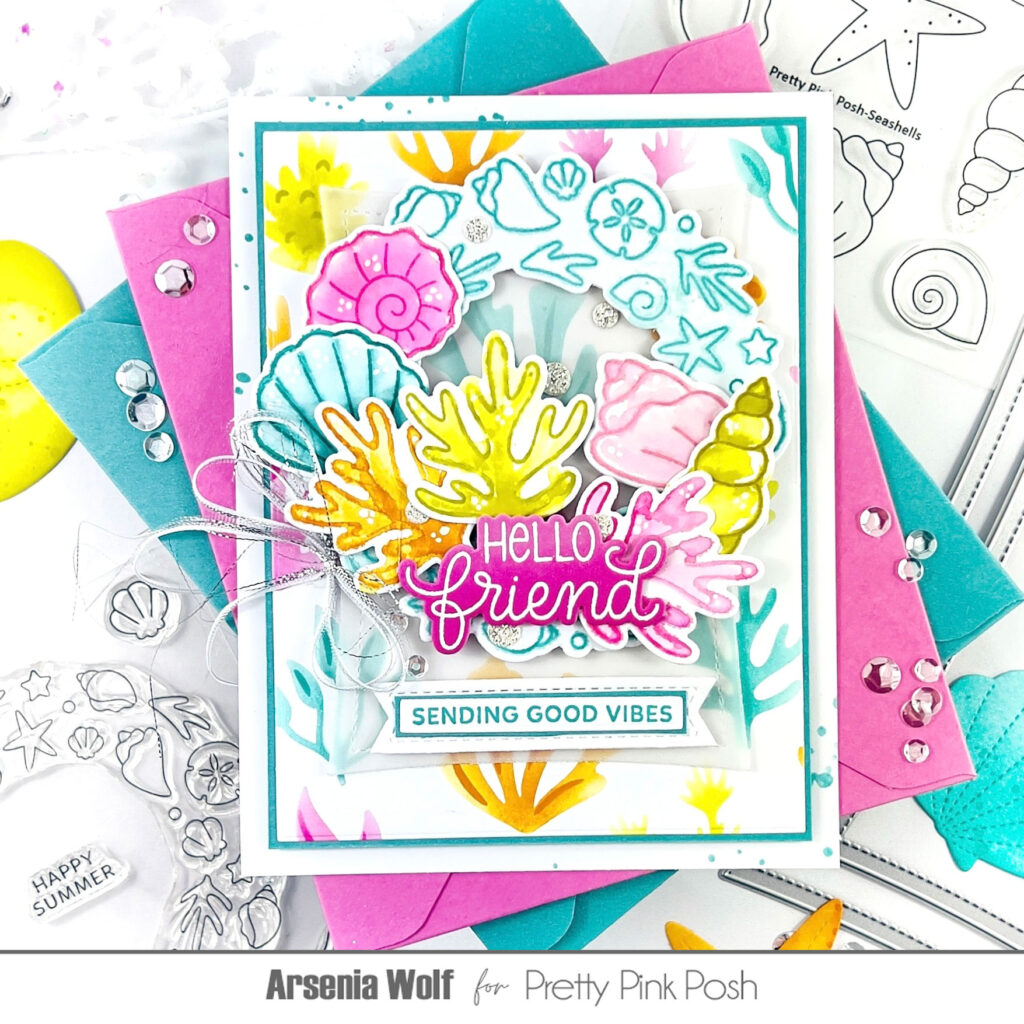
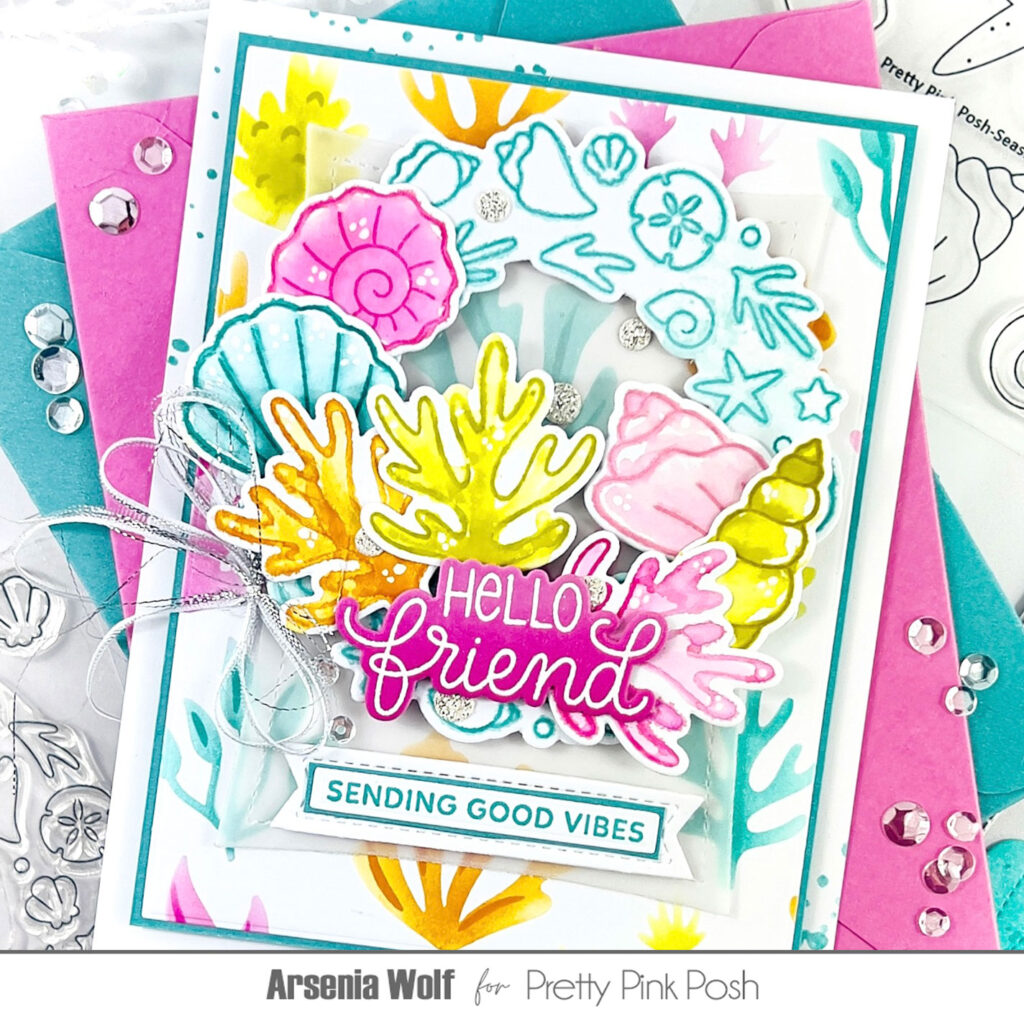
For this beauty, I created a dreamy faux watercolor effect — and it was so fun! I used watercolor paper, spritzed my dye-inked stamp images with water, then let the transformation happen. A few brush strokes here, a second stamp there, and boom — a soft, flowy look perfect for seashells. I used both new Seashells stamp set and Seashell Wreath stamp set! Once everything was die cut, it was time to build the background.
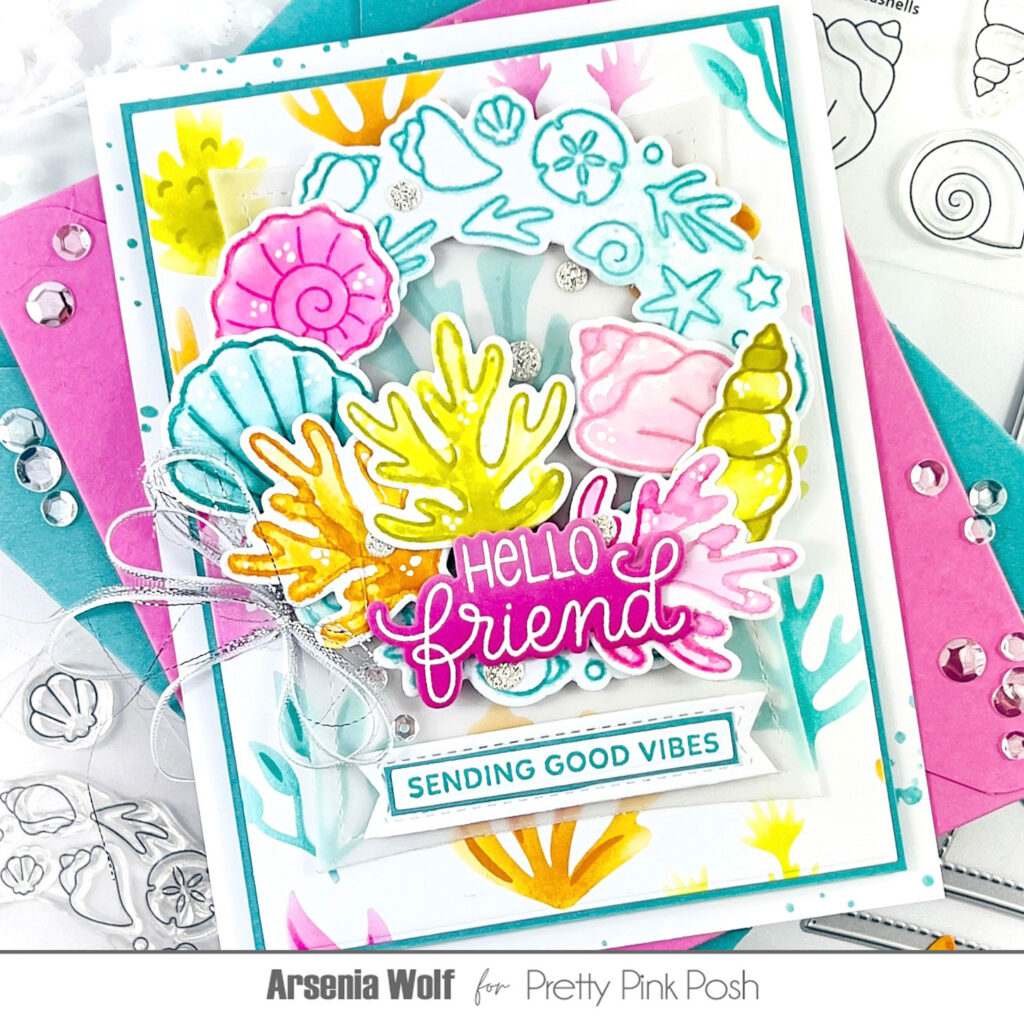
Enter: the gorgeous new Layered Coral Stencil Set. I inked it up using the same bold color combo, then layered it up with Coastal cardstock for some extra pop. A touch of vellum, using the Wonky Rectangles Dies, helped tone it down so my seashells could shine. I used a sentiment from Friend Greeting stamp set with coordinating dies and for a sub sentiment I used the new Sentiment Strips: Summer Stamp Set with the Sentiment Strip Dies! Add in some white gel pen highlights, a sprinkle of glittery “bubbles” (hello, Birthday Cake Pops and Party Flags Dies), and a little whimsical bow for good measure — ta-da! Ocean beauty!
Ready for another set?
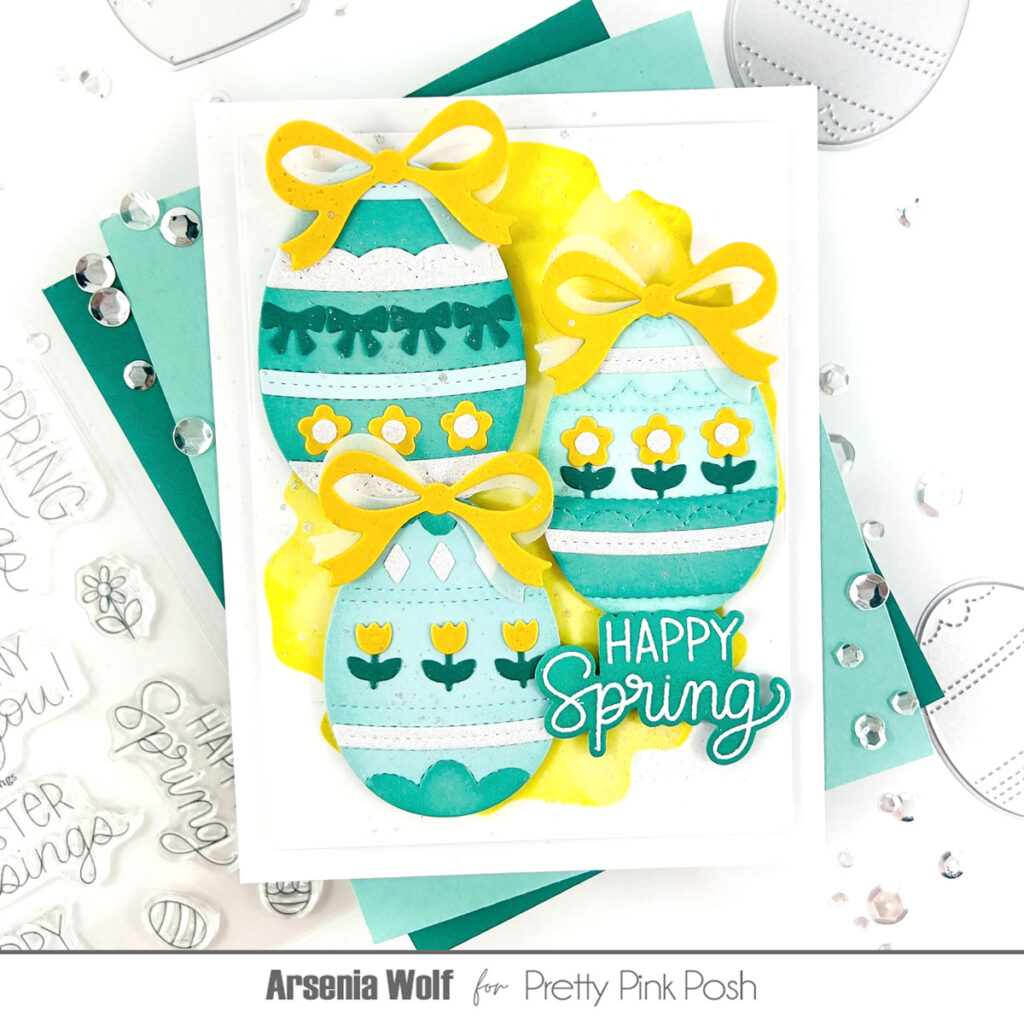
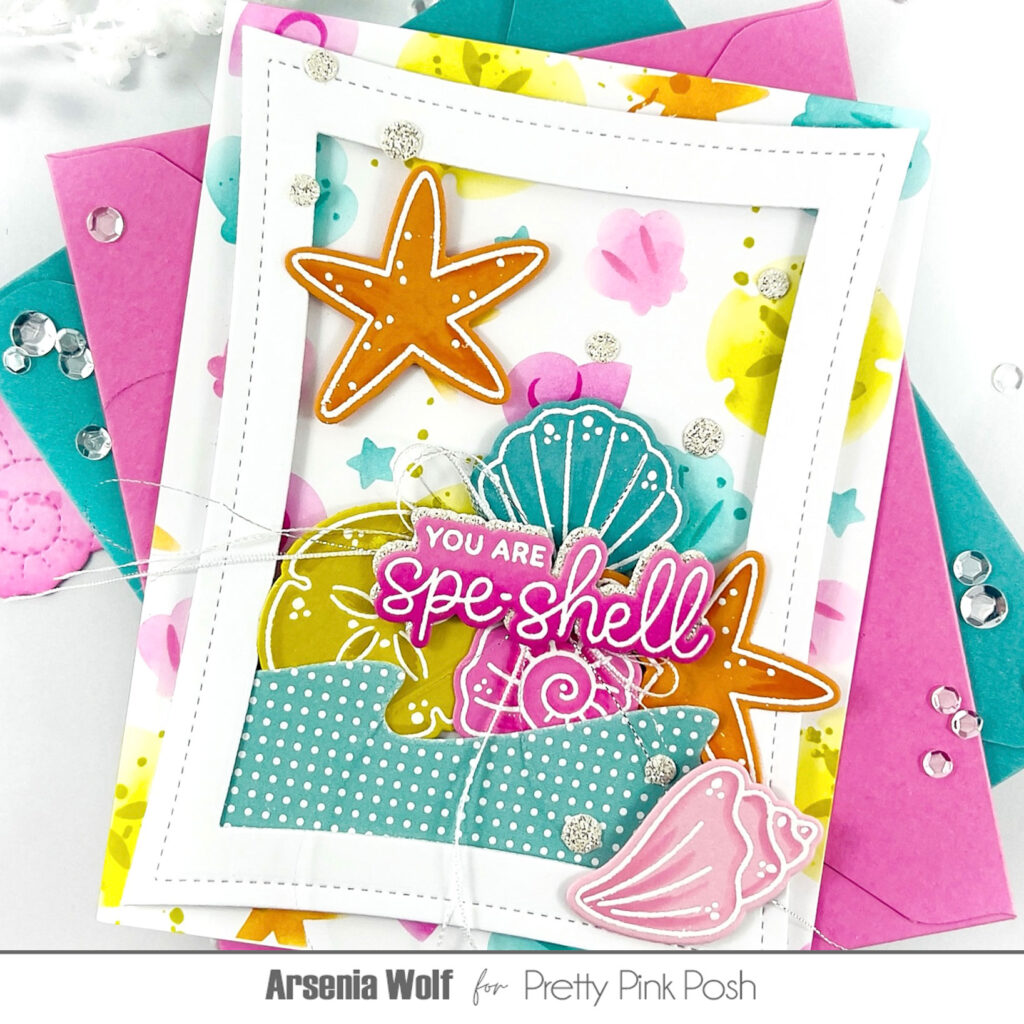
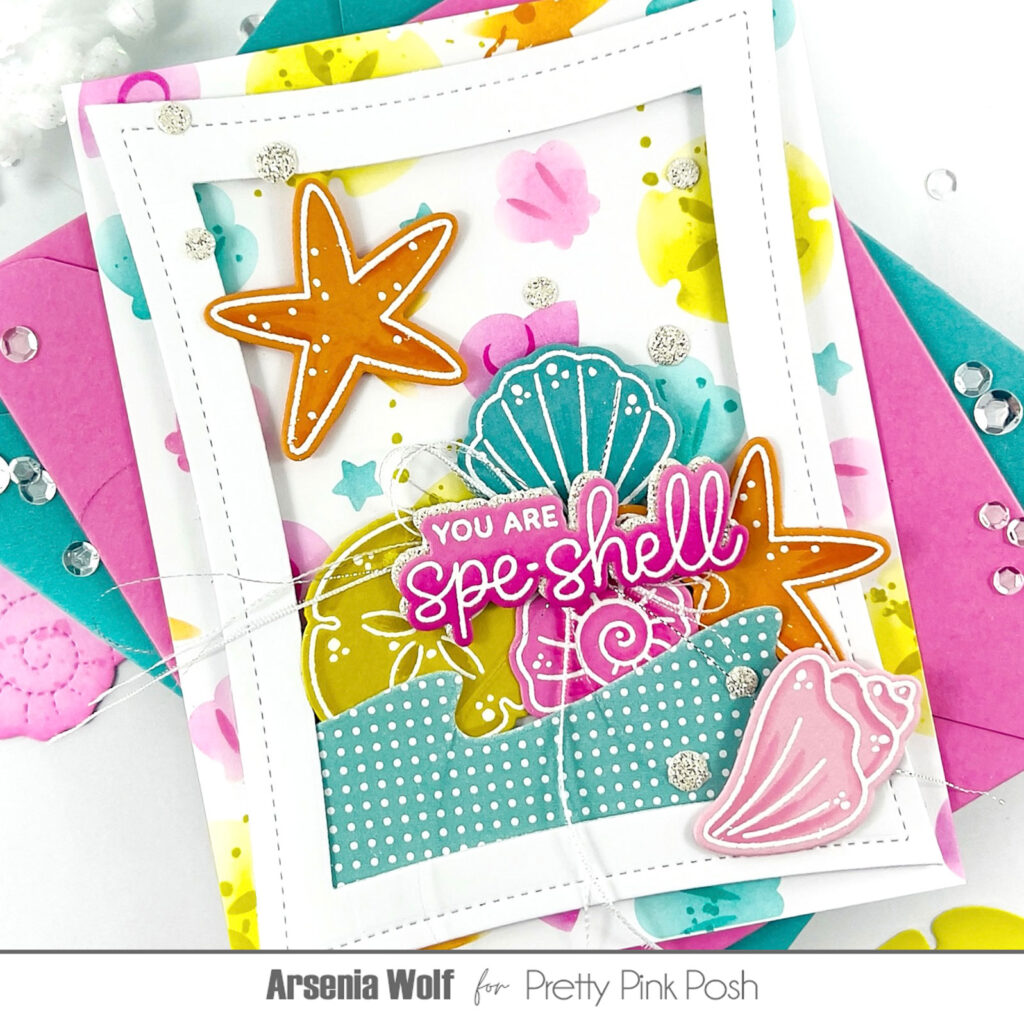
This time, I heat embossed the seashells from the Seashells Stamp Set, on colorful cardstock and gave them a little faux watercolor treatment with matching dye inks and a blending pen — subtle, soft depth that looks so dreamy! I die cut everything with the coordinating dies, added some gel pen sparkle, and used the Shoreline Borders Dies to create a wave out of patterned paper. (There are four shoreline styles in the set — so many possibilities!)
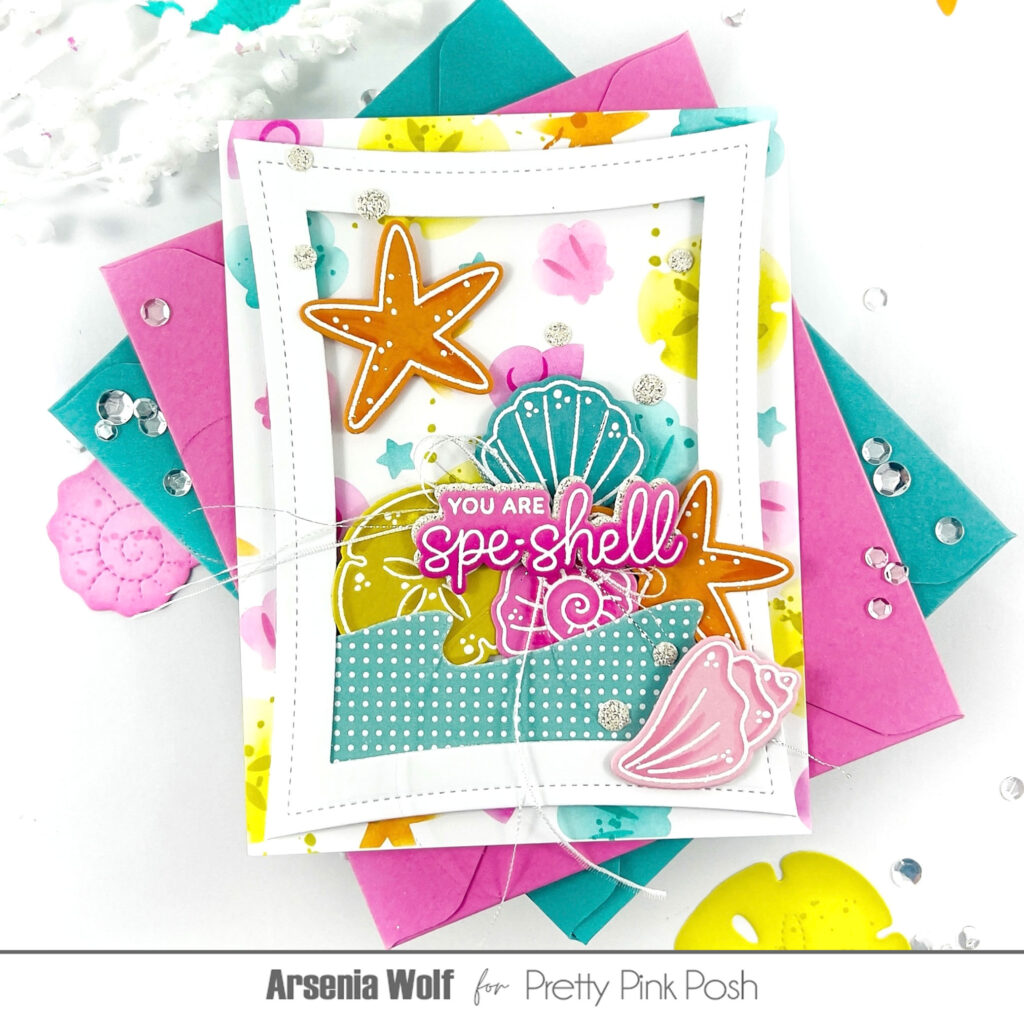
For the background, I went with the new Layered Seashell stencils and framed everything with my beloved Wonky Stitched Rectangles. Add in a sweet sentiment from the new Seashells stamp set and more glittery bubbles, plus a shimmery silver bow, and this card was ready to ride the tide.
Both of these cards are all about bold color, playful texture, and just enough sparkle to make a splash. I hope these ideas inspire you to get creative with your stash — even without traditional coloring!
Get ready — you are going to fall in love with this release. Don’t forget to check out all the other inspiring projects from my crafty friends below!
I hope you’re as excited as I am about these new stamps as we are. The possibilities are endless! Stop by tomorrow as we reveal more new products.