Sneak Peek: Decorative Hearts
Hello everyone! This is Melissa and I’m here to share a sneak peek post made with the adorable Decorative Hearts stamps and coordinating dies that will be released soon.
New release will be available January 3rd
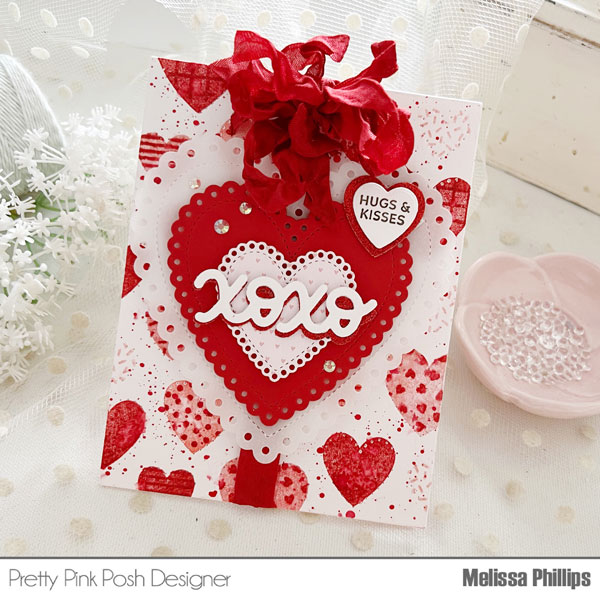
Did you know that Valentine’s Day is my favorite holiday to create for? Something about hearts and the colorful shades of reds and pinks that really inspire me and the Decorative Hearts stamp set from Pretty Pink Posh has certainly jumpstarted my creativity.
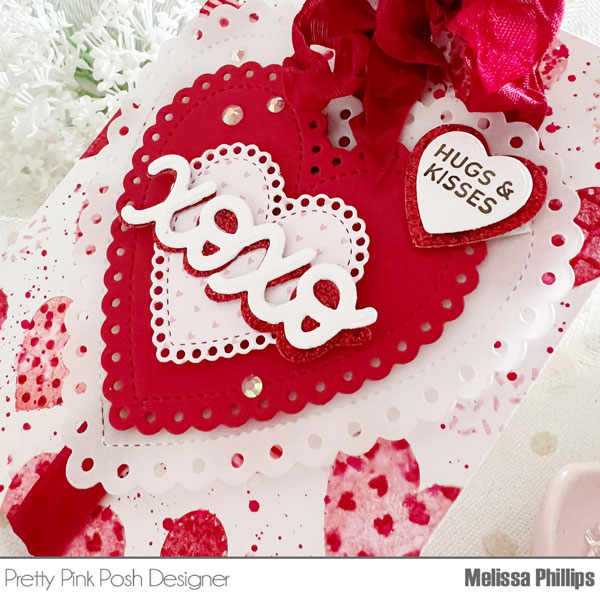
I’ve used the new Pierced Hearts die to create my card base and then stamped Decorative Hearts in reds and pinks in each empty heart space left by the Pierced Hearts die. I spritzed my stamped surface with a bit of water and added red splatters using my Distress Spray.

I then die cut three hearts of different sizes using the adorable, new Eyelet Hearts dies. These layered hearts provided the perfect space for my “XOXO” die cut that is from the Decorative Hearts die set. I added a secondary sentiment on a layered die cut Decorative Heart near the upper corner.
My next card uses a row of these sweet Decorative Hearts lined up down the edge of my card. They look adorable layered over die cut Eyelet Hearts, don’t they? They are truly the perfect fit for each other!
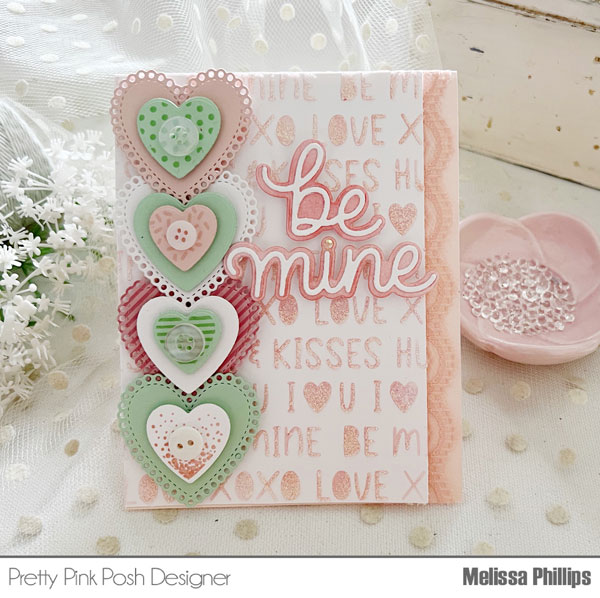
In the background I have used the new Valentine Words Stencils, first using ink in a soft pink and then going over them with Nuvo Moonstone Glitter Paste. They look dazzling all sparkly and shimmering.
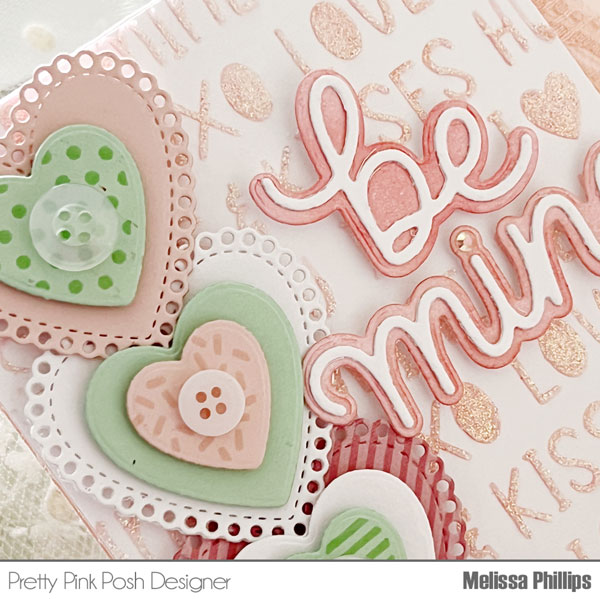
My darling die cut sentiment was cut using the new Be Mine Shadow dies…I adore these! And, I am smitten with all of the new Pretty Pink Posh products coming out this month. I think you’ll love them too! Come back tomorrow for another sneak peek!