Sneak Peeks

| |

Sneak Peek: May 2024 Dies

Good morning! It’s Lindsey here, and I am excited to give you a peek of the fun mix of dies releasing this month.  There are some awesome basics to add to your stash as well as a bunch of new dies to help you celebrate oodles of happy occasions – graduation, wedding, baby, and more!  You’re gonna love them!  

New release will be available May 8th

Sneak Peek: May 2024 Dies

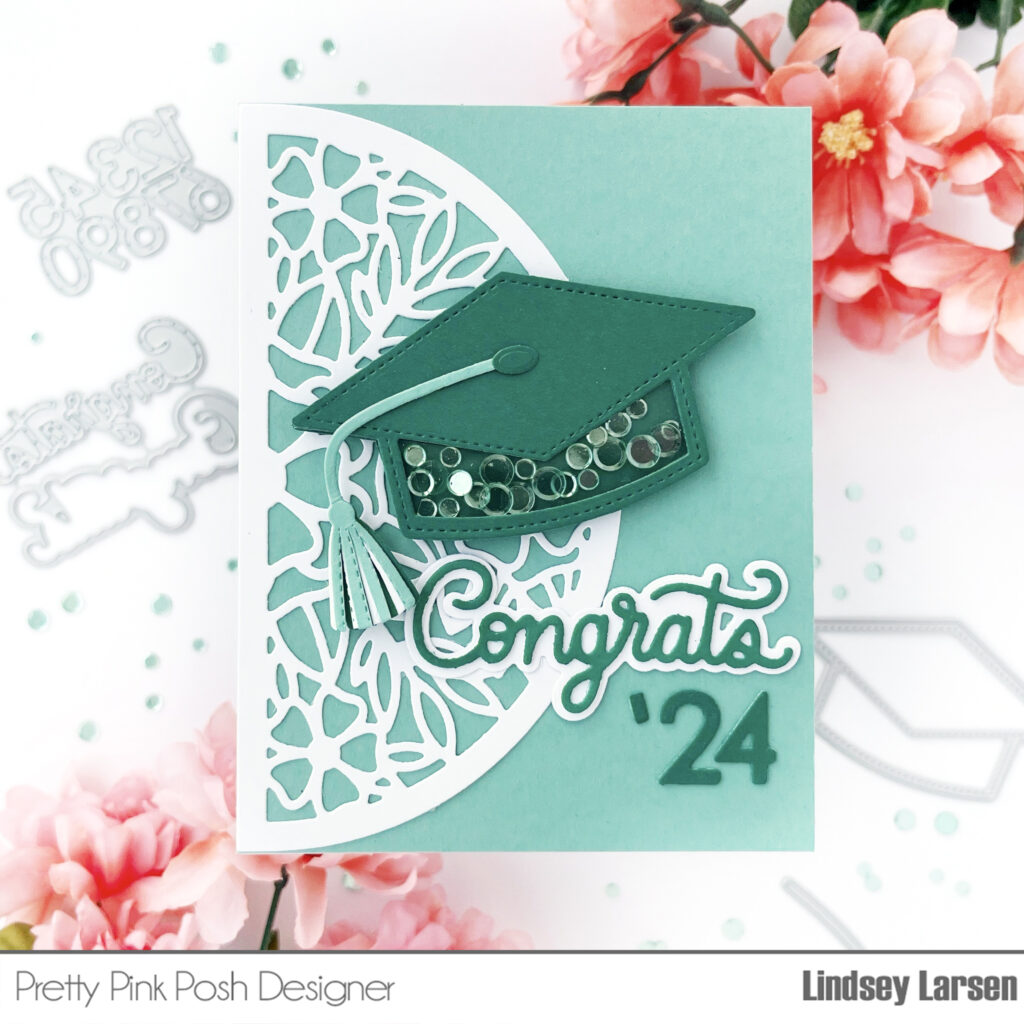
Since graduation season is upon us, I immediately pulled out the fun Graduation Cap Shaker Die. This die gives you options to add a shaker element to the top of the cap, the bottom of the cap, both, or no shaker element at all. You choose. :) 

Sneak Peek: May 2024 Dies

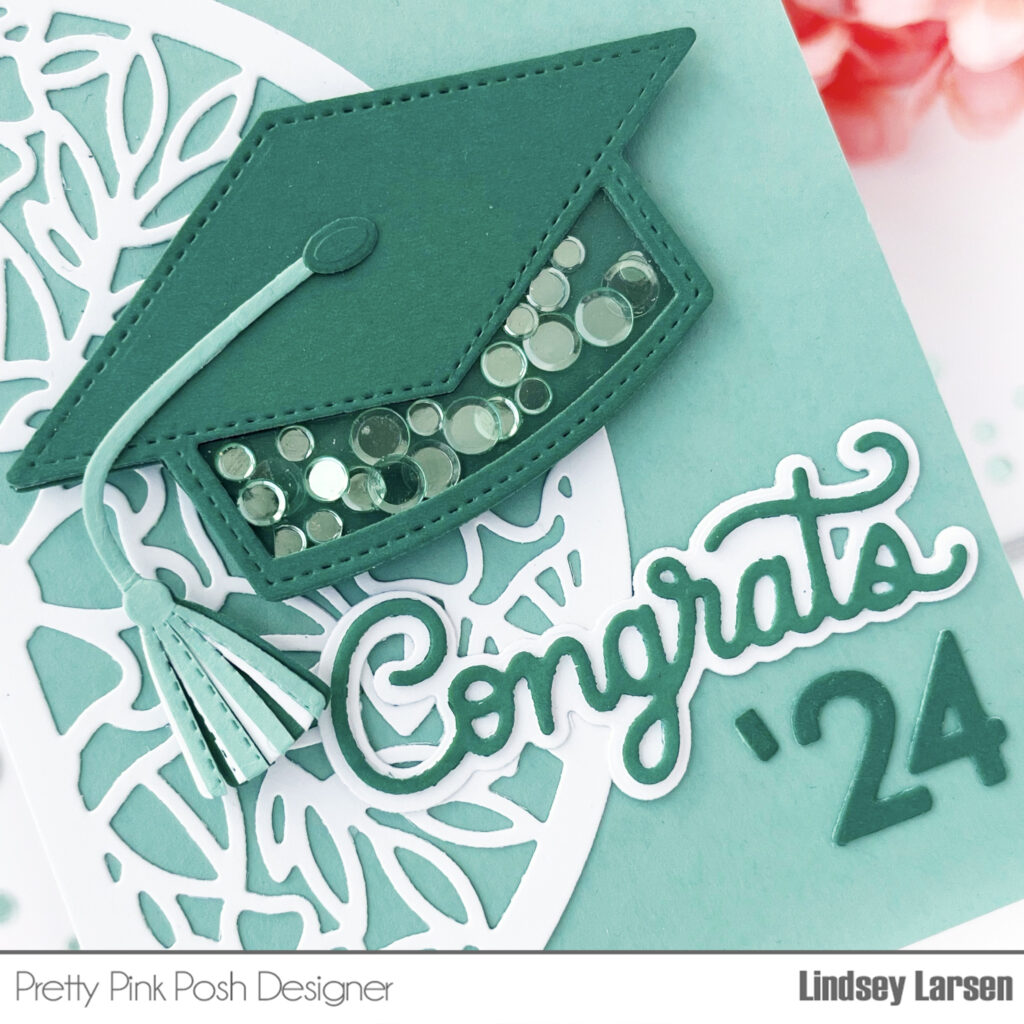
On my card I decided to fill the bottom of the Graduation Cap Shaker with Mint Shimmer Confetti Mix. I jazzed up the tassel a bit by trimming along the stitched lines and layering three colors of cardstock.

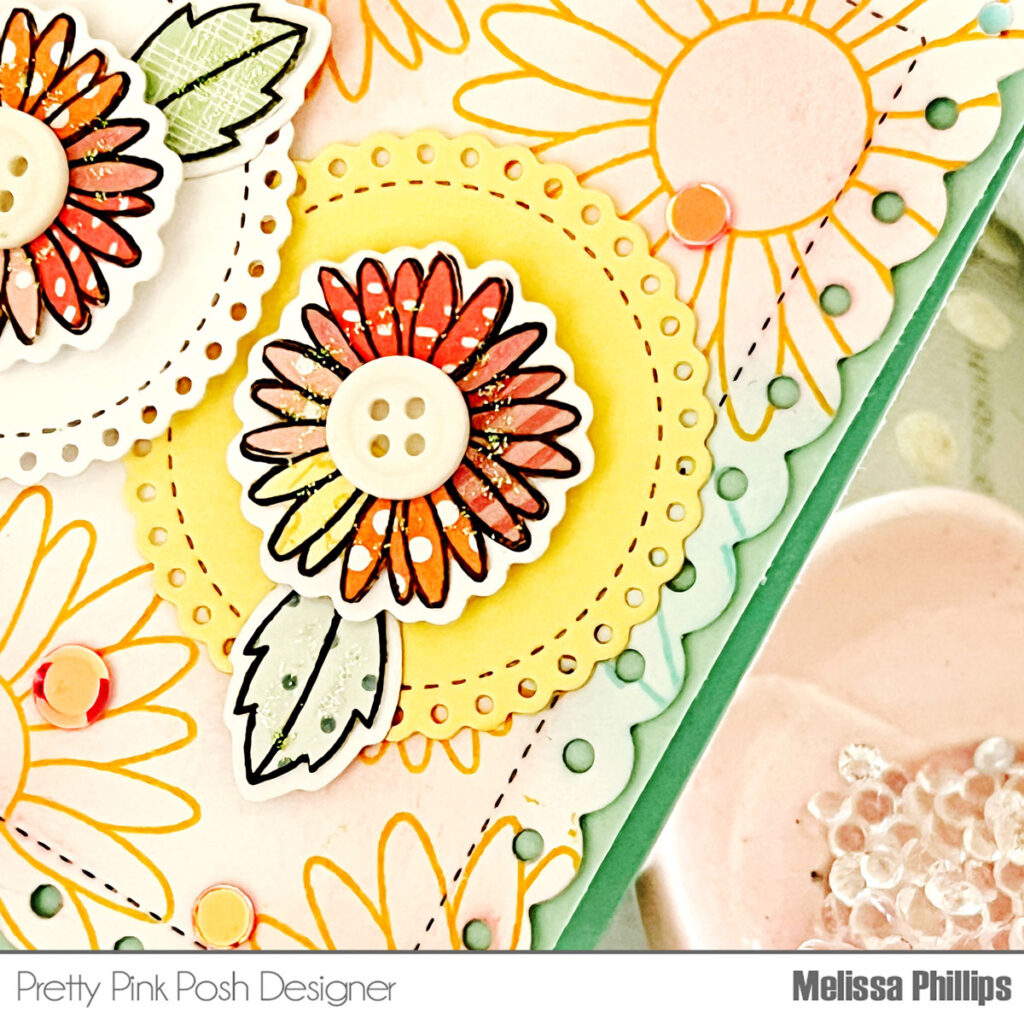
I considered adding some florals to the top of the graduation cap because I think the personalized graduation caps are so fun, but I opted to use the beautiful new Floral Semicircle Die to add florals to my card base instead. 

Sneak Peek: May 2024 Dies

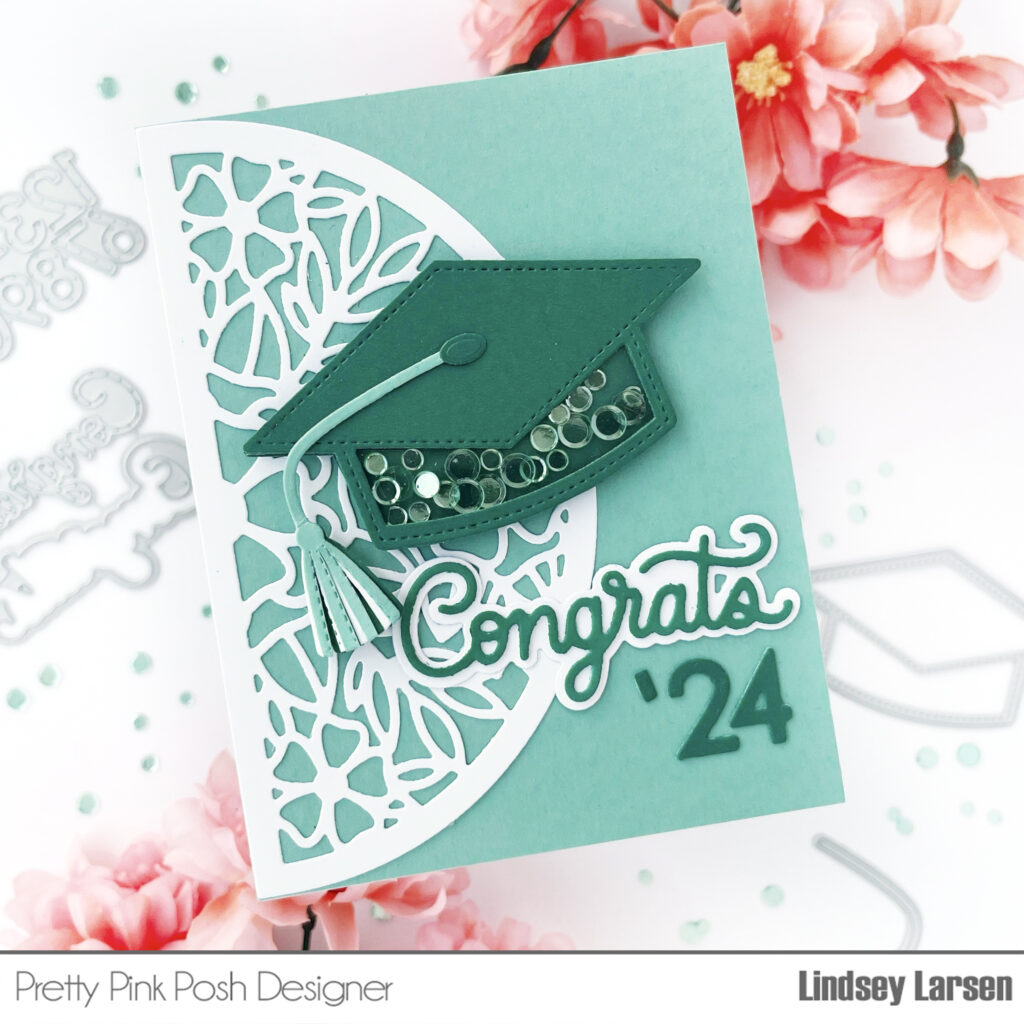
I finished the card with the Congrats Shadow Die and some numbers cut with the previously released Graduation Mug Additions Dies. This simple design makes it really easy to customize colors for your graduate. And if you want to go a little more masculine, you can always swap out the florals with the solid, stitched semicircle die in the Floral Semicircle die set.  

Sneak Peek: May 2024 Dies

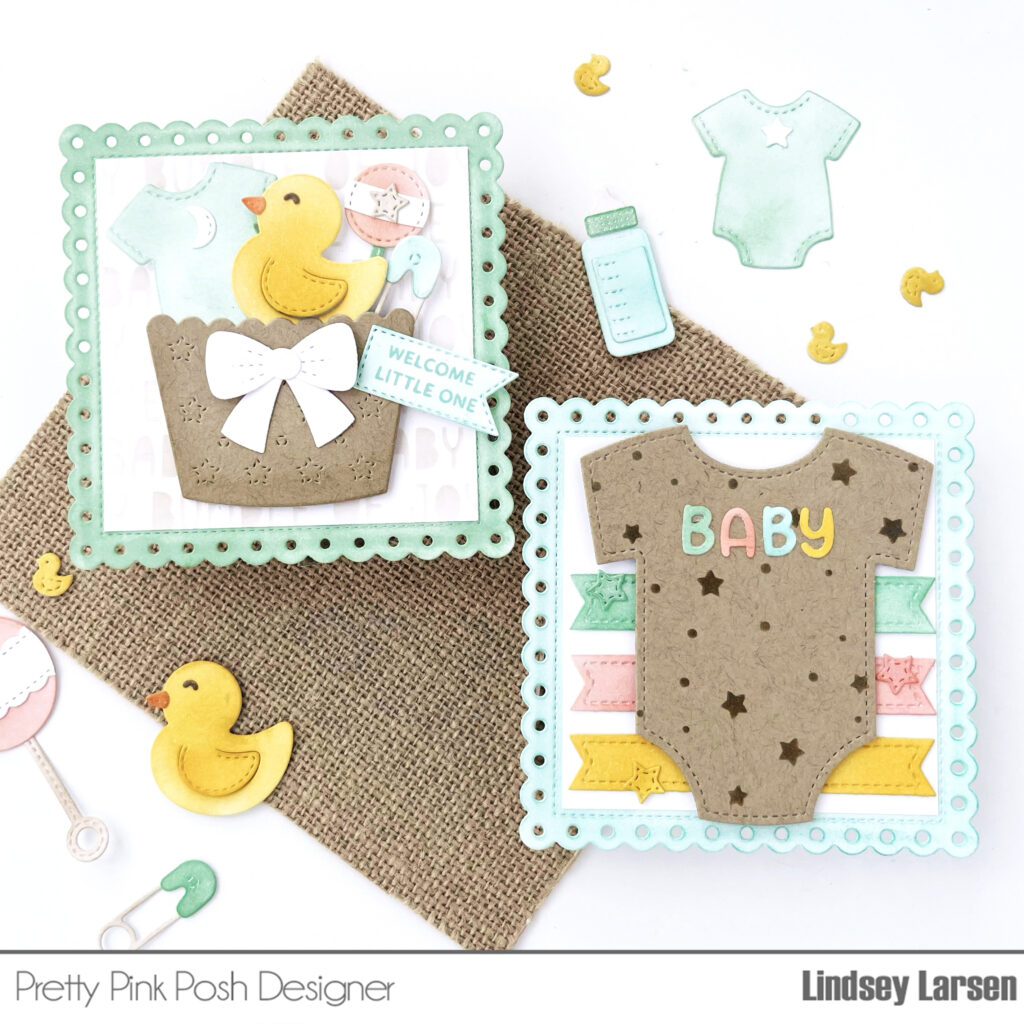
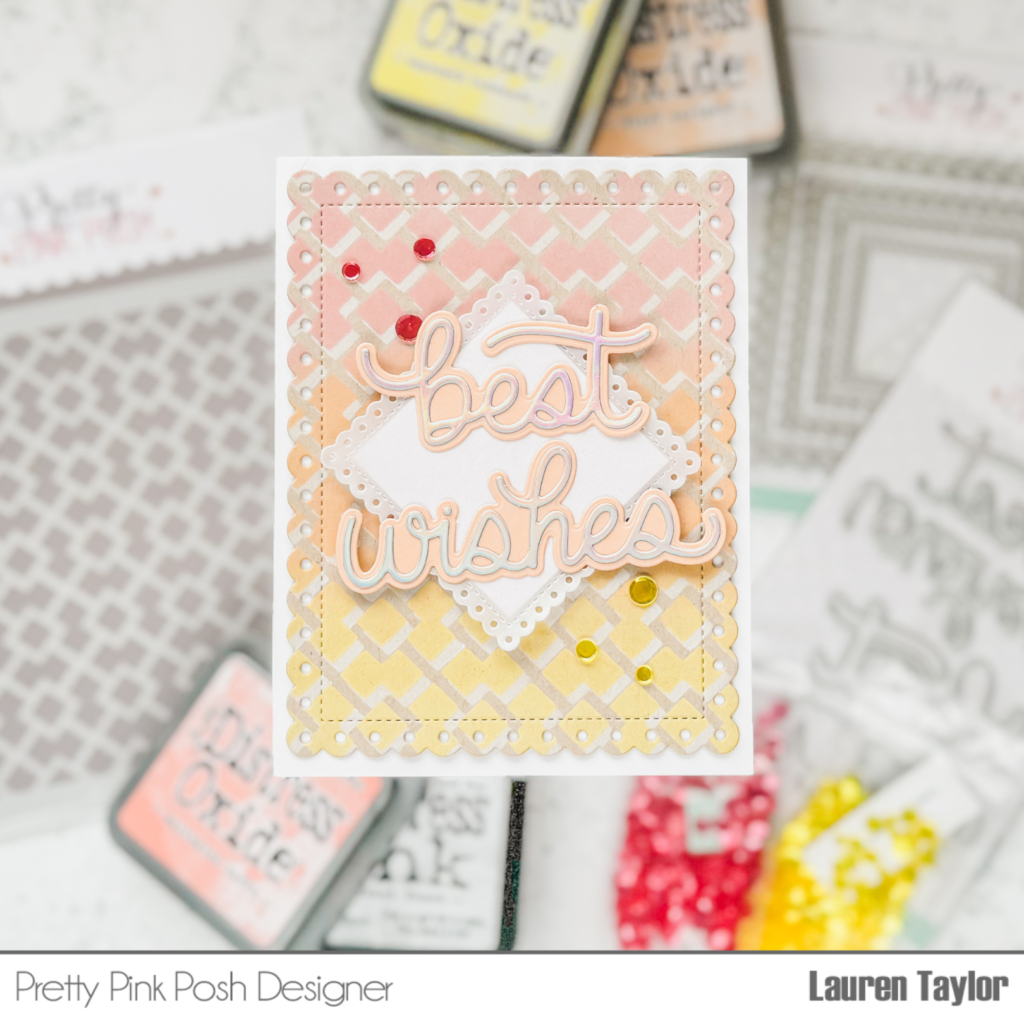
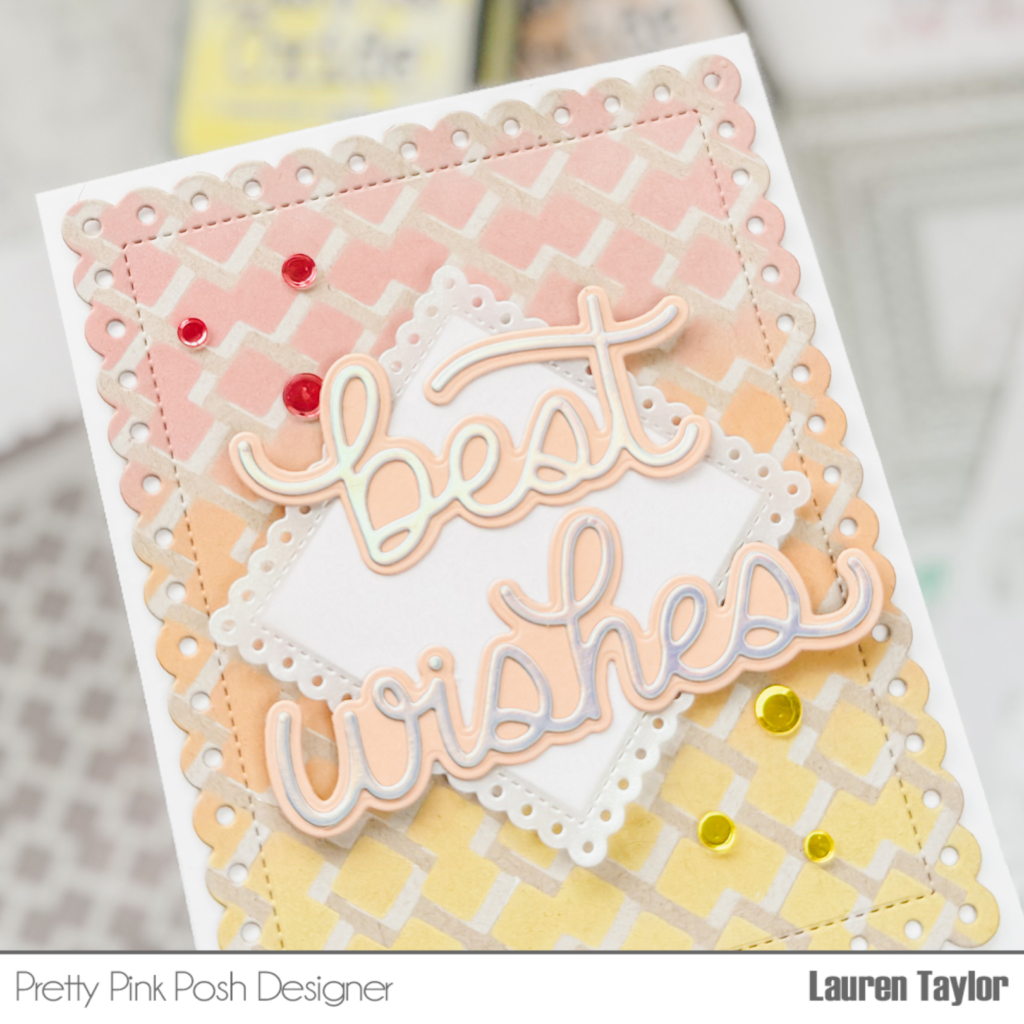
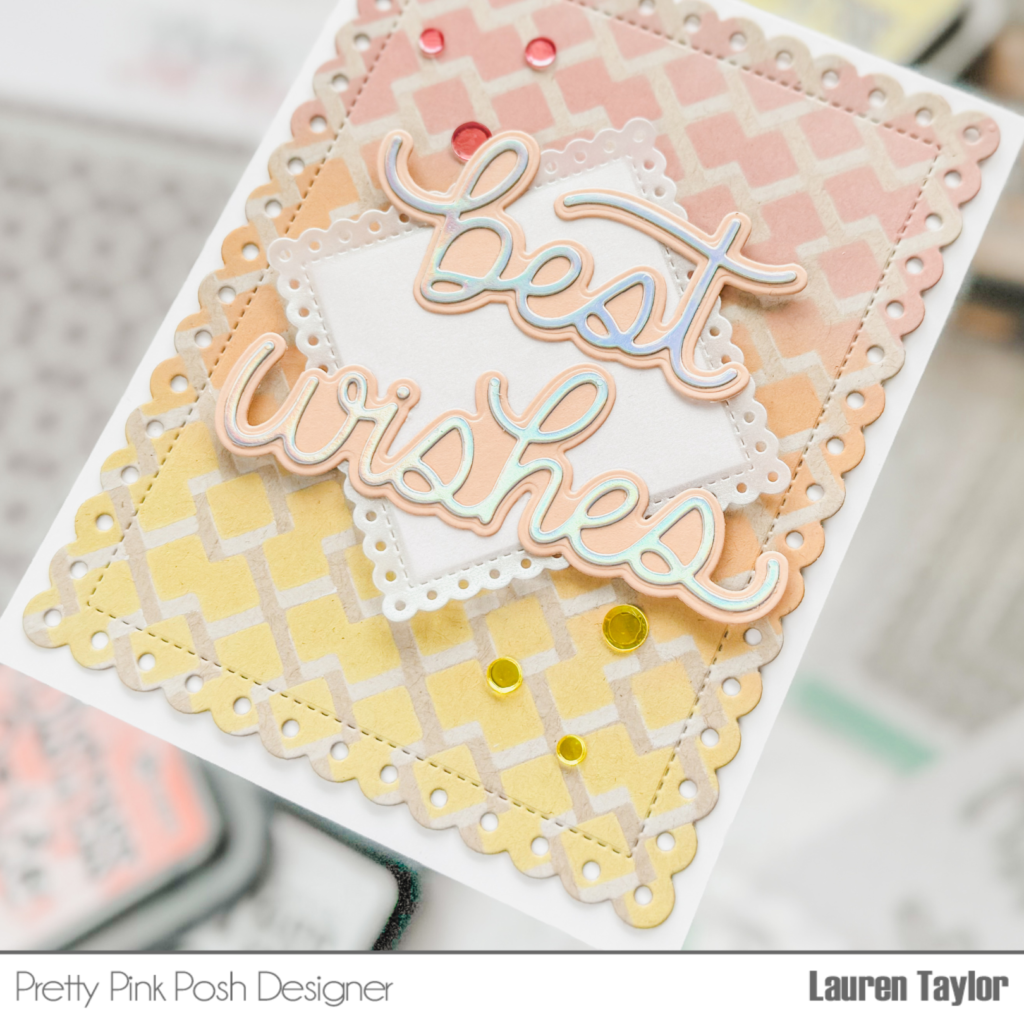
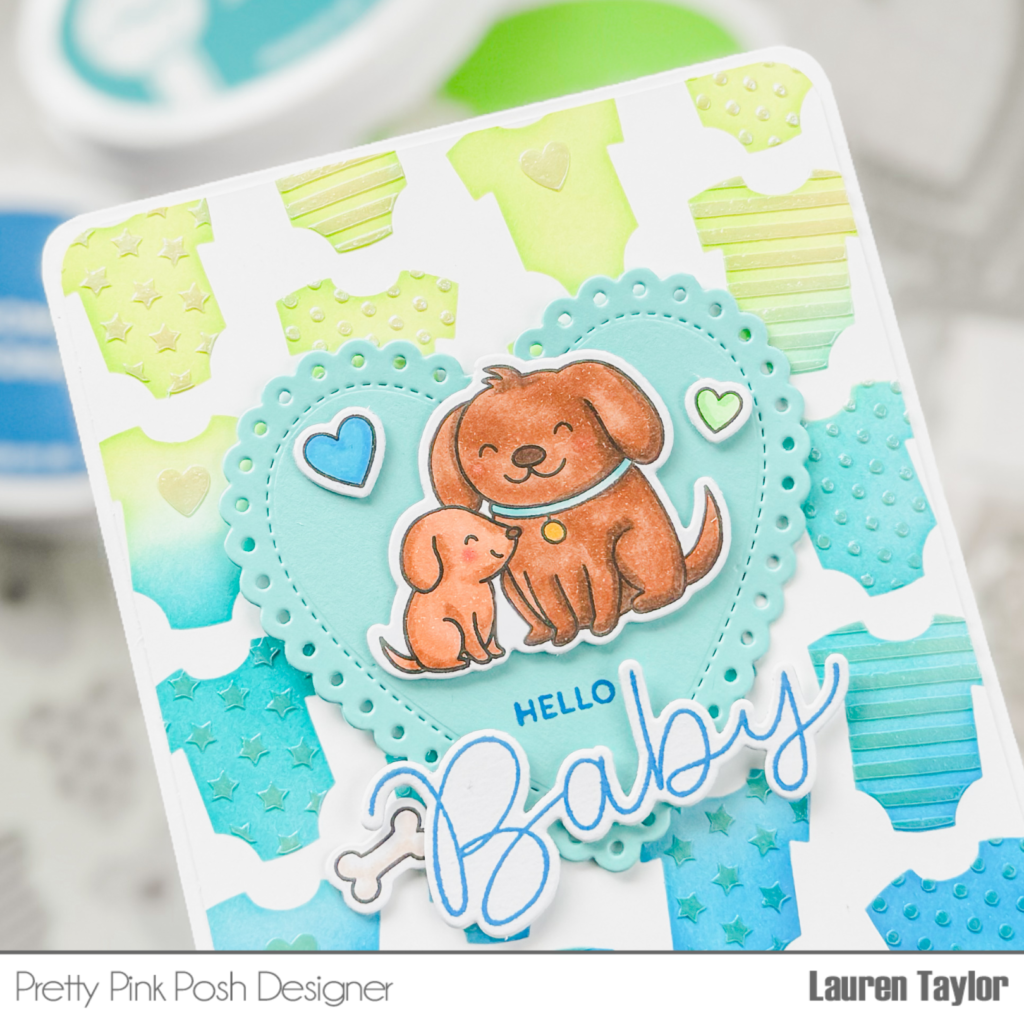
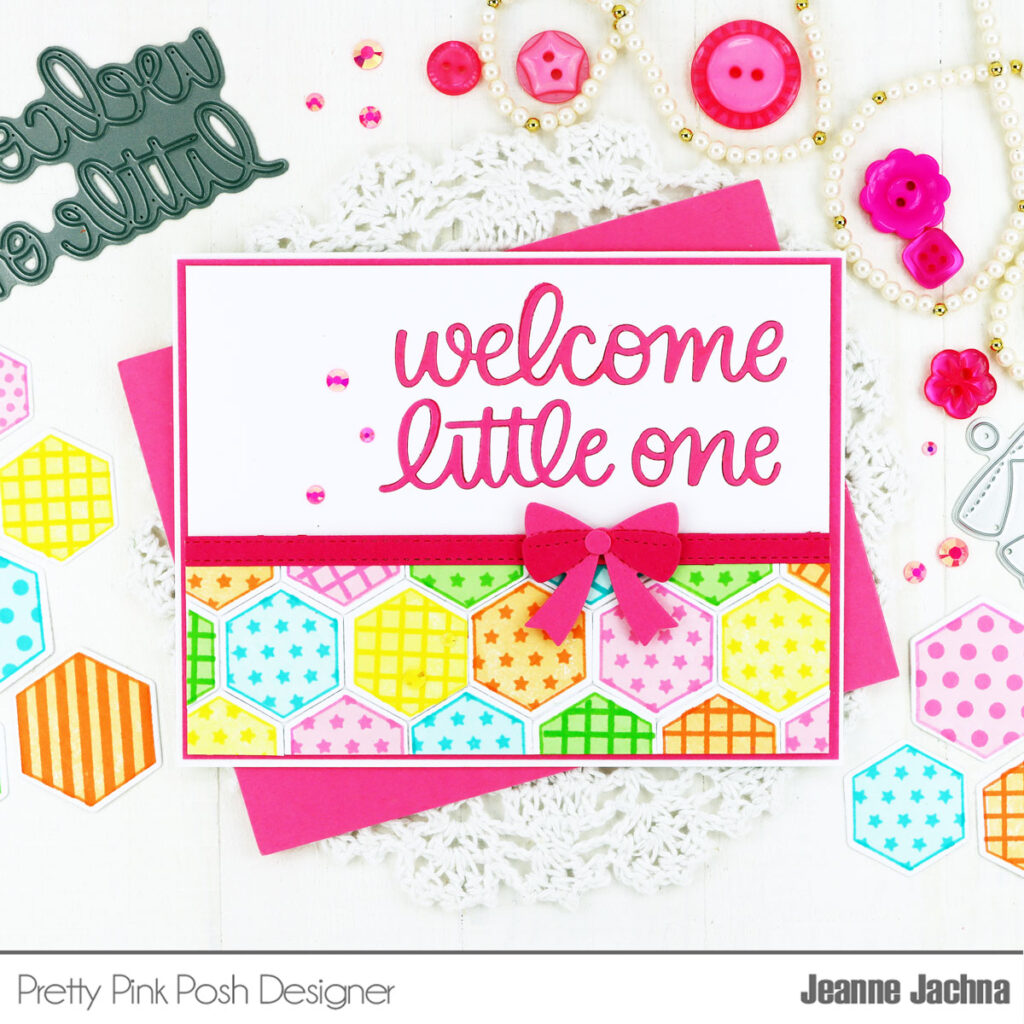
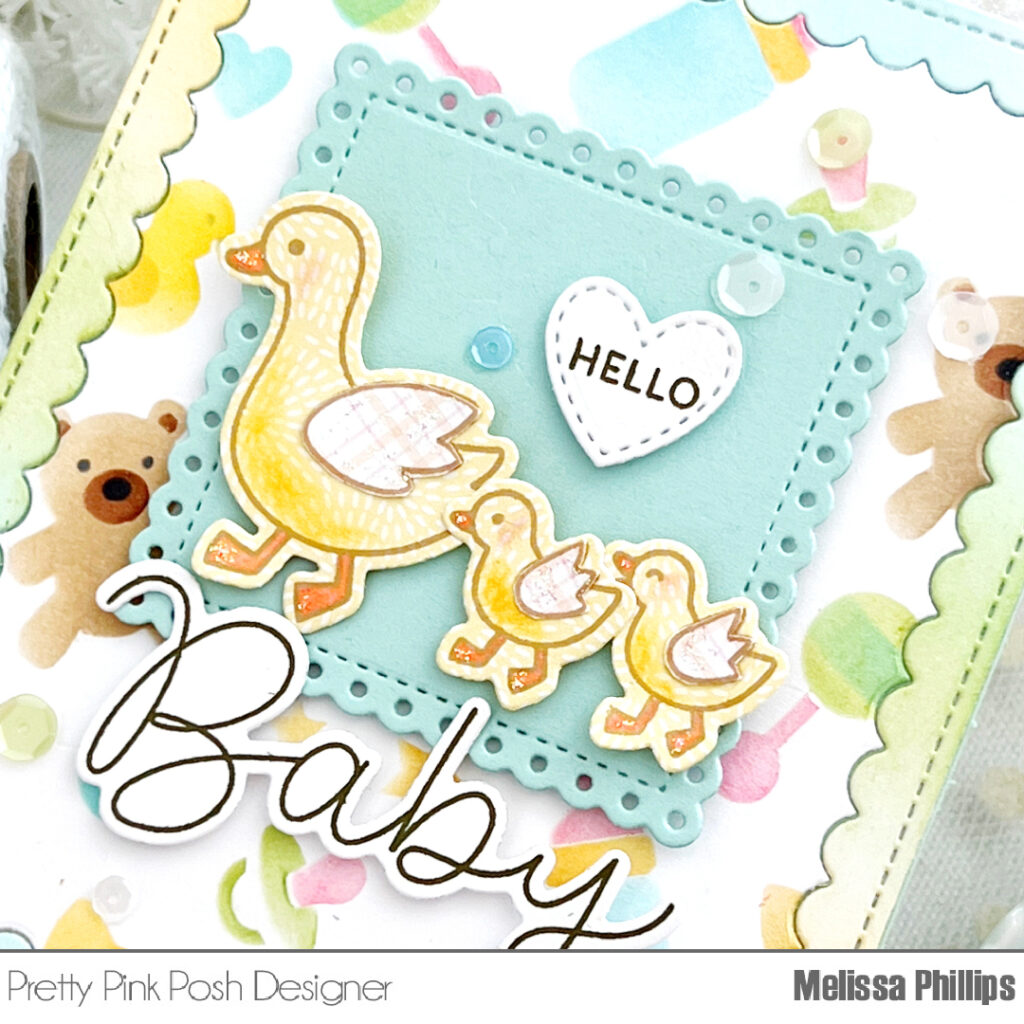
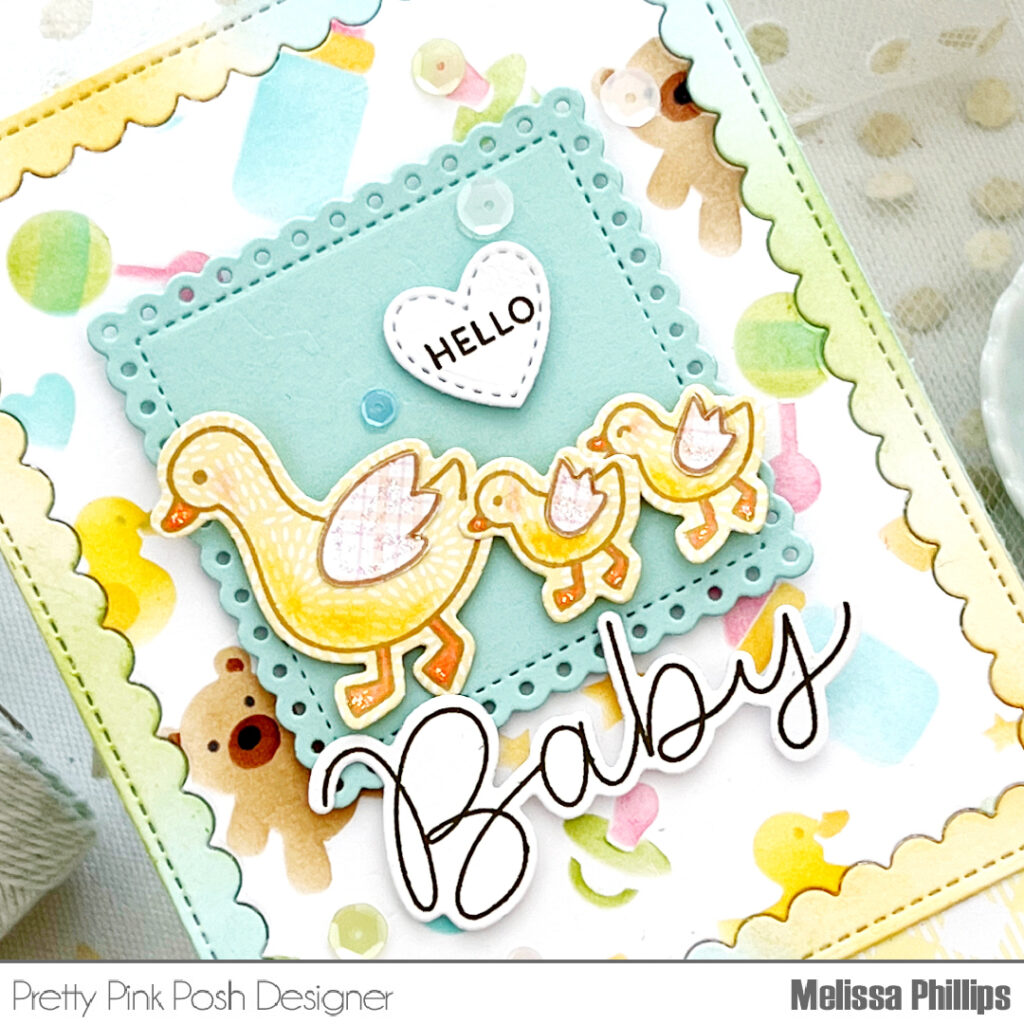
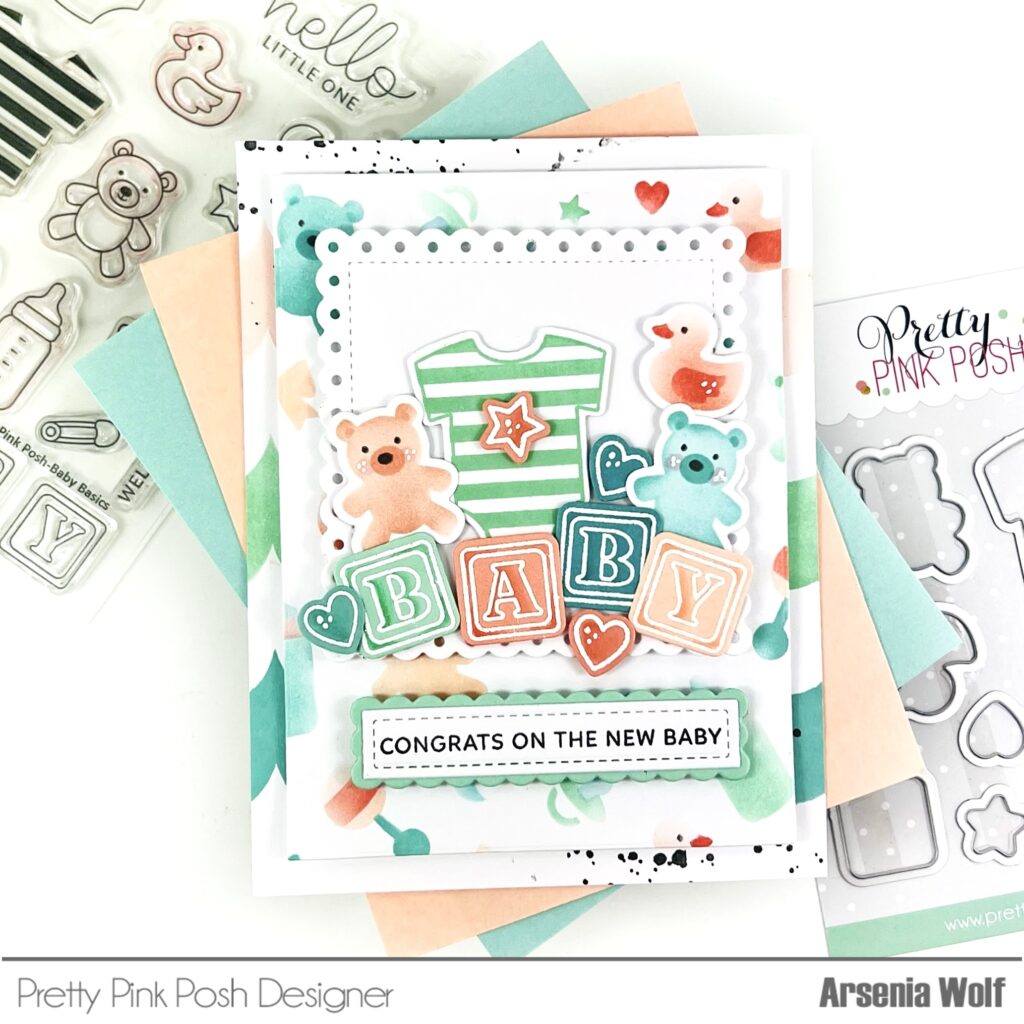
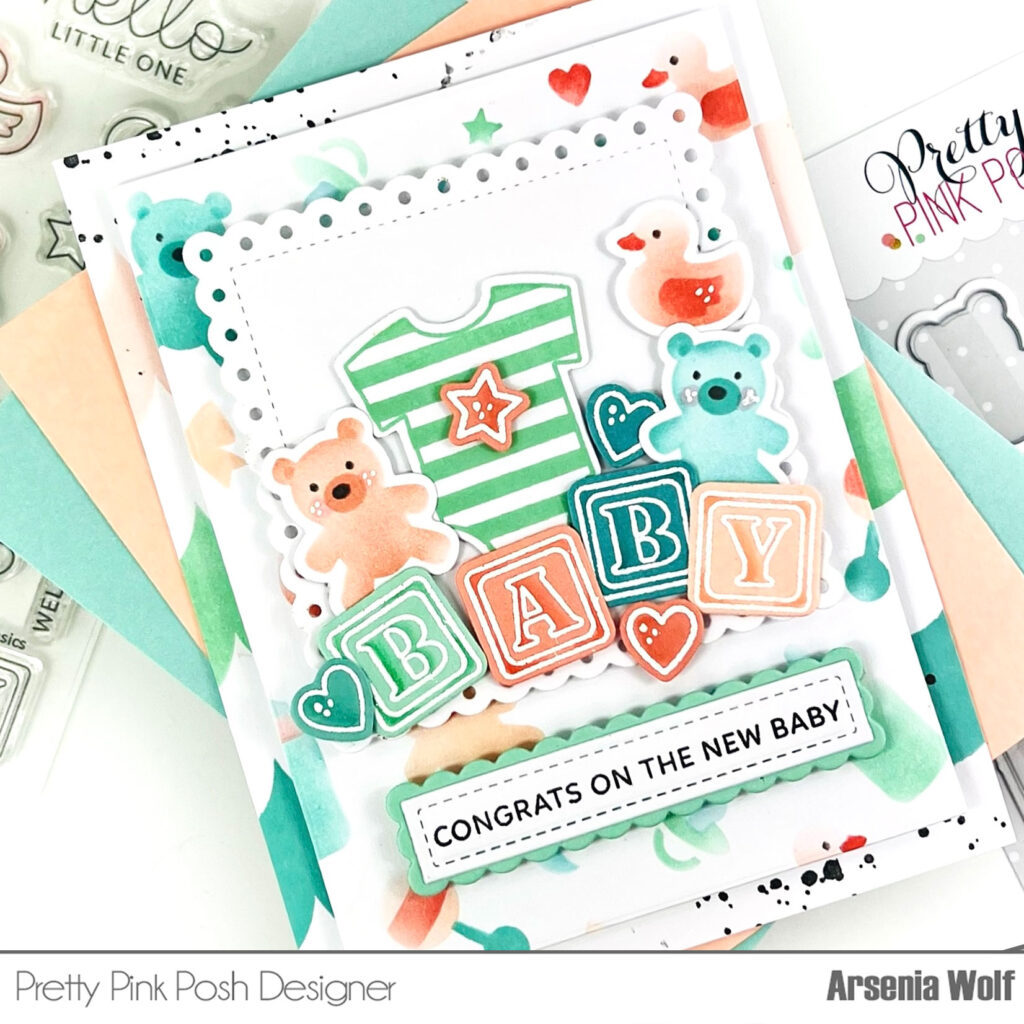
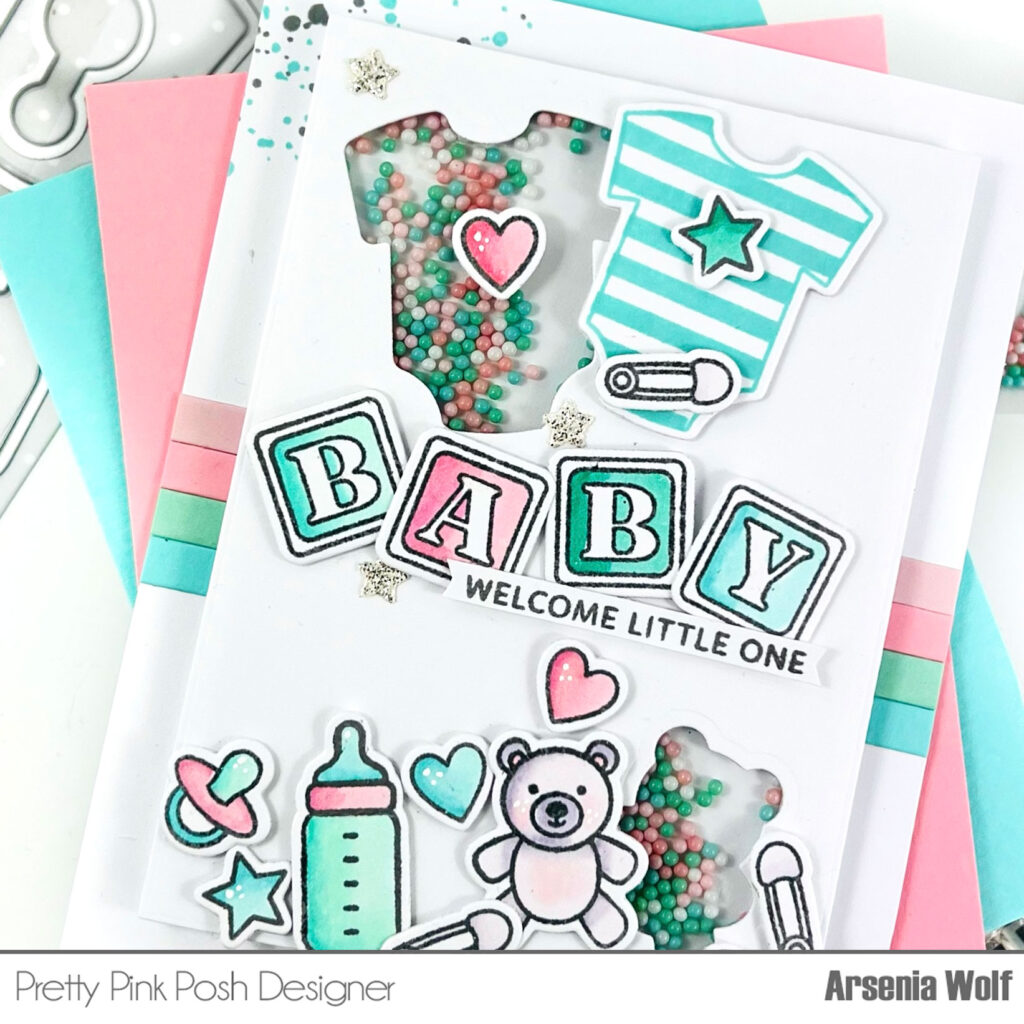
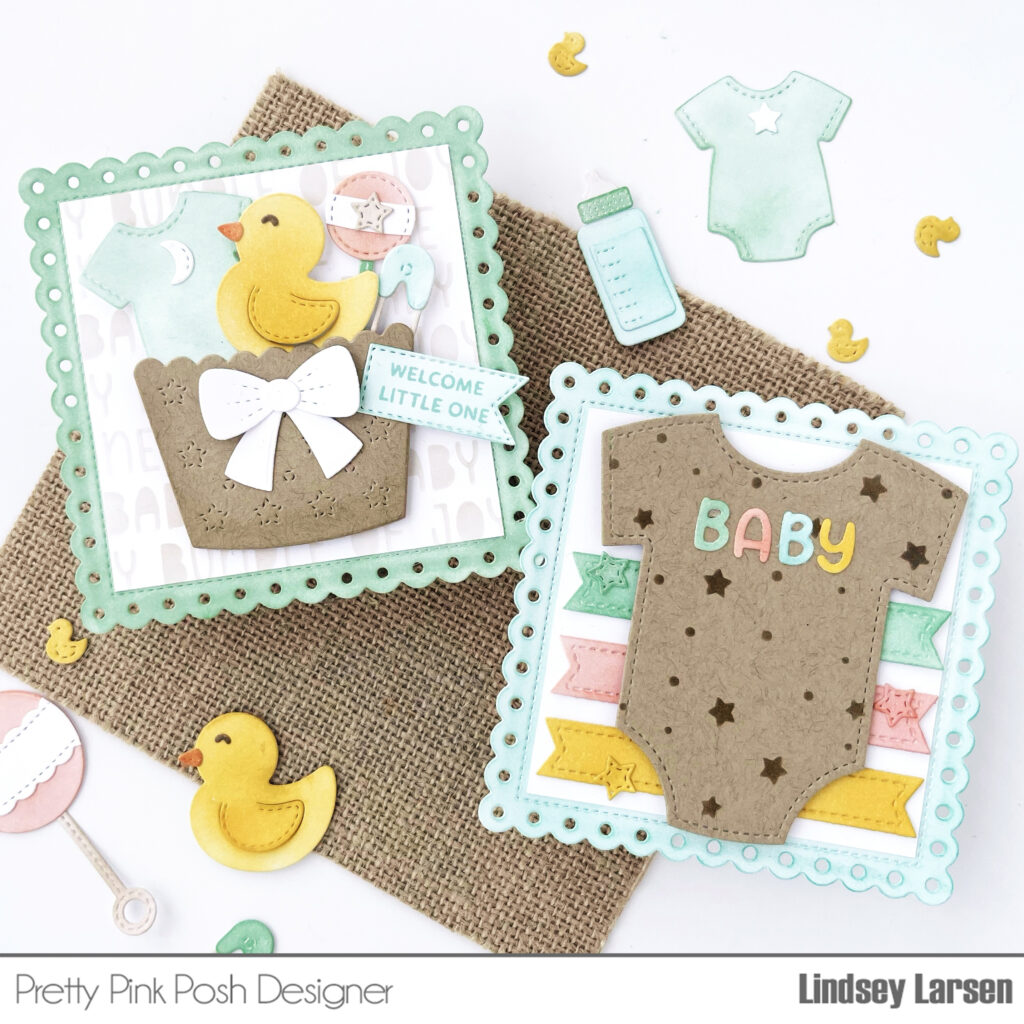
The baby themed products this release are absolutely darling!  I have six friends having babies in the next couple months, so I have lots of baby cards to make. I made this set of cards using the largest of the new Eyelet Squares dies.  

Sneak Peek: May 2024 Dies

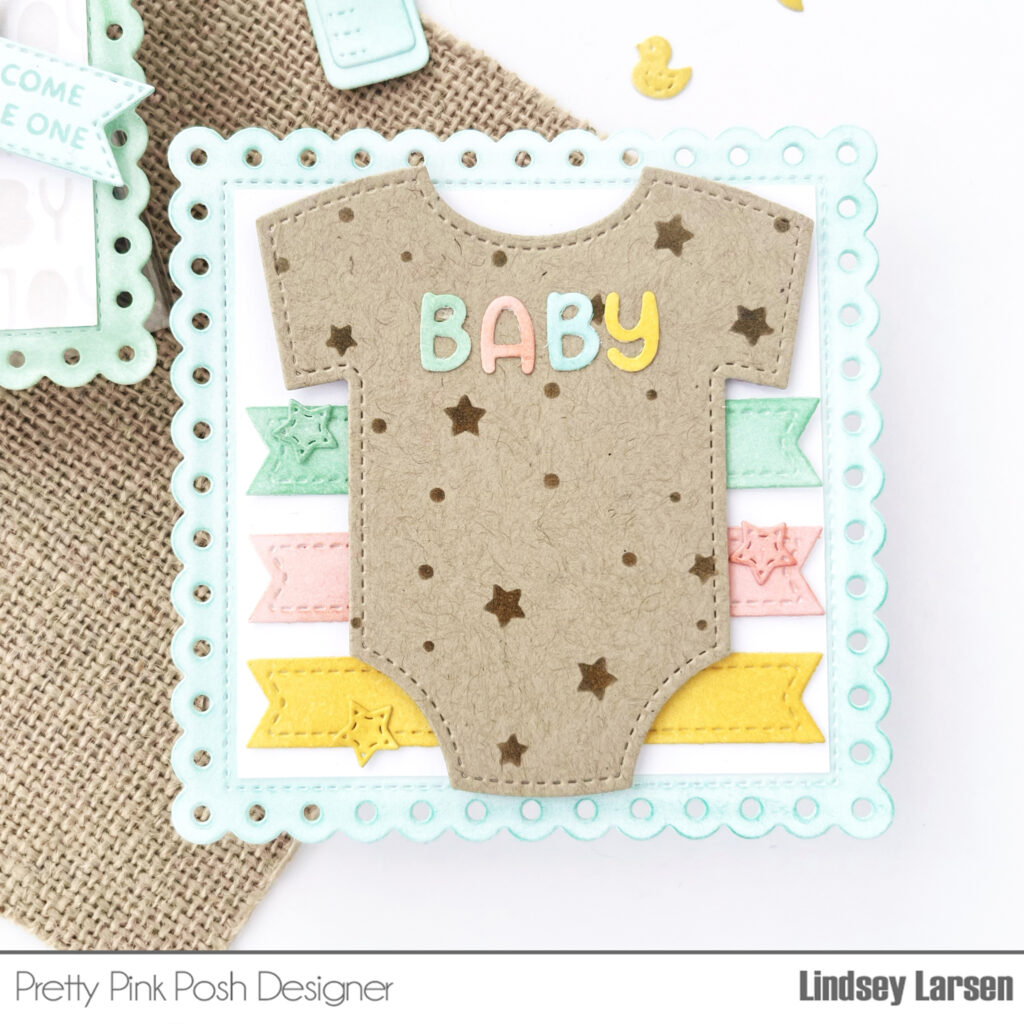
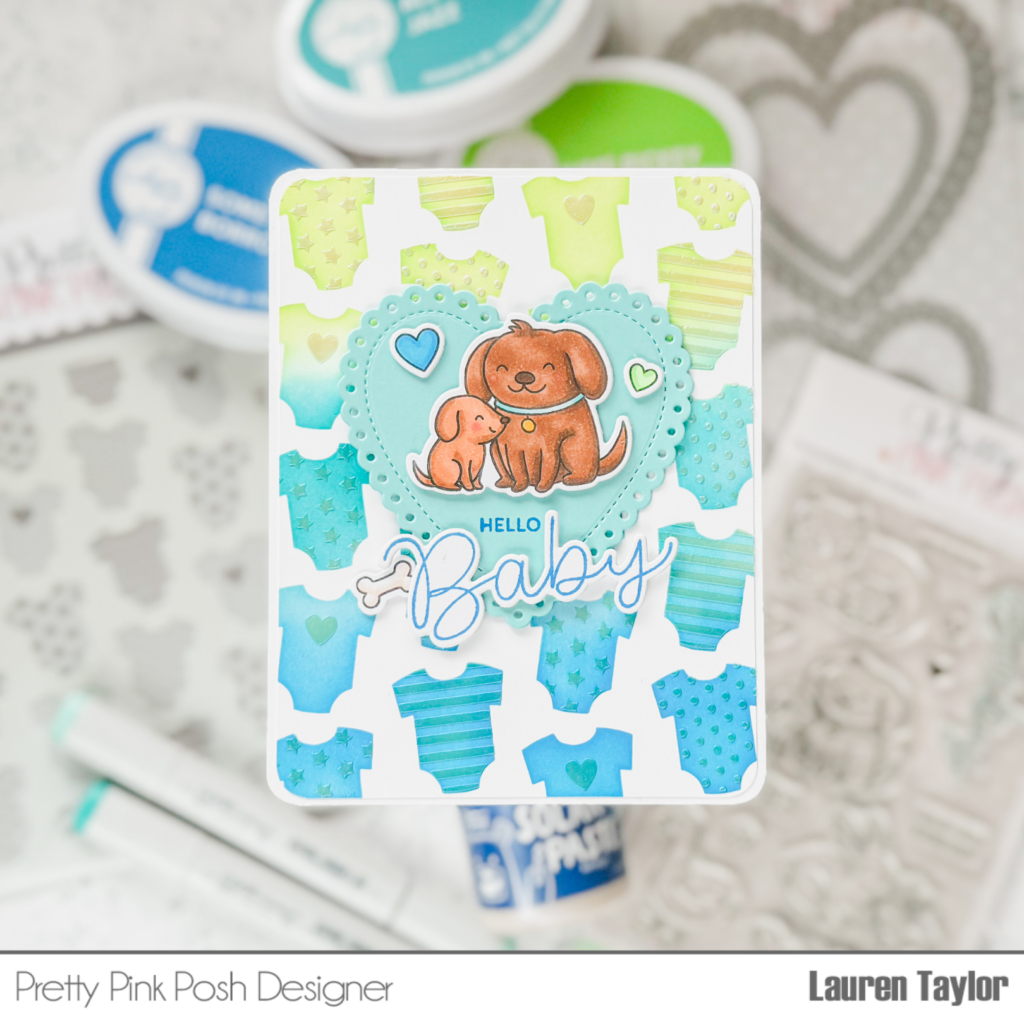
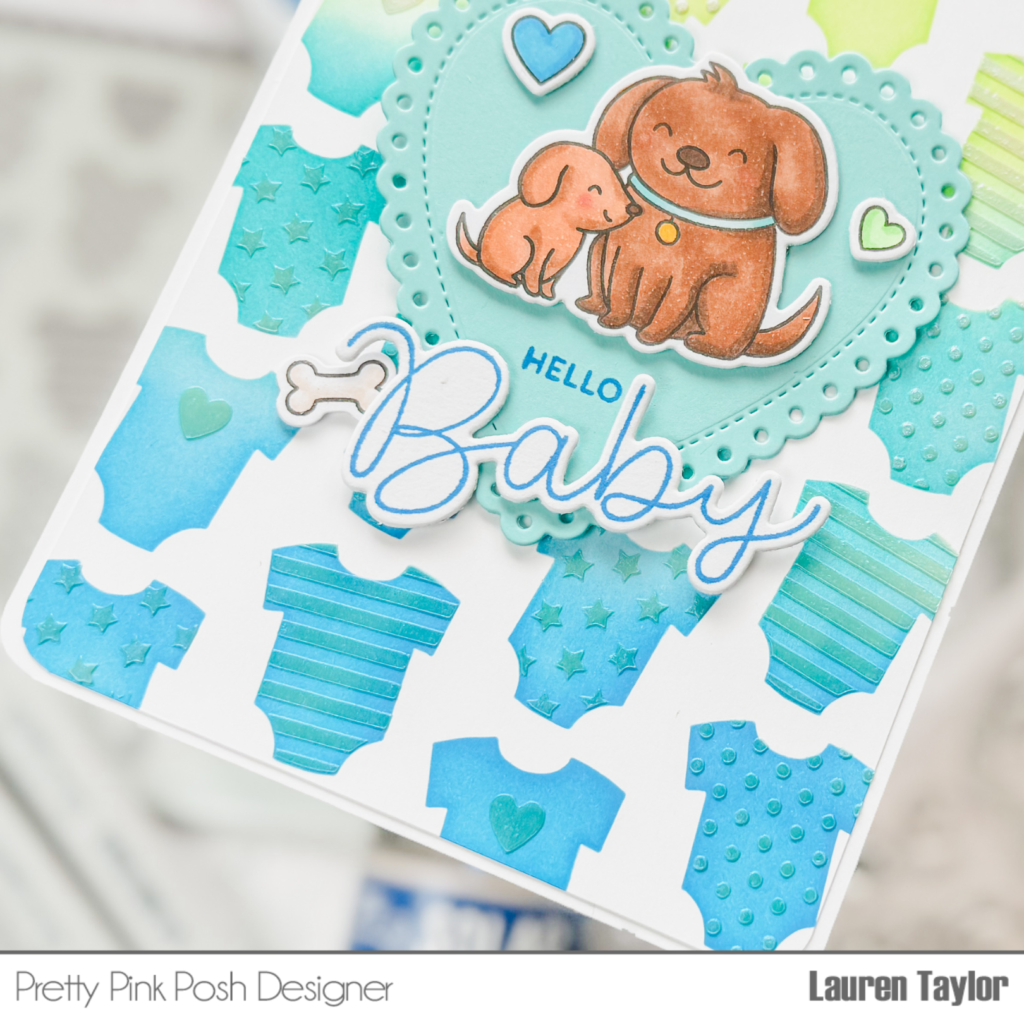
On the first card, I added the darling new Onesie Shaker Die. After cutting it, I stenciled on the Starry Background Stencil and added “baby” using the new Baby Mug Additions Dies.   

Sneak Peek: May 2024 Dies

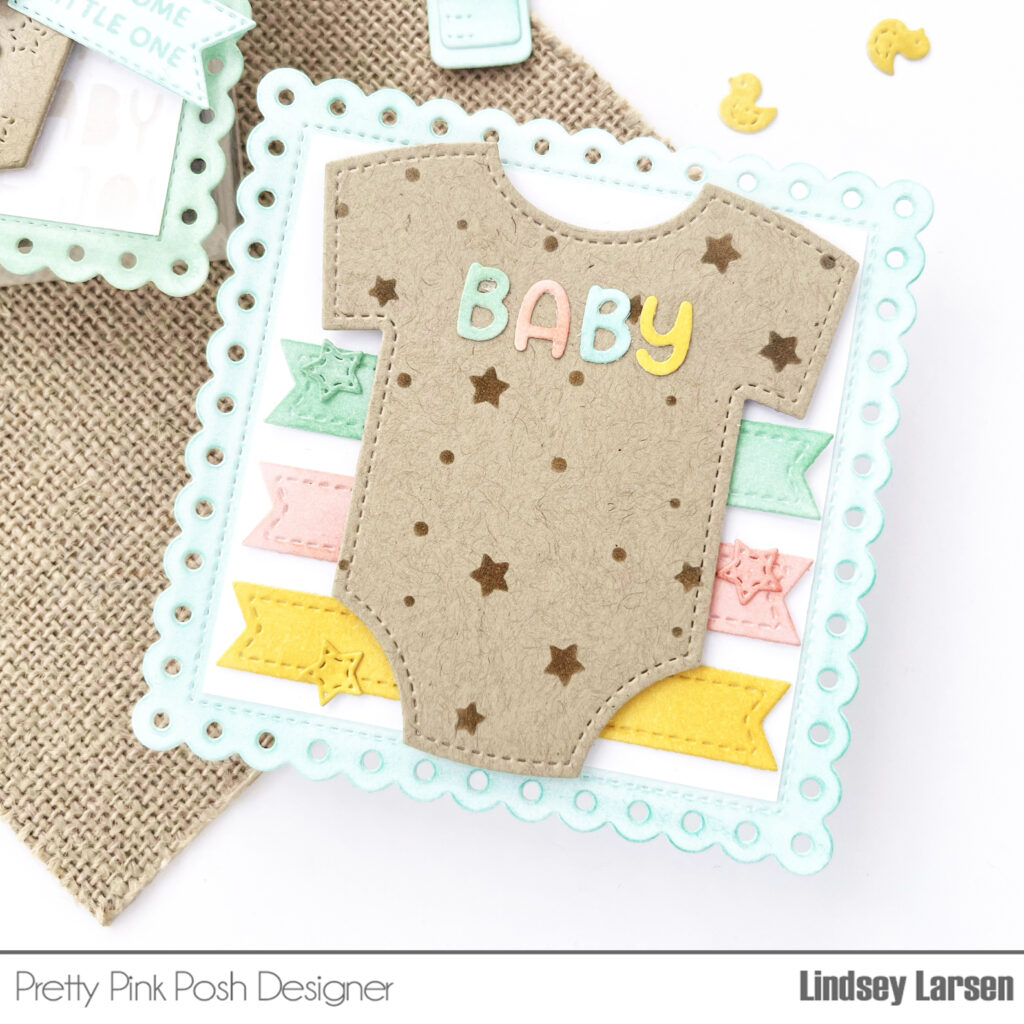
Then I used the Sentiment Strips Dies to repeat the colors on the background. Finally I added a few stitched stars found in the Baby Mug Additions

Sneak Peek: May 2024 Dies

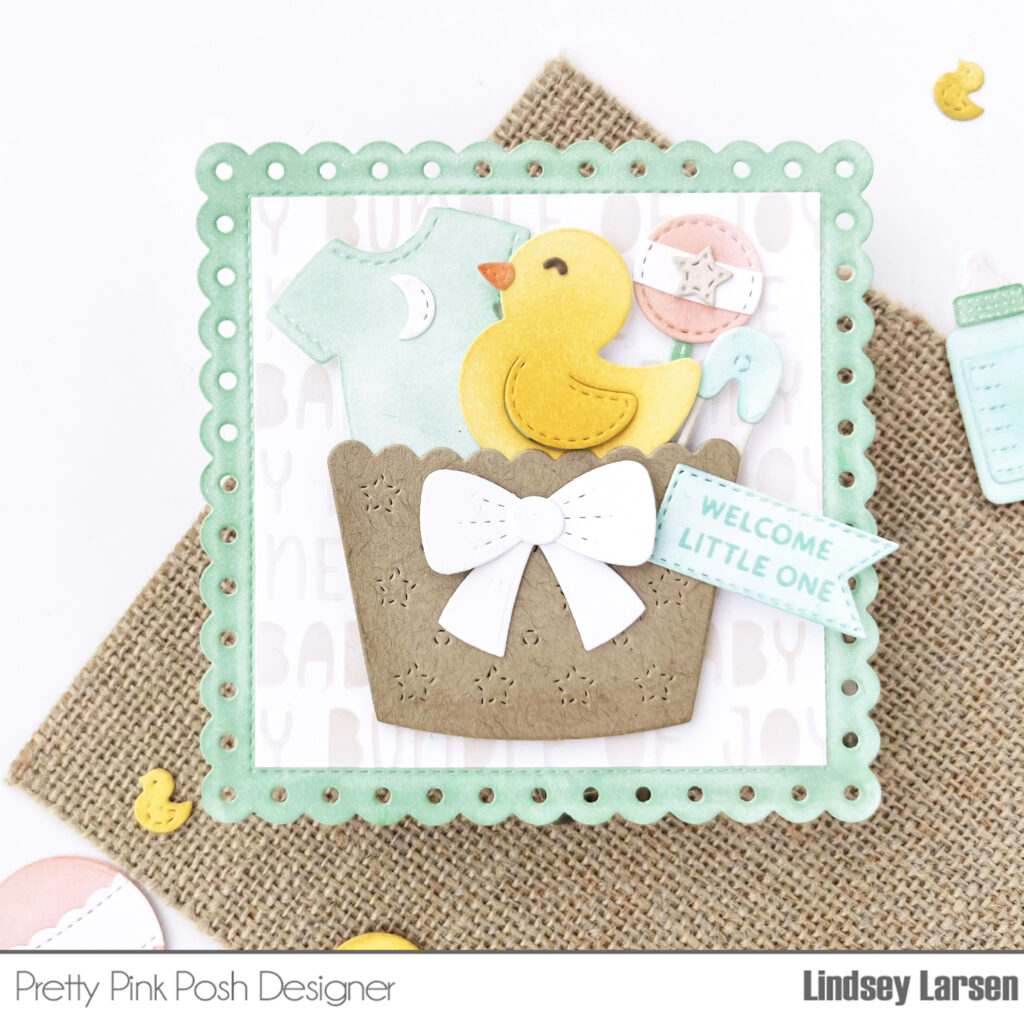
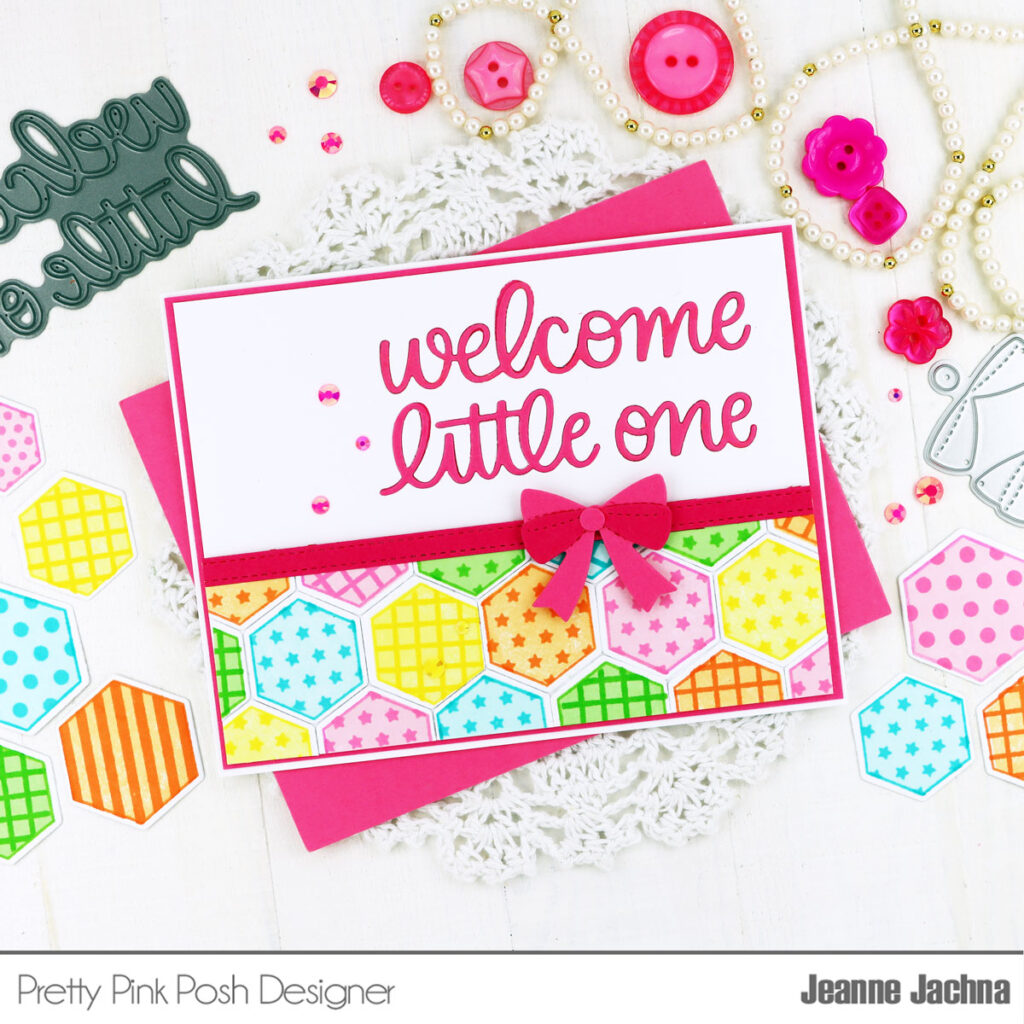
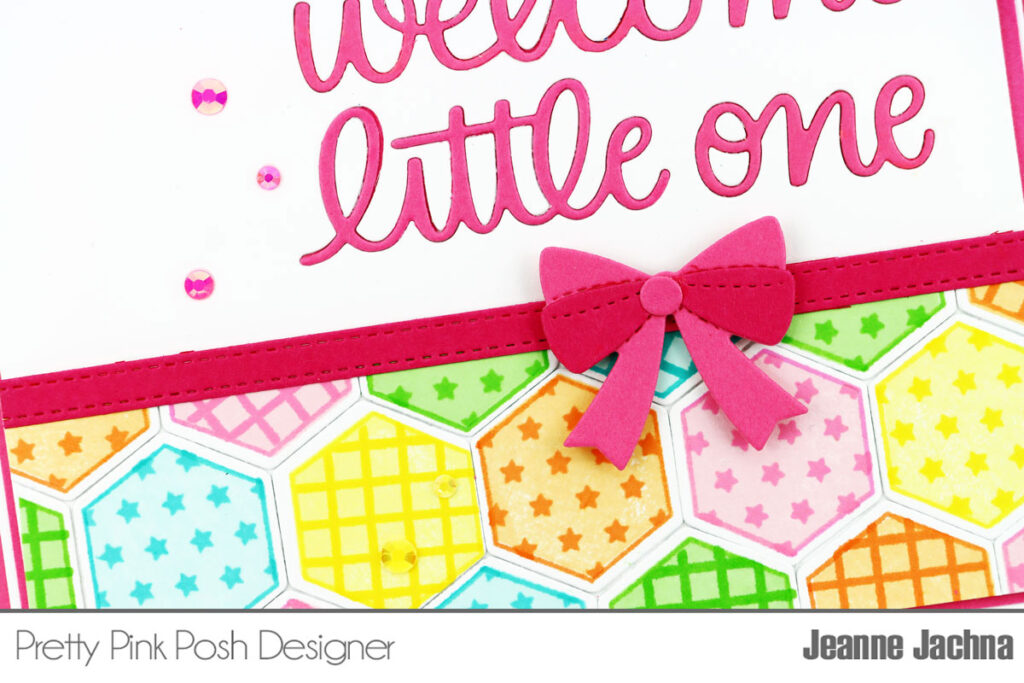
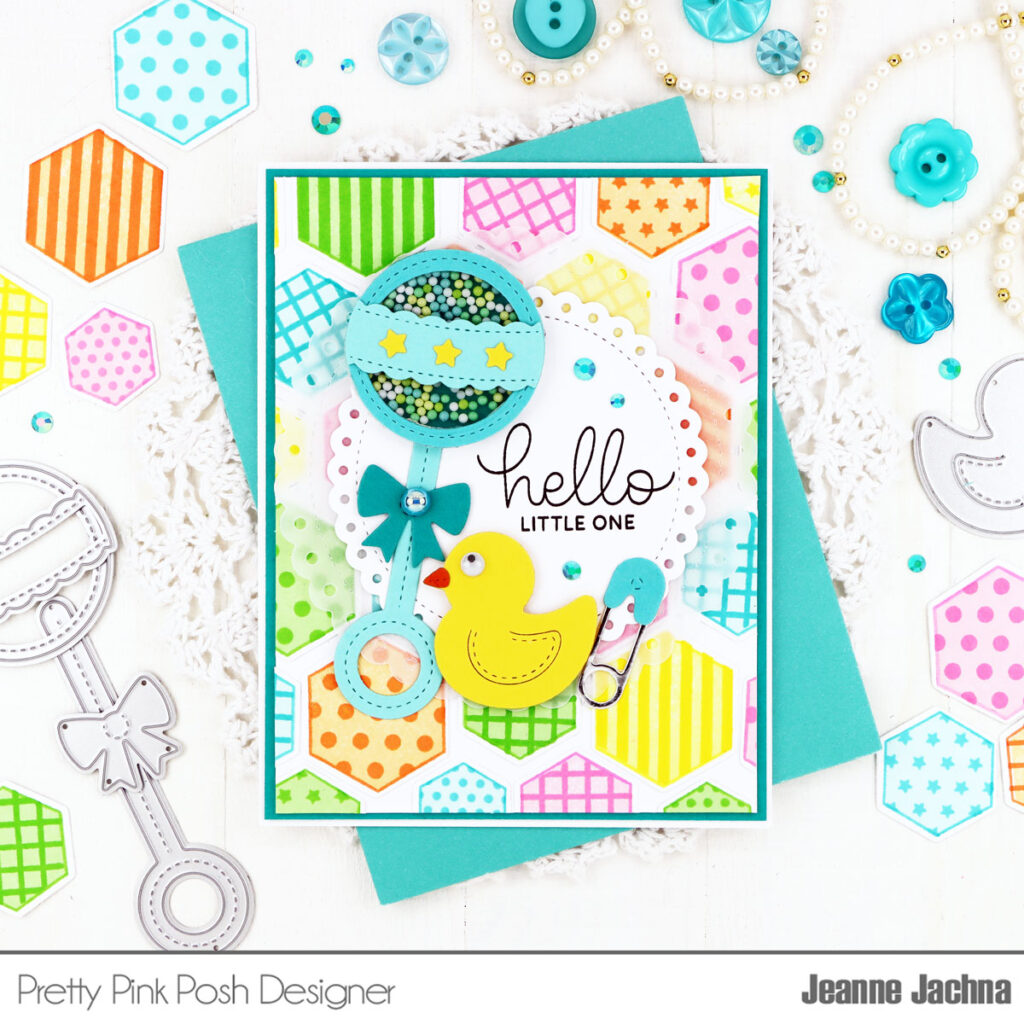
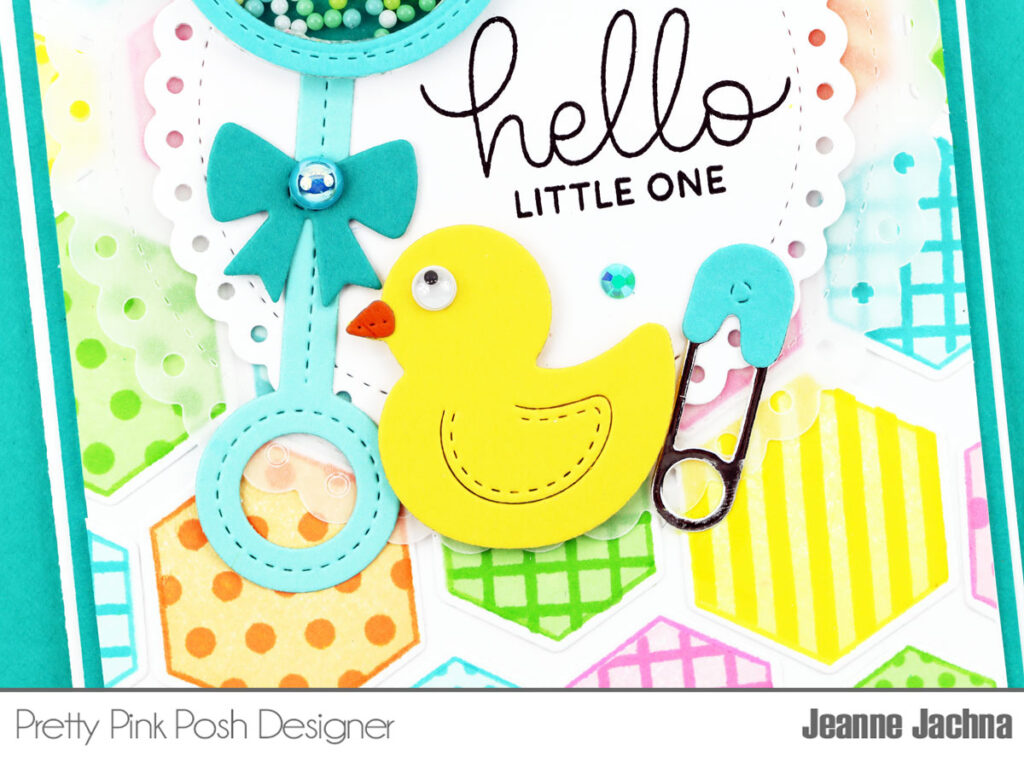
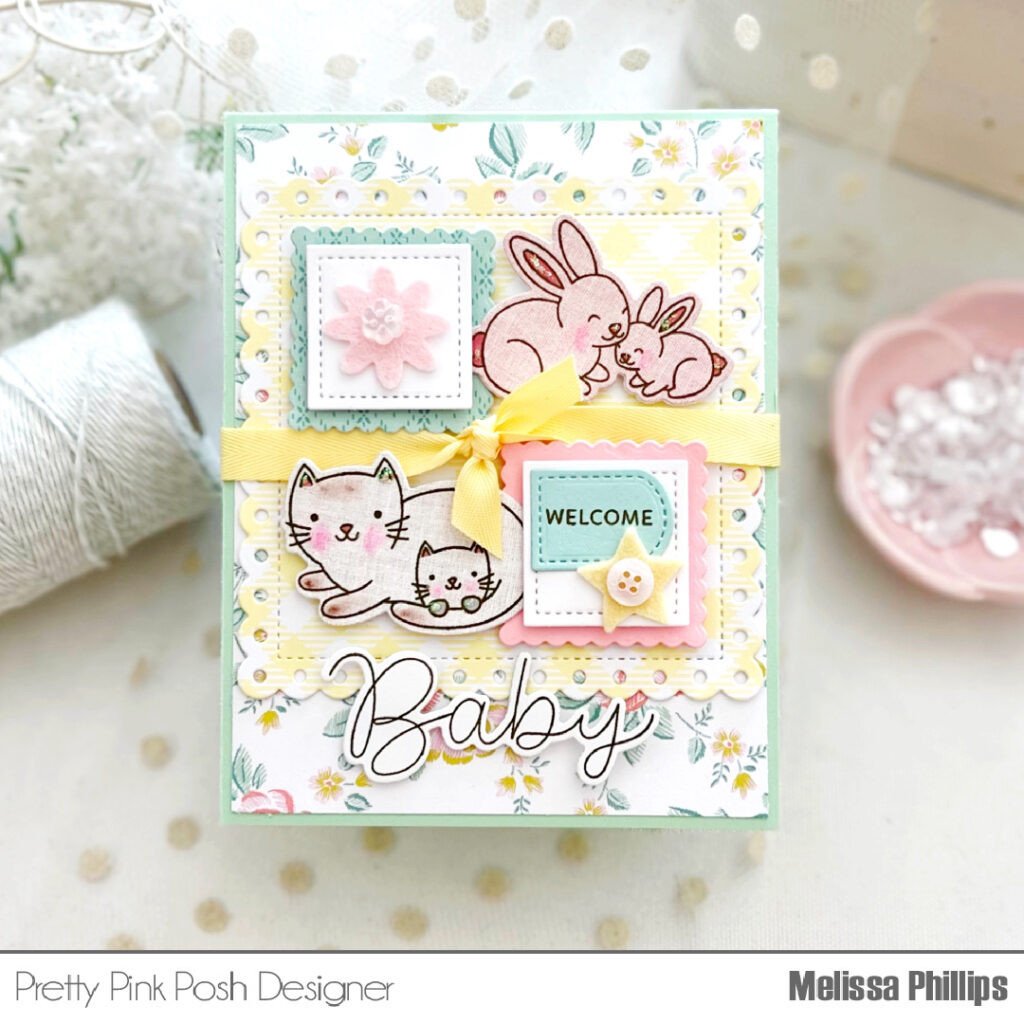
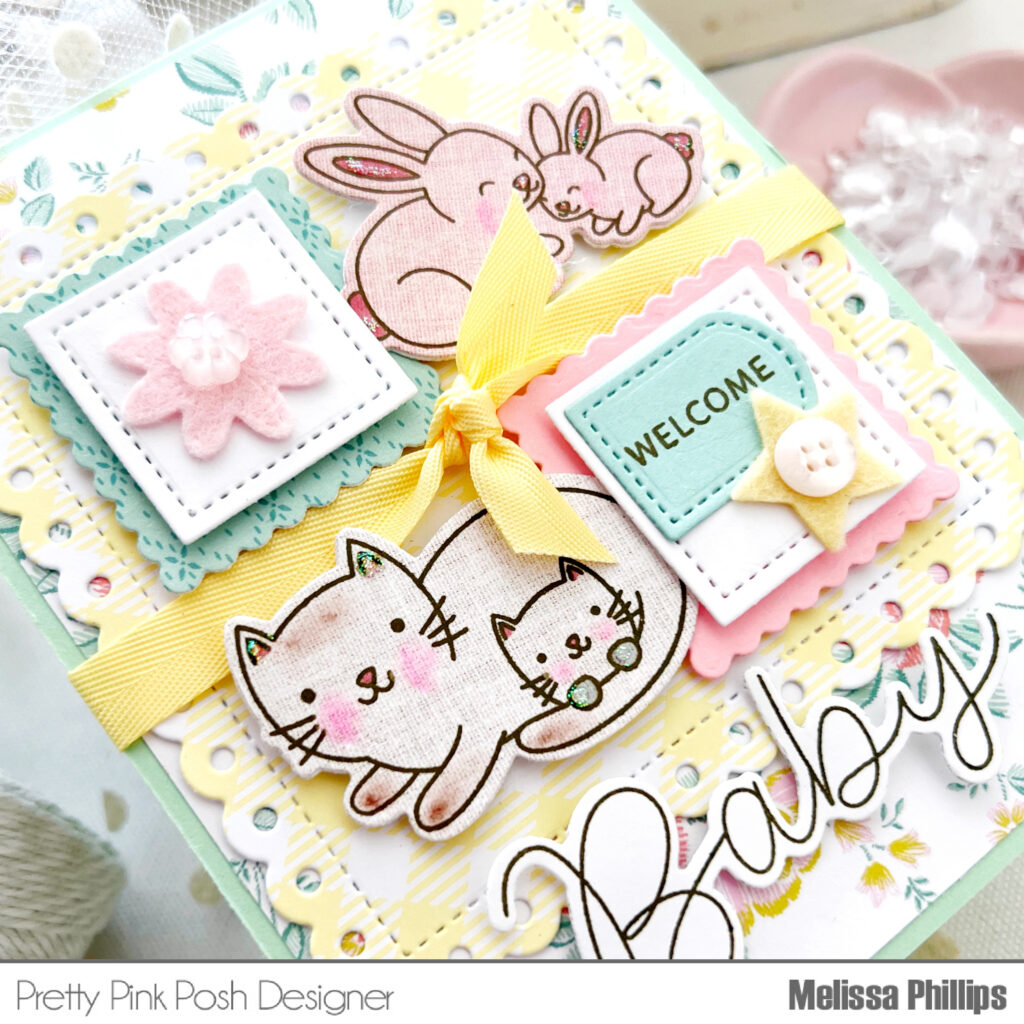
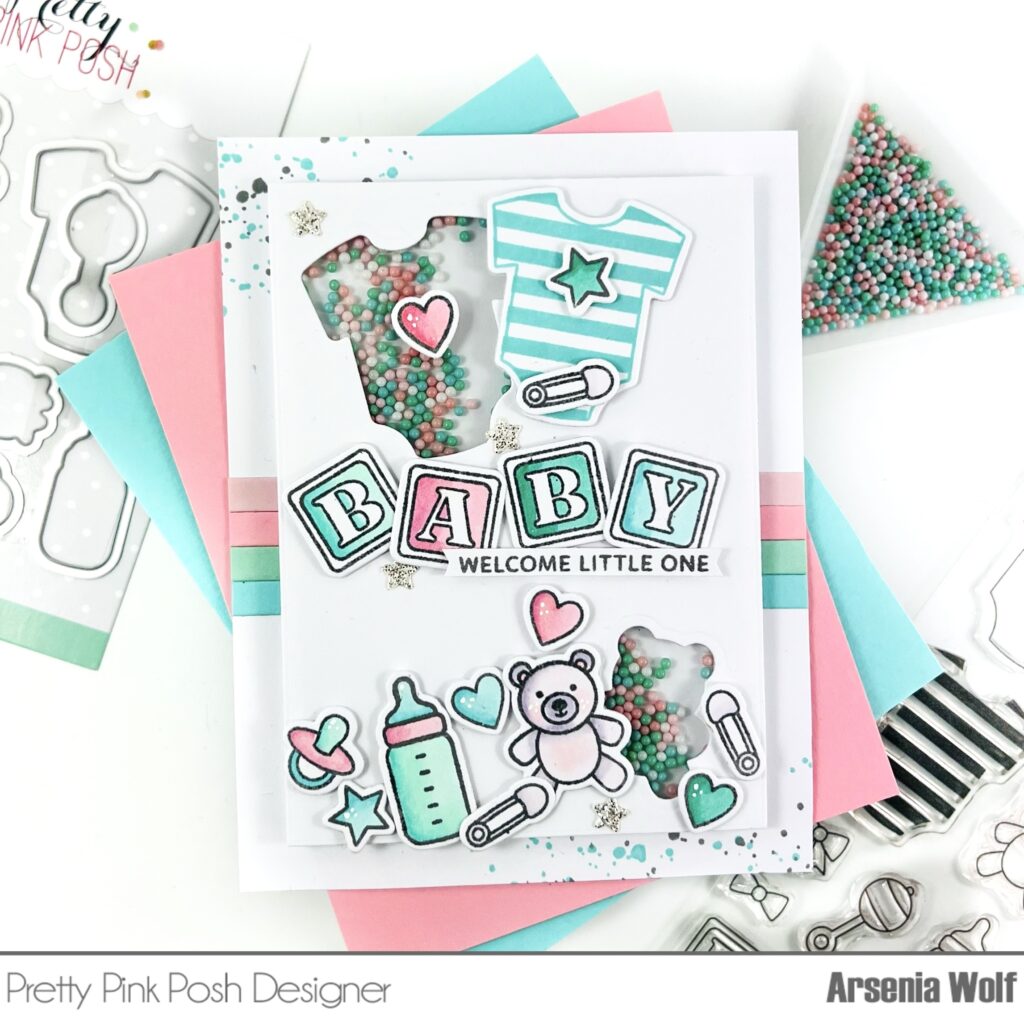
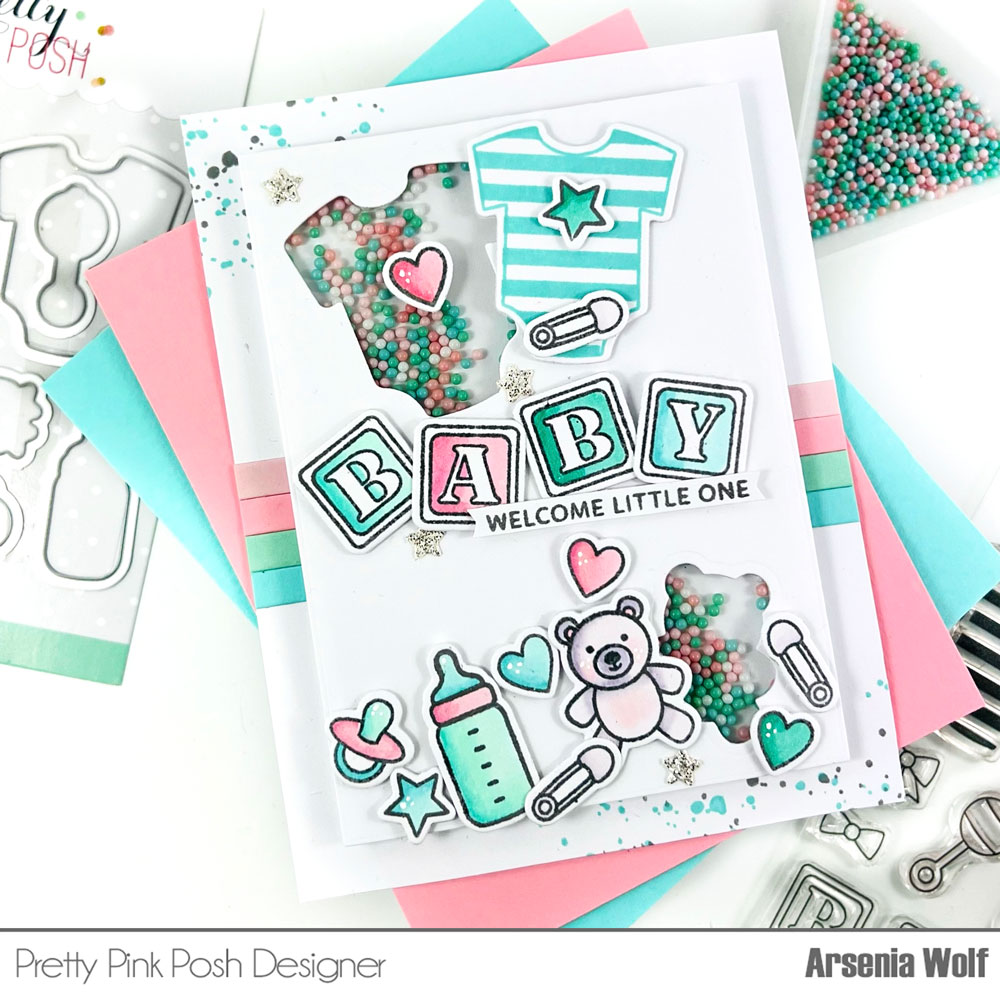
While I had the Baby Mug Additions out, I die cut a bunch of the other shapes and blended ink on them for my second card. These super cute baby items were designed to be great mug fillers, but I wanted to show another option.  I turned the wrapper in the new Big Celebration Cupcake into a little basket.

Sneak Peek: May 2024 Dies

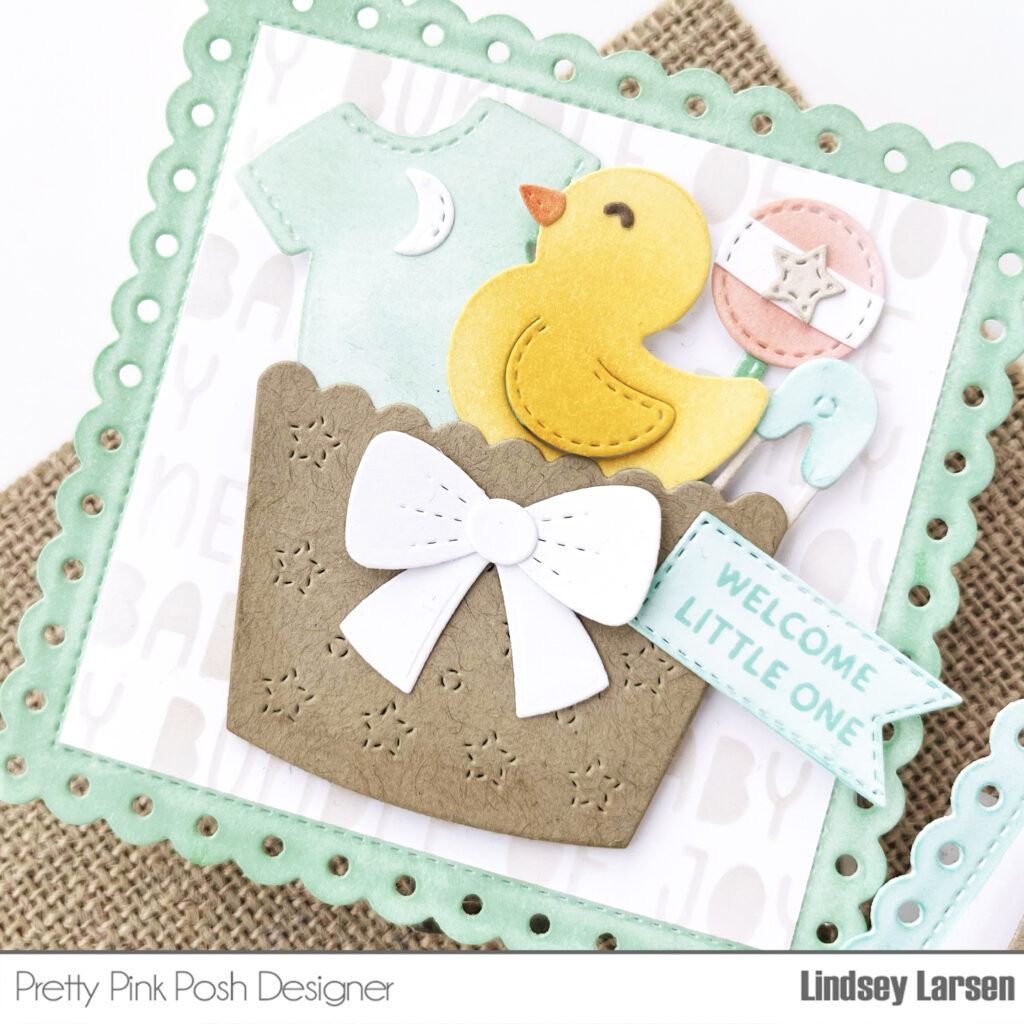
I added a bow from the new Beautiful Bows Dies (so many fabulous sizes and styles in that set!) and a little flag using a sentiment from the Baby Basics stamp set. You’ll also see a peek of the Baby Words Stencil on the background.  

Sneak Peek: May 2024 Dies

Thanks so much for joining me today! I feel like I only scratched the surface of the new dies releasing this month. Be sure you come back tomorrow to see a full look at what’s coming on May 8th!  

| |

Sneak Peek: May 2024 Stencils

Hi, friends! It’s Lauren and I am so excited to be sharing a sneak peek at two of the new stencils that will be released. I just love the new stencils – there are great layering stencils (like the Layered Onesies Stencils I will feature today), but my favorite just might be the new Fancy Lattice Stencil.

New release will be available May 8th

For my first card, let’s start with the Fancy Lattice Stencil! I used it with a 6×6” piece of kraft cardstock and first stenciled on Picket Fence Distress Ink. I cleaned off the stencil, then shifted it then inked a blend of Distress Oxide inks in Saltwater Taffy, Dried Marigold and Squeezed Lemonade.

When the ink was dry, I cut it with the largest Eyelet Rectangle Die and adhered it to an A2 white card base. I then cut the third Eyelet Square Die out of pearlescent vellum as well as trimming down a piece of white cardstock to 2×2” to fit behind the square. I finally cut out the Best Wishes Shadow Dies out of holographic cardstock and apricot cardstock for the shadows.

I adhered my words to their shadows, then to the pearlescent vellum with liquid adhesive. Using the words as a guide, I adhered the white square to the back of the Eyelet Square so the glue would not show through. I then popped it up to the card base with foam adhesive along with a few Strawberry Shimmer and Lemon Shimmer sequins to the card.

Moving to the second card, I stenciled the Layered Onesies Stencils on white cardstock. I used Catherine Pooler Inks with the (A) stencil in Lime Rickey, All That Jazz and Something Borrowed. For the (B) stencil, I used Beluga Solar Paste and set it aside to dry.

Next I stamped and colored my images from the Baby Animals Stamp Set as well as my sentiment. I used the Baby Animals Coordinating Dies to cut out the images and “Baby” sentiment. I cut the third Eyelet Hearts Die out of teal cardstock and used the images as a guide to stamp “Hello” onto the heart.

I cut down my stenciled background to 4-⅛x5-⅜” and used a corner rounder. I used the same corner rounder on my A2 white card base and I adhered the background to the card. I popped up the heart, images and sentiment to my card base. I love the subtle shine from the Layered Onesies and the adorable dog images.

I’m so excited for you to see the rest of the release and amazing stencils! Stop by tomorrow for a look at the new die sets coming soon!

| |

Sneak Peek: Decorative Hexagons

Hi friends, It’s Jeanne here and I’m so excited to share a sneak peek of the new Decorative Hexagons stamp set with coordinating dies. This set is so versatile and I love that it’s not for any specific holiday because I know I’ll be reaching for it throughout the year!

New release will be available May 8th

Sneak Peek: Decorative Hexagons

The set includes four different size hexagons, a solid stamp for each size, and two different patterns for each size. You can stamp the hexagon out line and solid and stop there, or add different patterns them.

Sneak Peek: Decorative Hexagons

For this card I stamped and cut several hexagons and then assembled them to create a solid panel. Along the seam of the solid and hex panels I added a Stitched Strip and one of the new Beautiful Bow die cuts.

Sneak Peek: Decorative Hexagons

This card is clean and simple looking but packs a punch with lots of colorful hexagons.

For my second card I stamped and cut the Decorative Hexagons in different sizes and arranged them on a clean white panel in a random order trying to fill as much space as possible. When I trimmed the pieces outside the edge of the card I was able to save some of the pieces to fill in smaller white spaces.

Sneak Peek: Decorative Hexagons

To create a focal point I topped the panel with a large vellum Eyelet Circle and then added a smaller white one over that. The sentiment is from Baby Basics.

Sneak Peek: Decorative Hexagons

I added a Baby Rattle Shaker die that I turned into a shaker. YES! That’s a new glass bead mix called Spring Breeze. The little duckie and safety pin are from the new Baby Mug Additions die set.

Sneak Peek: Decorative Hexagons

I think these Decorative Hexagons are going to look amazing on holiday cards. A simple switch of color will make them perfect for any occasion!

Stop by tomorrow for another look at the upcoming release!

| |

Sneak Peek: Baby Animals

Hello everyone!  This is Melissa and I’m here to share a couple of cards made with the adorable Baby Animals stamps and coordinating dies. These new products are simply irresistible and heartwarming. Let’s get started!

New release will be available May 8th

I used the darling mama duck and two ducklings on my first card and am smitten with them.  I die cut them from a soft, yellow patterned paper and paper-pieced their wings to bring in a little personality and texture.  I added a bit of ink blending down the front of each duck and duckling and across their bellies and near their cheeks.  

The new Eyelet Squares dies were used to provide a place for me to layer my sweet duck and babies.  You’ll adore these new dies! They are absolutely perfectly sized for so many projects, large and small.  I added a stamped and die cut sentiment using the Baby Animals. The “Hello” sentiment was stamped on a die cut heart using the new Stacked Squares dies.

One of my favorite new stencil sets is the sweet Layered Baby Wreath and that’s just what I’ve used behind my focal point.  I cut my card base using the Scallop Frames and love how my focal point was framed in perfectly!

My next card uses the darling mama and baby bunny and mama and baby kitten from the Baby Animals set. I added just a bit of ink blending and coloring with my Copics to highlight a few areas on each animal.  

I layered them on a die cut Eyelet Square and added baby blocks to create a grid of sorts using the Stacked Squares dies. These are so much fun to get creative with and are the perfect accent for the Baby Animals stamp set.

I used felt to cut my tiny star and flower, embellishing the centers of both using tiny buttons. My sentiment once again comes from the Baby Animals stamp set and dies.  

These new products have my heart and are so refreshing when it comes to creating with them. You’ll love them too!

| |

Sneak Peek: Baby Basics

Hello crafty friends, Arsenia here! Are you ready for some super cuteness!?  I’m thrilled to share this sneak peek using the new Baby Basics stamps and coordinating dies. Let’s get started!

New release will be available May 8th

Sneak Peek: Baby Basics

For my first card I used color cardstock with coordinating reinkers. I know some crafty friends don’t use alcohol markers so I thought I would share something a bit different.  I  heat embossed several of the images with white embossing powder on an array of colored cardstock. Next, I die cut the images and did some faux watercoloring with my reinkers to add some depth. I realized the Layered Baby Wreath Stencils worked with some of the dies from the Baby Basics, woohoo!  I did some ink blending and die cutting and viola we have some super cute images. 

Sneak Peek: Baby Basics

For my background I used the new Stacked Scallops stencils for the base and for the smaller layer I used new Baby Wreath Stencils, all the wreath stencil sets are a favorite of mine! I needed a resting place for my images, so I decided to use the new Eyelet Squares Dies, yes we have Eyelet Squares!  I adhered the images to the eyelet square. 

Sneak Peek: Baby Basics

My next and final step was a sentiment.  I used the new Sentiment Strips: Occasions stamps with my very much loved Sentiment Strips Dies and ta-da all done!  It’s a super adorable card and the images are the cutest!

Sneak Peek: Baby Basics

For my second card I stamped, die cut, and colored my images from Baby Basics stamps and coordinating dies with an array of Olo and Spectrum Noir alcohol markers. My color inspiration is from the new Sweet Dreams Shaker Beads!  For my card base I added some splatters of grey and blue to the top left and bottom right of the panel.  Next I added strips of cardstock using the Simple Strips Dies.  And yes friends it’s shaker time, my next panel I cut out two of the images from the Baby Basics Dies.  I added some acetate, foam, the new Sweet Dreams Shaker Beads and viola! 

Sneak Peek: Baby Basics

Next,  I adhered the images to the panel! I used one of the sentiments from the Baby Basics stamp set. I added some gel highlights to the images!

Sneak Peek: Baby Basics

I hope you enjoyed the sneak peeks and thank you so much for stopping by! The release is chock full of celebrating goodness!  Have a great day!

| |

Sneak Peek: March 2024 Stencils

Hi, friends! It’s Lauren and I am so excited to be sharing a sneak peek at two of the new stencils that will be released. It was hard to pick which two to create first as they’re all absolutely perfect for the Spring season, but I decided I just had to use the Layered Bunny Faces for a cute critter card and Layered Floral Vines for a floral card for Mother’s Day.

New release will be available March 6th

For the first card, I used the Layered Bunny Faces with a white pigment ink for Stencil (A) with the bunny shapes, Black Soot Distress Oxide for Stencil (B) with the bunny face details, and Rosy Cheeks Lunar Paste for Stencil (C) with the bunny ears and nose! I used kraft cardstock as I thought it would be so fun to have the bunnies in white.

When the stenciled bunnies were dry, I trimmed the panel to 4-1/4×5-1/2” (A2 size). I cut Bunny Face Shaker dies from white, black and pink cardstock to create a matching bunny face to the stenciled panel. I also cut the second largest Eyelet Circle out of pink cardstock, the carrots from Big Easter Cupcake in green and orange cardstock, and finally my Sentiment Strips out of white cardstock. I used “Hoppy Spring” from the Sentiment Strips: Easter stamp set!

For the second card, I wanted to create a Mother’s Day card with pink daisies, so I used those colors to inspire my stenciling! I started with a green ink for the vines on Stencil (A), pink ink for the flowers on Stencil (B), and Shooting Stars Lunar Paste for the center of the flowers with Stencil (C).

When it was dry, I cut the panel to 4×5-1/4″ and adhered it to a base of pink cardstock. I stamped and colored the images with alcohol markers from Daisies and used the Daisies coordinating dies to cut them out. I also hot foiled “Mother” from the Mom/Mother Foil Plates and used the Mom/Mother Shadow dies to cut it out. It’s a simple, but I think elegant card to sit on a mantel for the holiday!

I hope you enjoyed this sneak peek of the new Layered Bunny Faces and Layered Floral Vines Stencils. I hope you’re excited for this new release just as I was to receive these stencils to give you inspiration today!

| |

Sneak Peek: March 2024 Dies

Good morning! It’s Lindsey here, and I am so excited to share sneak peeks of the new dies today. You are going to love them! They are everything that makes a heart happy in the spring. Not only that, but you will probably also be delighted to hear that the dies are no longer wired together, which means they are ready for crafting right out of the package. Yay!

New release will be available March 6th

For all of you butterfly lovers out there, this release is going to make you really happy. The new Butterfly Cover Plate and Stitched Butterflies are fabulous!  I used both on my card today. I pulled my color scheme from the new Pastel Party Shaker Beads, so naturally I needed to make a shaker card. I just love the way the beads sound!  

After die cutting several of the Stitched Butterflies with cardstock and vellum, I layered them together. You are going to love the variety of sizes and styles!  I wanted them to playfully fly across my card, so I added little flight trails using 3mm Sparkling Clear Sequins.  

PS If you look closely inside the butterfly windows, you will also see a peek of the new Pierced Leafy Vines Plate that I used on my card base.

I finished the card with the new Spring Script Die and a sentiment from Sentiment Strips: Easter

My next card just screams spring (but in the happiest way). The new Bunny Face Shaker is absolutely darling!  I decided to make her a little girl bunny, and gave her a flower crown using the new Spring Mug Additions. (No worries, though…I made a little boy bunny on a different card and they are equally adorable.)

I created a colorful background using the Easter Egg Border Dies and used a vellum circle cut with the largest Eyelet Circle Die, so the sweet bunny would still stand out from the busy background. 

Then I embossed a sentiment from the previously released Easter Wreath Stamp Set onto a rounded stitched rectangle found in the Big Easter Cupcake Dies. Finally I framed the sentiment with two tulips from the Spring Mug Additions.

This card instantly makes me smile every time I see it. I hope it makes you smile, too! 

Thanks so much for joining me today!  I used many of the new dies on my cards, but there are a few more that I haven’t shared yet, so make sure you come back all week to see more of this fabulous new release. You won’t want to miss any of it!

| |

Sneak Peek: Decorative Butterflies

Hello, Gemma here today and I’m excited to share a sneak peek of the new Decorative Butterflies stamp set. The Decorative Butterflies stamp set includes both solid and outline butterflies, along with patterns and sentiments.

New release will be available March 6th

For my first card, I used the solid images to stamp with dye inks. I added patterns with a darker ink in the same colour family, then went one ink darker for the butterfly bodies.

I  die cut everything with the coordinating dies and adhered the bodies onto the butterfly wings.

Next, I used the new Layered Butterfly Lattice stencil set. This is a 2 layer stencil set, and I used a light grey ink on the lattice and Nuvo Glacier Paster in Winter White for the butterflies. Once dry, I trimmed this down to 5” square and adhered to a 5.25” card base.

To add a place for my sentiment to go, I die cut one of the new Eyelet Circles from white card. I stamped a sentiment from the Decorative Butterflies stamp set, then adhered the circle in the centre of my card.

I finished by adding the butterflies with foam tape for dimension.

For my second card, I used the outline images in the Decorative Butterflies stamp set.

I stamped them over some patterned papers, then added shading with copic markers. On some of the images, I heat embossed the patterns with gold embossing powder.

Copic colours:
R30 R20 R22; RV00 RV10 RV21: G40 G43; B000-01; BV00-02; E70 E71 E74

I cut a panel of white card, 5.5” x 2.75”, and adhered butterflies across the panel. For the butterflies without patterns added, I decided not to add the bodies so they were more of a background element.

I trimmed away anything overhanging the edges of the panel, then adhered it on an A2 card base. I adhered a strip of patterned paper below, then stamped a sentiment from the new Sentiment Strips: Easter stamp set to finish.

Thanks so much for joining me today! Stop by tomorrow for another sneak peek of the March 6th release!

| |

Sneak Peek: Easter Cupcakes + Easter Train

Hello crafty friends, Arsenia here and I’m super excited to be sharing these sneak peeks using Easter Cupcakes Stamps with coordinating dies and Easter Train Stamps with coordinating dies. This release is full of springtime goodness and will keep you busy crafting! Let’s get started!

New release will be available March 6th

For my first card I’m using the adorable new Easter Cupcakes Stamps and Easter Cupcake coordinating dies. I stamped the images and colored them with an array of Ohuhu markers. I also stamped and die cut a few images from an older set called Bunny Friends. Once I had all the images die cut, I added lots of white gel pen highlights. 

For my background I used the new Pierced Leafy Vines Plate, oh friends you’re going to love this die.  The texture from the piercing is phenomenal.  I backed the pierced layer with some light pink cardstock, added some black splatters to the top left corner and bottom right corner of the panel.  I wanted to add a small frame, so I took the large die from the Stitched Torn Rectangles Dies and cut it out of an A2 white card panel.  I then adhered the frame to the panel.  I started placing the images on the card panel and realized I wanted a bit more color on the panel.  I couldn’t help myself, I decided to use another new product called Eyelet Circles Dies!  I adore anything EYELETS!  I made some frames with circles and adhered to the panel.  

I arranged and adhered all the images to the card panel. I still wanted more color on the panel, I used the new Spring Mug Additions Dies for a few flowers!  I was completely thrilled when I saw the new Mug Additions Die set! Final step, I needed a sentiment!  Yay we have a new Sentiment Strips: Easter Stamp Set! I picked a sentiment and added to a few Sentiment Strips dies.  Ta-dah all done!  These cupcakes are super cute, and I’ll be sharing some more projects with these cuties!

For my second card I’m using the new Easter Train stamp set and coordinating dies, these images are the cutest!  I’m using the Valentine Train stamp set with coordinating dies for the engine car. I stamped and colored the images with an array of Ohuhu Markers. I then die cut the images and added white gel pen highlights. Oh, I did use one of the cupcakes from Easter Cupcakes stamps with coordinating dies to fill up the empty car, I think the little chicky looks stink’in adorable!

For my background I added black splatters to top left and lower right of an A2 panel.  I adhered some colorful strips of paper using the Stitched Strips dies.  I then took a piece of white cardstock and used the new Pierced Leafy Vines Plate die and back it with yellow cardstock.  I cut the panel down and adhered it to A2 panel with the strips.  

I arranged the images on the card panel and realized I wanted more color! The new Eyelet Circles dies to the rescue!  I die cut 4 of the smallest circles in colorful cardstock. I arranged them on the card panel, and then adhered the images. I had a few bits left from the Bunny Friends Stamps and coordinating dies, I adorned the panel with the florals. The sentiment was easy-peasy, I used the sentiment from the Easter Train Stamps and coordinating dies. I finished the card with a bit of sparkle on the wheels of the train.  

Thank you for stopping by and I hope you enjoyed the sneak peeks!  The release is chock full of springtime goodness and it’s spectacular!

| |

Sneak Peek: Daisies

Hello everyone! This is Melissa and I’m here to share a couple of cards made with the adorable Daisies stamps and coordinating dies.

New release will be available March 6th

I stamped and heat embossed my sweet flowers from the Daisies stamp set, using watermark ink and white embossing powder on my first card. I loved this darling bouquet of daisies and wanted to bring them to life with watercolor markers. They look so cute bunched together, tied up with the bow you can find in the Daisies set.

I matted my daisies on one of the new die cut Eyelet Circles dies. I adore these new circles…they make your focal point and sentiments pop all while adding soft curves and scallops.  

Behind my daisies, I have used the delightful, new Layered Butterfly Floral stencils. What a sweet treat they are and they look so cute paired with the Daisies stamp set. I added in a die cut Scallop Frame on my card base to frame everything in perfectly.  All that was left was the sentiment from the new Decorative Butterflies stamp set.

I wanted to share a different technique with you on my second card, so I paper-pieced my tiny daises and love how they turned out. Paper-piecing is one of my favorite techniques, because I love the quilted, pieced together look.  

I layered each of my paper-pieced daises on the smallest die cut Eyelet Circles, cutting each from a different color. I layered this trio of circles across the front of my horizontal card. I love the colorful, simplicity of them all lined up together, don’t you?

To create my background, I used the Daisies stamp set, stamping flowers and leaves in coordinating colors found in my paper-pieced daisies.  I then sponged ink over the surfaces of each and die cut my background using the largest Eyelet Rectangles dies. My sentiment was added last, using the Decorative Butterflies stamp set once again.  

I adore these new products from Pretty Pink Posh and am officially ready for Spring! Thanks for visiting, stop by tomorrow for another sneak peek!

Melissa