May Intro: Sneak Peek Day 4
Welcome to Day 4 of sneak peeks for the May 14th release. Today we’ll be taking a look at the new stamps and stencils. In this release, there are five new stamp sets (four with coordinating dies) and five new stencils.
Watch the video above I Watch the video in HD on YouTube
Hi everyone! Melissa Phillips here with you today and I am so happy to be celebrating the new May Release from Pretty Pink Posh.
I’m sharing a couple of cards created with the new stencils and stamps you’ll find in the May Release. You’re in for such a treat!
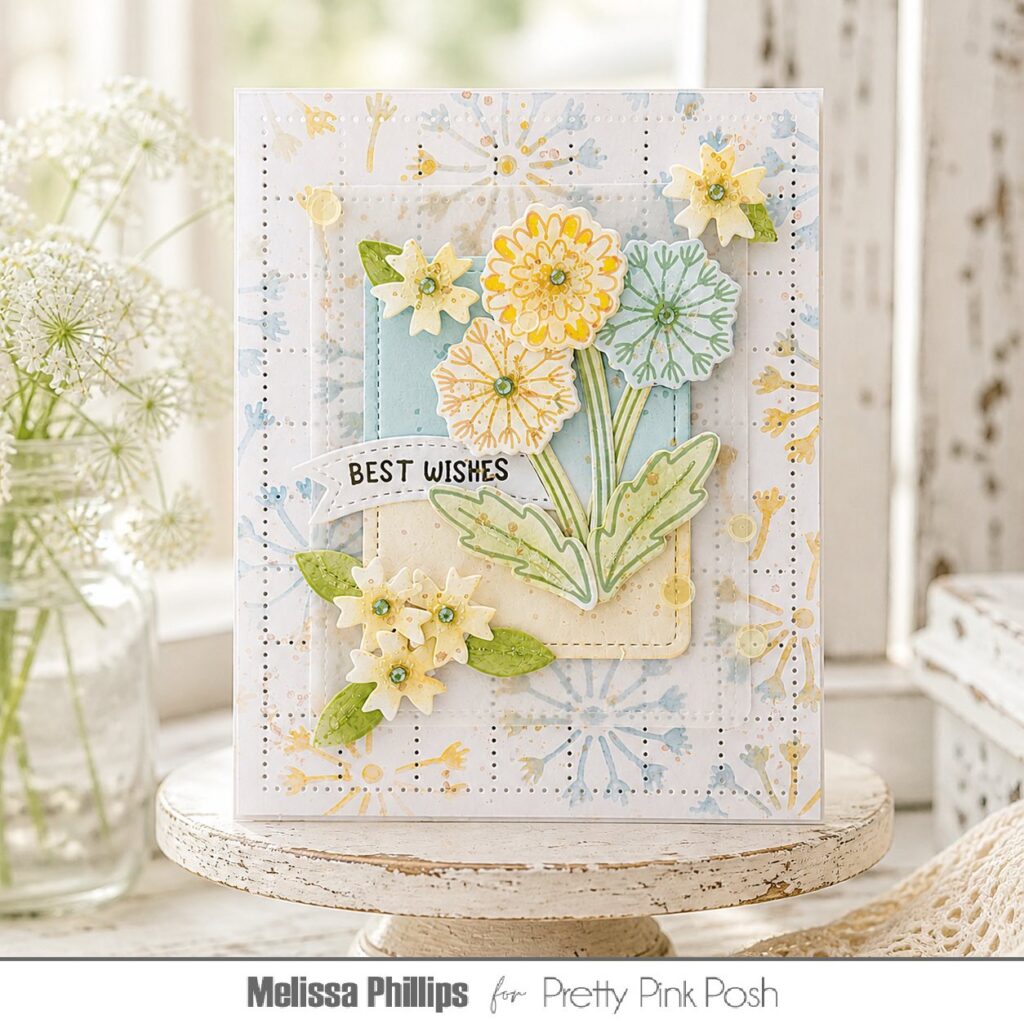
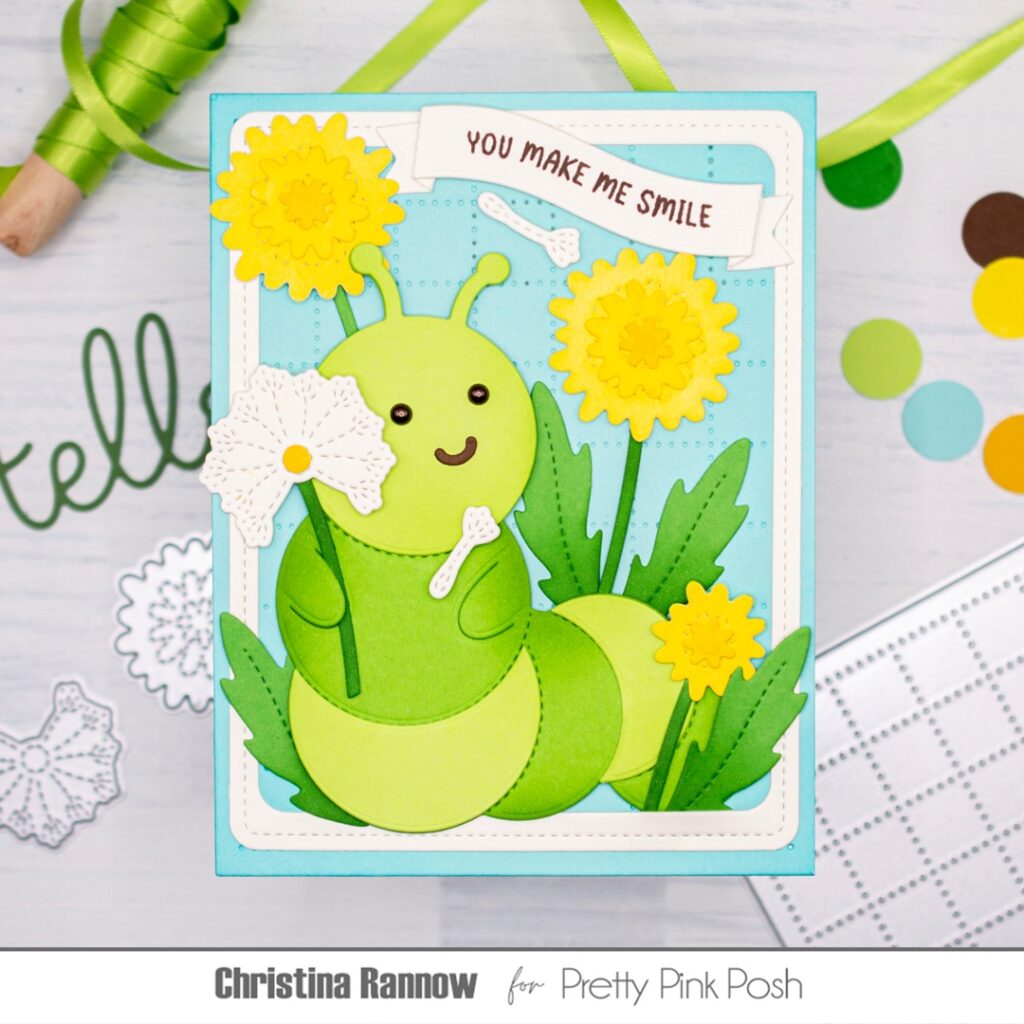
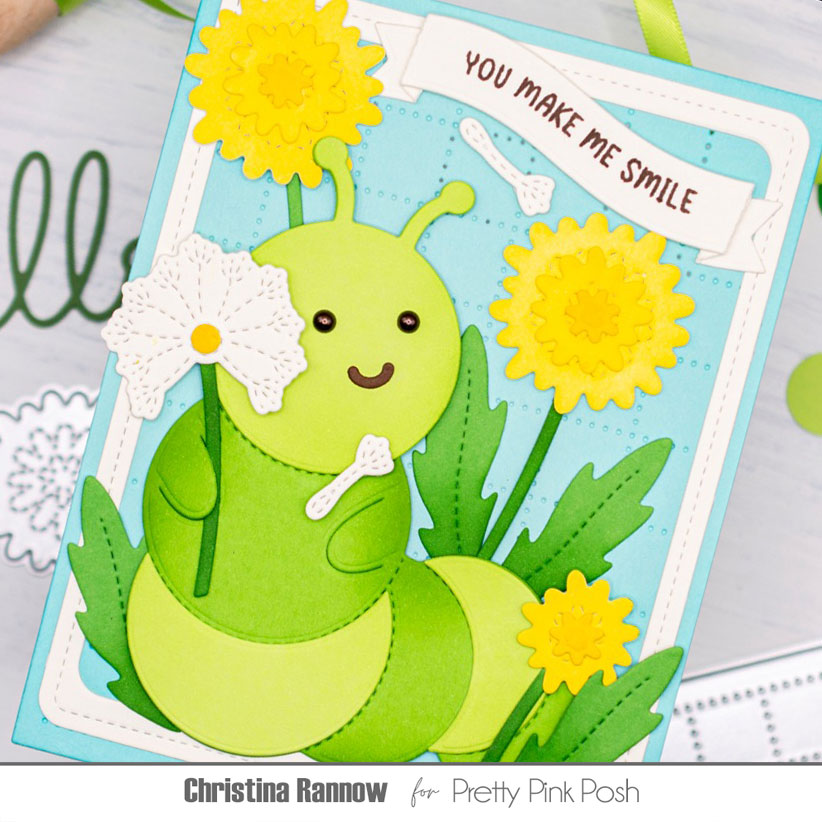
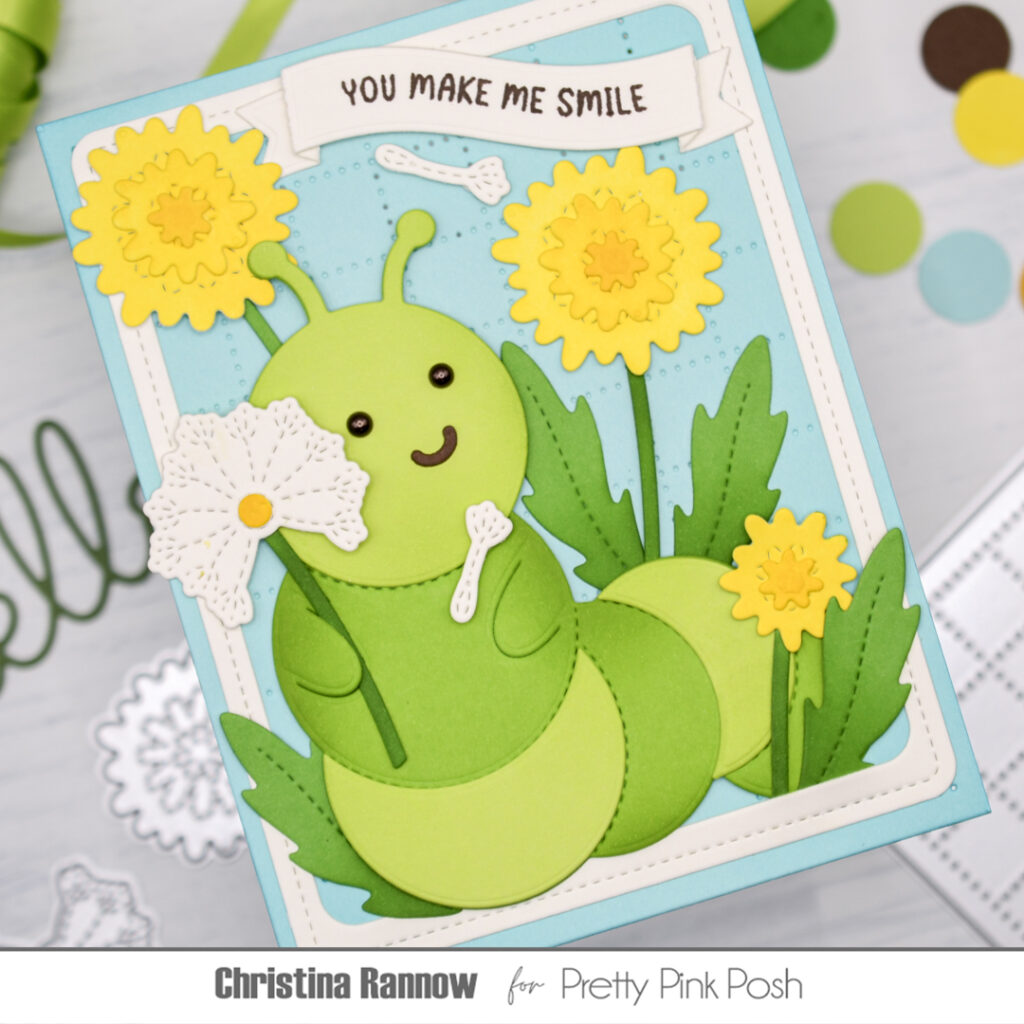
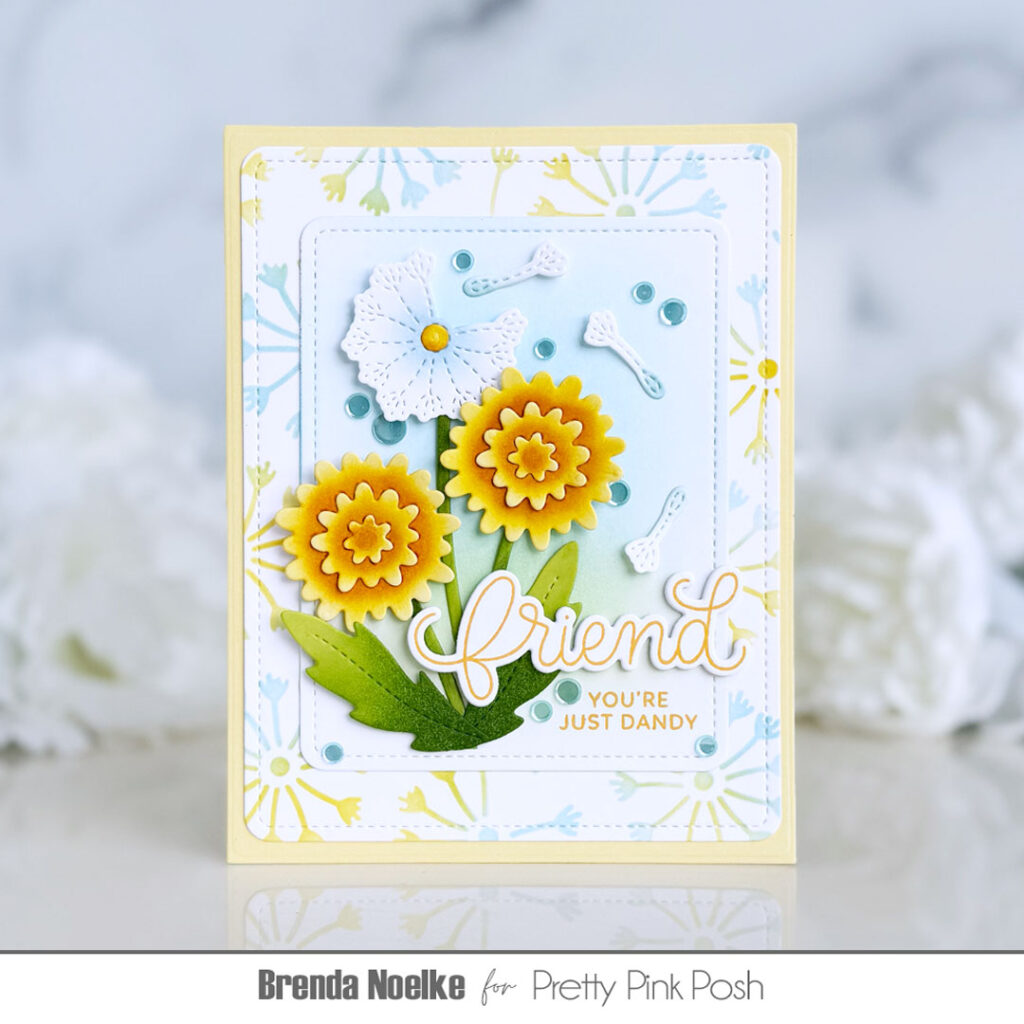
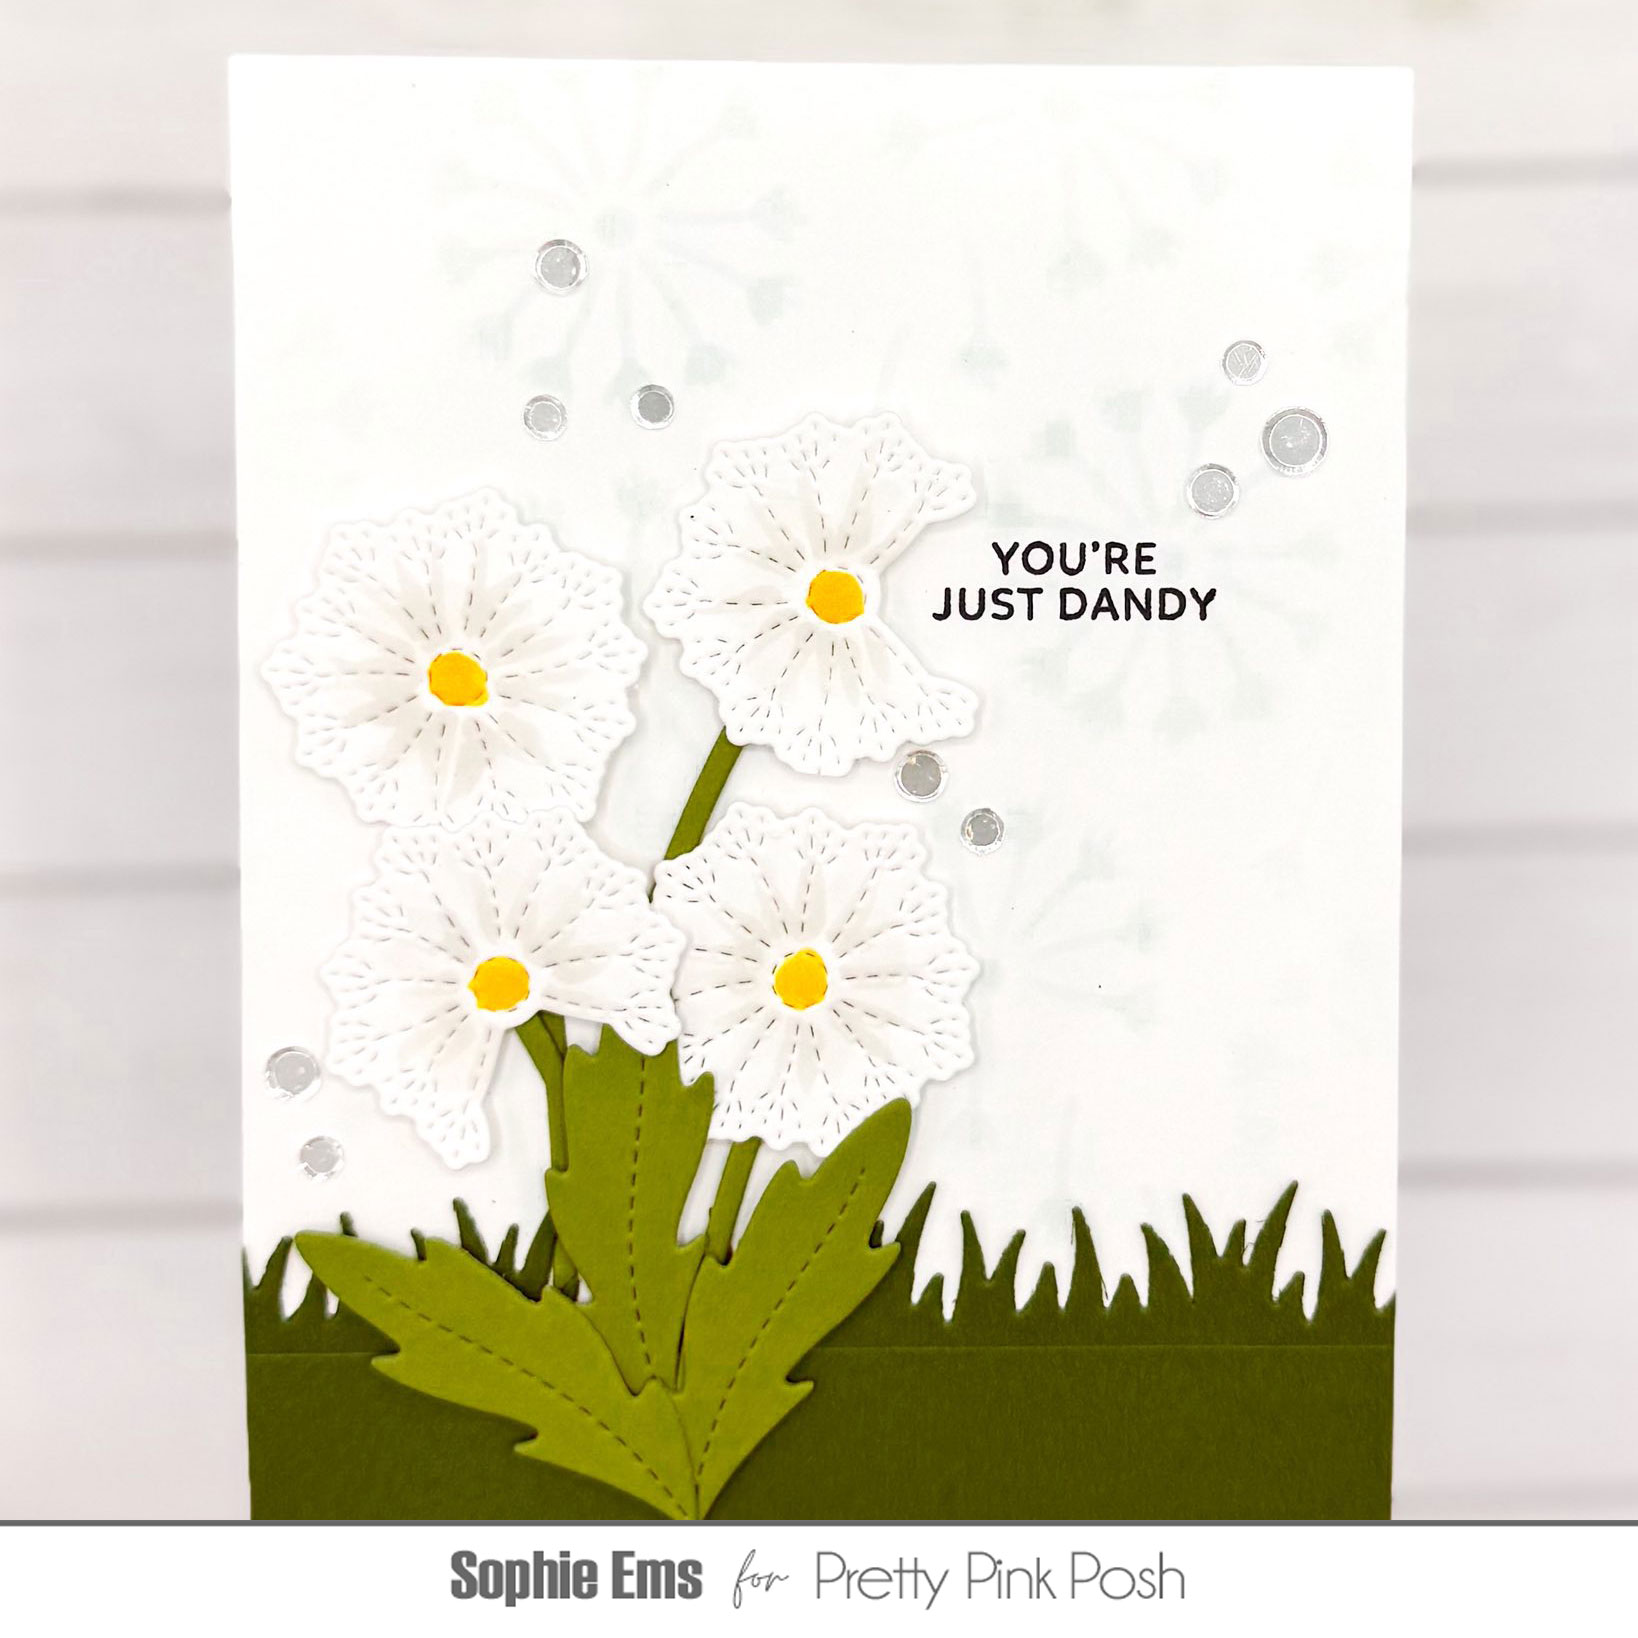
My first card uses the darling, new Dandelions stamps and coordinating dies. I began with the new Checkered Pierced Plate die to create my soft, textural background. I stenciled dandelions across my card base using the new Dandelion Background stencil. It’s so irresistible! From there I’ve used the new Rounded Stitched Rectangles die to create a scene for my dandelions. The base rectangle was cut from vellum and the top was cut from white cardstock and ink blended in coordinating colors.
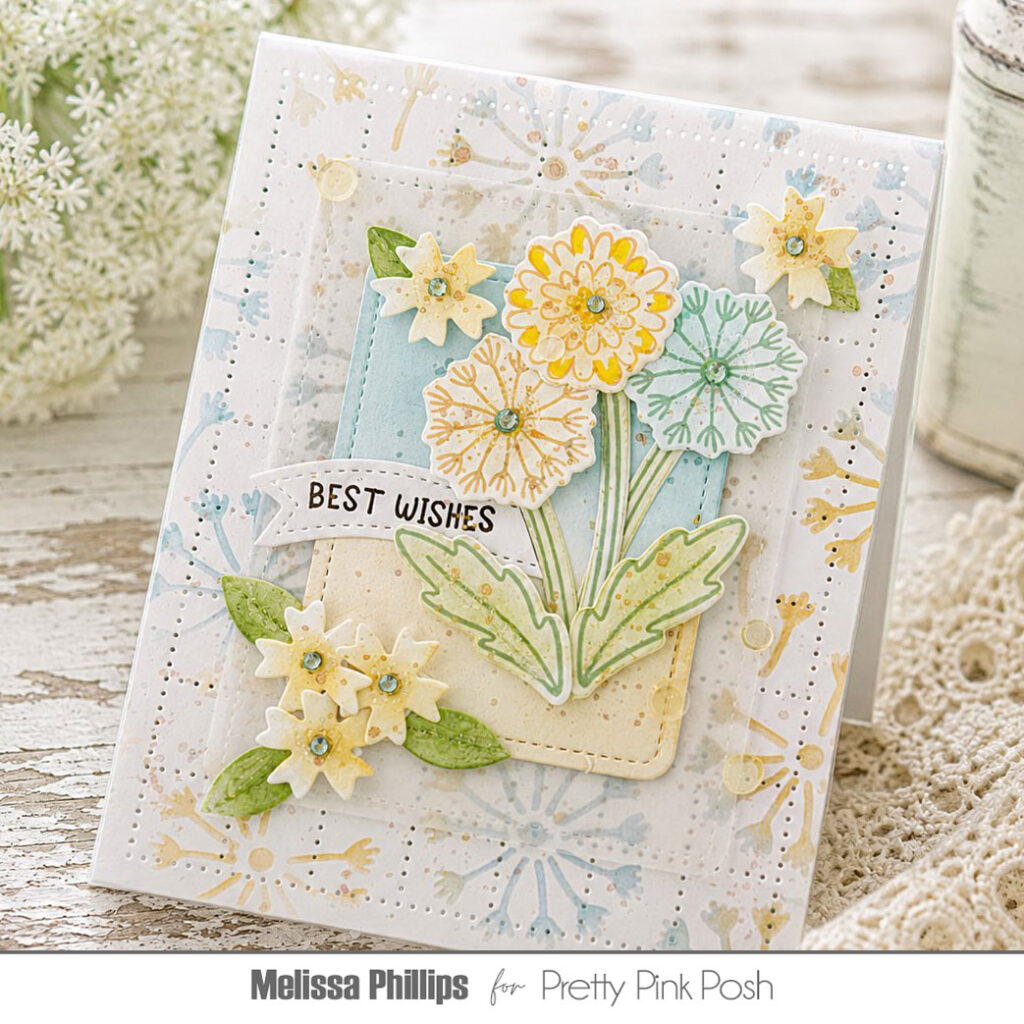
Each dandelion was cut from white cardstock and then stamped in shades of yellow and pale green. I then ink blended coordinating colors over each, stem, leaf, and dandelion. I arranged them using dimensional adhesive to make them pop up off the card.
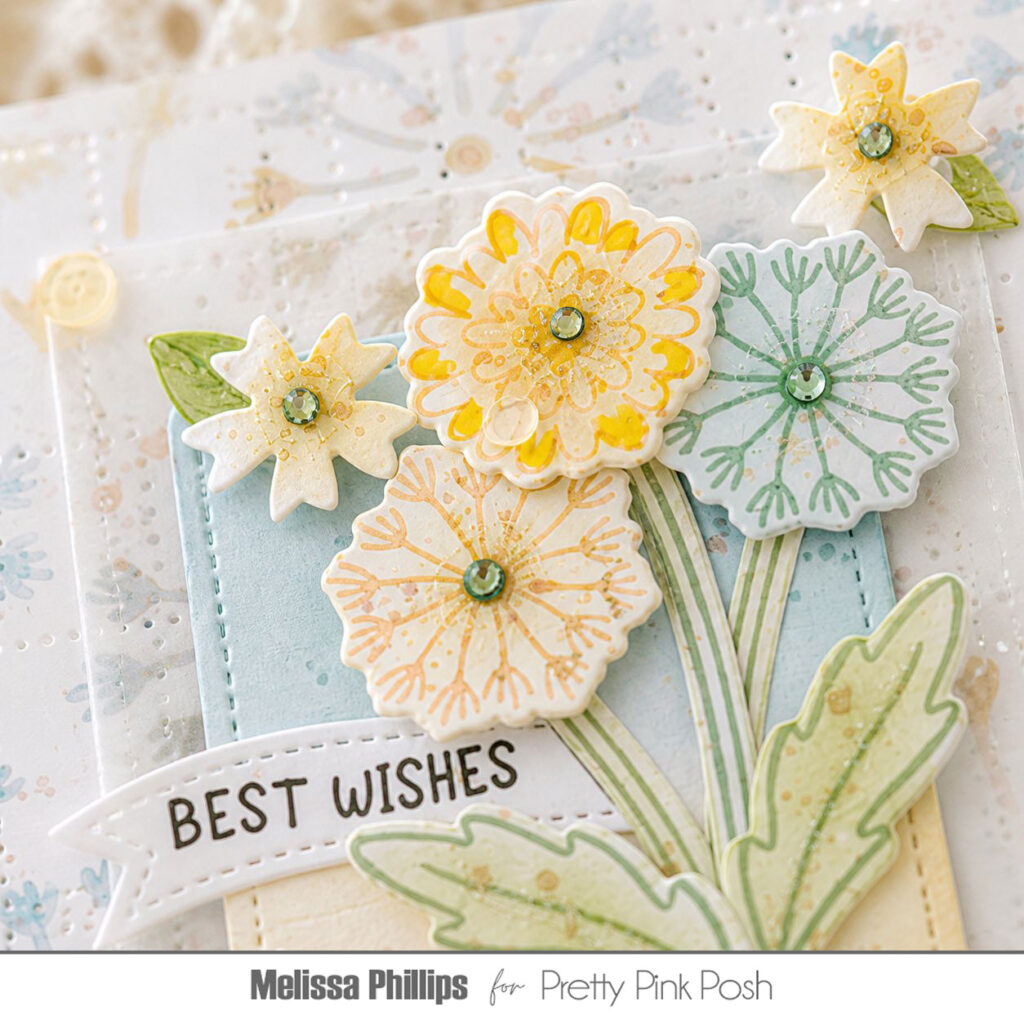
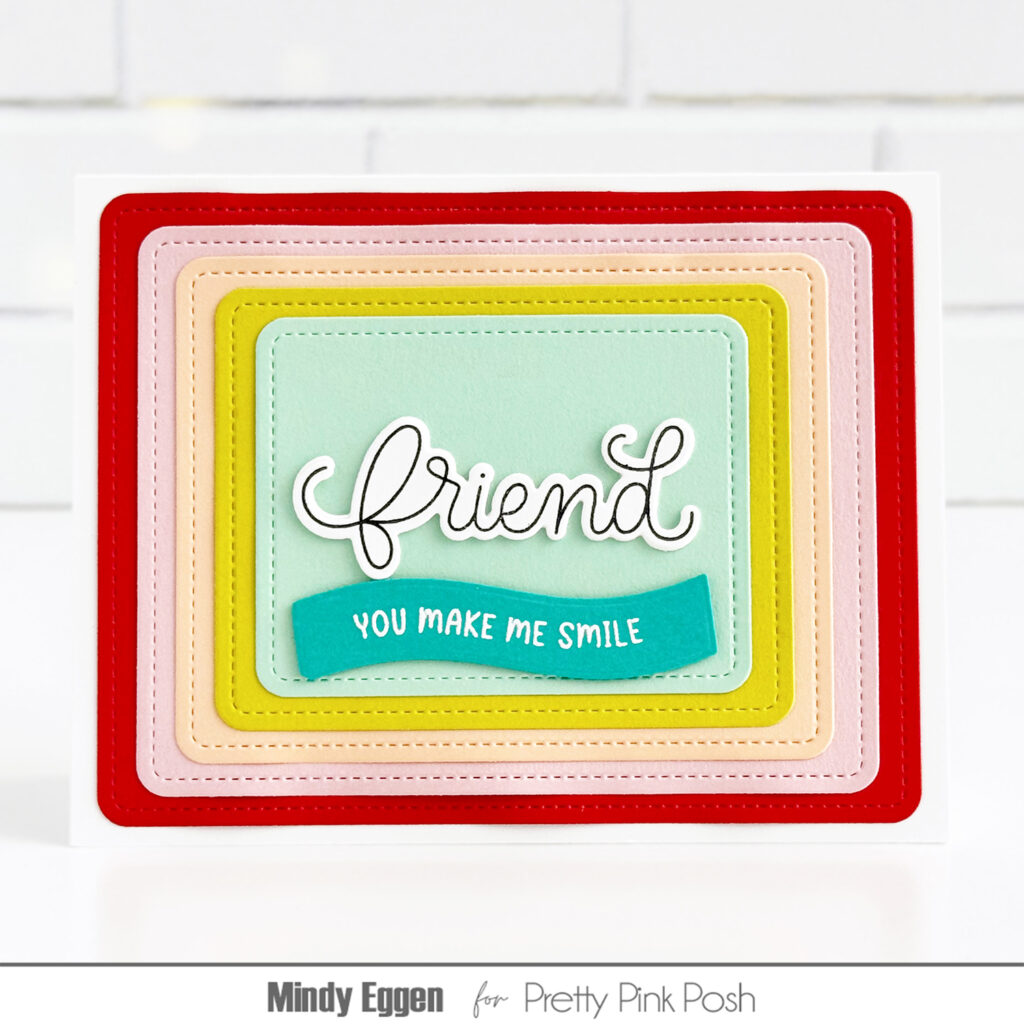
My sentiment comes from the new Everyday Banner Greetings stamp set and Banner Greetings 1 dies. Accent flowers were cut and ink blended using the Stitched Spring Flowers dies. Who would’ve thought weeds could be so cute?
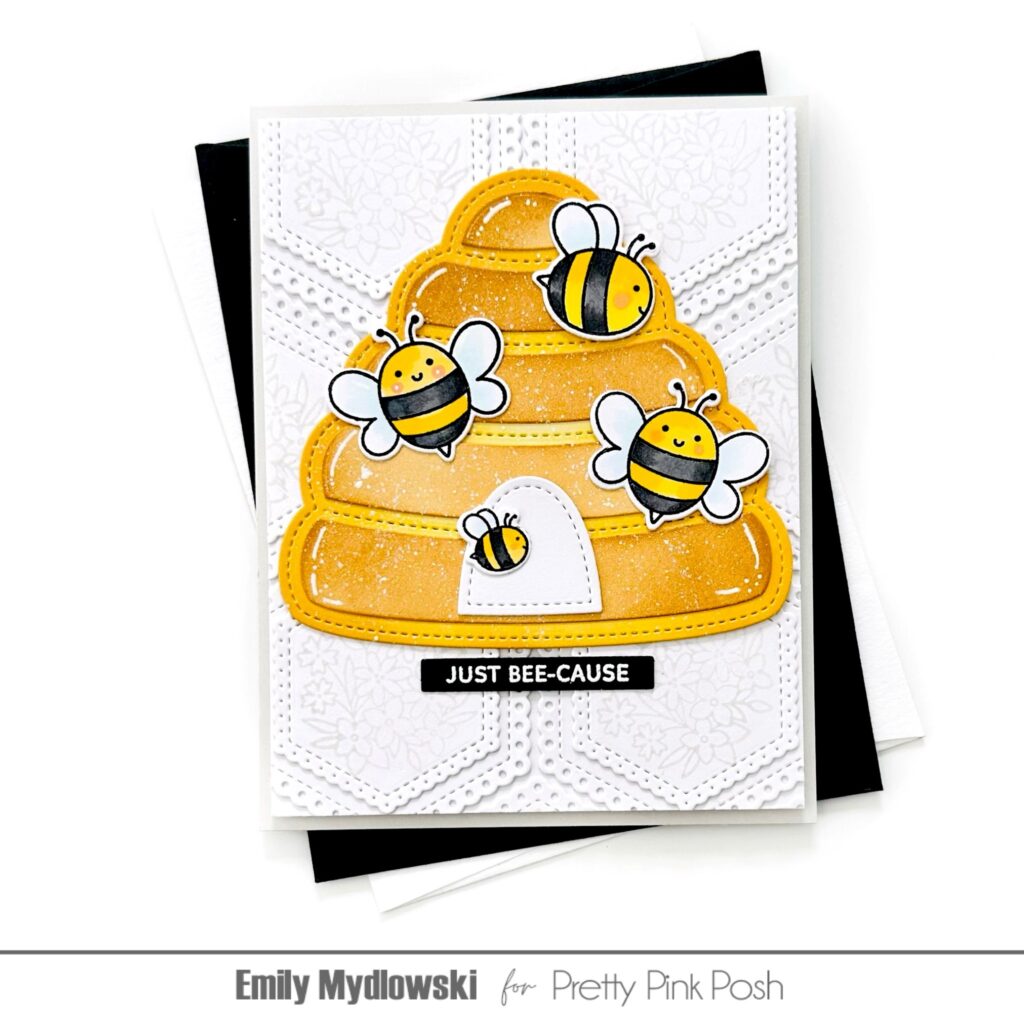
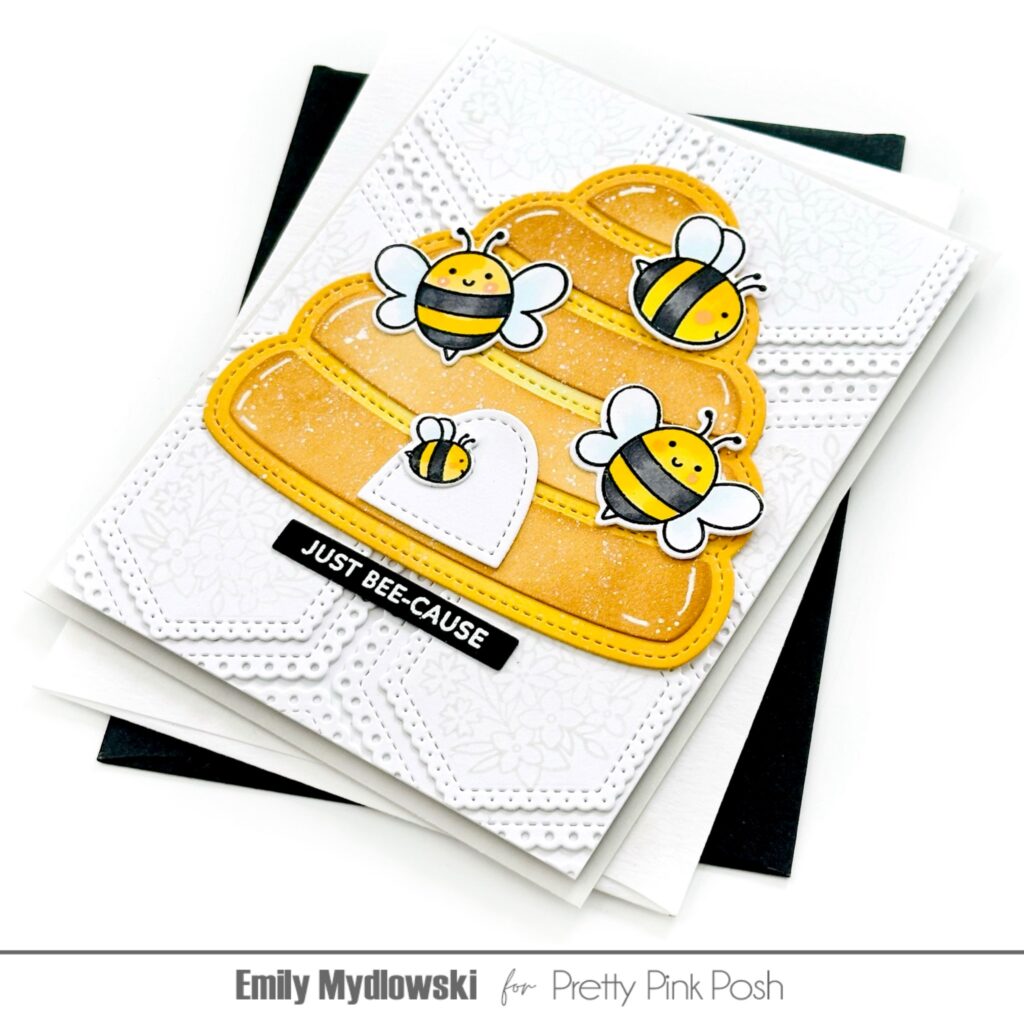
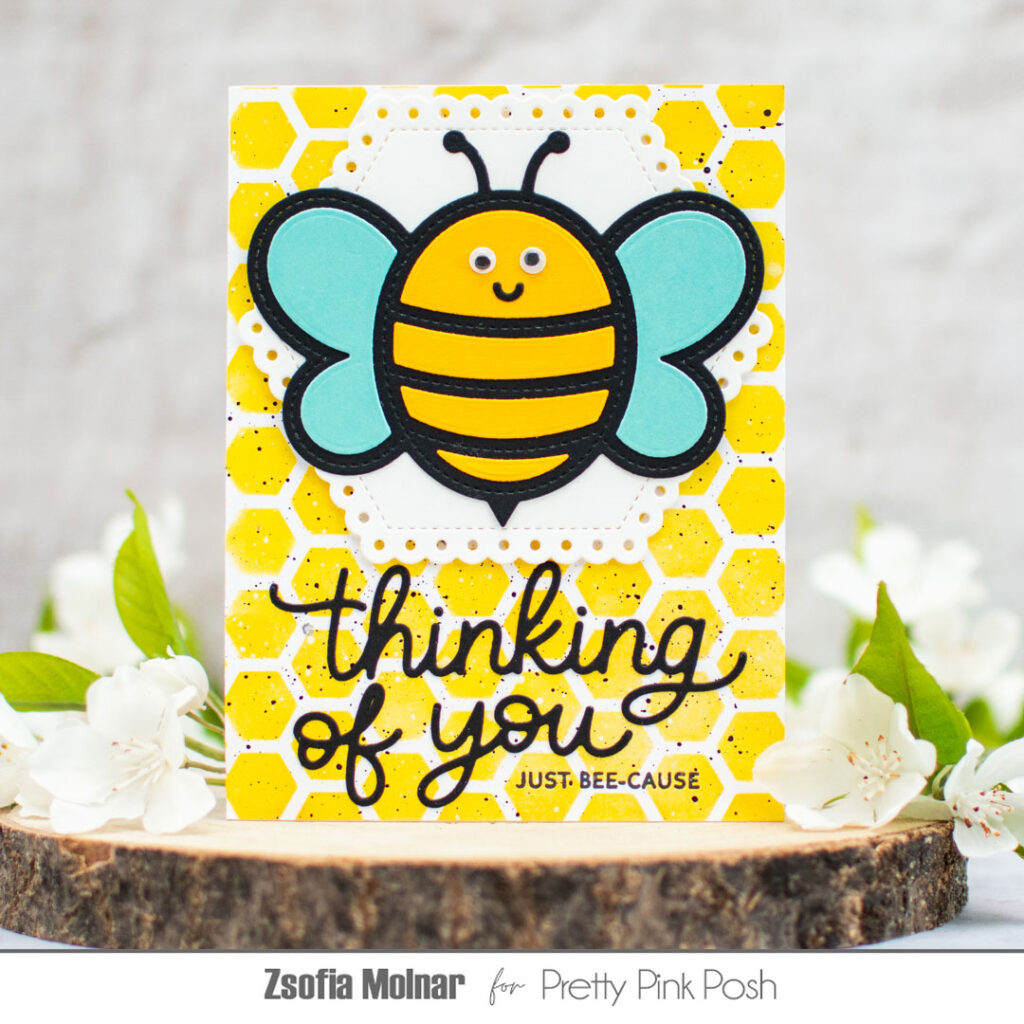
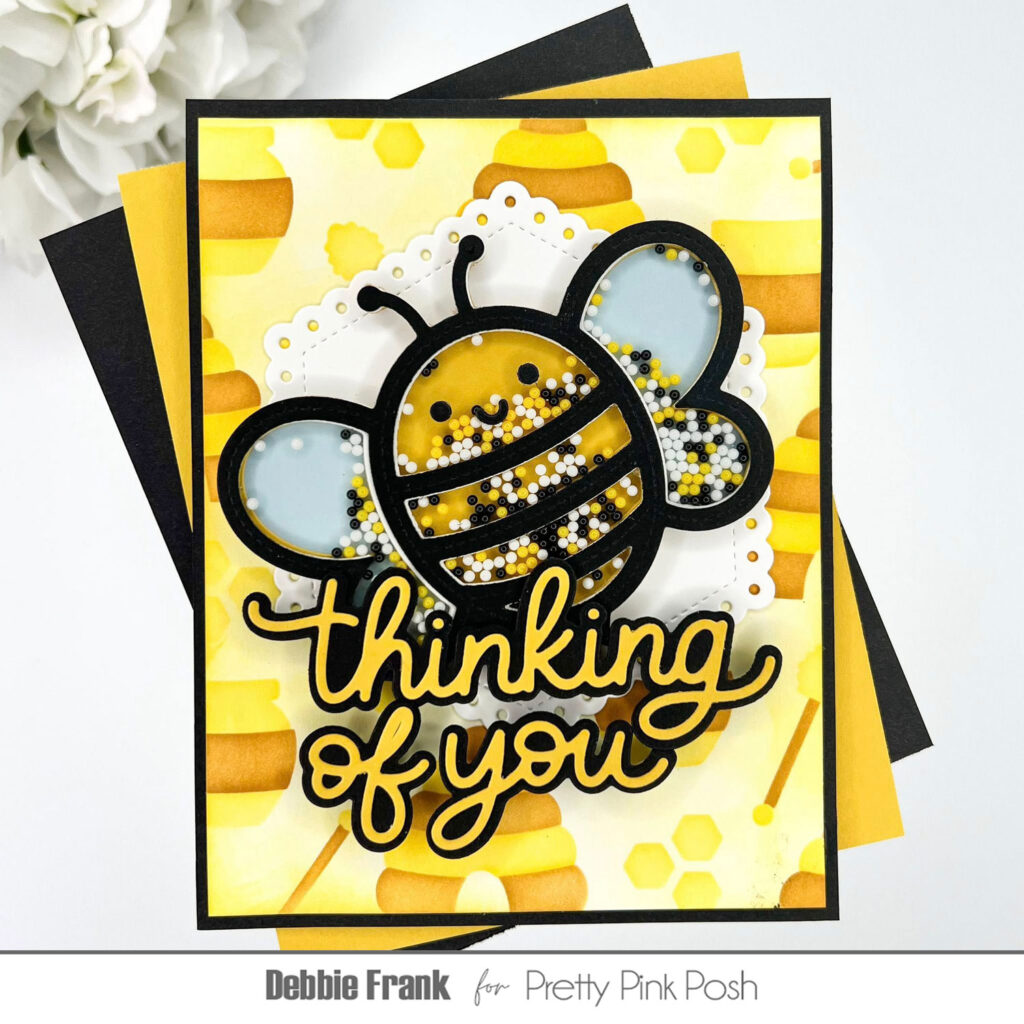
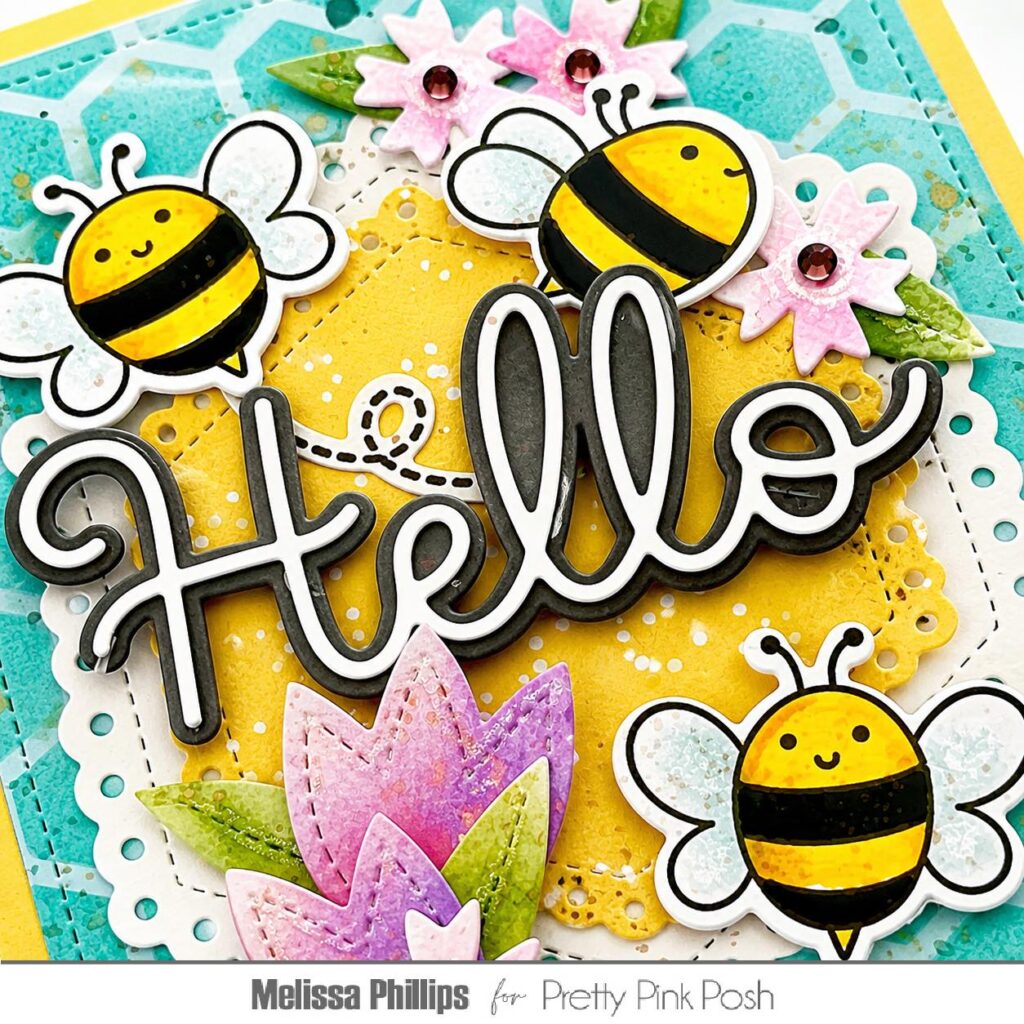
My second card warms my heart! I’ve used the new Honeycomb stencil to create my background. I stenciled bright aqua ink over an aqua cardstock background and then added a bit of splattering using coordinating Distress Spritz.
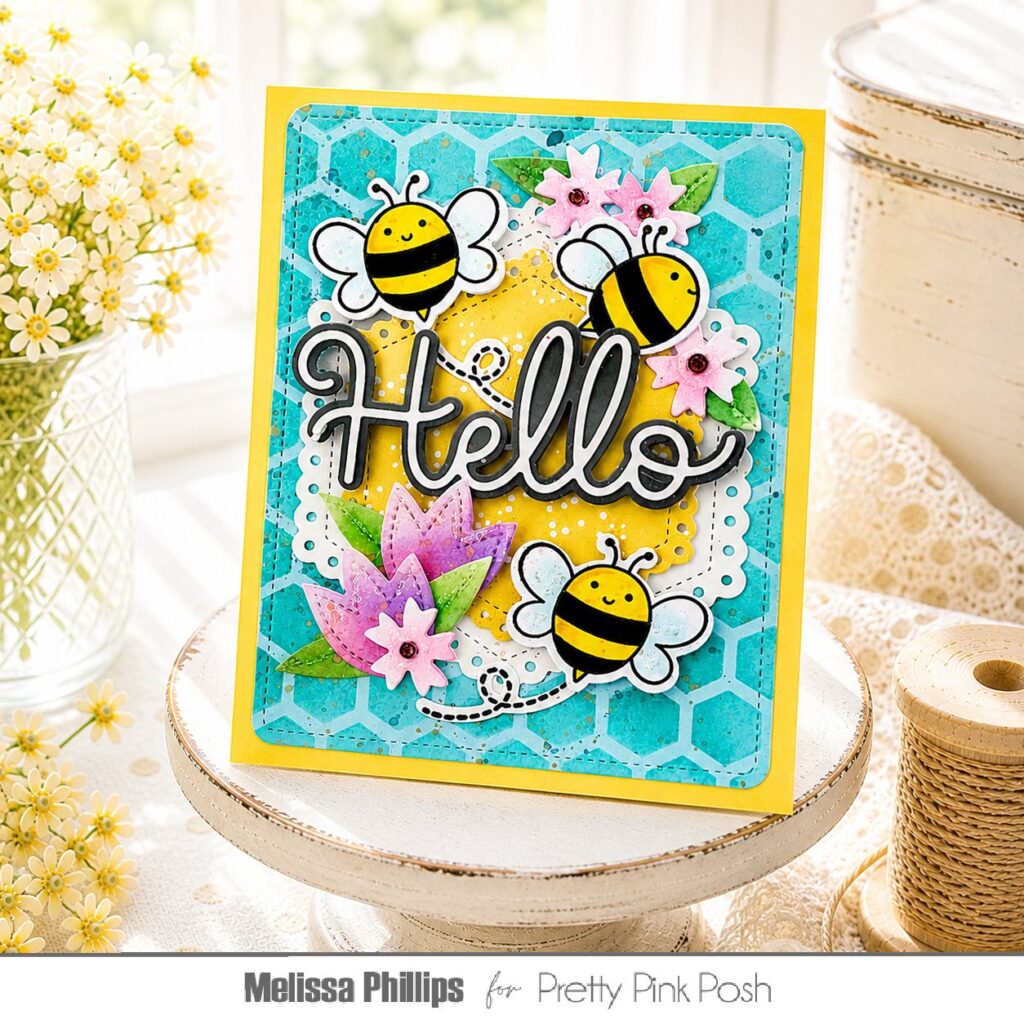
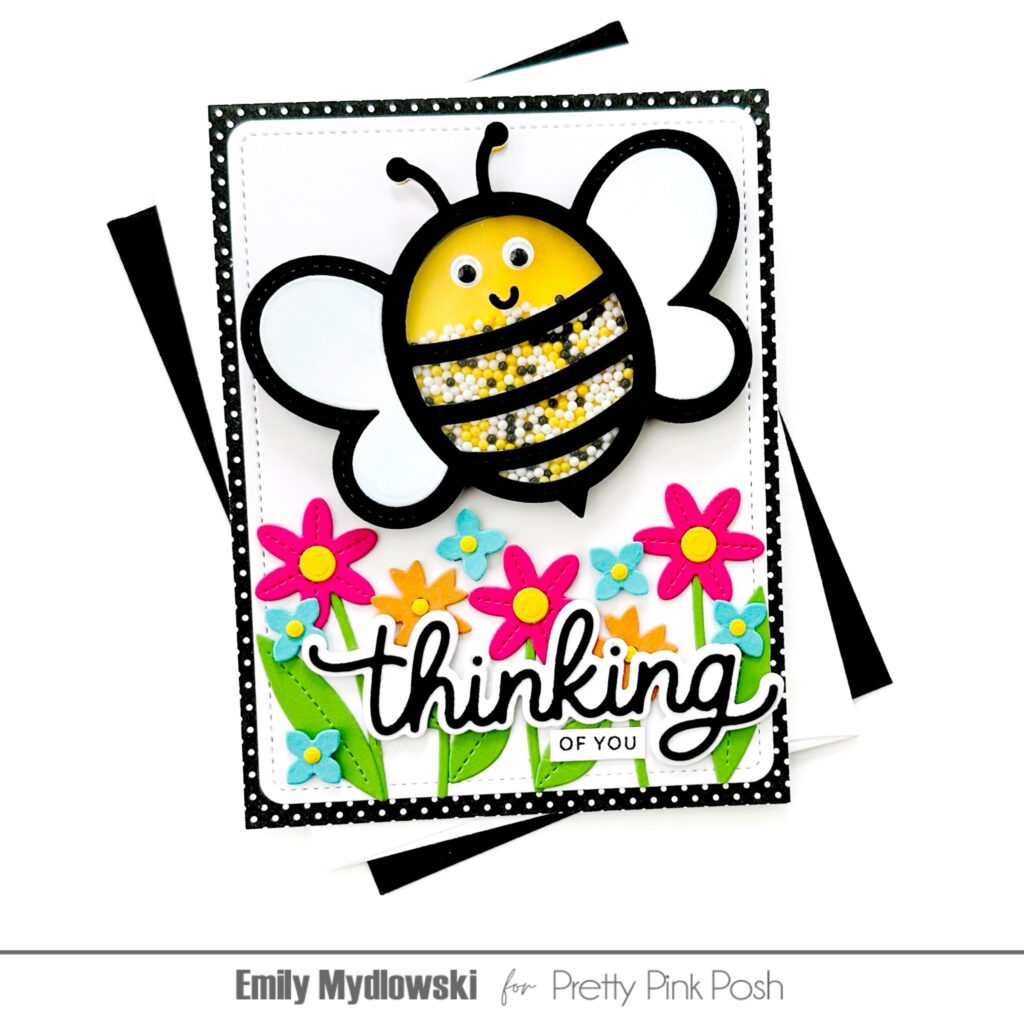
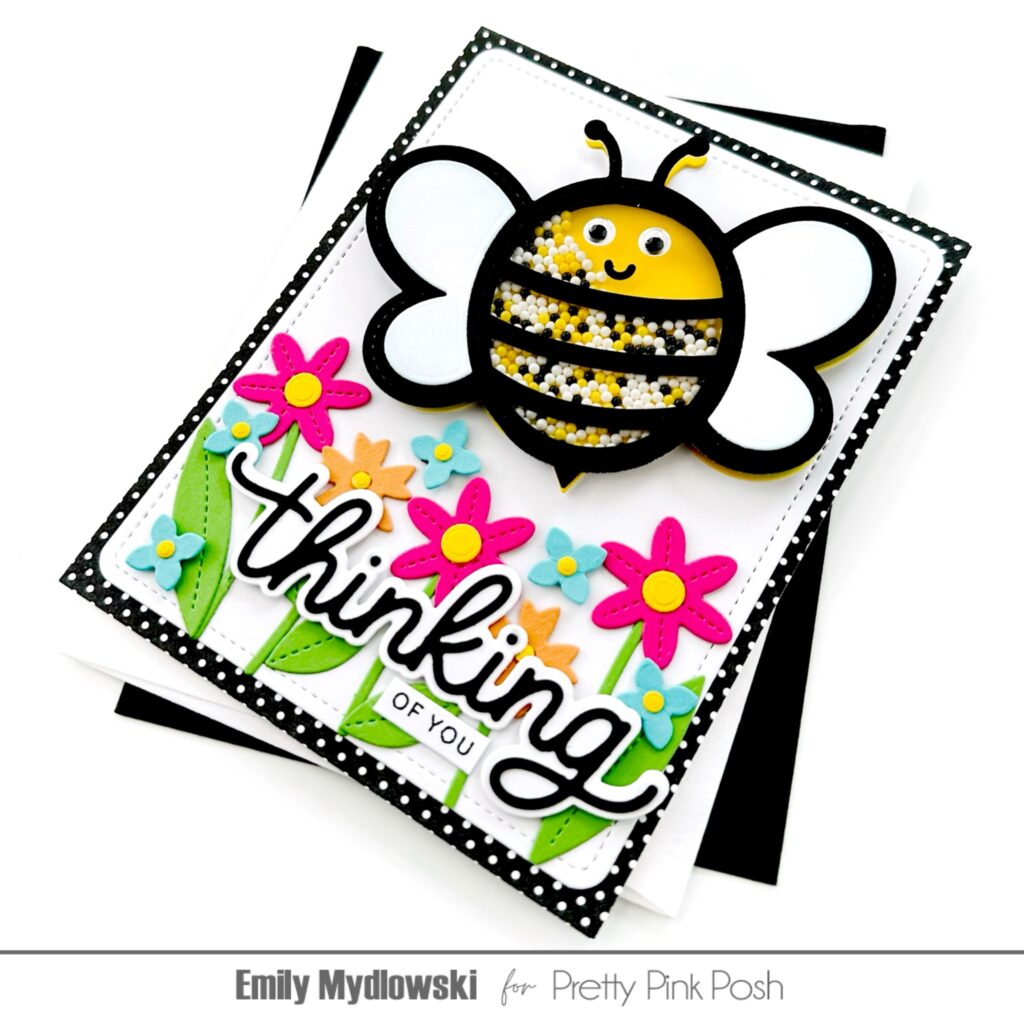
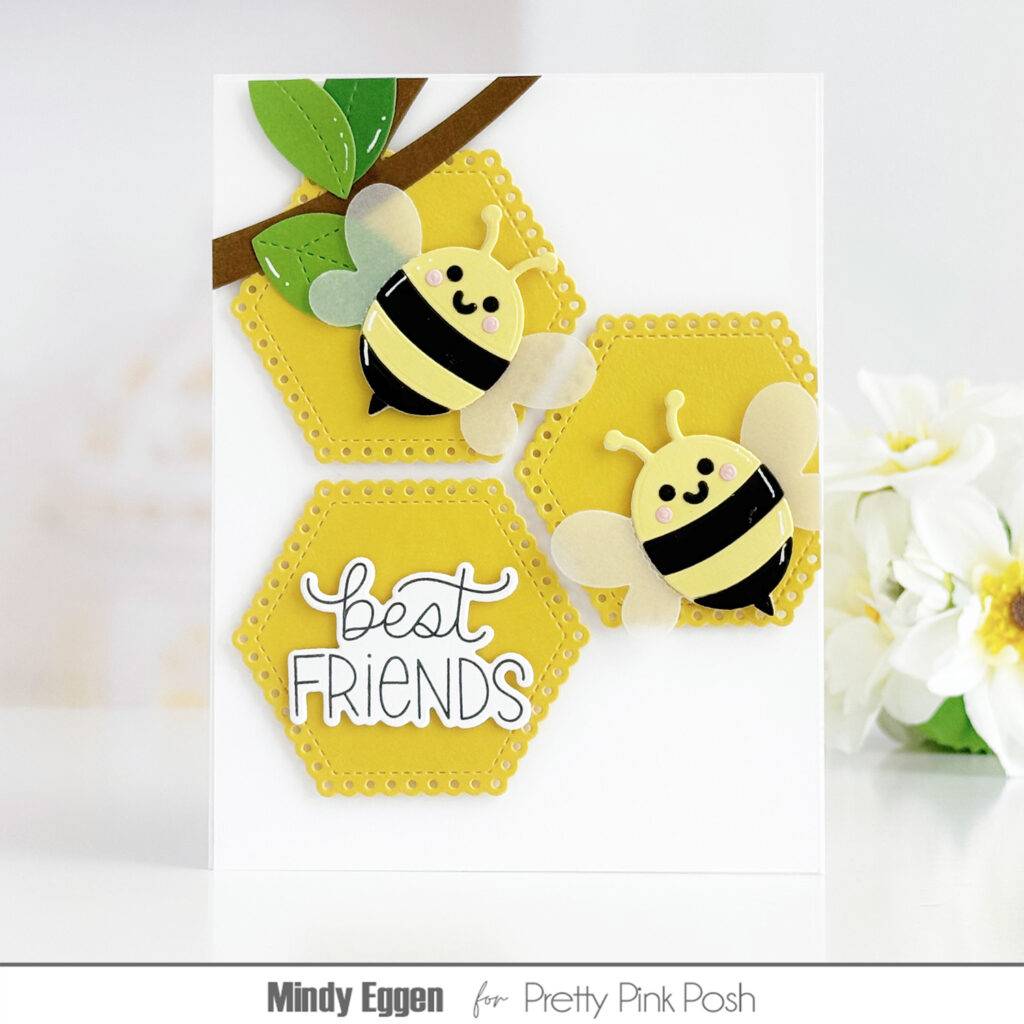
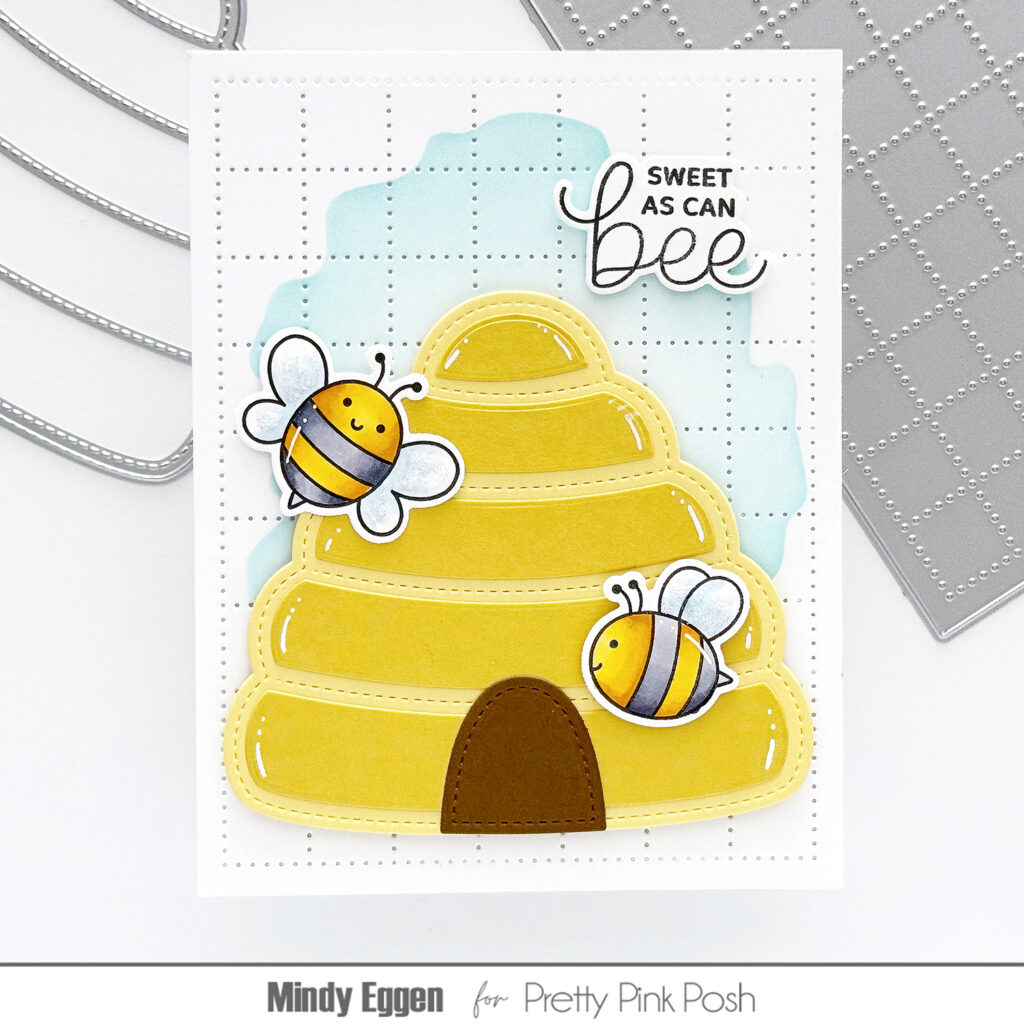
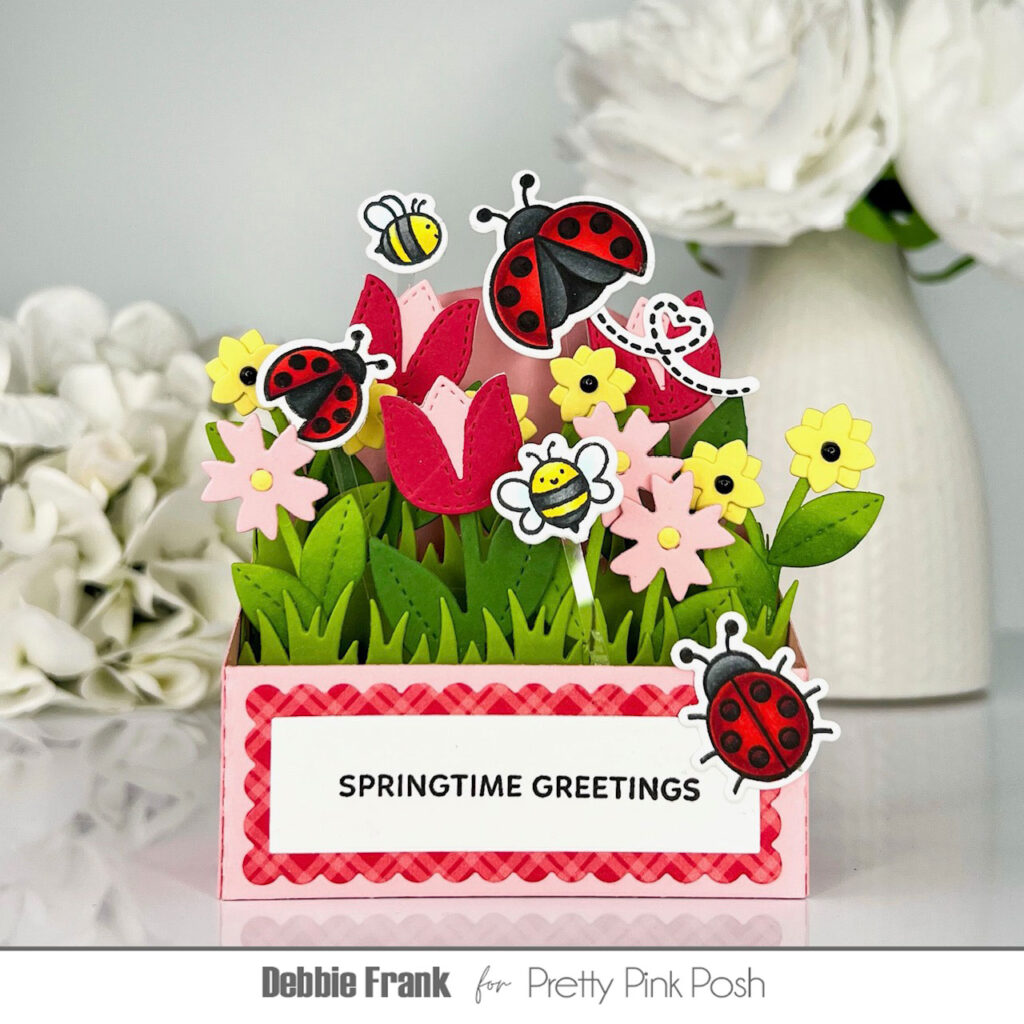
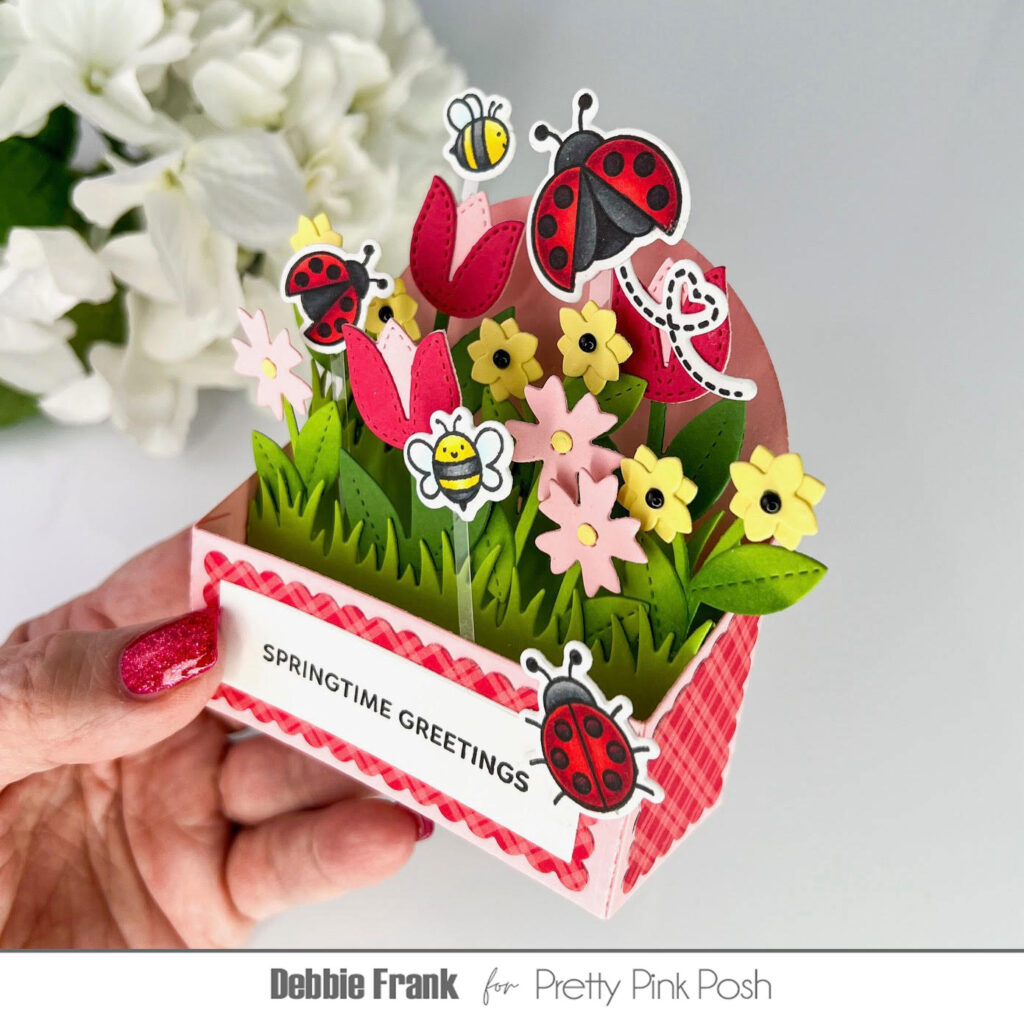
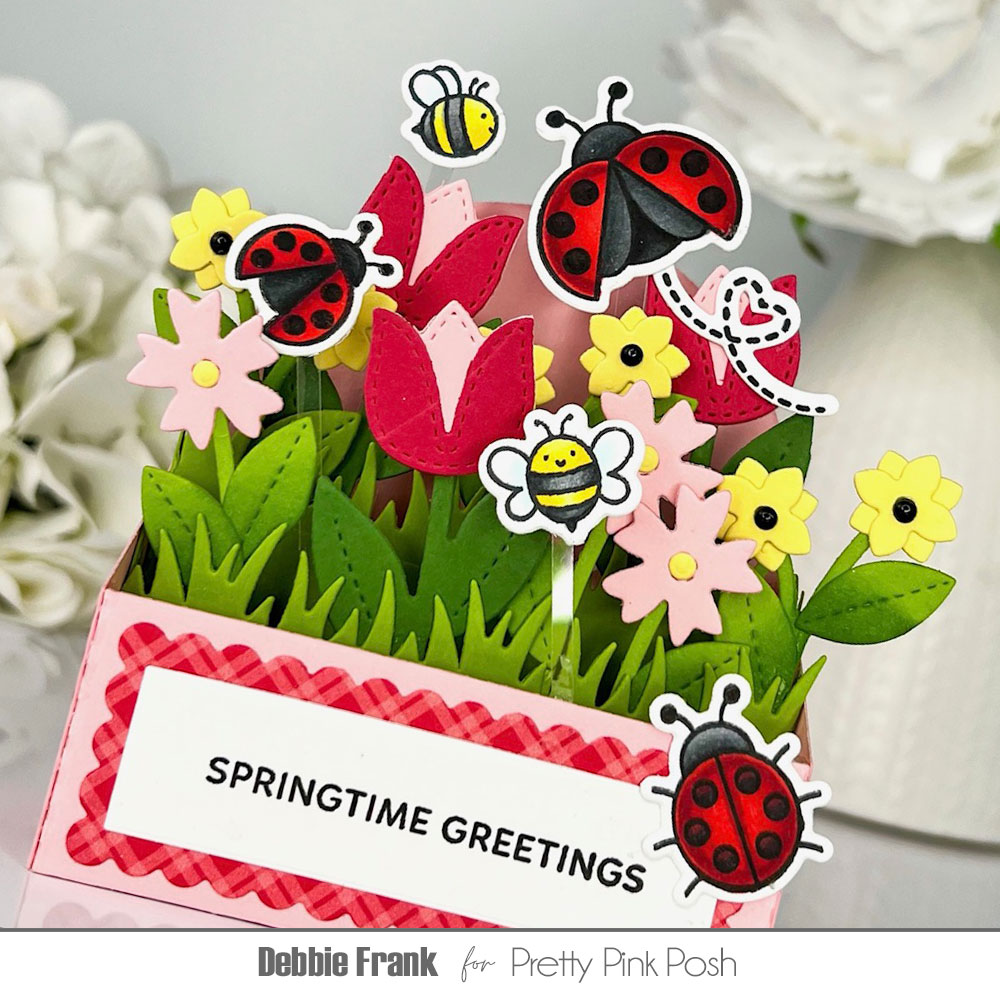
I used the Eyelet Hexagons dies to create my focal point. These come in a variety of sizes and layer together so perfectly. I added stamped and die cut bumblebees using the new Bee Additions stamps and coordinating dies. They are the cutest, happiest bumblebees!

My sentiment comes from the new Large Hello Shadow die. I love this beautiful, bold sentiment, don’t you?
The sweet tulips and tiny flowers were cut using the Stitched Spring Flowers dies. They make the sweetest accents and Iove adding them to my cards to finish things off.
Ready to see some wonderful samples from the team using these products? It’s so fun to see how we can use the same products in such a variety of ways!
It’s been so fun creating with you today. Stop by tomorrow to see the photo reveal of all the new products!