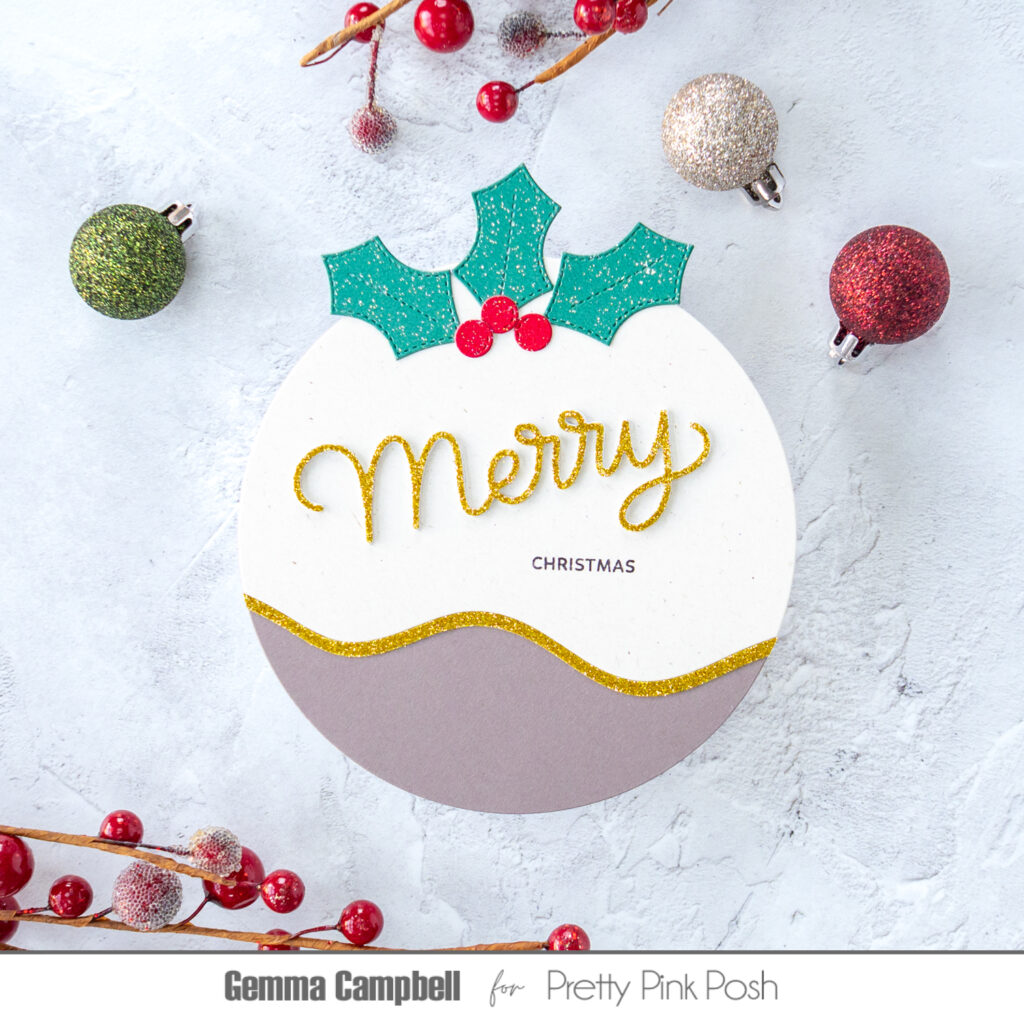
Hello, Gemma here today to share a fun Christmas pudding shaped card.
I began by creating the card base, using a large circle die from my stash. Die cut a folded card base, with the top of the circle die sitting above the fold line. To help the card base stand, trim a straight edge along the base at the back.
Next, I cut two more circles – one from cream card and another from brown card. I adhered the brown circle to the card base.
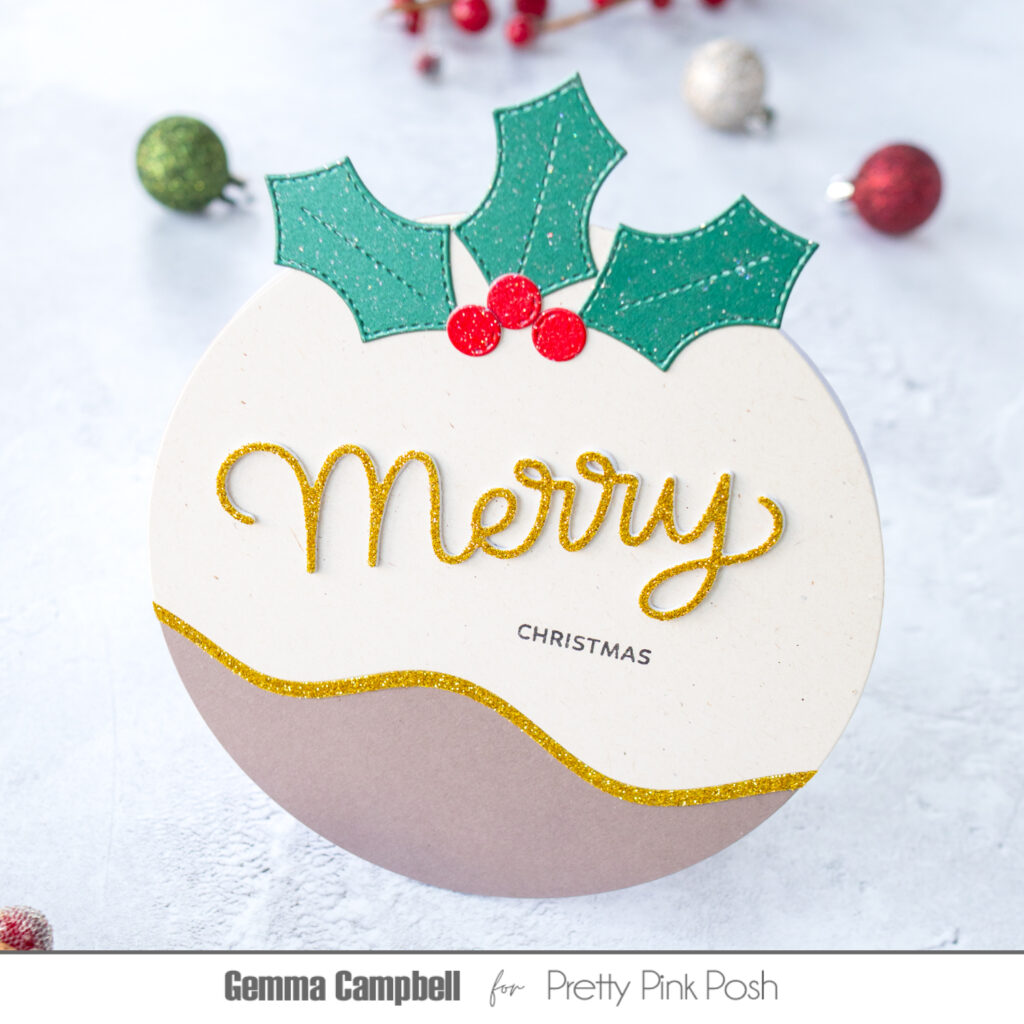
I used a die from theSnowy Hills Border set to add a wavy edge to the cream circle. I used the same border to create a gold glitter edge, adhering both to the card.
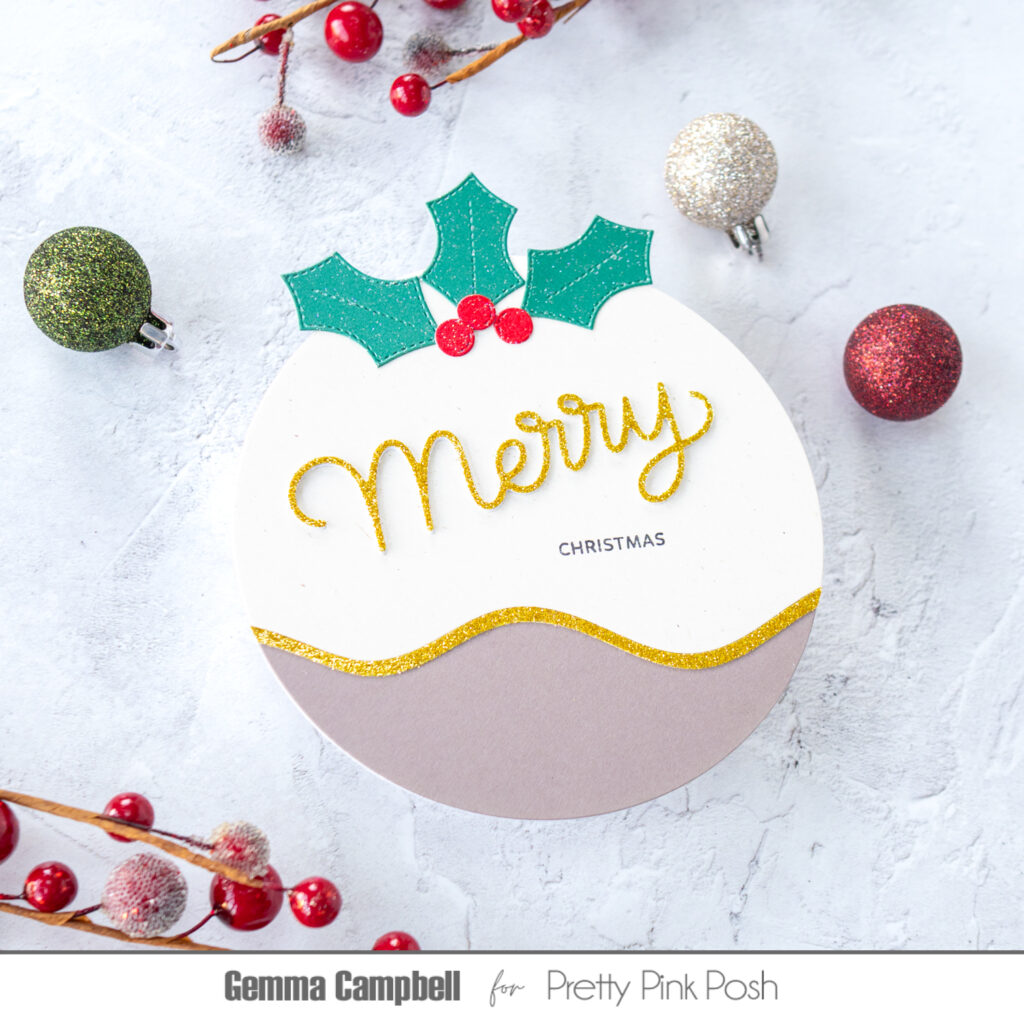
Next, I die cut some holly leaves and berries, using the Winter Foliage die set. I adhered these to the top of the card.
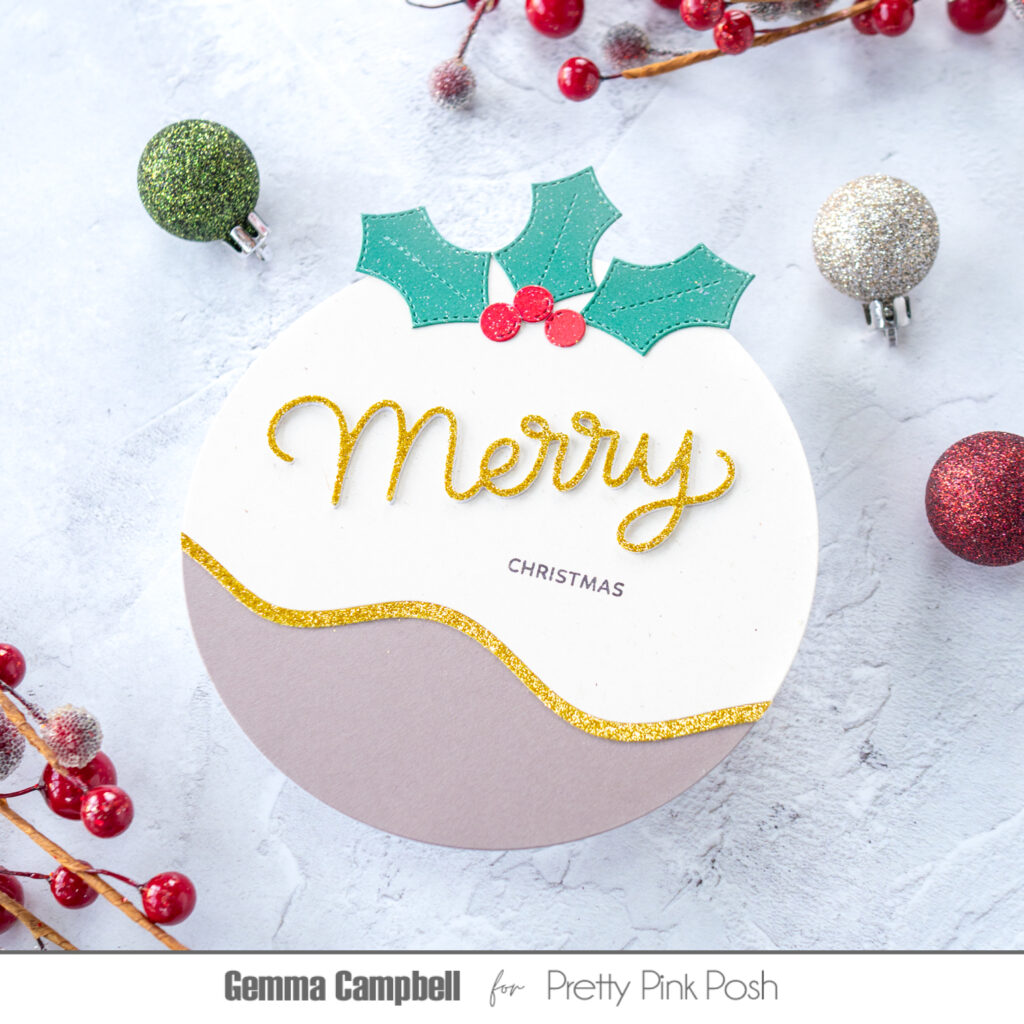
For the sentiment, I die cut the Large Merry Shadowfrom gold glitter card, adding some die cut layers behind for dimension. I stamped an accompanying sentiment on the cream card, from the Holiday Scripts stamp set, then adhered the Merry word above to finish.
This card was easy to put together and it’s fun to create a shaped card every now and then. Thanks for stopping by!
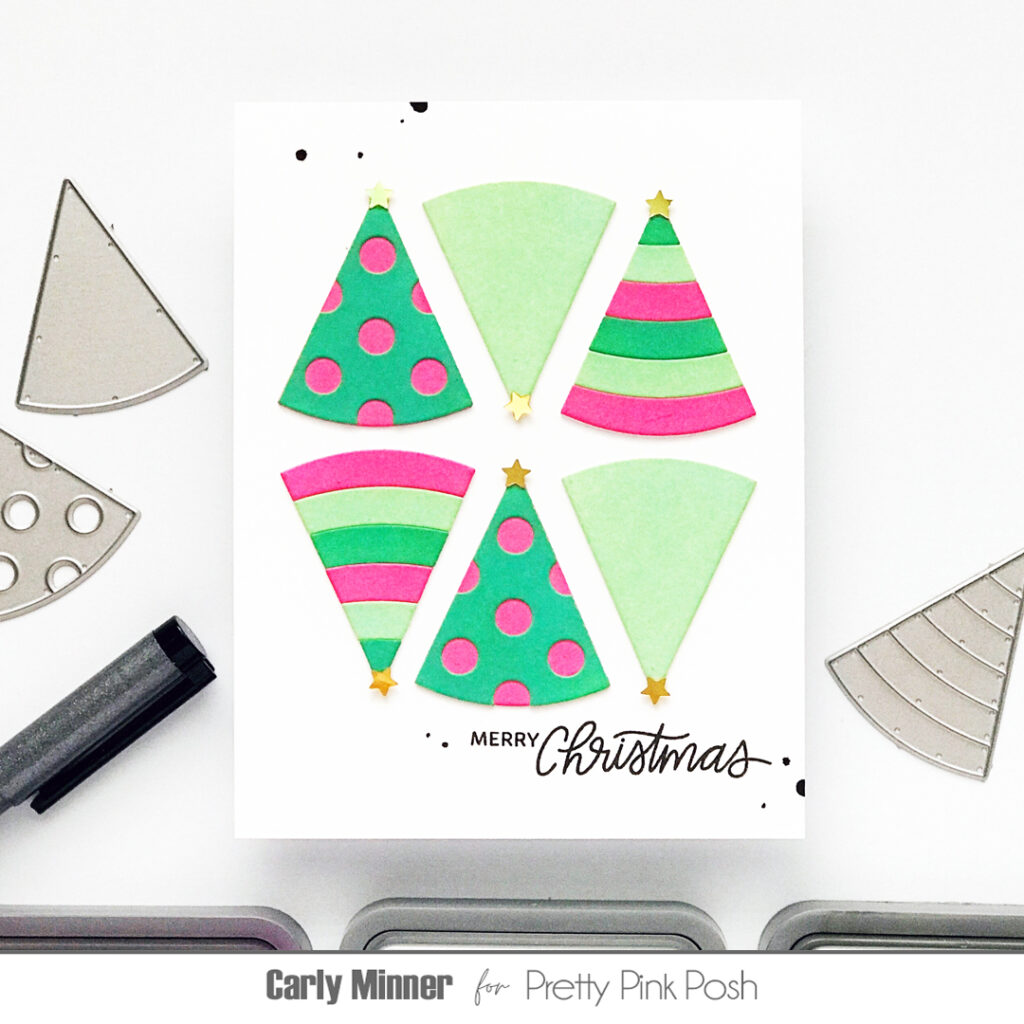
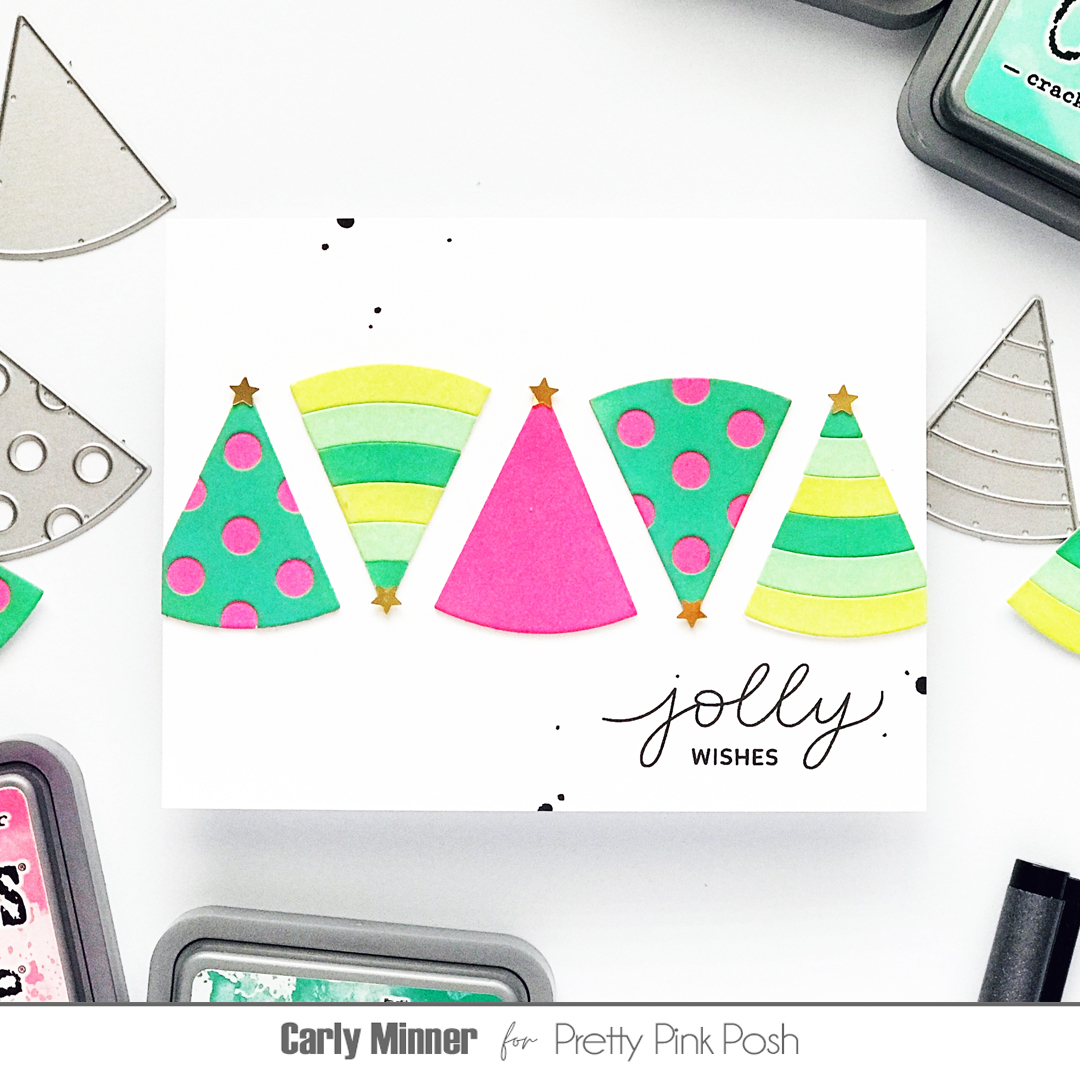
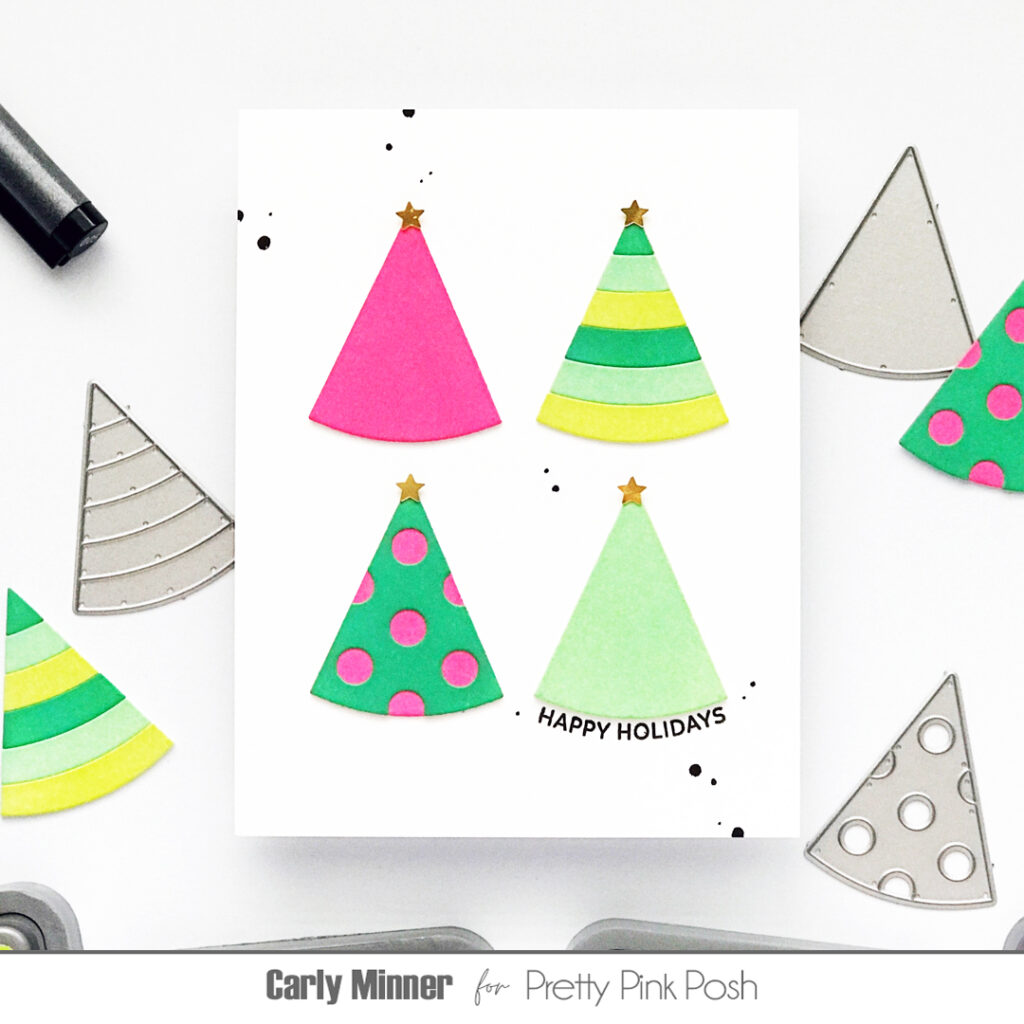
Hi friends, Carly here with you today. Are you looking for a technique to level up your card designs or an idea to jumpstart your creativity? Have you thought about using repetition?
Repetition is one of my favorite techniques for card design! It’s all about repeating elements like shape and color to create a cohesive design. For example you can see how I’ve repeated the tree shape with a limited color palette in these cards…
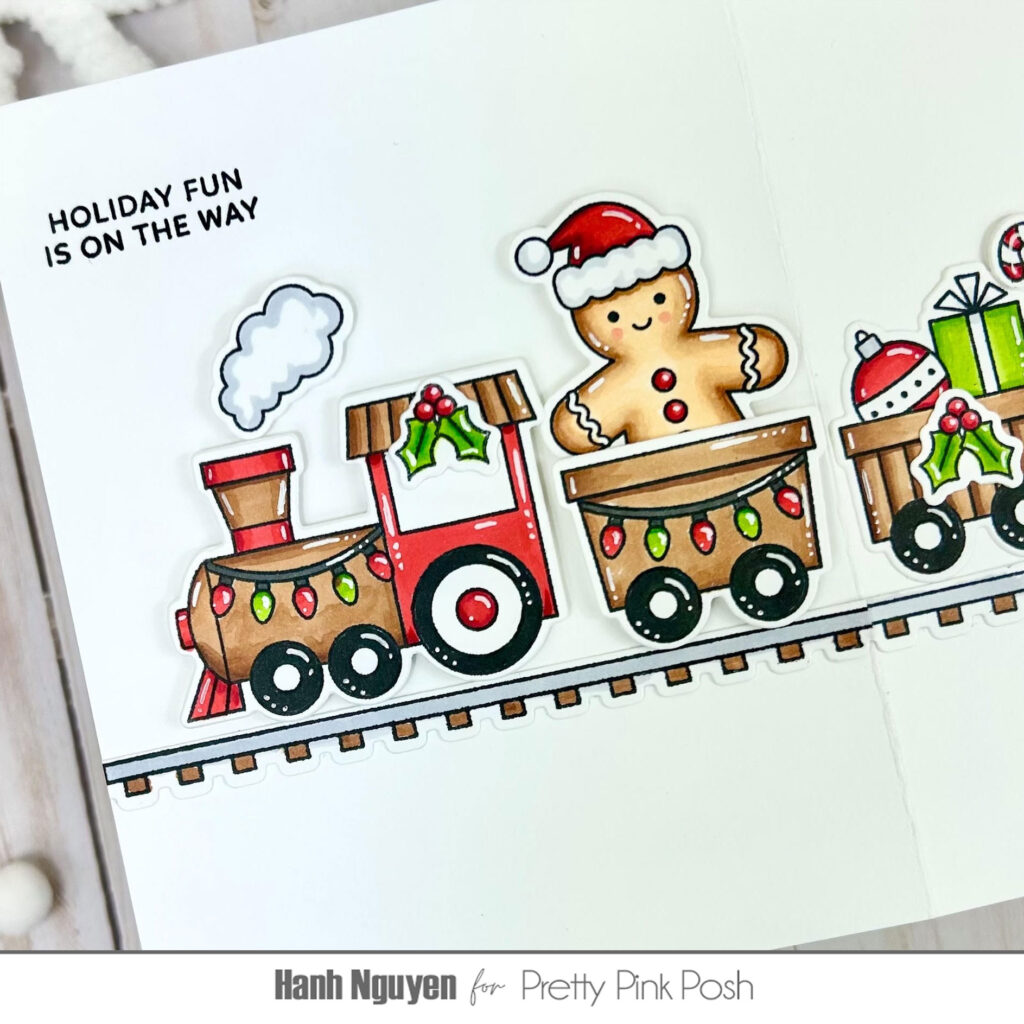
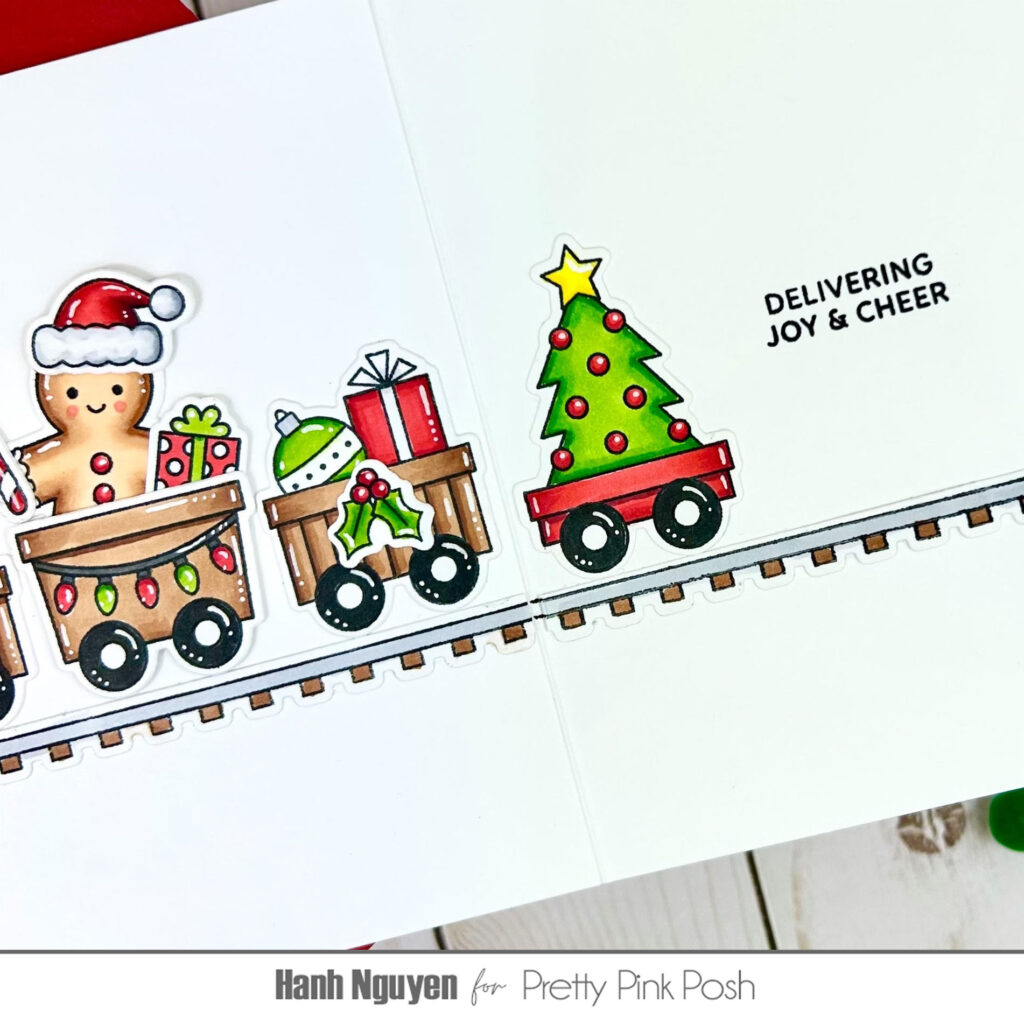
Hello Crafty Friends! It is Hanh here with you today. I’m sharing a fun Extra Long Christmas Train trifold card featuring the Christmas Train and some adorable Gingerbread Friends. It is super easy to customize the length of this cute Christmas Train set. However, there is only so much space on the front of a standard A2-size card. I was determined to find a way to fit more of the train onto my card. My solution: an unassuming card front that opens up to reveal a surprise trifold design that can hold 4 more carts of the train. So let’s get started.
First, I stamped the images from the Christmas Train stamp set and a couple of gingerbread images from the Gingerbread Friends set onto some Neenah Solar White cardstock with Memento Tuxedo Black ink.
NOTE: I used two different weights of Neenah Solar White cardstock for this card. The sturdiness of the Neenah 110 lb cardstock was perfect for the train engine and the first cart that I eventually adhered with foam tape to the card front. Whereas, the thin nature of the Neenah 80 lb cardstock was perfect for the remainder of the images which were adhered to the inside of the card and required a low profile in order for the card to fold up nicely.
For the trifold cardbase, I took a piece of white cardstock (8.5″ x 11″) and trimmed it in half to create 2 smaller panels (8.5″ x 5.5″). I used a score board to score and fold at the midline 4.25″ mark to create 2 side-folding A2 cardbases. I will now refer to these 2 cardbases as Card A and Card B. Card A will eventually be the left two panels of the finished trifold card. Card B will eventually be the back of the center panel and the right panel of the finished trifold card.
I opened and flipped Card A upside down on my table top as if I flipped an open book upside down to save the page that I was on. Card A should look like a tent or mountain with the fold line as the peak.
Next, I opened and held Card B right side up as if I were reading a book. Card B should look like a valley with the fold line pointing to the ground. I trimmed a sliver (about 1/8″) off of the left edge of the left panel of this card. Then, I added liquid glue all along the outline of the left panel of the card. I adhered the left panel of Card B to the back of the right panel of Card A.
The end result should be a trifold card with a left panel, a peak up, a center panel (two layers), a valley and then a right panel.
For the sentiment, I stamped the sentiments from the Christmas Train Stamp set “Holiday Fun is on the Way” onto the left panel (card front) and the “Delivering Joy & Cheer” onto the right panel (card inside) with Memento Tuxedo Black ink.
The train tracks and the colored images added to the inside of the card were adhered with liquid glue. The train engine, smoke and first cart were adhered to the front of the card with foam tape for a bit of dimension and interest.
I appreciate you taking the time to stop by and visit today. I hope you liked my card and are inspired to make your own trifold card.
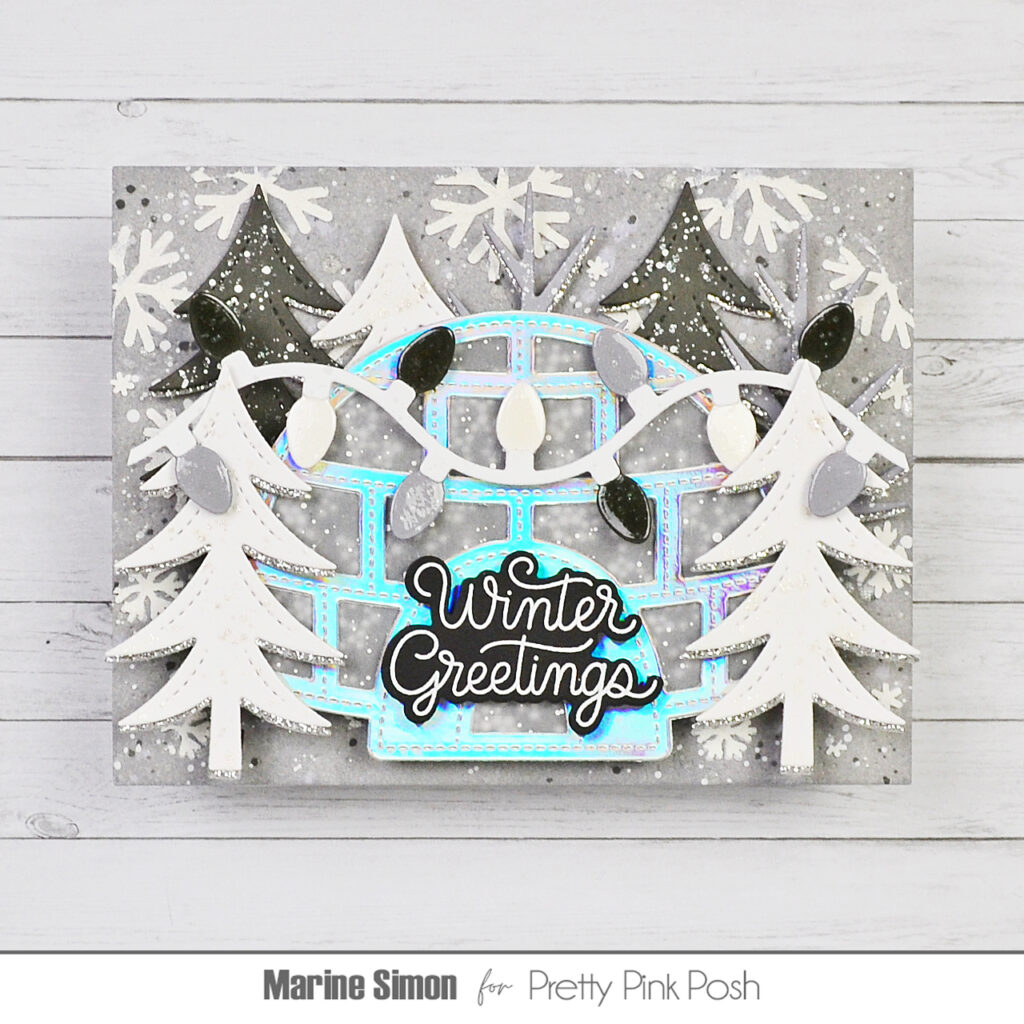
Hi crafty friends, Marine here with you today, I’m glad to be back with this new winter themed shaker card showcasing products from the November 2025 release. Working on that Igloo Shaker was super fun, I really enjoyed using vellum instead of the traditional acetate to make the window panel, I thought it would emphasize the frosty look of my card, I’m quite happy with how the whole scene turned out, and I hope that you like it, too!
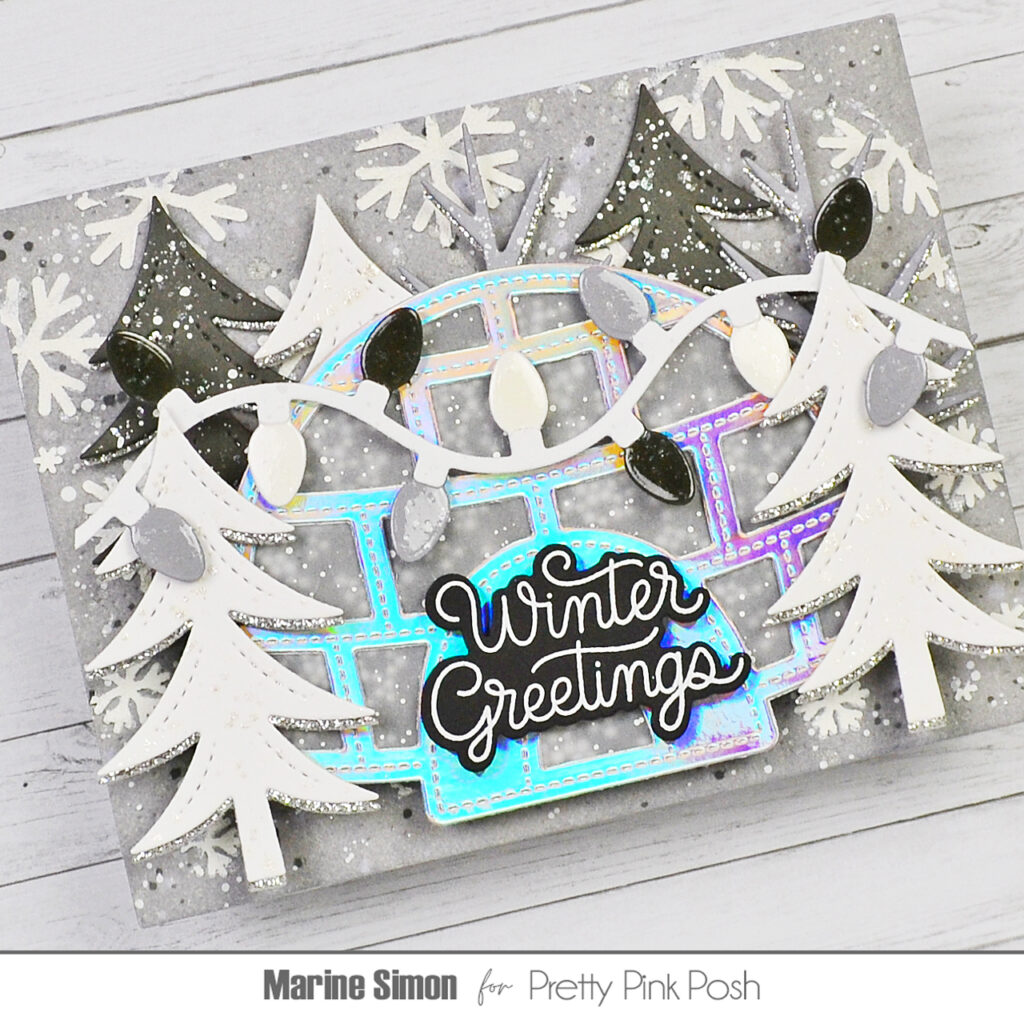
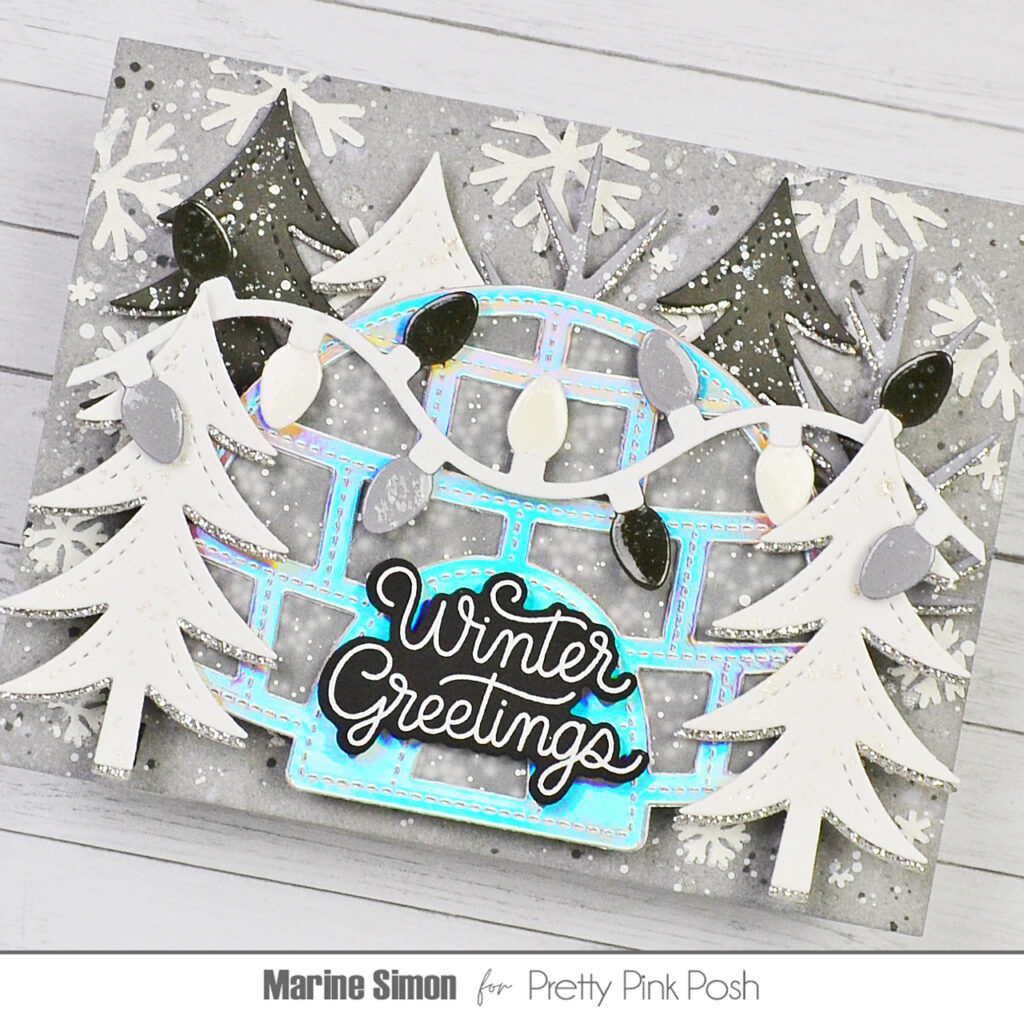
While my panel was drying, I cut my Winter Trees out of dark grey, light grey, white and silver glitter cardstock. I added white splatters and liquid stardust splatters on the grey and white trees, let them dry, and then attached a cardstock tree to a silver glitter tree using liquid glue, shifting the trees a little bit to get sparkling borders under the branches. I also cut the pieces to build my Christmas Light Garland out of the same cardstock as the trees. I added liquid stardust splatters to each light, attached them to the white string using liquid glue, and then applied glossy accents to the lights to make them super shiny.
1. I cut the Igloo Shaker frame out of holographic cardstock, cut a whole igloo out of vellum, added white splatters to that vellum panel, and once dry, attached it at the back of the holographic frame with liquid glue,
2. Still at the back of the igloo, I attached foam strips around the edges, following the curves, and also on each small section that divides the igloo,
3. I poured Black Tie shaker beads inside each section of the igloo, and peeled all the backing papers off the foam strips,
4. I cut another whole igloo out of dark grey cardstock, and attached it to the foam strips to totally close my Igloo Shaker.
Next I attached everything to my Cascading Snowflakes panel using 1mm and 2mm foam squares, starting with some Winter Trees in the back, my Igloo Shaker right in the middle of the panel and a tree on each side, and then the Christmas Light Garland on the igloo. My greeting is from Let It Snow, I white heat embossed it on black cardstock, cut it using the matching die, and finally attached it to the igloo using foam squares again.
And that’s it! Thanks so much for stopping by, and see you soon!
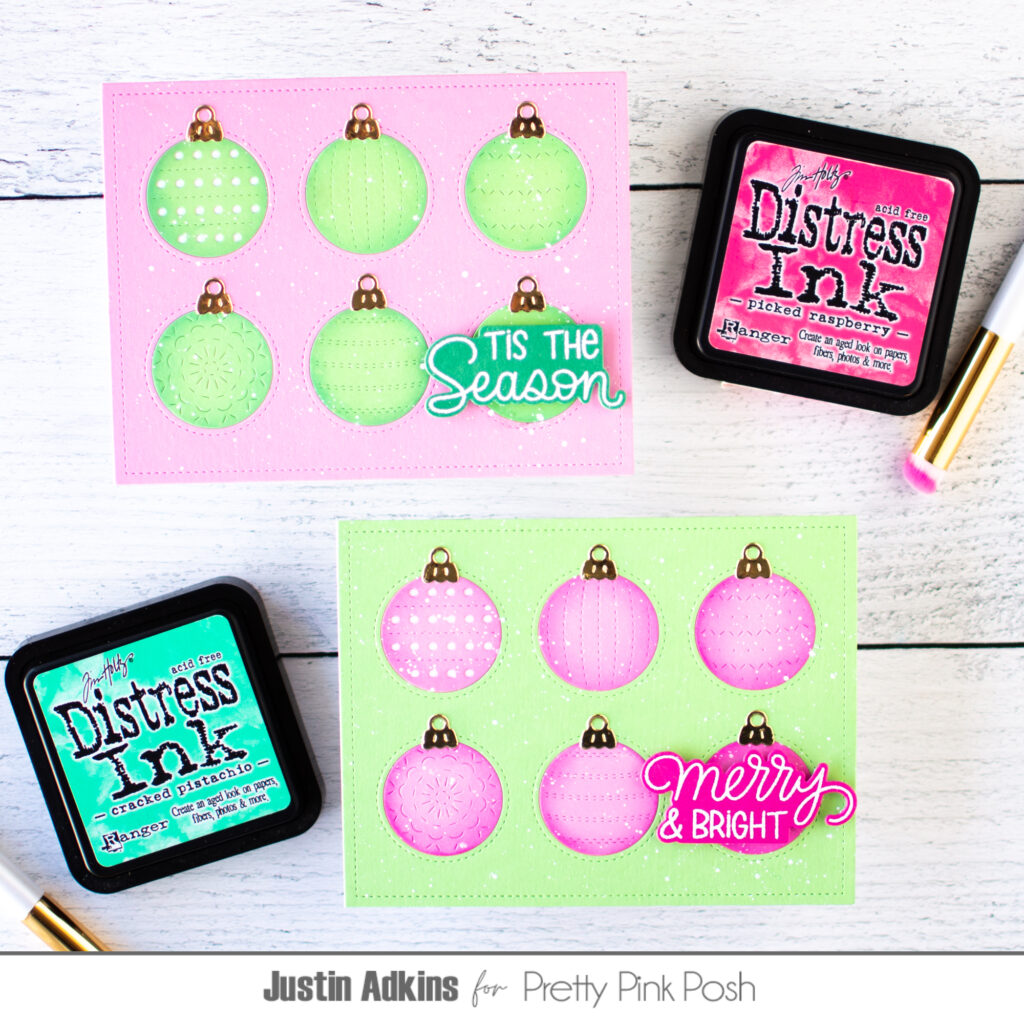
Hello, friends! Justin here, and I am so excited to be finishing off this super fun Christmas Theme Week with a duo of cards that are incredibly easy to create using a 2-for-1 method! I have been itching to use the Ornament Cover Plate Die, and this was the perfect opportunity to use it with some simple sentiments!
Now, let me show you how easy it was to put this card together!
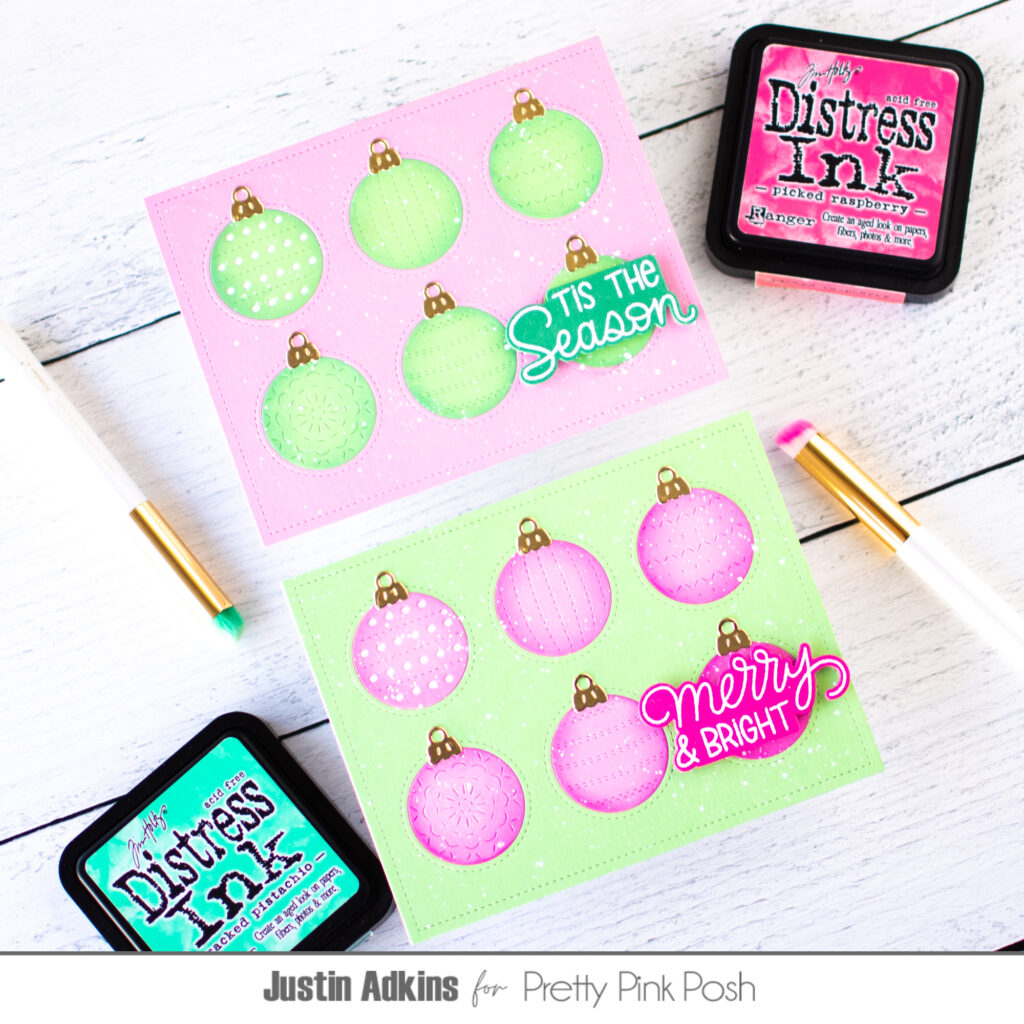
I decided that I just wanted to play with 2 distinct colors, and settled on bubblegum pink and mint green. I thought these were cards that play really well with themselves for the holiday season (that, and I was REALLY excited that the new Wicked: For Good movie would be out soon). I took the Ornament Cover Plate Die, and die cut the plate once from pink cardstock and again from green cardstock.
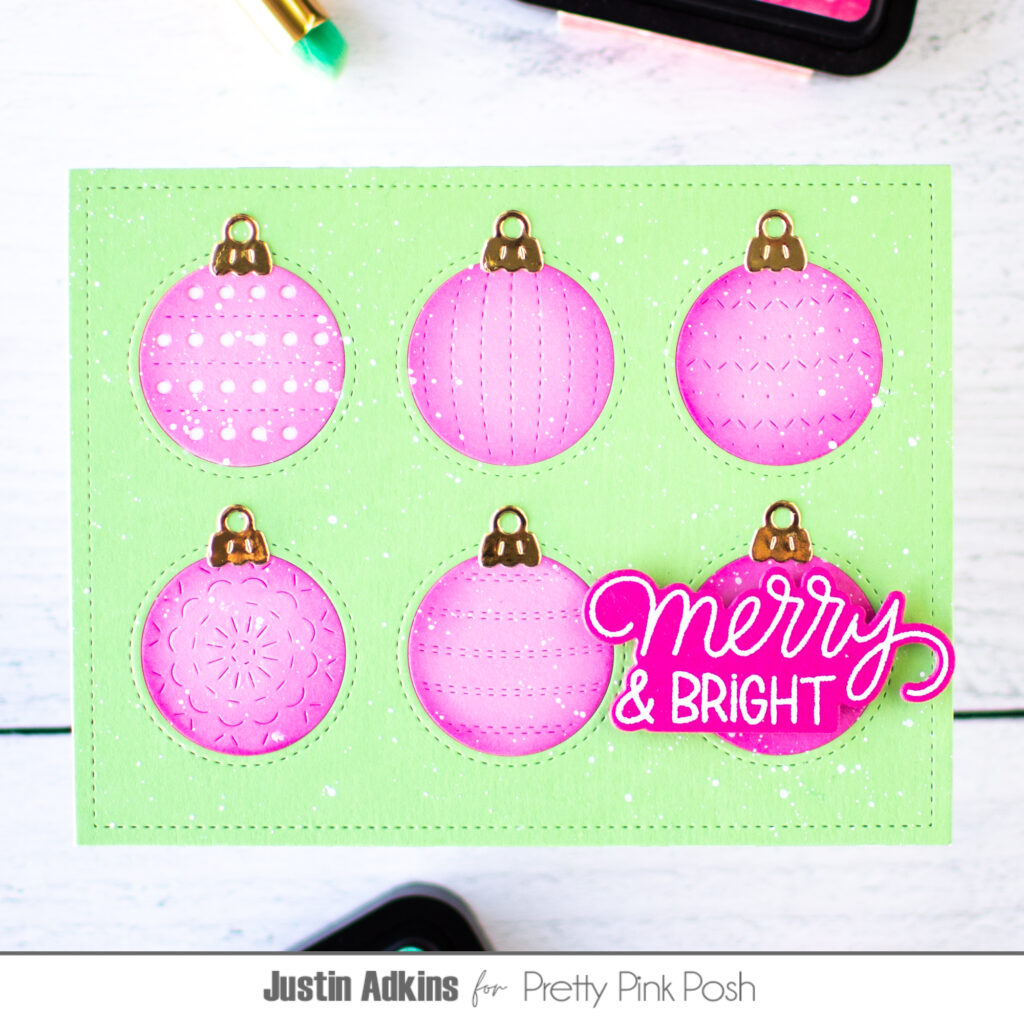
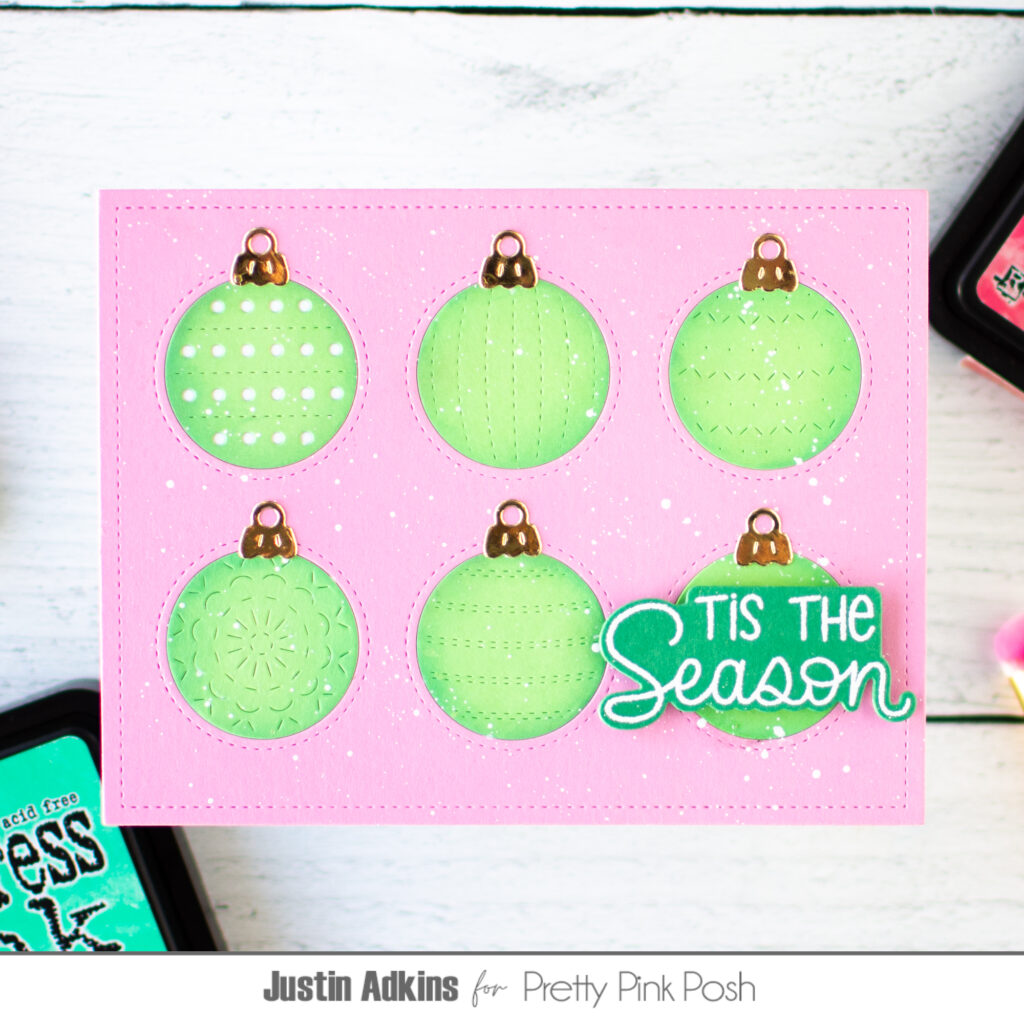
Because the Ornament Cover Plate Die is designed to create ornament designs with the negative shapes, I ended up with (6) pink and (6) green ornaments. I wanted to give these ornaments a little bit of extra detail, so I decided to blend the edges of the pink ornaments with Picked Raspberry Distress Ink, and the edges of the green ornaments with Cracked Pistachio Distress Ink. I felt this ink blending really helped the ornaments have more dimension than had I left them just plain cardstock.
I adhered my cover plate die cuts onto a white A2-sized card base, and then fit ornaments of the opposite color into each of the negative circle spots.
I was originally planning on adhering embellishments onto each card, by the simple symmetrical design of the card was sort of throwing me through a loop for embellishment placement. I decided to instead splatter each panel with white acrylic paint. I thought this was a great way to add some detail to the card, without overthinking placement. Also, I die cut the ornament topper dies from metallic gold paper, which also helped give the ornaments some great flair.
To finish my card, I heat embossed the sentiments “Tis The Season” and “Merry & Bright” on colored cardstock in white embossing powder. To give the sentiments a little bit of lift, I adhered them to the lower right ornament on each card using foam tape.
And there you have it! An easy way to create a duo of cards with minimal die cutting! I think that there are so many fun ways you could use this cover plate die for batch card making this holiday season!
GIVEAWAY
For today’s giveaway, we are giving away a $50 Pretty Pink Posh gift card. All you have to do is leave a comment on this post sharing what holiday product(s) you hope we release in the future.
All giveaways for Christmas Theme Week will end on December 10th. We’ll share a post with all the winners on the PPP blog later that week.
Thank you for stopping by today, and happy crafting!
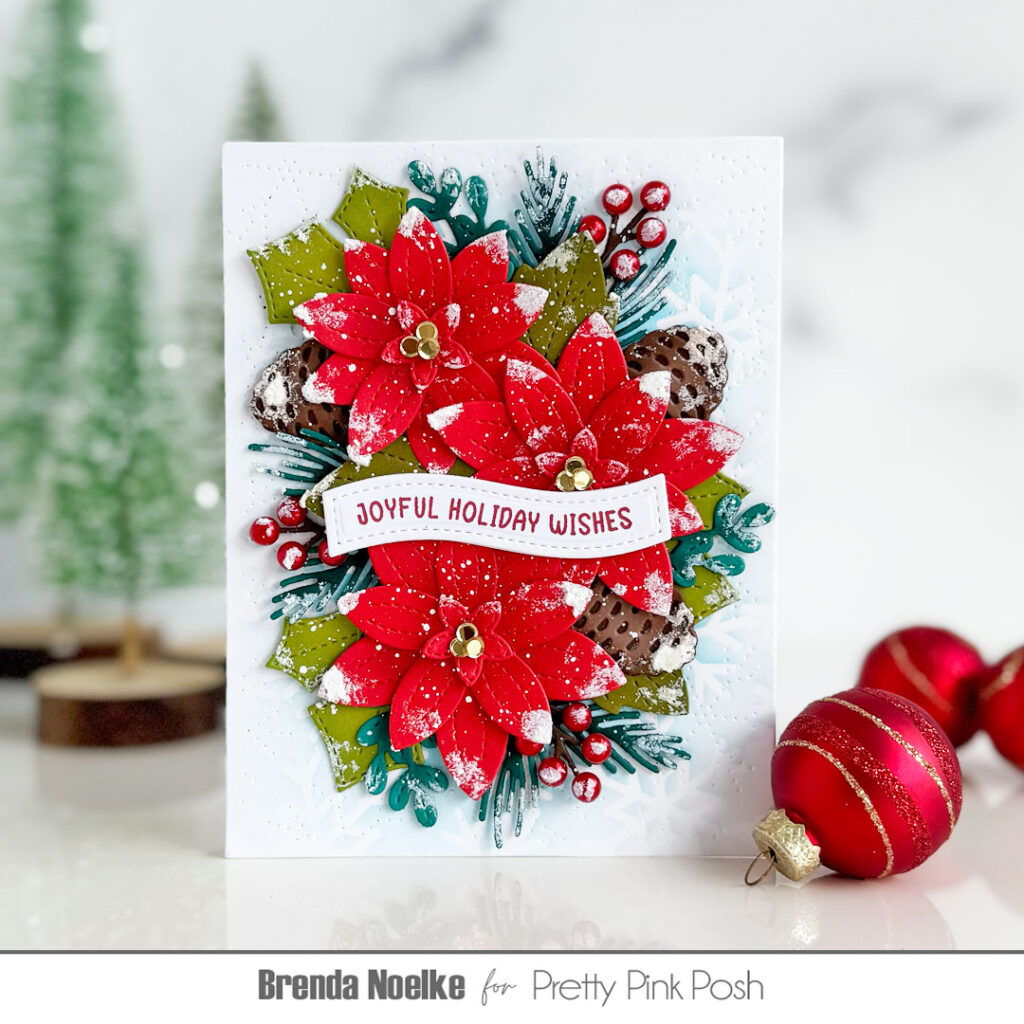
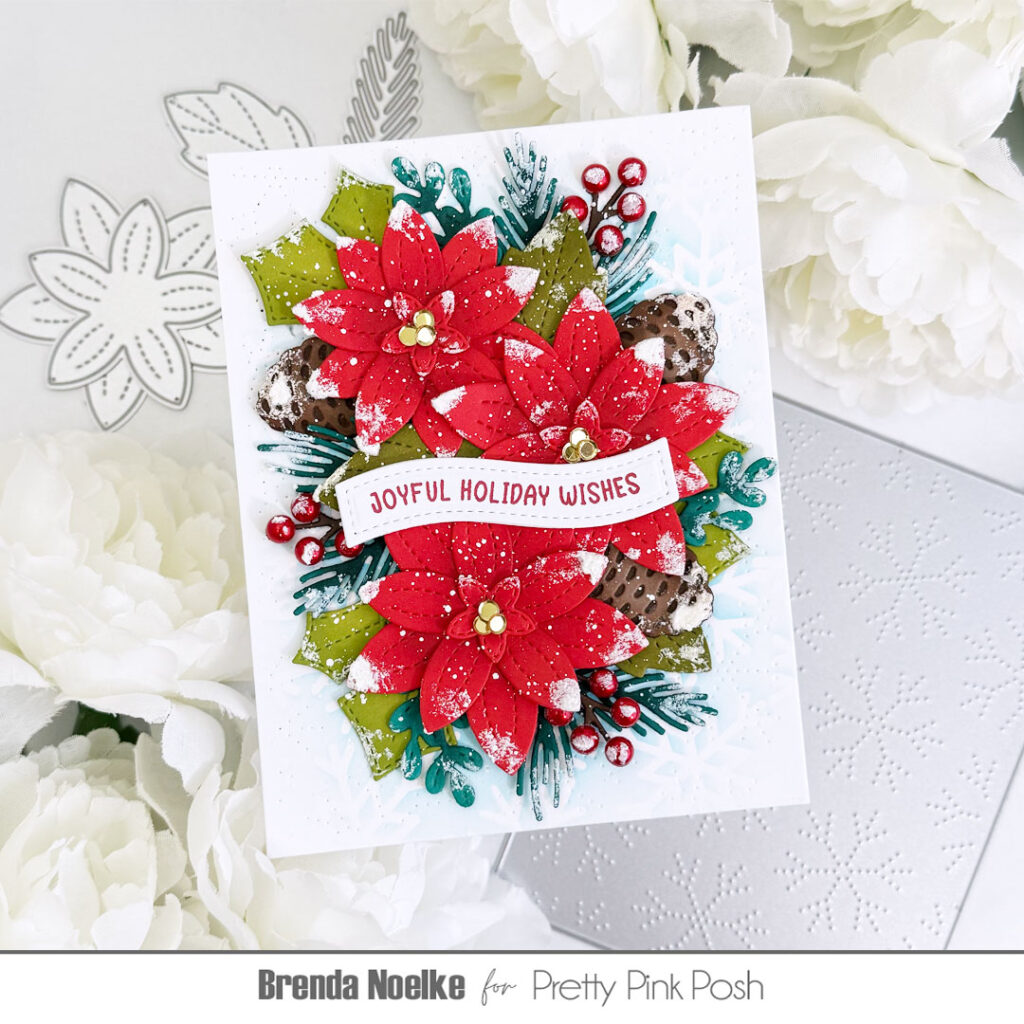
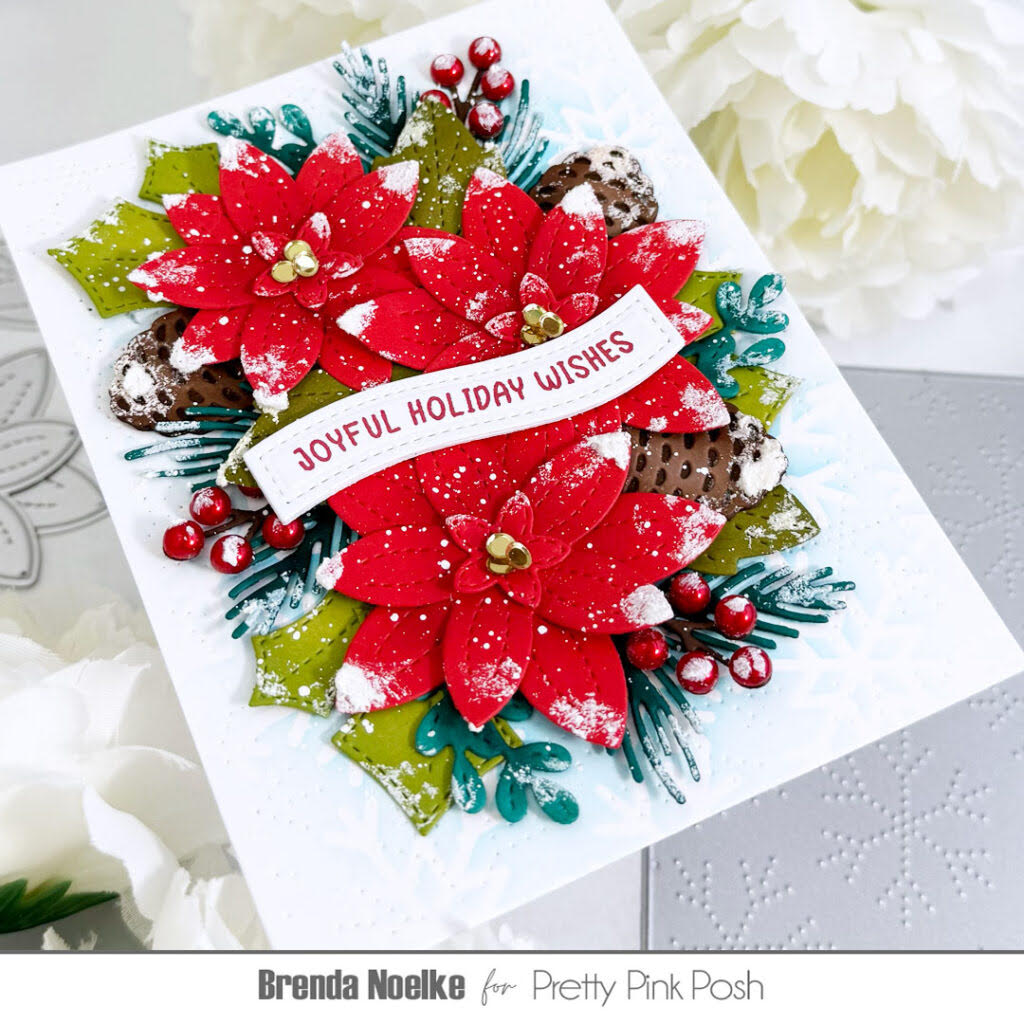
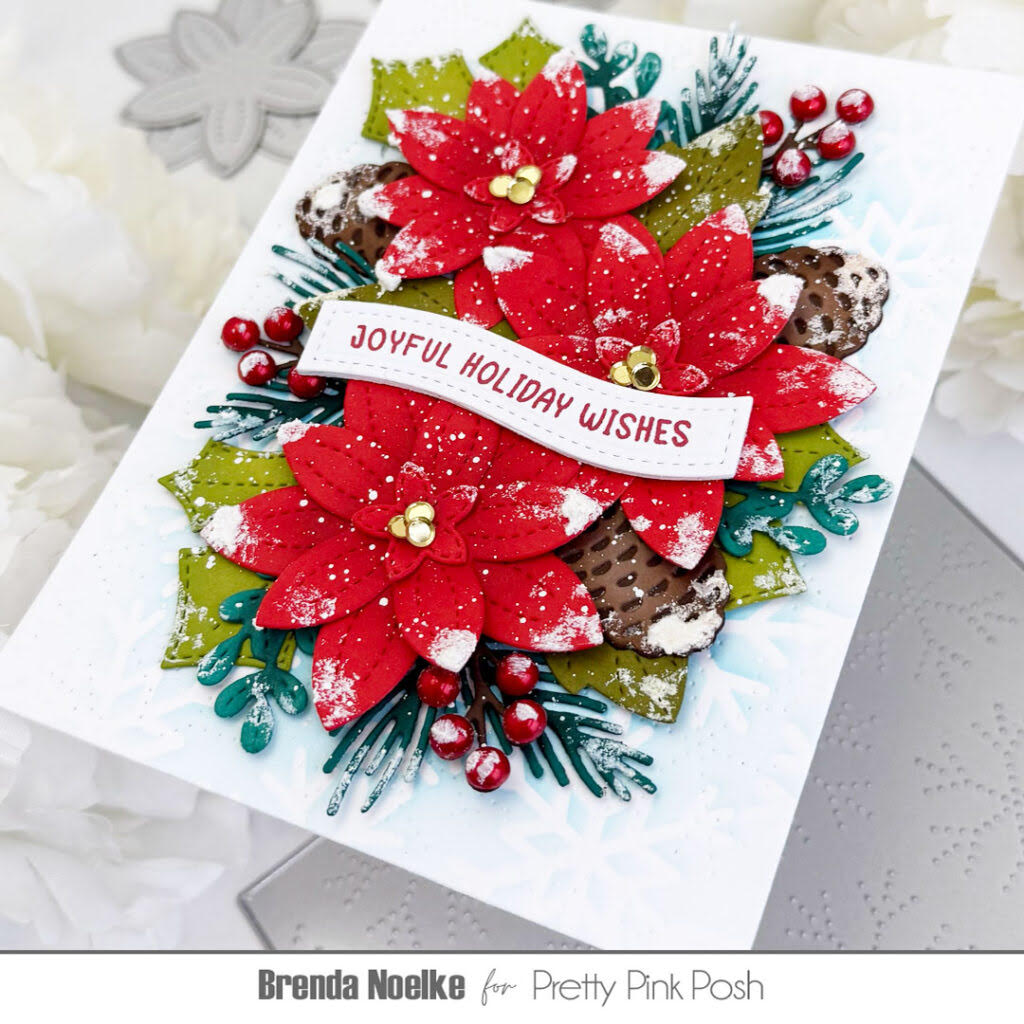
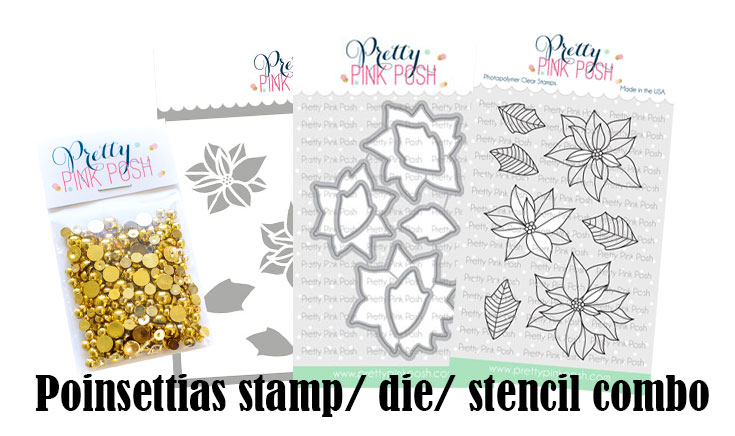
Hello, friends and welcome back to Day 6 of Christmas Theme Week on the Pretty Pink Posh blog! Brenda from My PaperCut Creations here with you today!! Holiday cards are some of my favorite to create so I’m super excited to be sharing my card featuring the stunning Winter Foliage Die Set with you today!! I love everything about this set!
I began by die-cutting all the elements in the Winter Foliage Die Set from red, two shades of green, two shades of brown and two shades of teal cardstock. I added some dimension to the die-cuts with dye inks and blending brushes, then layered and adhered each individual element together with liquid glue.
For the background, I blended Tumbled Glass and Mermaid Lagoon Distress Inks onto a panel of white cardstock with the Snowflake Background Stencil. I added the darker color toward the center, then blended it lighter toward the outside of the panel. I also die-cut the panel with the Pierced Snowflakes Die to add a bit of texture. The poinsettias were popped up with foam squares and the pinecones and foliage die-cuts were arranged and tucked in around the poinsettias, adhering them with liquid glue. I added Cherry Red Pearls to the berry branches, then splattered the panel with diluted white bleed-proof ink. I applied Opaque Grit Paste and a bit of Rock Candy Glitter to the entire arrangement to create a snowy effect.
The sentiment is from the Christmas Banner Greetings Stamp Set. It was stamped onto white cardstock with red dye ink and cut out with a die from the Banner Greetings 1 Die Set. I also die-cut three more banners from heavyweight white cardstock using the same die and adhered them behind the stamped one, then adhered it across the center of the card. A trio of Metallic Gold Confetti added to the center of each of the poinsettias finishes off the card.
GIVEAWAY
For today’s giveaway, we are giving away a $25 Doodlebugs gift card. They carry a wide assortment of our products, along with other brands. All you have to do is leave a comment on this post sharing your favorite holiday dish or dessert.
All giveaways for Christmas Theme Week will end on December 10th. We’ll share a post with all the winners on the PPP blog later that week.
Thank you so much for stopping by today! Be sure to stop in tomorrow for the 7th and final day of Christmas Theme Week!
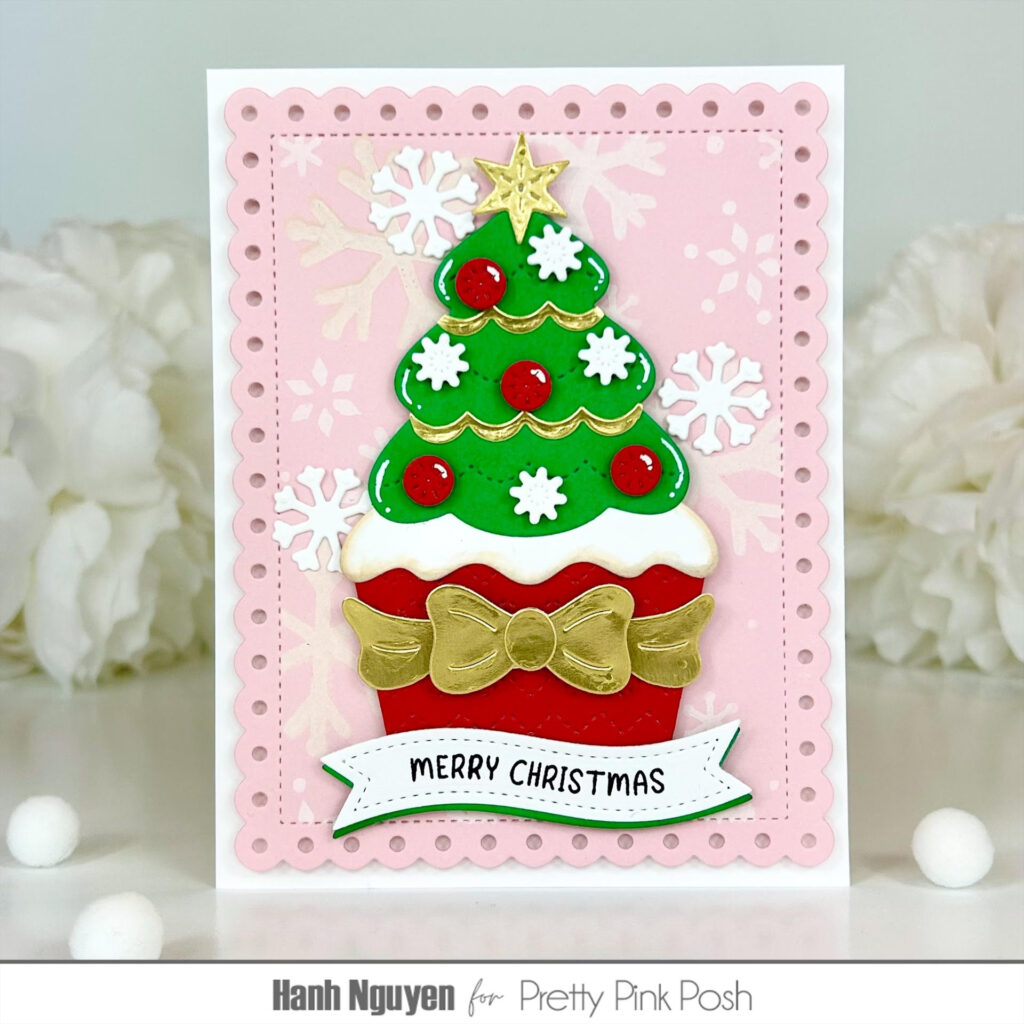
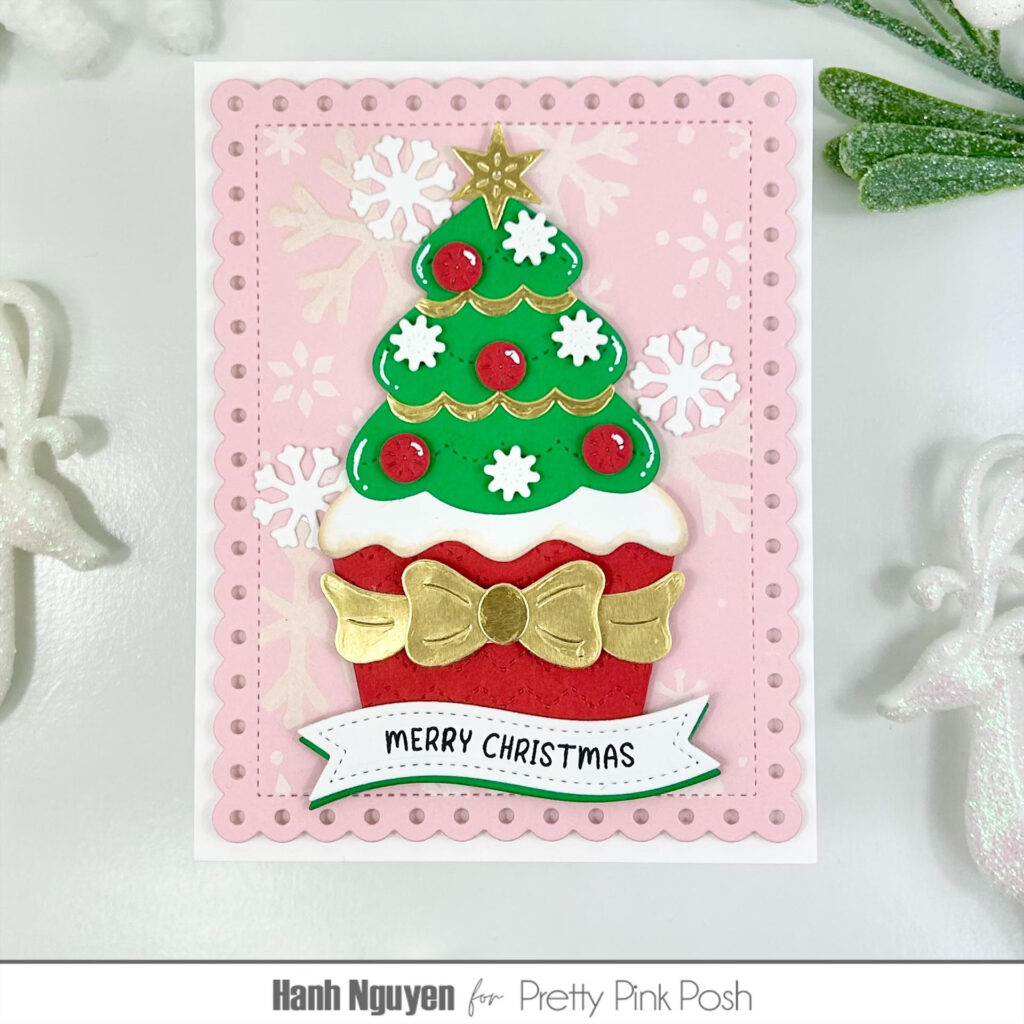
Hello Crafty Friends! It is Hanh here with you today. I’m sharing a fun and yummy Christmas card featuring the Big Christmas Cupcake Dies. Can you imagine if this were a real cupcake? Wouldn’t that huge Christmas tree worth of frosting be just heavenly?! It’s making me hungry already. This was a super fun die to play with because the possibilities for decorating this cupcake are endless.
I started by creating the background. I used the largest die from the Eyelet Rectangles Dies to diecut a piece of pink cardstock. The scalloped edges were masked off with some low tack tape. I used the three stencils in the Layered Snowflakes Stencils and Hero Arts Unicorn White pigment ink to create a subtle snowy background. I set that aside to dry as I worked on the cupcake.
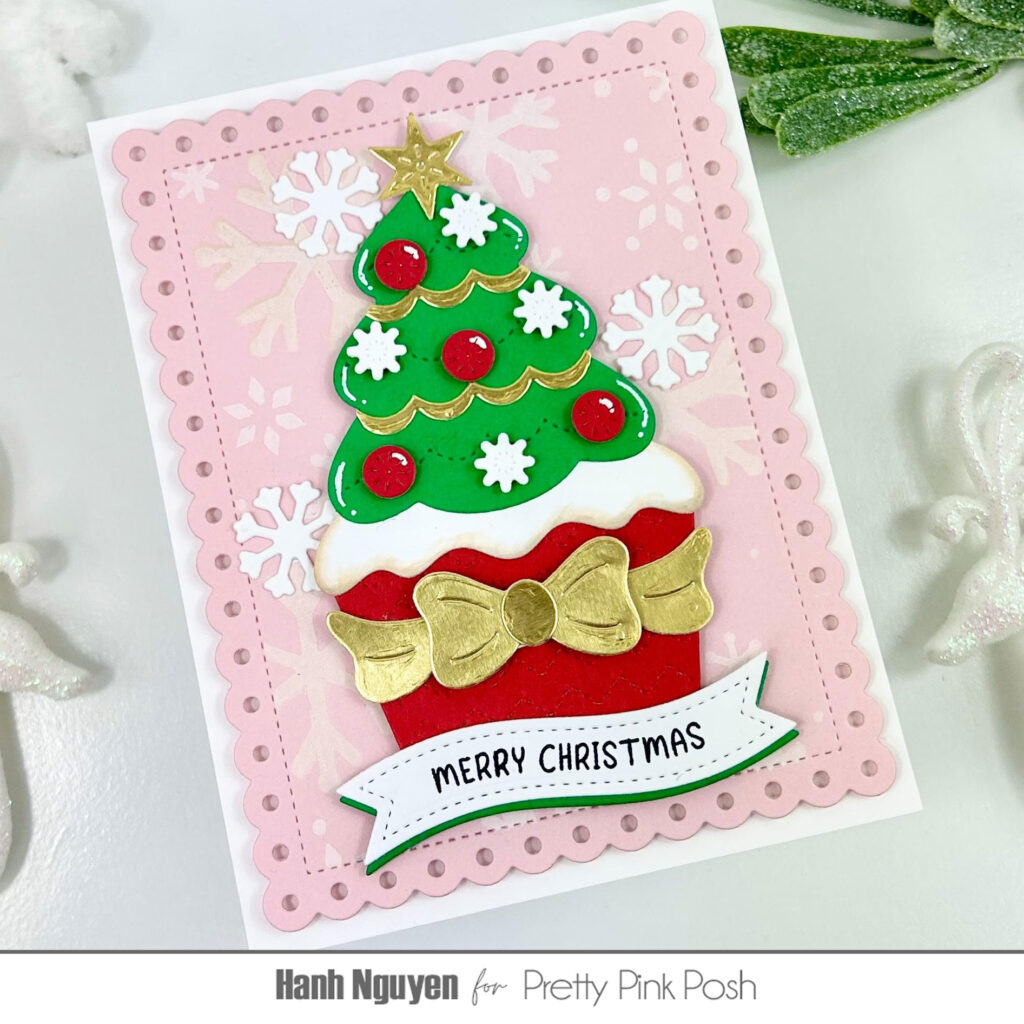
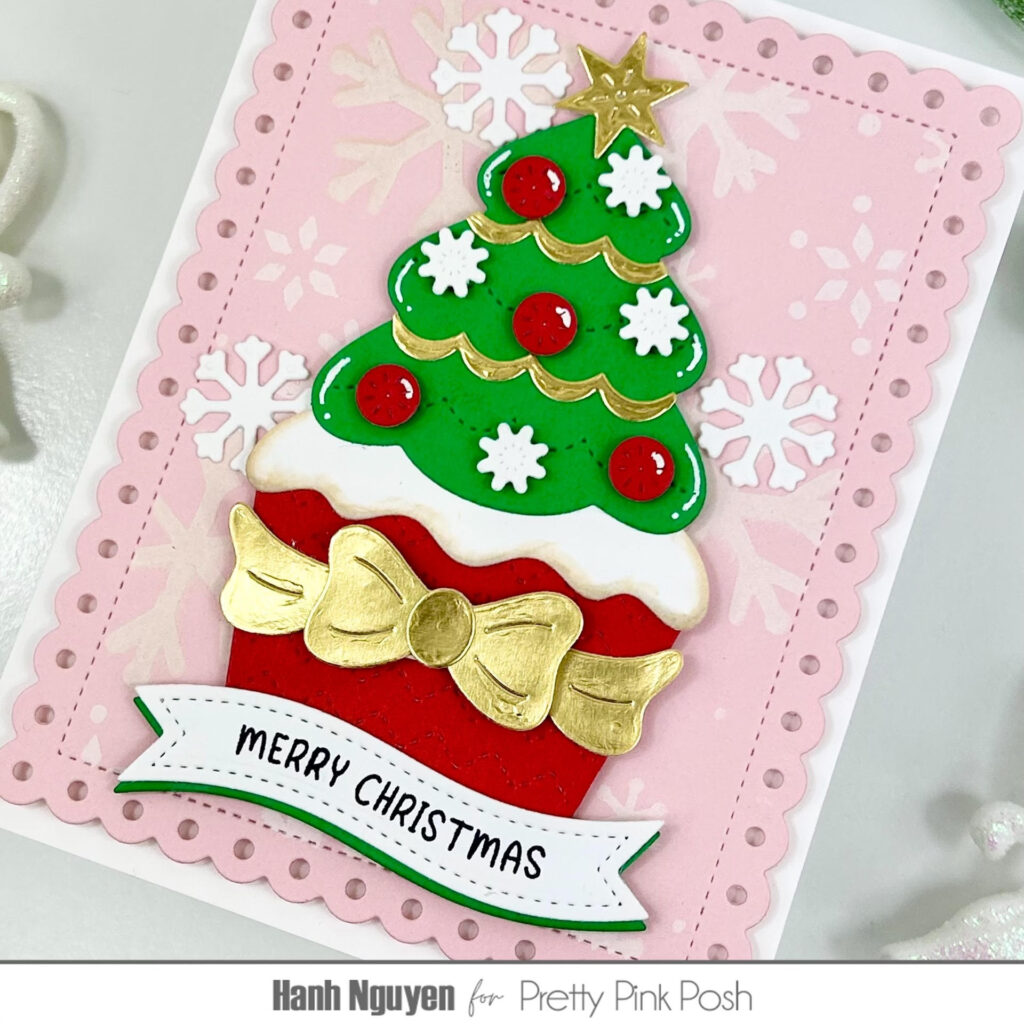
The Big Christmas Cupcake Dies were used to diecut all of the cupcake, Christmas tree, ornaments, snowflakes ad bow out of white, red, green and gold cardstock. I used Copic markers (E41 W1) to add a little color to the white frosting. I also added some highlights with a white gel pen. The elements were assembled as seen in the photos, with liquid glue. Foam squares were used to adhere the bow and ornaments for a bit of dimension and interest.
For the sentiment, I stamped the “Merry Christmas” sentiment from the Christmas Banner Greetings onto a piece of white cardstock with Memento Tuxedo Black ink. I used the Banner Greetings 1 Dies to diecut the sentiment. I used the die to also diecut another banner out of green cardstock. The two banners were adhered to each other slightly offset to create a green shadow.
The cupcake and sentiment banner were adhered to the pink panel with foam tape. I adhered the larger snowflakes directly onto the pink panel with liquid glue. A piece of craft foam was adhered to the back of the pink panel before it was adhered to a white A2 cardbase (4.25″ x 5.5″).
I appreciate you taking the time to stop by and visit today. I hope you liked my card and are inspired to make and send out your own version of this yummy cupcake this holiday season.
GIVEAWAY
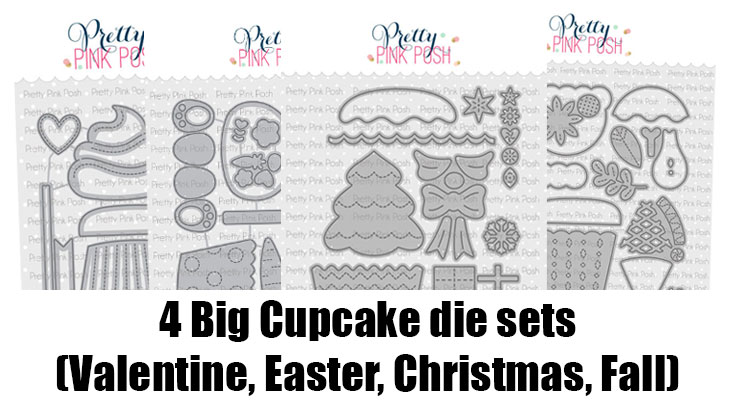
For today’s giveaway, we are giving away a prize pack with (4) different Big Cupcake die sets. All you have to do is leave a comment on this post sharing when you start to decorate for the holiday season.
All giveaways for Christmas Theme Week will end on December 10th. We’ll share a post with all the winners on the PPP blog later that week.
Thanks so much for visiting today. See you tomorrow for another day of inspiration and giveaways!
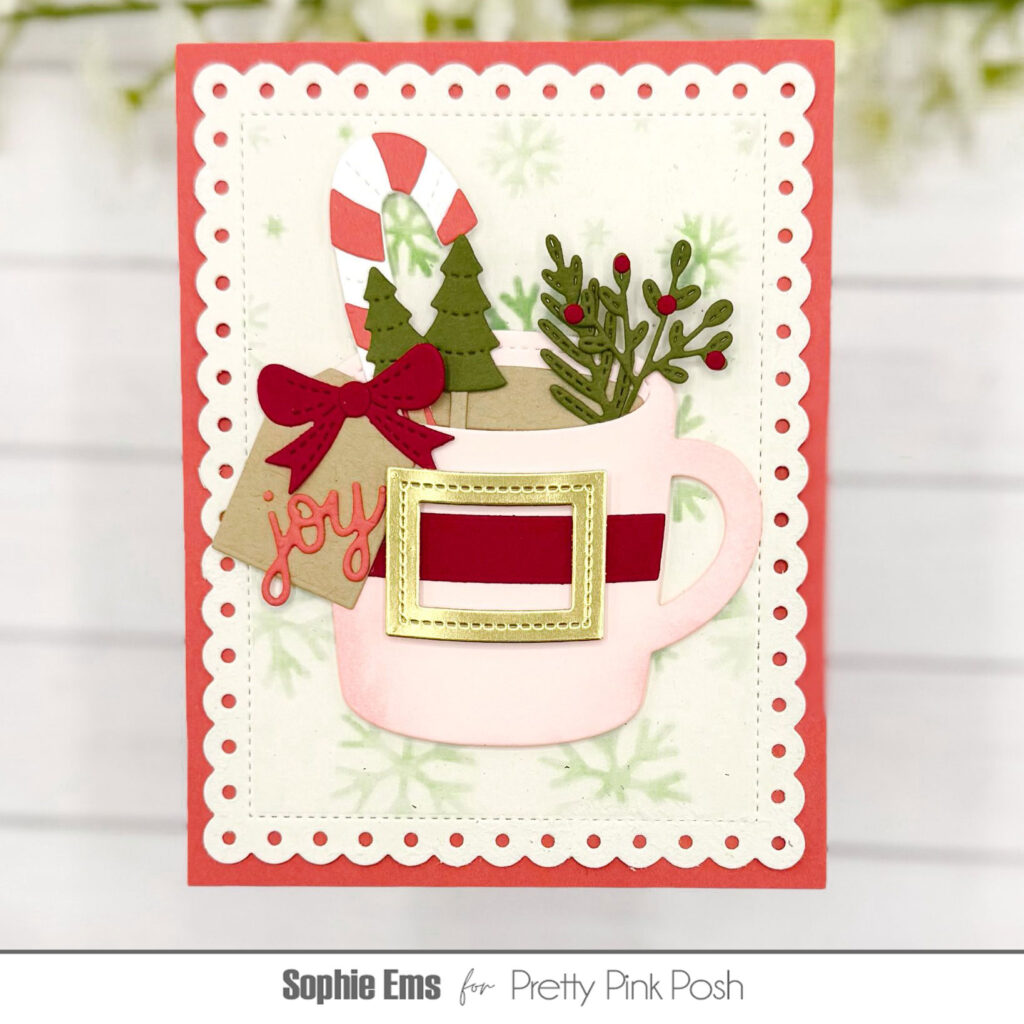
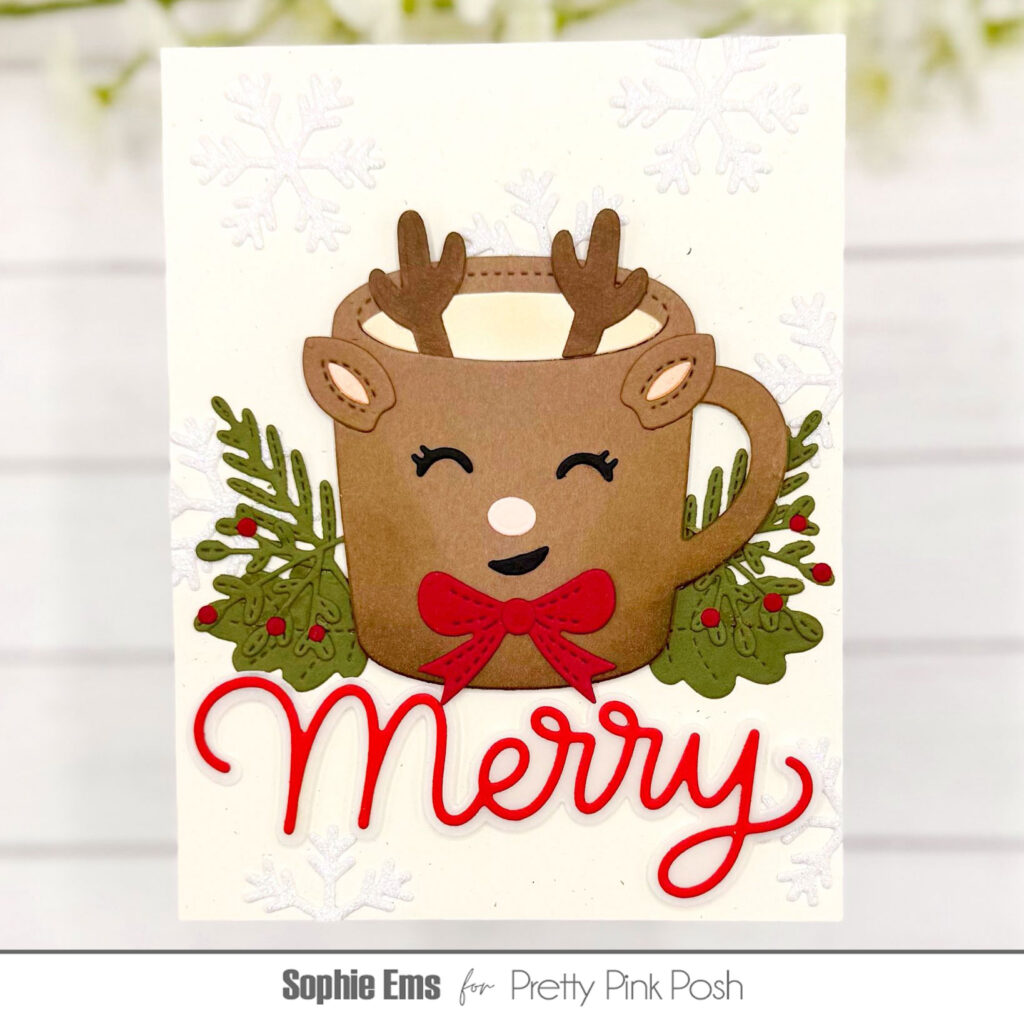
Hi crafty friends! Sophie here and I am thrilled to be here celebrating Christmas Theme week with you all! Today I am sharing a pair of fun cards featuring theWinter Mug die set and the Holiday Mug Additions die set.
For my first card I wanted to feature a somewhat non-traditional Christmas color palette with pinks, reds, and greens. I love pinks for holiday projects! I featured the additions that make the mug into a little Santa Claus with the belt and buckle. Such a whimsical set, PPP always knocks it out of the park with creativity. For the background, I used the Falling Snowflakes Stencil, an oldie but a goodie. TheEyelet Rectangles set is one of my most used staples.
For my second card I wanted to make a little reindeer mug. I used some of the greenery as decorations to frame the mug and I used theLarge Merry Shadow for a sentiment out of red with some vellum as the shadow layer. For the background I die cut a bunch of the snowflakes from the Winter Mug set and just scattered them around the card for a simple but sparkly effect.
GIVEAWAY
For today’s giveaway, we are giving away a $25 Simon Says Stamp gift card! All you have to do is leave a comment sharing your favorite holiday tradition.
All giveaways for Christmas Theme Week will end on December 10th. We’ll share a post with all the winners on the PPP blog later that week.
I hope you enjoyed these cards! Have you finished your Holiday cards yet? I would love to know below! I’ll be back soon with more inspiration!
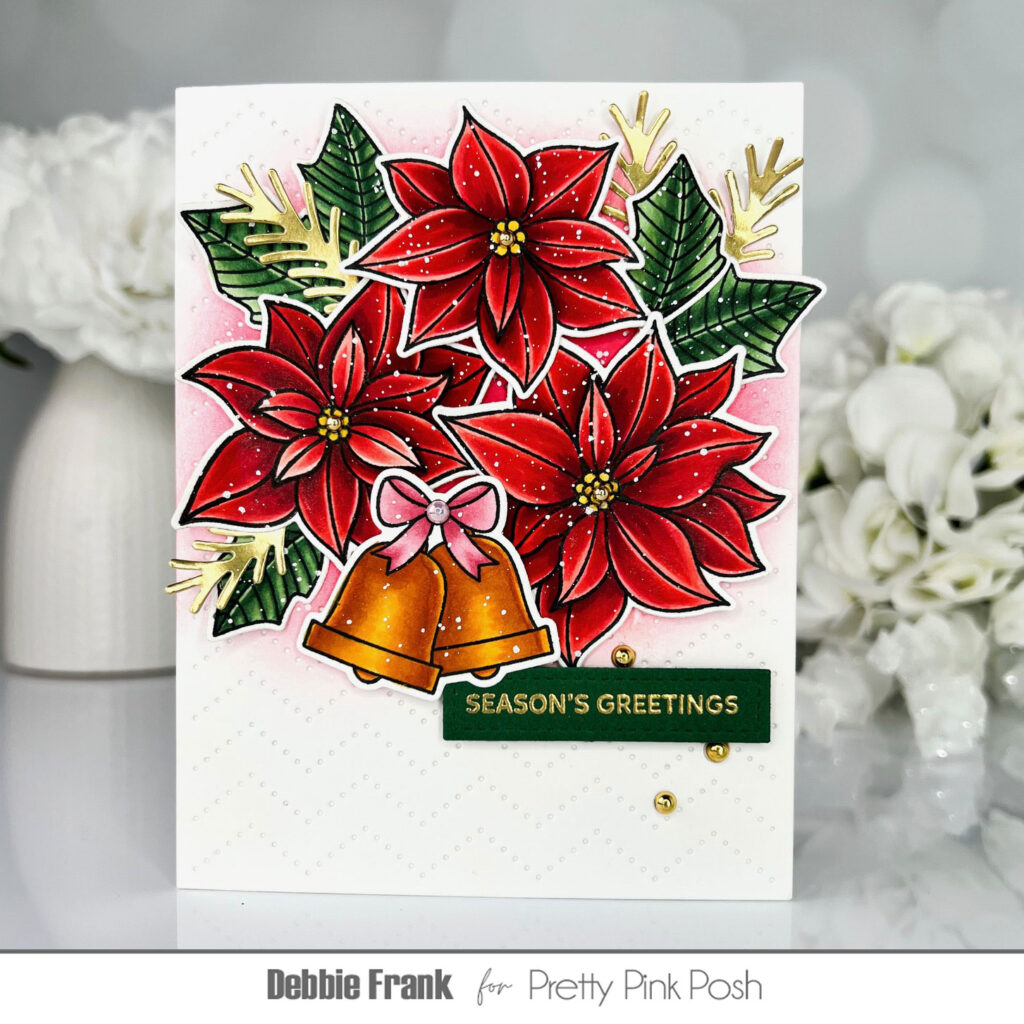
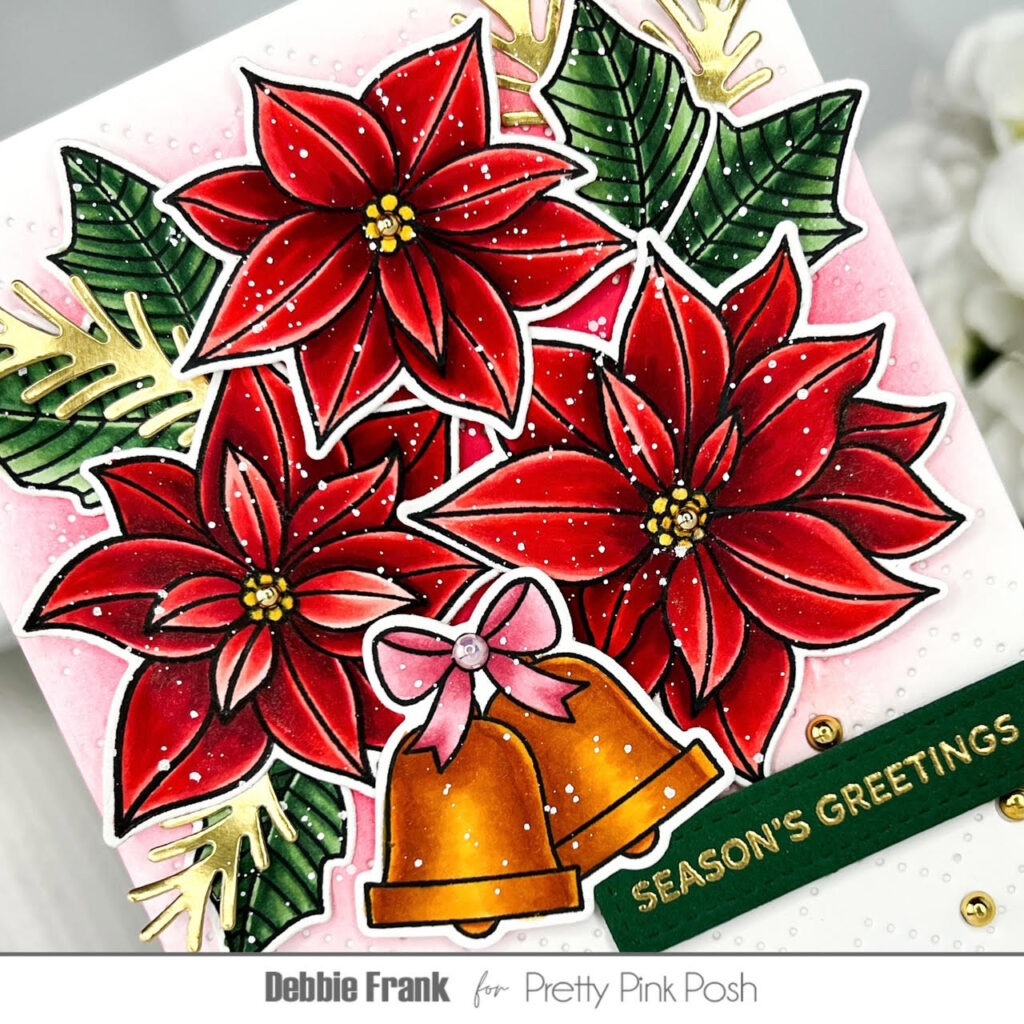
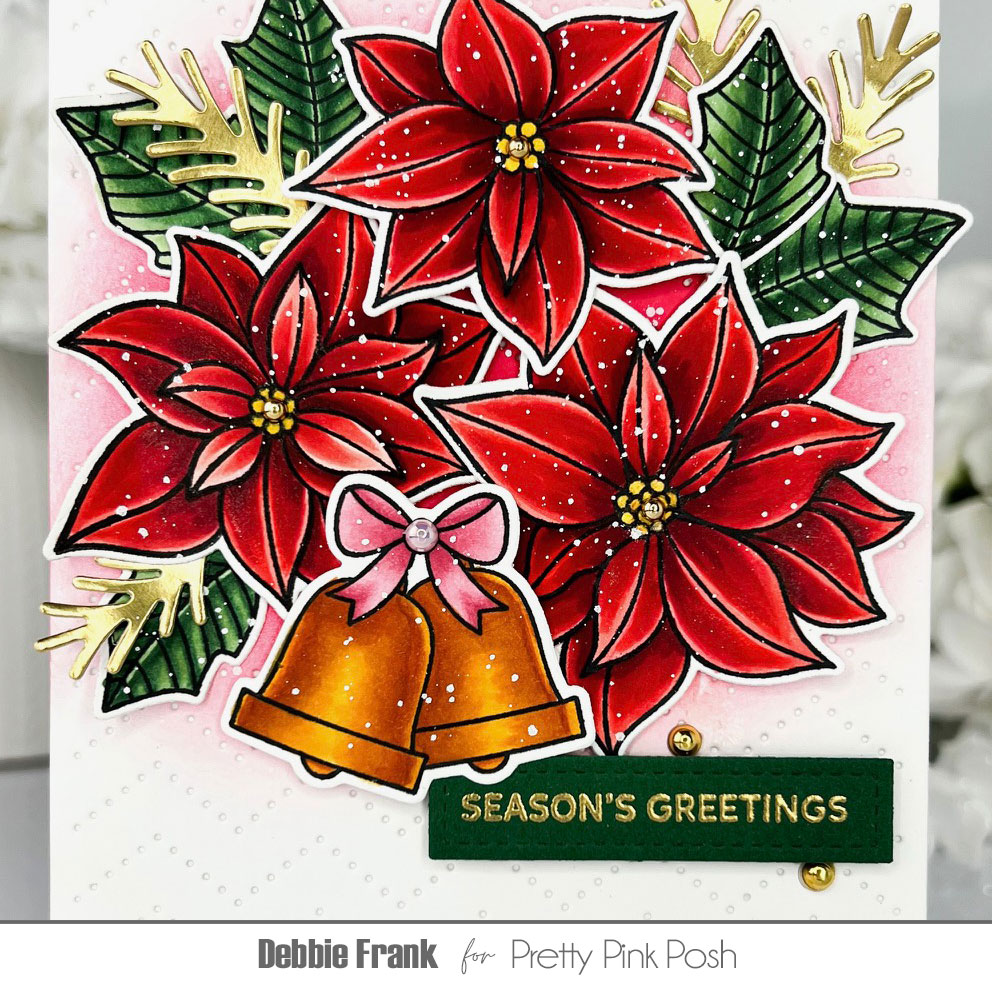
I started off by stamping out all the Poinsettias and leaves on to X-Press It card stock, also stamping out the bells from Christmas Bells stamp set and copic colored in with:
Then with a white standard A2 panel, I ink blended a pinkish red ink towards the top where I will attach the Poinsettias over. But before then I ran it through with the Chevron Pierced Plateand attached it to a card base.
I wanted some gold branches to tuck in with the foliage. So with the Holiday Wreath die set, I took some of the branch dies and ran through with the Matte Gold Card stock.
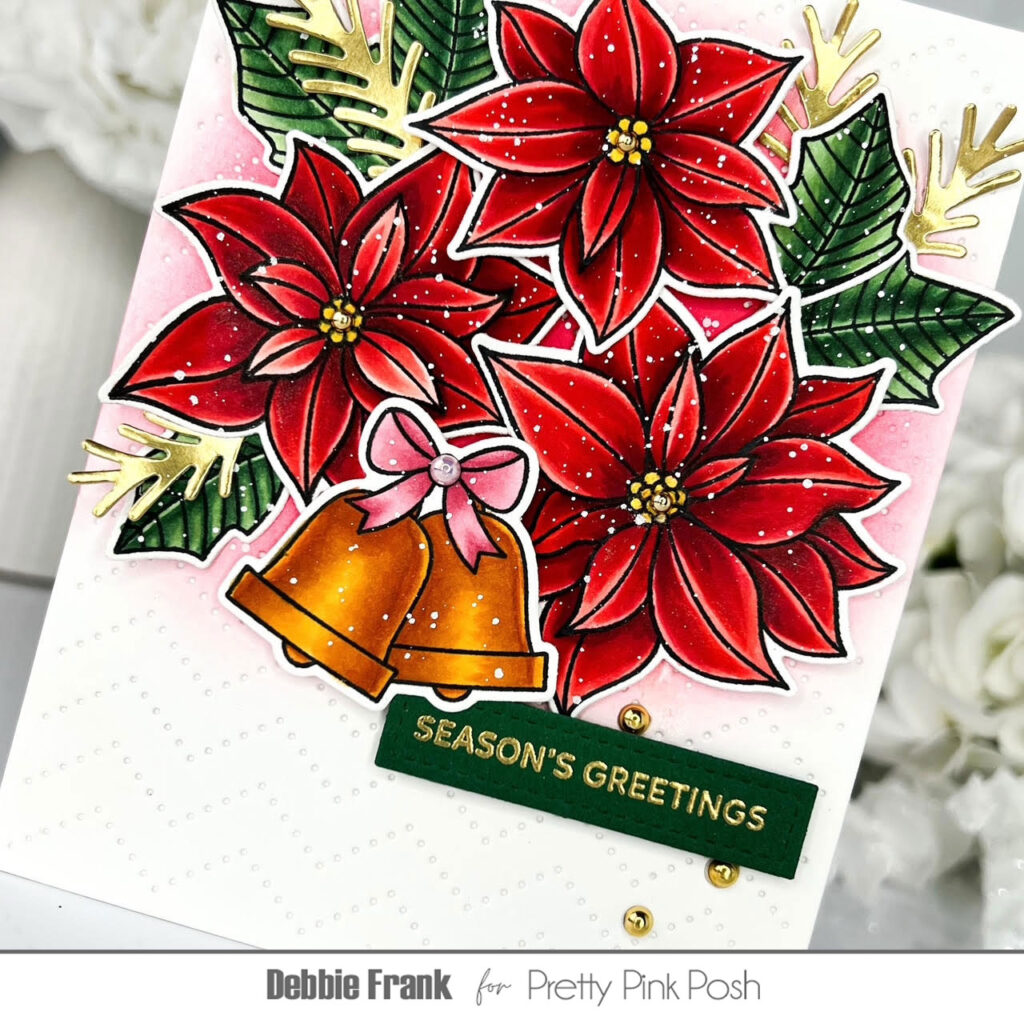
Popping up the poinsettias with thin and 3D foam squares, I made my arrangement. Adding the leave directly to the panel with liquid glue, and tucking the gold branches in also.
There was a small gap in the flowers, where I added a small foam squares in there to attach the bells on to.
Before I added my sentiment, I did white splatter all over the arrangement. As it dried I stamped and gold heat embossed “Season’s Greetings” from the Sentiment Strips: Christmas. Then with the Sentiment Strips DiesI die-cut it out and popped it up with foam squares.
For today’s giveaway, we are giving away a prize pack! All you have to do is leave a comment sharing your favorite color medium for crafting (Copic markers, Olo markers, colored pencils, etc….)
All giveaways for Christmas Theme Week will end on December 10th. We’ll share a post with all the winners on the PPP blog later that week.
We hope you’ve been enjoying all the posts and giveaways so far. See you back here again tomorrow!
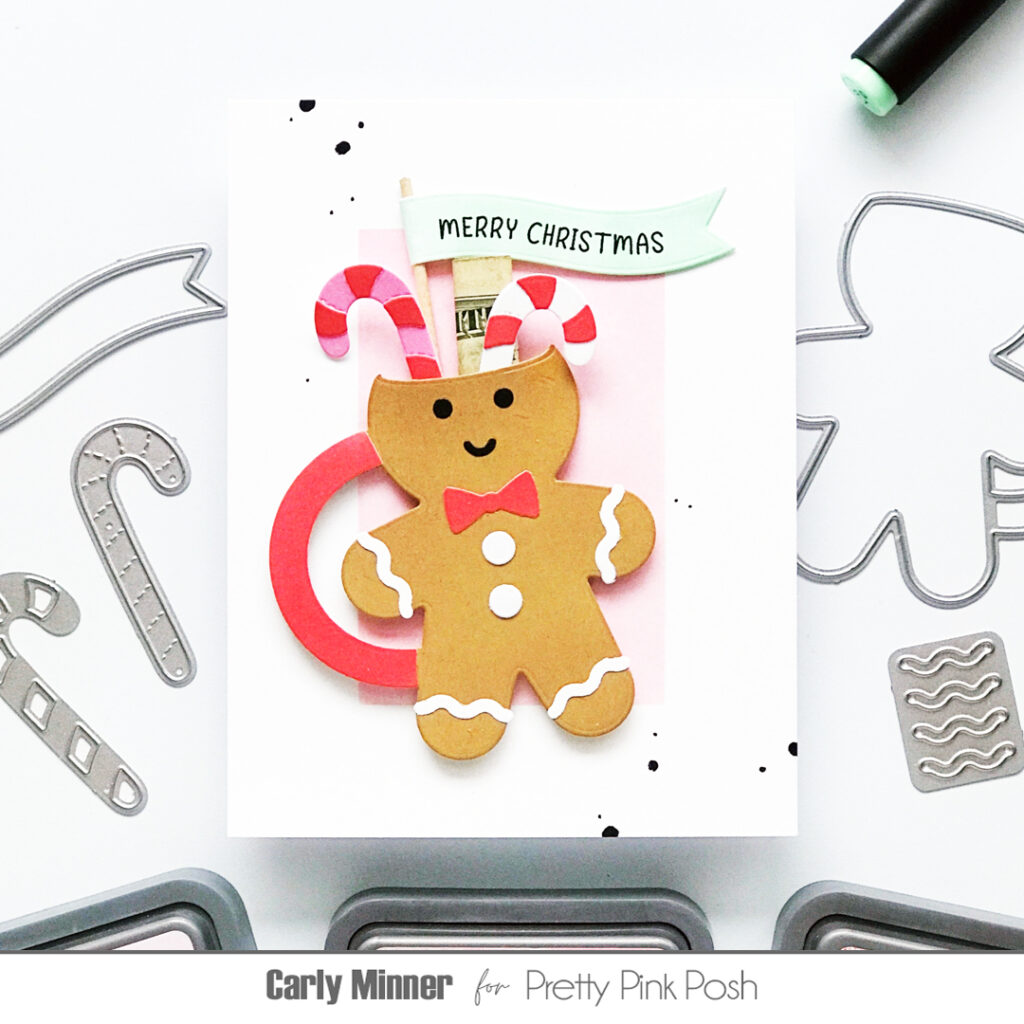
Hi Friends, it’s Carly and it is that time of year when I see how many cards I can turn into little holiday treats because you never know when you need to give a gift card, cash or even candy!
The adorable Gingerbread Mugs turns into a treat holder so easily! All I needed was just a little foam tape and then the mug was able to hold paper candy canes (but real ones would be so cute too), a banner and cash to treat a friend to coffee!
For today’s giveaway, we are giving away a $25 Scrapbook.com gift card. All you have to do is leave a comment sharing what your favorite holiday icon is (gingerbread, penguin, Santa, nutrackers, etc….)
All giveaways for Christmas Theme Week will end on December 10th. We’ll share a post with all the winners on the PPP blog later that week.