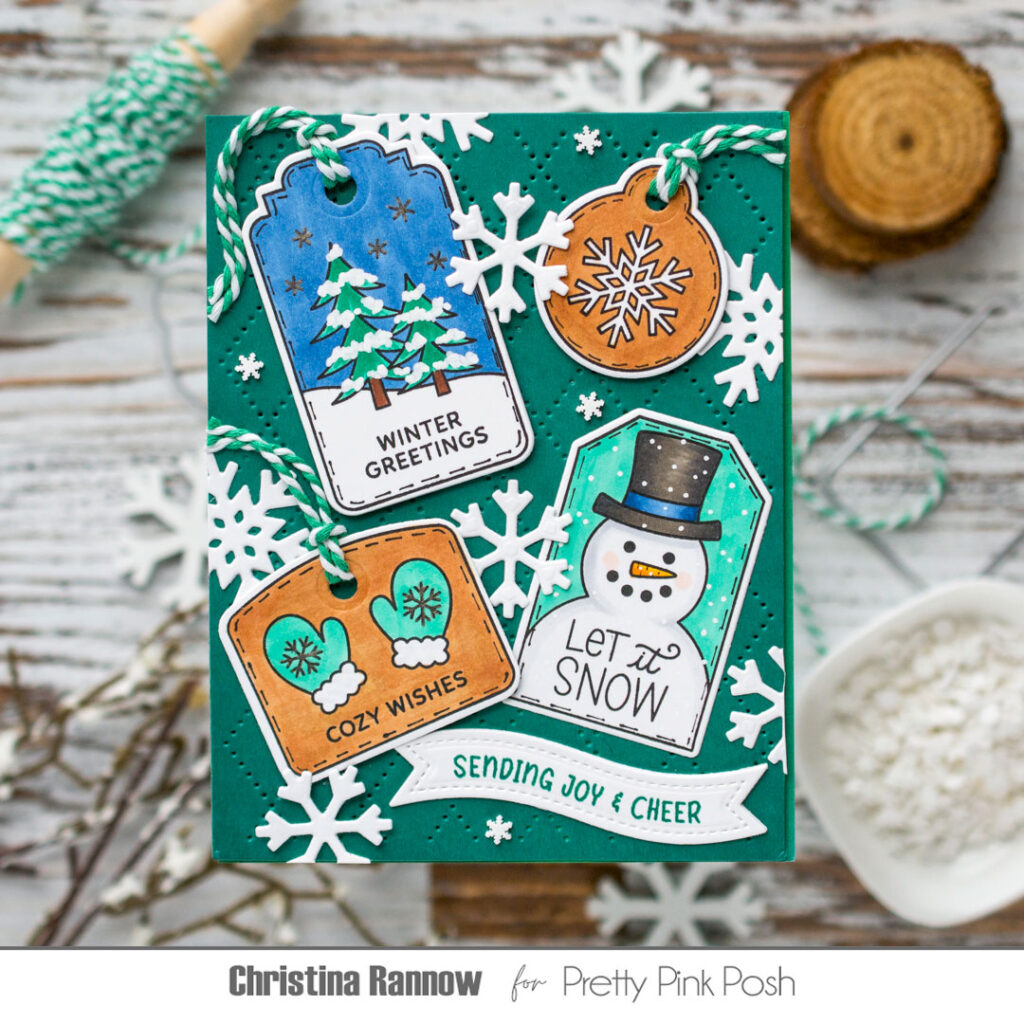
Winter greetings, friends! Christina here to share a unique way to use the new Winter Tagsfrom the latest release. There are endless crafty possibilities for these tags – you can stamp the images like I did, you could heat-emboss them on colored cardstock, or you could just use the dies to create your own tags. And they are perfect for adding a small homemade touch to your holiday gifts. Another way to use these tags is to create a festive holiday greeting card like I did here.
I started by stamping the images on white cardstock and then colored them with Copic markers. You can use any medium to color these images, and I think colored pencil would be beautiful for this project. Here is the Copic coloring guide:
Teals BG 34, G16 Blues B45, B37 Background E33 Snowman C0, C1, YR15, YR24, R00 Hat W3, W5, N5
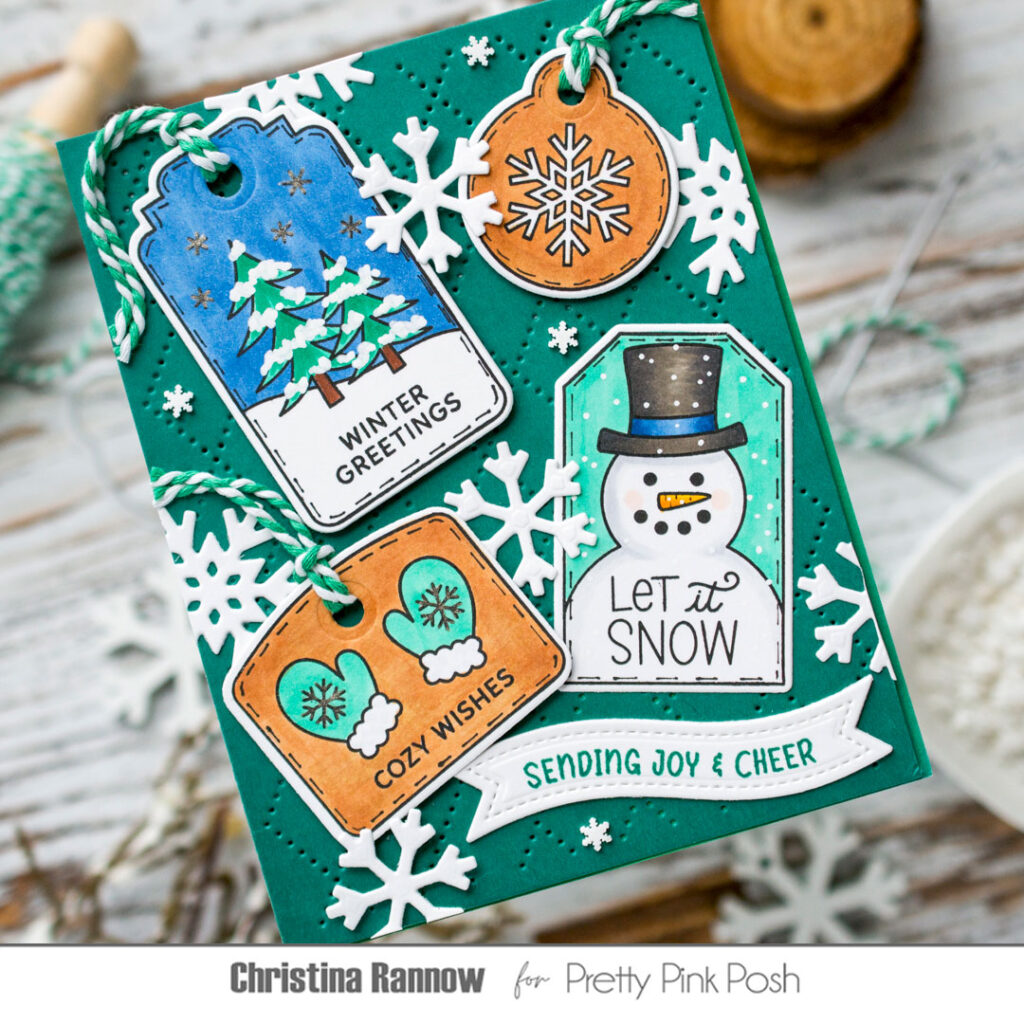
Once the images were colored, I die-cut them with the coordinating dies, adding holes to just three of the tagsbefore adding some fun details to the images. I used a Copic Multi-liner to add a stitching detail to each tag and a white gel pen to add some snowy details to the trees and the snowman. I also used a glitter pen to add a sparkly detail to the mittens and the night sky. To finish up the tags, I threaded some green and white cotton twine through the tops.
Next, I die-cut the Argyle Pierced Plate from Juniper cardstock for the background and then attached the tags to the pierced panel using either foam tape or glue. Then I trimmed the twine and tacked each one down with a bit of glue.
I thought this winter card needed even more snowy elements, so I added a flurry of die-cut snowflakes, tucking some under the tags and placing some right on top with the help of thin foam strips. And lastly, I added the stamped and die-cut Banner Sentiment along with just a few more snowflakes from the Winter Wonderland Mix.
Thank you so much for checking out one of the many ways you can use these fun and festive Winter Tags! Happy crafting!
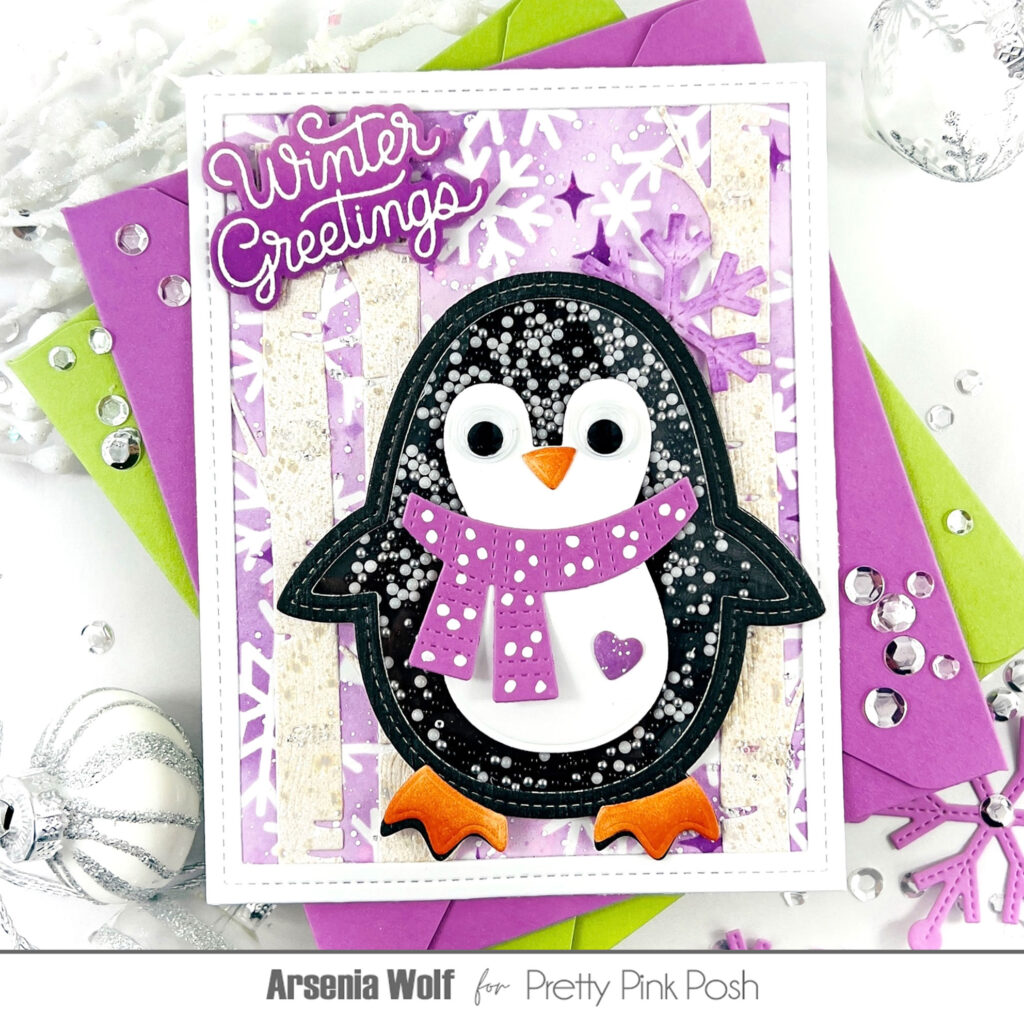
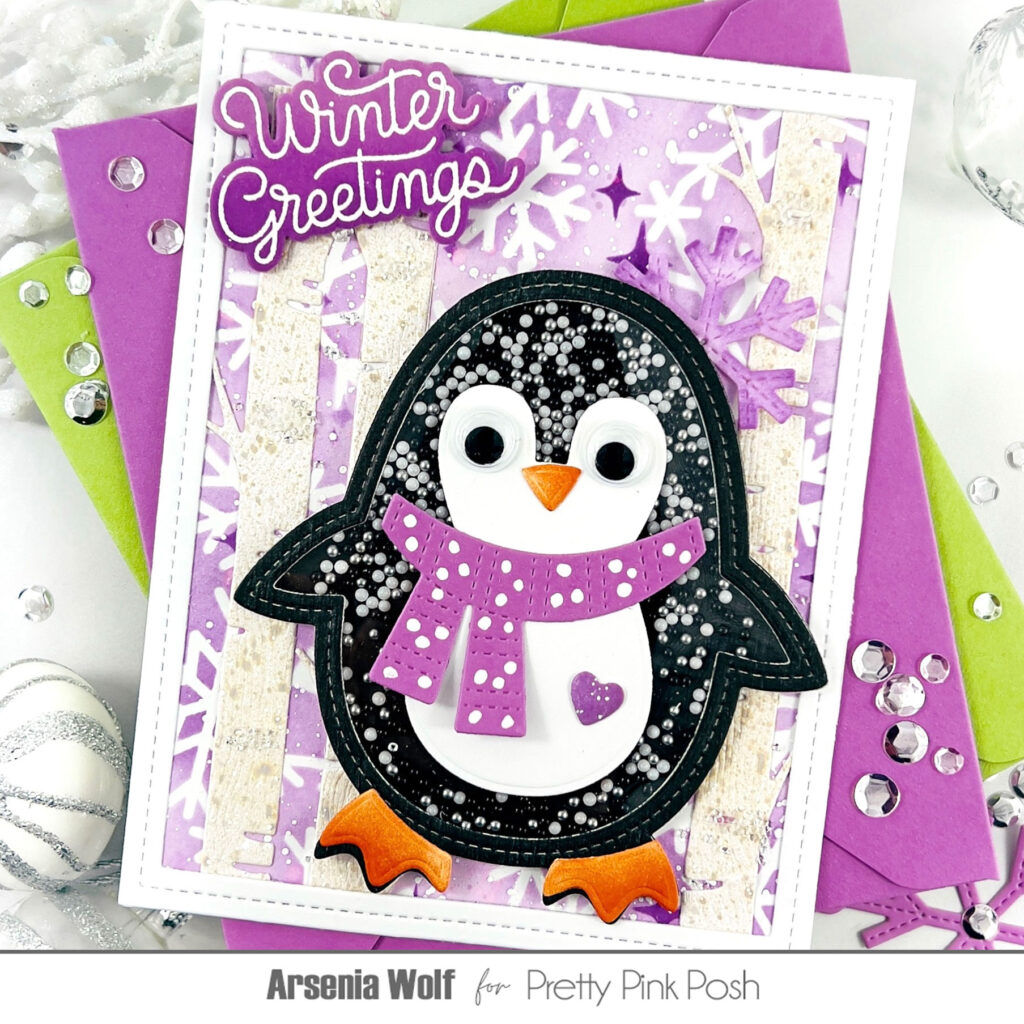
Hello Crafty Friends! Arsenia here, ready to sprinkle some crafty cheer as we kick off the last day of our Instagram Hop! This release is bursting with all the cozy winter vibes — and oh my goodness, do we have the cutest penguins waddling their way into your hearts!
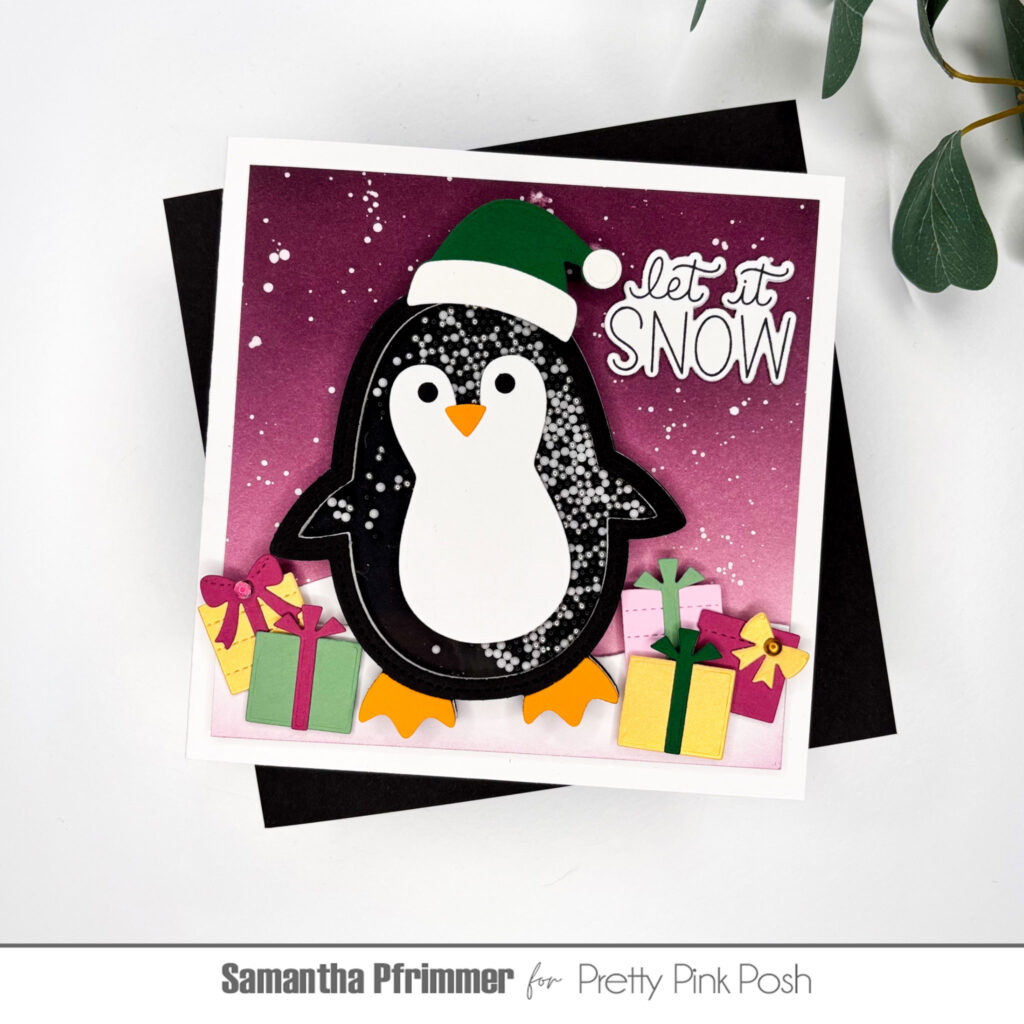
Today’s project stars the brand new Penguin Shaker Die, and yes friends… it’s shaker time! My color palette? A dreamy trio of plum-perfect purples — simple, elegant, and a little unexpected for the season (but totally fabulous, trust me).
First up, I created a whimsical winter background using the new Snowflake Background Stencil paired with the new Twinkle Stencil. With three shades of plum and a flurry of white paint splatters, the background came alive with frosty dimension. To add a little woodland wonder, I tucked in some delicate new Birch Tree Dies, and for that polished, finished edge — my trusty Fancy Cake Dies made an appearance (it’s one of my most-loved crafty tools!).
Now for the star of the show — the Penguin Shaker! I die-cut all the pieces, gave the beak and feet a soft touch of ink blending, and filled the shaker belly with the new Black Tie Shaker Beads(snow much fun!). Once assembled, my dapper little penguin got dressed up with googly eyes and a cozy scarf from the new Penguin Mugs Dies set — complete with white gel pen polka dots and a sweet plum heart.
For the sentiment, I reached for the new Let It Snow stamp Set withcoordinating dies! To finish everything off, I added crystal accents to the birch trees and a single stitched snowflake floating above our penguin friend.
And just like that — ta-da! — card complete! It’s a touch unexpected for the holidays, but I absolutely adore how the purples make this chilly scene feel warm and whimsical.
Thank you snow much for stopping by! I hope you’re loving this release as much as I am. Be sure to hop over to Instagram to join in the fun, see all the amazing inspiration, and celebrate with us!
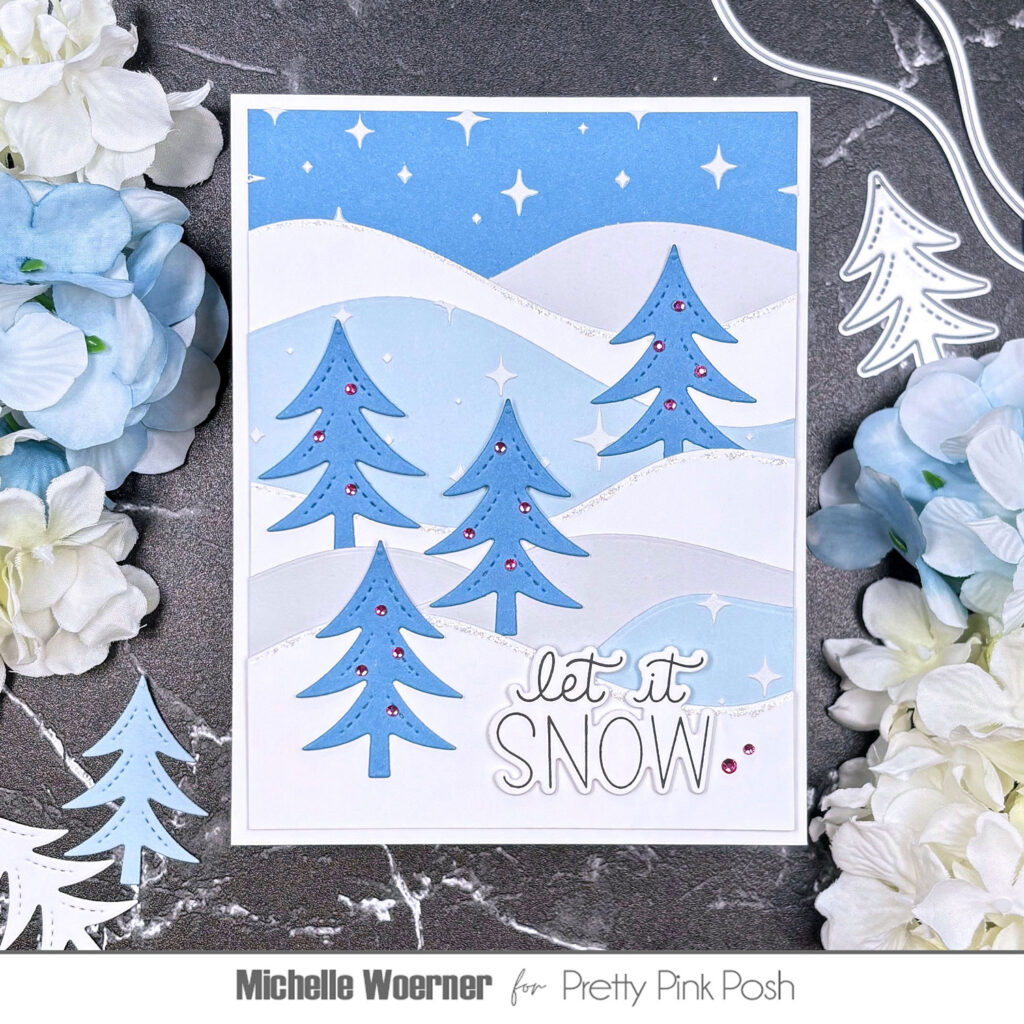
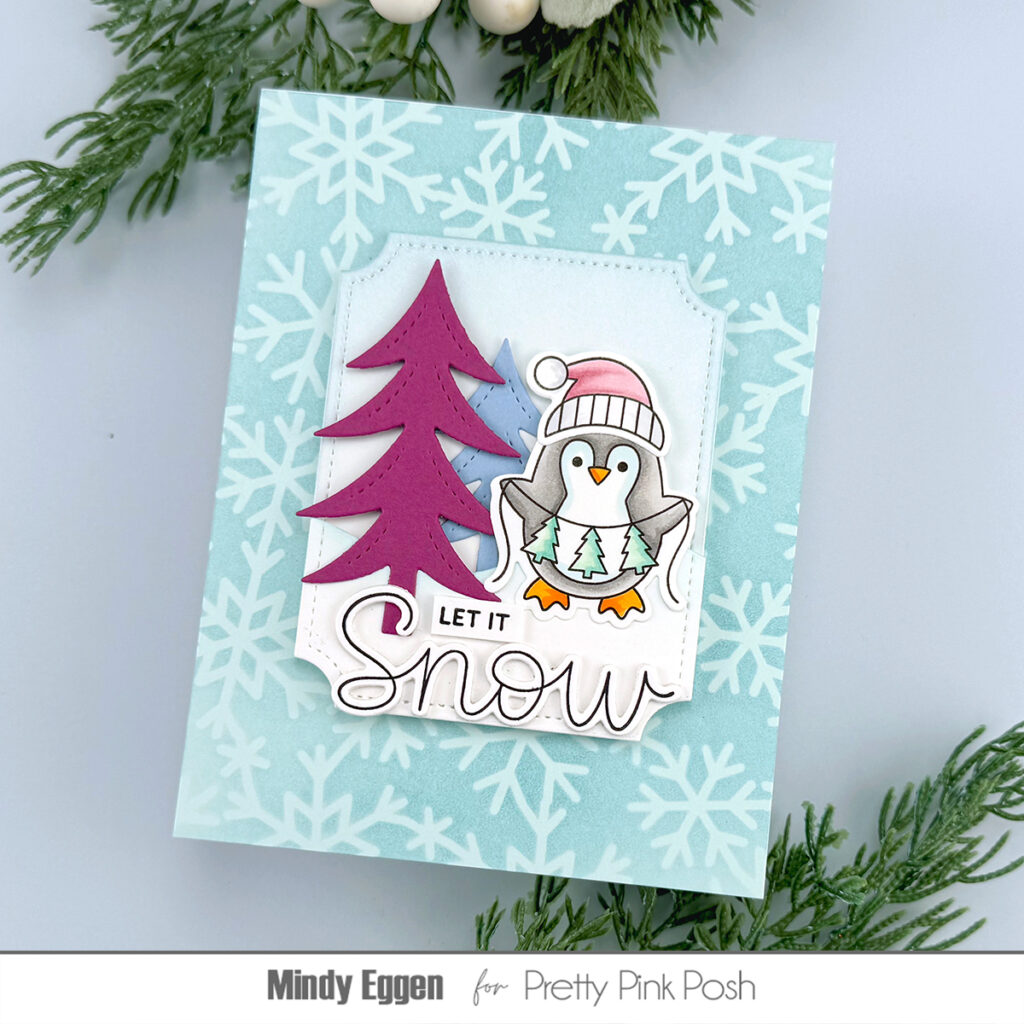
Hi crafty friends! I’m Michelle Woerner and I am super excited to be a guest designer with Pretty Pink Posh and help celebrate the November Winter Release! Today I’m sharing a serene layered winter trees card using several of the new release sets- theSnowy Hills Borders, Winter Trees andTwinkle stencil.
To start my card, I die cut two shades of blue, pale gray and white cardstock with the Snowy Hills Border die set. Once I had my cut pieces, I laid them out and arranged them into a snowy hills layout that I liked. I then used the Twinkle stencilwith white paste on the blue pieces adding pretty texture. And for some extra sparkle, I used Stardust Stickles on the top of the white snowy hills.
Designer tip: Designers often follow the Rule of Threes, but card designs look equally as good with any odd number. For my card, I used 4 trees and a sentiment, making a cluster of 5 elements.
To make the trees, I used the Winter Trees die set and cut them from the darker blue cardstock. I arranged the trees in the snowy hills, some of the trunks tucked behind the snowy hills and some in front to add dimension. To add a small pop of color, I added berry color gems to the trees and by the sentiment. The sentiment is from the Let It Snow stamp setand cut with the coordinating die set.
Thank you for stopping by and be sure to check back for more Winter Release inspiration!
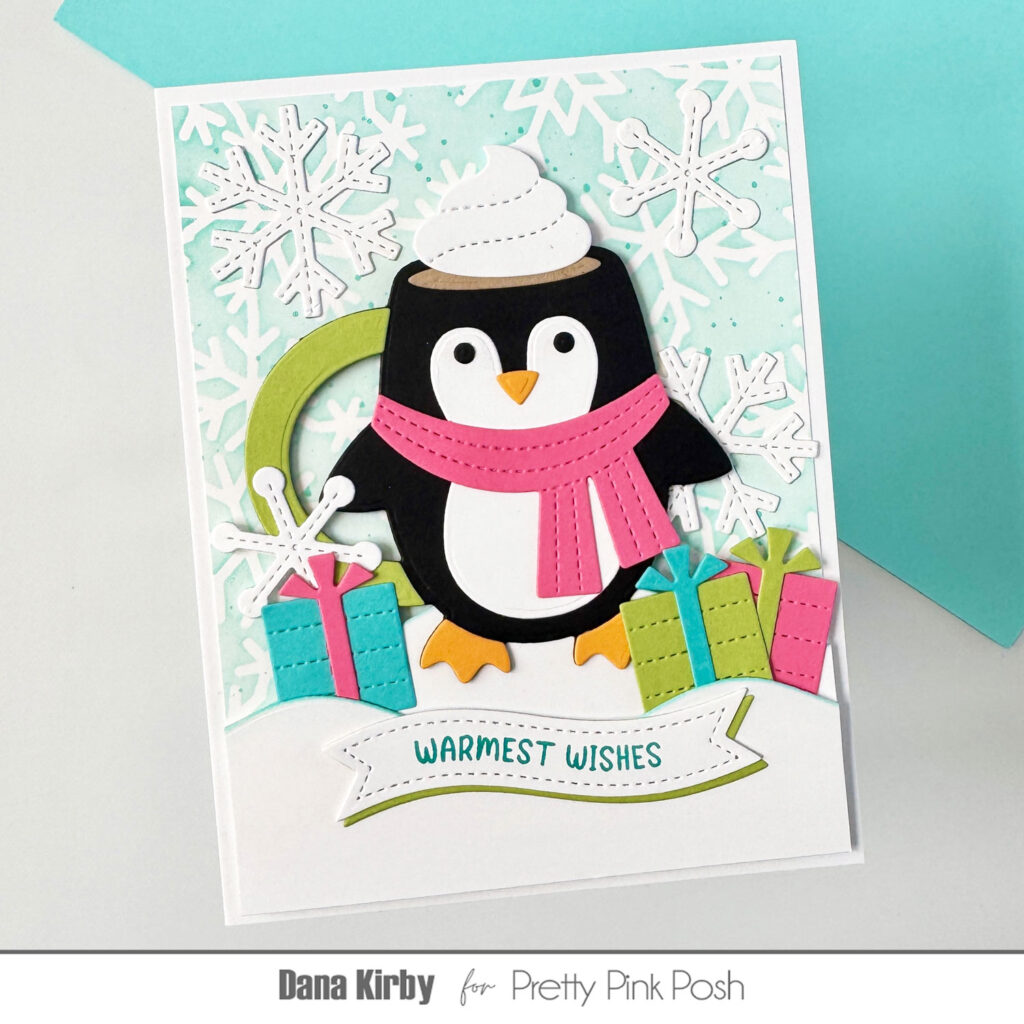
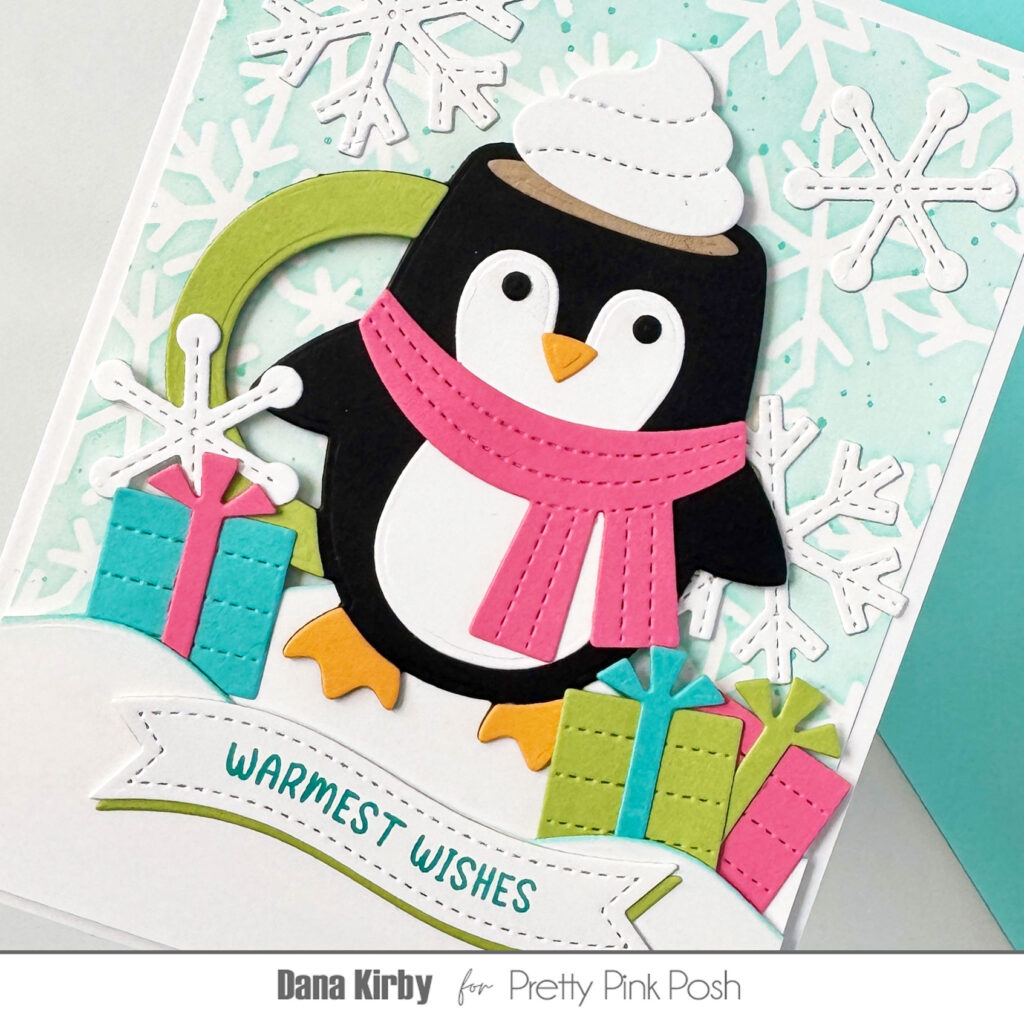
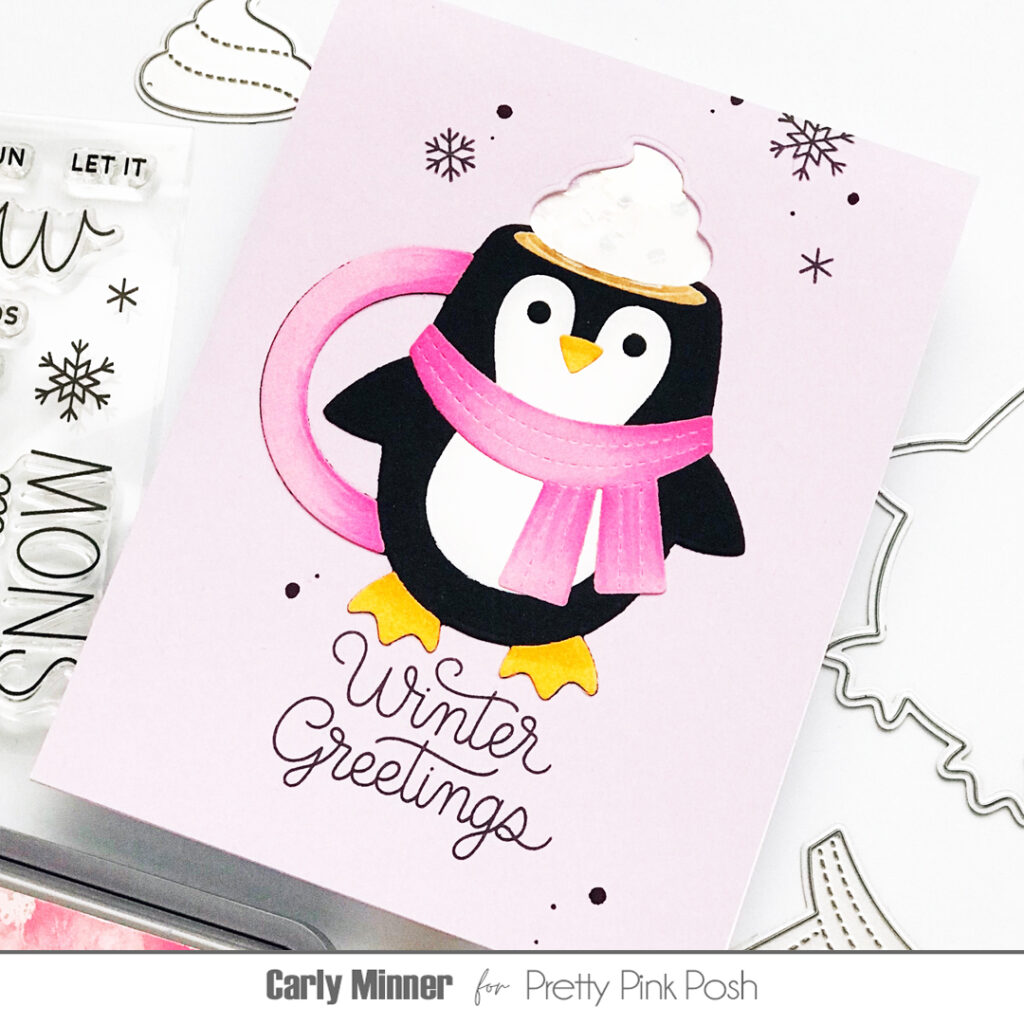
Hi crafty friends! It’s Dana here today and I am back with a card that uses the adorable Penguin Mugs die set. This die set creates the sweetest mug that can be used for the holidays and throughout winter.
I started by using the Snowflake Background stencilto create my card panel. I ink blended the panel with aqua ink and added a few splatters with a coordinating reinker. I then used the Snowy Hills Borders die setto create the snowy hills. I used a blending brush and aqua ink to add a touch of color to the top of the hills, and then attached them to the card panel with foam adhesive.
Next, I used the Penguin Mugs die set to create my mug. I added a fun pink scarf and, of course, a little whipped cream to the top too! I attached the mug to the panel and then added some coordinating presents to my scene. I used the Penguin Holder die set for the presents. I also added a few snowflakes that I die cut with the Stitched Snowflakes dies for a little added detail. Lastly, I used the Christmas Banner Greetings and Banner Greetings 1 dies for my sentiment.
Thanks for joining me today and I hope you enjoyed my card. I hope I inspired you to create a sweet Penguin Mug of your own.
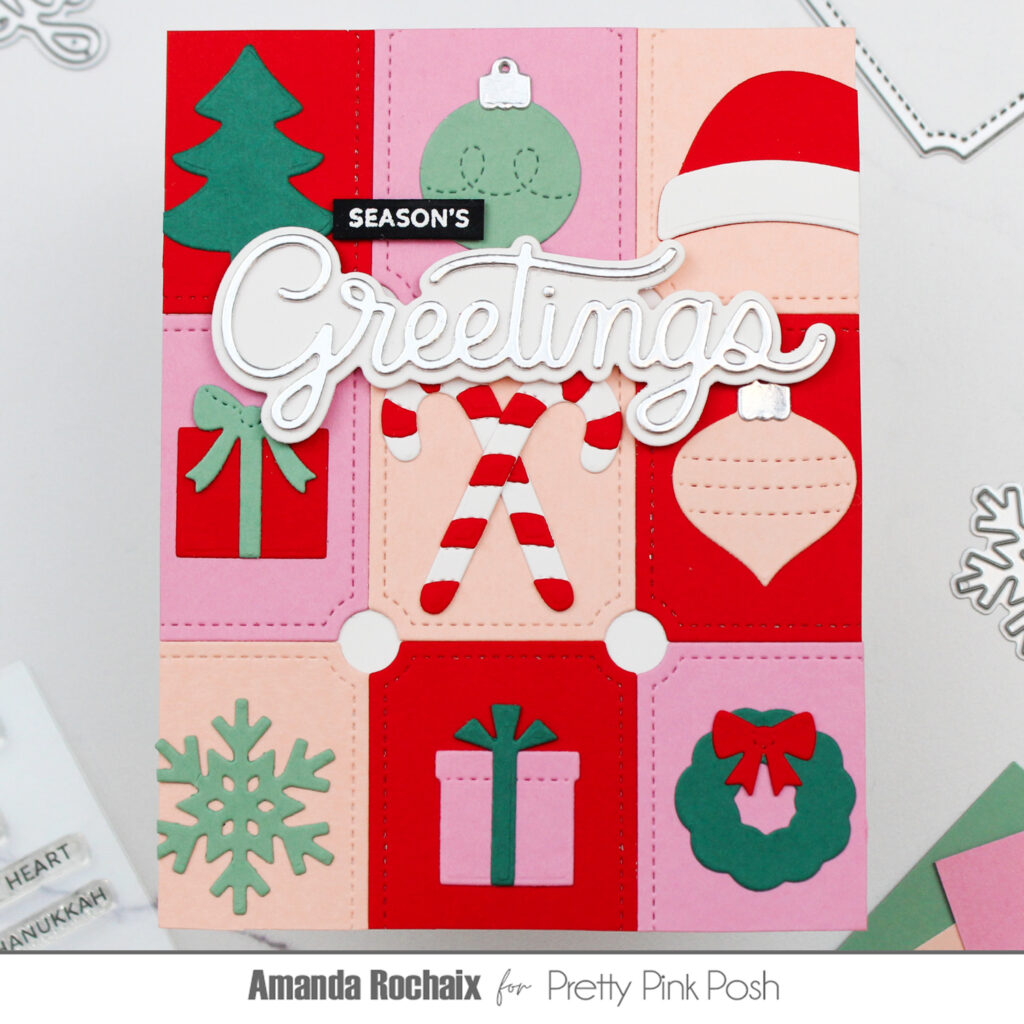
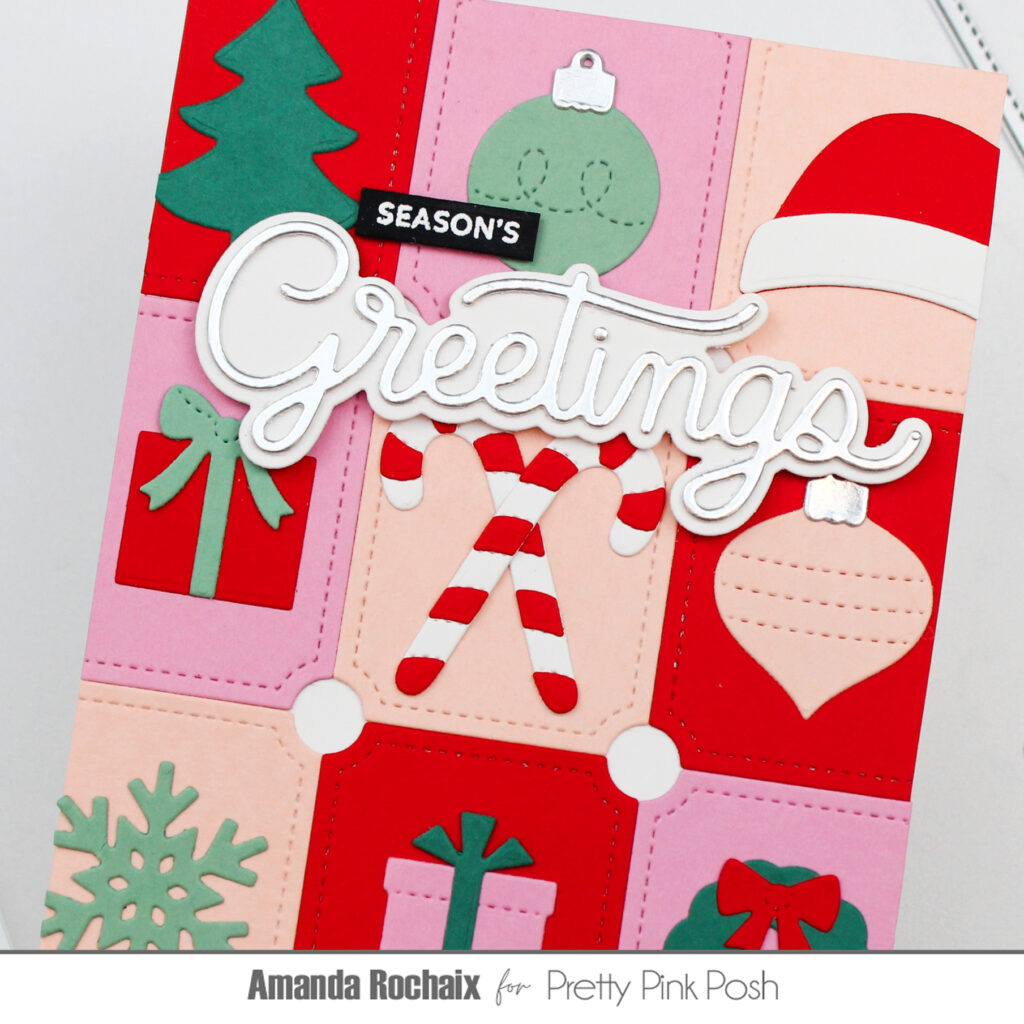
Hi, crafters! Amanda here, and I’m so excited to kick off my first blog post with Pretty Pink Posh! Today’s card is a little bit die cut heavy, but if you die cut all these elements in multiple colors, then you could have a pretty fun mass production party on your hands.
Now onto the details! For this card I chose the color palette of Poppy, Carnation, Nectar, Eucalyptus, and Juniper cardstocks from Concord & 9th, but this card would be fun with a variety of color palettes! I started off by die cutting the second smallest of the Notched Rectangles dies out of Poppy, Carnation, and Nectar.
With those ready to go, I grabbed an A2 card front and divided it into thirds with a ruler. This just helps me to try to make things even with a guideline, but if you’re a fly-by-the-seat-of-your-pants crafter, you can just eyeball it! When I stuck the rectangles down, I made sure the Nectar rectangle in the center of the card was as straight and centered as possible since I was trying to make the rectangles that would go above and below it equal in size since they would be hanging off my card front a little bit. When it came to gluing down the other rectangles, I kept them in the same order (Poppy, Carnation, Nectar), but shifted the colors over one each row so that the same colors weren’t in the same place, then trimmed off the excess.
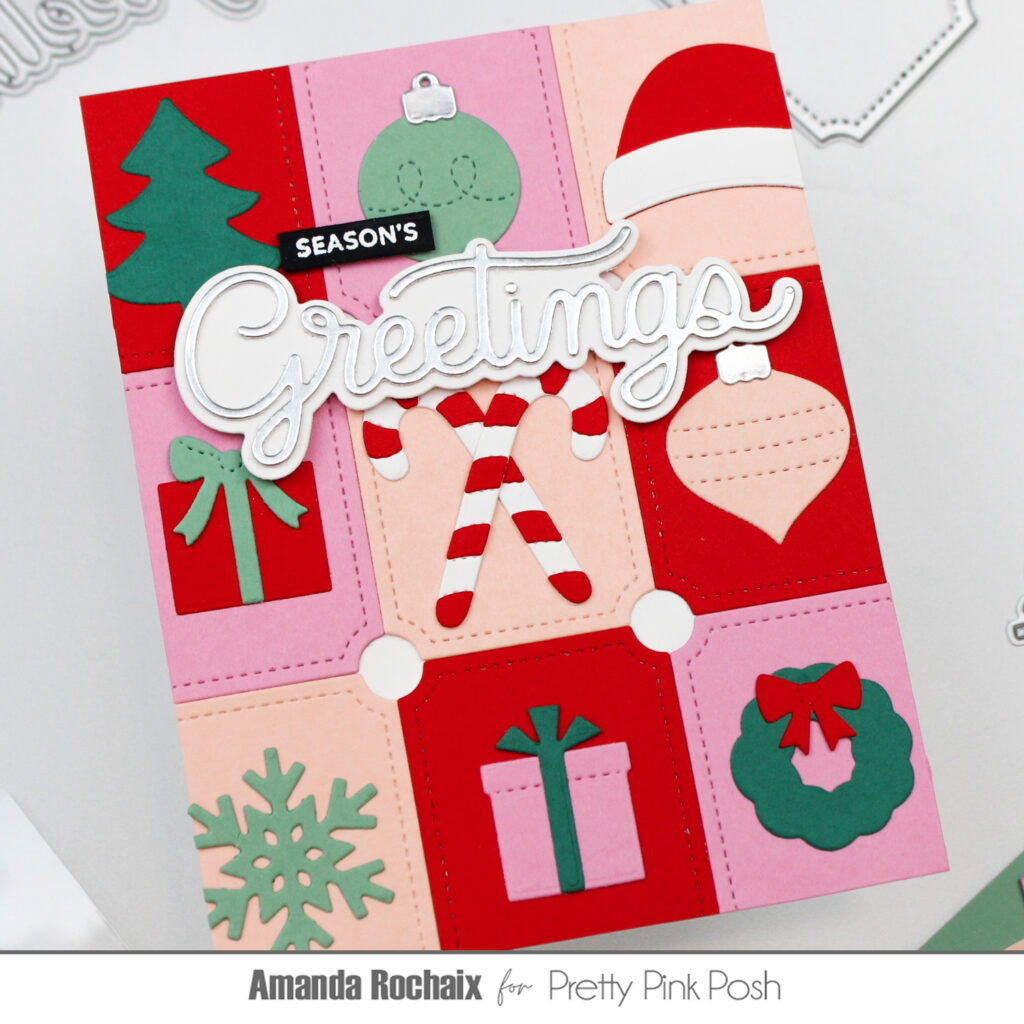
Now comes the fun part! I pulled out the Christmas Holder Additions die set, and die cut the Santa hat, one of the presents, the candy cane details, and the small bow out of Poppy cardstock. I die cut the Santa hat trim and the candy canes out of white cardstock, the pointy ornament out of Nectar, and one the presents out of Carnation. The Christmas tree, wreath, and pointy bow were die cut out of Juniper cardstock, and the round ornament, snowflake and long bow were die cut out of Eucalyptus cardstock. For the ornament toppers, I chose silver metallic cardstock since the tones of it worked really well with these colors. I assembled all of the cute little icons, then adhered them to the rectangles. I didn’t have any rhyme or reason with where I glued them down, except that I wanted the colors to pop.
All that was left to do on this card was the sentiment! I die cut the ‘greetings’ from the Winter Greetings Shadow die set out of matte silver cardstock and a layer of white cardstock, plus the shadow layer out of white cardstock as well. I grabbed the Holiday Sentiments stamp setand pulled out the ‘season’s greetings’ stamp, masked off the ‘greetings’ portion of it, and white heat embossed on black cardstock. Then I used the small simple strip from the Sentiment Strips die setto die cut my sentiment. I popped the ‘greetings’ up on some 2mm foam squares and stuck it down right where the first two rows of rectangles meet. This does cover up the fun circles that the Notched Rectangles make when they meet up at the corners, but if those circles bother you, you can totally use any rectangle die as well! To finish this card off, I stuck the ‘season’s’ on some 1mm foam squares and nestled it just above the ‘greetings’.
I really love how this card turned out! The pops of color are so fun and so are all those cute icons! If this inspires you to create, please tag me on Instagram! I would love to see what you made!
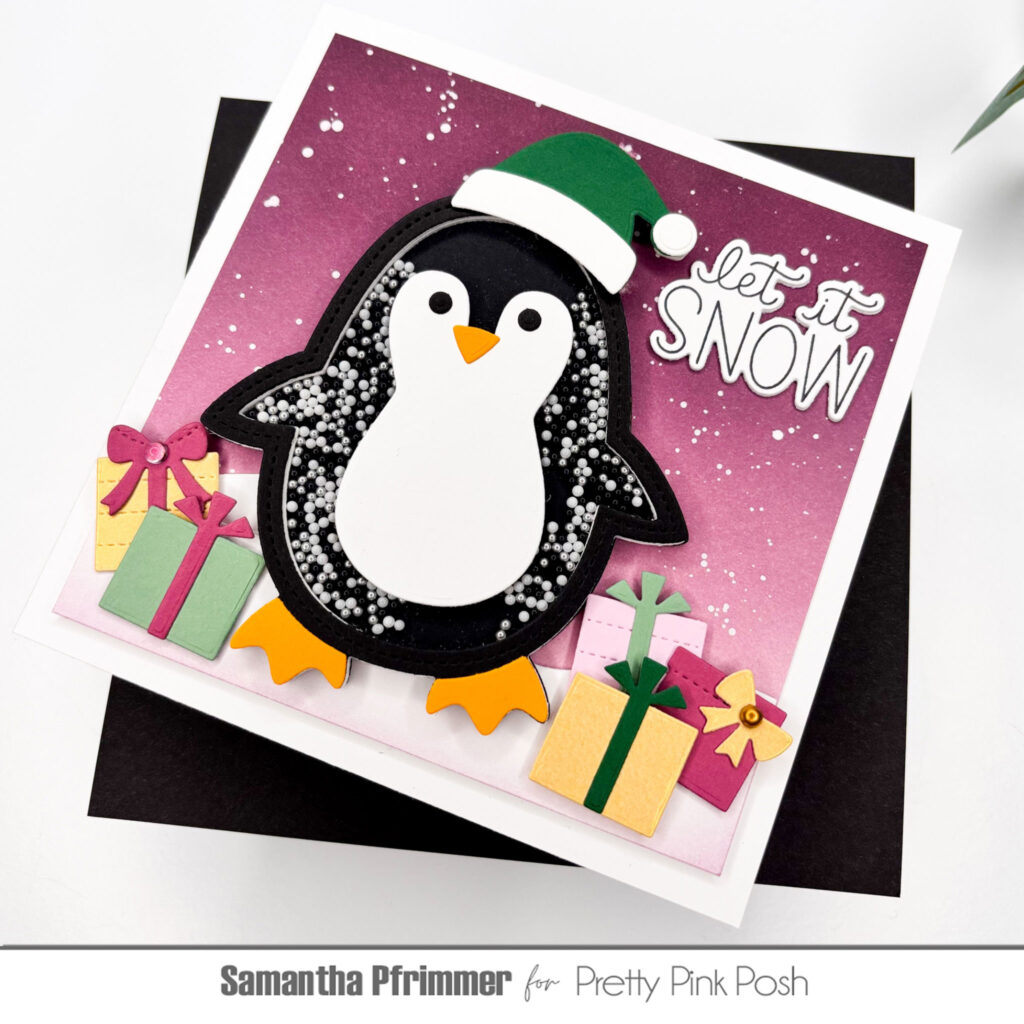
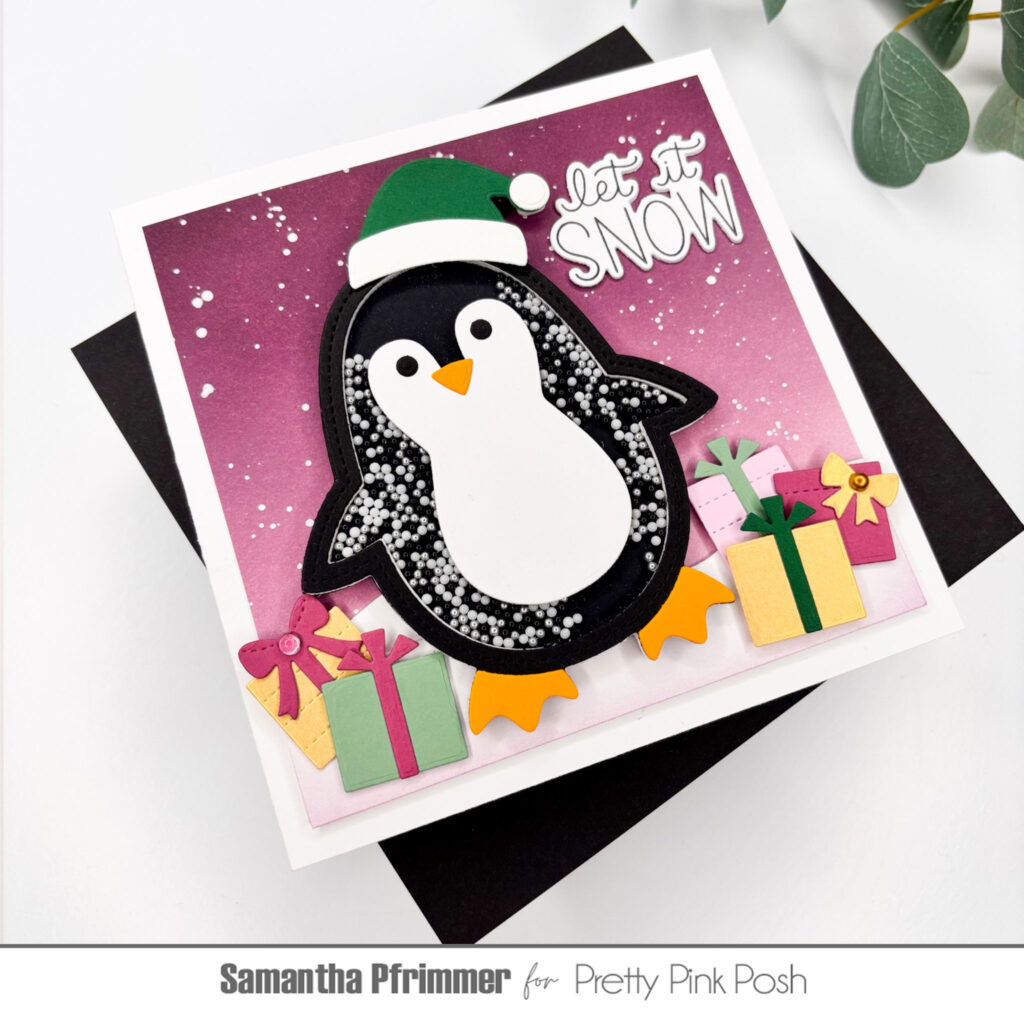
Hello, everyone! It’s Samantha here happy to be guest designing for the November Pretty Pink Posh release. I’m excited to share a fun shaker card featuring new Penguin Shaker Die.
To start off my card, I first made my penguin. I die-cut him from black, white, and orange card stock, and I cut several additional outline layers from white cardstock to stack for my shaker. After adhering acetate to the top of my shaker panel, I filled my shaker penguin with the new Black Tie Shaker Beads before sealing him up and moving onto my background.
Since my penguin was on the larger size, I decided he would be perfect for a 5.5” square card. To start my background, I cut a 5” x 5” panel from white cardstock and did an hombre background in shades of plum. Next, I die-cut a 5” long strip of white cardstock, ink-blended in the lightest of lavenders, using the new Snowy Hills Border Dies. After adding white splatter to my plum background panel, I adhered my snowy hills die-cut with foam tape and attached the entire panel to a 5.5” white folding card-base.
To finish off my scene, I attached my Shaker Penguin and gave him a little Santa hat cut from dark green and white cardstock using dies from the Christmas Holder Additions die set. I also cut several presents to decorate the ground around my penguin using gift box dies found in both the Christmas Holder Additions Die Set and the new Penguin Holder die set. All that was left was to add a sentiment stamped with the new Let it Snow stamps andLet it Snow coordinating diesand my cute card was complete. I can’t wait to give it to one of my nieces for Christmas!
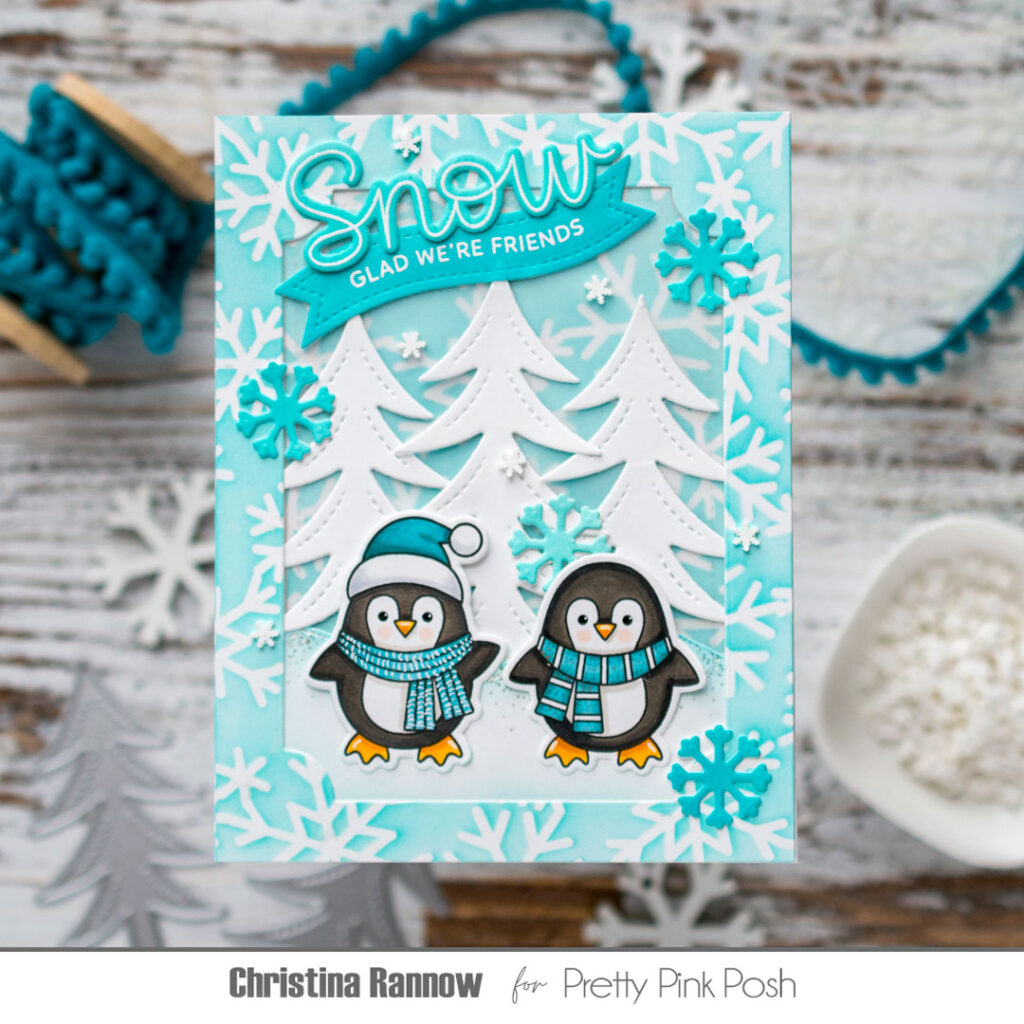
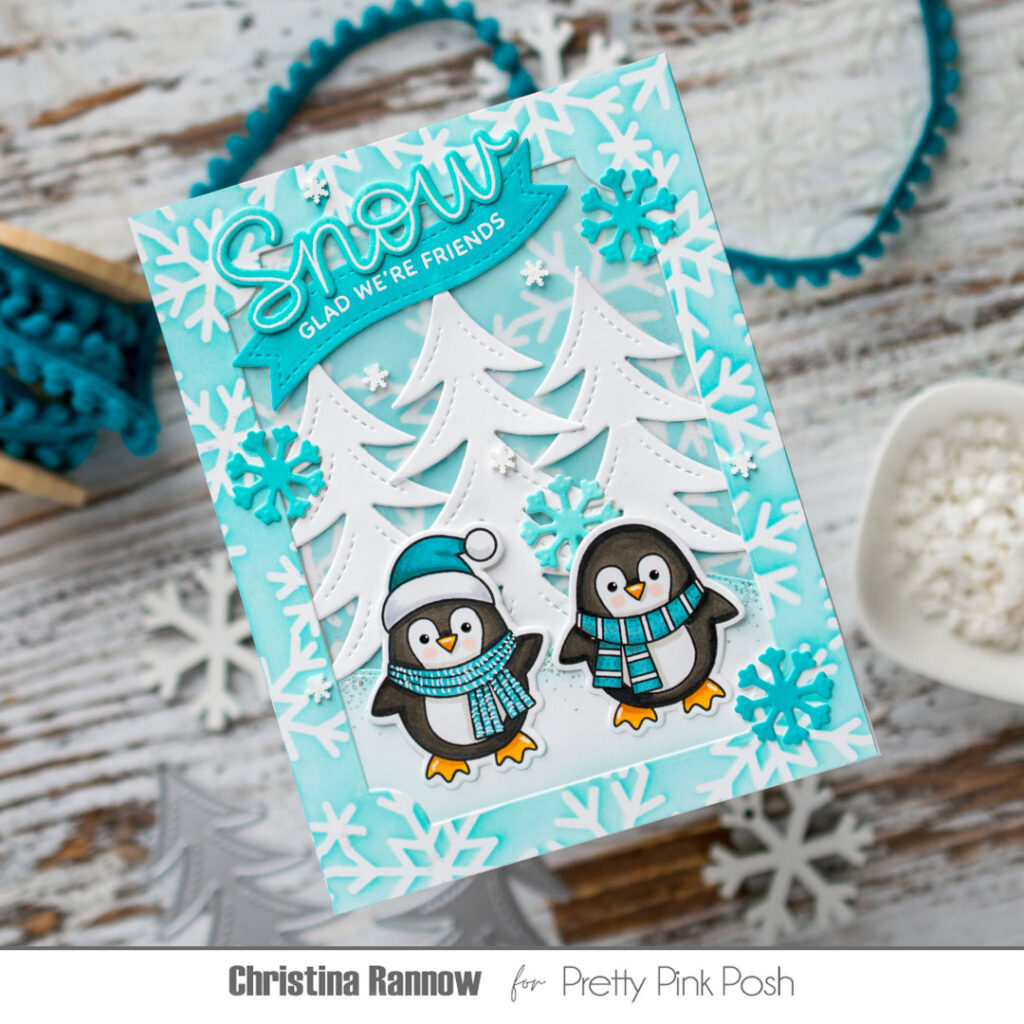
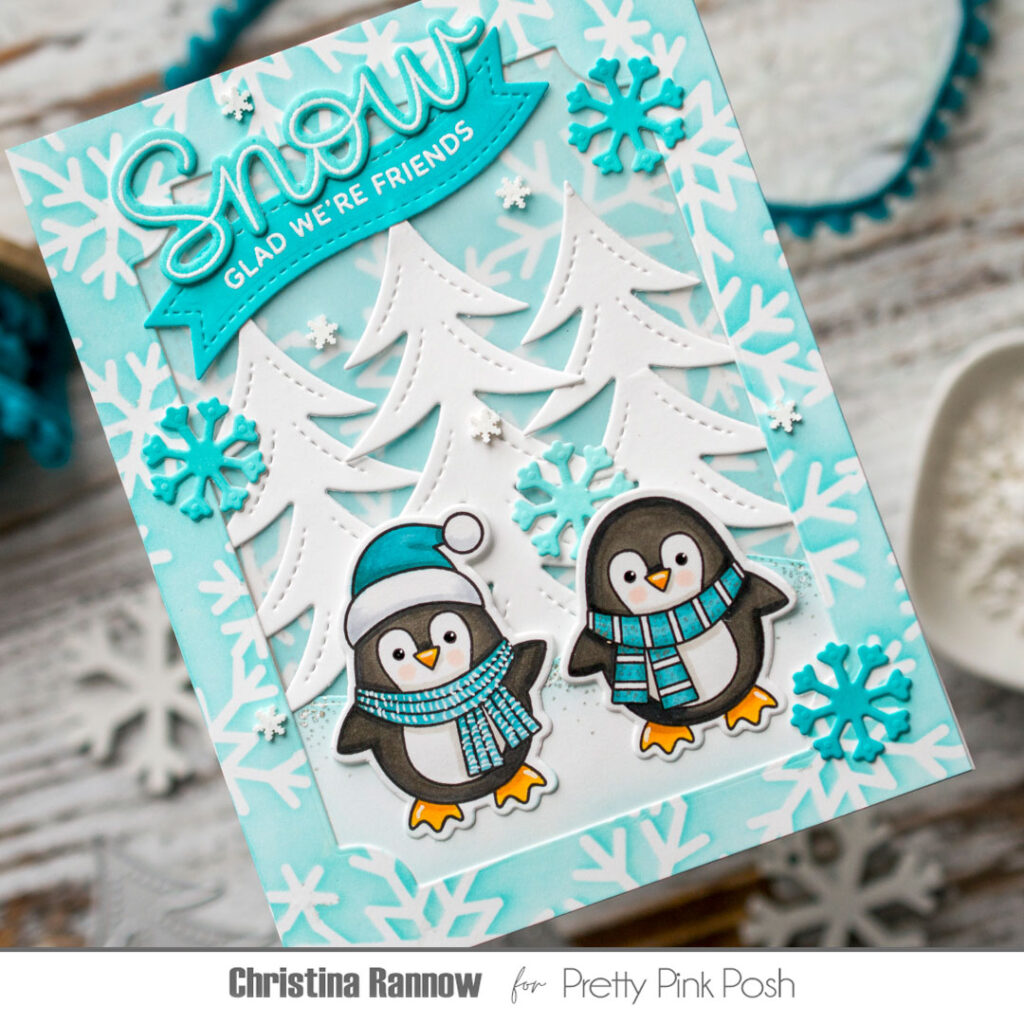
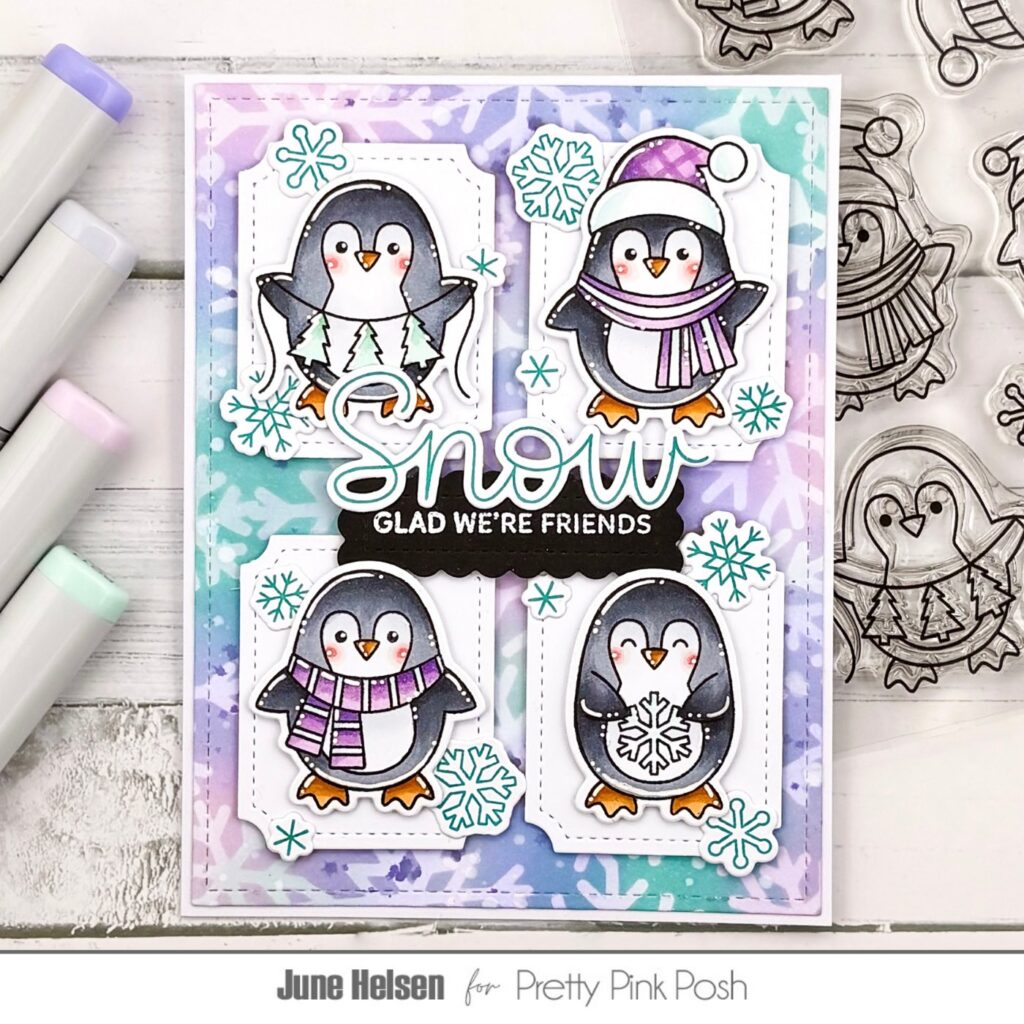
Hello, friends! It’s Christina, and I have a frosty fun card to share with you showcasing products from the latest release. I combined new stamps, dies, and stencils to create a winter wonderland perfect for these little Penguin Friends.
I started by creating the stenciled background. I used aqua blue ink to stencil the Snowflake Backgroundon a white cardstock panel and then used a partial die-cutting technique to die-cut an elongated Notched Rectangle from the center of the panel. I kept both the positive and negative pieces from die-cutting and layered a piece of acetate over just the center rectangle portion. Next I die-cut some Winter Trees and a Snowy Hillfrom white cardstock. I lightly inked the edges of the snowy hill with aqua ink and tucked it into my background along with the trees.
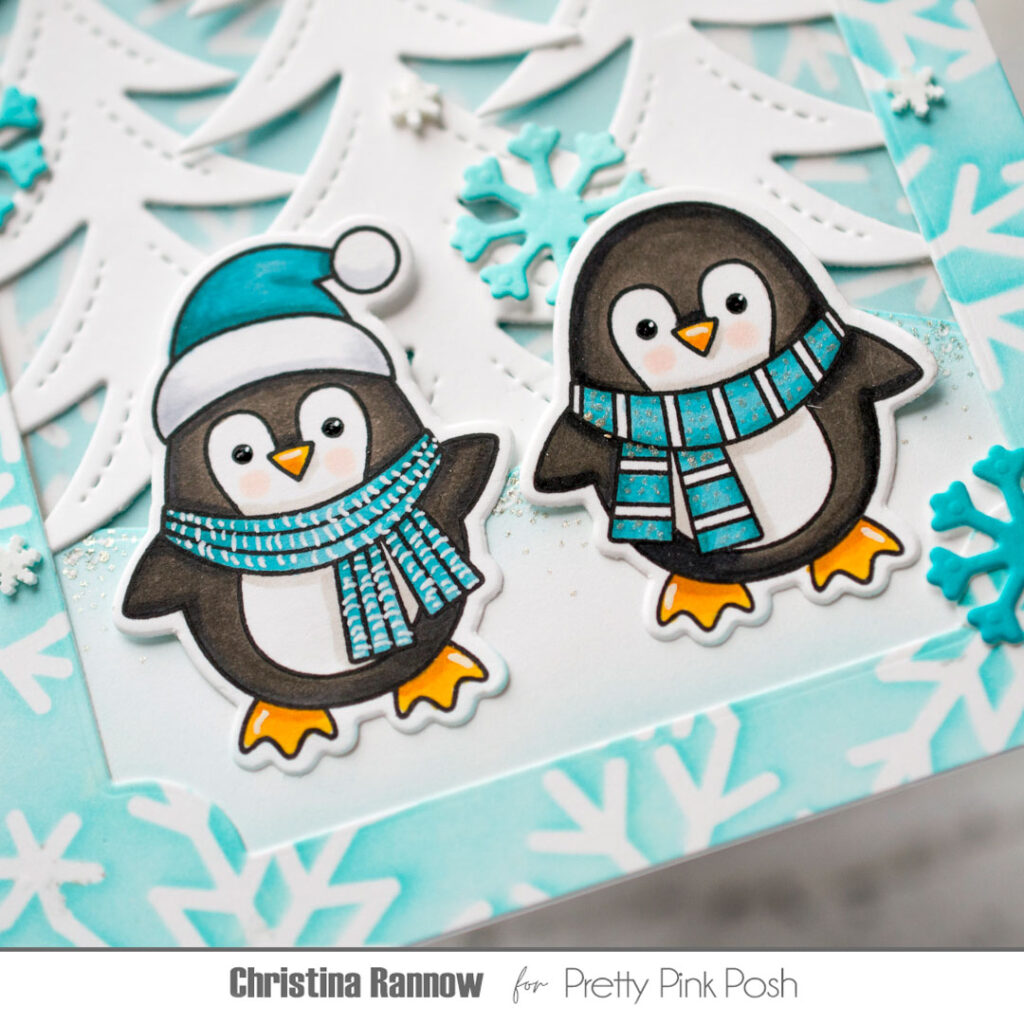
With the background finished, I moved on to the other elements of my card design. First I stamped two Penguin Friends with black ink and then colored the images with Copic markers.
After coloring the images, I die-cut them with the coordinating dies and then used a glitter pen and a white gel pen to add highlights and decorative details to the scarves. With these cuties colored and die-cut, I added them to my scene along with a flurry of die-cut snowflakes that I first ink blended with a trio of aqua inks.
Next, I created the sentiment. I used stamps from the new Let it Snowsetwith an emboss-resist technique by heat-embossing the text with white embossing powder and then inking over it with aqua ink. I heat-embossed part of the sentiment on a Banner Greeting 1 die cut, using my MistI to help curve the sentiment to fit. After heat-embossing the word “Snow”, I die-cut it with the coordinating die. And the finishing touch was to add a few white clay snowflakes.
Thank you so much for checking out this frosty fun card featuring products from the new winter release.
Hi friends, it’s Carly! I’m excited to share a project using the brand new winter release.
This project is part of our November Video Hop! Check the description in the video for links to the next stop so you can keep hopping along for tons of holiday inspiration.
Shaker cards are my absolute favorite type of card to make and sometimes a little shaker window is all you need, like a little whipped cream *wink wink*
The November 2025 Release is now available in the Pretty Pink Posh Shop and select retailers that carry our products. If you missed our post yesterday, we revealed all of the products in picture form, but if you would like to see them in a video, Mindy has that for you today!
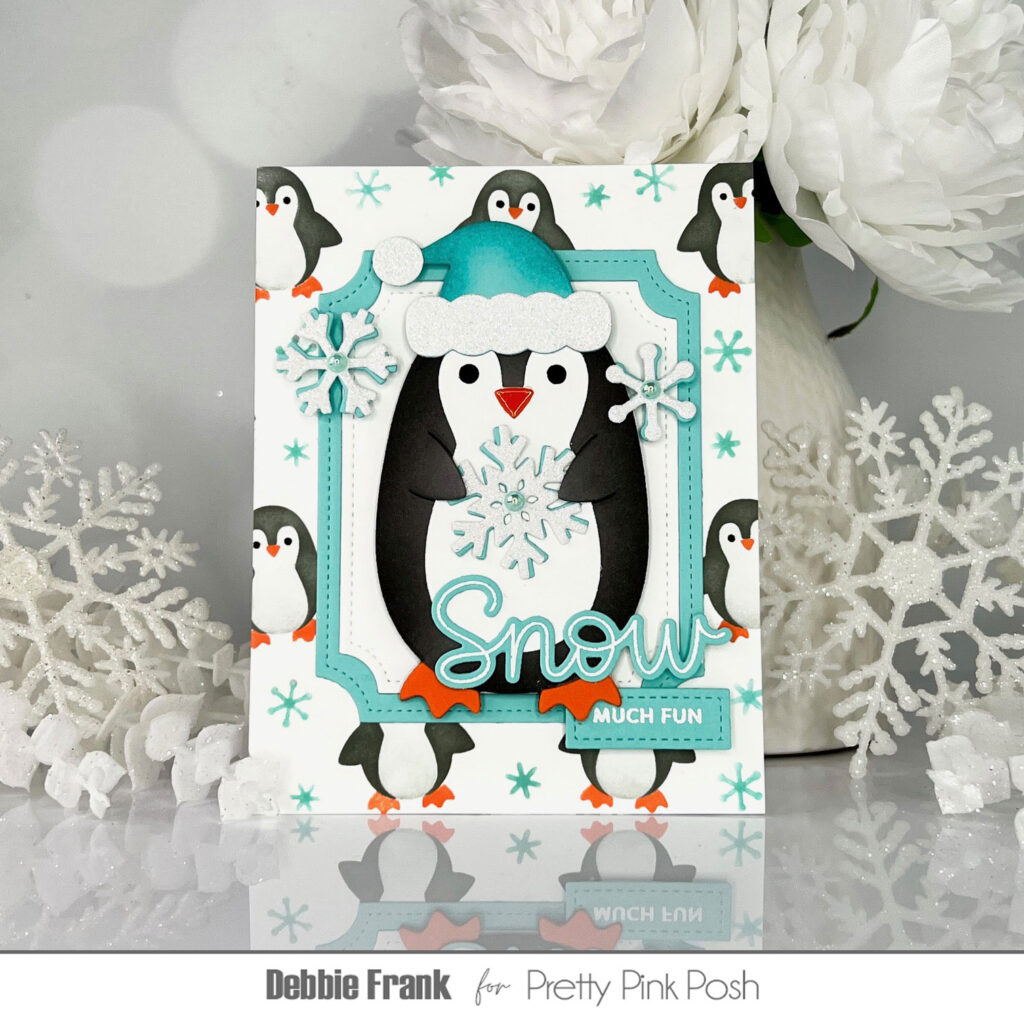
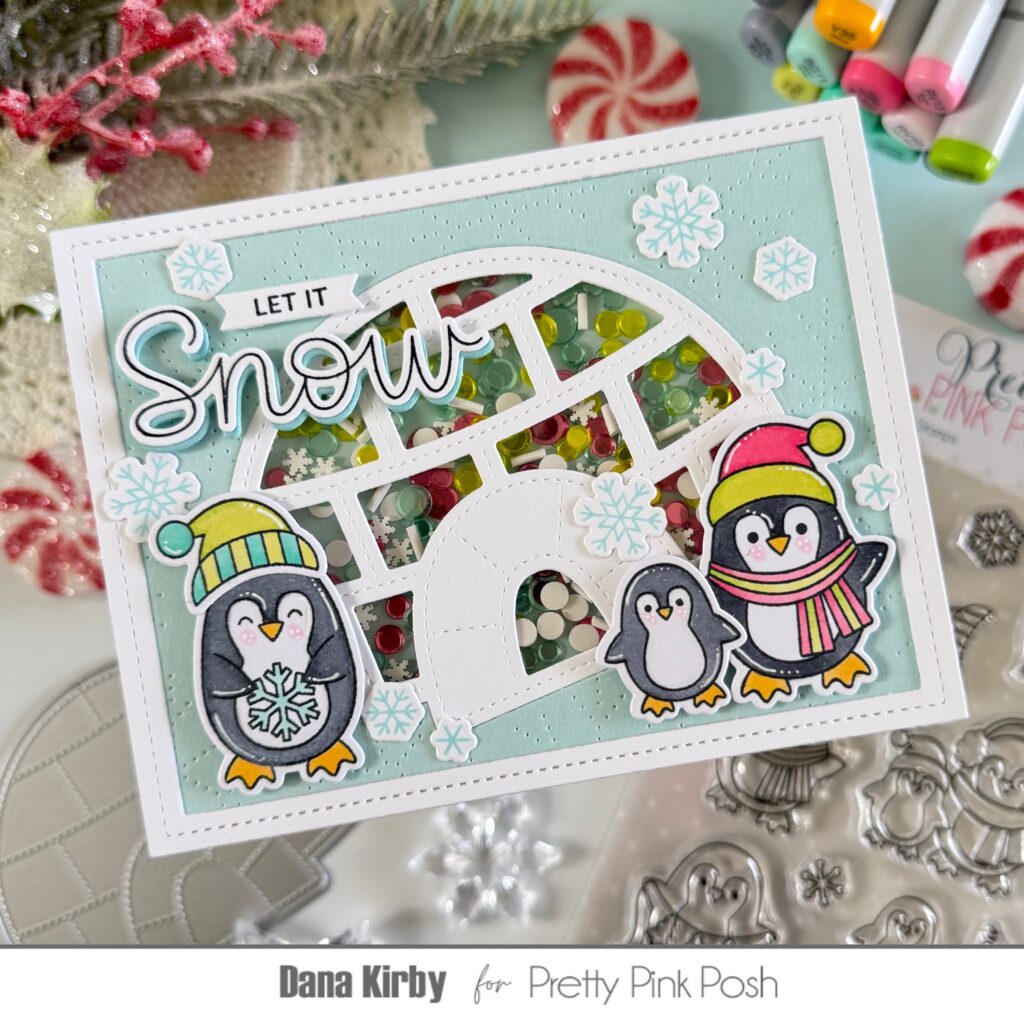
To start off with my card today, I took a standard A2 panel and the Layered Penguins Stencil onto a grip mat and ink blended on dye inks.
Next, with the Notched Rectangles Dies I die cut out with the two largest dies. The largest die from a matching teal card stock to the background panel. And the other with a white card stock to adhered them together to give a nice frame for the penguin. And attached to the Penguin panel background with liquid glue.
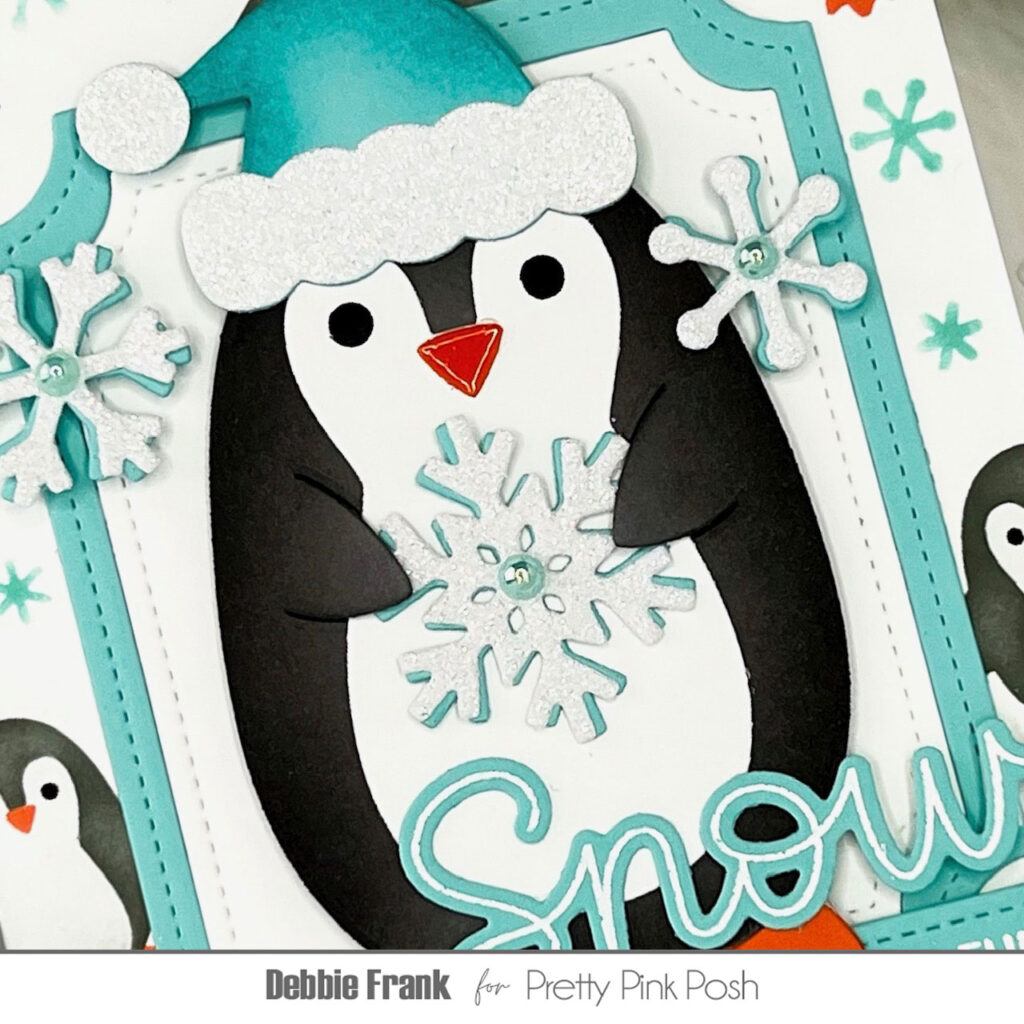
After I die cut out the Penguin Holder, he needed the Santa hat from the set. I did an ink blend with dye ink on the edge for dimension, and a glitter brim on the hat. I decide to have the Penguin holding a snowflake. So I die cut out a both of the snowflakes from the Christmas Holder Additions Dies. I layered up the snowflakes with glitter card stock and teal by off setting them a bit and attached with liquid glue. But I still needed one more smaller snowflake, using the one in the Christmas Bucket Additions Dies.
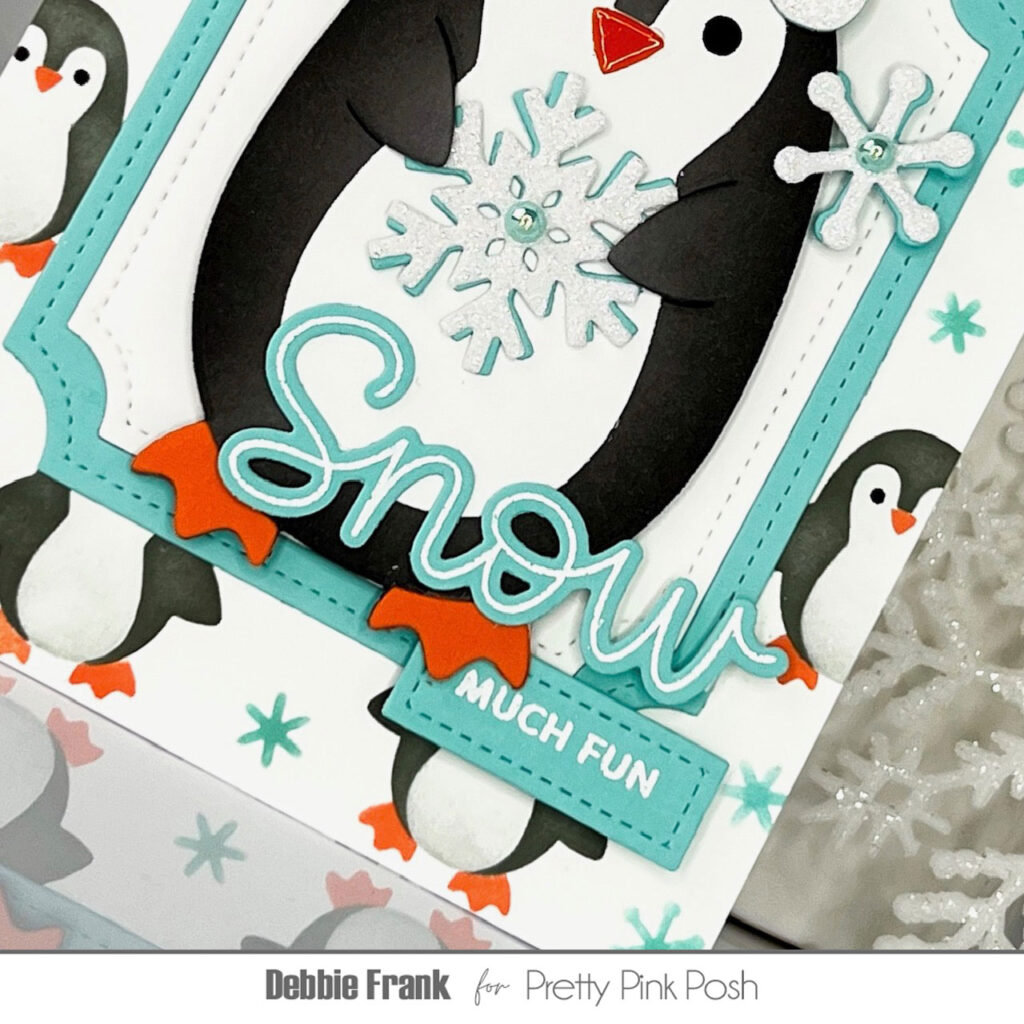
For my sentiment, I went with the Let it Snow stamp set. I stamped and white heat embossed the “Snow” and the “Much Fun”. I then die cut the “Snow” with the coordinating dies. For the “Much Fun” I used the Sentiment Strips Dies to cut it out.
The final touch was to added Sea Foam Pearls to the center of the snowflakes. Then attached the panel to the card base and added Glossy Accent to the beak of the penguin!
Welcome to the last day of sneak peeks of our November 6th release. Today we’ll be taking a look at the new stamps sets, along with the Igoo Shaker and Notched Rectangles die sets.
Hello, my crafty friends! Arsenia here, welcoming you to Day 3 of our cozy November Release Sneak Peeks! Today’s post is bursting with frosty charm, glittery snowbanks, and penguin-sized cuteness.
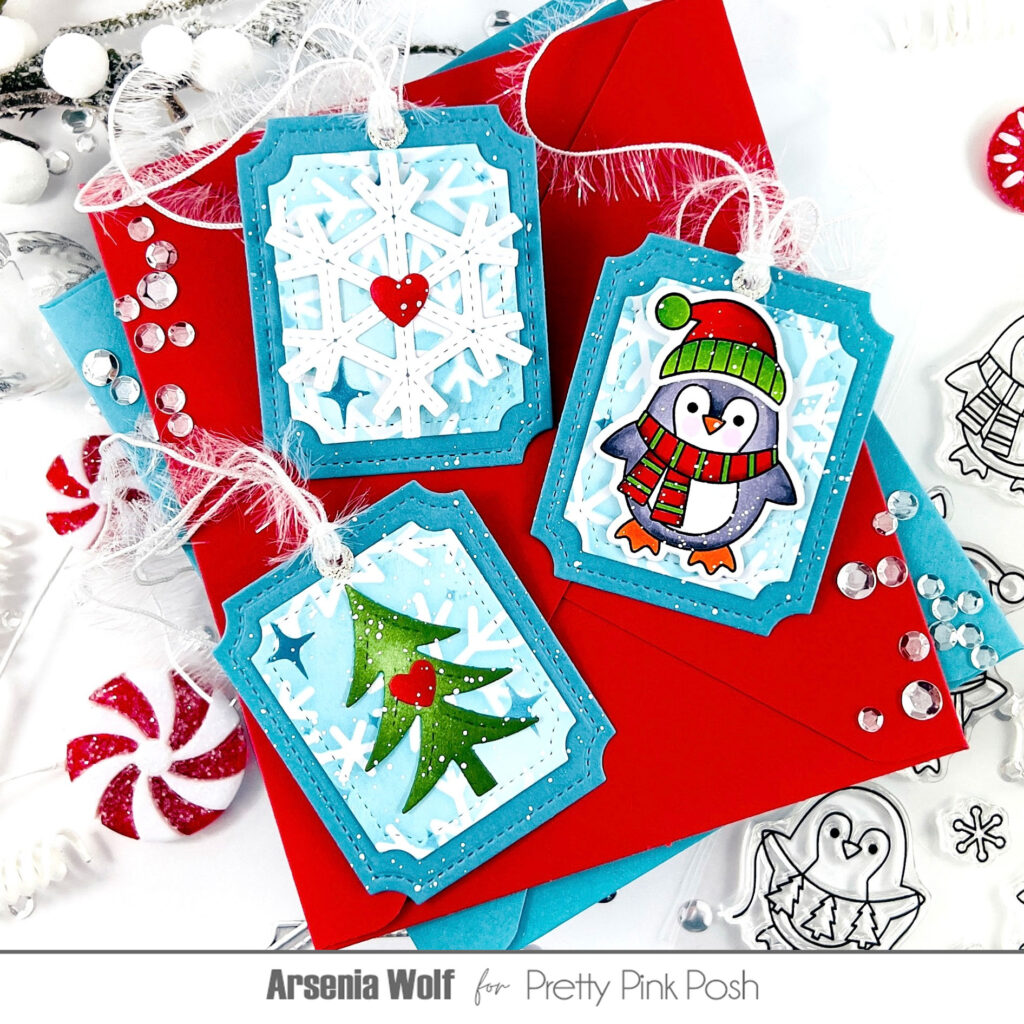
This release is absolutely snow-laden with possibilities — penguins galore, twinkling trees, icy hills, and a dash of holiday magic. I whipped up two cards, a set of tags, and even a little tag holder box (because what’s winter without a few surprises?). My color palette? Classic holiday red, frosty blues, and just a wink of green — simple, cozy, and perfectly festive. Let’s slide right in!
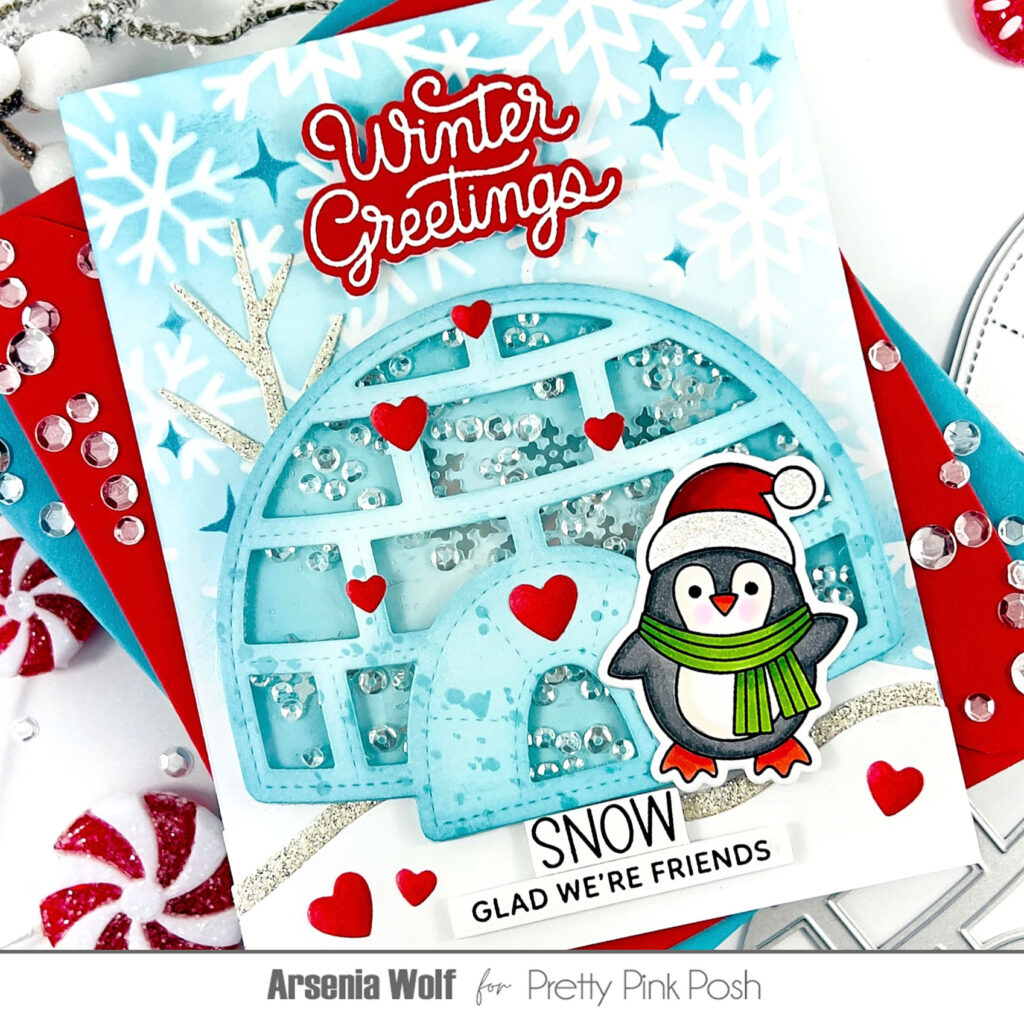
Card One: Shake, Sparkle, and Let It Snow!
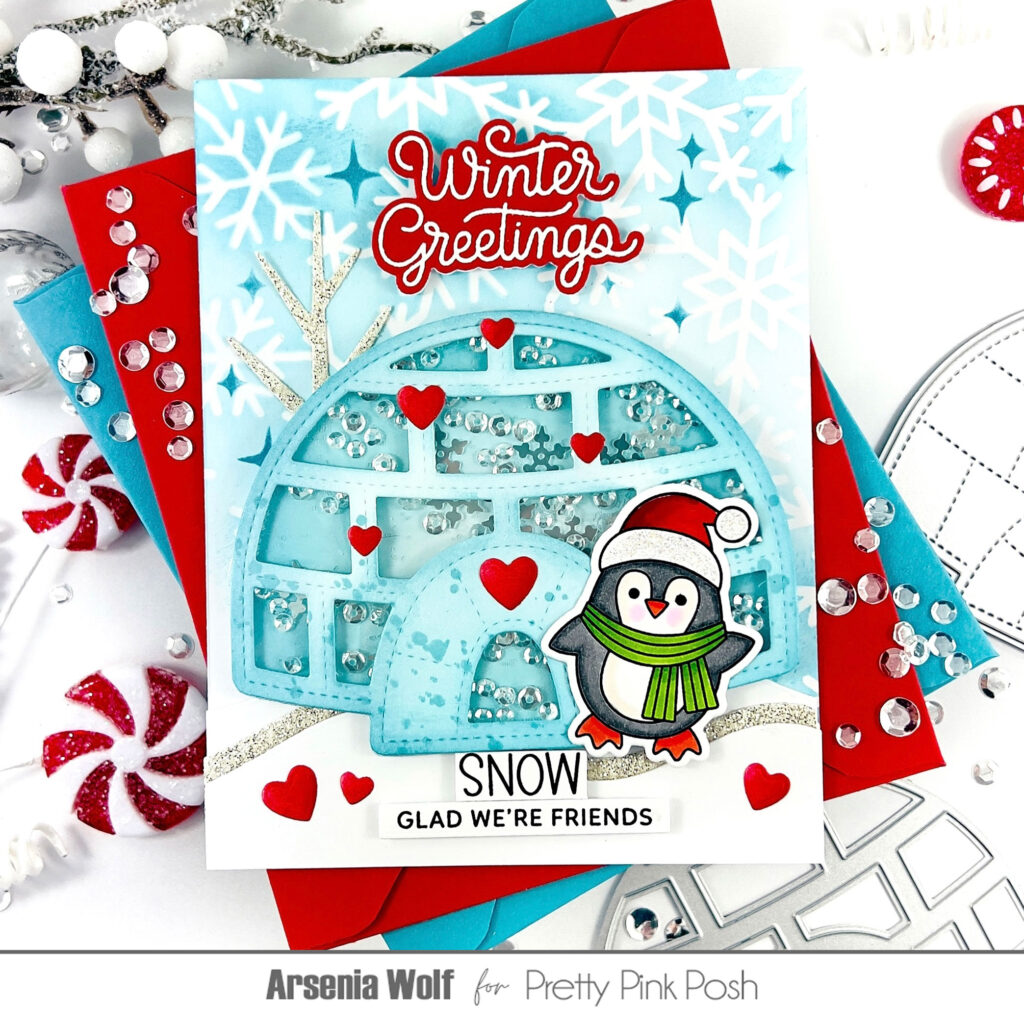
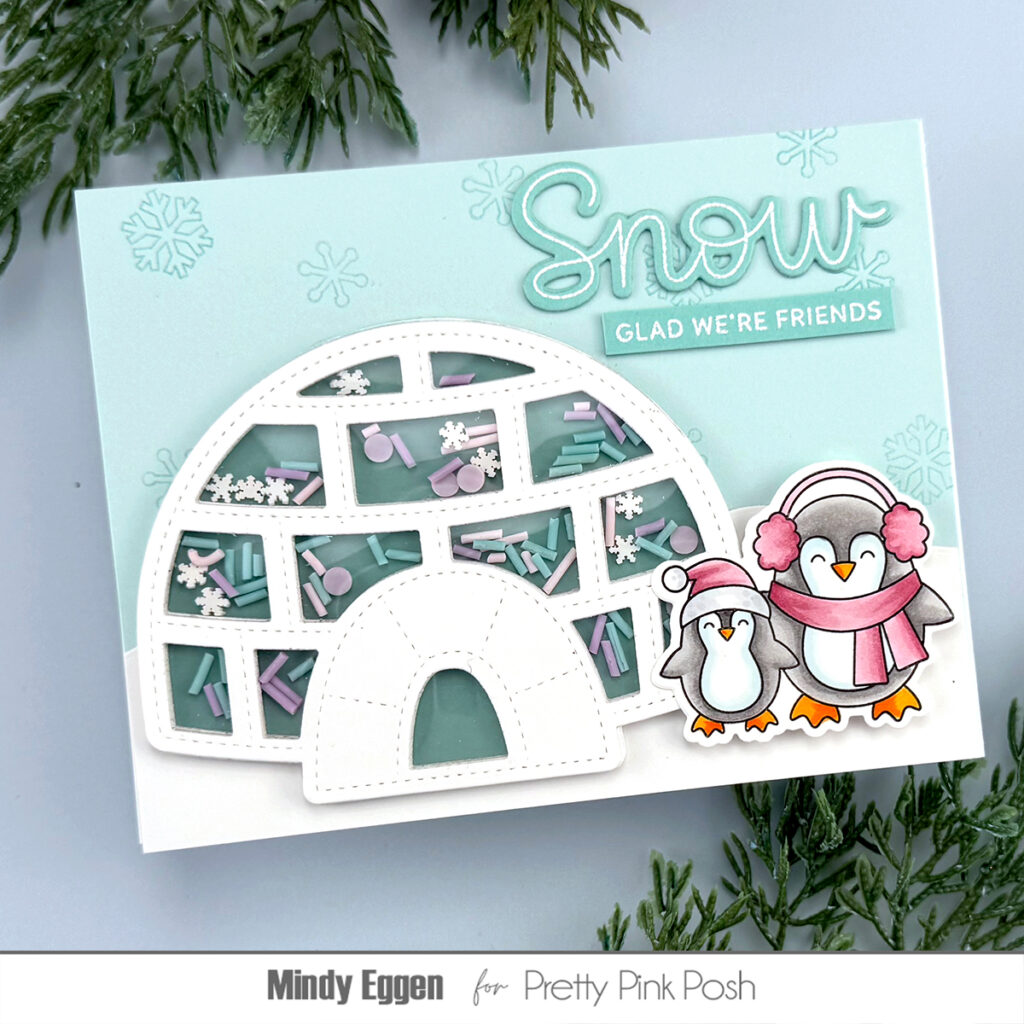
For my first frosty creation, I reached for the new Igloo Shaker Die, Penguin Friends stamp set (with coordinating dies), Let It Snow stamps, and Winter Tags — a perfect combo for a snow-filled celebration!
I started by ink-blending panels with the new Snowflake Background Stencil, using three shades of icy blue for a chilly ombré effect. Then I added a dark, twinkling layer using the new Twinkle Stencil — instant winter magic! These panels became the frosty base for all my projects today (yes, I made four — I couldn’t stop!).
Next up, the Igloo Shaker — cut from soft blue cardstock and gently ink-blended for frosty depth. I filled it with a storm of clear sequins and snowflake confetti, then layered three snowy hills using the new Snowy Hills Borders — two white and one glittery, because sparkle is always a good idea.
A charming winter tree (from the new Winter Trees Die Set) stood tall in the background, and of course, the star of the show — a cheerful little penguin from the Penguin Friends stamp set, all decked out with a touch of glitter on his hat!
For the sentiment, I white-embossed Winter Greetings onto red cardstock from the new Let it Snow Stamp set with coordinating dies. My sub sentiment is paired with the word snow from the Winter Tags set. A sprinkle of red hearts (thank you, Build A Heart Dies) finished it off perfectly. And just like that — a snowy, sparkly shaker card was born!
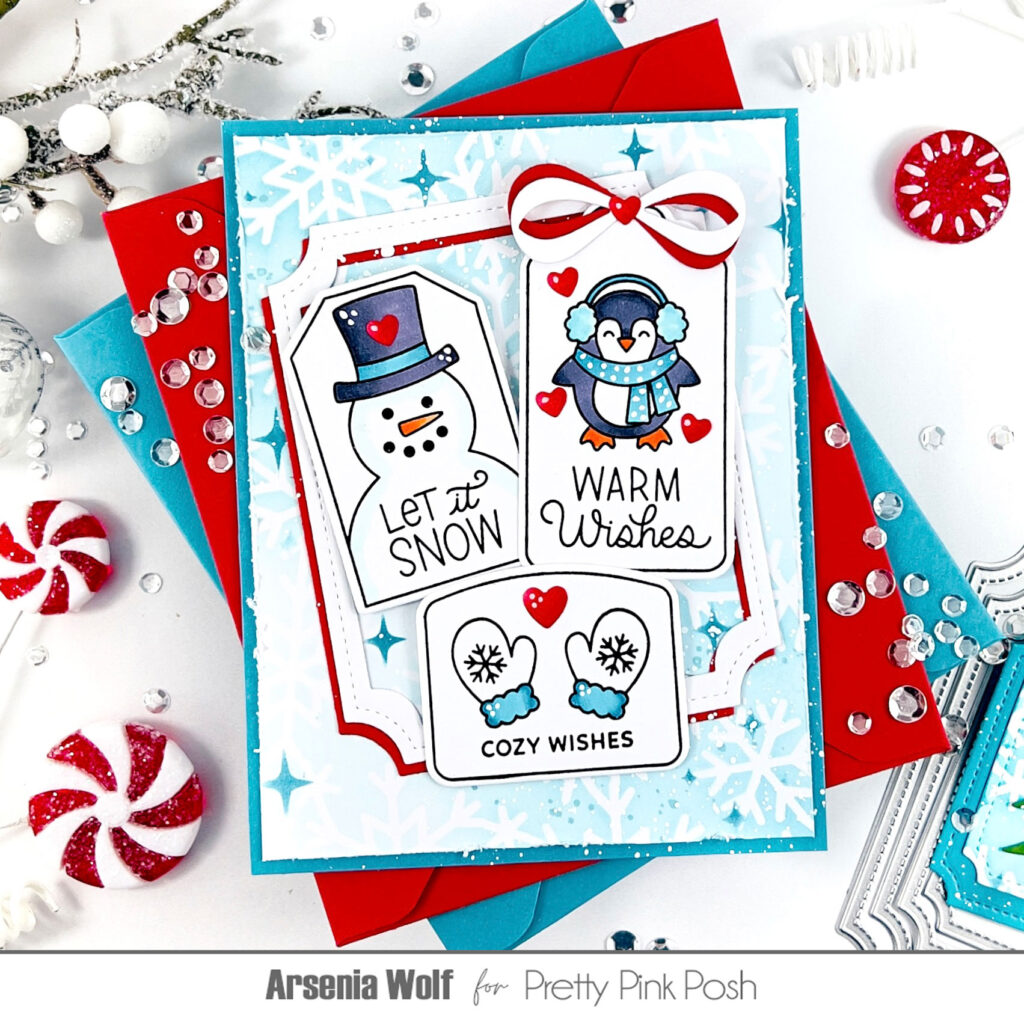
Card Two: Tags, Twinkles, and a Touch of Fun
For my next card, I used one of my stenciled panels (a blend of Snowflake Background and Twinkle Stencil). I trimmed it to size and mounted it on a blue card base.
Then came the stars of the show — three adorable images from the Winter Tags stamp set, colored up with my trusty OLO markers. To add a little dimension, I framed the scene using the new Notched Rectangles Dies — one crisp white frame and one in festive red, layered just slightly off-center.
A dainty bow (from the beloved Beautiful Bows Die Set) and a sprinkle of hearts from Build a Heart dies brought everything together. And because it wouldn’t be a proper winter card without it — I added white splatters for that freshly fallen snow look. Ta-da! You’d think tags belong on gifts, but oh no — they make stunning cards too!
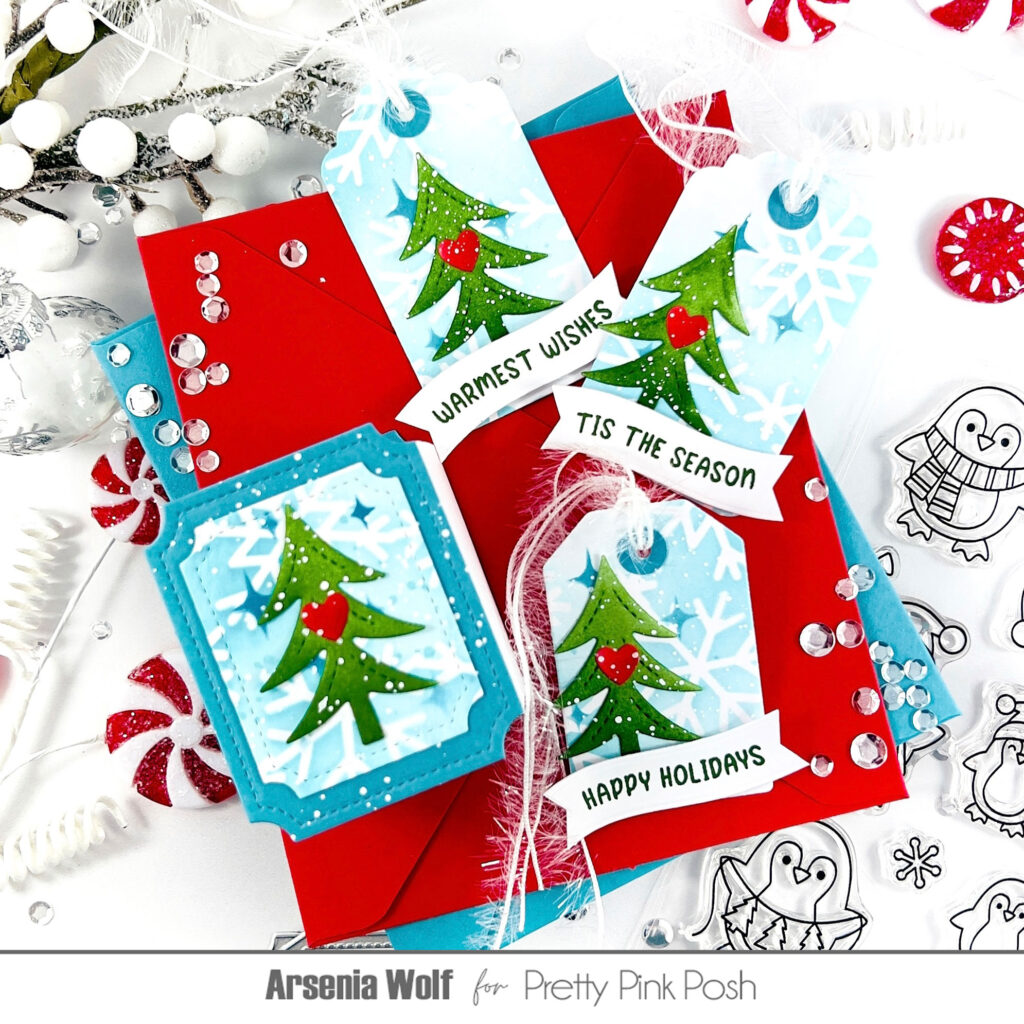
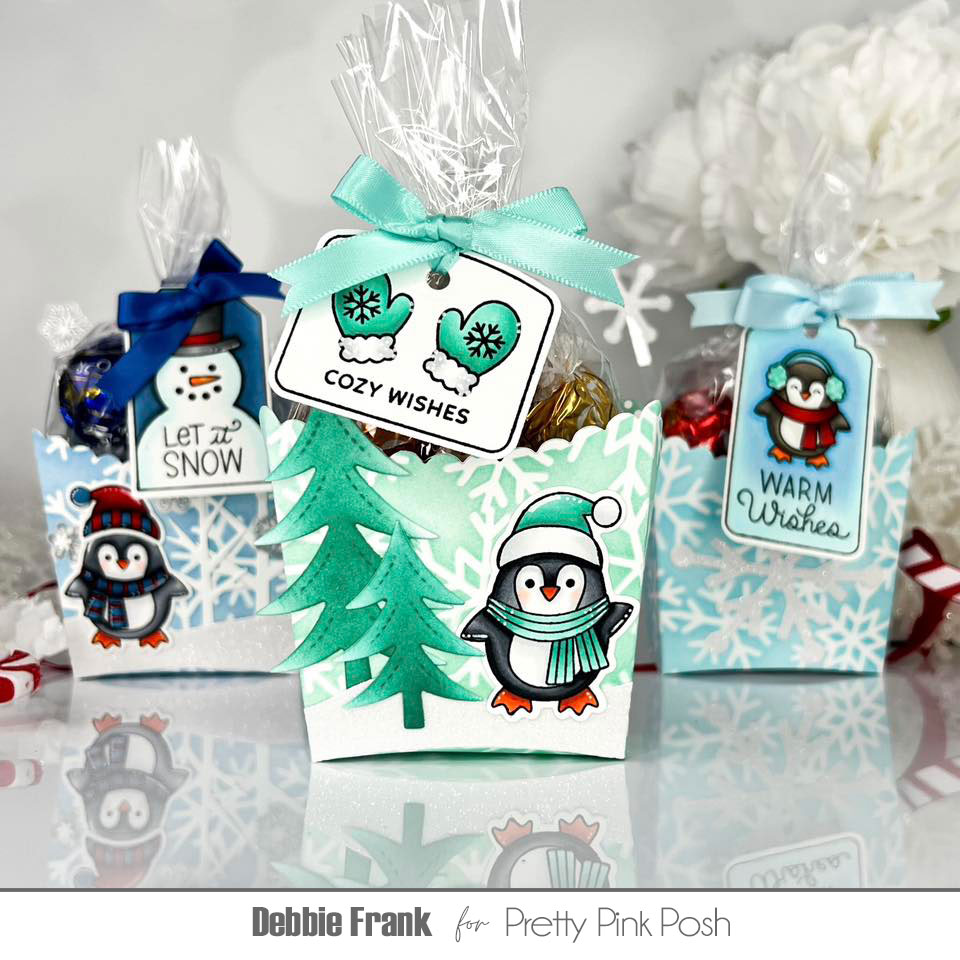
Tags & Holder Box: Frosty Favors and Tiny Treasures
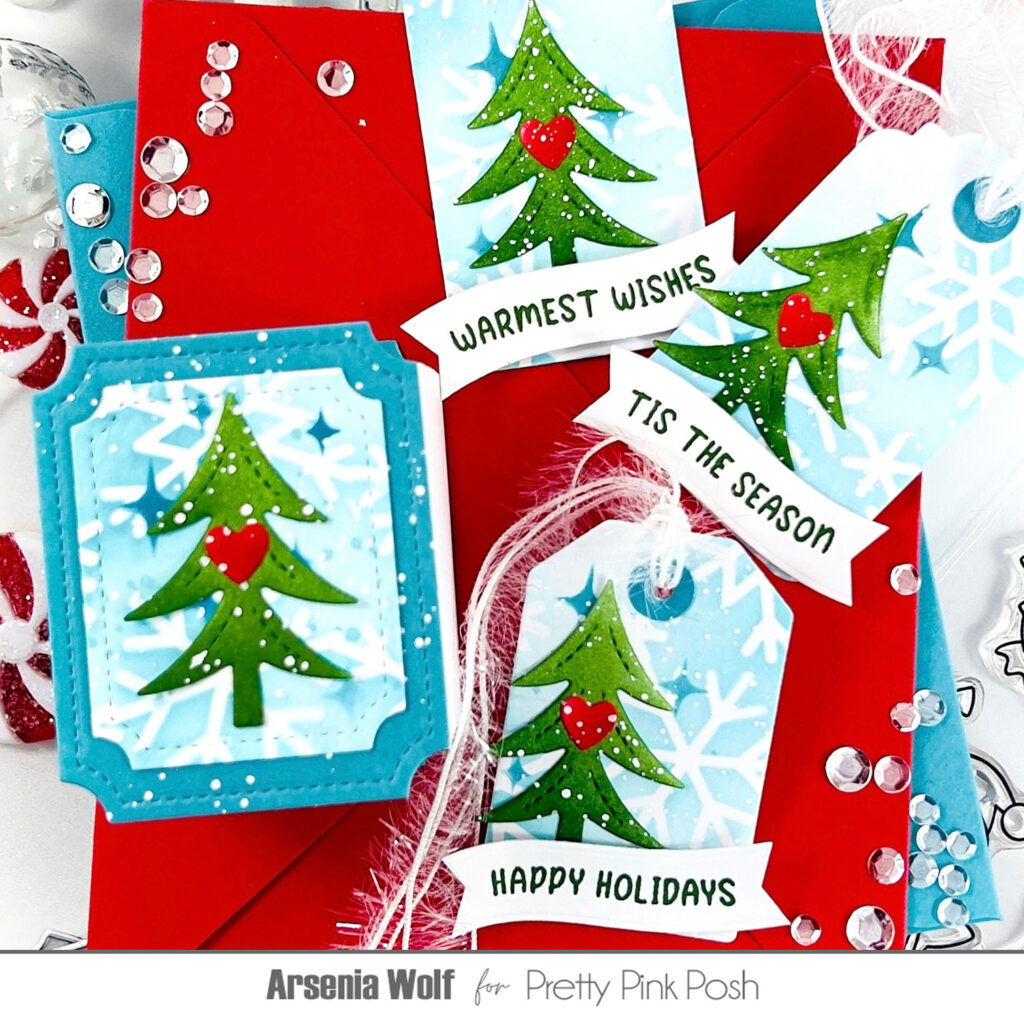
Now for the grand finale — the tags and tag holder box! Using my earlier stenciled panels, I cut out three tags with the new Winter Tags Dies. Each tag got its own little snowy tree (from the Winter Trees Die set), a heartfelt sentiment from Christmas Banner Greetings, and a red heart using the Build A Heart Dies. Add a flurry of white splatters and voilà — winter perfection!
For a finishing touch, I created a mini box using the Notched Rectangles Dies to hold my tags. The notched edges act like adorable little “snowshoe feet,” making the box extra charming. Imagine these at your holiday table — tiny tag holders filled with chocolates or notes of gratitude. The possibilities are truly endless!
For my final trio of tags using the Notched Rectangles Dies as tags, I switched things up — one with a snowy tree from Winter Trees Die set, one featuring our darling penguin friend from Penguin Friends Stamp set, and one with a shimmering snowflake from the Stitched Snowflake Dies.
Be sure to check out the incredible inspiration from the rest of the design team below — and remember, there’s snow limit to what you can create!
Thank you so much for joining us for the sneak peeks! I hope your imagination is snowballing with ideas. We’ll be back tomorrow with the full picture reveal, so you can start to put together your wish lists!