
Vibrant Good Vibes
Hey friends! Justin here, and I am SO excited to be sharing one of my very first blog posts as an official Pretty Pink Posh Design Team Member! For my first month of my first term, I wanted to create a card that was full of color and just all around good vibes! I pulled in some new and older product to make this card come together, so let’s get into the details!
Below is a list of Pretty Pink Posh Products used to create this card:
Good Vibes Shadow Dies
Circle Grid Stencil
Other Key Products Used:
Picket Raspberry Distress Ink, Carved Pumpkin Distress Ink, Mustard Seed Distress Ink, Twisted Citrón Distress Ink, Peacock Feathers Distress Ink, Wilted Violet Distress Ink, Black Paper Splatter, Liquid Snowflake Paper Splatter, Black Cardstock, White Cardstock, Metallic Cardstock
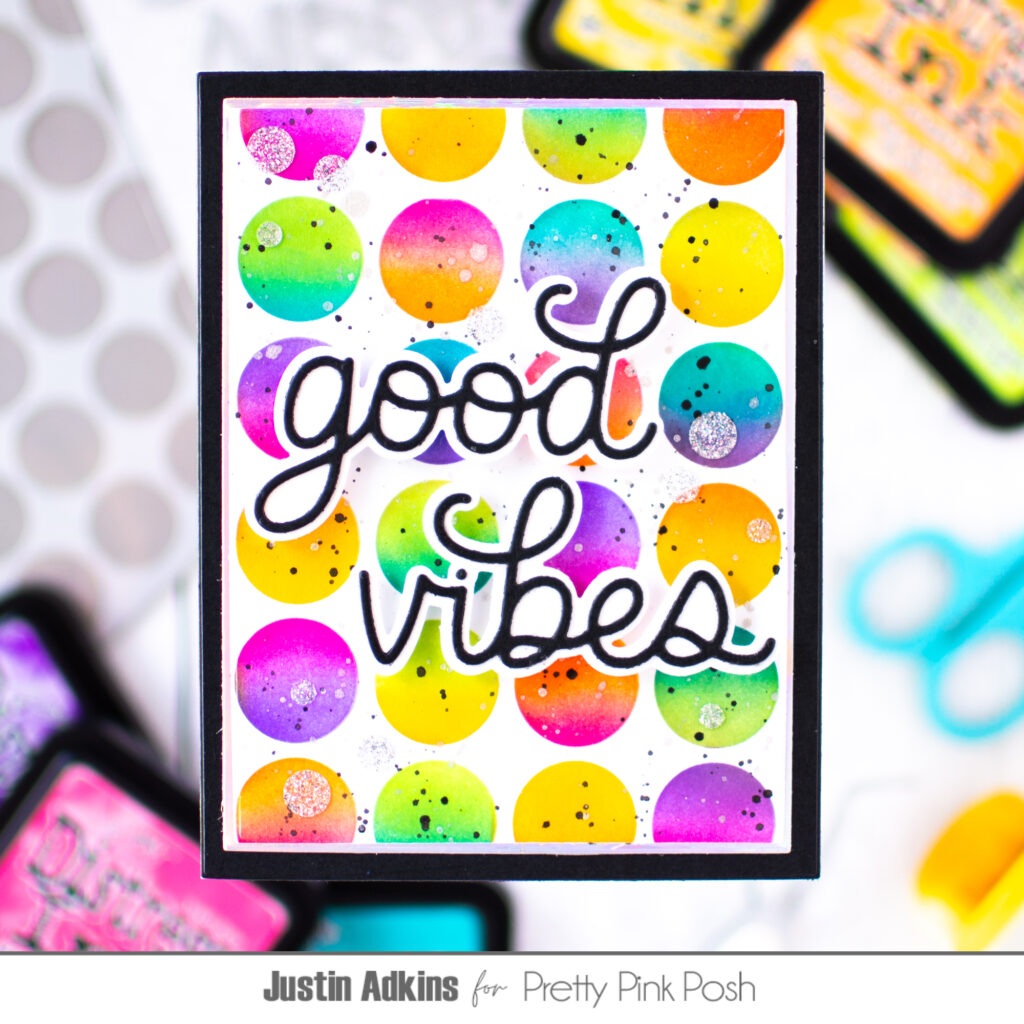
For my colorful circle panel, I placed the Circle Grid stencil on top of a piece of white cardstock that is good for blending Dye Inks. Then, I used a low-tack tape to only expose one circle at a time (masking the surrounding circles) and I ink blended 2 different Distress Inks in each circle. I tried my best to use colors adjacent to one another on the color wheel. When I was done, I trimmed this panel down to 3.875” x 5.185” and then splattered both Black and Snowflake Paper Splatter to give it some detail.
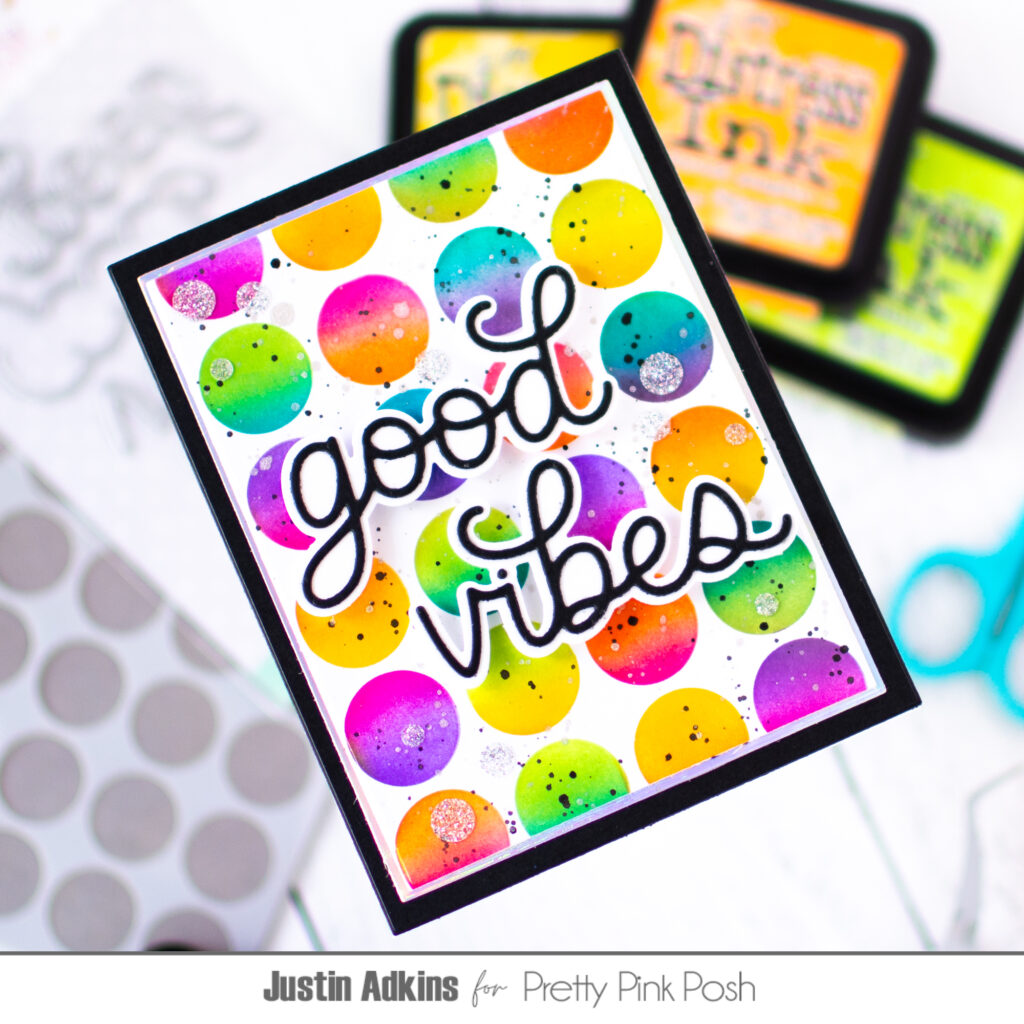
To create my good vibes sentiment, I decided to die cut the shadow from white cardstock, and the letters from black cardstock, because I didn’t want to detract too much from the overly colorful background! However, once my sentiments were assembled, I did adhere them to my panel using foam tape so that they had some nice lift off of the paper.
I adhered my circle panel to a 4” x 5.25” panel of iridescent metallic cardstock, and then adhered that full unit to a 4.25” x 5.5” panel of black cardstock. I think this layering helps give the card nice clean edges, and a slight bit of a professional look.
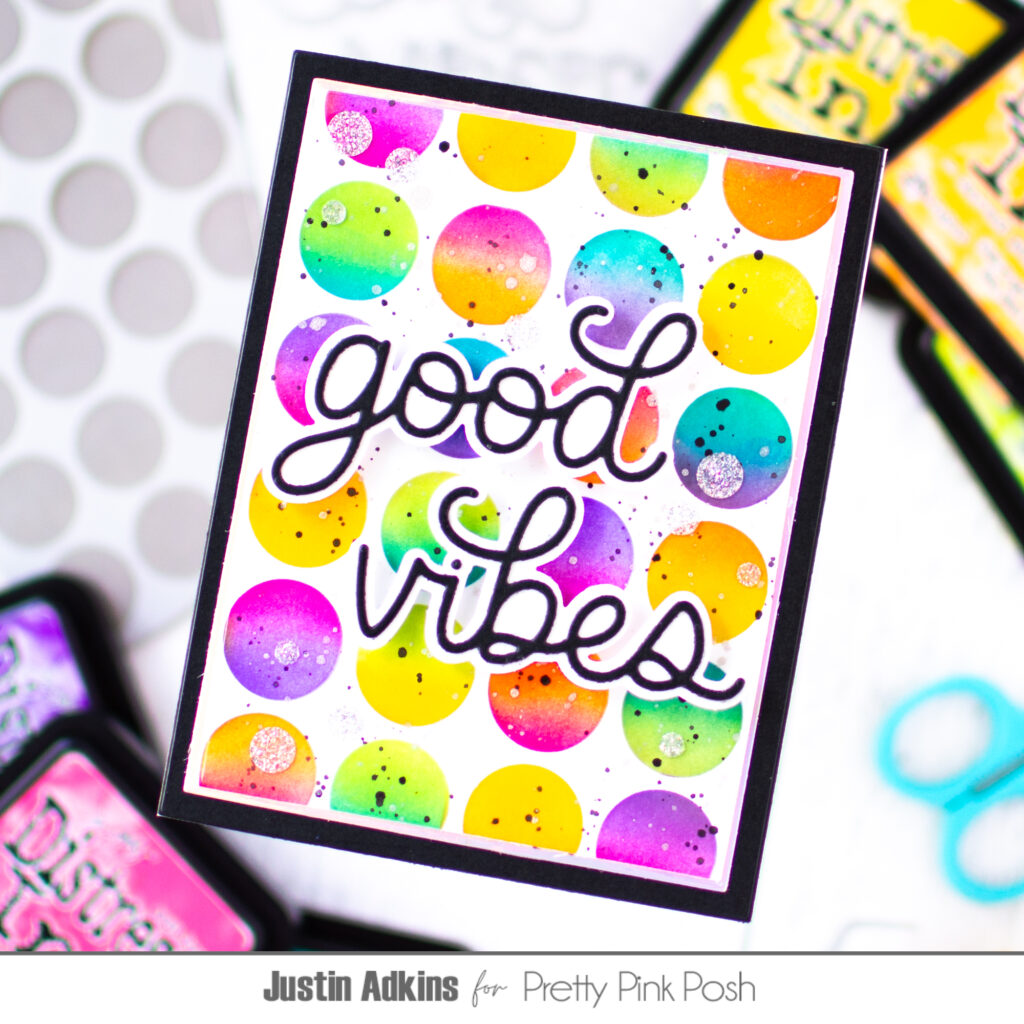
When it came to finishing up this card, I adhered it to an A2-size card base, and also adhered some sparkle embellishments as well for extra glitz. I always like to add my embellishments as the very last step as I think it helps in not disturbing them!
Thank you so much for stopping by the Pretty Pink Posh blog today for some bright and colorful inspiration! I can’t wait to see what stencils you decide to try this “mask and blend” technique on!
Happy Crafting!
Justin
This is such an awesome colorful design!
Vibrant and pretty!
Love the colors 😍😍