Blog Hop

| | | |

Day 1: Valentine Blog Hop
Pretty Pink Posh- Day 1: Valentine Blog Hop

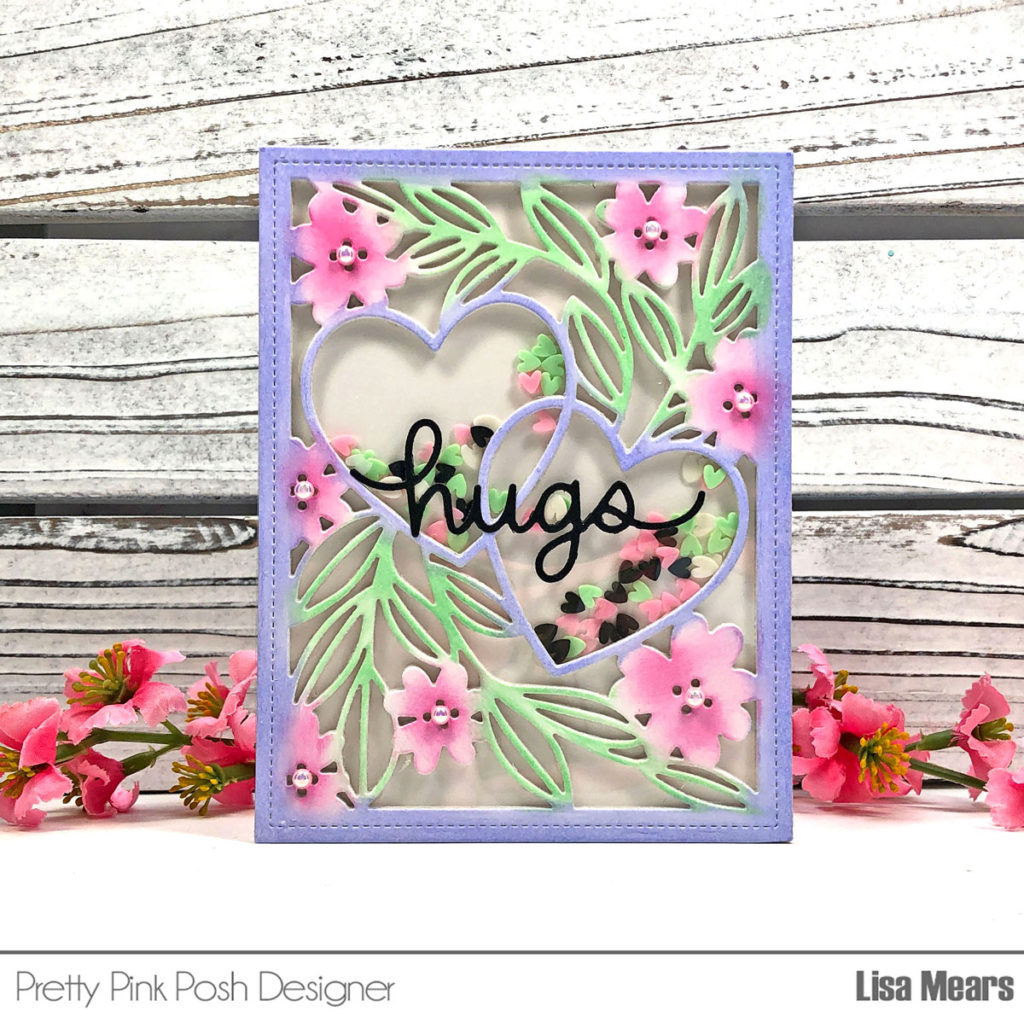
Hello crafty friends. It’s Lisa Mears here. I love to make shaker cards and today I’m sharing a shaker card that I made using the Love Hearts die. This die measures 4 1/4” x 5 1/2” and is perfect for the front of an A2 size card. 
Pretty Pink Posh- Day 1: Valentine Blog Hop

If you would like to watch how I made this card, then watch my video here.

Watch the video above  I  Watch the video in HD on YouTube

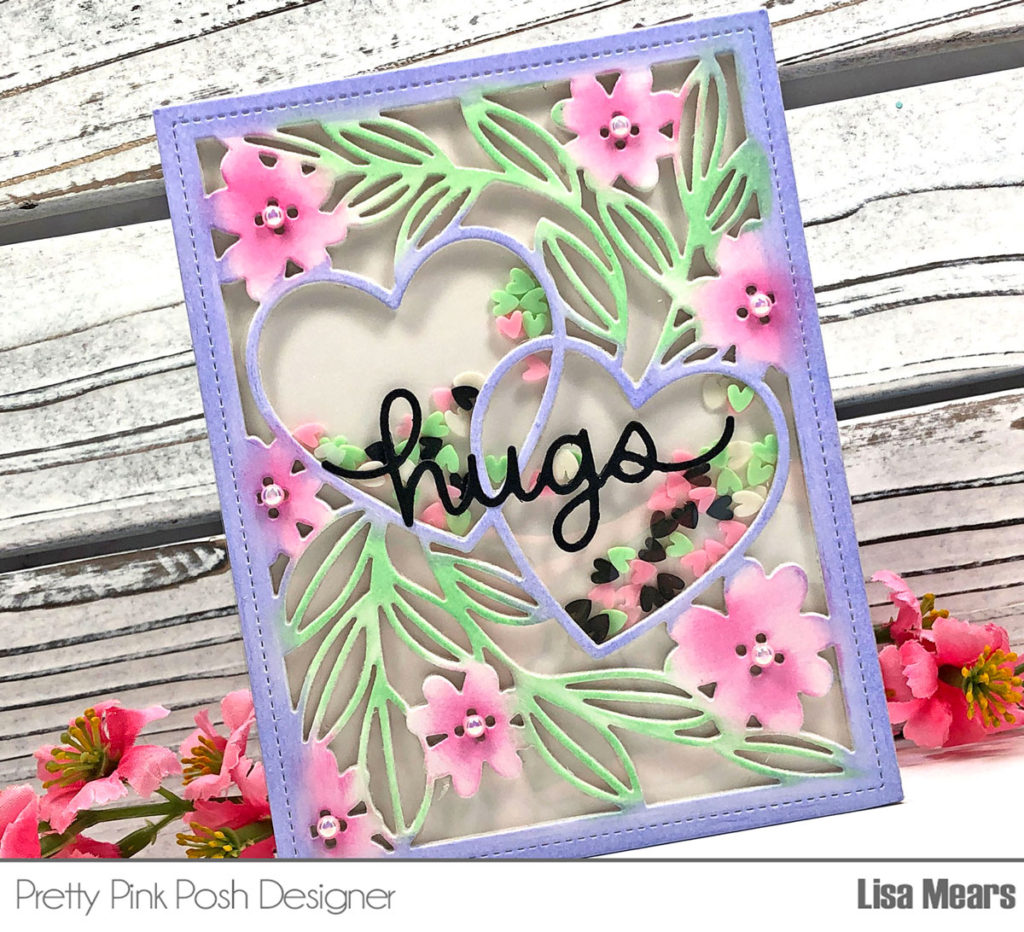
I started by die cutting the Love Hearts die using Bristol Smooth cardstock and applied various distress oxide inks to the die cut panel. The ink colors I used are Cracked Pistachio, Picked Raspberry, and Shaded Lilac. After the die cut panel was colored, I set it aside. This will be the top panel for my card.
Pretty Pink Posh- Day 1: Valentine Blog Hop

Next, I started to work on the shaker. To create the shaker, I die cut four pieces of white 110 lb. cardstock. I used these four pieces of cardstock to build up the walls for my shaker card by gluing each of the white die cut pieces together. Next, I glued the stack of white die cuts to an A2 size white card base which measures 4 1/4” x 5 1/2”.

I cut a piece of acetate to measure 4 1/4” x 5 1/2” and added it to the back of the colored die cut panel and set it aside.
Pretty Pink Posh- Day 1: Valentine Blog Hop

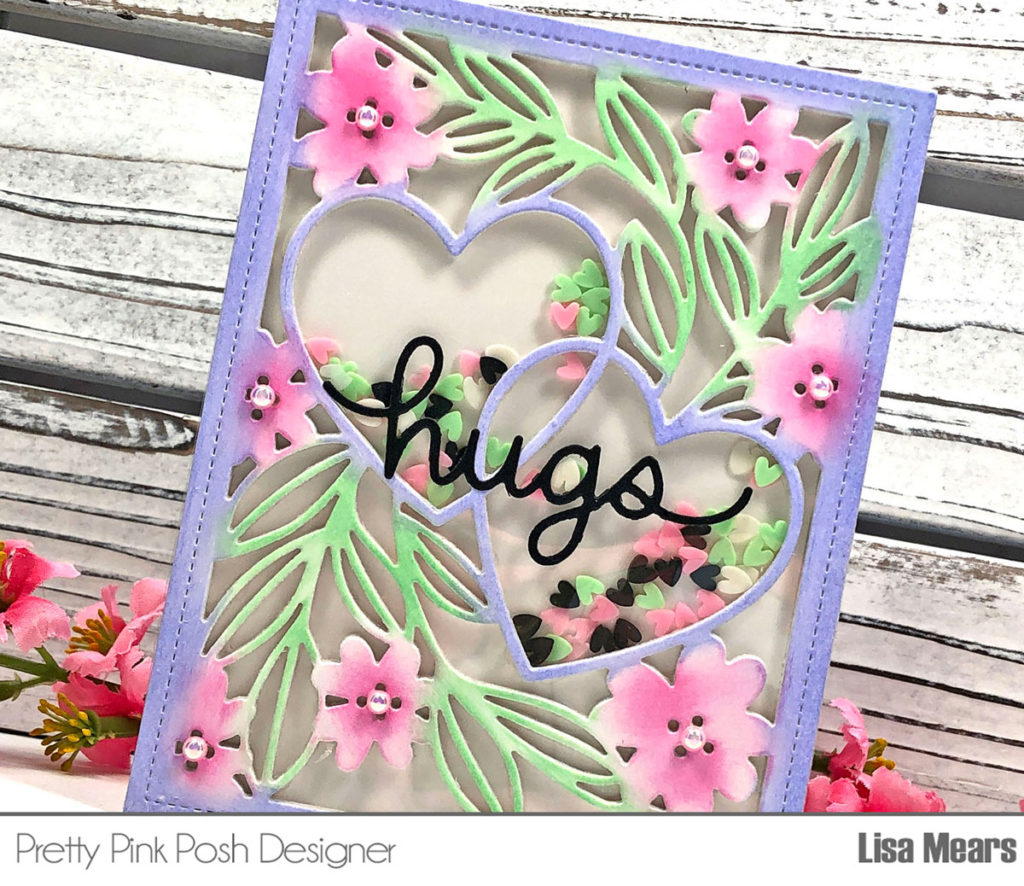
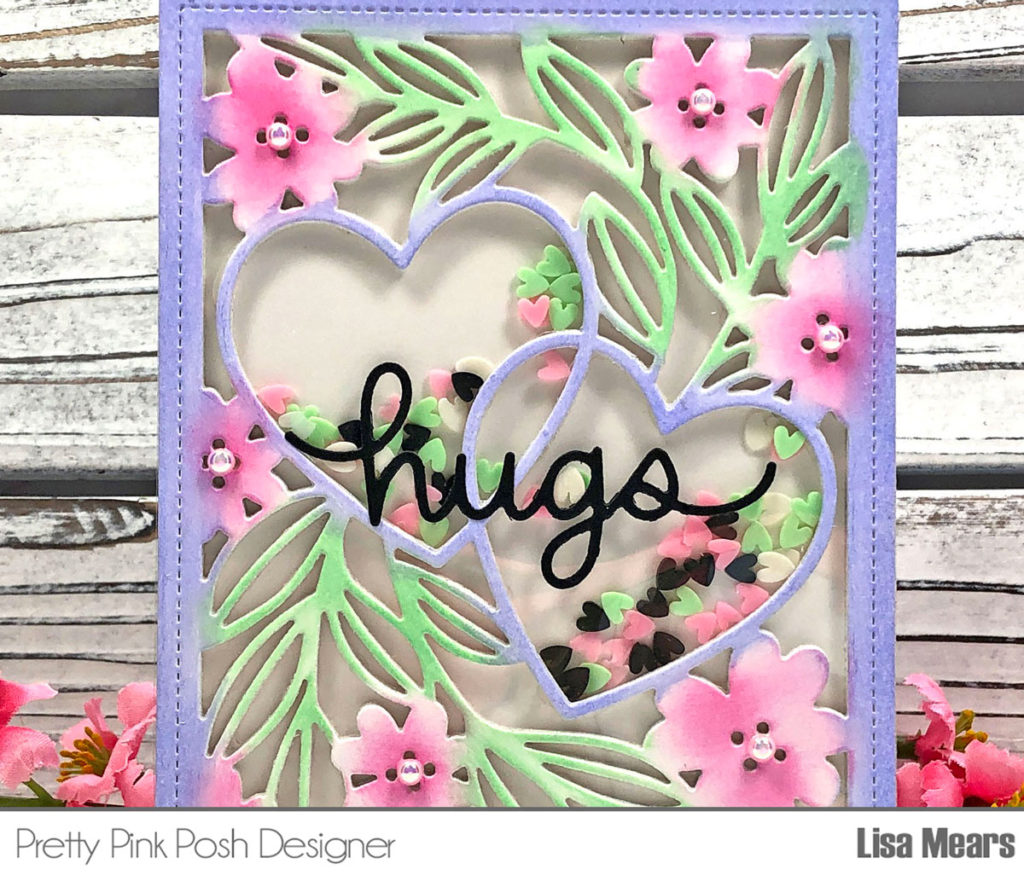
Next, I added the Sweet Love Clay Confetti shaker pieces to the center of the white hearts on the stack of four die cut panels. Finally, I added glue to the back of the acetate of the colored panel and attached it to the top of the stacked white panels. 

To finish off my card, I die cut the Hugs Script Die with black cardstock and adhered it to the front of the card. Next, I added the Pink Blush Pearls to the center of all of the flowers on the front of the card panel.
Pretty Pink Posh- Day 1: Valentine Blog Hop

PRIZES: be sure to leave comments on each stop. We are giving away 2 $25 gift certificates to three random comments (1 winner each day) left before January 16, 2022 at 11:59 PM PST. I’ll be announcing the winners next week, so be sure to return and see if you are one of the winners!

Pretty Pink Posh blog << you are here
Gemma Campbell
Ashley Ebben
Raquel Arribas
Leica Palma

I hope my card inspired you to make a shaker card. Be sure to check out all of the fun new products in the Pretty Pink Posh Valentine’s Day release.

|

October Blog Hop Winners

Hello! It’s time to announce the three lucky winners of the Product Release Blog Hop posts HEREHERE and HERE. Here are the lucky winners…

Winners, email me within 7 days and I’ll send over the gift certificates so you can shop!

Thank you to all who hopped along in this blog hop. If you would like even more inspiration with the new release and are on Instagram, we’ll have a three day Instagram hop starting TOMORROW with three more chances to win a gift certificate!

| |

Day 3: Blog Hop + Holiday Release Now Available

If you missed Day 1 CLICK HERE //  If you missed Day 2 CLICK HERE

Hey friends! Elaine here today from @pinkpeppermint cards. A new Pretty Pink Posh release is here and I have a super fun and festive project to share with you. Go ahead and grab a coffee and join us for a fun blog hop showcasing lots of fun inspiration using the new release plus a chance to win a prize!

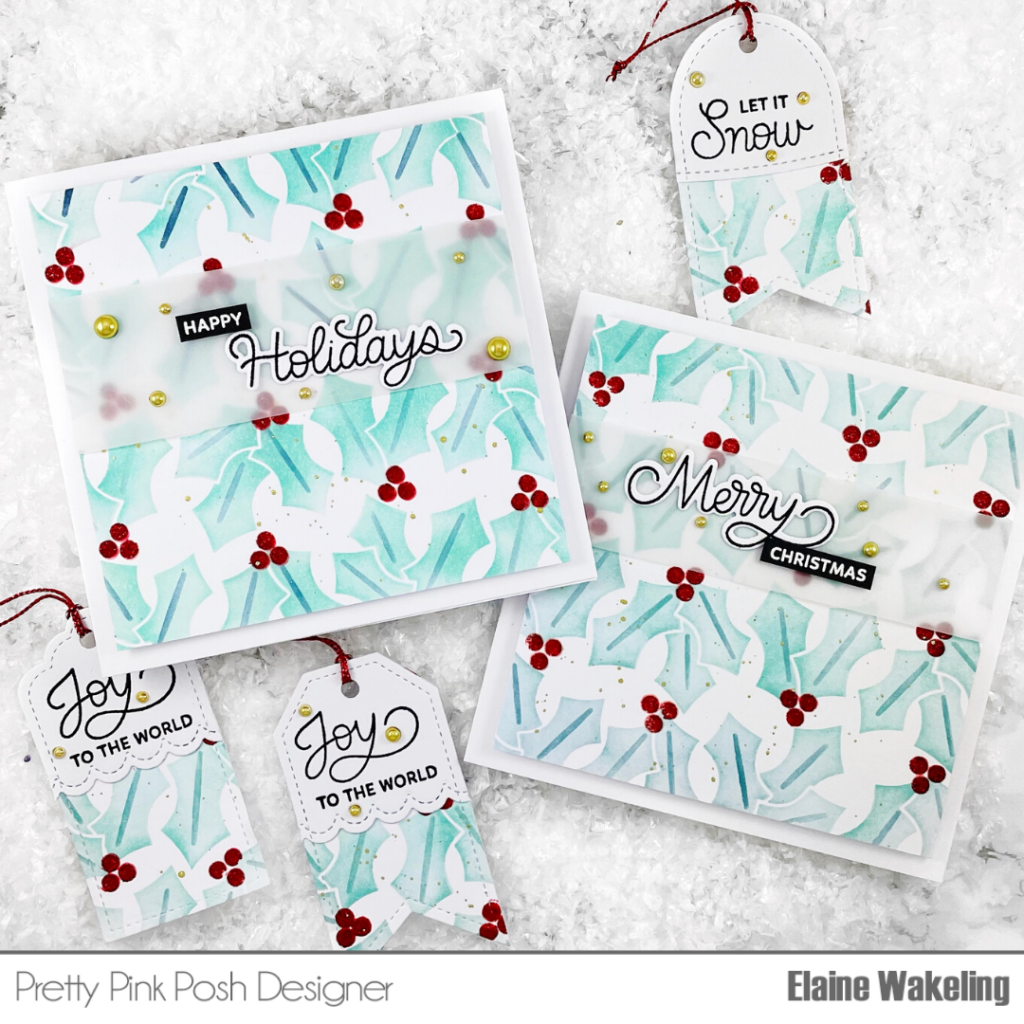
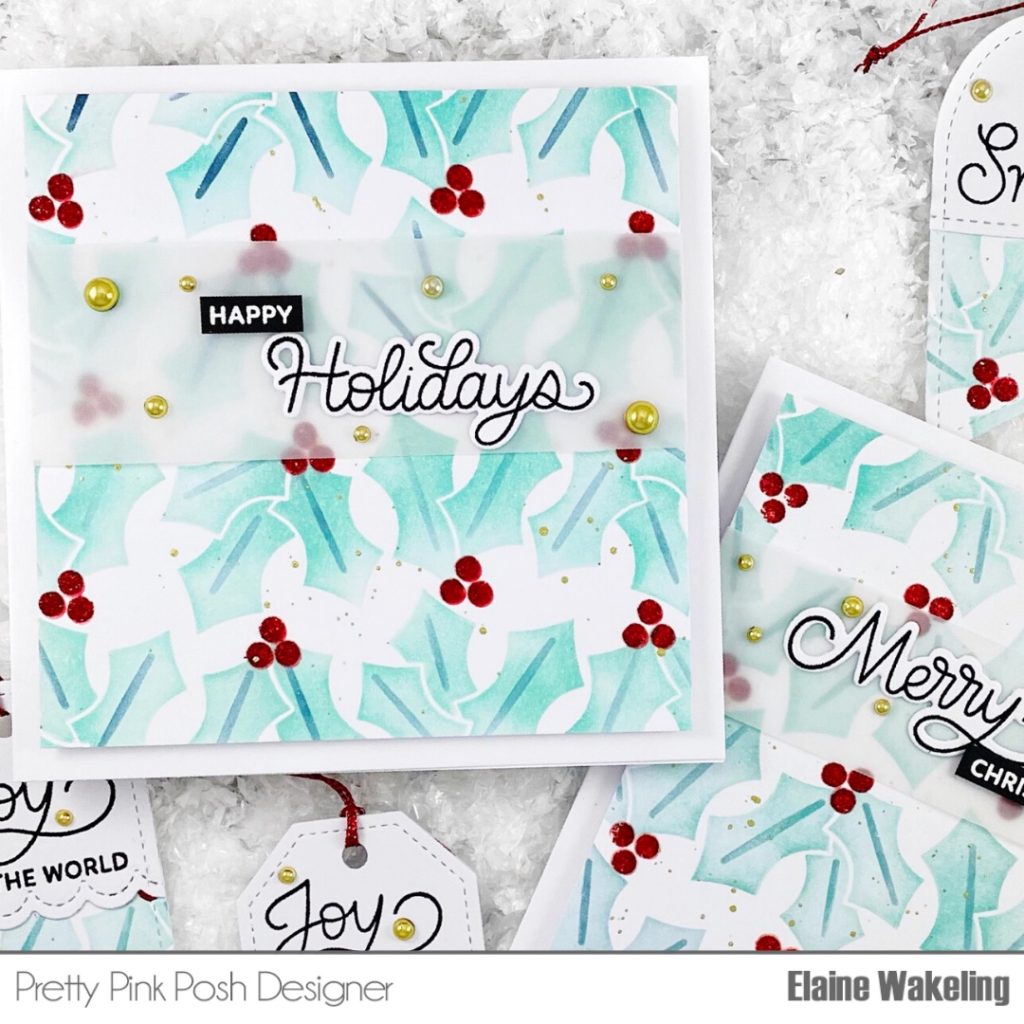
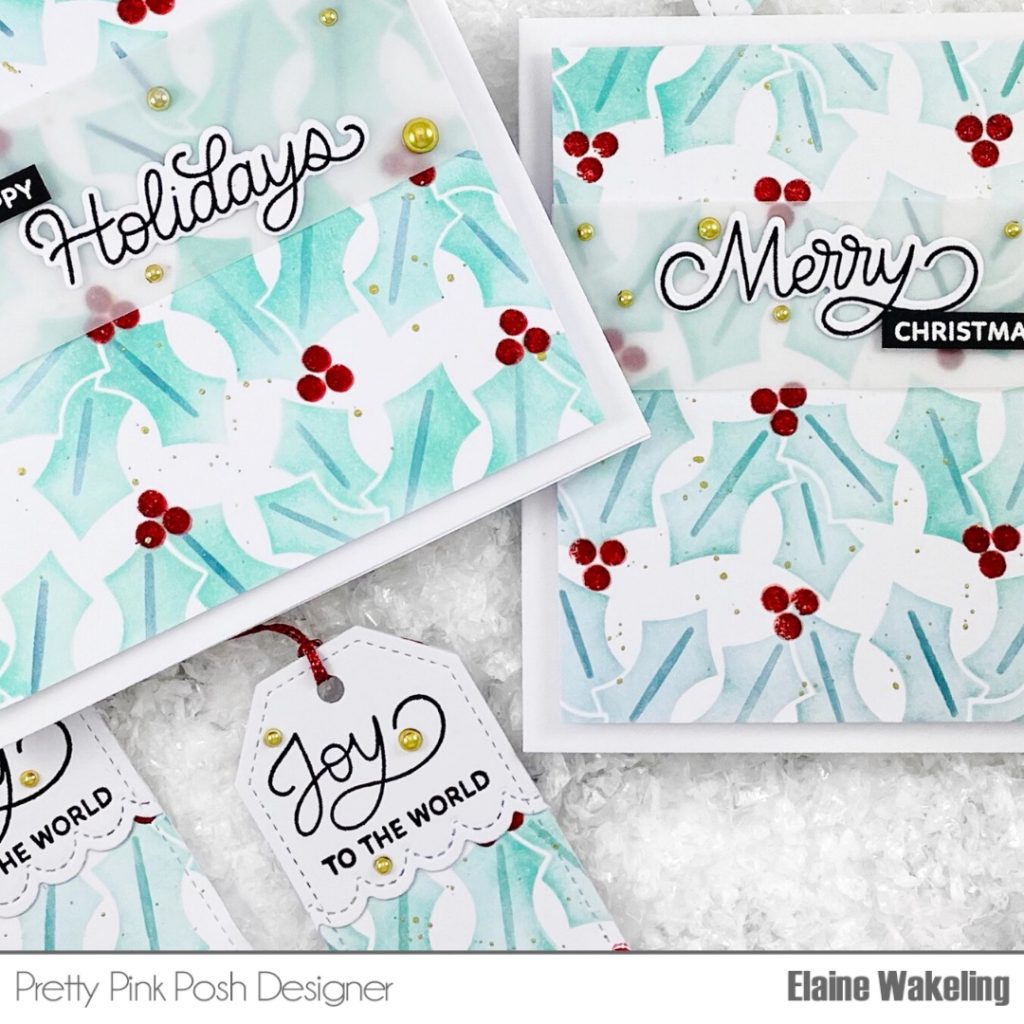
To start my project I took 4 pieces of heavyweight white card cut to 6”x6”.  Taking the Layered Holly Stencil I took stencil B and ink blended on the holly leaves in a green, teal shade all over each of the card panels. I then used stencil C to blend a slightly heavier layer of the same ink through the apertures to create the spines of the holly leaves.  Lastly, took stencil A to apply a red ink through the holes to add berries to the panel.  Before removing the stencil, I applied Nuvo Glimmer Paste in Sceptre Red to give some sparkle and added dimension.  To add a little more interest to my card panels and add extra sparkle I splattered on some gold metallic paint over the top of the stencil pattern.  I set all 4 panels aside to dry and thoroughly cleaned my stencils and paint brush.

While the panels were drying, I prepared my tags and sentiments.  Firstly I die cut some tags from white card stock using the Stitched Essentials 1 die set.  I used a border die from the Stitched Borders 1 die set and cut away the bottom half of each tag.  For the tags, I added sentiments using the beautiful new Holiday Scripts stamp set in a black pigment ink.  I also prepared the sentiments for my cards while my card panels were drying.  I stamped the words ‘Merry’ and ‘Holidays’ on to white cardstock with a black pigment ink and used the Holiday Scripts coordinating dies to cut out the words.  I also white heat embossed the words ‘Christmas’ and ‘Happy’ on to black cardstock and trimmed into thin strips. 

Using a guillotine, I trimmed 2 of my holly stencilled panels down to 4.5” x 4.5”.  I wrapped a strip of vellum around each card panel and adhered each end to the back with double sided adhesive.  I put foam tape on the back of each panel and adhered each one to a white 5”x 5” side folding card base.  I applied my pre prepared sentiments on to the vellum strip with liquid adhesive. 

Taking the Stitched Essentials 1 die set again, I cut tags from the remaining holly blended panels.  I adhered the stamped tag pieces over the top of the stencilled tags with liquid adhesive.  I used a hole punch to add some holes to the tags and popped some red thread through the openings.   

As a final embellishment on both the cards and tags I added some new Metallic Gold Pearls in various sizes using some liquid adhesive.

Did you hear the news? We’re giving away this not-yet-released 4 layer stencil called Layered Plaid with qualifying orders over $125. This is while supplies last and will automatically be included with orders.

Pretty Pink Posh- Day 2: Blog Hop + Holiday Release Now Available

PRIZES: be sure to leave comments on each stop. We are giving away 3 $25 gift certificates to three random comments (1 winner each day) left before October 19, 2021 at 11:59 PM PST. I’ll be announcing the winners next week, so be sure to return and see if you are one of the winners

Pretty Pink Posh blog << you are here
Mona Toth
Mindy Eggen
Melody Rupple
Ashley Ebben
Leica Palma

I hope you are inspired to create cards with the new products and were inspired by this three day blog hop! Thank you for hopping with us!

| |

Day 2: Blog Hop + Holiday Release Now Available

Pretty Pink Posh- Day 2: Blog Hop + Holiday Release Now Available

If you missed Day 1 CLICK HERE 

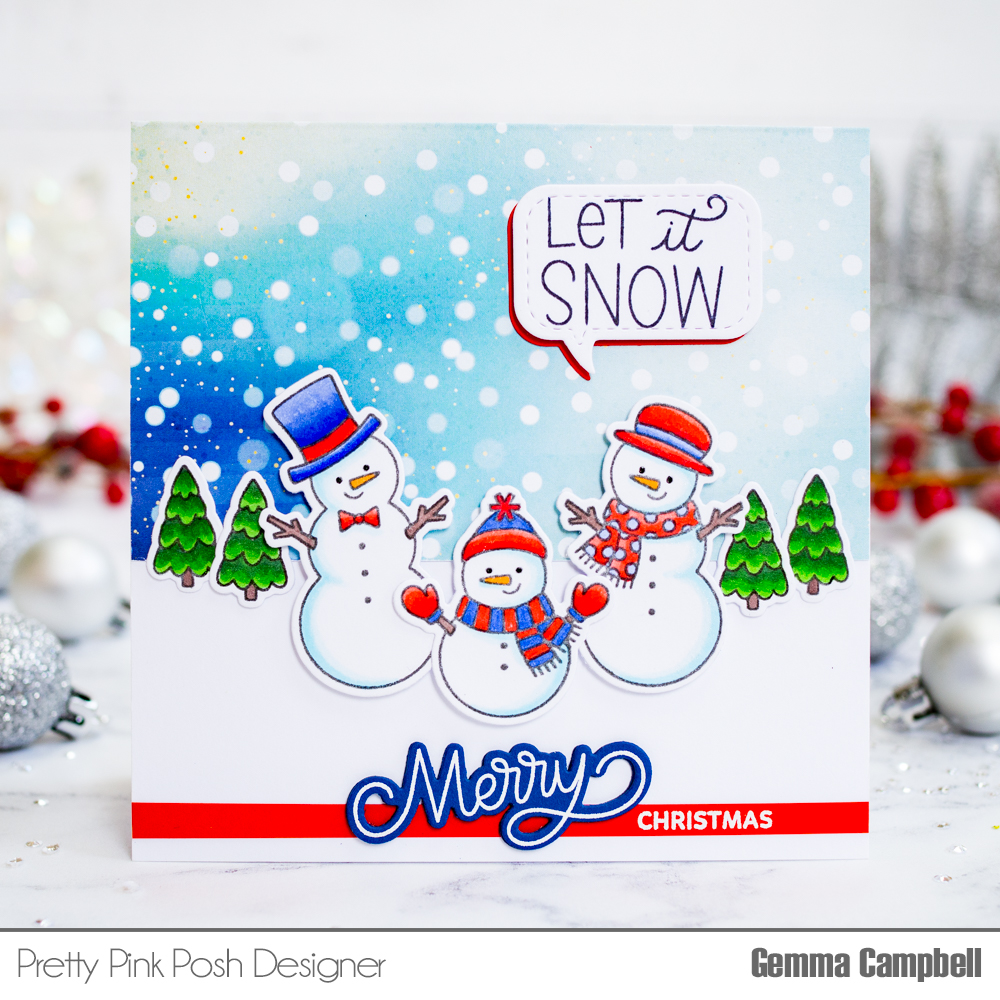
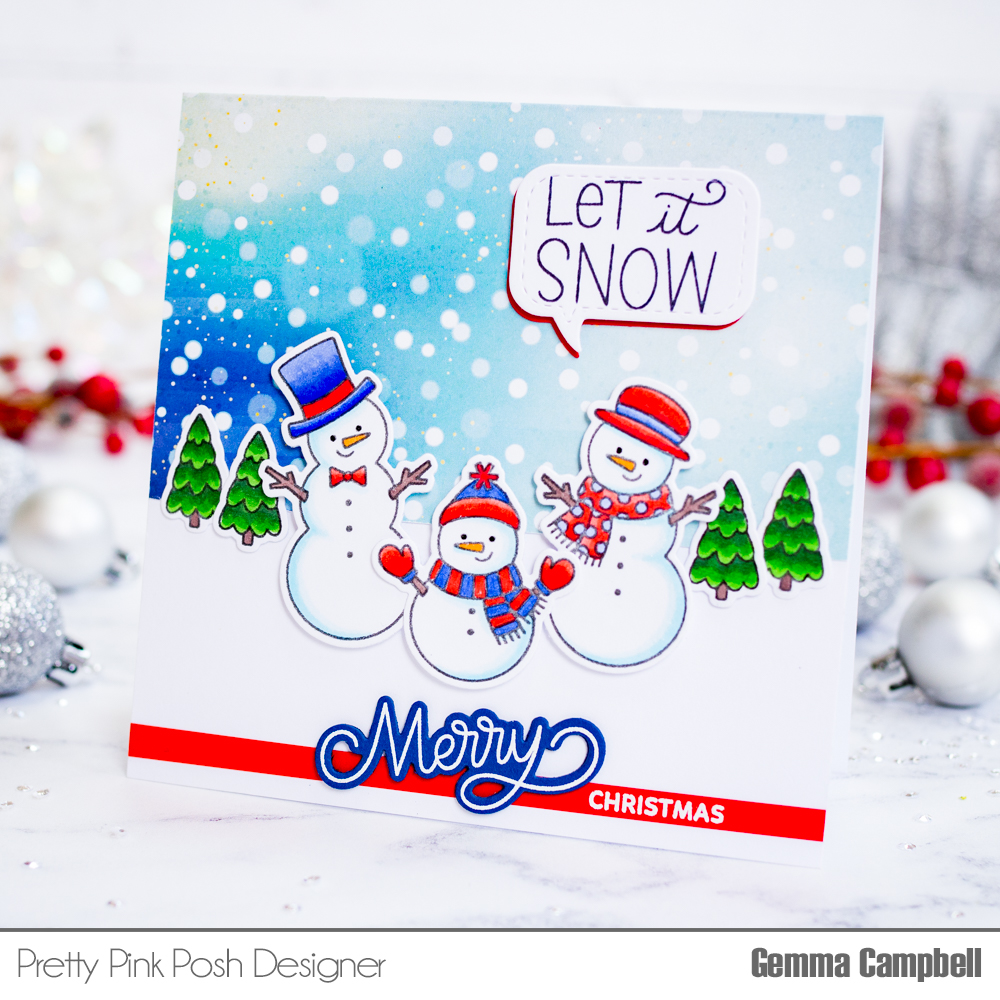
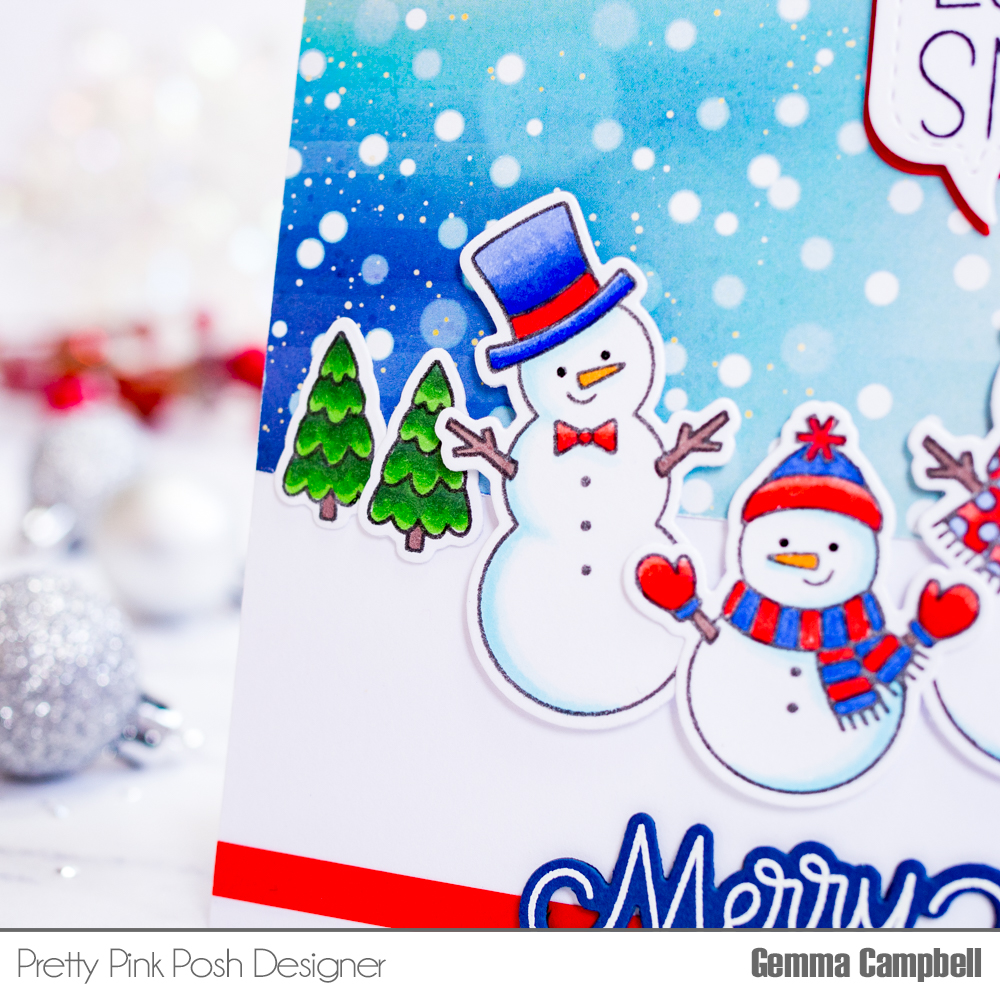
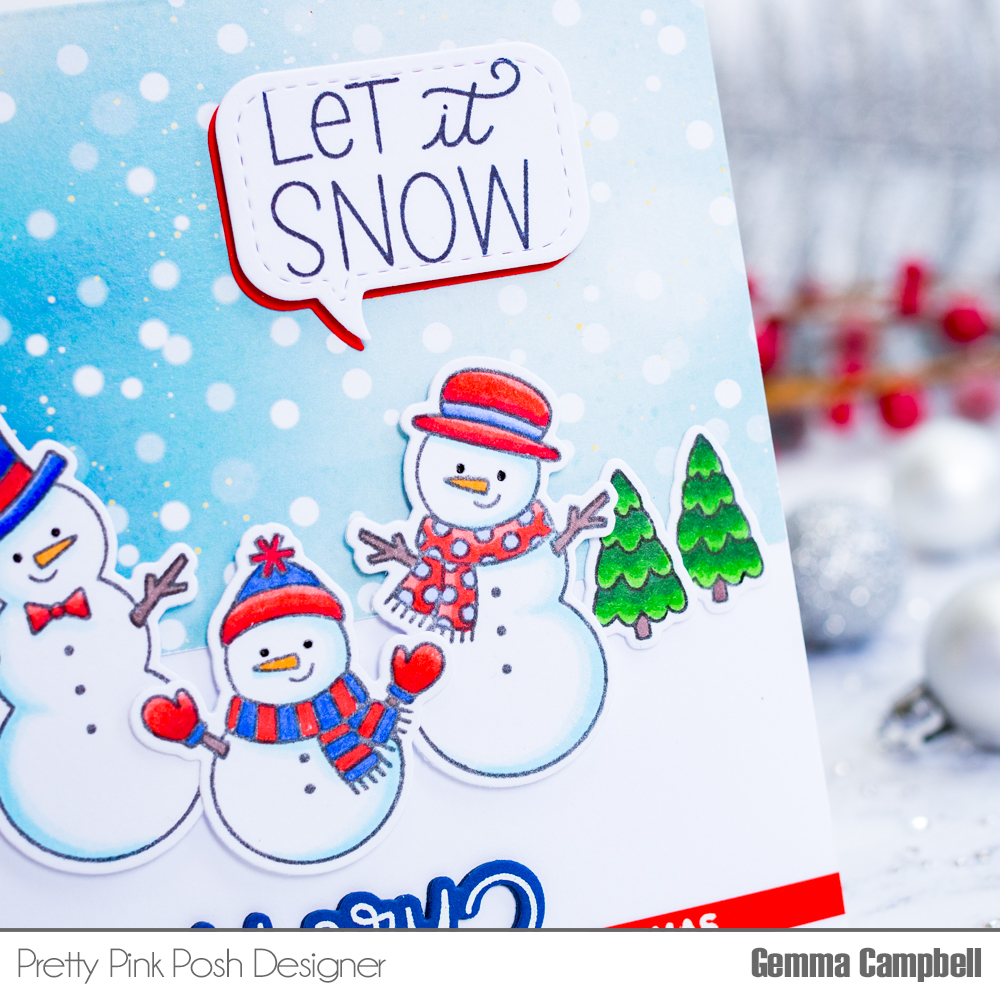
Hello, Gemma here and I have a jolly Christmas card to share, using the new October release using a bright and bold colour scheme of red and blue.

Pretty Pink Posh- Day 2: Blog Hop + Holiday Release Now Available

I stamped images from Snowman Friends and Village Additions and coloured them with my copic markers. I then die cut the images with the coordinating dies.

Next, I worked on the background. I adhered a panel of patterned paper to a 5.25 inch square card base, then added a piece of white card for the snowy ground.

Pretty Pink Posh- Day 2: Blog Hop + Holiday Release Now Available

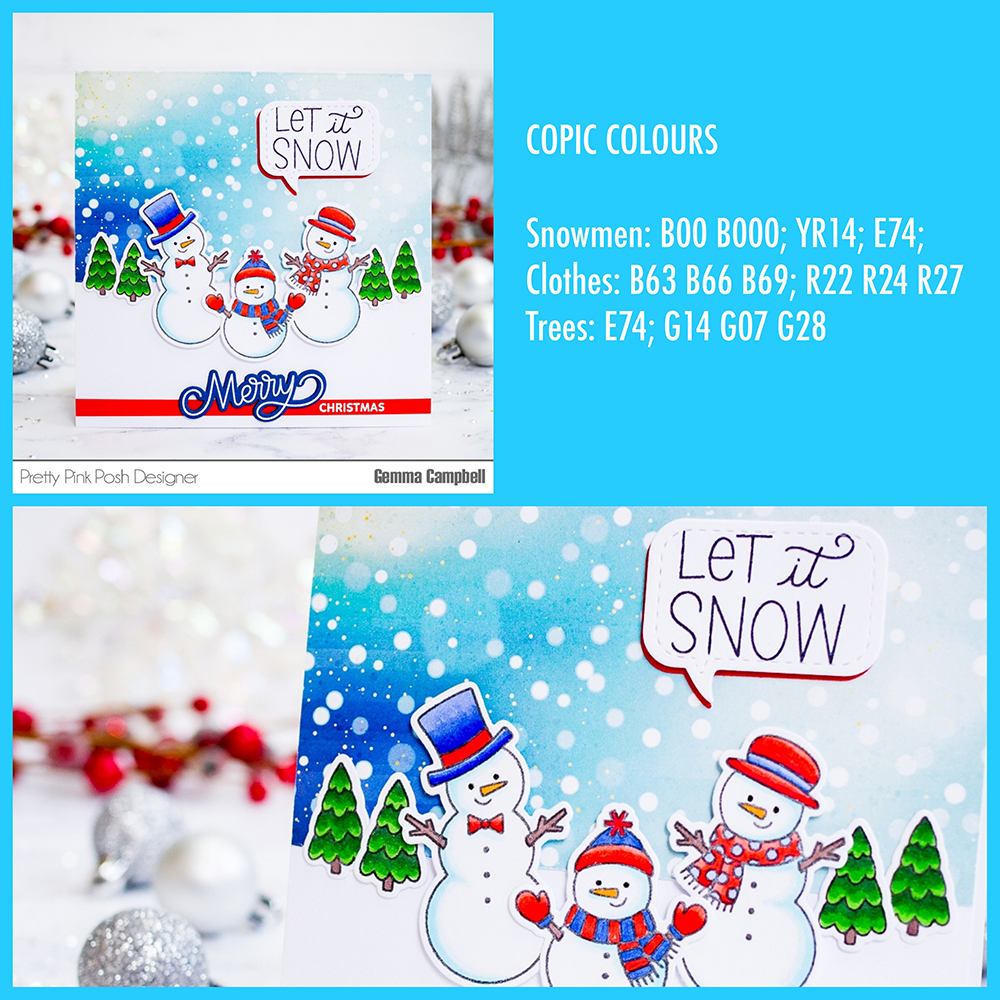
Copic marker colours

Snowmen: B00, B000; YR14; E74, Clothes: B63, B66, B69; R22, R24, R27
Trees: E74; G14, G07, G28

Pretty Pink Posh- Day 2: Blog Hop + Holiday Release Now Available

I arranged the images in the scene, adhering them directly on the card, apart from the smaller snowman who is popped up with foam tape.

For the main sentiment, I used the fabulous Holiday Scripts stamp set, which is a must-have. I love having the coordinating dies for the large words, which offer lots of possibilities. My favourite way to use this set is to heat emboss the words in white on coloured card stock, then die cut with the coordinating dies. I added a couple of die cut layers behind the Merry word for dimension.

Pretty Pink Posh- Day 2: Blog Hop + Holiday Release Now Available

I embossed the second sentiment on a strip of red cardstock, then adhered both at the base of the card. For a fun extra sentiment, I decided to give the snowmen a speech bubble sentiment. I used the previously released Stitched Speech Bubbles die set, cutting one from white card and another from red.

Pretty Pink Posh- Day 2: Blog Hop + Holiday Release Now Available

I stamped the sentiment from Snowman Friends in blue ink, to match the colour scheme, then offset layered the speech bubbles together on the card to finish.

Did you hear the news? We’re giving away this not-yet-released 4 layer stencil called Layered Plaid with qualifying orders over $125. This is while supplies last and will automatically be included with orders.

Pretty Pink Posh- Day 2: Blog Hop + Holiday Release Now Available

PRIZES: be sure to leave comments on each stop. We are giving away 3 $25 gift certificates to three random comments (1 winner each day) left before October 19, 2021 at 11:59 PM PST. I’ll be announcing the winners next week, so be sure to return and see if you are one of the winners

Pretty Pink Posh blog << you are here
Caly Person
Thi Lam
Mindy Baxter
Dana Kirby
Jeanne Jachna

Be sure to leave comments on all the stops- we’ll be randomly picking comments to win gift certificates. Thanks for joining us!

| |

Day 1: Blog Hop + Holiday Release Now Available

Pretty Pink Posh- Day 1: Blog Hop + Holiday Release Now Available

The October 2021 Release is now available in the Pretty Pink Posh Shop and select retailers that carry our products. If you missed our post yesterday, we revealed all of the products in picture form, but if you would like to see them in a video, Heather has that for you today!

Watch the video above  I  Watch the video in HD on YouTube

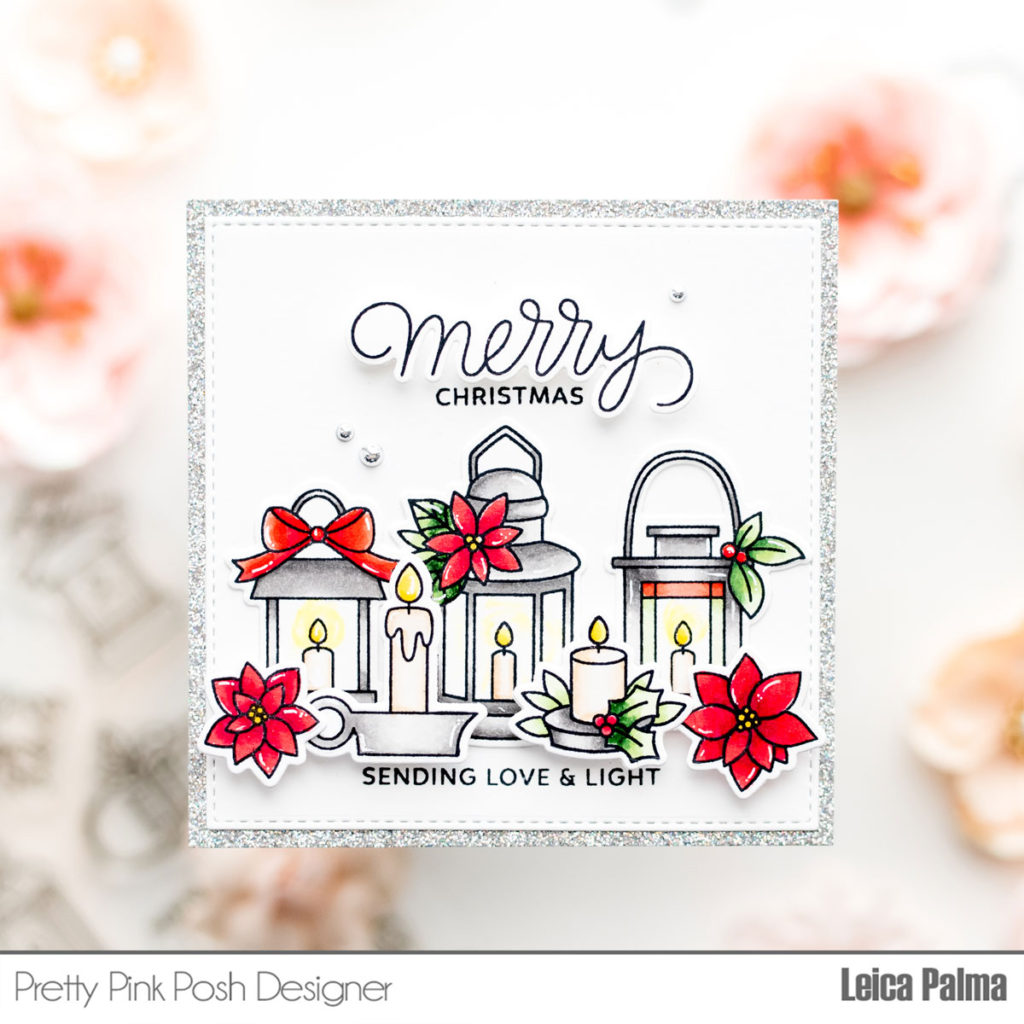
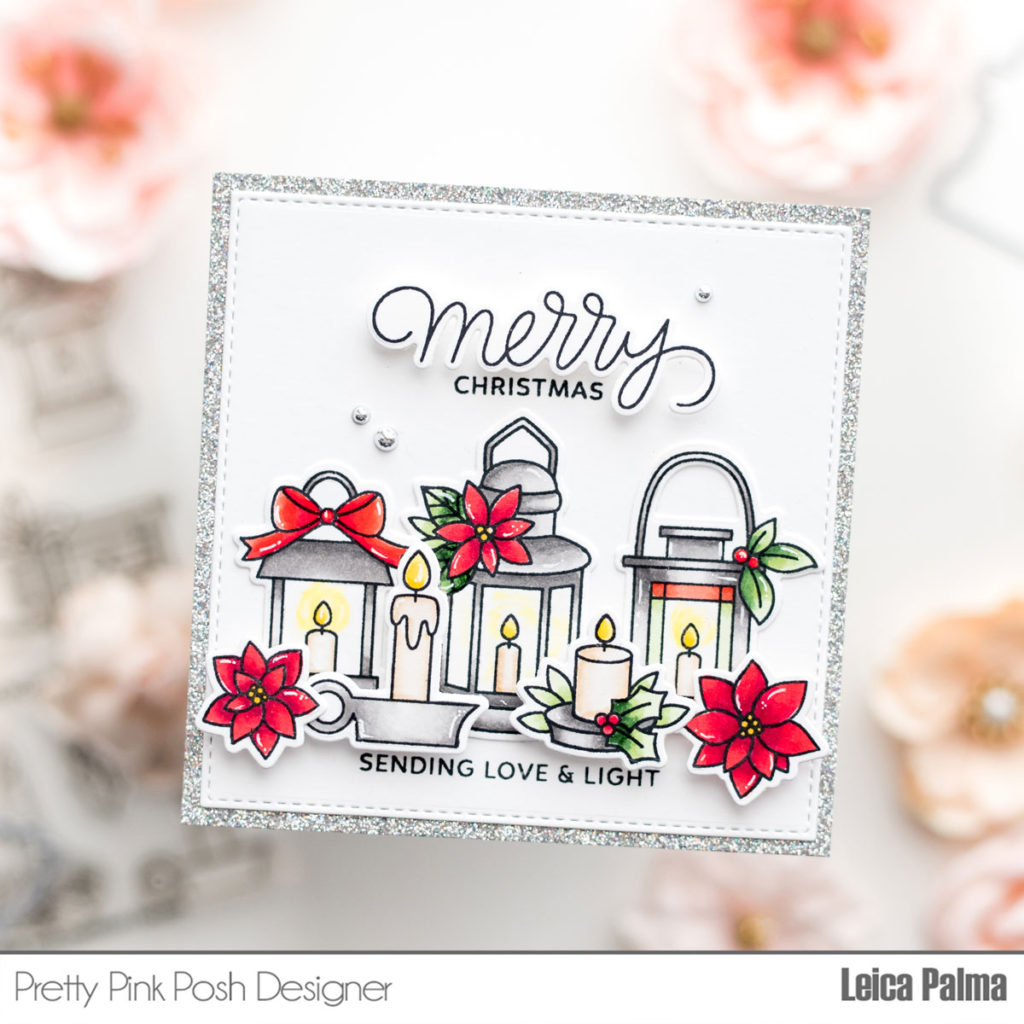
Hello friends! It’s Leica here today. I have a simple Christmas card to share with you all to kick off day 1 of the blog hop.

Pretty Pink Posh- Day 1: Blog Hop + Holiday Release Now Available

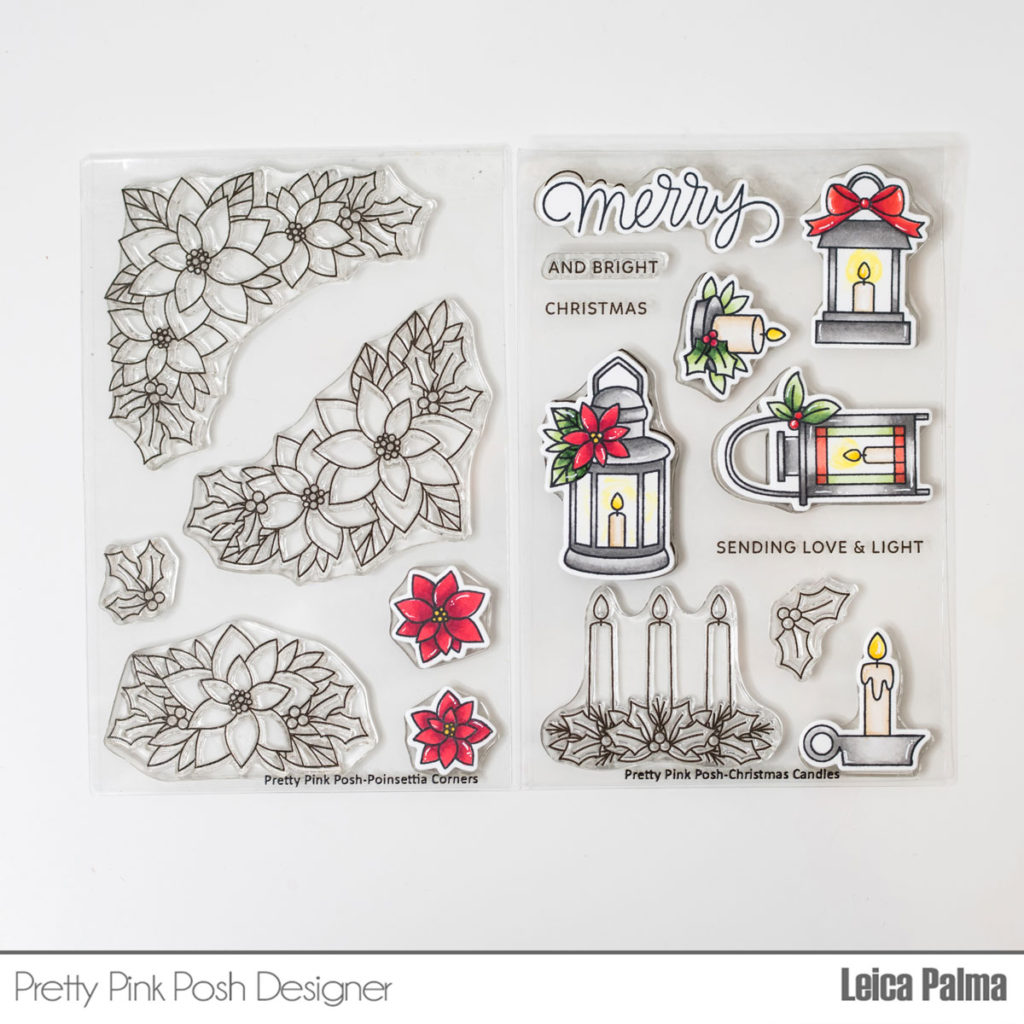
For this square-shaped card, I used images from the new Pretty Pink Posh Christmas Candles stamp set and Poinsettia Corners stamp set. Let’s begin! I first cut a 4.25″ square in silver glitter cardstock. I also cut a 4″ square and adhered it onto the larger panel.

Pretty Pink Posh- Day 1: Blog Hop + Holiday Release Now Available

Next, I stamped, colored, and cut the images from the Christmas Candles stamp set and Poinsettia Corners stamp set. I used the following Copic markers: E42/41/40, R39/37/35, T5/3/1, Y18/11.

I glued down the 3 large candles directly on the card. I also stamped “Christmas” and “sending love & light” on the card panel. Next, I foam mounted the smaller candles, poinsettia, and the “merry” greeting. For added texture and interest, I added Metallic Silver Pearls here and there. 

Pretty Pink Posh- Day 1: Blog Hop + Holiday Release Now Available

We’re giving away this not-yet-released 4 layer stencil called Layered Plaid with qualifying orders over $125. This is while supplies last and will automatically be included with orders.

Pretty Pink Posh- Day 1: Blog Hop + Holiday Release Now Available

PRIZES: be sure to leave comments on each stop. We are giving away 3 $25 gift certificates to three random comments (1 winner each day) left before October 19, 2021 at 11:59 PM PST. I’ll be announcing the winners next week, so be sure to return and see if you are one of the winners

Pretty Pink Posh blog << you are here
Jennifer McGuire
Rachel Alvarado
Gemma Campbell
Tammy Stark
Tina Smith
Ashley Marcu

Thanks so much for stopping by today, we hope to see you again tomorrow for another day of holiday inspiration!

| |

Day 3: Blog Hop+ September Release Now Available

If you missed Day 1 CLICK HERE //  If you missed Day 2 CLICK HERE

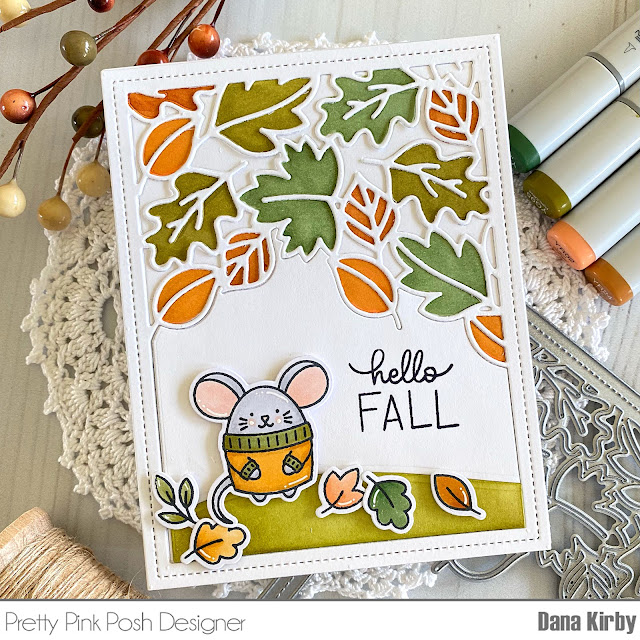
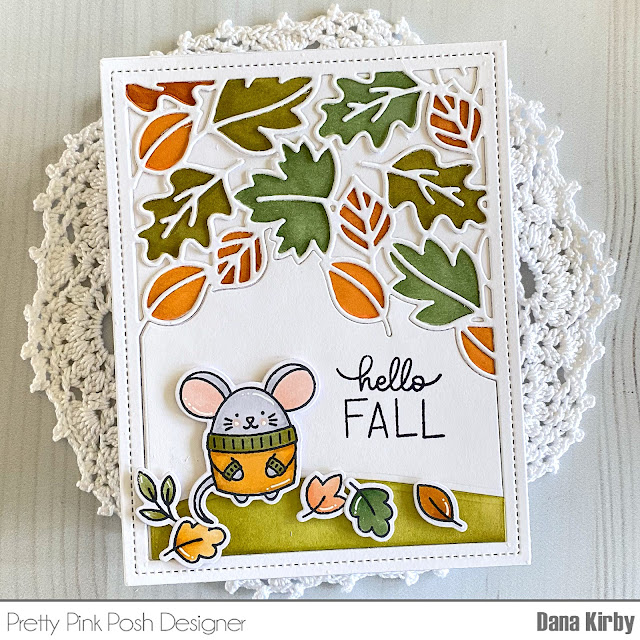
Hi friends! It’s Dana here today with a fun card for fall. The new fall release just might be my favorite release yet, so many amazing new products. Let’s get started…

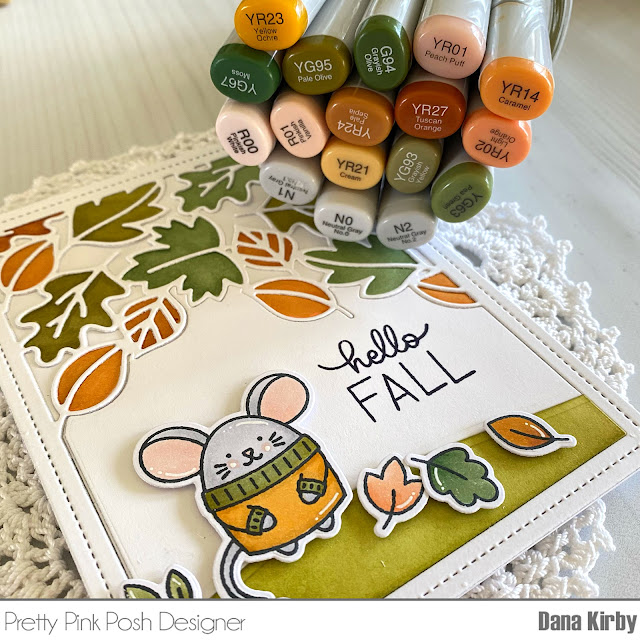
I started my card by making my background. I used the new Leaf Frame die and ran it through my die cutting machine with no extra shims so I could get an impression of the die on my cardstock. I then used my Copic markers and quickly colored the leaves. I didn’t worry about staying in the lines because I knew it would be covered. Next, I ran the Leaf Frame die through my die cutting machine again with normal pressure to get a clean cut. I then laid the frame over the colored panel to create my background. 

Next, I used the Cozy Fall Critters set to stamp my mouse, sentiment and leaves. I colored my images with Copic markers and used the coordinating dies to cut them out. I am in love with these critters. They are so cute and perfect for fall. Though I also can’t wait to use them for winter. I think their little sweaters and scarves will be so adorable for a winter scene. 

Lastly, I added my images with foam adhesive to finish my card. 

PRIZES: be sure to leave comments on each stop. We are giving away 3 $25 gift certificates to three random comments (1 winner each day) left before September 19, 2021 at 11:59 PM PST. I’ll be announcing the winners next week, so be sure to return and see if you are one of the winners!

Pretty Pink Posh blog << you are here
Keeway Tsao
Jeanne Jachna
Gemma Campbell
Lindsey Larsen

I hope you are inspired to create cards with the new PPP stamps and dies and were inspired by this three day blog hop! Thank you for hopping with us!

| |

Day 2: Blog Hop+ September Release Now Available

Pretty Pink Posh- Blog Hop+ September Release Now Available

If you missed Day 1 CLICK HERE 

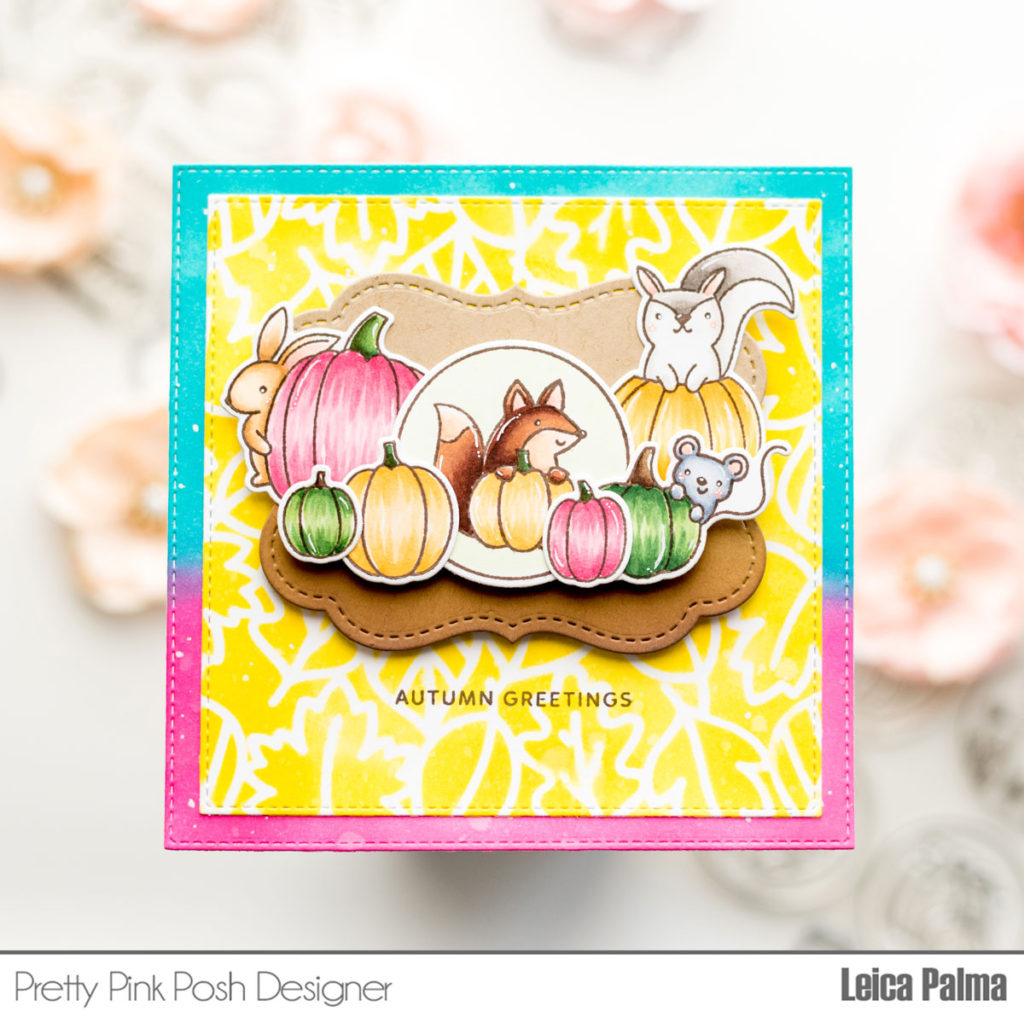
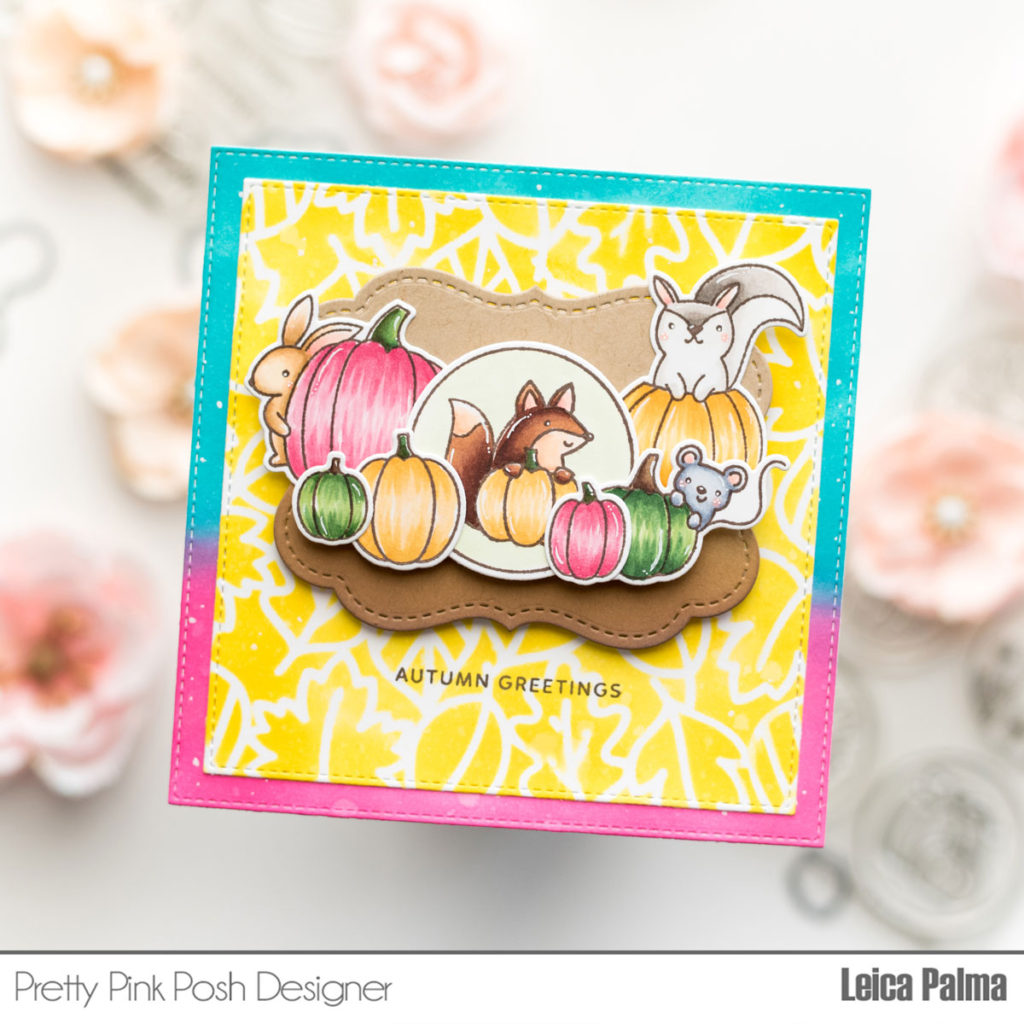
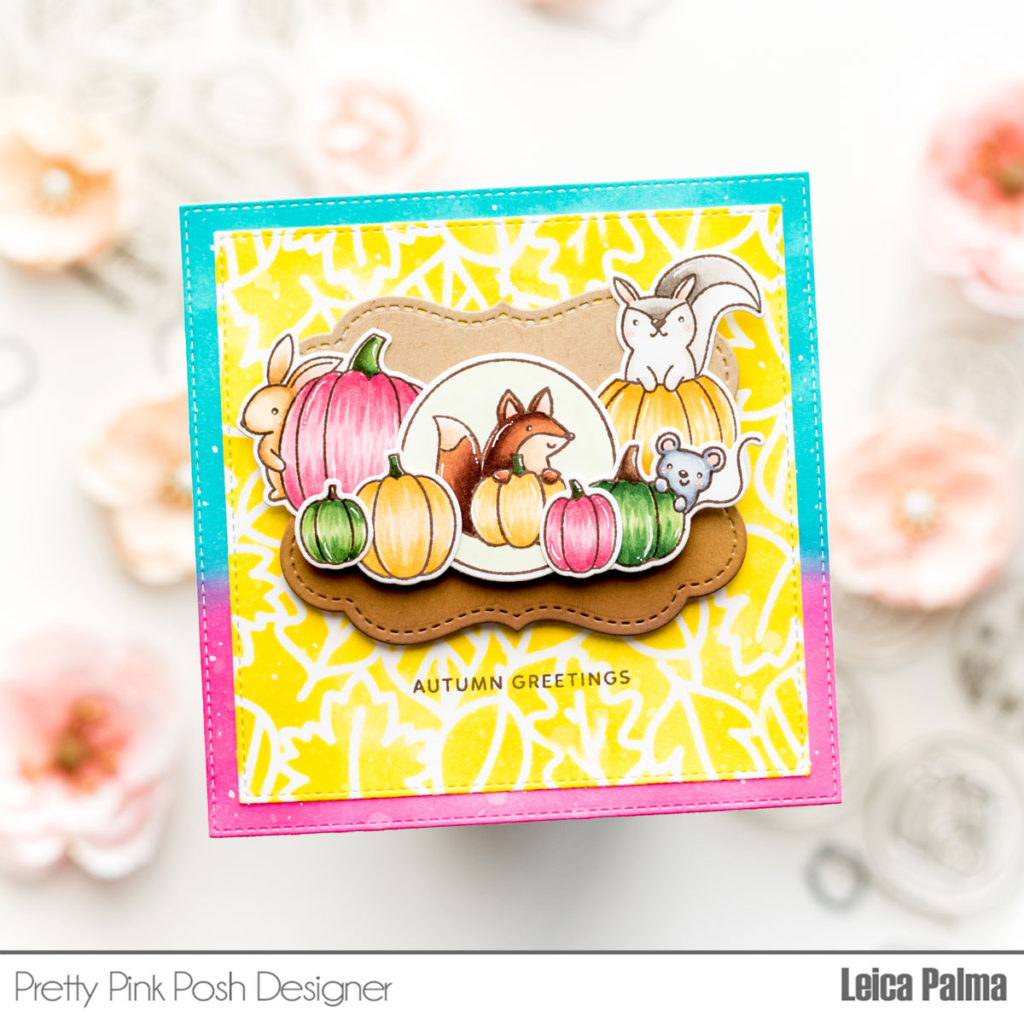
Hello everyone! It’s Leica here today with an Autumn card with the cutest critters at the pumpkin patch. I wanted to use non-traditional fall colors and I’m so happy that it worked out for this card. I hope you like it!

Pretty Pink Posh- Blog Hop+ September Release Now Available

To create my card, I started by cutting a 5″ square panel that I ink blended with Peacock Feathers and Picked Raspberry Distress Oxide Inks. I sprayed with water for an oxidized effect and added white dots here and there with a white gel pen. I also cut a 4.5″ square and ink blended Mustard Seed Distress Oxide Ink through the Leaves Background Stencil. Next, I cut the ornate die from the Fall Circles coordinating die in kraft cardstock and ink blended the bottom with Vintage Photo Distress Oxide Ink.

Pretty Pink Posh- Blog Hop+ September Release Now Available

The images are from a previously released set, Pumpkin Patch Critters stamp set. I stamped them with Memento Rich Cocoa ink on 110lb white cardstock and colored them with Copic markers. I also cut one of the images from the new Fall Circles stamp set

Pumpkins – G46/43/40, R85/83/81, YR23/21/20

Squirrel – W5/3/1/0 

Mouse – C5/3/1

Rabbit – E55/53/50

I cut the images with their coordinating dies and adhered them to the ornate panel, using glue and foam tape. I then stamped the Autumn Greetings sentiment onto the yellow panel and foam mounted the ornate panel on top. Lastly, I cut a white 5″ square, scored at the .25″ mark, and adhered it to the card panel to finish my card.

Pretty Pink Posh- Blog Hop+ September Release Now Available

Will you be trying non-traditional colors for your Autumn cards? We’d love to see them! Tag us on Instagram and make sure to share them on our Facebook Group

PRIZES: be sure to leave comments on each stop. We are giving away 3 $25 gift certificates to three random comments (1 winner each day) left before September 19, 2021 at 11:59 PM PST. I’ll be announcing the winners next week, so be sure to return and see if you are one of the winners!

Pretty Pink Posh blog << you are here
Tammy Stark
Wanda Guess
Carly Minner
Dana Kirby
Tina Smith

Be sure to leave comments on all the stops- we’ll be randomly picking comments to win gift certificates. Thanks for joining us!

| |

Day 1: Blog Hop+ September Release Now Available

Pretty Pink Posh- Blog Hop+ September Release Now Available

The September 2021 Release is now available in the Pretty Pink Posh Shop and select retailers that carry our products. If you missed our post yesterday, we revealed all of the products in picture form, but if you would like to see them in a video, Heather has that for you today!

Watch the video above  I  Watch the video in HD on YouTube

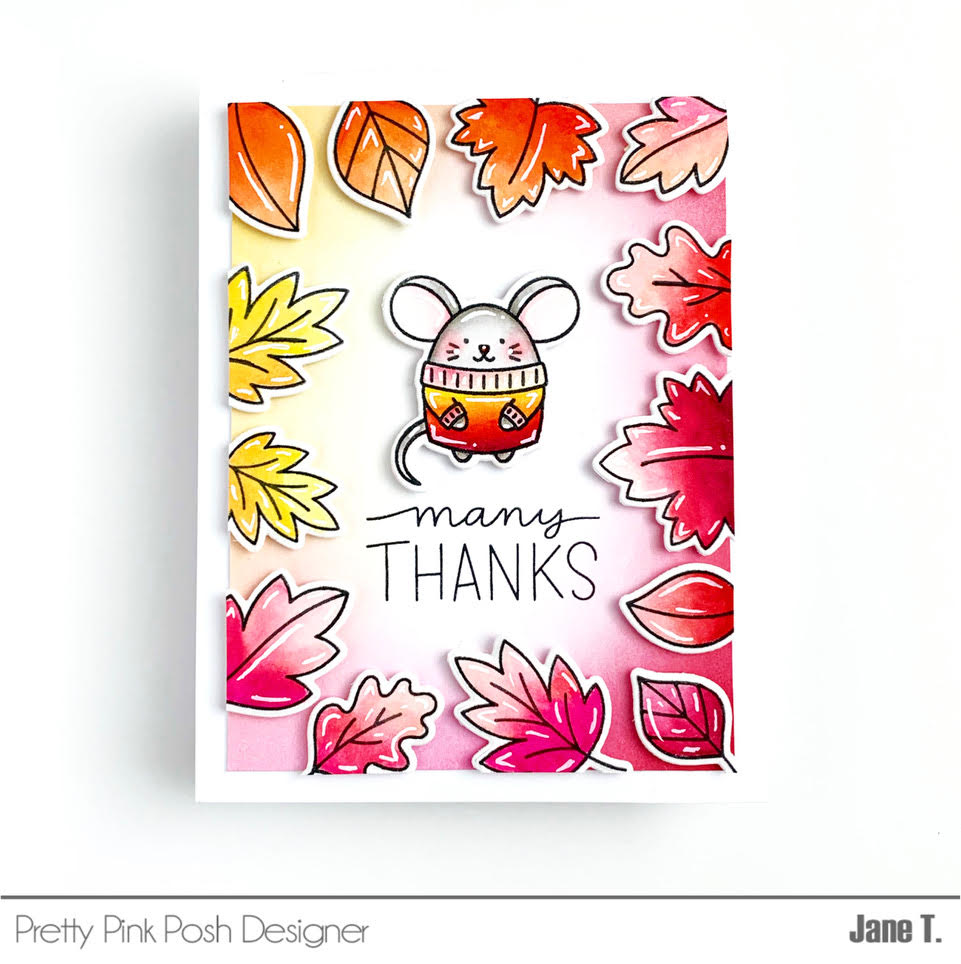
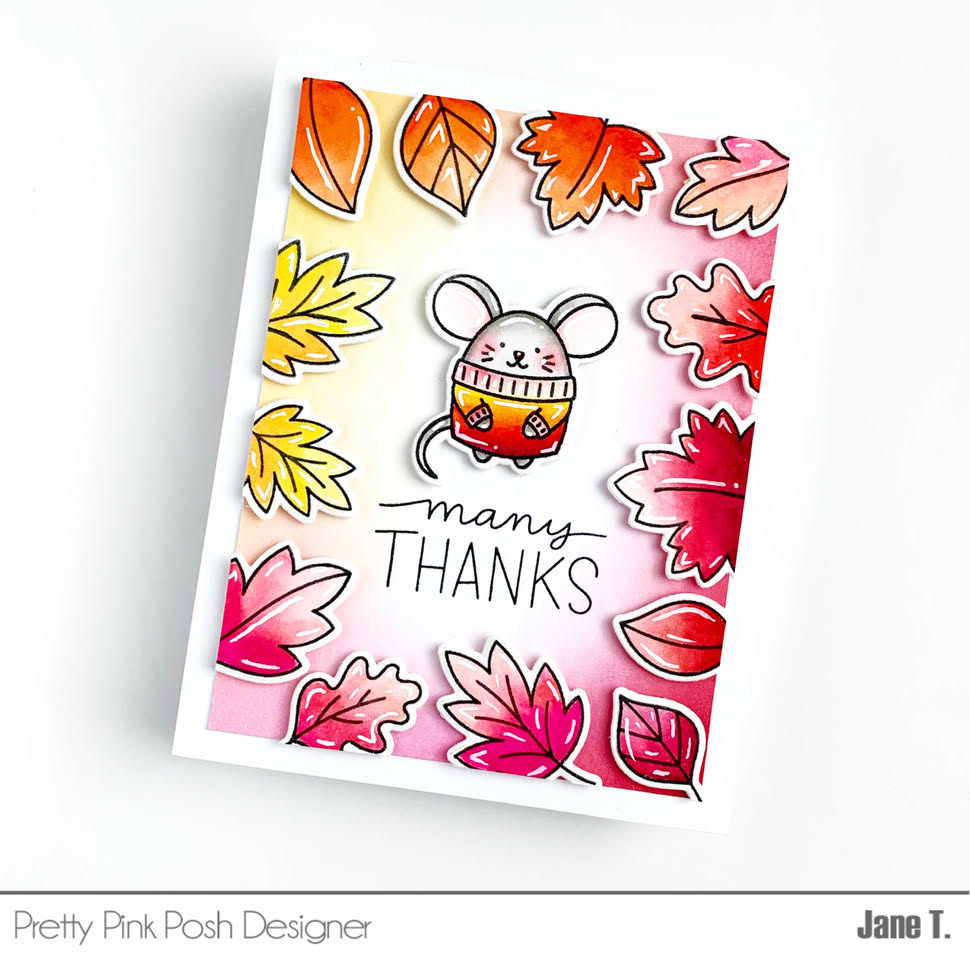
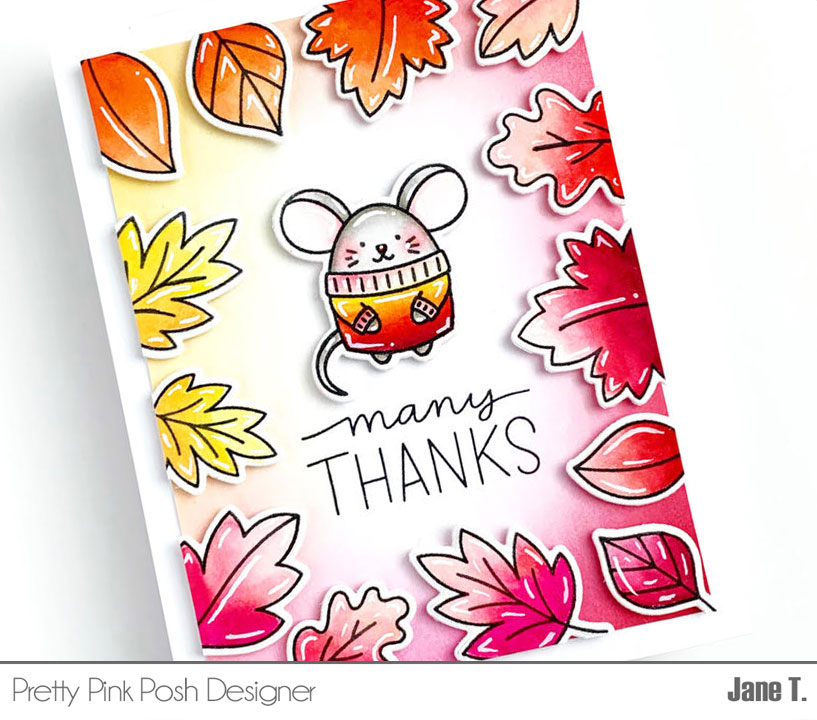
Hi Friends! It’s Jane here and I’m happy to be sharing a colorful fall card featuring products from the new September 2021 release by Pretty Pink Posh!

Pretty Pink Posh- Blog Hop+ September Release Now Available

To create this card, I used an A2 sized piece of heavy weight white cardstock.  Then, using a large blender brush (and very light pressure) various shades of dye ink were used to add color to the edges of the cardstock.

Pretty Pink Posh- Blog Hop+ September Release Now Available

Next, I stamped and colored the images from Cozy Fall Critters (mouse) and Falling Leaves stamp sets. Karin brush markers used to color all the images. The coordinating dies were then used to die cut each piece and I arranged them to coordinate with the background blending.  

Each images was popped up using foam tape and the center sentiment was stamped in black ink using the sentiment from the Woodland Thanks stamp set. Next, I trimmed the edges of the card using a guillotine trimmer and adhered it to a white A2 card base.  White gel pen used to accent the images and that completes the card!

Pretty Pink Posh- Blog Hop+ September Release Now Available

PRIZES: be sure to leave comments on each stop. We are giving away 3 $25 gift certificates to three random comments (1 winner each day) left before September 19, 2021 at 11:59 PM PST. I’ll be announcing the winners next week, so be sure to return and see if you are one of the winners!

Pretty Pink Posh blog << you are here
Caly Person
Leica Palma
Elaine Wakeling
Channin Pelletier
Mayra D. Hernandez
Mona Toth

Thanks so much for stopping by today! Join us tomorrow for another fun day of blog hop inspiration!

|

August Blog Hop Winners

Hello there! I wanted to pop in quickly to announce the three lucky winners of the Product Release Blog Hop posts HEREHERE and HERE. Here are the lucky winners…

Winners, email me within 7 days and I’ll send over the gift certificates so you can shop!

Thank you to all who hopped along in this blog hop. If you joined along in our Instagram hop, we’ll be posting those winners shortly on our account there!

| |

Day 3: Blog Hop+ August Release Now Available

Pretty Pink Posh- Day 3: Blog Hop+ August Release Now Available

If you missed Day 1 CLICK HERE //  If you missed Day 2 CLICK HERE

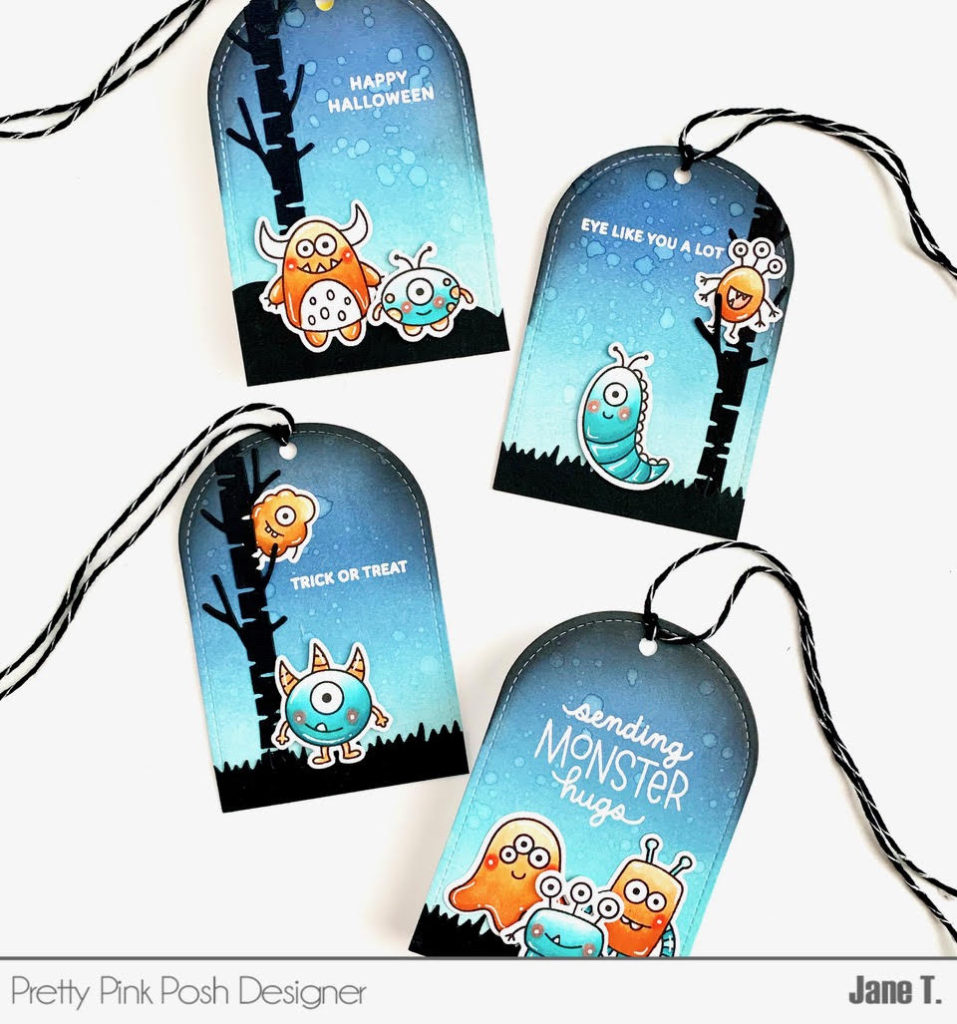
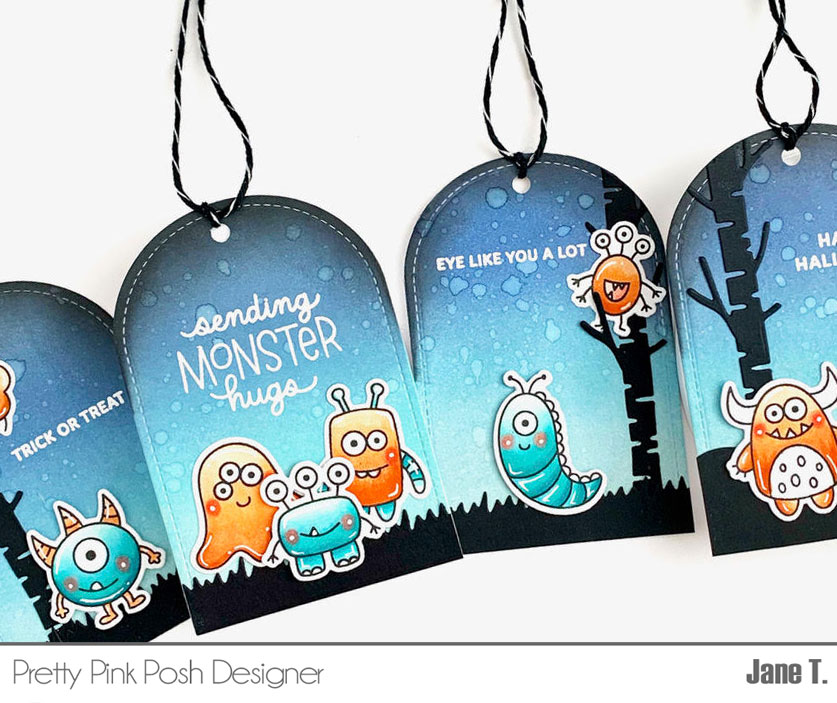
Hi everyone! Jane here sharing these fun Halloween tags featuring the new Monster Hugs set!

Pretty Pink Posh- Day 3: Blog Hop+ August Release Now Available

To create these cute tags, I first cut the base of the tags from Bristol cardstock using the Stitched Duo 3 die set.  Next, I blended the panel using the following distress oxide inks (top to bottom): black soot, faded jeans, salvaged patina and speckled egg.  Next, the background was splattered with water using a thin paintbrush and the tags were left to dry.

Pretty Pink Posh- Day 3: Blog Hop+ August Release Now Available

While the backgrounds were drying, the images from Monster Hugs were stamped, colored using copic markers and die cut using the coordinating dies.  White gel pen used to accent the images.  The black background pieces were die cut using the Nature Essentials die and black cardstock.  

Finally, all the elements were adhered to the tags with the excess around the edges snipped off using craft scissors.  The monsters were adhered using thin foam squares to create dimension. Lastly, I used a hole punch at the top of the tags and tied them using some thread to finish the tags.

Pretty Pink Posh- Day 3: Blog Hop+ August Release Now Available

PRIZES: be sure to leave comments on each stop. We are giving away 3 $25 gift certificates to three random comments (1 winner each day) left before August 16, 2021 at 11:59 PM PST. I’ll be announcing the winners next week, so be sure to return and see if you are one of the winners!

Pretty Pink Posh blog << you are here
Keeway Tsao
Dana Kirby
Jeanne Jachna
Mayra D. Hernandez
Lindsey Larsen

I hope you are inspired to create cards with the new PPP stamps and dies and were inspired by this three day blog hop!