Blog Hop

| |

Day 2: Blog Hop+ August Release Now Available
Pretty Pink Posh- Day 2: Blog Hop+ August Release Now Available

If you missed Day 1 CLICK HERE 

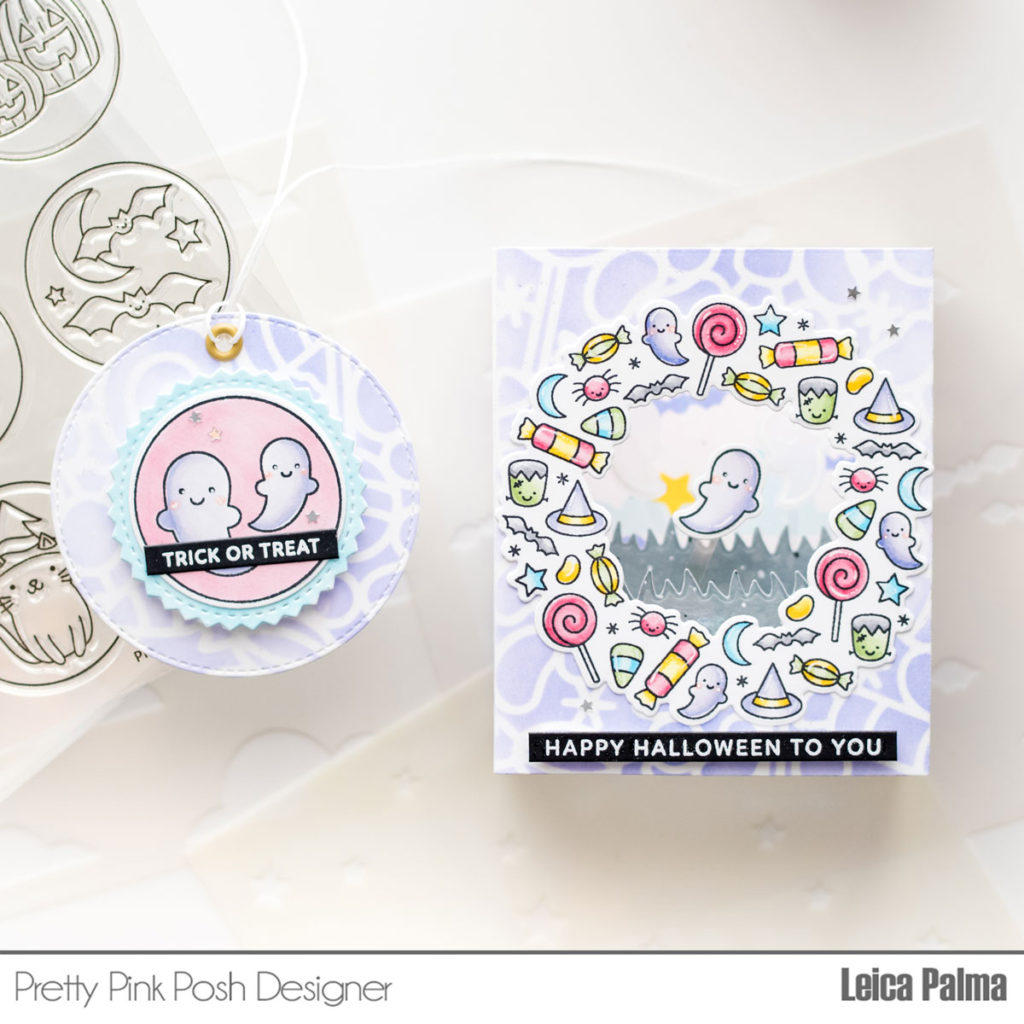
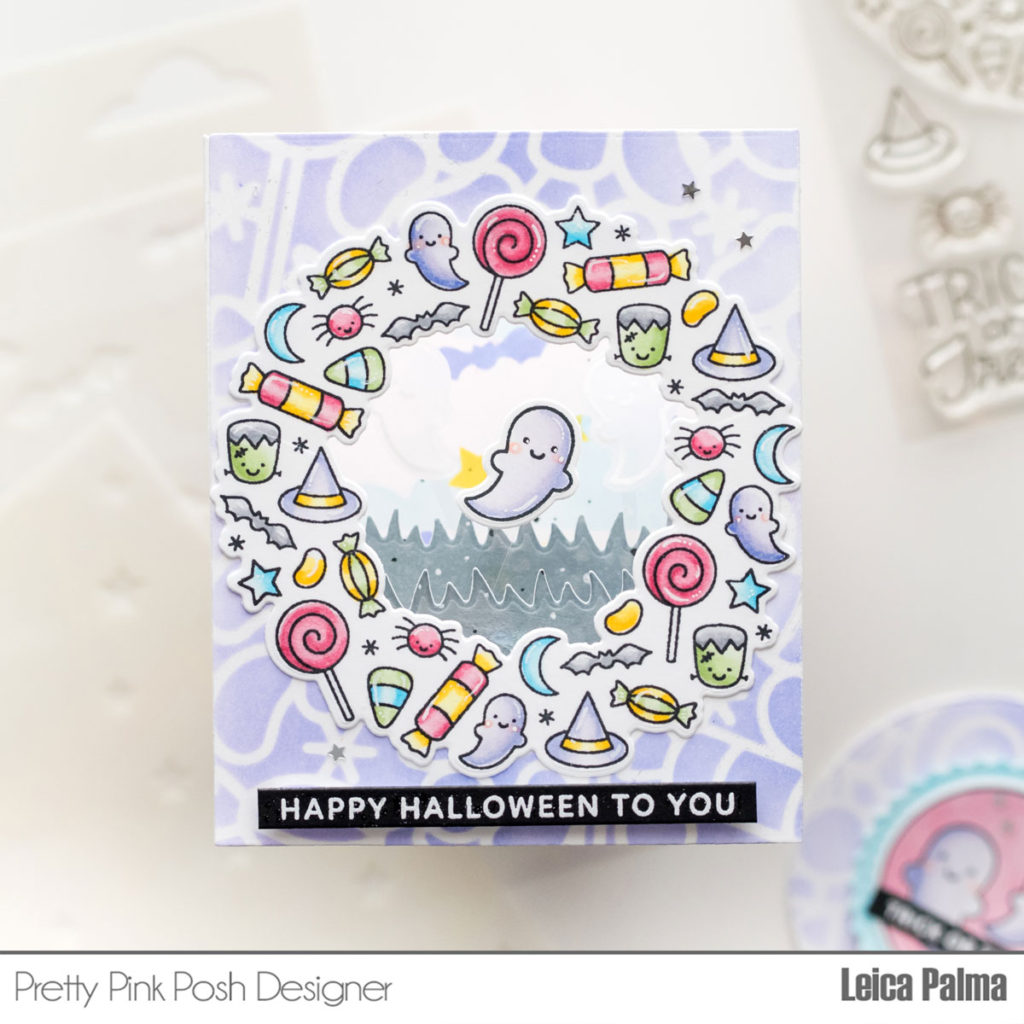
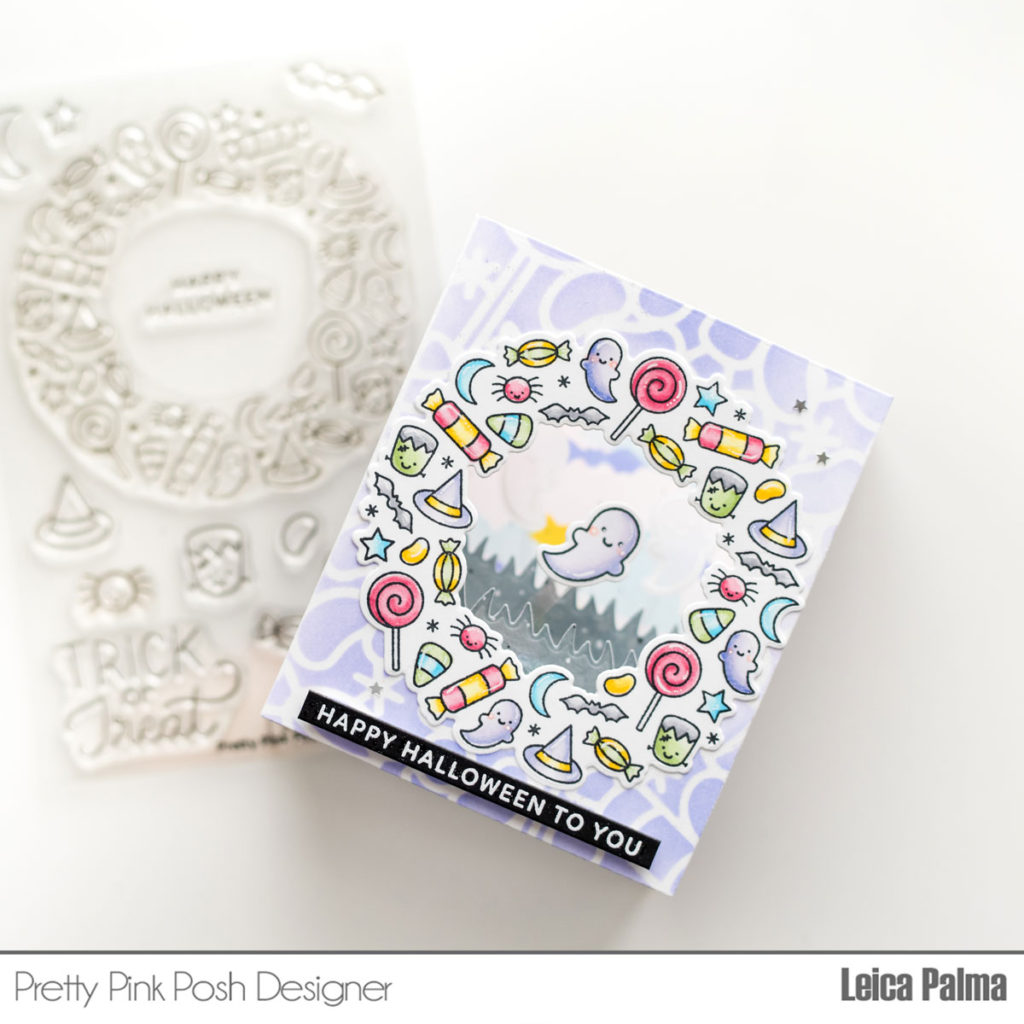
Hello hello! It’s Leica here today with a Halloween box card in pastel colors. For this box, I used the new Halloween Wreath stamp set. I love all the previously-released Pretty Pink Posh wreath stamps and am so happy that there is a Halloween version now. This is just so fun to color and the size of it makes it easy to fill up a card. 
Pretty Pink Posh- Day 2: Blog Hop+ August Release Now Available

I first ink blended Shaded Lilac Distress Oxide Ink through the new Candy Background Stencil before cutting the panels for the card box. I then assembled the box using Heffy Doodle Big Shadow Box Die and die cut a 3 inch circle in the middle of one of the panels. This opening is the perfect size for the wreath to be glued on top of later. I added 2 grass inserts inside the box using Hickory Smoke Distress Oxide Ink. For the background, I used the new Spooky Sky Stencils to make my own patterned paper: the clouds were blended with Tumbled Glass, bats with Wilted Violet, and stars with Mustard Seed.
Pretty Pink Posh- Day 2: Blog Hop+ August Release Now Available

I then stamped the Halloween Wreath with Memento Tuxedo black ink on 110lb white cardstock. I colored with Copic Markers – BV01/00/000, B02/00, G43/40, R85/83/81, N3/1/0, Y18/15 and cut with the coordinating die. I glued the wreath on top of the opening in the front of the card. I also stamped the cute little ghost from the same stamp set and attached it to the insert using a strip of acetate. Next, I white heat embossed 2 more ghosts on vellum and glued them to the back insert using acetate. I flipped one of the vellum ghosts for a mirrored look. They look super cute inside the box card, but can’t really see them in the photos. 
Pretty Pink Posh- Day 2: Blog Hop+ August Release Now Available

I then white heat embossed the “Happy Halloween to you” sentiment on a strip of black cardstock and foam mounted it to the front of the card. I also added 3 little stars for added sparkle.

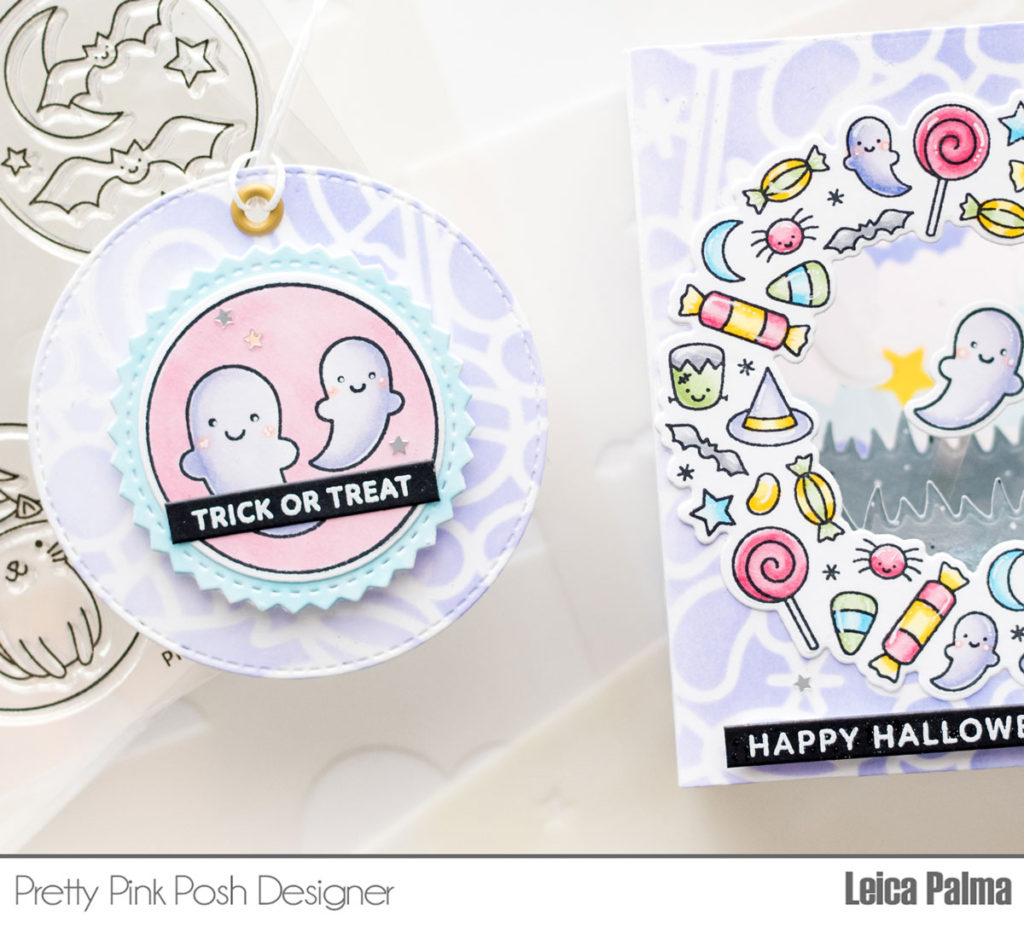
For the tag, I used the 3 inch circle that I cut out from the front panel of the box. I stamped the ghosts image from the Halloween Circles stamp set and cut with the coordinating die. I also cut the zigzag circle, which is included in the coordinating dies,  in white cardstock and colored with Copic B000. 
Pretty Pink Posh- Day 2: Blog Hop+ August Release Now Available

PRIZES: be sure to leave comments on each stop. We are giving away 3 $25 gift certificates to three random comments (1 winner each day) left before August 16, 2021 at 11:59 PM PST. I’ll be announcing the winners next week, so be sure to return and see if you are one of the winners!

Pretty Pink Posh blog << you are here
Carly Minner
Gemma Campbell
Tammy Stark
Wanda Guess
Tina Smith

Be sure to leave comments on all the stops- we’ll be randomly picking comments to win gift certificates. Thanks for joining us!

|

Day 1: Blog Hop+ August Release Now Available

Pretty Pink Posh- Day 1: Blog Hop+ August Release Now Available

The August 2021 Release is now available in the Pretty Pink Posh Shop and select retailers that carry our products. If you missed our post yesterday, we revealed all of the products in picture form, but if you would like to see them in a video, Heather has that for you today!

Watch the video above  I  Watch the video in HD on YouTube

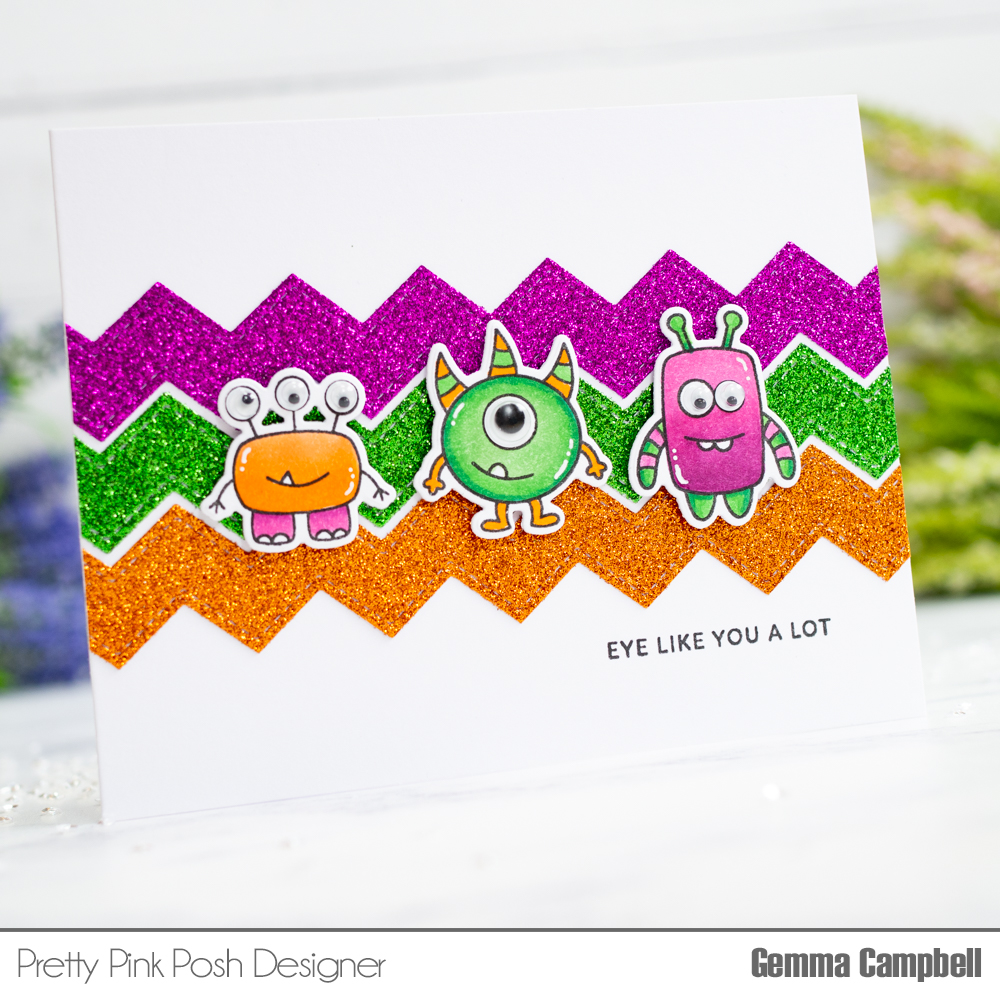
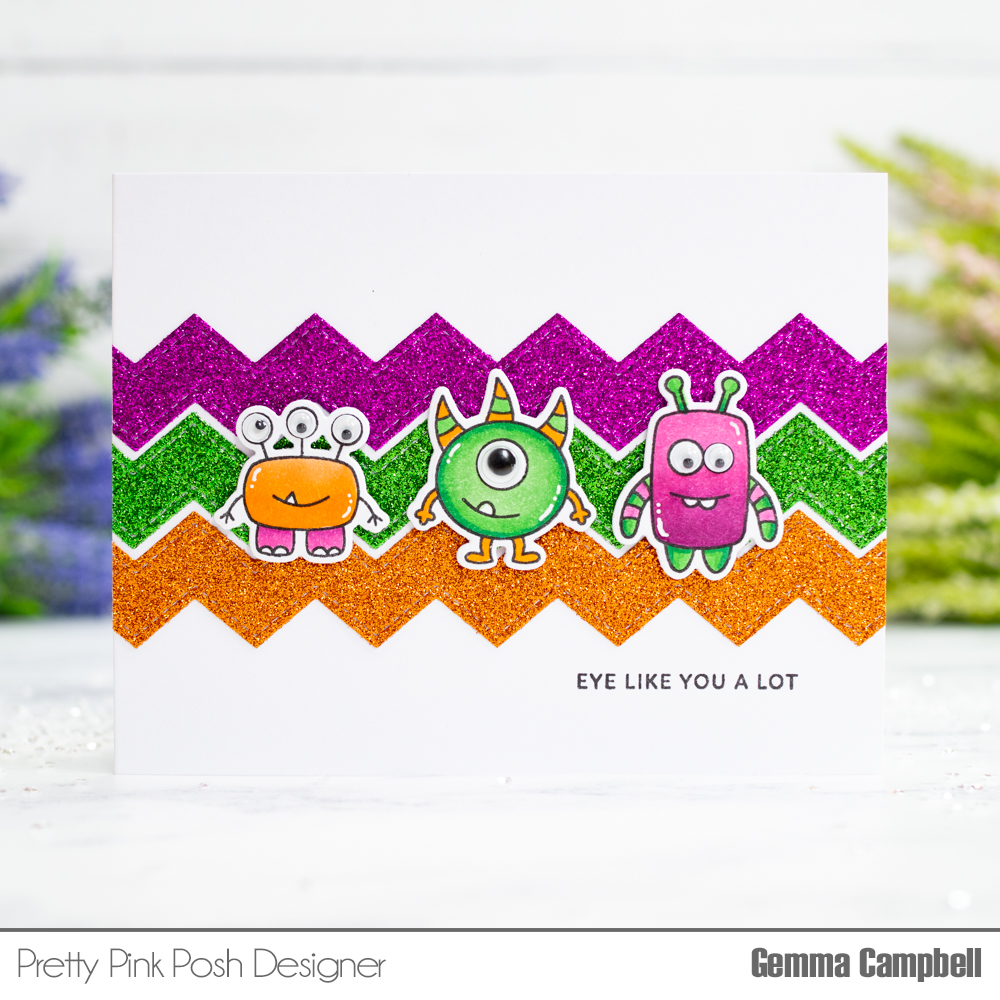
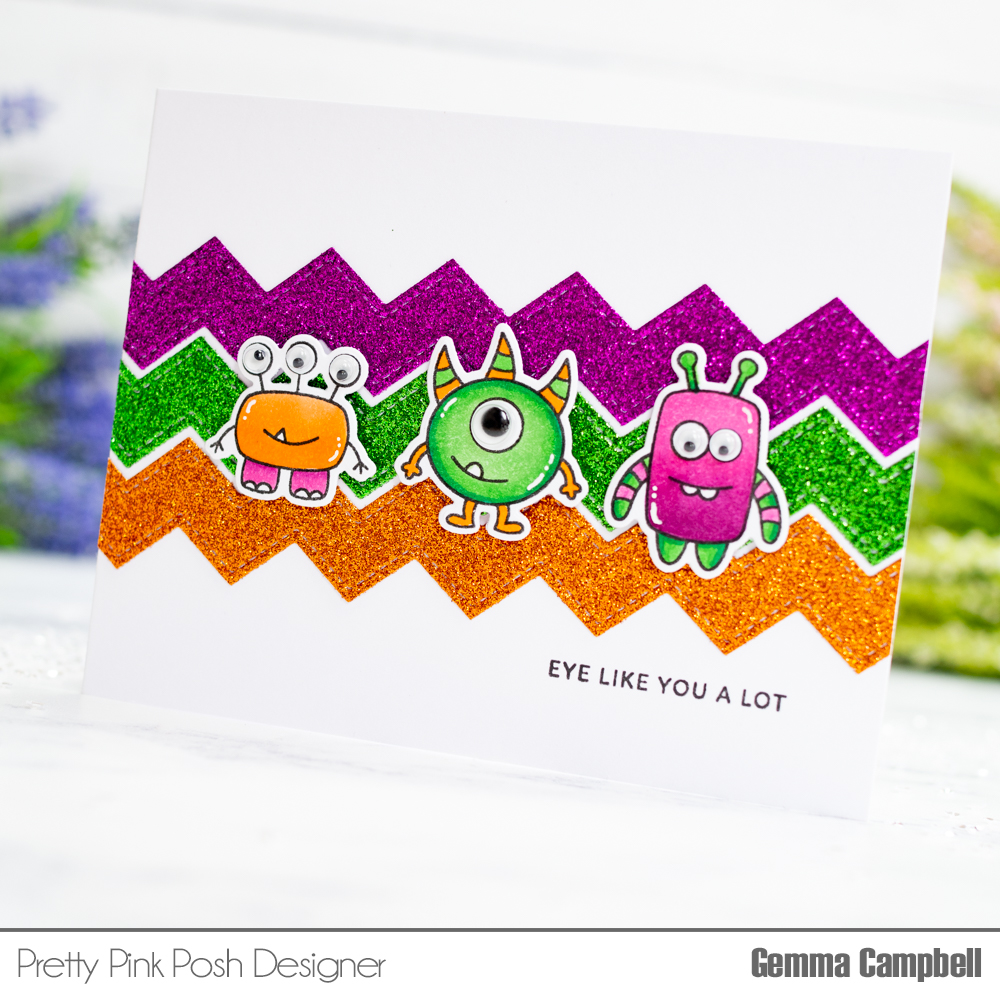
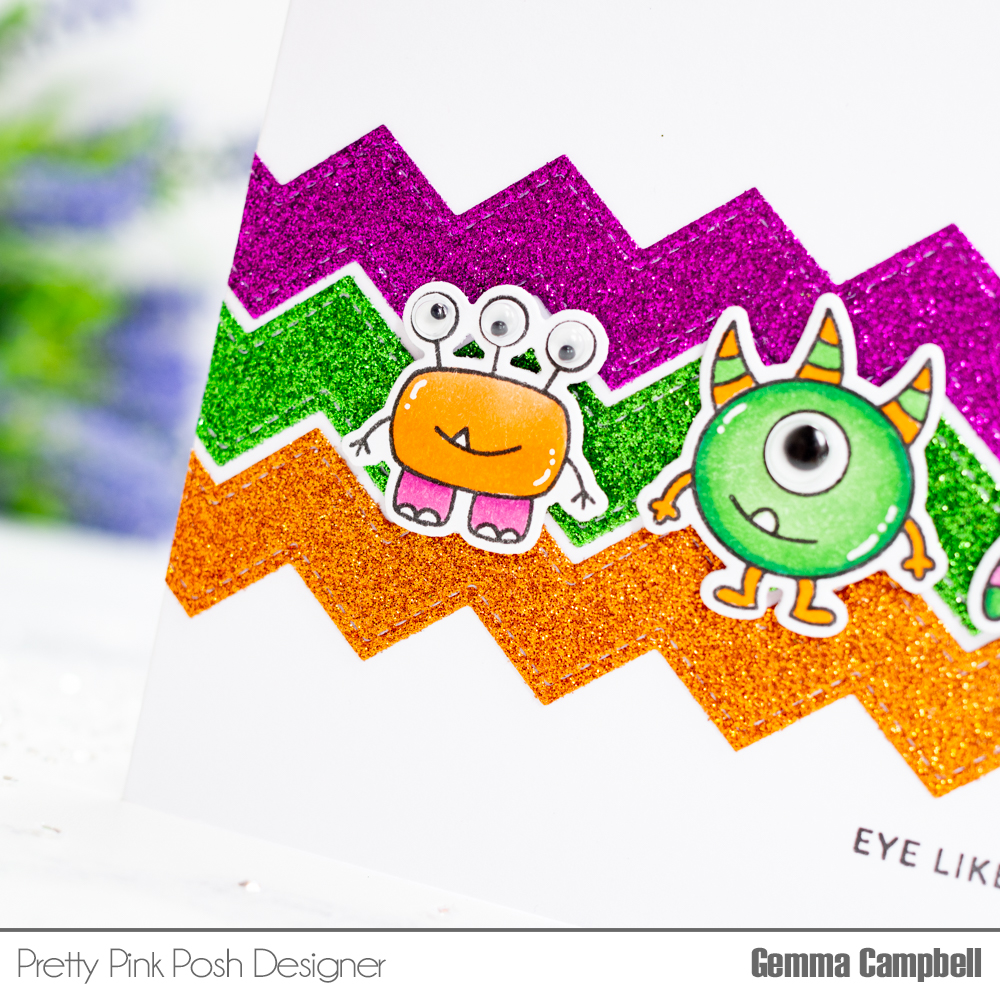
Hi Friends! It is Gemma here today. When I saw the fabulous Monster Hugs stamp set in the August release, I knew I wanted to add some googly eyes to the monsters.

Pretty Pink Posh- Day 1: Blog Hop+ August Release Now Available

For this card, I started with the background. I chose some fun glitter card in vibrant Halloween colours and die cut some zig-zag borders using a die from the Stacked Edges 1 die set.

I adhered these borders across the centre of an A2 card base. Underneath the borders, I stamped a fun sentiment from the Monster Hugs stamp set.

Pretty Pink Posh- Day 1: Blog Hop+ August Release Now Available

Next, I stamped some monsters and coloured them in with copic markers, using colours inspired by my zig-zag borders. I used the following copic markers: G12, G14, G17; RV55, RV66; YR02, YR14, YR16.

I die cut the monsters with the coordinating dies, then added some googly eyes. I then added the monsters to the card with foam tape.

Pretty Pink Posh- Day 1: Blog Hop+ August Release Now Available

I love the fun touch of googly eyes on these monsters. There’s just something about them which always bring a smile to my face.

Pretty Pink Posh- Day 1: Blog Hop+ August Release Now Available

PRIZES: be sure to leave comments on each stop. We are giving away 3 $25 gift certificates to three random comments (1 winner each day) left before August 16, 2021 at 11:59 PM PST. I’ll be announcing the winners next week, so be sure to return and see if you are one of the winners!

Pretty Pink Posh blog << you are here
Caly Person
Ashley Ebben
Mona Toth
Leica Palma
Elaine Wakeling
Channin Pelletier

Be sure to leave comments on all the stops- we’ll be randomly picking comments to win gift certificates. We’ll see you tomorrow for another day of inspiration!

|

June Blog Hop Winners

Hello there! I wanted to pop in quickly to announce the three lucky winners of the Product Release Blog Hop posts HEREHERE and HERE. Here are the lucky winners…

Winners, email me within 7 days and I’ll send over the gift certificates so you can shop!

Thank you to all who hopped along in this blog hop and shopped this release. I hope you were inspired and cannot wait to start seeing your fun projects using these new items.

If you joined along in our Instagram hop, we’ll be posting those winners in the next day or so!

| |

Day 3: Blog Hop+ June Release Now Available

Pretty Pink Posh- Day 3: Blog Hop+ June Release Now Available

If you missed Day 1 CLICK HERE //  If you missed Day 2 CLICK HERE

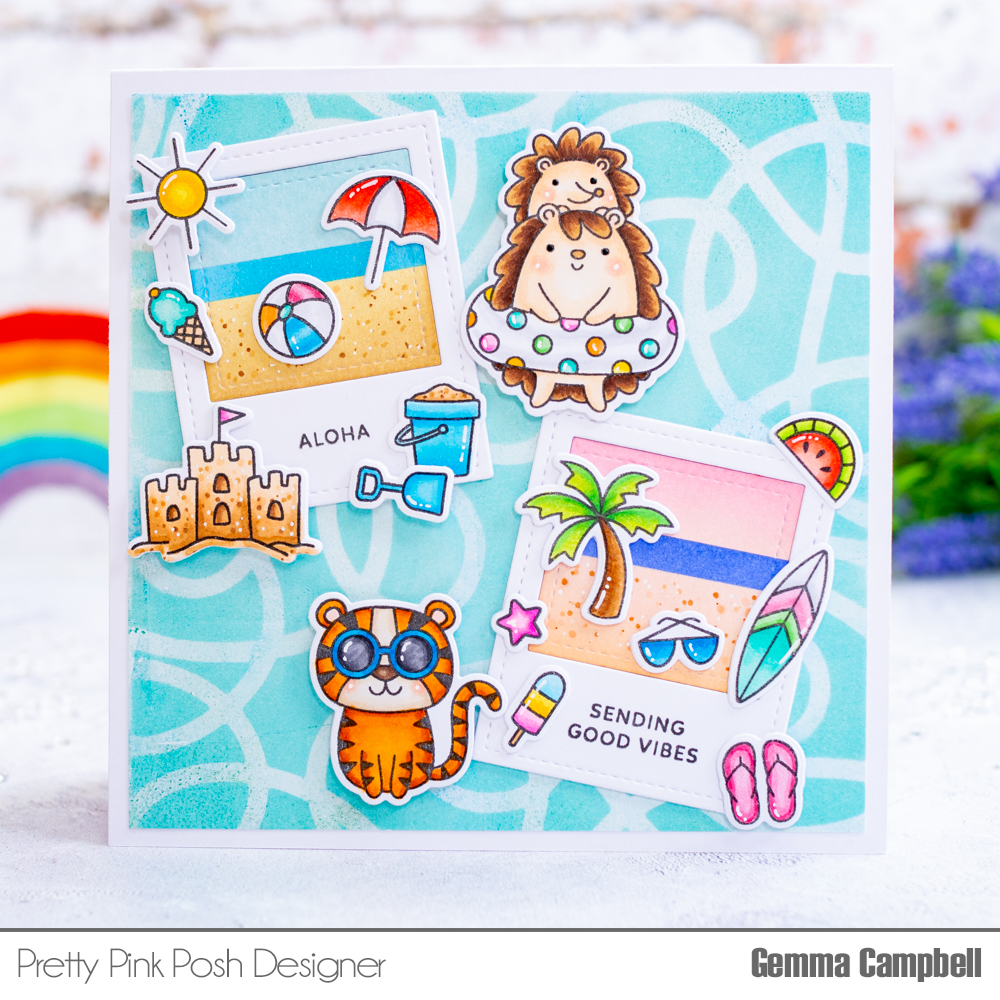
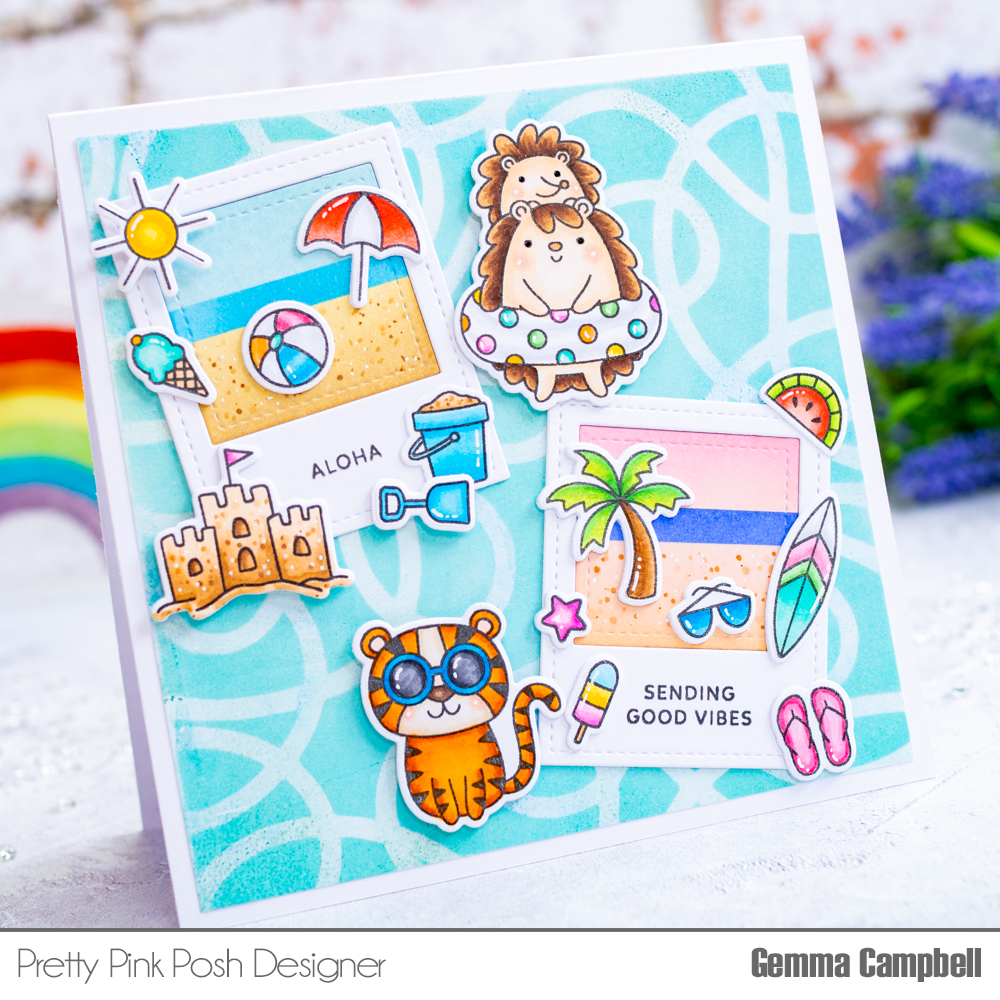
Hello, Gemma here and today my card is in the style of a scrapbook layout and features lots of summery June release products.

Pretty Pink Posh- Day 3: Blog Hop+ June Release Now Available

I began with the background. I created a gel print patterned background, with evergreen bough, mermaid lagoon, and cracked pistachio distress oxide inks.

Over the top of the print, I blended salvaged patina distress oxide ink through the new Squiggles stencil. The texture of the background shows through the ink on top and it’s a nice contrast in the swirl areas of the stencil.

Pretty Pink Posh- Day 3: Blog Hop+ June Release Now Available

I layered this background print over a large square card base. My card base is 148mm square, as this fits my U.K. cardstock, but a slightly smaller 5.5 inch square card base would work well too.

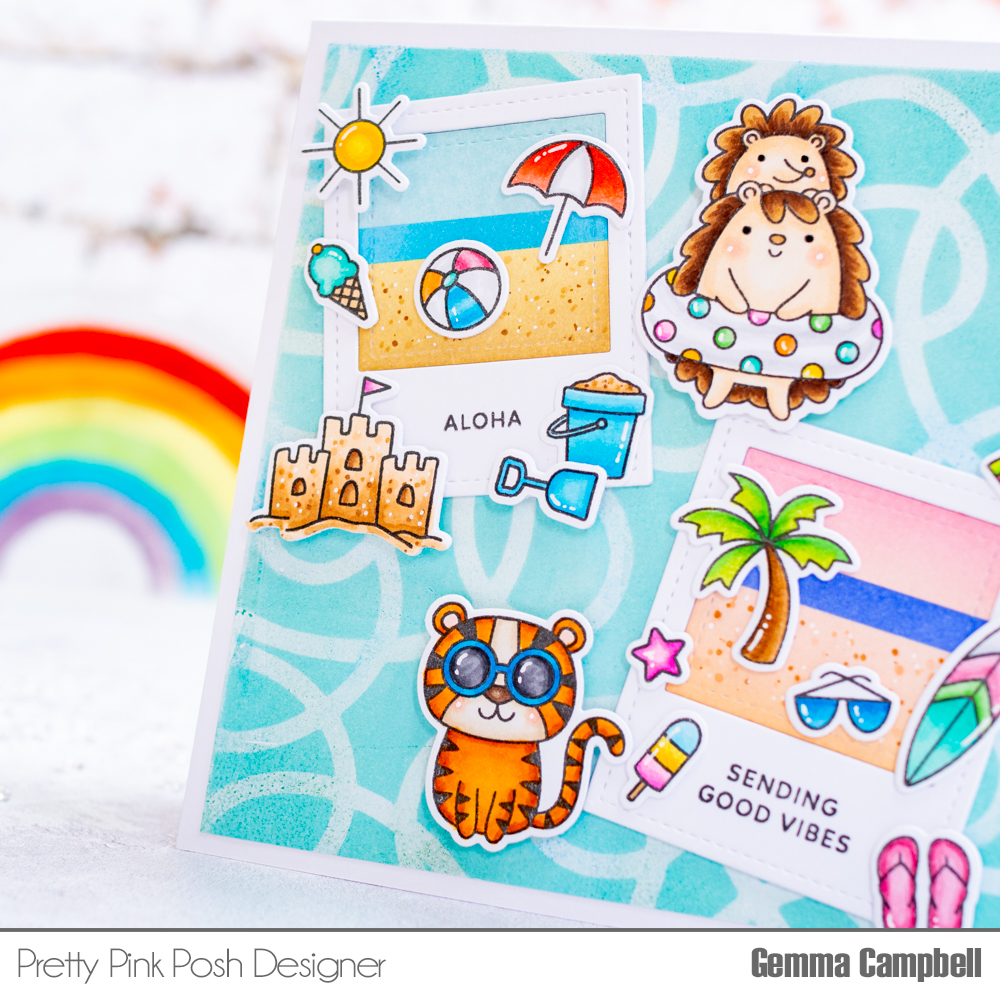
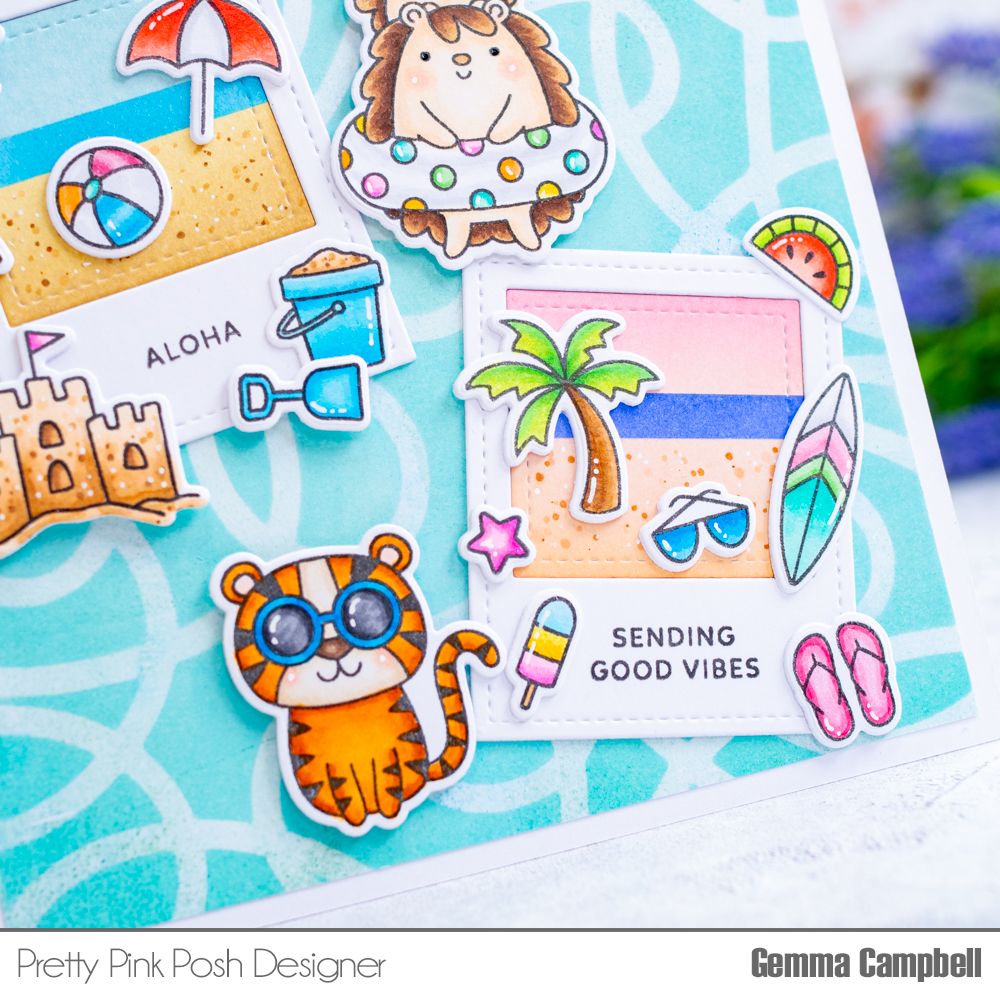
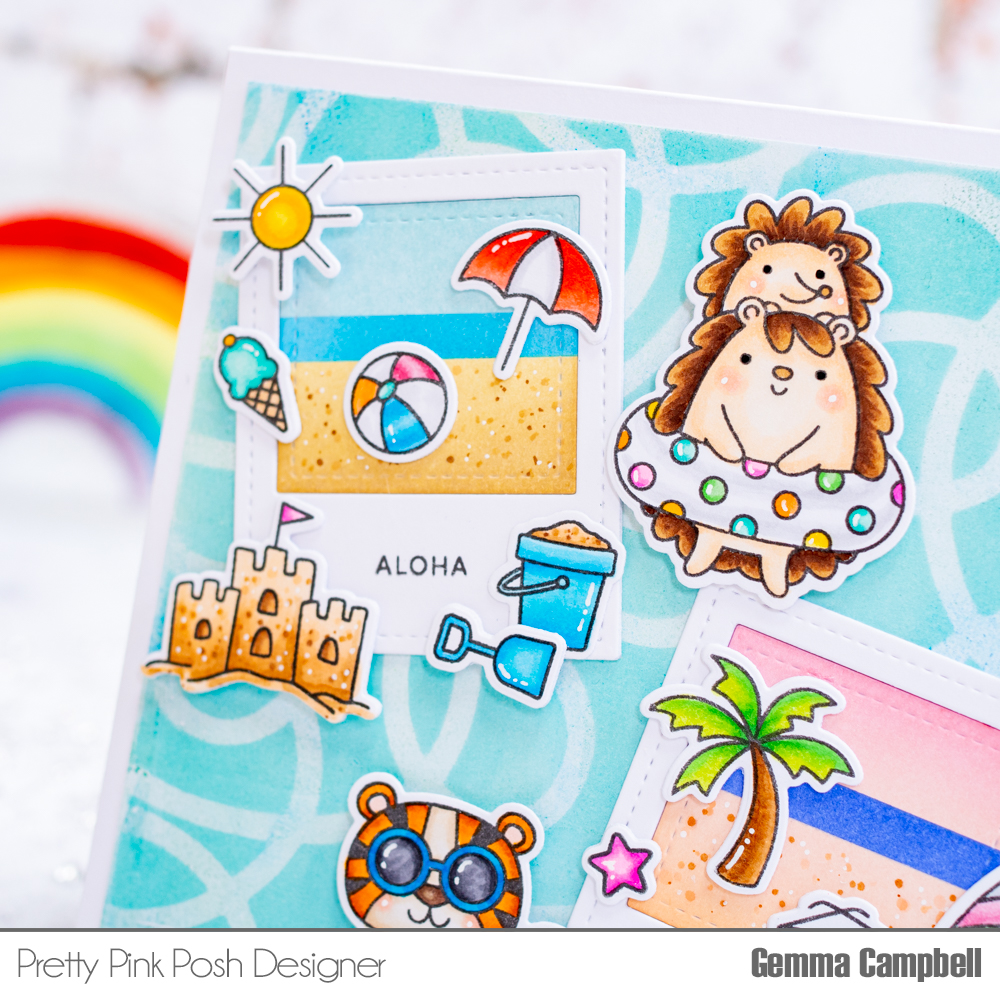
Next, I die cut four of the previously released Stitched Photo Frames from white card. I layered two frames together for dimension, and stamped a sentiment on each from the new Summer Fun stamp set.

Pretty Pink Posh- Day 3: Blog Hop+ June Release Now Available

On two of the insert pieces, I created day and night beach scenes with masking and distress oxides. Here are the colours I used:

I added some copic markers and white gel pen dot details on the sand, to give the beach some texture.

Pretty Pink Posh- Day 3: Blog Hop+ June Release Now Available

Next, I stamped images from Summer Fun and Summer Wreath stamp sets and coloured them with copic markers. The smaller images from the Summer Wreath stamp set are perfect for adding to my beach scenes. I die cut the images with the coordinating dies and arranged on the card, using foam tape for dimension. Finally, I added white gel pen highlight details to the images.

Pretty Pink Posh- Day 3: Blog Hop+ June Release Now Available

PRIZES: be sure to leave comments on each stop. We are giving away 3 $25 gift certificates to three random comments (1 winner each day) left before June 20, 2021 at 11:59 PM PST. I’ll be announcing the winners next week, so be sure to return and see if you are one of the winners!

Pretty Pink Posh blog << you are here
Rachel Alvarado
Mona Toth
Ardyth Percy- Robb
Dana Kirby
Jeanne Jachna
Yoonsun Hur

I hope you are inspired to create cards with the new PPP stamps and dies and were inspired by this three day blog hop! Thank you for hopping with us!

| |

Day 2: Blog Hop+ June Release Now Available

Pretty Pink Posh- Day 2: Blog Hop+ June Release Now Available

If you missed Day 1 CLICK HERE

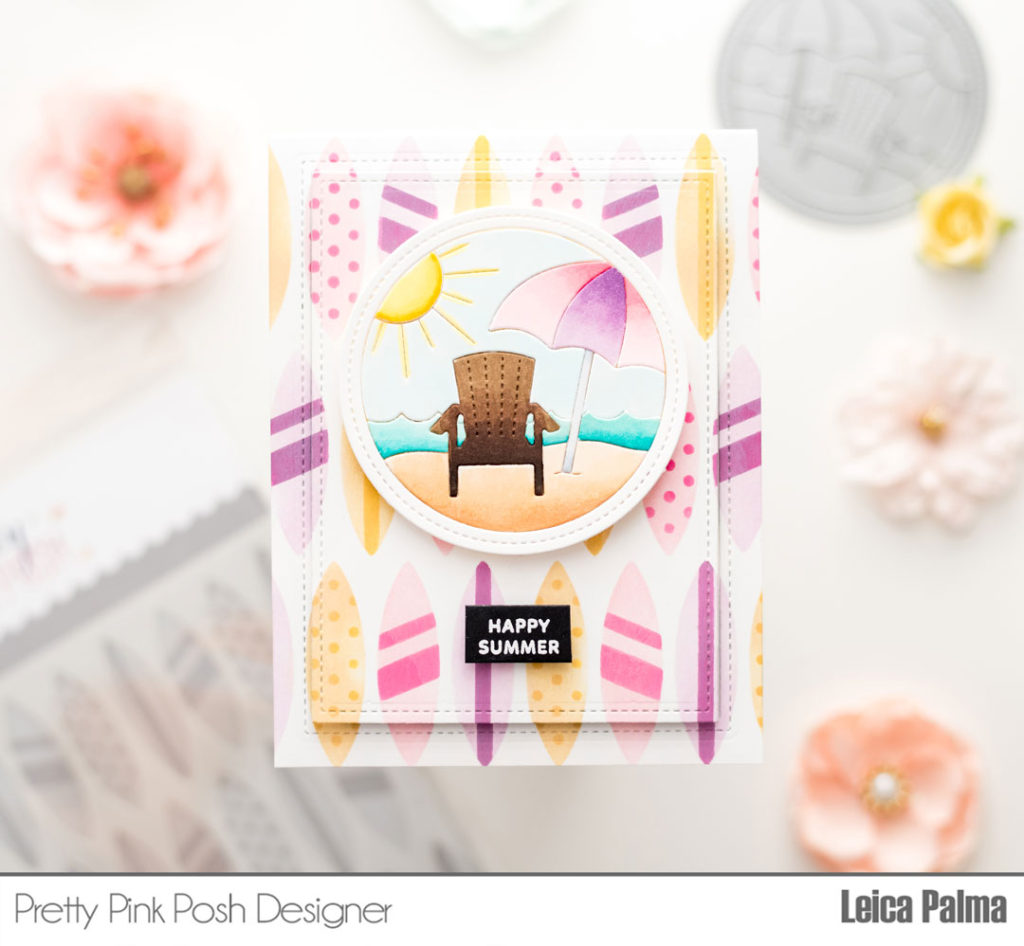
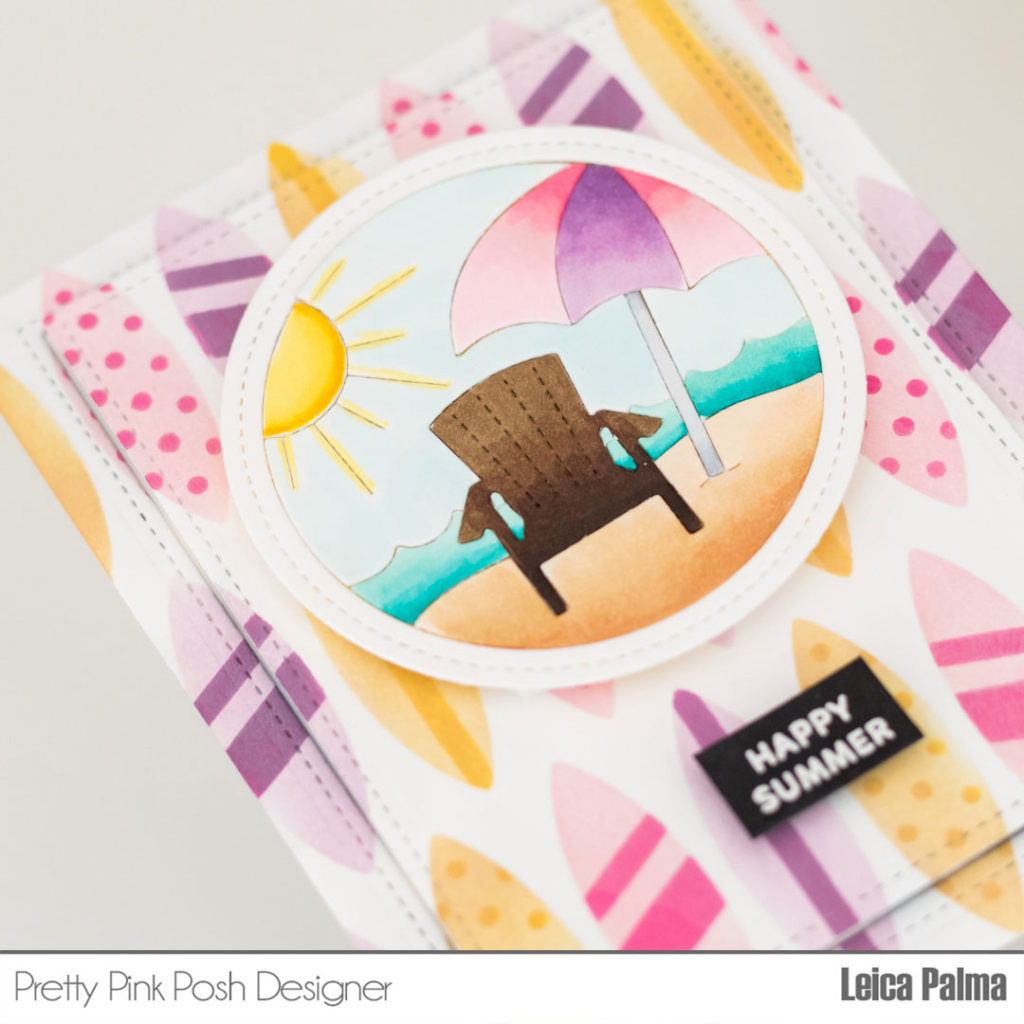
Hello friends! Ready or not, Summertime is upon us! It’s Leica here today with an A2 sized card, featuring the new Vacation Scene Die. This is a fun new addition to the previously released scene Dies – SpringWinter, and Beach

Pretty Pink Posh- Day 2: Blog Hop+ June Release Now Available

Let’s begin! I first die cut the Vacation Scene Die in white cardstock and colored it with Copic Sketch Markers. I used BG15/11/000, E47/44/43/33/31/30, N3/1, Y15/13/11, RV11/10/00, V17/15/12. I then adhere  the pieces back together by gluing them onto a circle panel. 

Pretty Pink Posh- Day 2: Blog Hop+ June Release Now Available

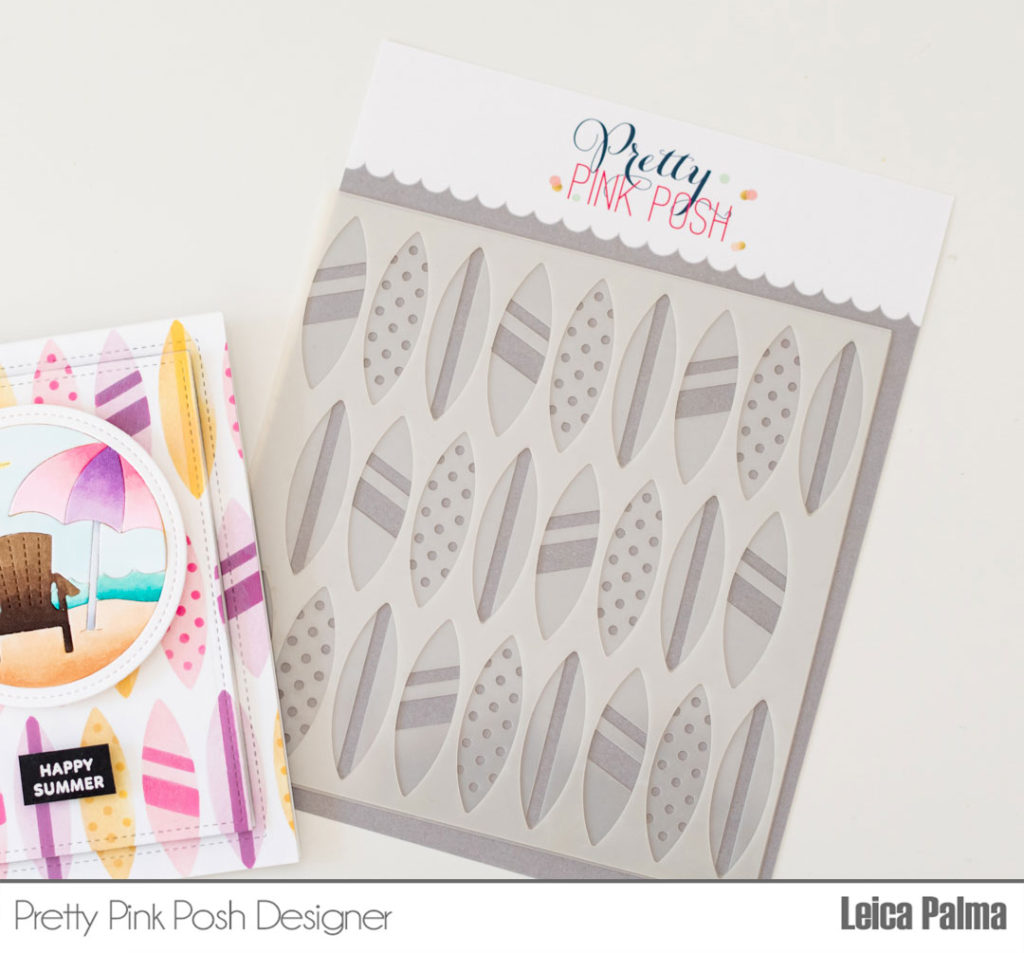
For the fun background, I inked through the new Layered Surfboards Stencil in Seedless Preserves, Milled Lavender, Picked Raspberry, Spun Sugar, Fossilized Amber, and Antique Linen distress oxide inks.

Pretty Pink Posh- Day 2: Blog Hop+ June Release Now Available

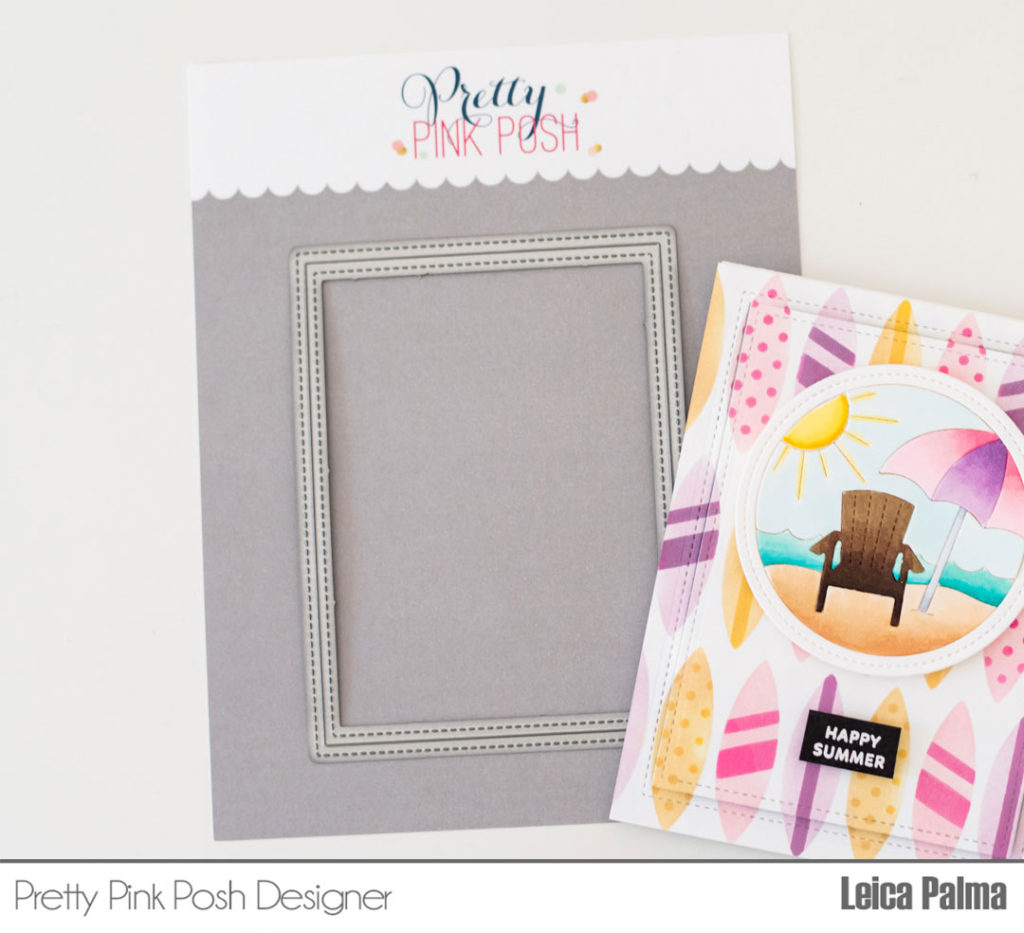
I added stitching details around the panel by running it through my die cut machine using the Stitched Notes Die. I then glued the outer area of the panel onto an A2 card base, and for dimension, I foam taped the center part. I also foam taped the scene die for even more dimension. Lastly, I white heat embossed the Happy Summer sentiment from Summer Fun stamp set onto a strip of black cardstock. 

Pretty Pink Posh- Day 2: Blog Hop+ June Release Now Available

PRIZES: be sure to leave comments on each stop. We are giving away 3 $25 gift certificates to three random comments (1 winner each day) left before June 20, 2021 at 11:59 PM PST. I’ll be announcing the winners next week, so be sure to return and see if you are one of the winners!

Pretty Pink Posh blog << you are here
Kristie Marcotte
Adelle Emery
Melody Rupple
Gemma Campbell
Tina Smith 
Tammy Stark

Be sure to leave comments on all the stops- we’ll be randomly picking comments to win gift certificates. Thanks for joining us!
| |

Day 1: Blog Hop+ June Release Now Available

Pretty Pink Posh- Day 1: Blog Hop+ June Release Now Available

The June 2021 Release is now available in the Pretty Pink Posh Shop and select retailers that carry our products. If you missed our post yesterday, we revealed all of the products in picture form, but if you would like to see them in a video, Heather has that for you today!

Watch the video above  I  Watch the video in HD on YouTube

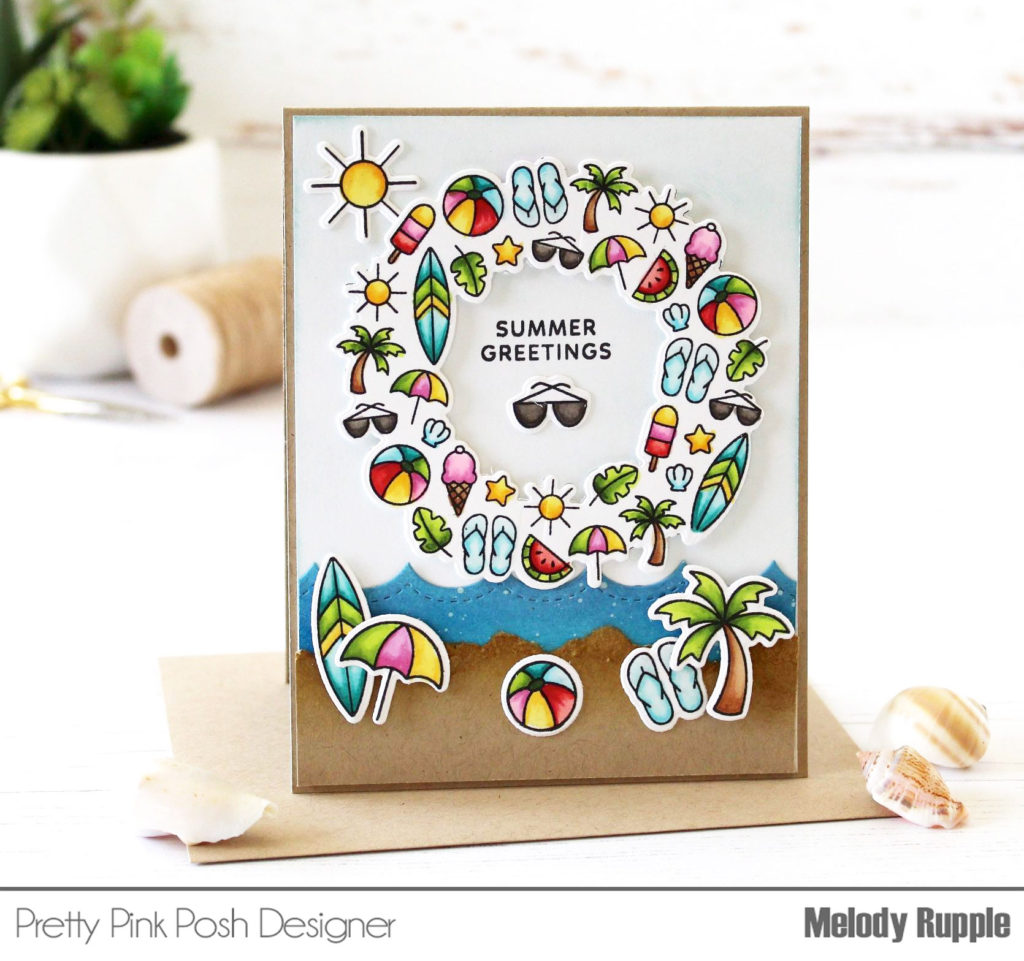
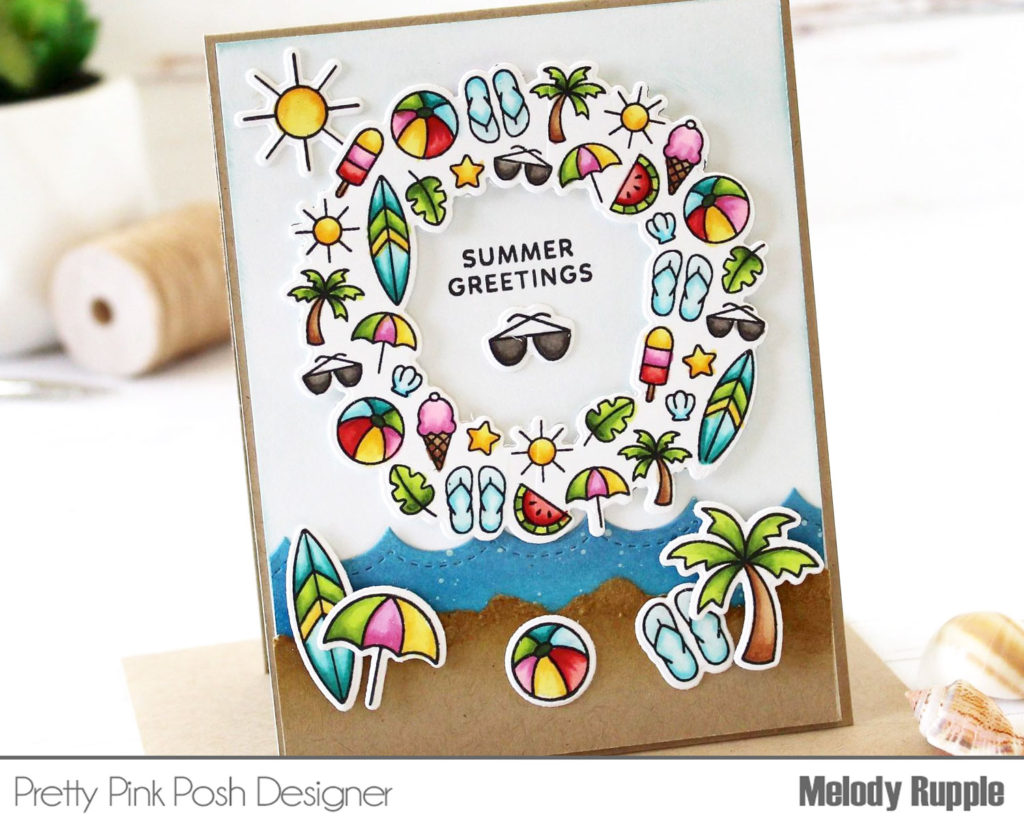
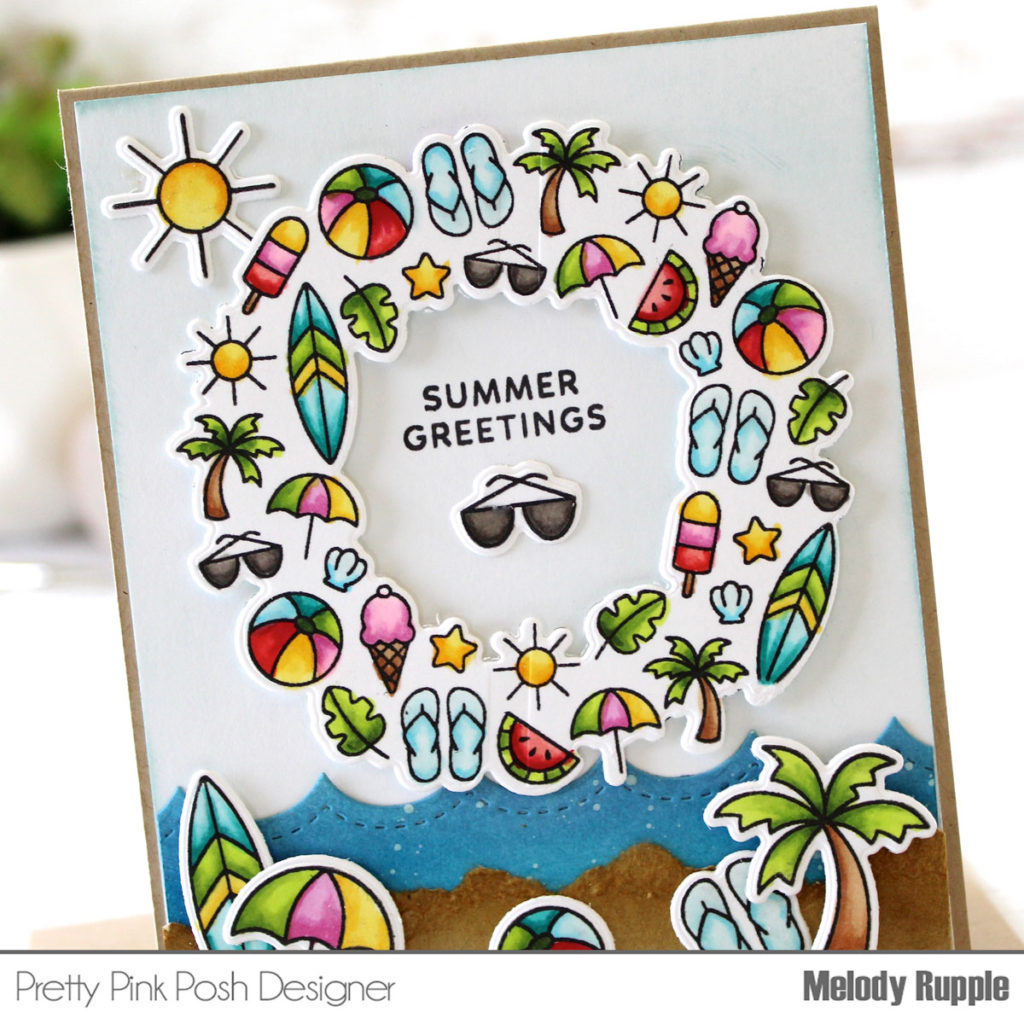
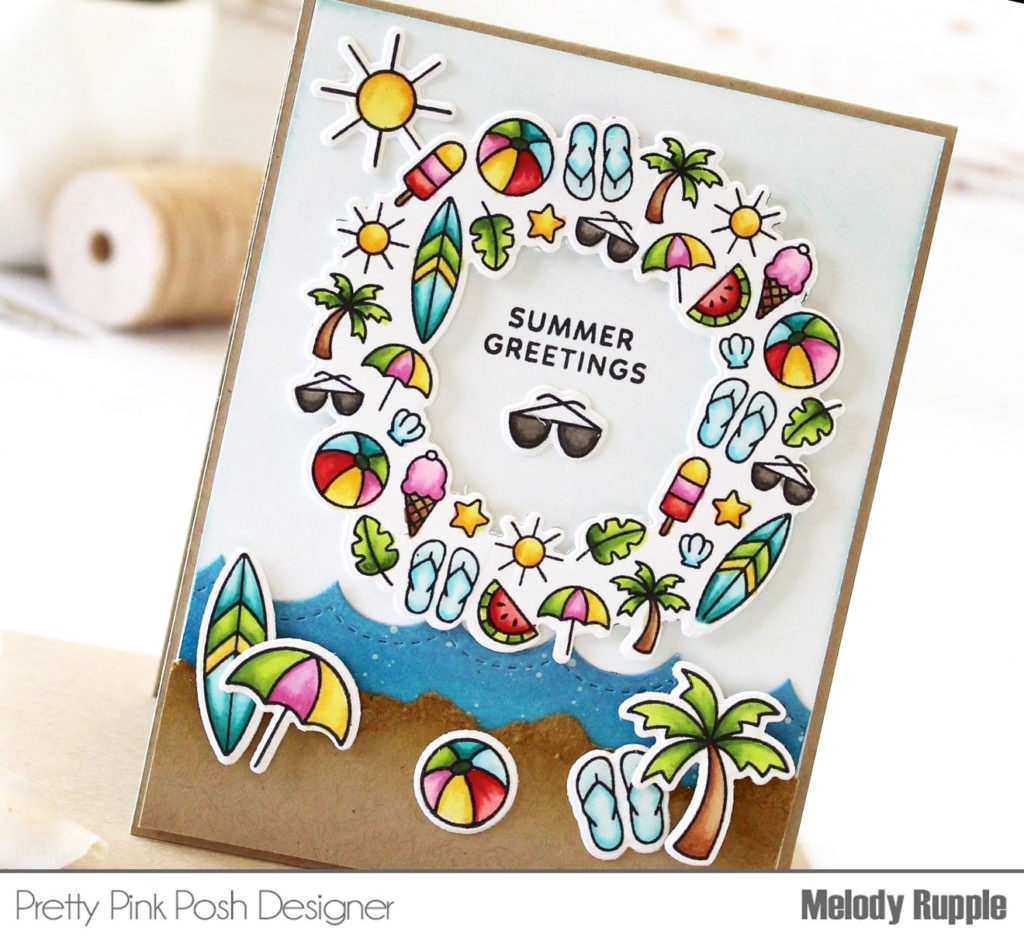
Hi Friends! It is Melody here today and I have a card to share with you that I created with the new Summer Wreath stamp set and coordinating dies. I love the PPP Wreath Collection and the summer theme is a fun addition to the collection. 

Pretty Pink Posh- Day 1: Blog Hop+ June Release Now Available

I started by stamping the wreath in black ink and coloring the images with Copic Markers. I die cut the wreath with the Summer Wreath coordinating die

Pretty Pink Posh- Day 1: Blog Hop+ June Release Now Available

The stamp set includes additional images besides the wreath. I chose some of the images to stamp, color, and die cut to add to my card. I stamped the sentiment from the stamp set in the middle of the wreath and added the sunglasses below the sentiment. In the left corner I added the sun. 

I added additional images at the bottom of the card, attaching some of the images with foam tape to add dimension. 

Pretty Pink Posh- Day 1: Blog Hop+ June Release Now Available

To create the card front I cut a piece of white cardstock and blended Speckled Egg Distress Ink on the white background. Next I cut the wave with the new Stitched Waves die set. I cut the wave from white cardstock and blended Mermaid Lagoon Distress Ink. I splattered a little bit of white paint on the wave.

Next I cut a strip of Kraft cardstock and tore the edges to add to the look of sand. To finish the card off, I blended Brushed Corduroy Distress Ink on the edges. 

Pretty Pink Posh- Day 1: Blog Hop+ June Release Now Available

PRIZES: be sure to leave comments on each stop. We are giving away 3 $25 gift certificates to three random comments (1 winner each day) left before June 20, 2021 at 11:59 PM PST. I’ll be announcing the winners next week, so be sure to return and see if you are one of the winners!

Pretty Pink Posh blog << you are here
Caly Person
Ashley Ebben
Heather Hoffman
Cathy Zielske
Yana Smakula
Alberto Gava
Laura Bassen

Be sure to leave comments on all the stops- we’ll be randomly picking comments to win gift certificates. We’ll see you tomorrow for another day of inspiration!

|

May Blog Hop Winners

Hello there! I wanted to pop in quickly to announce the three lucky winners of the Product Release Blog Hop posts HEREHERE and HERE. Here are the lucky winners…

Winners, email me within 7 days and I’ll send over the gift certificates so you can shop!

Thank you to all who hopped along in this blog hop. If you joined along in our Instagram hop, we’ll be posting those winners shortly on our account there!

| |

Day 3: Blog Hop+ May Release Now Available

Pretty Pink Posh- Day 3: Blog Hop+ May Release Now Available

If you missed Day 1 CLICK HERE //  If you missed Day 2 CLICK HERE

Hi, friends! It’s Leica here today for day 3 of our blog hop.

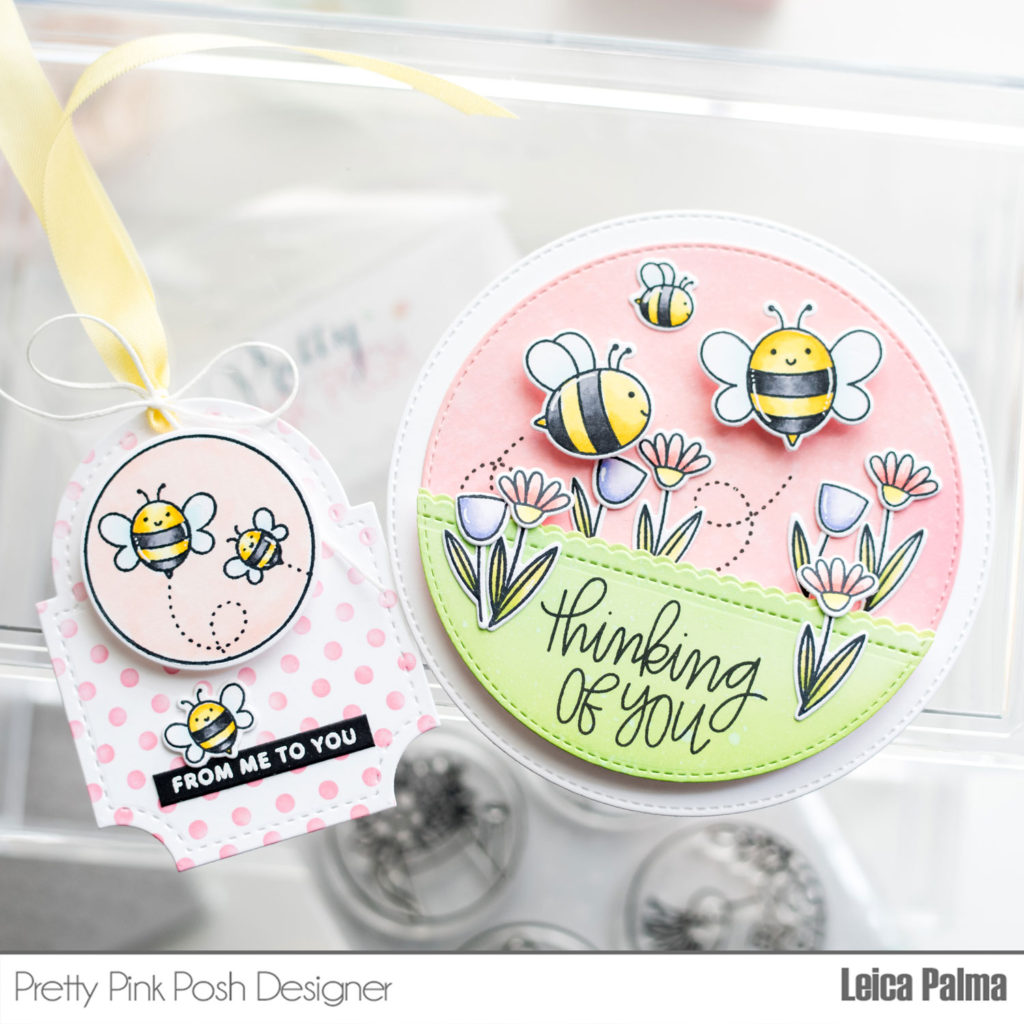
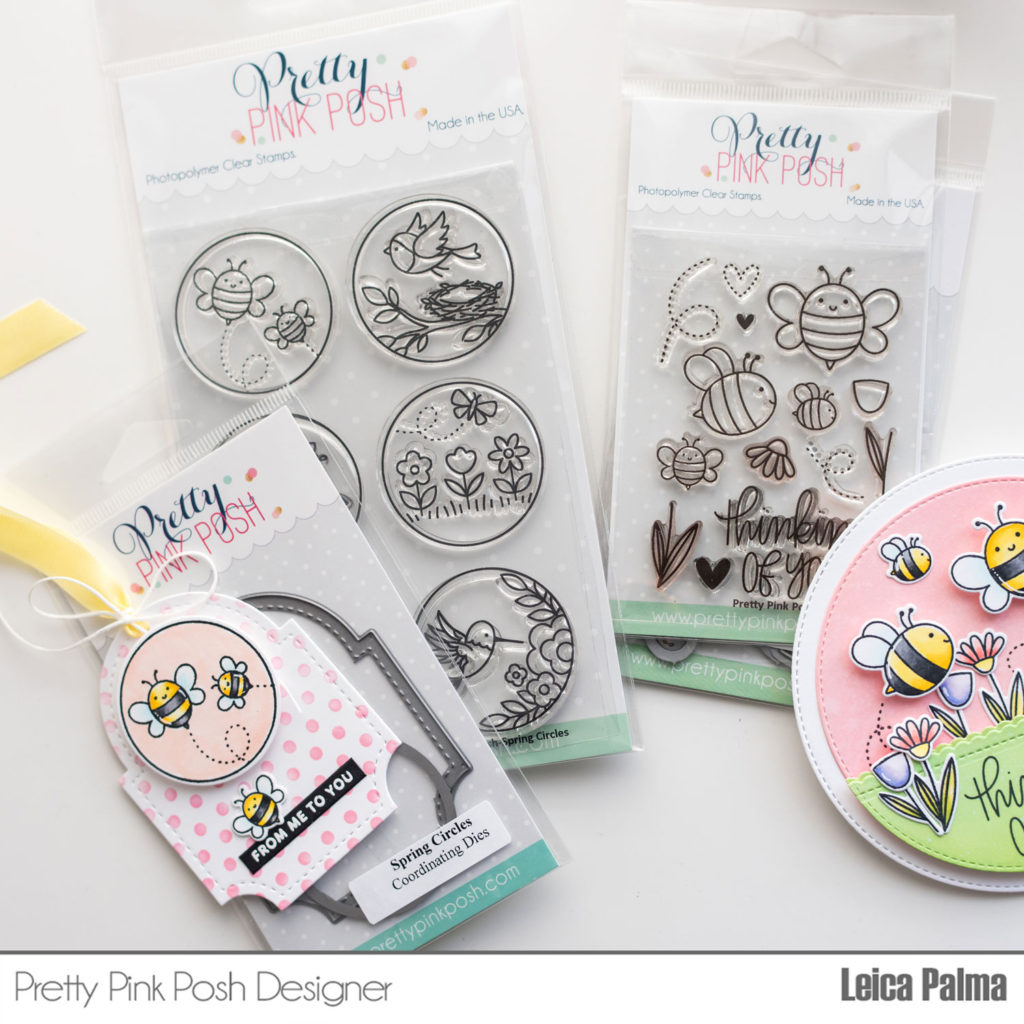
I have a card and tag set using a combination of old and new stamp sets from Pretty Pink Posh. The old stamp set is Bee Friends and the new one is Spring Circles. I love that the new Spring Circles stamp sets go perfectly together with other PPP products, such as the Hummingbird Thanks, any of the butterflies setsSpring RobinsSpring Scene Die, and the new Flower Bouquets stamp set.

Pretty Pink Posh- Day 3: Blog Hop+ May Release Now Available

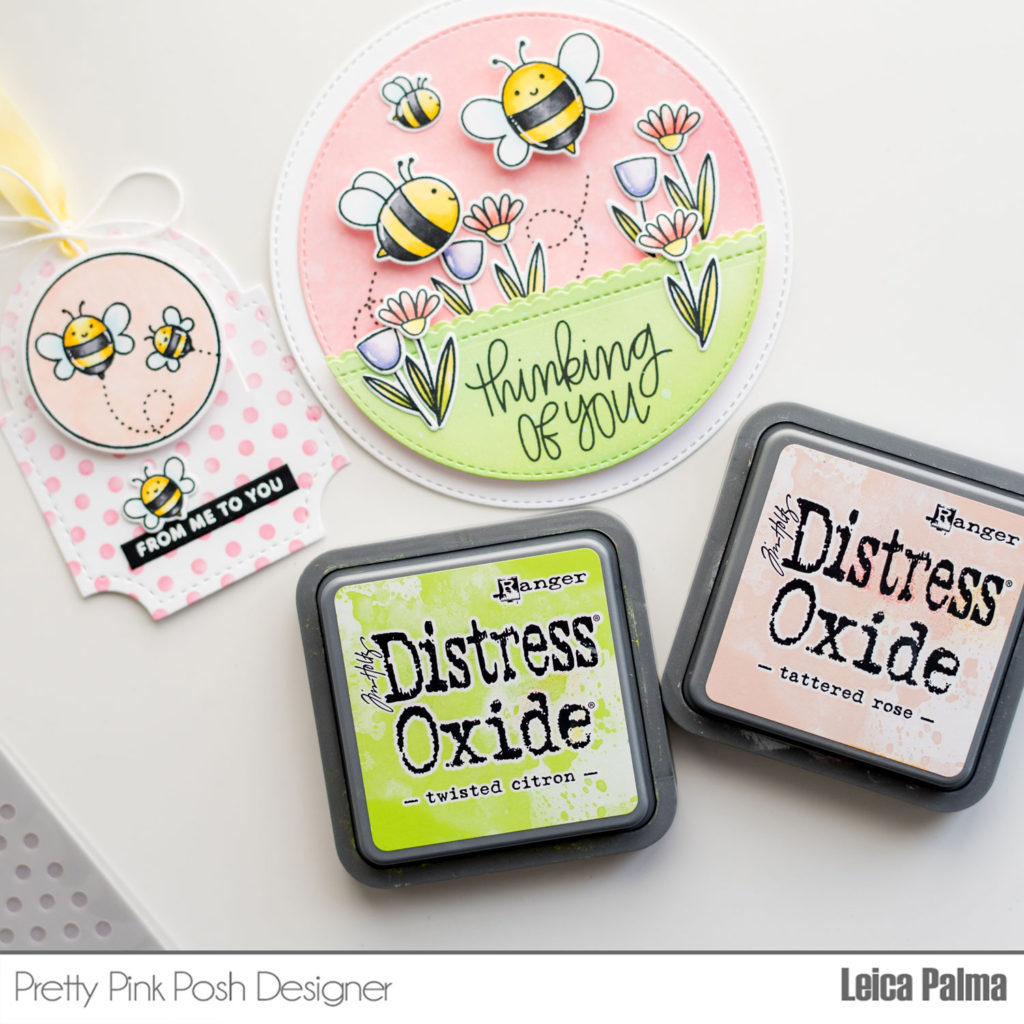
Let’s start with the circle card. To begin, I die cut a white cardstock using a 4.5″ circle die and another one in 4″. I then ink blended the smaller circle with Tattered Rose Distress Oxide ink and sprayed some water for some interest. I also cut a small part of the circle in white cardstock for the grass area and inked with Twisted Citron Distress Oxide. The scallop edge is cut using Scallop Borders Dies. I ended up with 2 layers of the grass area, because the inked smudged on the first layer so I fixed my mistake by adhering another layer on top. In the end, I liked the look of the double scallop edging for the grass. 

Pretty Pink Posh- Day 3: Blog Hop+ May Release Now Available

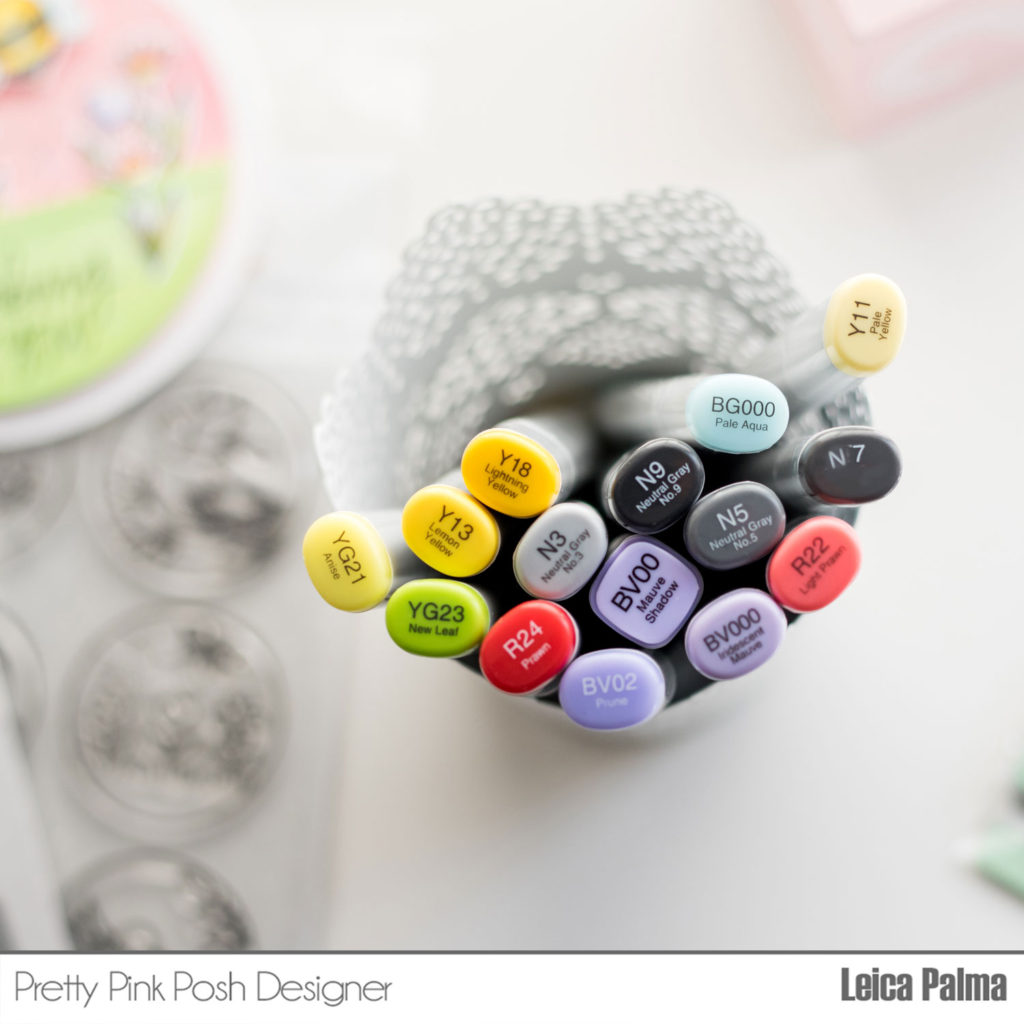
Next, I stamped, colored, and cut the images from the Bee Friends stamp set. I then stamped the bee trails on the circle panel and the sentiment on the grass piece. Lastly, I adhered the stamped images onto the card panel using liquid glue and the bees with foam tape for dimension. 

Pretty Pink Posh- Day 3: Blog Hop+ May Release Now Available

For the matching tag, I used the tag die from the Spring Circles coordinating dies. I used the Mini Polka Dots Stencil with Tattered Rose Distress Oxide Ink for the background. The bee image in a circle is from Spring Circles and I added a little bee from the Bee Friends stamp set, too.  Lastly, the From Me to You sentiment is from Bear Friends stamp set. Make sure to check your stash for other beautiful sentiments that fit on the Simple Strips Dies.

Pretty Pink Posh- Day 3: Blog Hop+ May Release Now Available

Pretty Pink Posh blog << you are here
Rachel Alvarado
Mona Toth
Ardyth Percy- Robb
Cathy Zielske
Dana Kirby
Yoonsun Hur

Pretty Pink Posh- Day 3: Blog Hop+ May Release Now Available

I hope you are inspired to create cards with the new PPP stamps and dies and were inspired by this three day blog hop!

| |

Day 2: Blog Hop+ May Release Now Available

Pretty Pink Posh- Day 2: Blog Hop+ May Release Now Available

If you missed Day 1 CLICK HERE //  If you missed Day 3 CLICK HERE

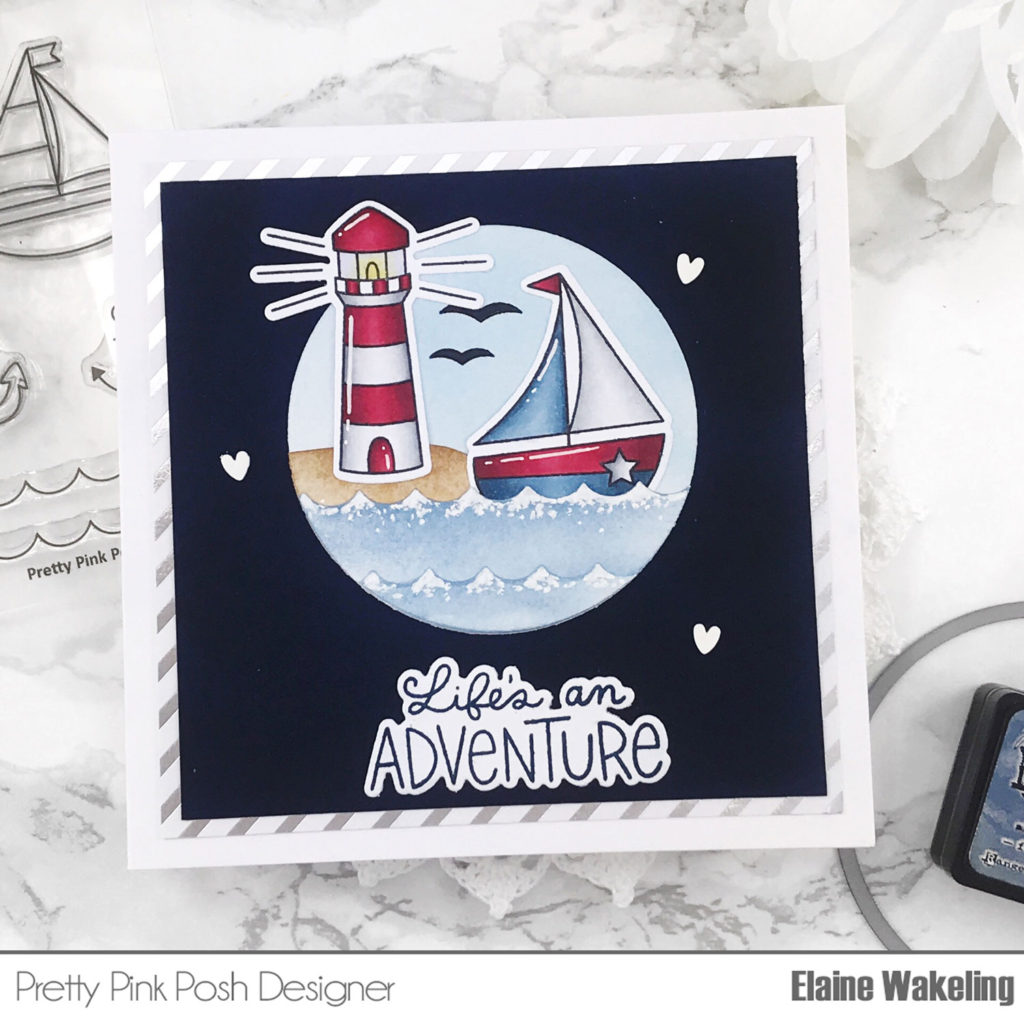
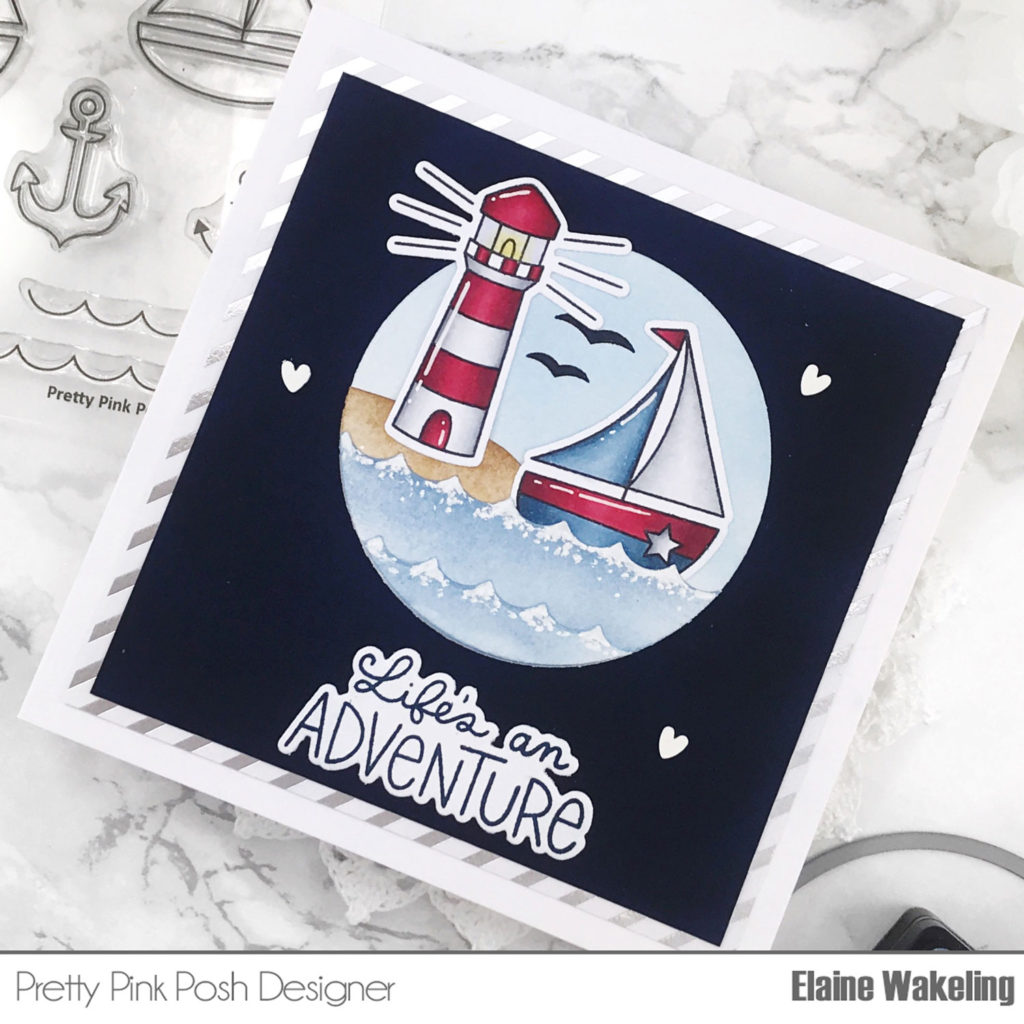
Hey crafty friends, Elaine here for Day 2 of our blog hop. I’m sharing a seaside themed card with the amazing new stamp set Nautical.  To help build the cute scene I also used some other Pretty Pink Posh goodies and I have them linked throughout the post.

Pretty Pink Posh- Day 2: Blog Hop+ May Release Now Available

Firstly, I stamped out my images and coloured them with copic markers.  The numbers I used were:

  • Red: R59, R39, R29
  • Blue: B99, B97, B95
  • White/Grey: C3, C1, C00, 0 (blender)
  • Yellow: Y15, Y13, Y11

I then went ahead and cut out the images with the Nautical coordinating dies and set them aside while I worked on the circle scene element of the card.  

Pretty Pink Posh- Day 2: Blog Hop+ May Release Now Available

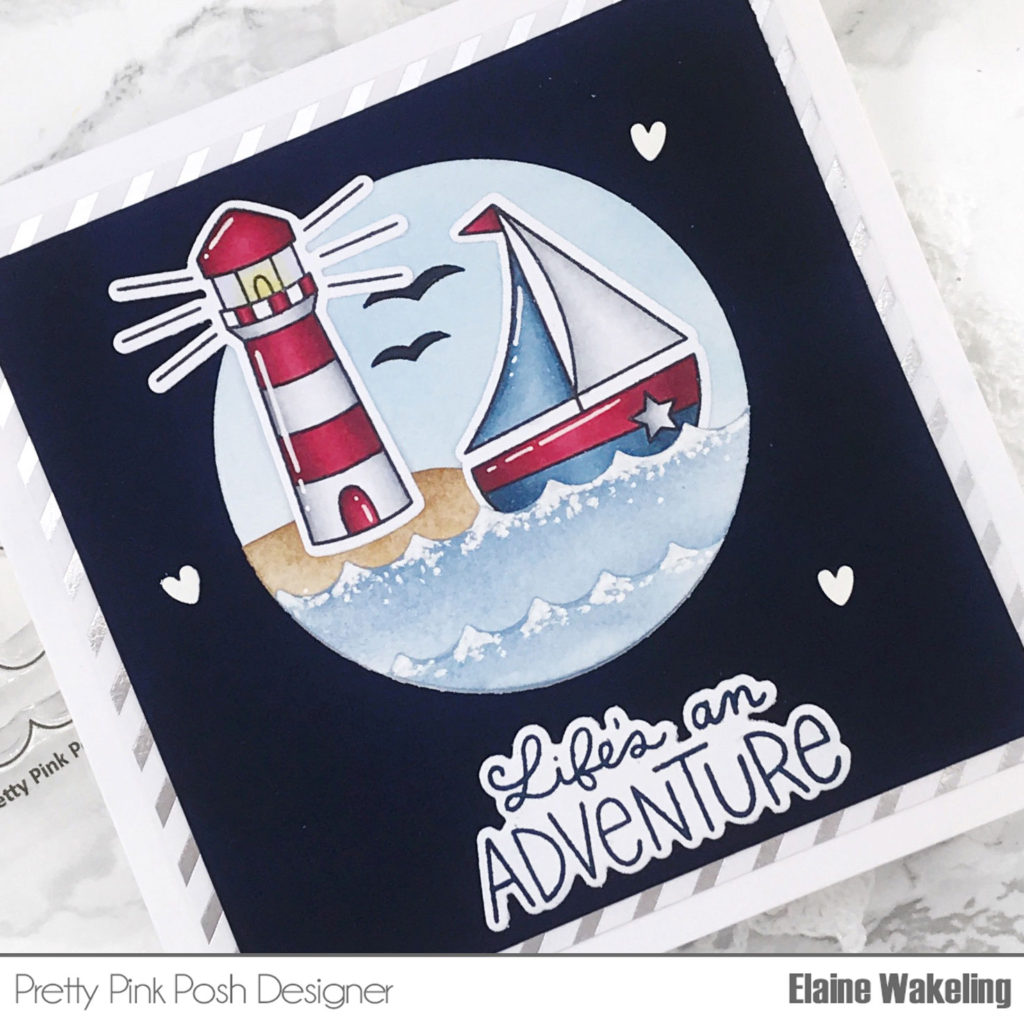
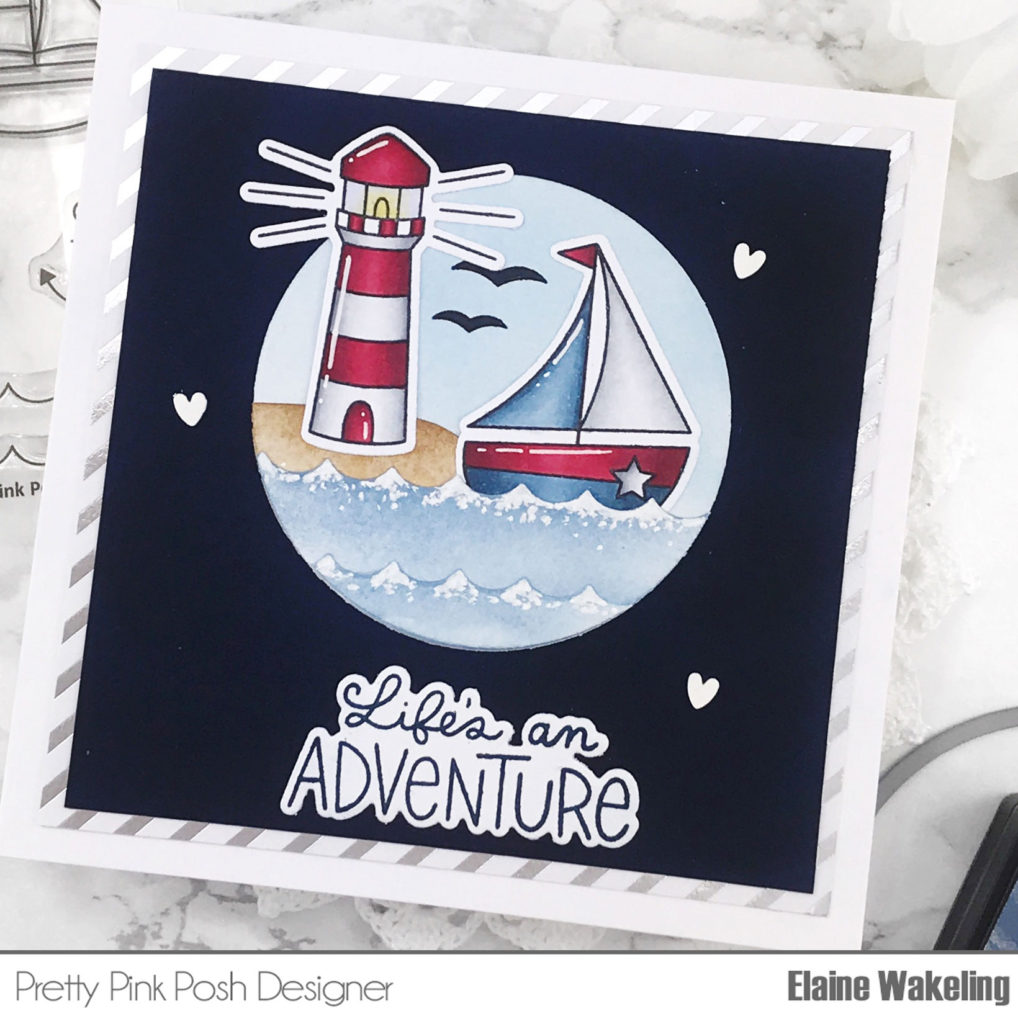
To create the layered circle scene, I cut 4 circles from heavyweight white card using the largest circle die in the Lets Party die set.  One of the circles I left whole and blended on some Distress Ink in Tumbled Glass for the sky.  This created the base layer.  The next layer I freehand cut a shape to represent ‘land’ or a ‘bank’ for the lighthouse to sit on.  I used Distress ink in Vintage Photo for the land layer.  For the wavey layers (there are 2) I used the small scallop border die from the Stitched Borders 4 die set to create waves.  Both layers were ink blended with Distress Ink in Faded Jeans.  I adhered all the layers together with liquid adhesive.  To give the waves a little more interest and definition I used a white paint pen (you could use white acrylic paint or white gouache on a paintbrush) all along the top edge of the waves to help them stand out and give the look of sea foam or waves breaking.  Before stamping on the birds, I gently laid my boat and lighthouse on to the scene to give me an idea of where the birds needed to go.  Once stamped with a black ink I filled them in with a black copic marker (100).  I adhered the lighthouse and boat to the scene and left to fully dry.

Pretty Pink Posh- Day 2: Blog Hop+ May Release Now Available

As a base for my coastal scene, I cut a piece of navy card stock to 4.25” x 4.25” and layered that on top of a piece of stripy patterned paper which measured 4.5” x 4.5”.  The two layers were adhered together with liquid adhesive and then secured to a white square card base measuring 5” x 5”. 

Pretty Pink Posh- Day 2: Blog Hop+ May Release Now Available

For the sentiment I stamped out the ‘Life’s an Adventure’ sentiment with a navy ink on white card and cut out with the coordinating die.  The circle scene and the sentiment were then adhered to the front of the card.  Lastly, to finish off the card, I popped a few white clay confetti hearts here and there and I love how they pop on the dark navy background.

PRIZES: be sure to leave comments on each stop. We are giving away 3 $25 gift certificates to three random comments (1 winner each day) left before May 9, 2021 at 11:59 PM PST. I’ll be announcing the winners next week, so be sure to return and see if you are one of the winners!

Pretty Pink Posh blog << you are here
Caly Person
Kristie Marcotte
Adelle Emery
Gemma Campbell
Jeanne Jachna
Tammy Stark

Pretty Pink Posh- Day 2: Blog Hop+ May Release Now Available

Be sure to leave comments on all the stops- we’ll be randomly picking comments to win gift certificates. Thanks for joining us!
| |

Day 1: Blog Hop+ May Release Now Available

Pretty Pink Posh: Day 1: Blog Hop+ May Release Now Available

The May 2021 Release is now available in the Pretty Pink Posh Shop and select retailers that carry our products. If you missed our post yesterday, we revealed all of the products in picture form, but if you would like to see them in a video, Heather has that for you today!

Watch the video above  I  Watch the video in HD on YouTube

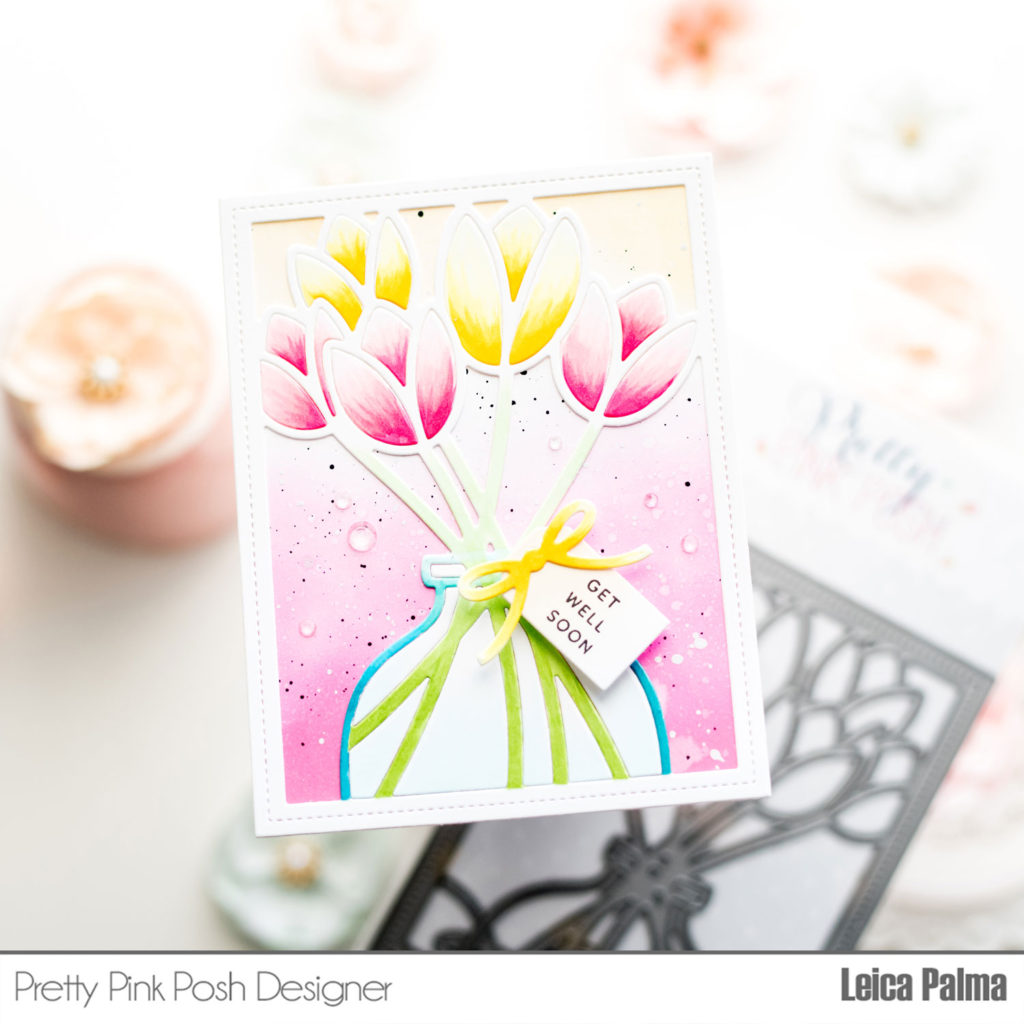
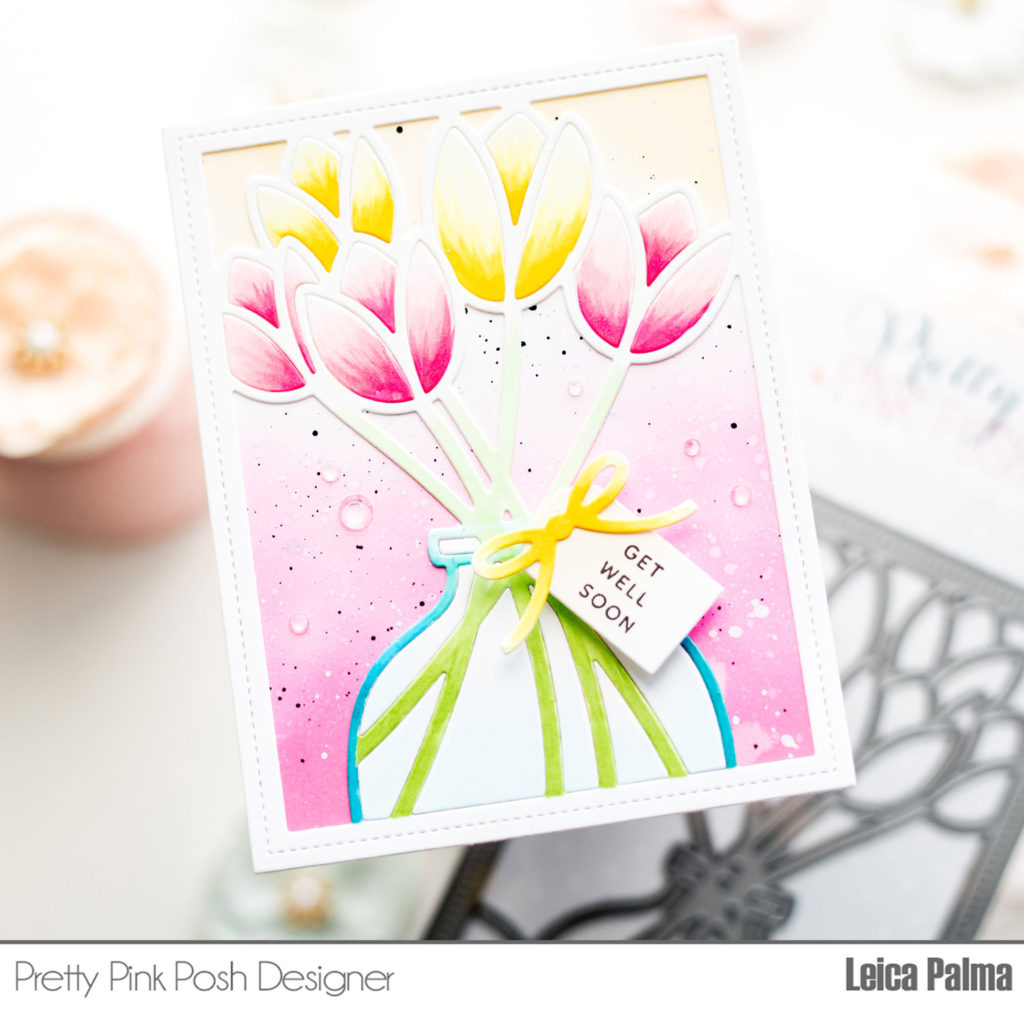
Hello, crafty friends! Leica here today with a card featuring the new Tulip Cover Plate Die. I love that this is an A2 sized die and you can easily make beautiful cards for any occasion with this product. 

Pretty Pink Posh: Day 1: Blog Hop+ May Release Now Available

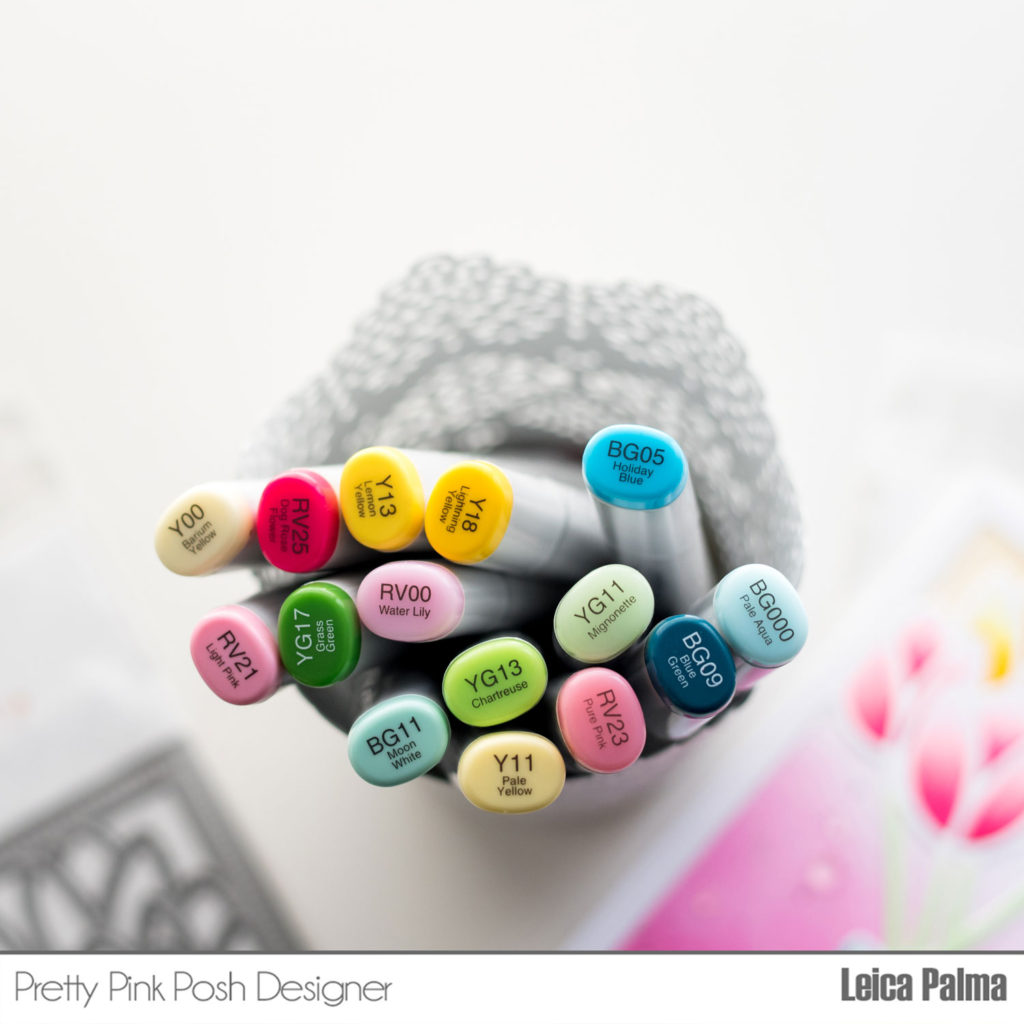
To begin, I die cut the Tulip Cover Plate Die in white cardstock. I then colored the negatives with Copic Sketch Markers. Next, I made an A2 card base and ink blended the front with Picked Raspberry and Antique Linen. I sprayed some water and splattered white and black acrylic paint for added interest to the background. 

Pretty Pink Posh: Day 1: Blog Hop+ May Release Now Available

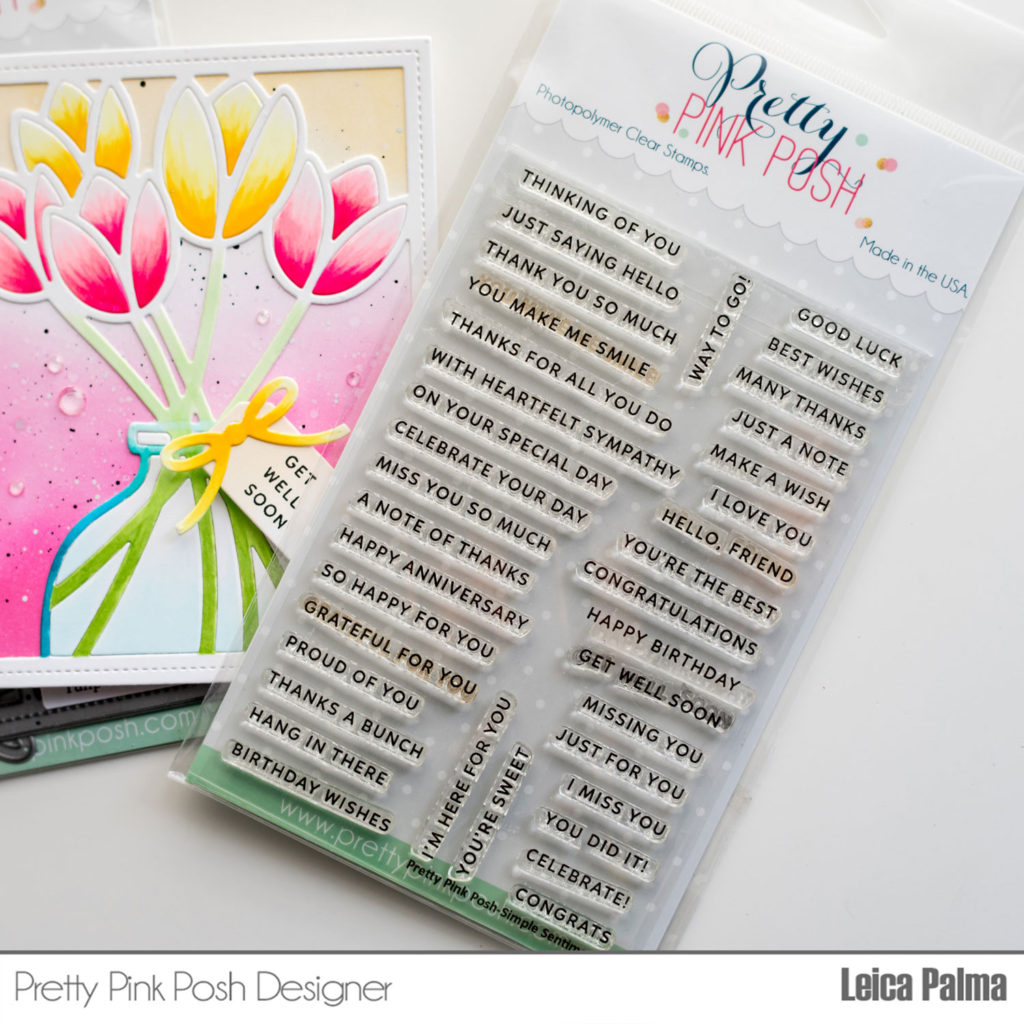
I then adhered the cover plate die onto the card base with liquid glue. Next, I paper pieced the negatives onto the card. Super easy, right? The Get Well Soon sentiment is from Simple Sentiments stamp set – I cut up the sentiments so that it would fit on the tag.

Pretty Pink Posh: Day 1: Blog Hop+ May Release Now Available

Lastly, I added Sparkling Clear Jewels here and there for interest. 

Pretty Pink Posh: Day 1: Blog Hop+ May Release Now Available

That’s all for this simple but beautiful card. I hope that you enjoyed today’s card share and I can’t wait to see your take on this cover plate die. 

PRIZES: be sure to leave comments on each stop. We are giving away 3 $25 gift certificates to three random comments (1 winner each day) left before May 9, 2021 at 11:59 PM PST. I’ll be announcing the winners next week, so be sure to return and see if you are one of the winners!

Pretty Pink Posh blog << you are here
Laura Bassen
Tina Smith
Ashley Ebben
Heather Hoffman
Melody Rupple
Yana Smakula

Pretty Pink Posh: Day 1: Blog Hop+ May Release Now Available

Be sure to leave comments on all the stops- we’ll be randomly picking comments to win gift certificates. We’ll see you tomorrow for another day of inspiration!