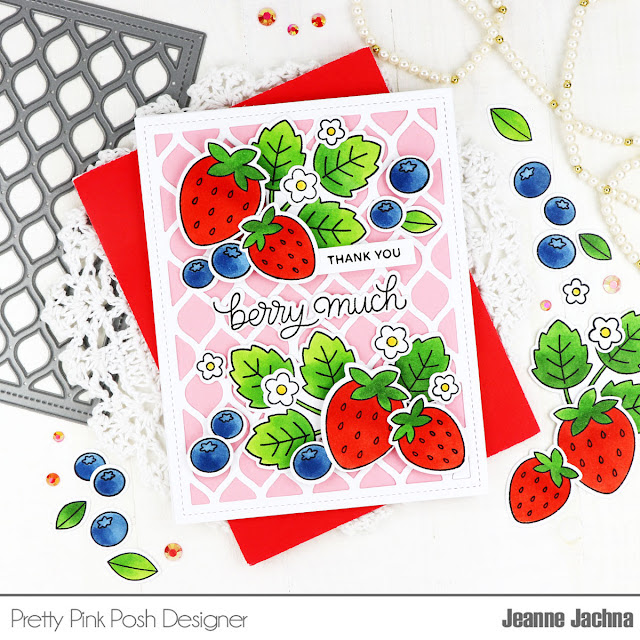
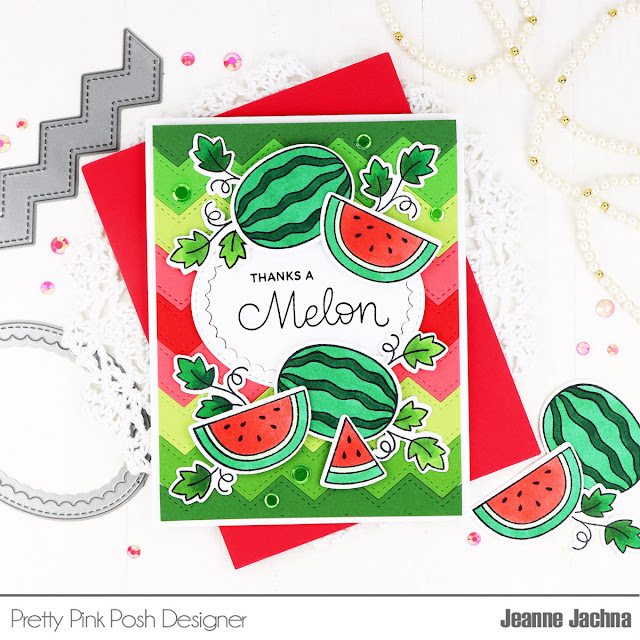
Hi friends, Jeanne here. Is there anything sweeter than fresh berries in the summertime? They’re just too tempting to resist! I’m loving the new release that’s loaded with fruity goodness!
My card today is made with the Fresh Berries stamp set and coordinating die. I stamped and colored a big pile of these so all that was left to do was arrange them.
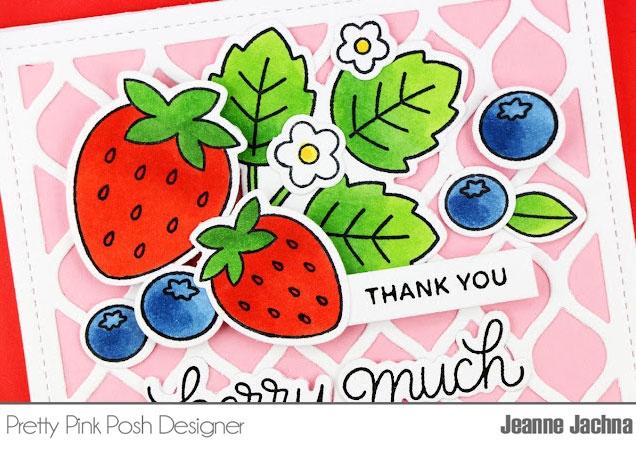
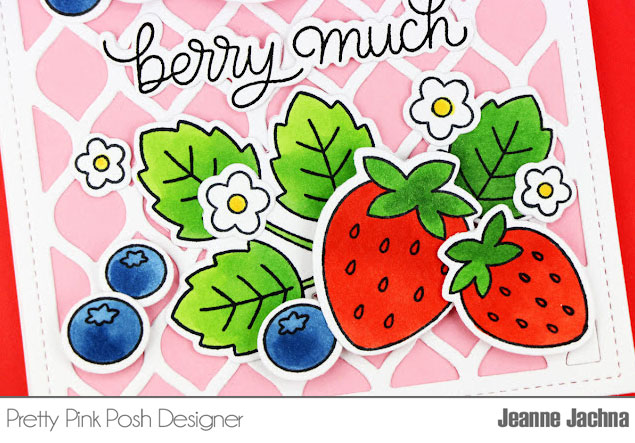
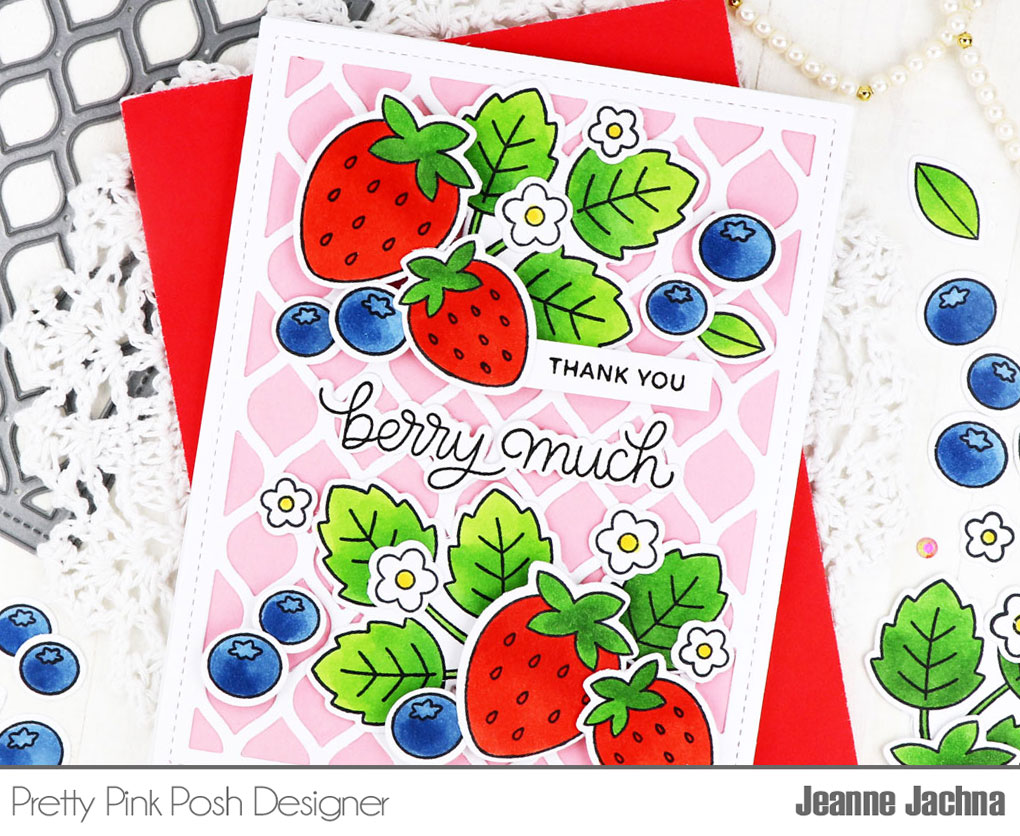
I adhered a light pink panel to the front of a card base and then die cut the Pretty Petals Background die from white cardstock. Next I added the “Berry much” sentiment to the center of the card, and then arranged the fruit and foliage above and below the sentiment.
The foliage is adhered flat to the card base and the berries are “popped up” using adhesive foam tape. This adds dimension to the design. A scatter of flowers is the finishing touch for this pretty design!
This card is sure to make the recipient’s life sweeter! I hope you’re smiling too!
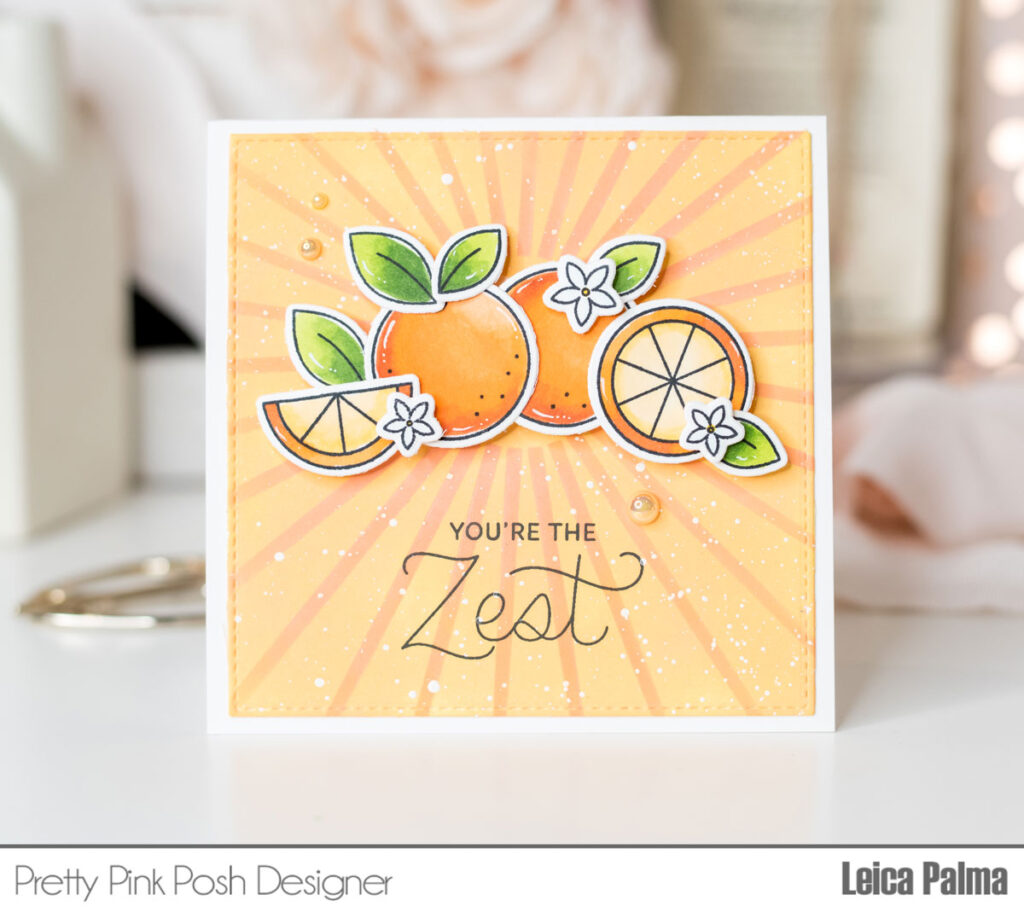
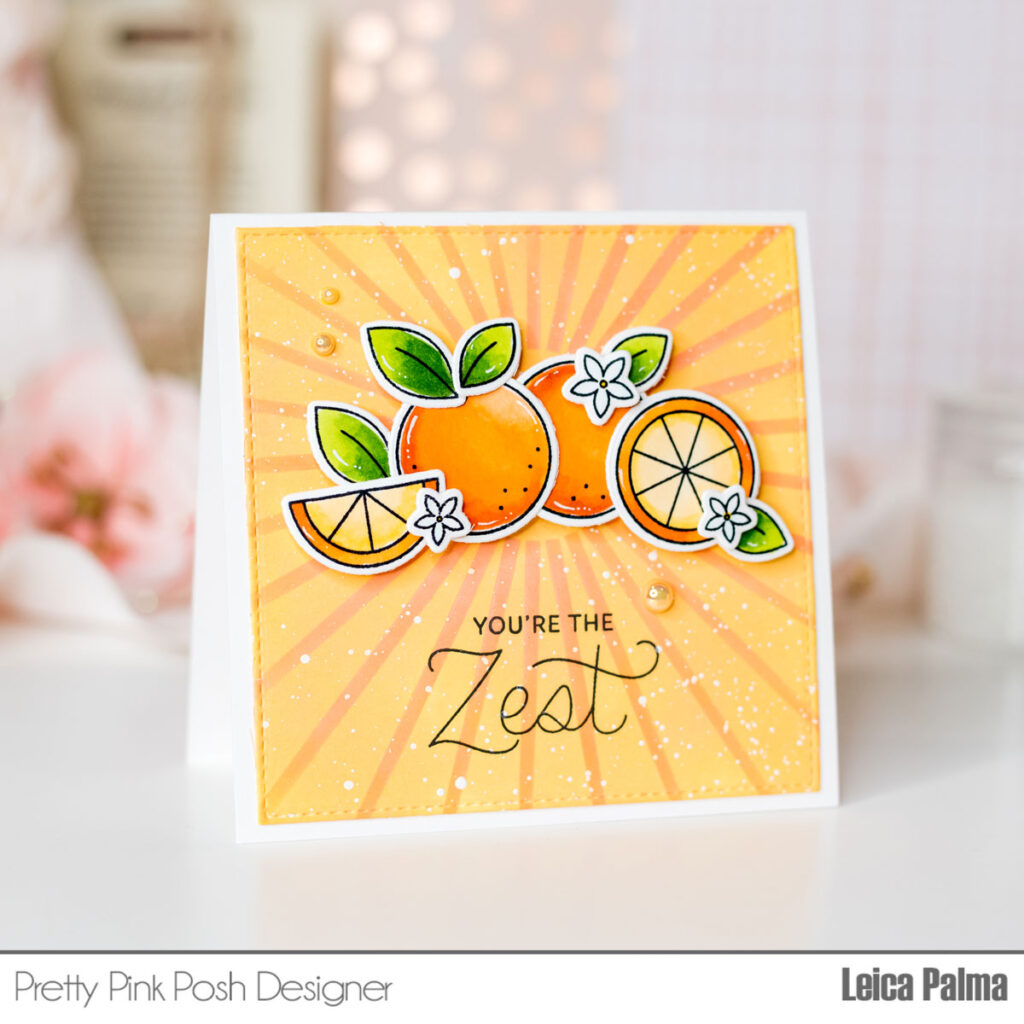
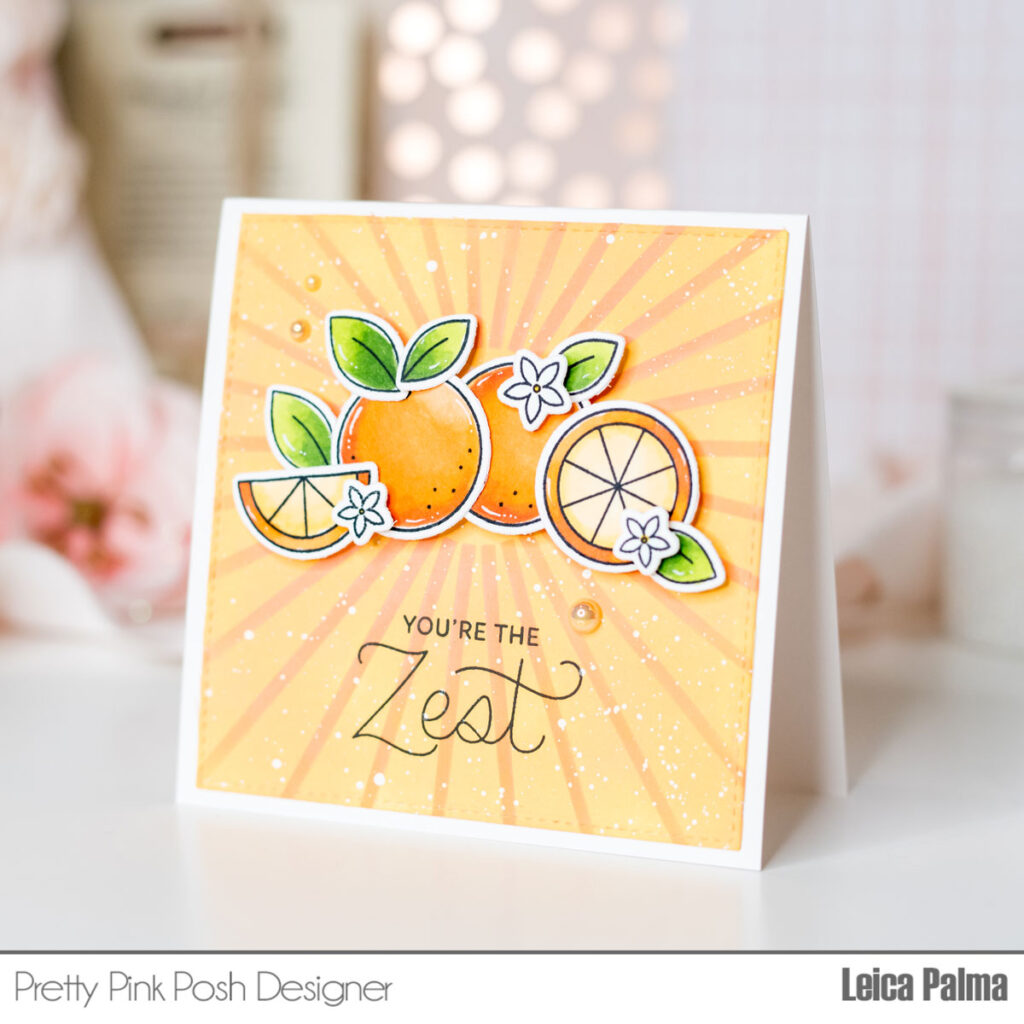
Hey there! It’s Leica, and I’m excited to share a cute Orange-themed card with you today, featuring the new Citrus Stamp Set from the June Release. This card is perfect for letting someone know they’re the best, saying thank you, or celebrating a birthday. Let’s dive in!
To start, I took a 4-inch square white cardstock and blended it with Dried Marigold Distress Oxide Ink. Then, using the Starburst Stencil and Spiced Marmalade Distress Oxide Ink, I stenciled some fun patterns over it. And to add an extra touch of fun, I splattered some white ink around. For the sentiment, I stamped “You’re the Zest” on the card panel using Versafine Onyx Black Ink.
Next, I stamped and colored the oranges and leaves from the Citrus Stamp Set. After coloring them, I cut them out using their coordinating dies. I used different Copic Sketch Markers: YG67/17/03 for the leaves, Y35/32 for the oranges, and YR16/14/00 for the outside part of the oranges.
I used foam tape to attach the stamped images onto the card panel, giving them a nice dimension that really pops!
Lastly, I glued the card panel onto a 4.25-inch white card base and added some Sunset Orange Pearls here and there for a touch of shine and texture.
And that’s all for my card! Thanks for stopping by, and I hope I’ve inspired you to create a card with the Citrus Stamp Set. Happy crafting!
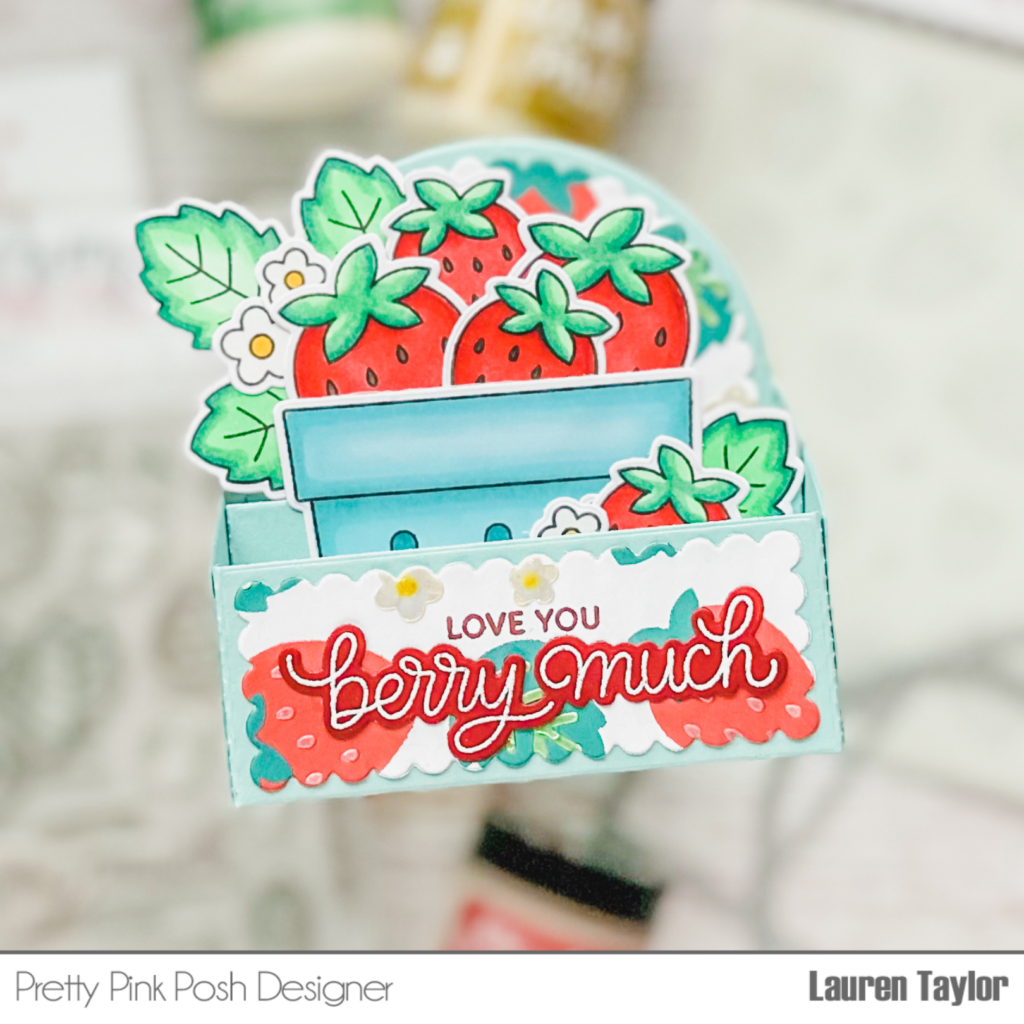
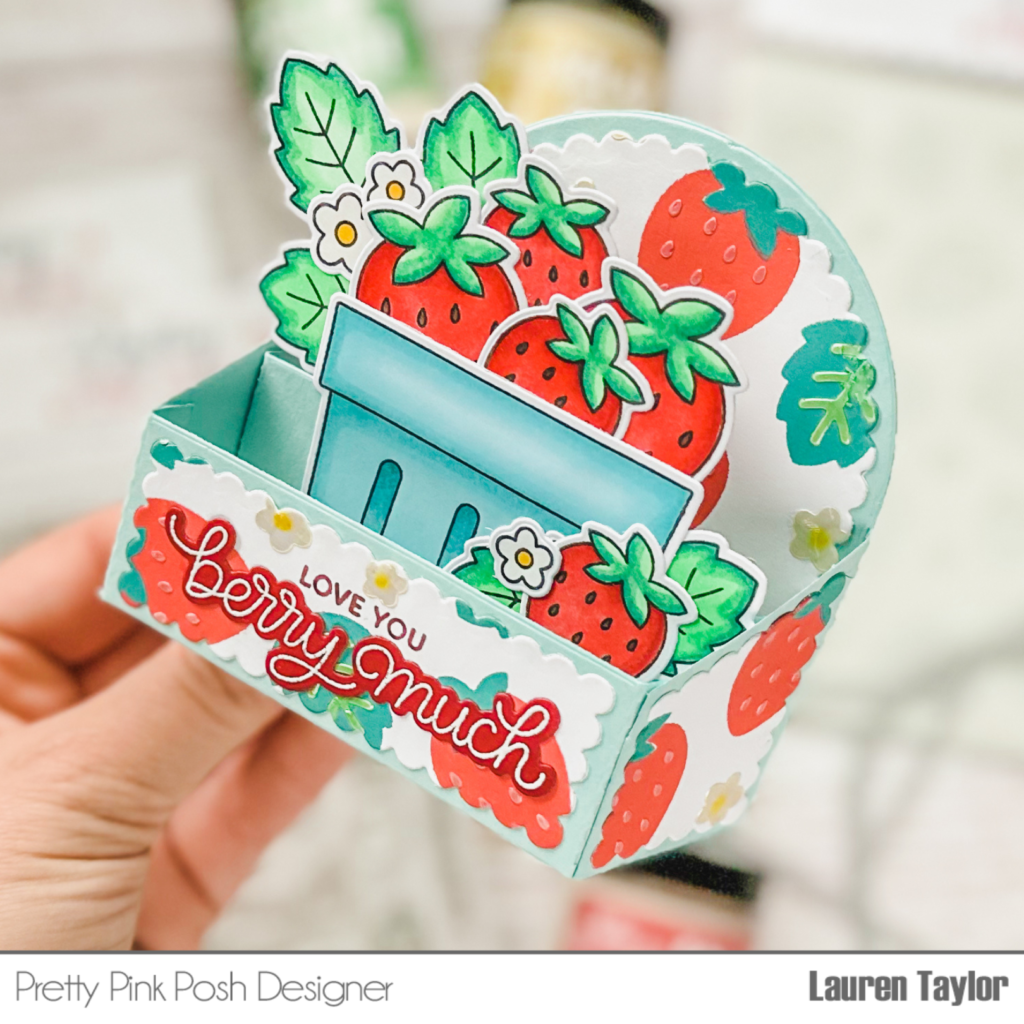
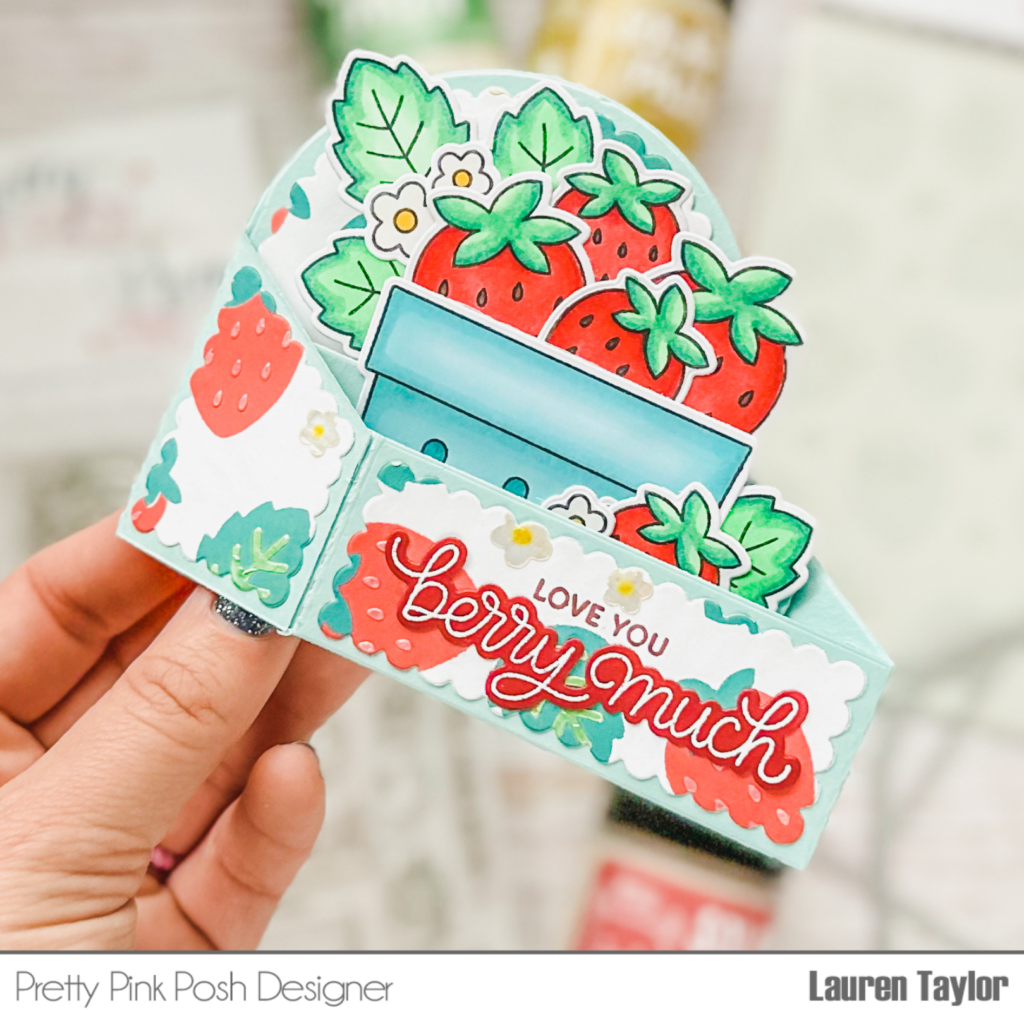
Hi, friends! It’s Lauren and I have a new video to share today. One of my favorite items in my craft room are my mint/teal berry baskets that I use for storage and when I saw the Fresh Berries Stamp Setand Coordinating Dies, I knew I had to color the basket stamp the same color!
I will be using different stencil pastes in the video, so I will be jumping around just a little bit as I need some drying time when making my stenciled background. Starting with a 6×6” piece of white cardstock, I started with using the Layered Strawberries Stencils. Using Festive Berries Distress Oxide, I added ink to the strawberries after masking the flowers with Stencil A. Next is Stencil B with Pine Needles Distress Oxide, followed by Mustard Seed Distress Oxide through the small circles in Stencil C; I used a small foam blender so I would just get ink through the circles.
For the first stencil paste, I am using Golden Hour Solar Paste for the flowers in Stencil A and then set it aside to dry while I color. I stamped the Fresh Berries Stamp Set with an alcohol marker friendly black ink and colored them in with Ohuhu Art Honolulu Markers after die cutting them with their Coordinating Dies. In my video, I share the marker caps so you can follow along with the colors if you’d like!
When I finished coloring, my flowers were dry and I brought back Stencil C to add the strawberry seeds with Cross My Heart Solar Paste. Setting the backdrop to the side to dry, I moved on to die cutting the Scallop Box Card Dies out of some mint/teal-ish cardstock and assembling the die cut pieces with strong adhesive tape. Finally, I add my last layer of stencil paste using Stencil D with Crocodile Tears Solar Paste.
My Fresh Berriessentiment is embossed with white embossing powder with a berry colored cardstock and used the Coordinating Die. I assembled the berry box with the strawberries, leaves and flowers, then added it to the center of my box card. When my stenciled cardstock was dry, I used the scalloped details from the Scallop Box Card Diesand glued them to the assembled box card as well. After adding my sentiment, that will finish up my box card!
I hope it brings a smile to your face and inspires you to create today!
I like to arrange my images on a piece of clear plastic the size of my card face to help me decide on placement before I commit and adhere everything in place. It’s also easy to pick up the entire design and layer it over different backgrounds to choose which one I like best.
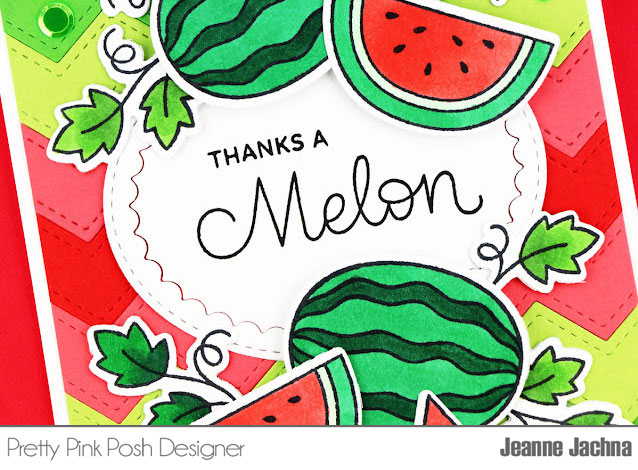
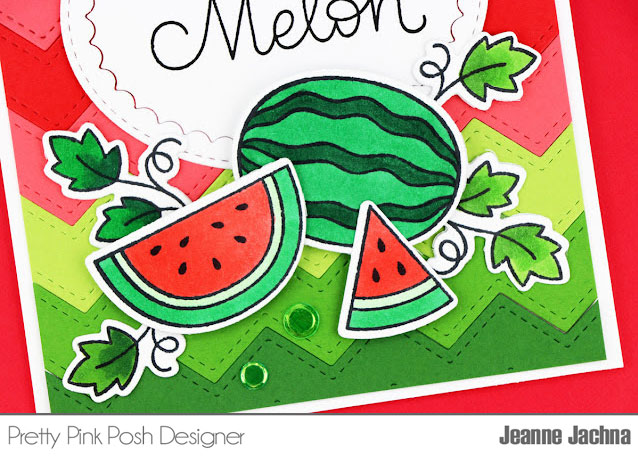
I stamped the sentiment in the center of a Scallop Oval Frame and then arranged the watermelon, slices and leaves around the frame.
I decided on a stitched zig zag border in watermelon shades of ombre red and green. I love theStacked Edges series of dies because they make quick detailed backgrounds in a snap. The die cut borders fit together like puzzle pieces so the finished background is smooth and flat.
The finishing touch is a sprinkle of Lime Shimmer Confetti. They shine like juicy dewdrops!
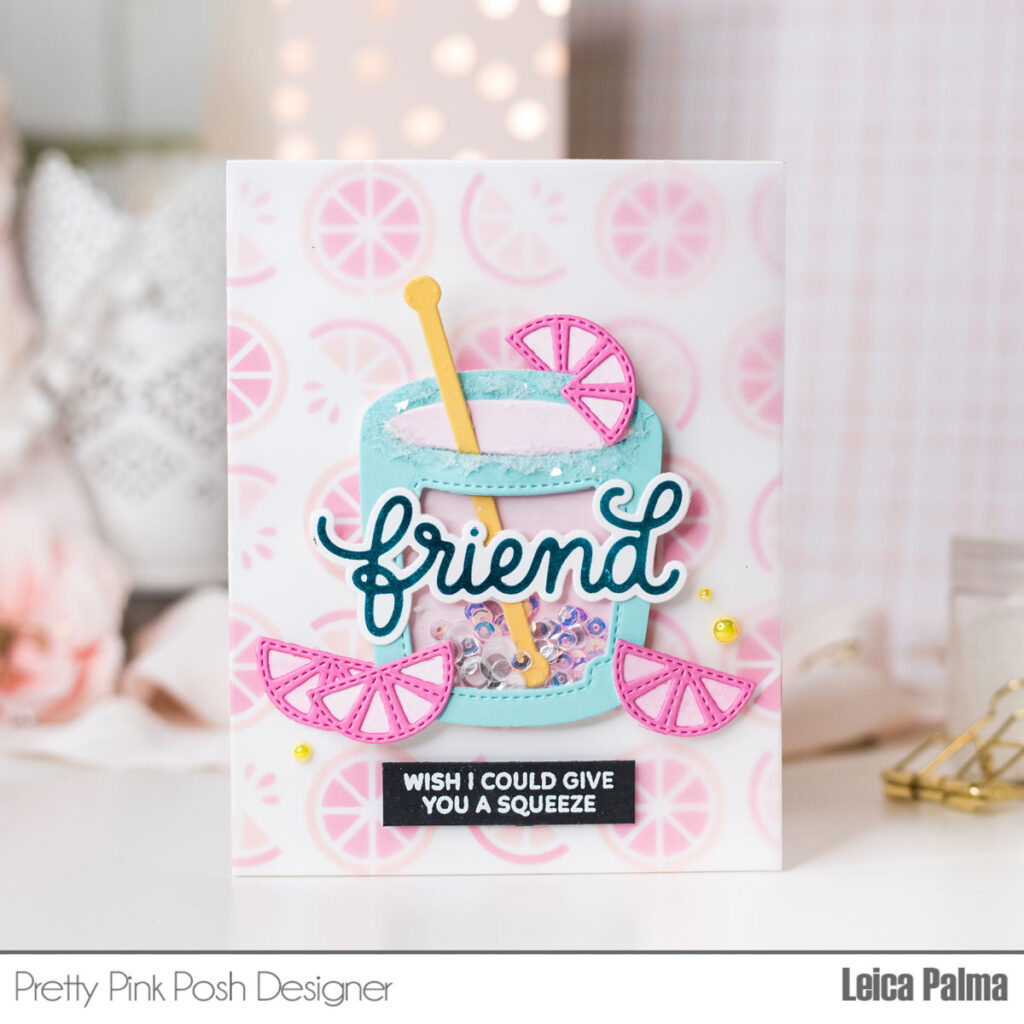
Hey there, crafty friends! It’s Leica, and I’m excited to share a fun card with you today using the Fruit Mug Additions Dies. I decided to create a card featuring my favorite cocktail, the Paloma. It’s a refreshing mix of grapefruit and Tequila. If you haven’t tried it yet, I highly recommend it if you enjoy cocktails. But for now, let’s dive into the card!
To start, I used a A2-sized white card base and inked it up with some pretty colors using the Layered Citrus Stencils and Distress Oxide Inks in Spun Sugar and Kitsch Flamingo. This stencil makes it super easy to create a fun background.
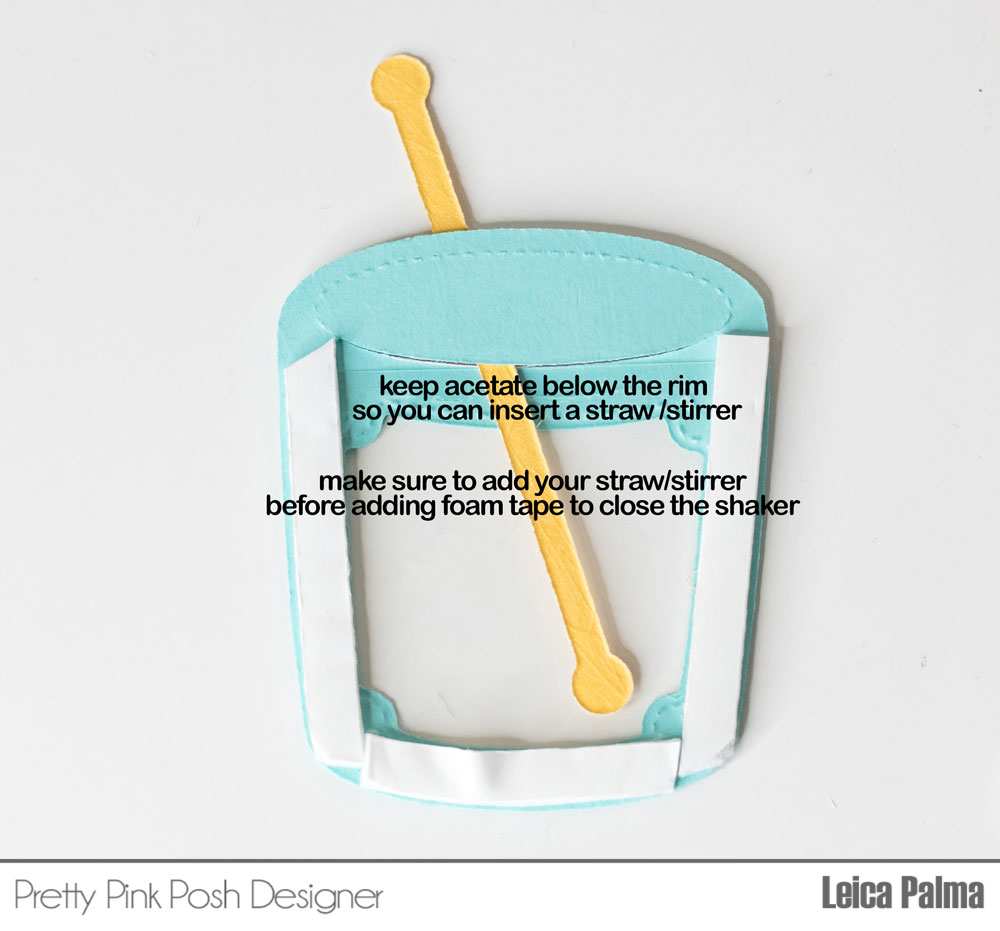
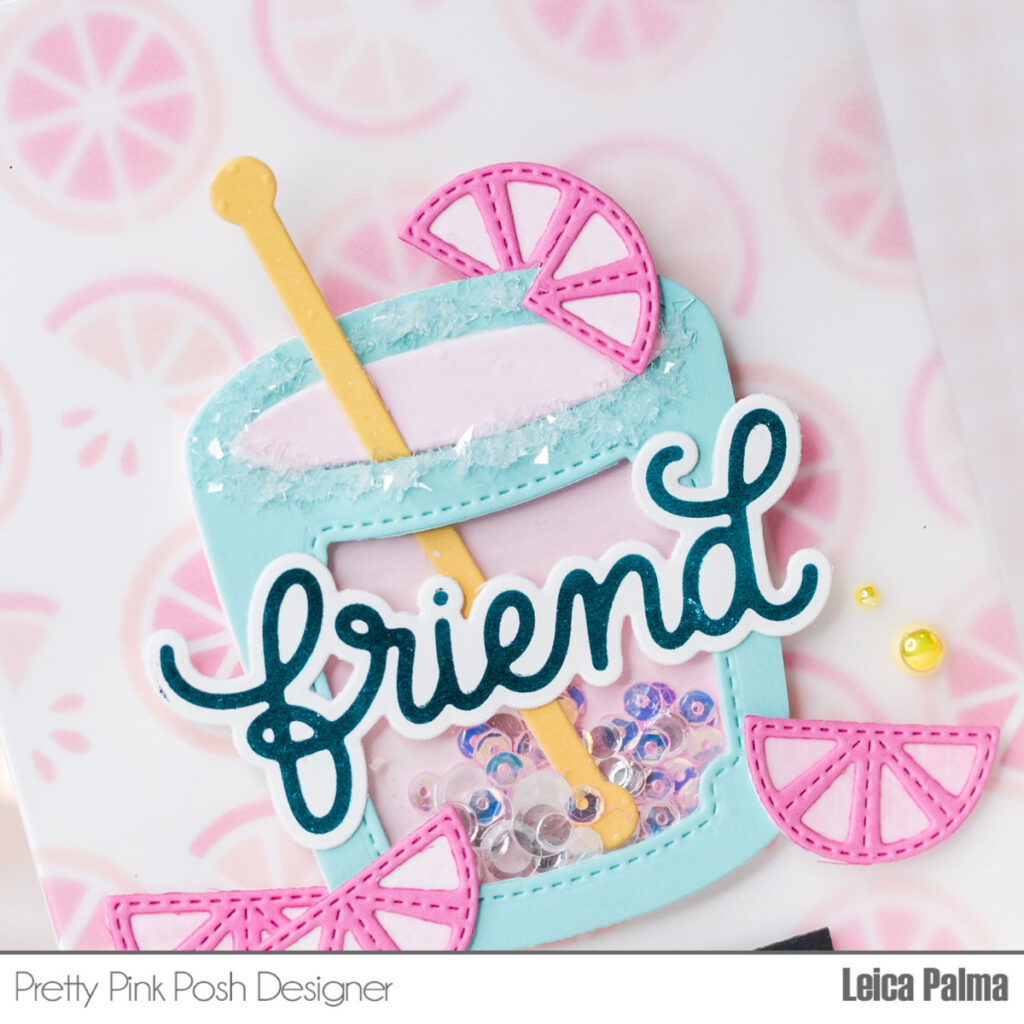
Next, I used the Winter Mug Dies to cut out the shape of a mug and created a shaker element by adding a window with the Fruit Mug Additions Dies. I turned the mug into a short glass by removing the handle. To make the shaker, I attached a clear plastic sheet to the back of the mug, just below the rim. Make sure the plastic stays below the rim so you can add a stirrer or straw. I added foam around the mug’s frame to create space for the shaker, and I filled it with Ballerina Pink and Sparkling Clear Confetti Mix. To make it more realistic, I cut out grapefruit slices from pink cardstock and glued them onto the card, including one on the rim of the glass. For a finishing touch, I added salt around the rim using Diamond Dust and used Nuvo Crystal Drops as glue.
Before attaching the mug to the card, I added a sheet of vellum to create a softer background.
For the sentiment, I used teal foil to hot foilthe “Friend” script and cut it out using the Friend Shadow Dies. I absolutely love that PPP now offers hot foil scripts. They add a special and fun detail to my cards. I also heat embossed a sub-sentiment on a strip of black cardstock and mounted it below the glass using foam tape. To add some extra sparkle and interest, I included some Sunshine Pearls.
I hope you like my card! I had so much fun creating it. You could say I had a Happy Hour in my craft room. Teehee!
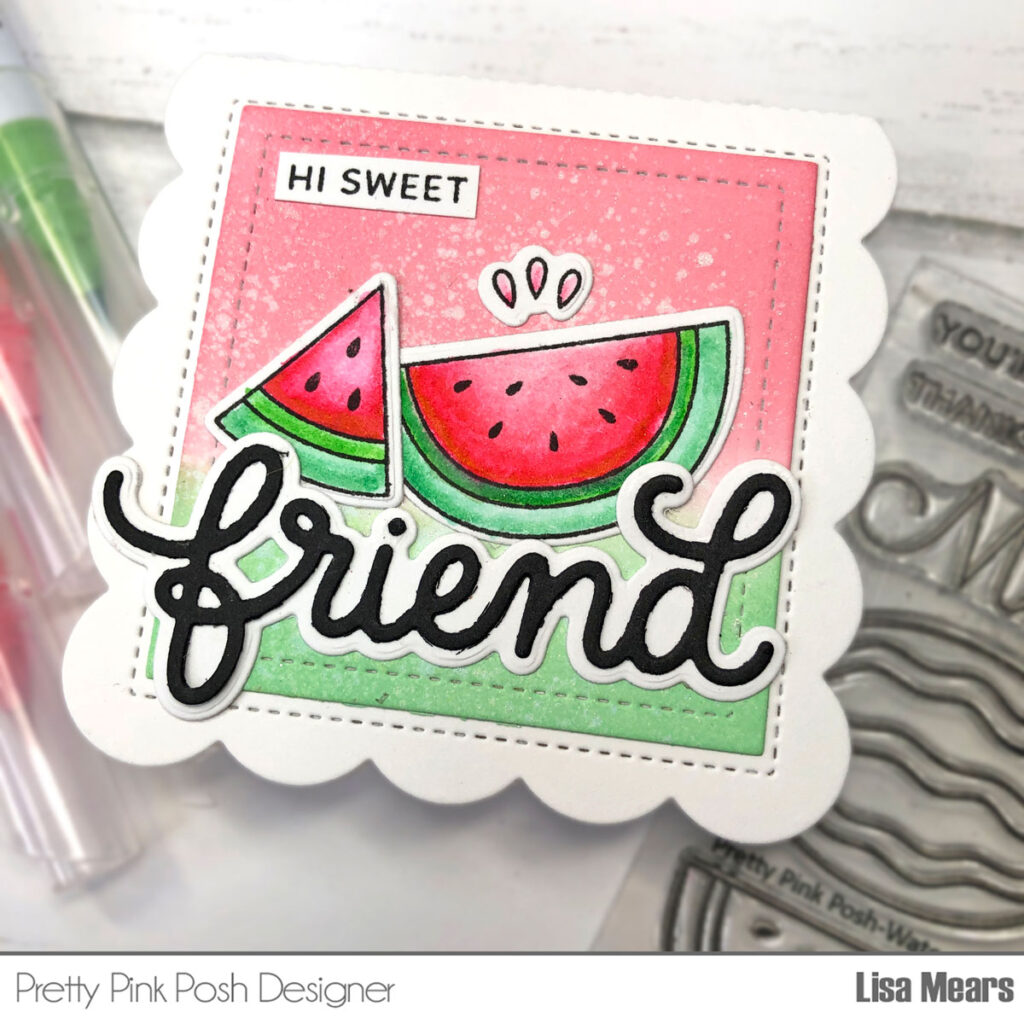
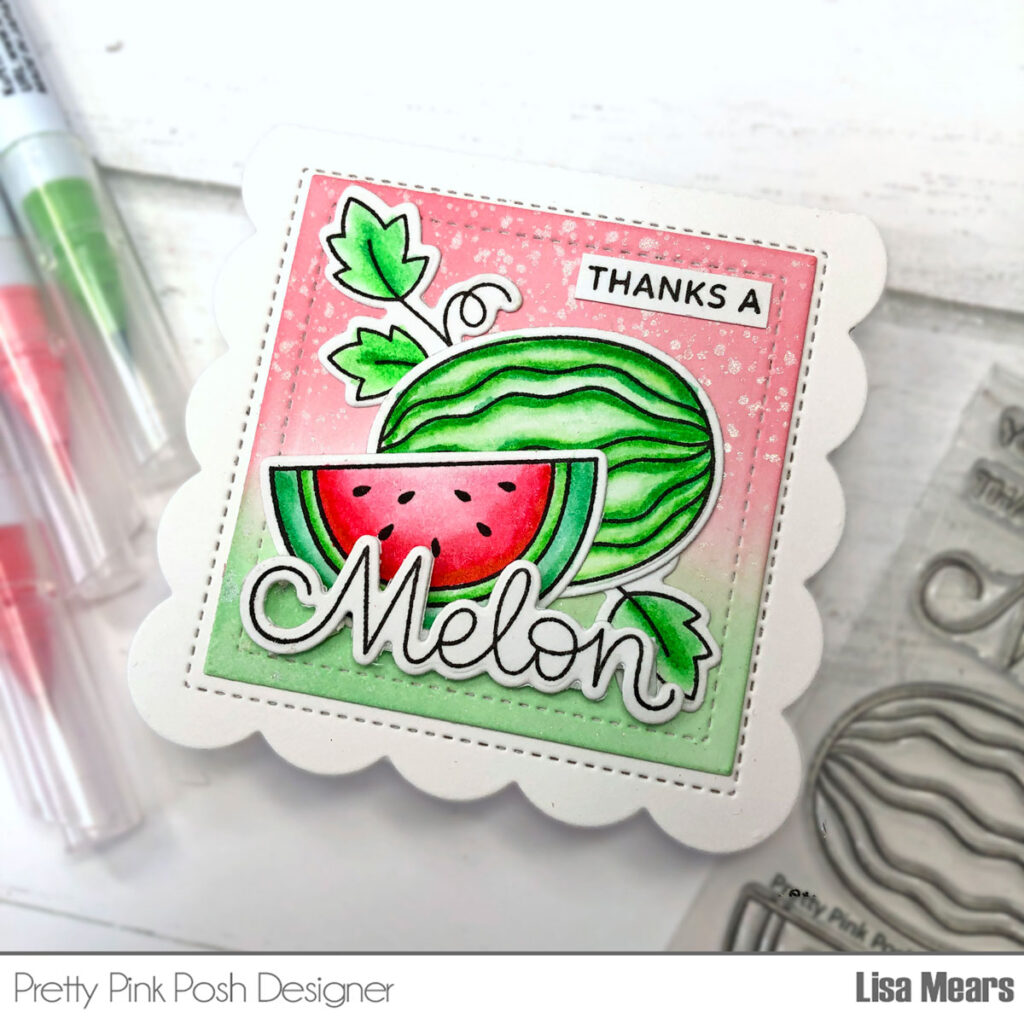
Hello friends. It’s Lisa Mears on the blog today sharing some watermelon themed cards using products from Pretty Pink Posh’s June 2023 release. Watermelon cards are perfect year round, but I especially love them for the upcoming summer months. You can use them for friendship cards, thank you cards, and more!
I stamped the images from the Watermelon stamp set onto Bristol Smooth cardstock and colored them with Zig Clean Color Real Brush pens in the following colors — Carmine Red, Light Carmine, Emerald Green, May Green, and the Blender. After I colored them, I die cut them with the coordinating dies.
For the card base, I used the Mini Scallop Card die set. This die set makes a card base that is approximately 3 1/4” with a beautiful scallop border. There is beautiful stitching on the front and also comes with a stitched square layering die.
I die cut the stitched square layering die and added distress oxide inks in the following colors — Worn Lipstick and Cracked Pistachio.
I added my stamped images to the front of the cards. I used the sentiment stamps from the Watermelon stamp set. For one of the cards, I used the Friend Shadow die.
I just love these mini cards. They are perfect for sending a quick note to a friend, co-worker, or loved one.
Thank you for stopping by today. Have a sweet day! Lisa Mears
Hello! It’s time to announce the three winners of the June blog hop posts HERE, HERE, and HERE. Here are the lucky winners of the $30 gift certificates…
Winners, email me within 7 days to claim your prize!
If you would like even more inspiration with the new release and are on Instagram, we also have a four day Instagram hop with four more chances to win a $30 gift certificate if you leave a comment before June 20th!
We hope you were inspired by the blog hop and we cannot wait to start seeing your fun projects using these new items.
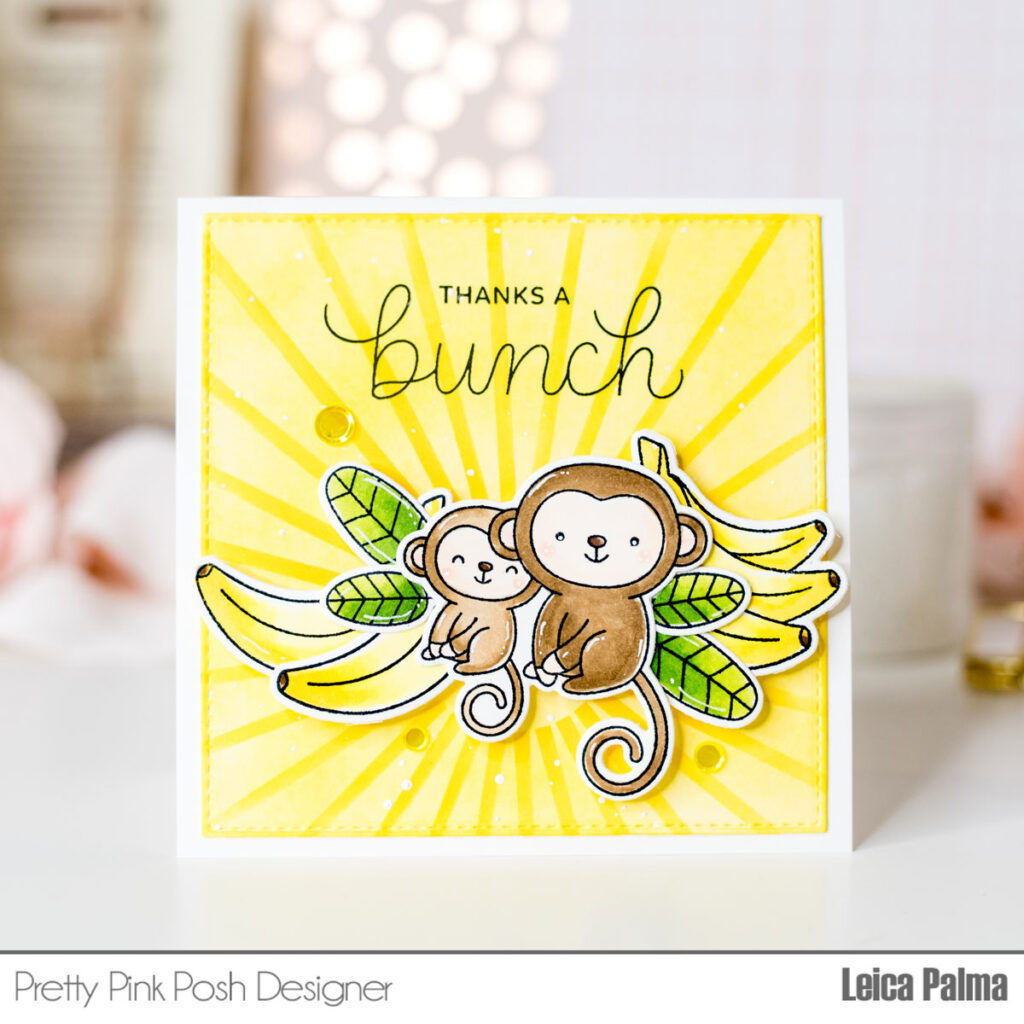
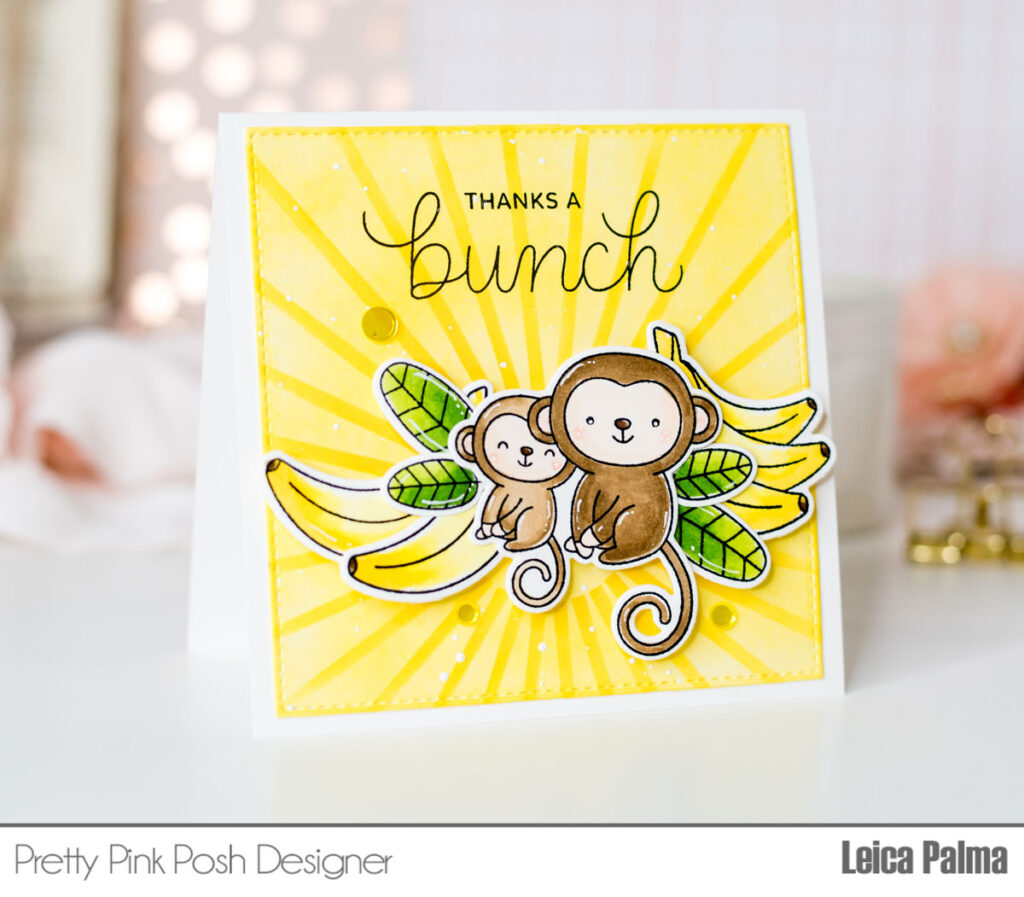
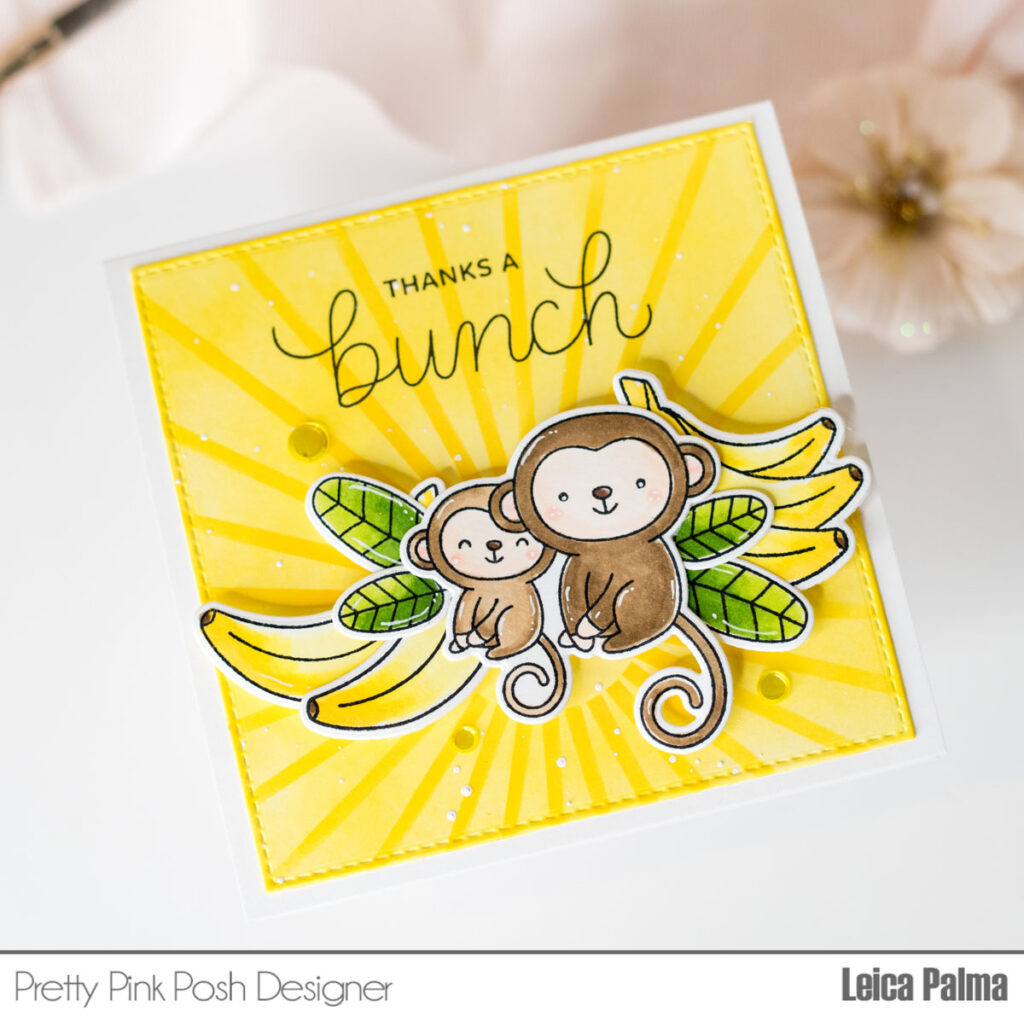
Hello and welcome to the PPP Blog! It’s Leica here, and I’m excited to share a thank you card with you today featuring the new Fruit Salad stamp set along with the Monkey Friends stamp set. Let’s dive in!
To begin, I cut a 4-inch square white cardstock and blended it with Squeezed Lemonade Distress Oxide Ink. Then, using the fabulous Starburst Stencil and Fossilized Amber Distress Oxide Ink, I added a burst of patterns to the card panel. This stencil has quickly become my favorite from PPP! I stamped the sentiment “Thanks A Bunch” at the top of the card panel using Versafine Onyx Black Ink.
Next, I stamped and colored the adorable bananas from the Fruit Salad stamp set, as well as the cute monkeys and leaves from the Monkey Friends stamp set. After that, I cut out the stamped images using their coordinating dies. I used foam tape to attach the images to the card panel, creating a nice dimensional look.
Finally, I glued the card panel onto a 4.25-inch square white card base. To add some extra interest and shine, I scattered some Lemon Shimmer Mix here and there.
I absolutely love how this card turned out, and I hope you do too! Wishing you a fantastic day ahead!
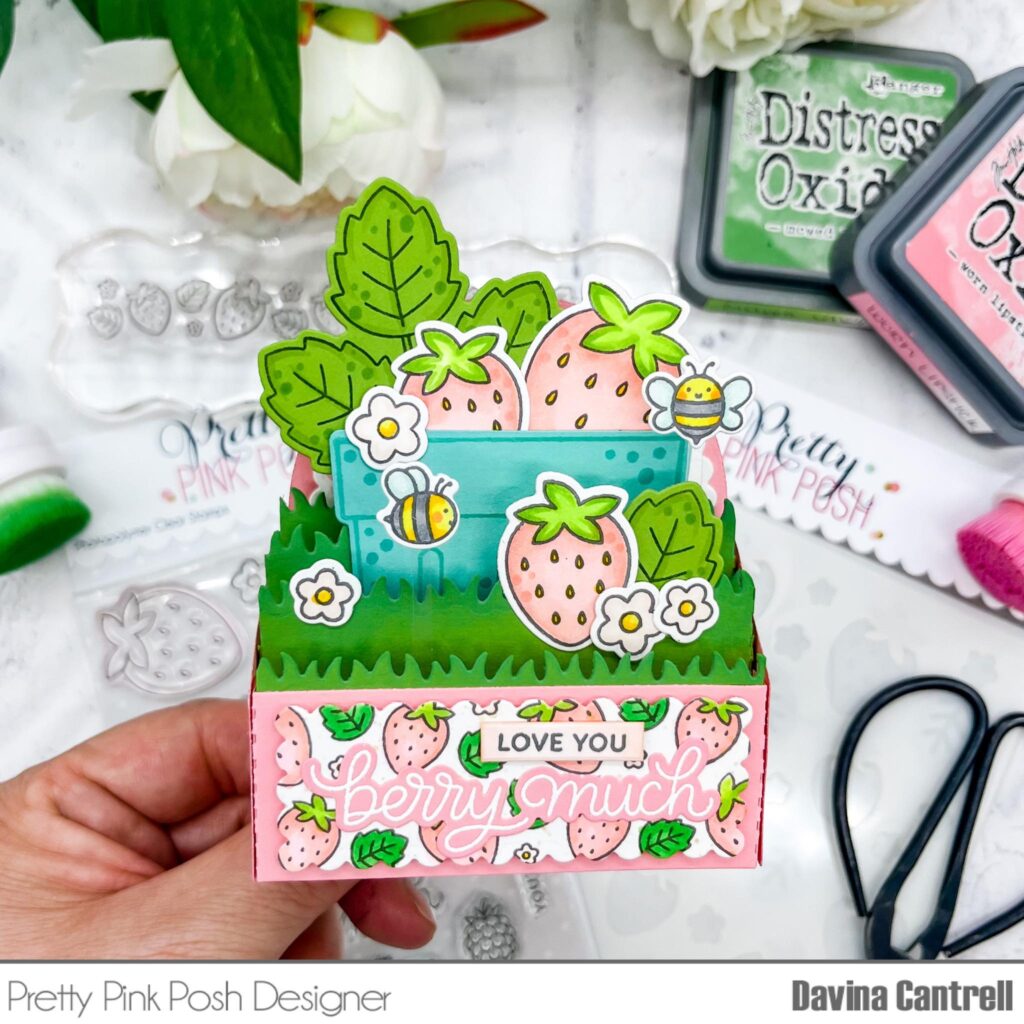
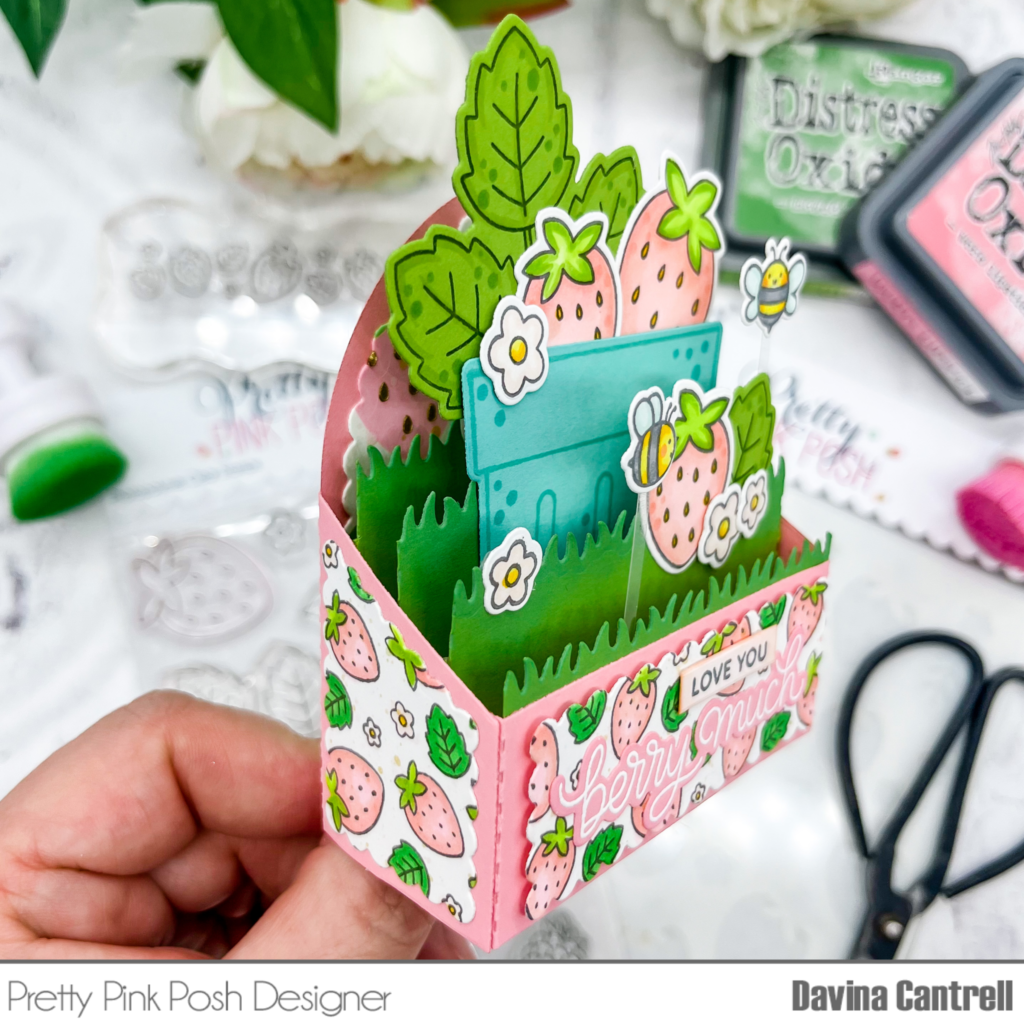
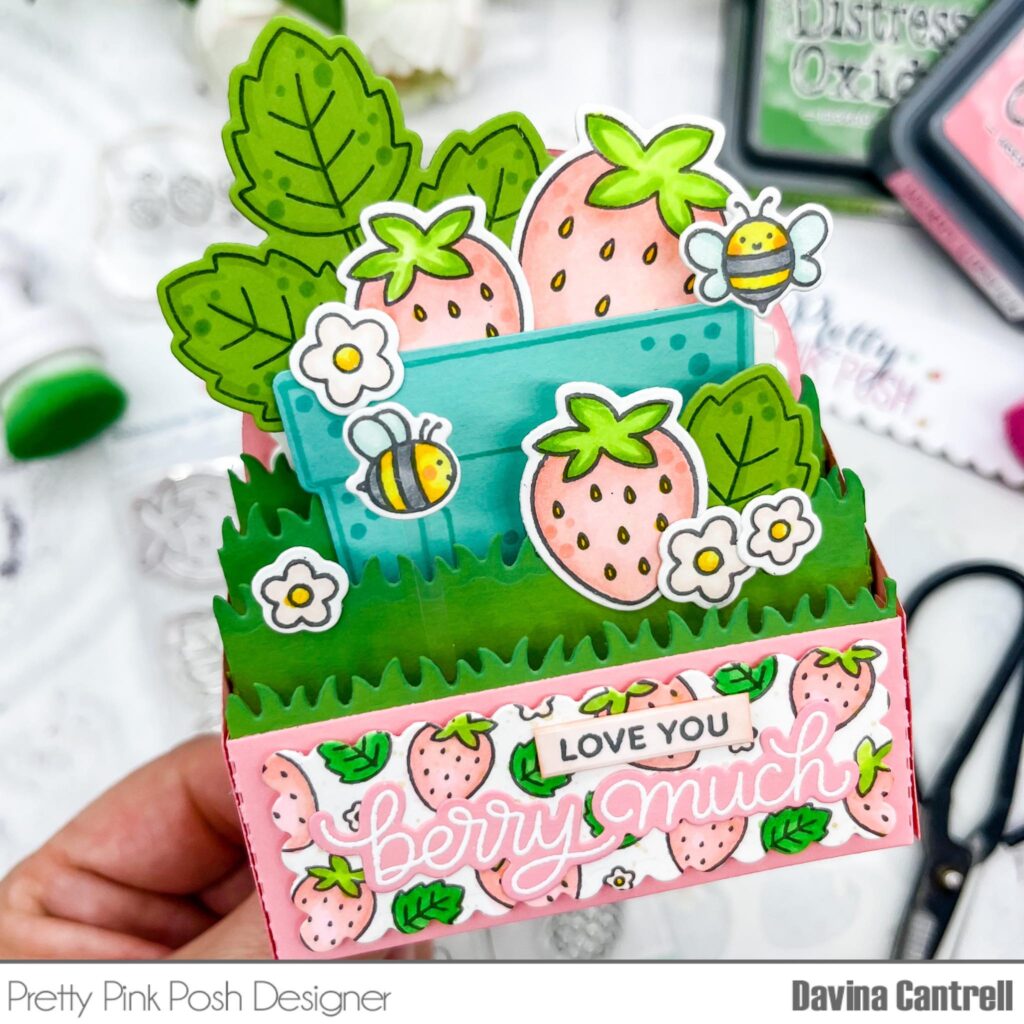
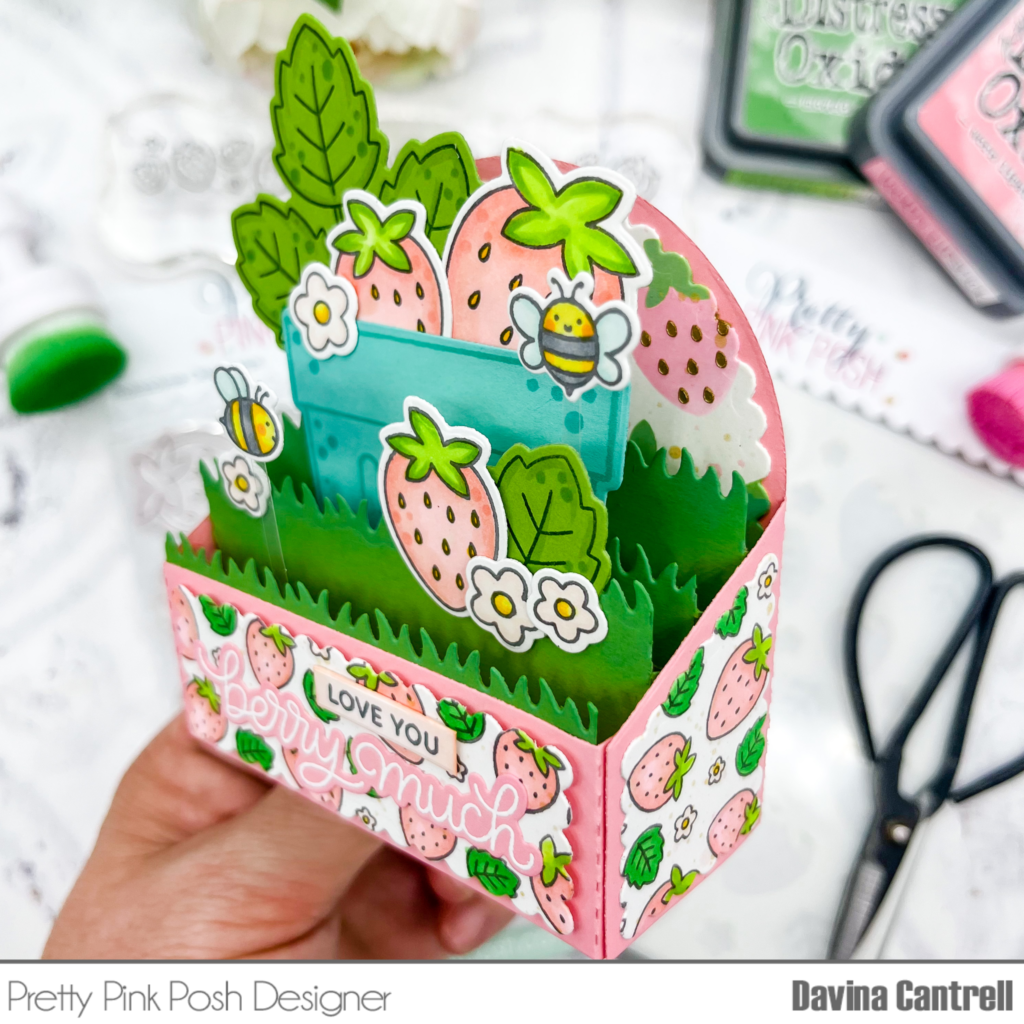
Hello crafty friends! Davina here with some incredible new products from Pretty Pink Posh. The new June release is bursting with sweet juicy fruit. And not just regular fruit, but super cute stamps, dies, and stencils that will always be perfectly in season!
Some of my favorite products are the strawberry themed items. I couldn’t wait to use the adorable berry carton in the Fresh Berries stamp set. I decided to make a lush box card using the Scallop Box Card die set and filled it with grassy layers and stamped images.
Although it’s not very visible in the photos, I used the new Layered Strawberries Stencils to create a dreamy pink and green background for my box card. I gently splattered the paper before using gold embossing paste for the seeds. Next, I assembled the box card, creating 3 grassy inserts and adding a 4th little layer of grass behind the very front piece.
I stamped the strawberry strip from the Fruit Borders stamp set in layers to make a sort of patterned paper. I die cut the little scalloped panels for the box card, and colored it in with shades of pink and green to match my card. Then, I stamped the leaves and basket onto colored cardstock with matching colored ink. I combined those large images with copic colored berries and sweet little bees from the Bee Friends stamp set.
I tucked my images throughout the layers, and adhered the little bees to acetate strips for a floating whimsical look. Finally, I finished off this cute little card with a heat embossed sentiment from the Fresh Berries stamp set. I really love this soft pink basket of berries and hope that you do too.
Thank you for stopping by and make sure to hop along on the Instagram Hop to see the inspiration from the design team and guests.
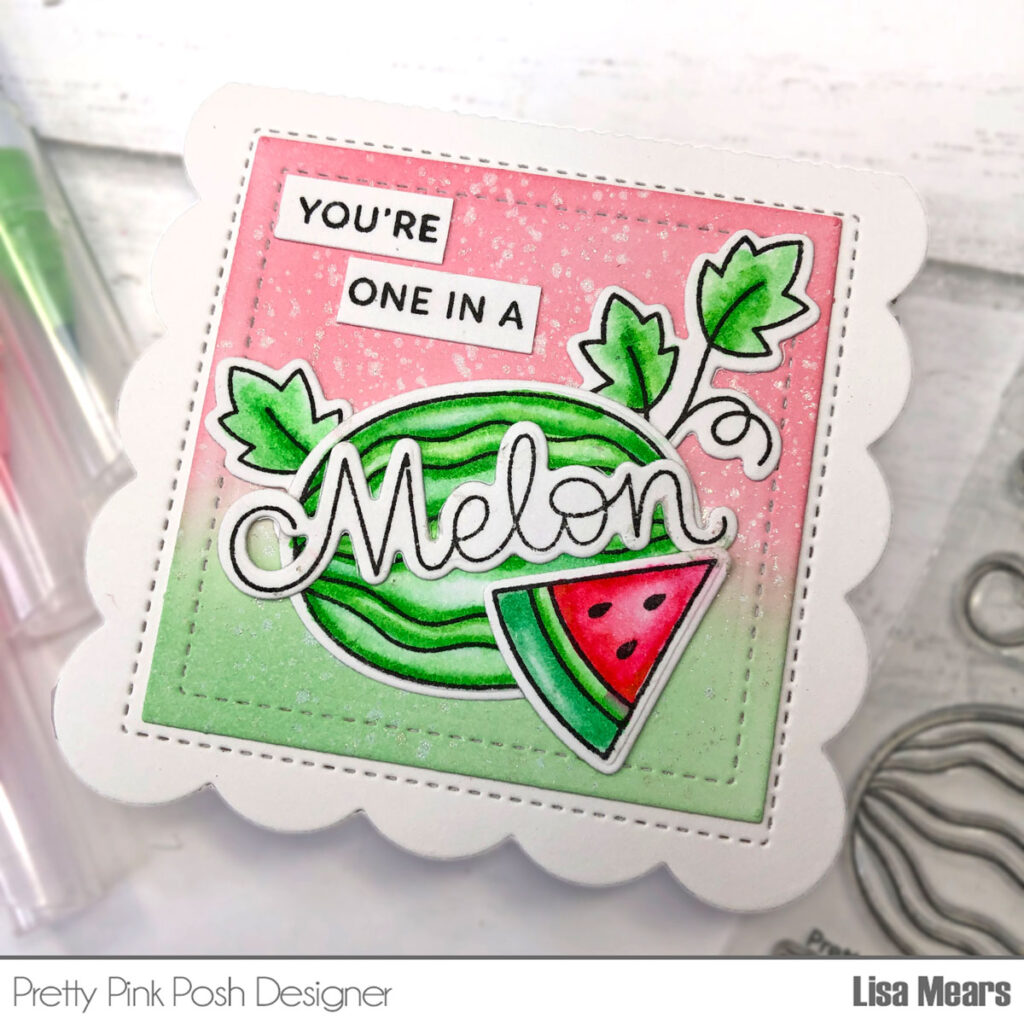
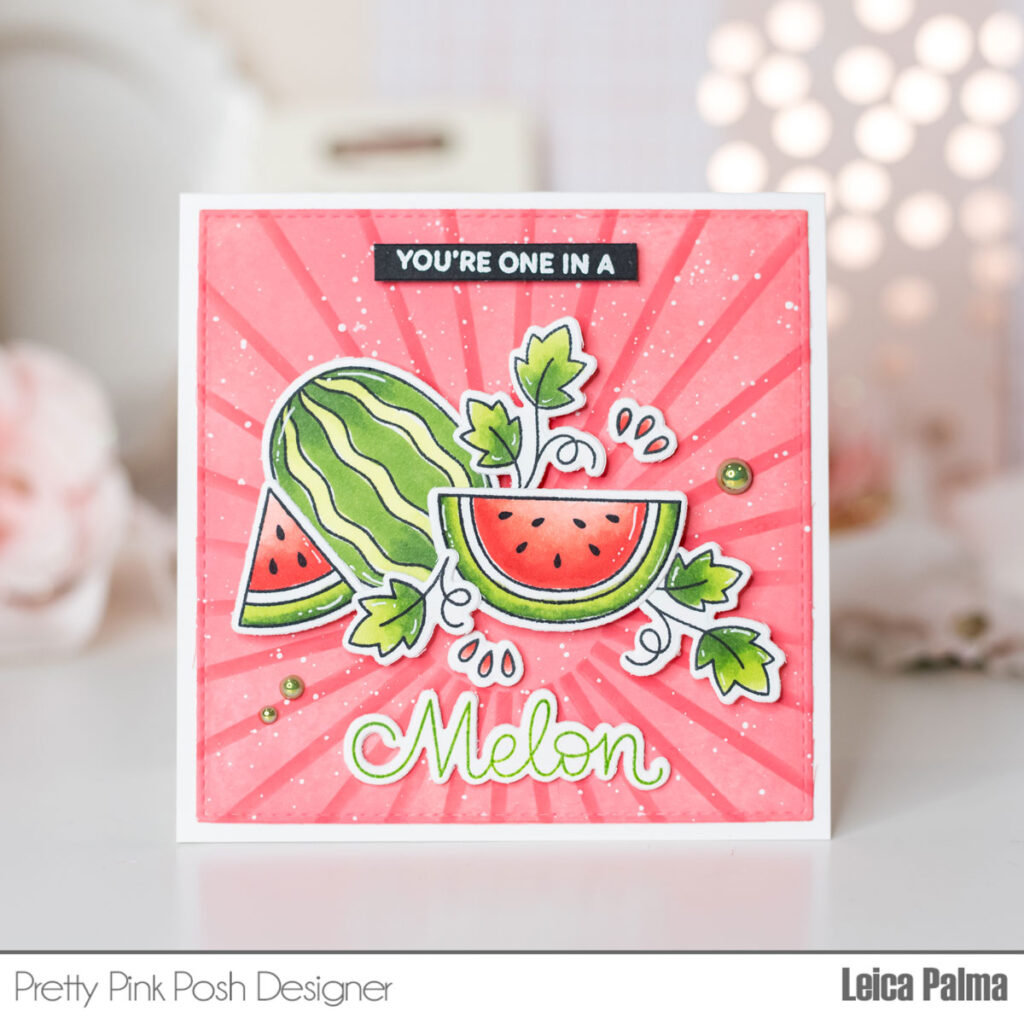
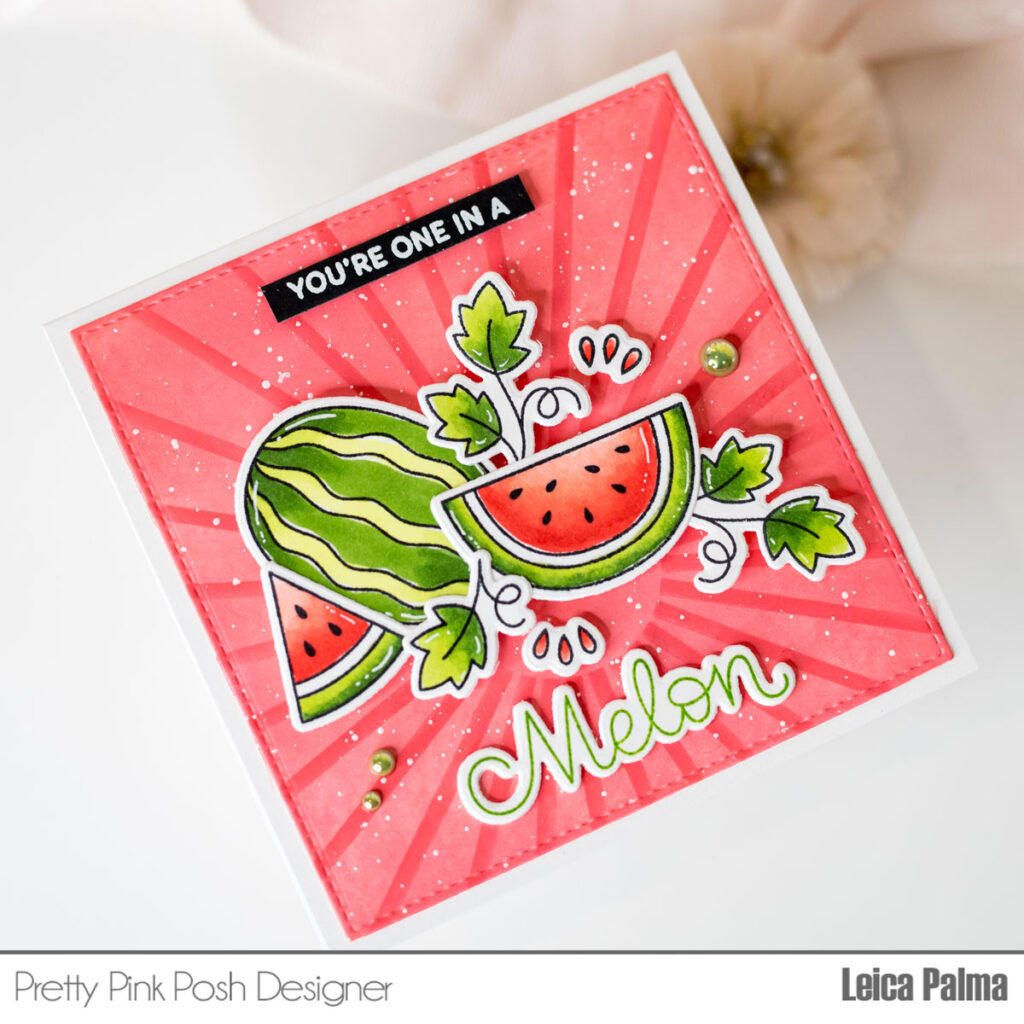
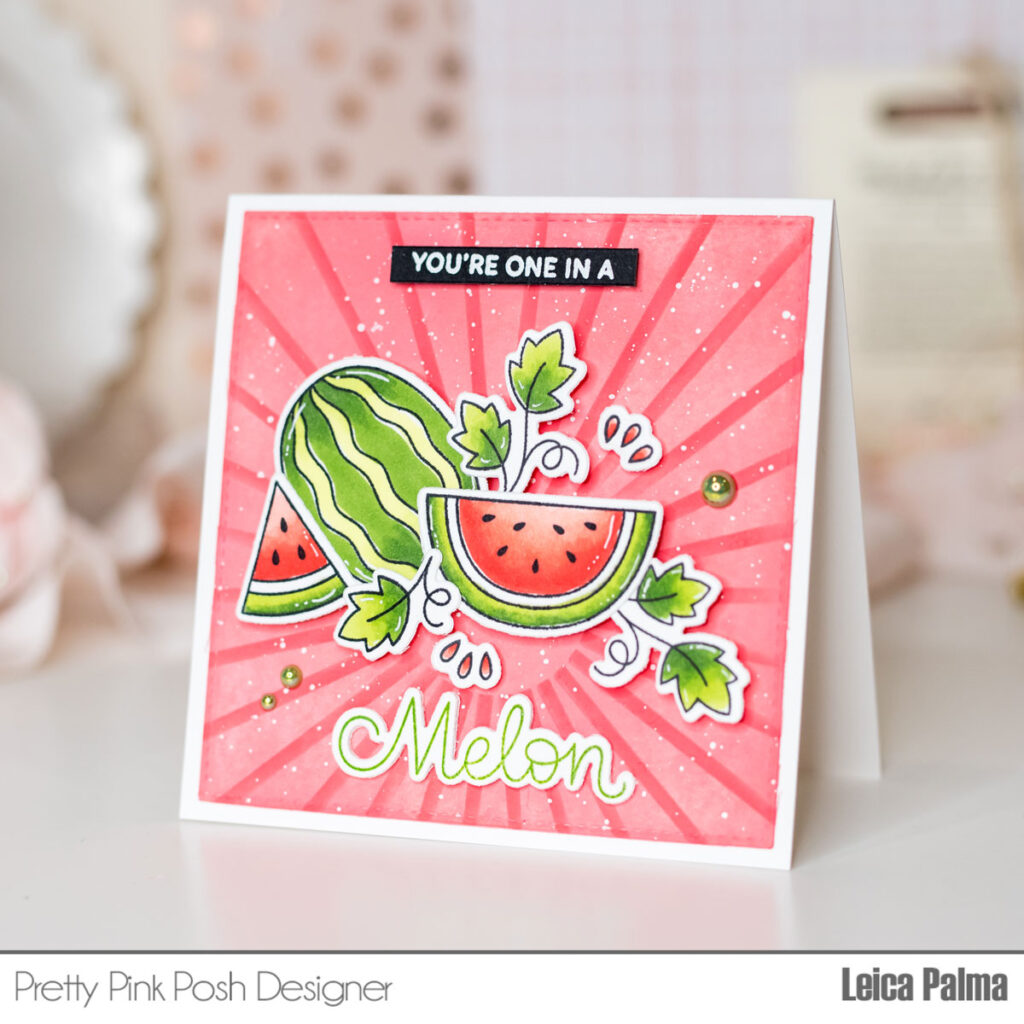
Hey, friends! It’s Leica here, and I’m thrilled to share a watermelon-themed card with you today using the latest goodies from Pretty Pink Posh. This card is perfect for summer and can be sent as a Thank You card or a Birthday card.
To start, I took a 4-inch square white cardstock and blended Festive Berries Distress Oxide Ink on it. Then, I used the Starburst Stencil and inked through it with the same Festive Berries Ink to create a cool tone-on-tone effect. To make it even more interesting, I splattered some white ink.
Next, I stamped, colored, and cut out the images from the Watermelon stamp set using Copic Sketch Markers. I used YG67/17/03 for the greens and R27/24/22 for the reds. Then, I used foam tape to attach the stamped images to the card panel for some dimension.
For the sentiment, I stamped the word “Melon” on white cardstock using Mowed Lawn Distress Oxide Ink. I cut it out using the coordinating die and added a few extra die cuts stacked together for a raised effect. I also white heat embossed the words “You’re One In A” on a strip of black cardstock and foam mounted it above the watermelons.
Lastly, I adhered the card panel onto a 4.25-inch square white card base and added some Pine Green Pearls here and there for a touch of texture and interest.
That’s all for my card. Thank you so much for visiting the blog, and I hope I’ve inspired you to create a fun watermelon card with this stamp set. Happy crafting!